Running Playwright Real Device Tests on HyperExecute
This guide explains how to run your Playwright tests on Real devices (Android and iOS) using HyperExecute:
Prerequisites
Before running your tests, ensure you have:
- Your TestMu AI Username and Access key
- HyperExecute YAML file with the test configuration.
- HyperExecute CLI in order to initiate a test execution Job .
Step 1: Set Up Your Test Project
You can use your own Playwright project or try the sample repo:. For demo purposes, we are using the sample repository.
Download or Clone the code sample for the Playwright Real Device from the TestMu AI GitHub repository to run the tests on the HyperExecute.
 View on GitHub
Configure Desired Capabilities
Update your test configuration with the required capabilities.
- Android
- iOS
loading...
loading...
You can also use dev and beta browser versions. To generate capabilities for your test requirements, you can use our inbuilt 🔗 Capabilities Generator.
Configure the CDP URL
You will have to update the CDP (Chrome DevTools Protocol) URL which is a protocol used for communication between the browser and the developer tools.
const browser = await chromium.connect({
  wsEndpoint: `wss://cdp.lambdatest.com/playwright?capabilities=${encodeURIComponent(JSON.stringify(capabilities))}`
})
Step 2: Download the CLI in your Project
The CLI is used for triggering the tests on HyperExecute. It is recommend to download the CLI binary on the host system and keep it in the root directory of the project to execute the tests on HyperExecute.
You can download the CLI for your desired platform from the below mentioned links:
Step 3: Configure YAML in your Test Suite
Use the sample YAML below to configure your execution:
- Android
- iOS
loading...
loading...
To Run test on Mobile Containers in a Particular Region
dynamicAllocation: true

framework:
  name: appium
  args:
    playwrightRD : true
    region: ap       # supported regions -> ap, eu, us
    reservation: false
- If
reservation : false, it means that it will allocate the device from any region. If you want to allocate the device of any specific region, keep thereservation : true.
Step 4: Execute your Test Suite
NOTE : In case of MacOS, if you get a permission denied warning while executing CLI, simply run
chmod u+x ./hyperexecuteto allow permission. In case you get a security popup, allow it from your System Preferences → Security & Privacy → General tab.
Run the below command in your terminal at the root folder of the project:
./hyperexecute --user undefined --key undefined --config RELATIVE_PATH_OF_YOUR_YAML_FILE
Step 5: Monitor the Test Execution
Visit the HyperExecute Dashboard and check your Job status.
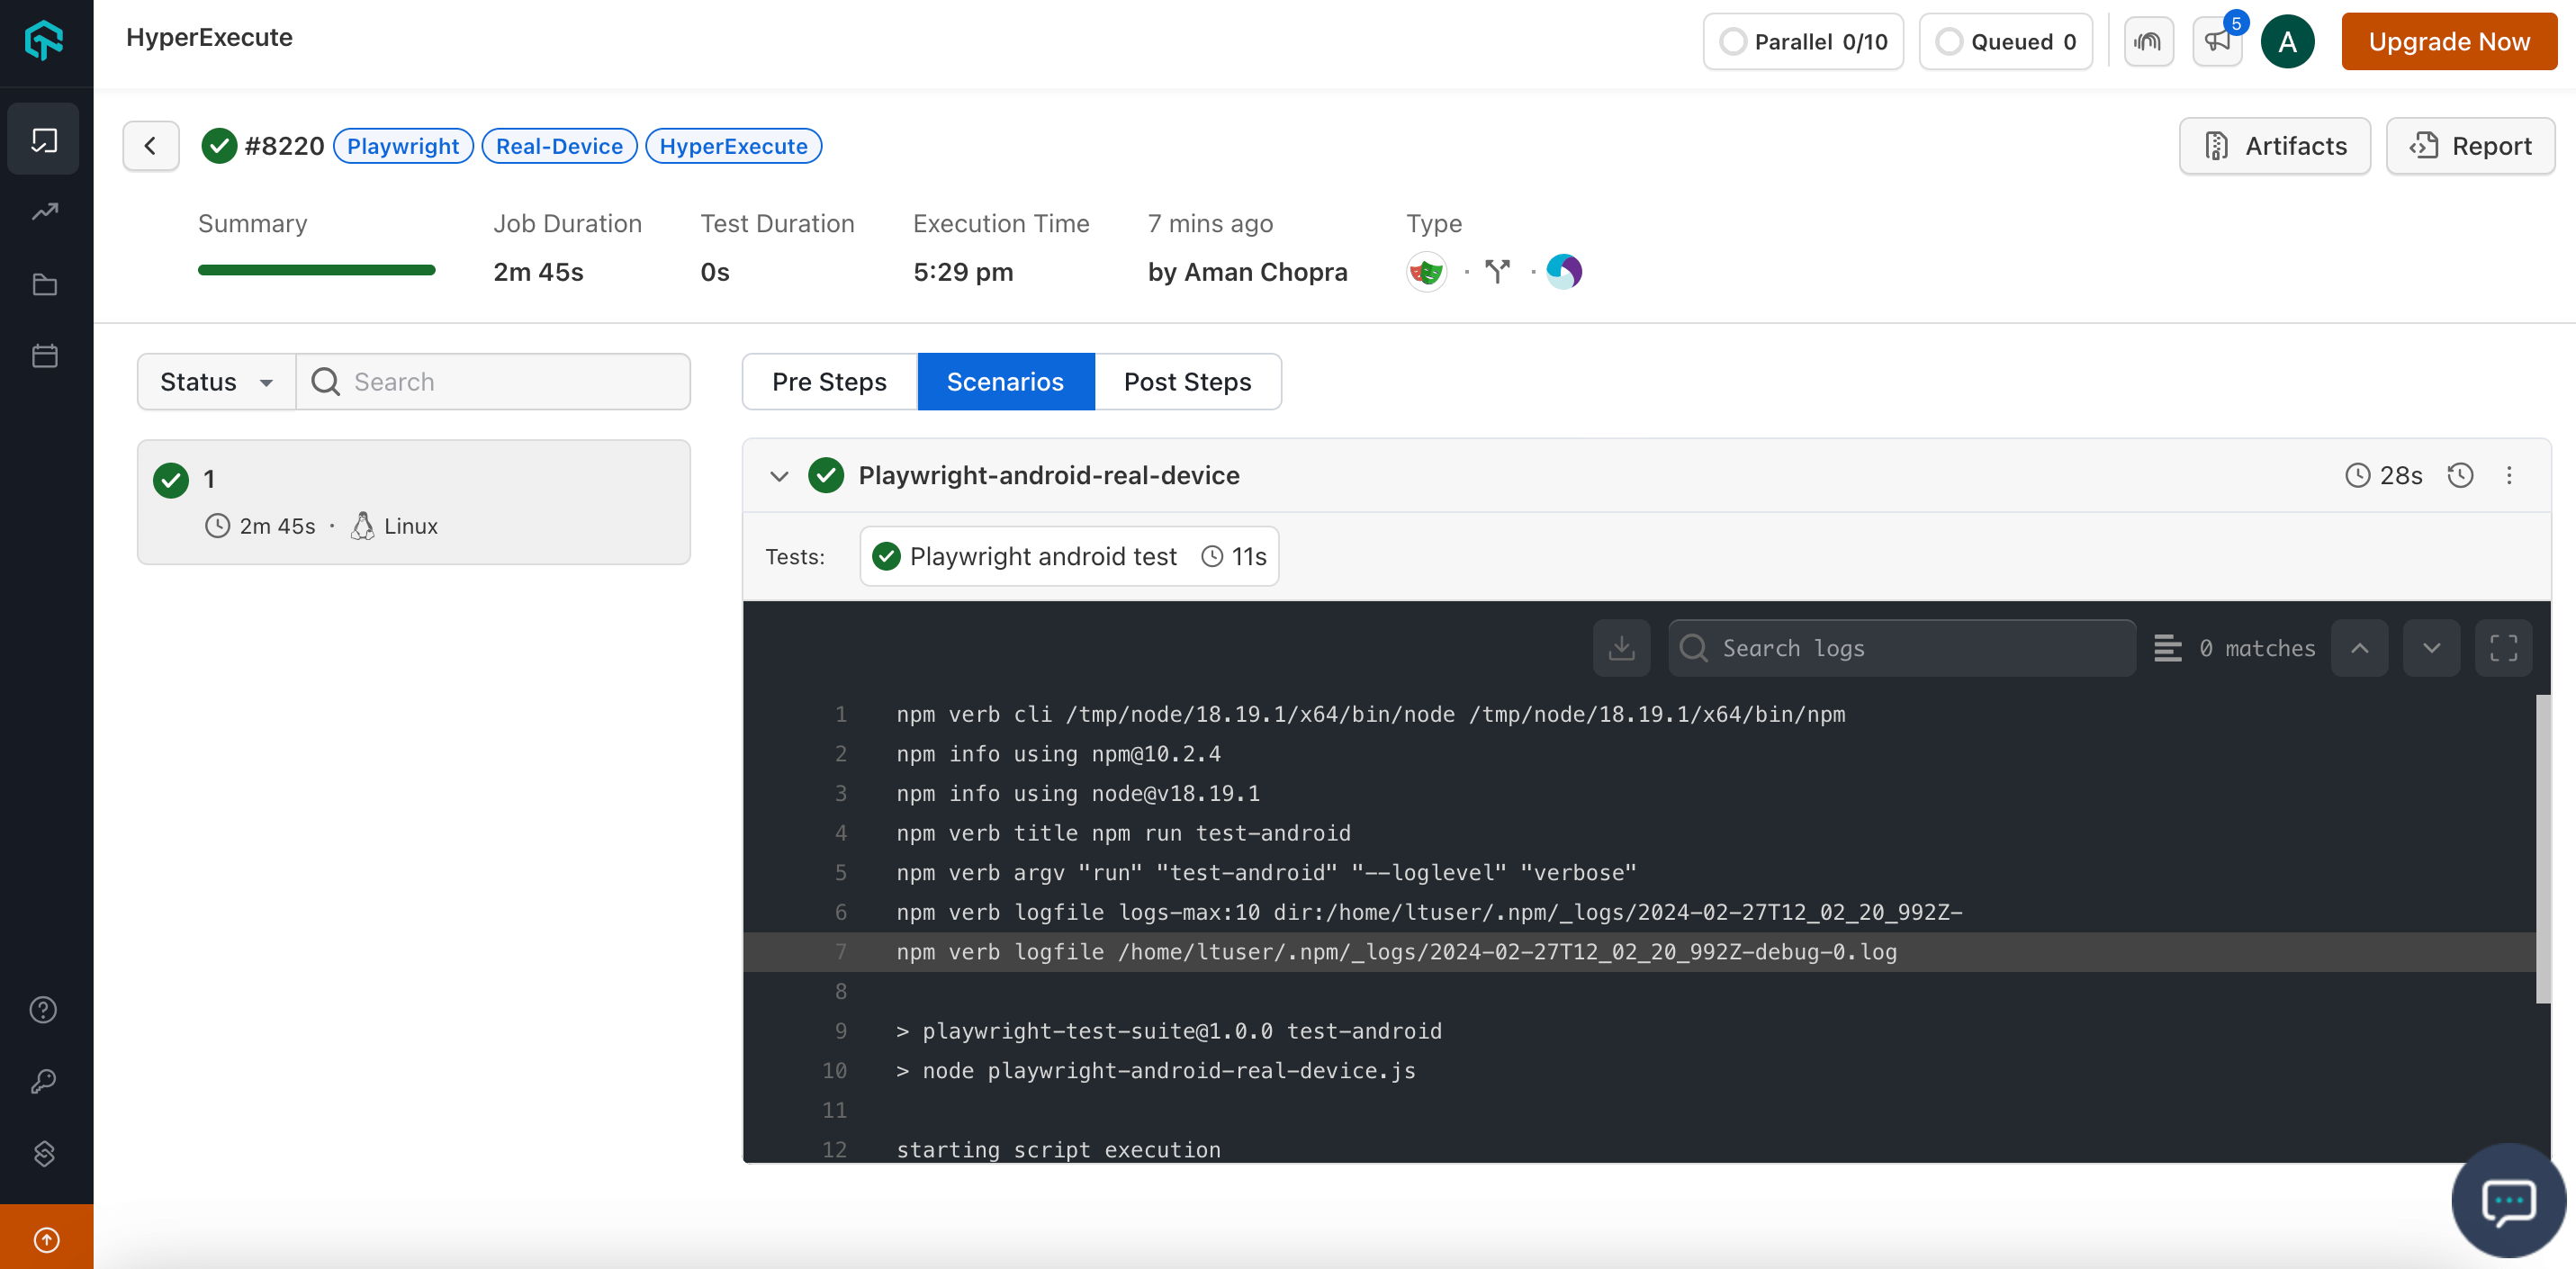
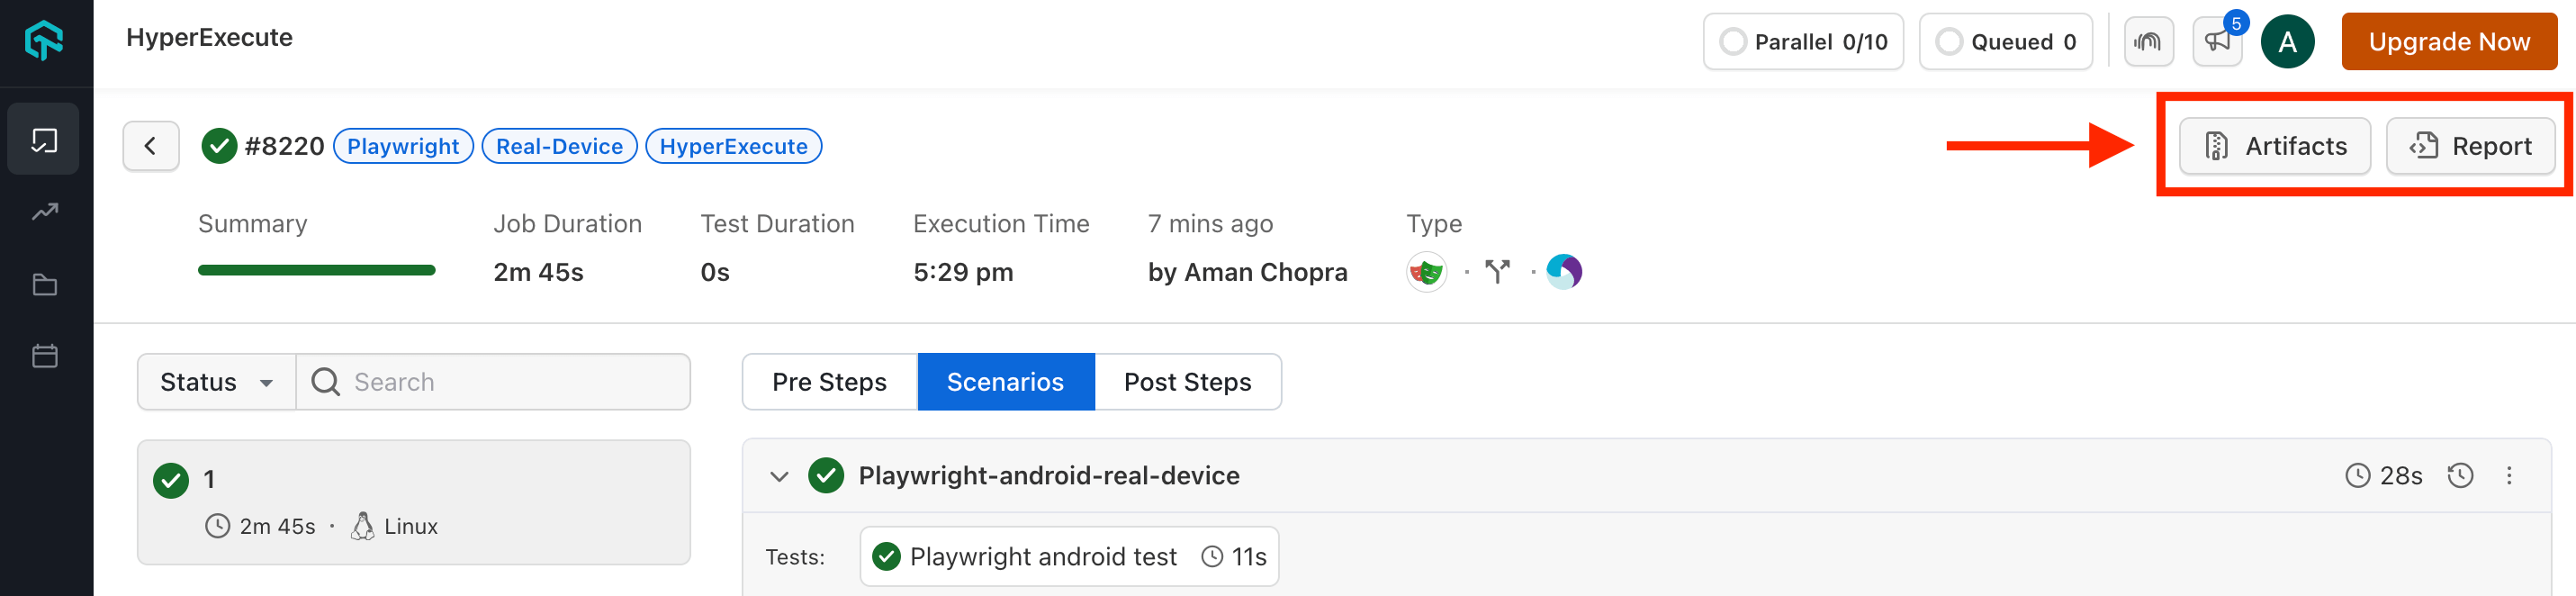
Step 6: Download Artifacts and Reports
HyperExecute also facilitates the provision to download the Artifacts and Reports on your local machine. Click on the corresponding button to download your generated artifacts and reports.
Using the Playwright Agent Skill with TestMu AI
The playwright-skill is a part of TestMu AI Skills that guide AI coding assistants in generating production-ready test automation.
The playwright-skill package includes:
playwright-skill/
├── SKILL.md
└── reference/
    ├── playbook.md
    └── advanced-patterns.md
It provides structured guidance for:
- Project structure and setup
- Dependency configuration
- Local execution
- TestMu AI cloud execution
- Debugging patterns
- CI/CD integration
Installing Playwright Agent Skill
Install a Playwright Agent Skill using the command below:
# Clone the repo and copy the skill you need
git clone https://github.com/LambdaTest/agent-skills.git
cp -r agent-skills/playwright-skill .claude/skills/

# Or for Cursor / Copilot
cp -r agent-skills/playwright-skill .cursor/skills/
Note: If you prefer installing all available framework skills instead of only playwright-skill, clone the repository directly into your tool's skills directory (for example, .claude/skills/, .cursor/skills/, .gemini/skills/, or .agent/skills/).
