Self-Hosted Jira Integration
Many organizations consistently choose to self host their application as it gives them complete control of almost everything. If you want to place Jira behind your corporate firewall and restrict access to someone who isn't on your private network, you can do the same.
TestMu AI-Jira integration allows you to integrate your self-hosted Jira instance and create the issues directly from the TestMu AI platform. You can send annotated issues to the project of your choice, assign them to a colleague, and add a screenshot straight from the TestMu AI platform.
How To Integrate Self-Hosted Jira With TestMu AI
You can integrate your self-hosted Jira with the TestMu AI platform. To view and install integrations, you would need to have admin or user-level access.
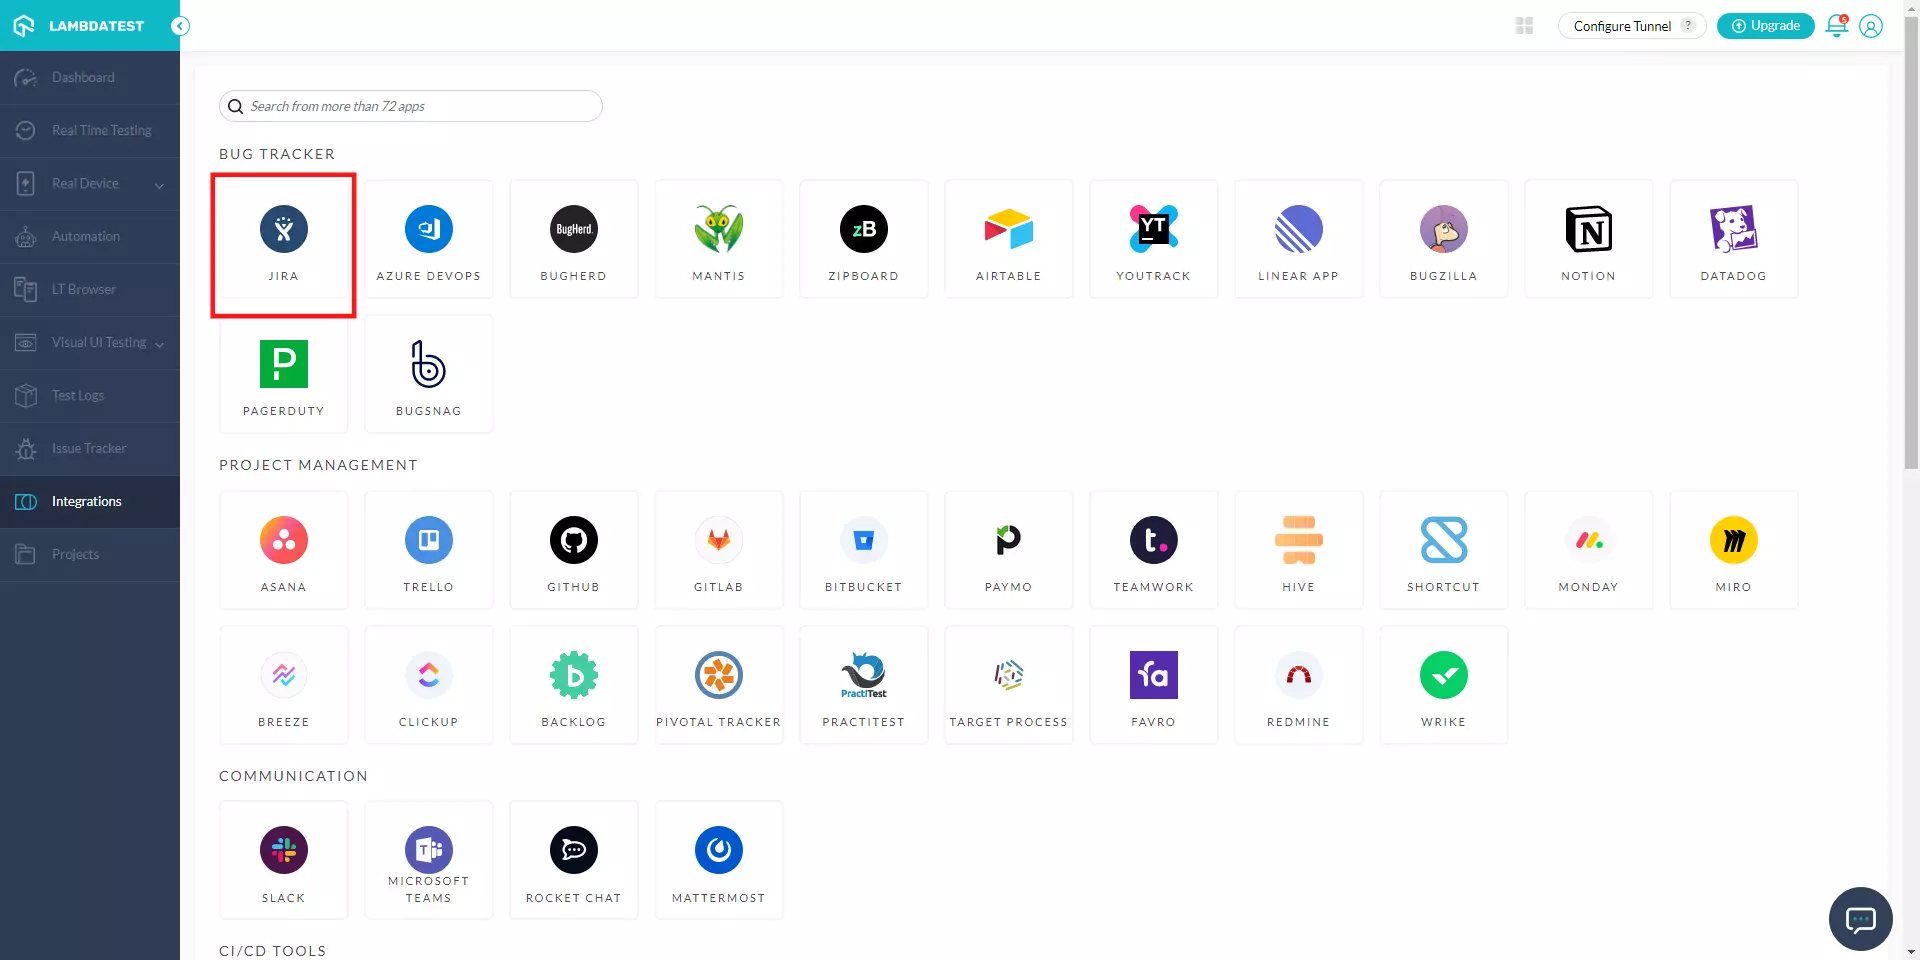
Step 1: Login to your TestMu AI account and select 'Integrations' from the left menu bar. You will be taken to the integration page where you'll find third-party apps available to integrate. Click on 'Jira' icon under the 'Bug Tracker' category.
Step 2: You will be guided to the below screen. Click on 'Self Hosted'.
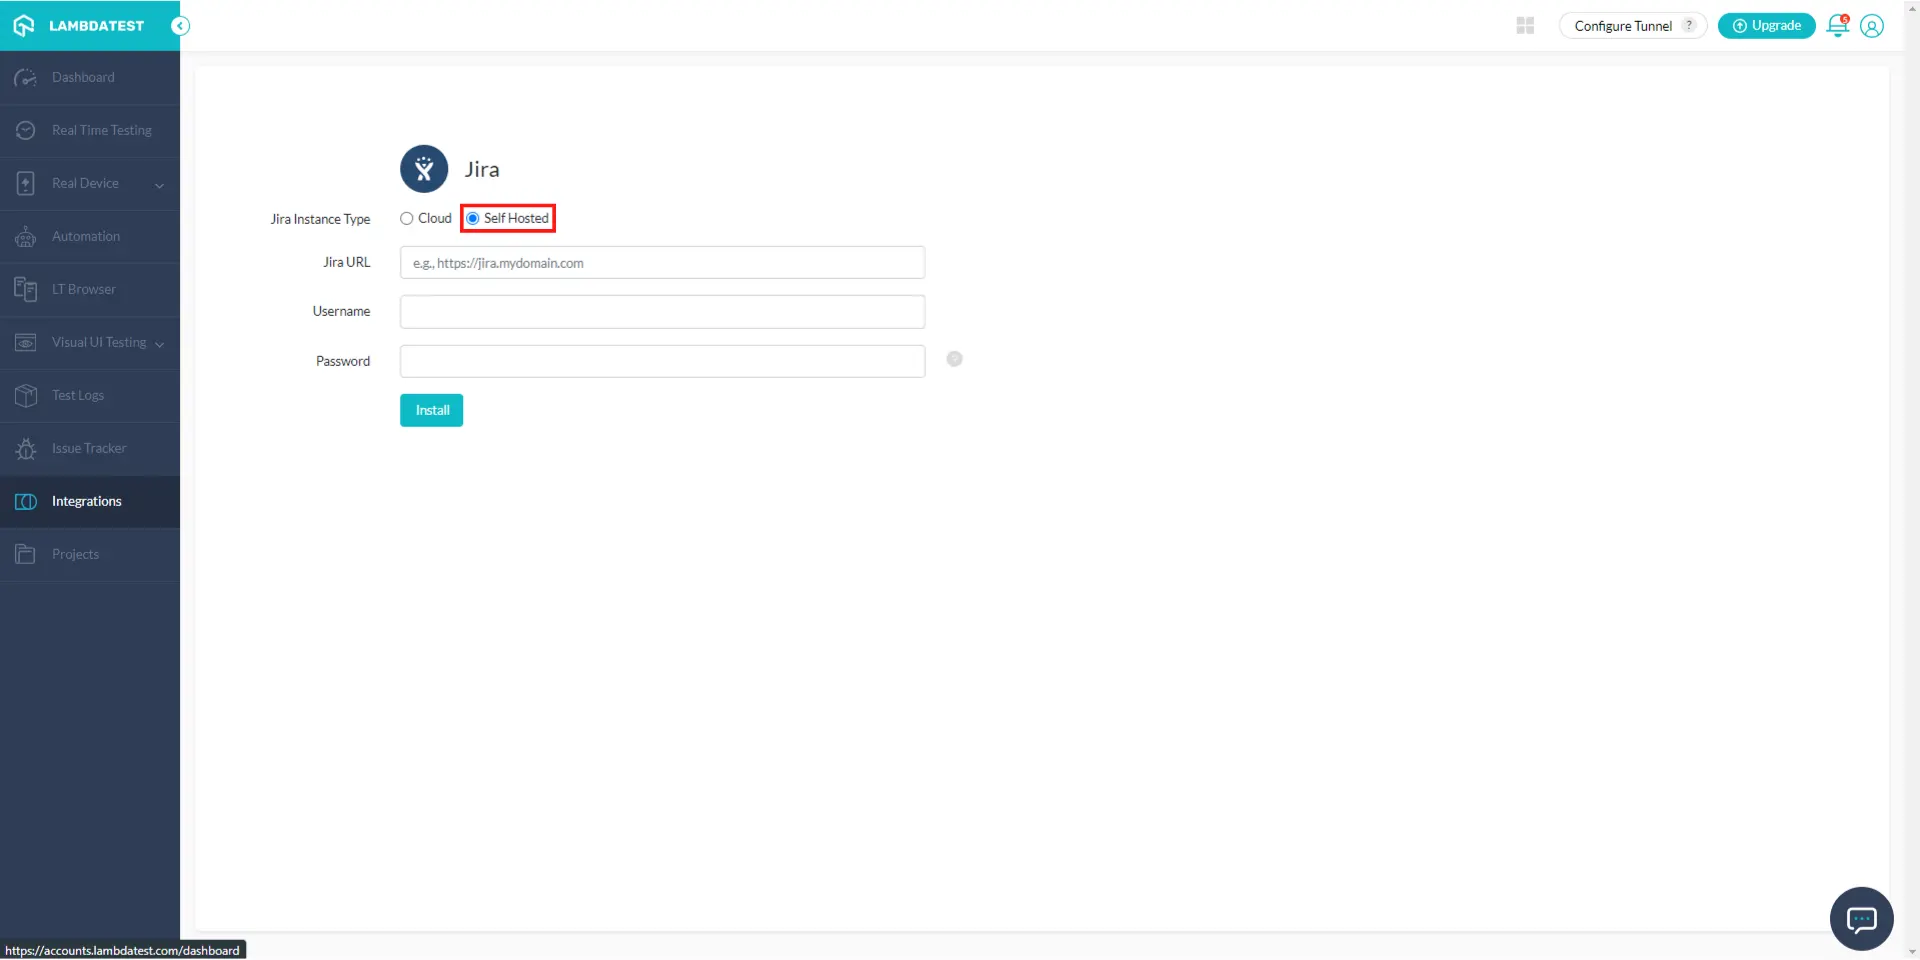
Step 3: Enter your Jira URL, Jira username and password in the provided fields then Click on 'Install'.

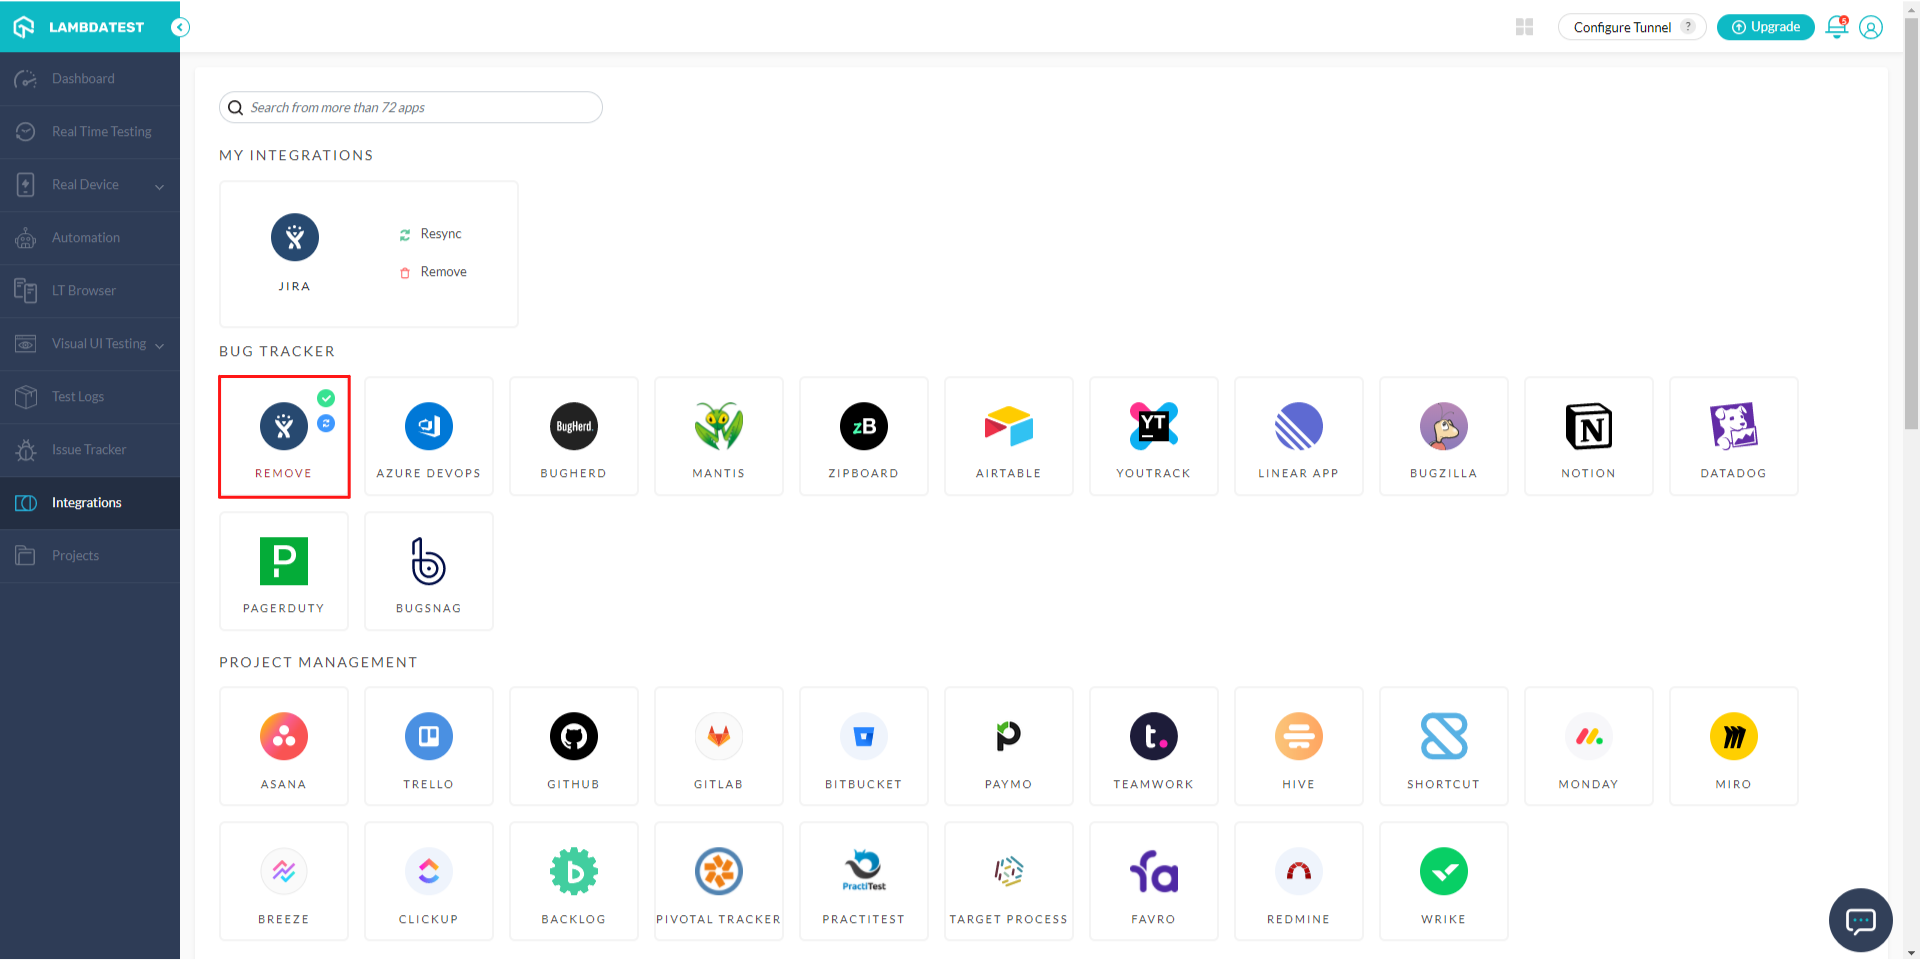
Step 4: Visit the Integration page, you'll find the Jira integration under the category 'My Integrations'.
How To Mark Your Bug Through Self-Hosted Jira Integration?
Once you have established TestMu AI-Jira integration, you can directly mark and push your bugs from TestMu AI to your Jira dashboard.
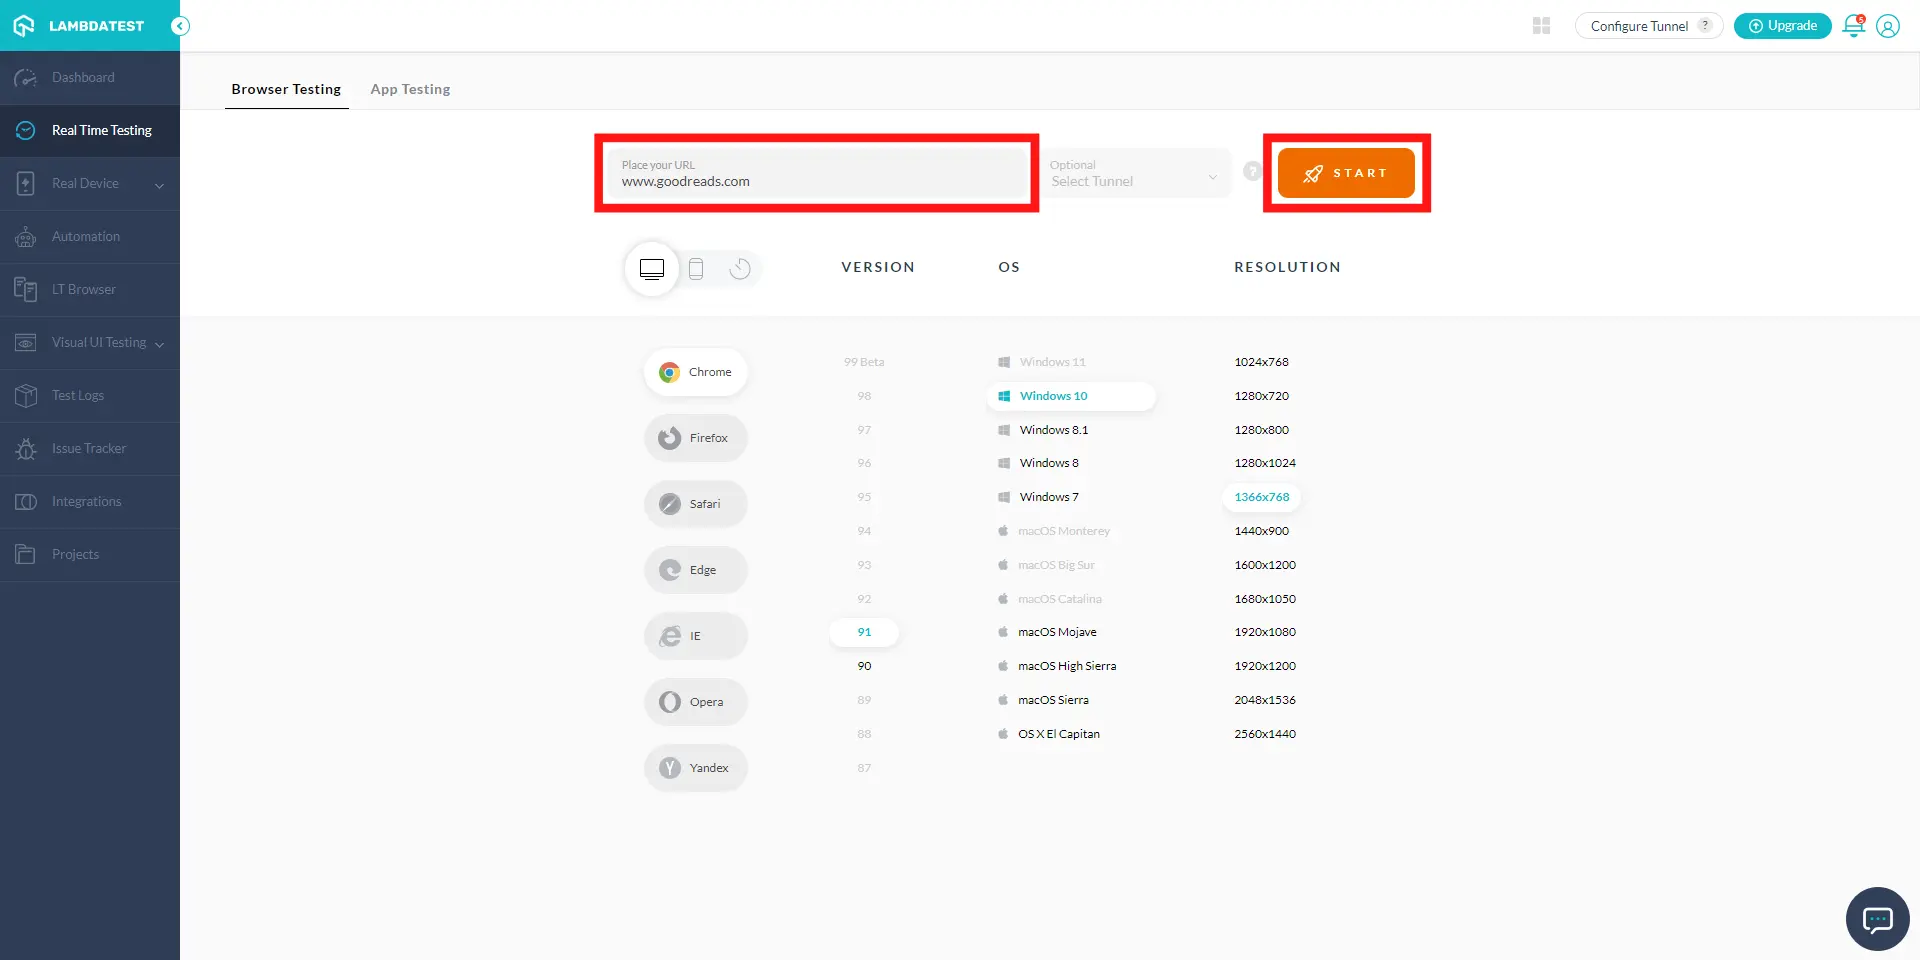
Step 1: Select the test that you want to perform from the left menu bar. For demonstration, we will perform Real-time testing.
Step 2: Enter the test URL of the website/web app in the URL field. Select the browser and OS combinations that you wish to perform the test on and then click on 'Start'.
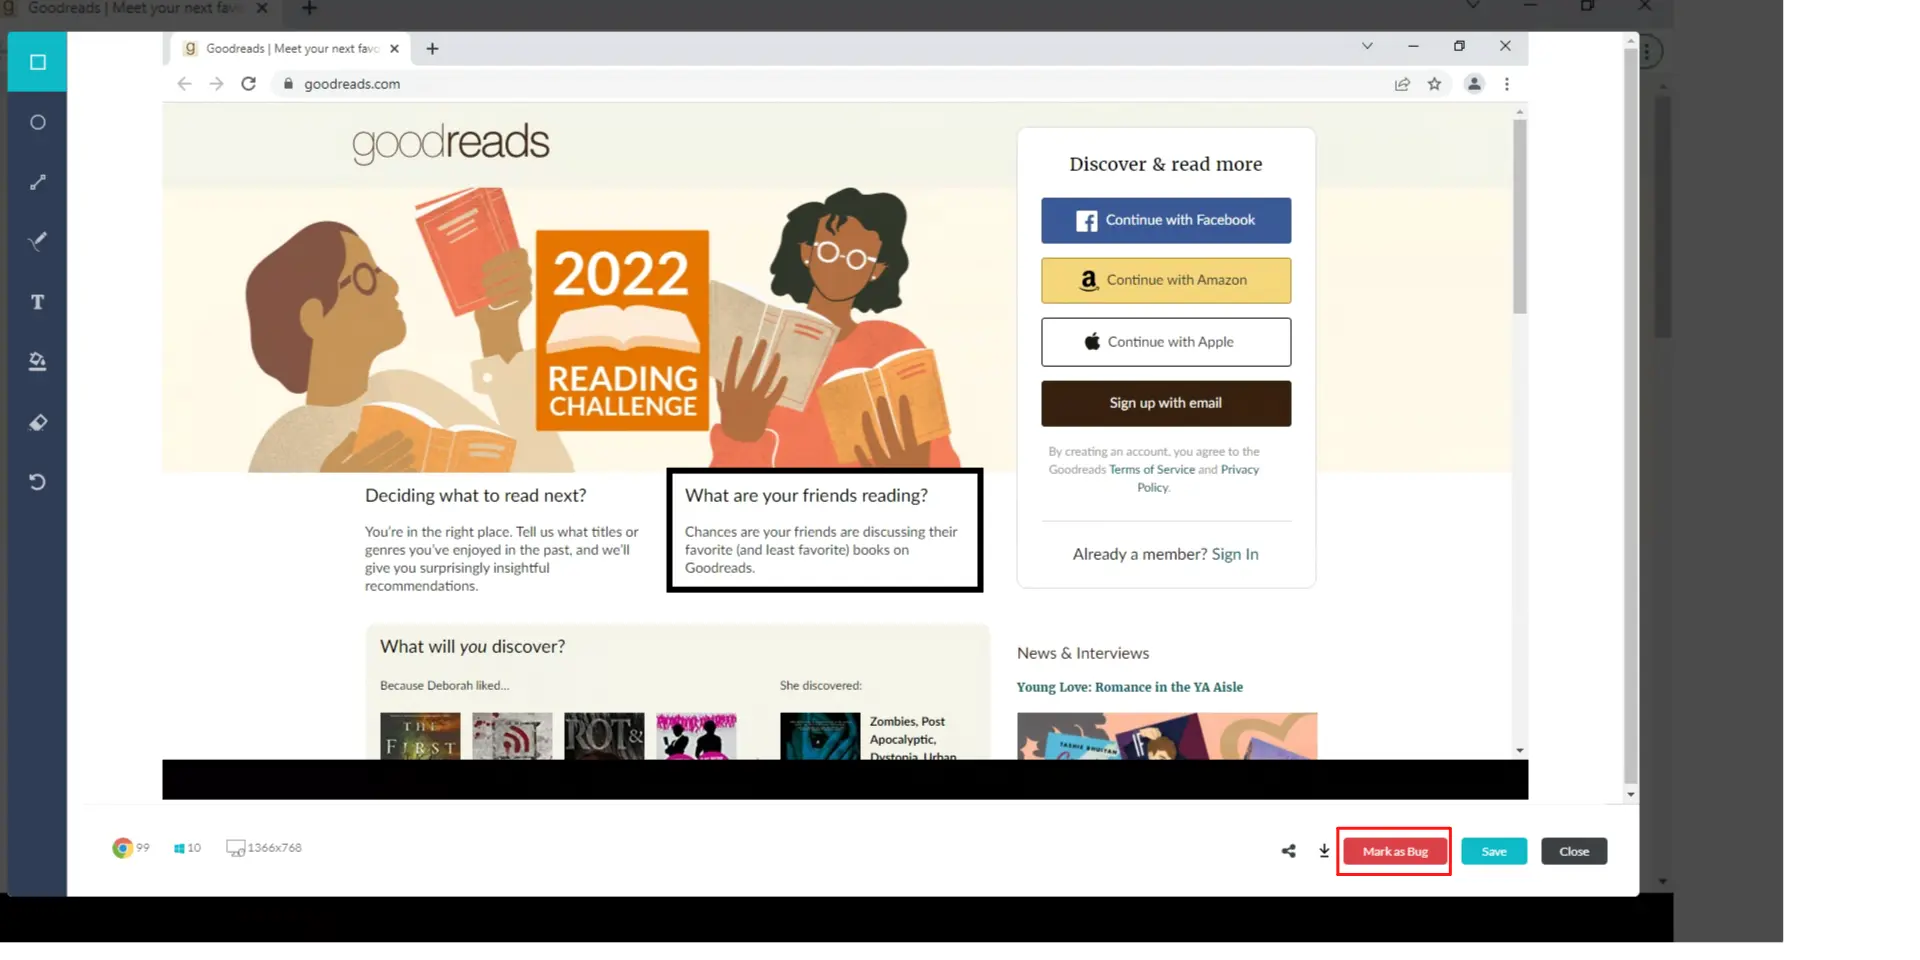
Step 3: A TestMu AI virtual machine will fire up where you can perform real-time testing of your websites and web-apps to find bugs/issues. If you encounter a bug, you can click on the Spider icon from the left panel for capturing a screenshot of the same.

Step 4: Once the screenshot is captured, you can annotate any bugs or a task with an in-built image editor. After highlighting the bug, click on 'Mark as Bug'.
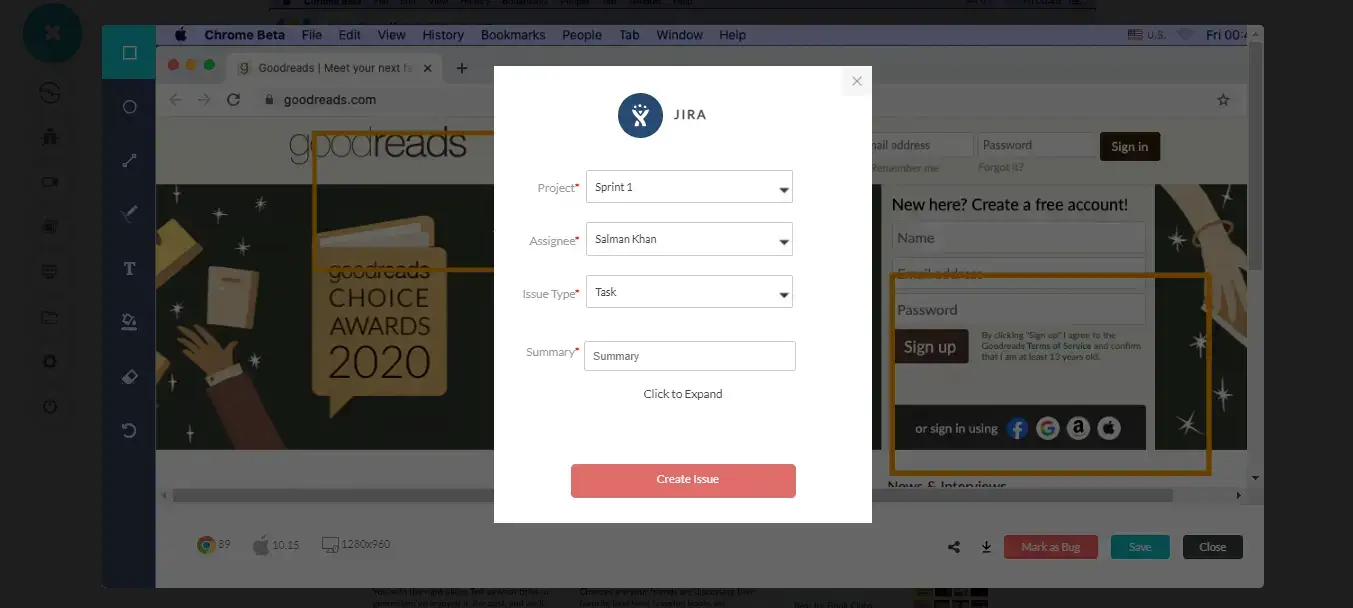
Step 5: After clicking on Mark as Bug, a Jira-specific ticket will open up. Fill in the fields as per your requirement and click on 'Create Issue'.
- Select the 'Project' to which your ticket will go under.
- Assign the bug to a teammate by populating the field 'Assignee'.
- Select the 'Issue Type'.
- Fill the 'Summary' about the bug's details.
Your bugs will get marked successfully to your Jira dashboard. You'll also receive the prompt message confirming the same.
Step 6: Visit the Jira dashboard and you'll find your marked bugs right away. All the data such as test environment details, screenshots that you provided through TestMu AI will be present there.

How To Remove Self-Hosted Jira Integration?
You can integrate one bug-tracking tool at a time. If you want to integrate to a similar third party application, then need to remove your current integration. Here is how to do that.
Step 1: Login to your TestMu AI account.
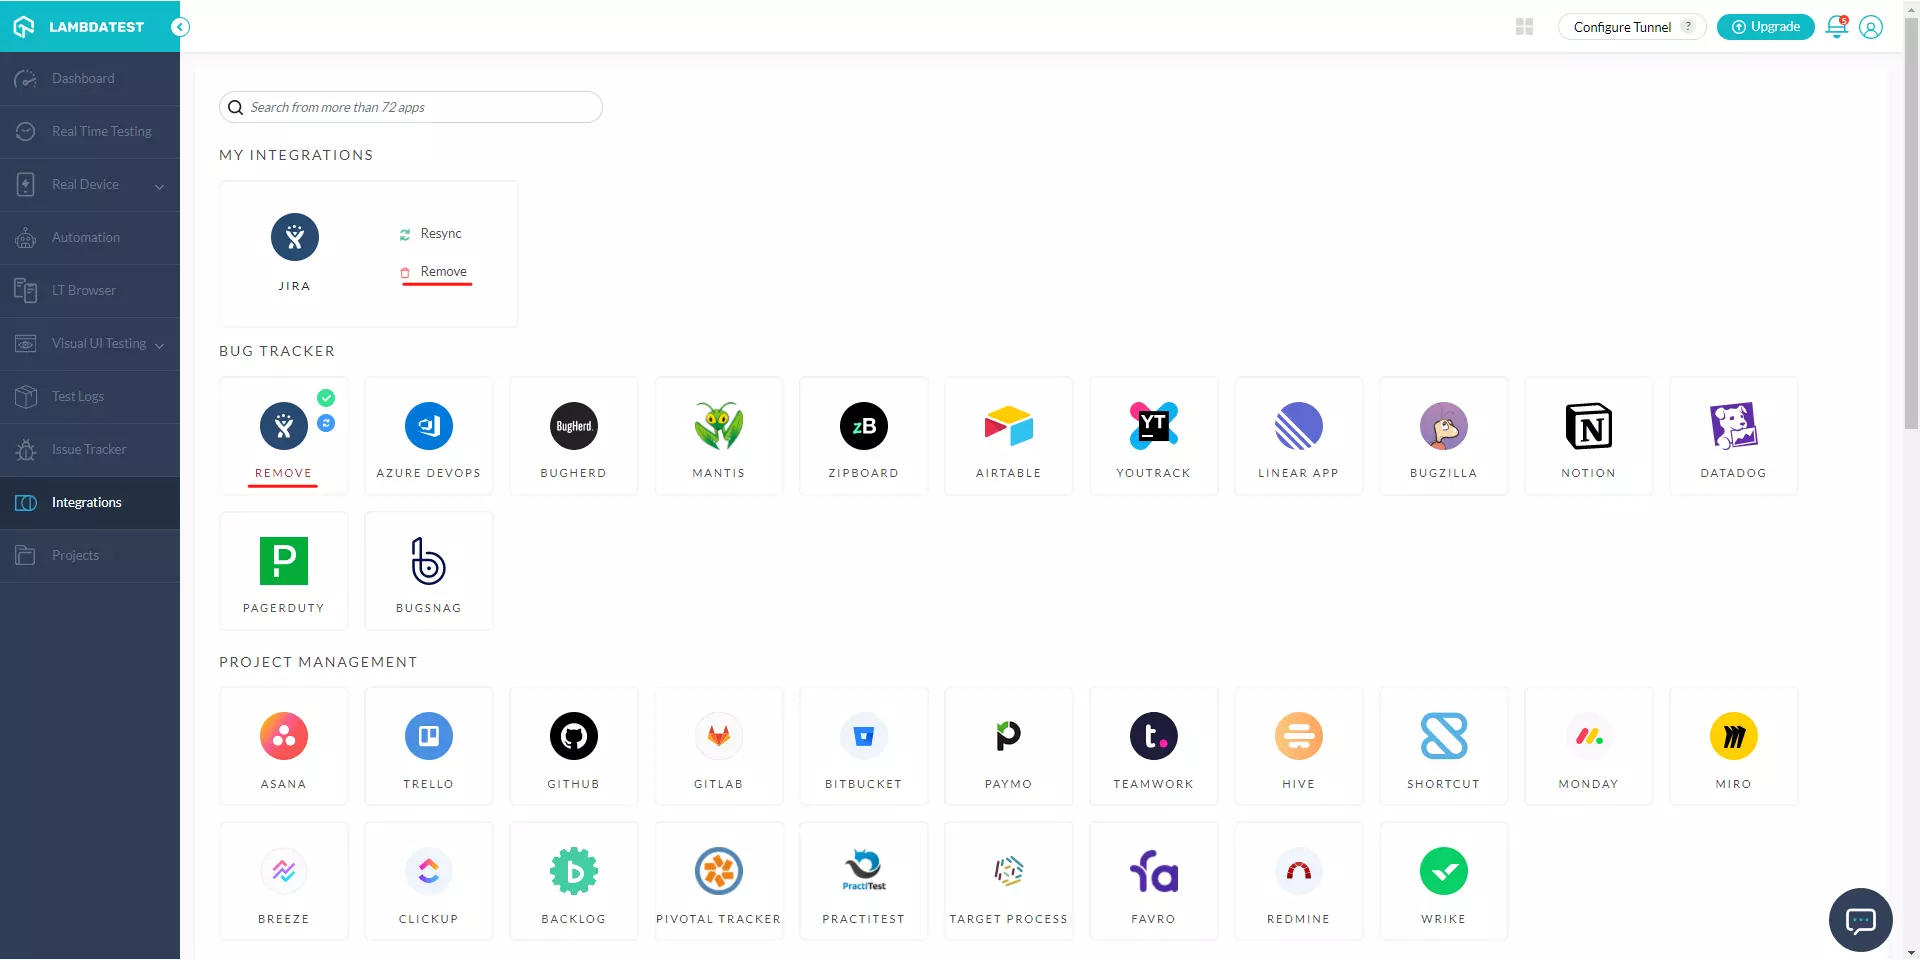
Step 2: Navigate to 'Integrations' tab from the left menu bar.
Step 3: Under the category 'My Integrations'. You can find the 'Remove' button adjacent to Jira icon.
You will receive the confirmation message upon the successful uninstallation of Jira Self Hosted integration.
That's all you need to know for TestMu AI + Jira Self Hosted Integration. If you have any questions for us, please feel free to let us know. Our experts are always available on chat to help you out. Happy testing!
