Power Your Software Testing with AI and Cloud
Supercharge QA with AI for Faster & Smarter Software Testing

- Selenium C#
- Home
- /
- Learning Hub
- /
- How to Use C# Asserts [With Examples]
How to Use C# Asserts [With Examples]
Learn about C# asserts including how they work, different types, usage, custom assertions, and best practices for reliable test-driven development.
Last Modified on: October 31, 2025
- Share:
C# asserts are the statements for verifying expected behavior in automated tests across different points in the workflow of the website or web application. Rather than checking a single method’s output, assertions are used to validate page elements, states, or user interactions.
For example, after submitting a form, you might assert that a success message is displayed, a specific element is visible, or the URL has changed as expected. These checks ensure that the web application responds correctly and help catch regressions or unexpected behavior early in the testing process.
Overview
In test automation, a C# assert is a statement provided by a testing framework (like MSTest, NUnit, or xUnit) that checks whether a specific condition is true during a test execution. If the condition evaluates to false, the test fails immediately, and the framework reports this failure.
How Do Assertions Work in C# Test Automation?
Assertions generally require two components: a Boolean expression that represents the condition you want to verify and a message that is displayed if that condition evaluates to false.
For example: Assert.That(condition, "Failure message");
In this case,condition is the Boolean expression under evaluation, and the failure message provides context if the assertion does not hold. When an assertion fails, the current test or method halts immediately, and the failure is recorded. This behavior allows you to quickly pinpoint which expected condition was not satisfied, making it easier to detect logical errors early in the test execution.
How to Create Custom C# Asserts?
Custom assertions in C# simplify tests by encapsulating repetitive validation logic, making test scripts more readable, maintainable, and aligned with domain-specific language concepts.
- Custom Assertions: Implement using MSTest’s Assert class or any framework to create reusable, expressive, and clear tests that precisely communicate the expected behavior and intent.
- Static Class: Define a static class like CustomAssert containing methods such as IsPositive, which validate conditions and throw AssertFailedException when validation fails, encapsulating repeated logic efficiently.
- Test Method Usage: Call custom assertions like regular assertions within test methods, passing the value to validate, improving readability, maintainability, and reducing duplication across multiple tests consistently.
- Failure Handling: When a custom assertion fails, the test immediately stops, logs a clear, meaningful failure message, and helps developers quickly identify the logic causing the test to fail.
What Are Assertions in C#?
When performing automation testing with C#, assertions allow you to verify that a specific condition is true at a defined point within your method. They are used to validate preconditions, postconditions, and invariants, ensuring that the assumptions you made while writing the unit test remain valid during test execution.
You can implement assertions using Debug.Assert(condition, message) from the System.Diagnostics namespace. If the condition evaluates to true, execution continues normally. If the condition evaluates to false, the assertion fails and identifies the exact location where the expected condition was not met, providing the message you provided.
How Does C# Assert Work?
Assertions usually take two arguments: a Boolean expression representing the condition to verify, and a message that will be displayed if the condition is false.
Example:
Assert.That(condition, "Failure message");Here, the condition is the Boolean expression being checked, and a failure message is shown if the condition evaluates to false.
If the assertion fails, the current method or test stops executing at that point, and the failure is reported. It helps you immediately identify which expected condition was not met and helps detect logical errors early.
Note: Run C# automated tests on an online Selenium Grid. Try LambdaTest Now!
What Are the Different Types of C# Asserts?
If you are not using a unit testing framework, C# provides assertion mechanisms in the System.Diagnostics namespace.
There are three main types of assertions: Debug, Trace, and Contract. Each serves a different purpose and has distinct behavior in Debug and Release builds.
Debug.Assert
Debug.Assert is evaluated only in Debug builds. If the condition is false, a message box is displayed showing the failure message and the call stack. Execution of the current method continues after dismissing the message box.
You can use Debug.Assert to validate internal logic and catch errors during development without affecting the performance of Release builds.
Syntax:
Debug.Assert(condition, "Failure message");Trace.Assert
Trace.Assert behaves similarly to Debug.Assert but is evaluated in both Debug and Release builds. It is useful for identifying critical issues in runtime or production-like environments.
If the assertion fails, a failure message is sent to the configured trace listeners (for example, the Output window or a log file). Execution continues after the failure, allowing you to monitor multiple conditions without halting the software application.
Syntax:
Trace.Assert(condition, "Failure message");Contract.Assert
Contract.Assert is part of the Code Contracts library. It is used to validate assumptions about software state, such as invariants or critical conditions. If the condition evaluates to false, an exception is thrown.
Syntax:
Contract.Assert(condition, "Failure message");Important: Code Contracts, including Contract.Assert, is no longer maintained by Microsoft and should not be used in new projects. Modern alternatives include runtime validation with exceptions or using static analysis tools.
For a deeper comparison of how assertions differ from verifications in Selenium and when to use each approach, you can refer to this blog on assert vs verify in Selenium.
How to Use C# Asserts?
In the following section, we will focus on using assertions for C# testing with frameworks like Selenium. For more information, you can check out this Selenium C# tutorial.
We will cover NUnit and MSTest. Both are free and can be selected at the start of a Visual Studio project:
Using NUnit Asserts
NUnit is a widely used C# testing framework for testing web applications across most .NET platforms. You can use NUnit asserts to verify that code behaves as expected.
New to NUnit? Visit this NUnit tutorial.
Test Scenario:
- Open the LambdaTest eCommerce Playground.
- Click ‘Shop by Category’.
- Select the ‘Components’ category.
- Add to cart the first item with the title ‘HTC Touch HD’.
- Validate that the cart icon has the value 1 displayed.
Implementation:
Below is the automation script for automating the above test scenario, demonstrating practical implementation, validations, and use of assertions.
namespace NUnitAsserts
{
    internal class NUnitExample
    {
        private static IWebDriver driver;


        [SetUp]
        public void OpenApplication()
        {
            driver = new ChromeDriver();
            driver.Navigate().GoToUrl("https://ecommerce-playground.lambdatest.io/");
        }


        [Test]
        public void ValidateProductIsAddedToTheCart()
        {
            // Navigate to the Components page
            driver.FindElement(By.XPath("//a[contains(normalize-space(.), 'Shop by Category')]")).Click();
            driver.FindElement(By.XPath("//a[.//span[normalize-space(text())='Components']]")).Click();


            // Hover the first HTC Touch product HD in the carousel
            Actions builder = new Actions(driver);
            builder.MoveToElement(driver.FindElement(By.XPath("//div[@class='carousel-item active']/img[@title='HTC Touch HD']")))
                   .Build().Perform();


            // Wait for the product menu to be visible
            IWebElement composeButton = driver.FindElement(By.XPath("//button[span[text()='Add to Cart']]"));
            WebDriverWait wait = new WebDriverWait(driver, TimeSpan.FromSeconds(10));
            wait.Until(d => composeButton.Displayed);


            // Click Add to Cart button
            composeButton.Click();


            // Wait for the notification message to be visible
            IWebElement notificationMessage = driver.FindElement(By.XPath("//div[contains(@class, 'toast') and @role='alert']"));
            wait.Until(d => notificationMessage.Displayed);


            // Validate that the cart contains one item
            string expectedText = driver.FindElement(By.XPath("//div[@class='cart-icon']/span")).Text;
            Assert.That(expectedText.Equals("1"), "The cart was not updated.");


            // Other ways to validate
            Assert.IsTrue(expectedText.Equals("1"), "The cart was not updated.");
            Assert.AreEqual(expectedText, "1", "The cart was not updated.");
            Assert.IsFalse(expectedText.Equals("0"), "The cart was not updated.");
            Assert.AreNotEqual(expectedText, "0", "The cart was not updated.");
            Assert.IsNotNull(expectedText, "The cart was not updated.");
        }


        [TearDown]
        public void CloseBrowser()
        {
            driver.Dispose();
        }
    }
}
Code Walkthrough:
- Namespace & Class: NUnitAsserts contains the NUnitExample class, which organizes all test-related methods. It defines the WebDriver and structures setup, test execution, and teardown for automation.
- Setup Method: [SetUp] initializes the Chrome browser and navigates to the LambdaTest eCommerce Playground website. It ensures the test begins in a clean state with the application fully loaded.
- Navigating & Selecting Product: The test navigates to the Components section, hovers over the HTC Touch HD product in the carousel, preparing it for interaction and adding it to the cart.
- Waiting & Assertions: Explicit waits ensure elements like Add to Cart buttons and notifications are visible. Multiple NUnit assertions confirm the cart updates correctly, validating expected UI behavior reliably.
- Teardown Method: [TearDown] closes and disposes the WebDriver, cleaning up browser resources to prevent interference with other tests, ensuring each test run starts fresh without leftover state.
Test Execution:
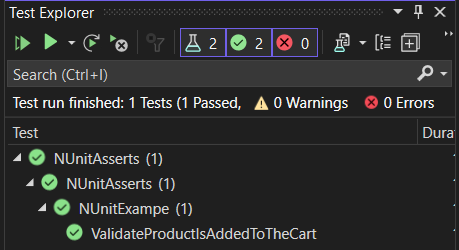
In Visual Studio, the tests are displayed in the Test Explorer pane after the project is built. You can run them by clicking on the Run icon or by selecting the test you want to run, right-clicking, and pressing Run.
When running the tests locally, you will see the browser window open, and all the defined steps execute. Once the test finishes, you can see the results in the explorer.
Using MSTest Asserts
MSTest is a built-in C# testing framework provided by Microsoft to test web applications across most .NET platforms efficiently. It provides assertions to validate that the code works as expected.
New to MSTest? Check out this MSTest tutorial.
Test Scenario:
Open the LambdaTest eCommerce Playground. Click ‘Shop by Category’. Select the ‘Software’ category. Validate that the web page has the correct title.
Implementation:
The following automation script implements the above test scenario, showcasing practical execution, element validations, and the use of assertions to verify expected results.
namespace MSTestAsserts
{
    [TestClass]
    public class MSTestExample
    {
        private static IWebDriver driver;


        [TestInitialize]
        public void OpenApplication()
        {
            driver = new ChromeDriver();
            driver.Navigate().GoToUrl("https://ecommerce-playground.lambdatest.io/");
        }


        [TestMethod]
        public void ValidateCorrectCategoryIsSelected()
        {
                // Navigate to the Components page
                driver.FindElement(By.XPath("//a[contains(normalize-space(.), 'Shop by Category')]")).Click();
                driver.FindElement(By.XPath("//a[.//span[normalize-space(text())='Software']]")).Click();


                // Wait for the filter menu to be displayed
                WebDriverWait wait = new WebDriverWait(driver, TimeSpan.FromSeconds(10));
                wait.Until(d => driver.FindElement(By.Id("mz-filter-0")));


                // Validate the title of the page is correct
                Assert.IsTrue(driver.Title.Equals("Software"), "The page was not loaded.");


                // Other ways to validate
                Assert.AreEqual("Software", driver.Title, "The page was not loaded.");
                Assert.IsFalse(driver.Title == "0", "The page was not loaded.");
        }


        [TestCleanup]
        public void CloseBrowser()
        {
            driver.Quit();
        }
    }
}
Code Walkthrough:
- Namespace & Class: MSTestAsserts contains the MSTestExample class, organizing all test methods. It defines the WebDriver and structures setup, test execution, and cleanup for MSTest automation.
- Test Initialization: [TestInitialize] launches ChromeDriver and navigates to the LambdaTest eCommerce Playground, ensuring every test starts with a fresh browser session and the application is fully loaded.
- Navigation & Interaction: The test navigates to the Software category, clicks the appropriate links using XPath selectors, simulating user interaction to reach the desired page accurately.
- Assertions & Validation: Multiple MSTest assertions like Assert.IsTrue, Assert.AreEqual, and Assert.IsFalse validates that the page title matches expectations, confirming the correct category is selected.
- Test Cleanup: [TestCleanup] closes the browser using the driver.Quit(), freeing resources and ensuring subsequent tests run in a clean, isolated environment without leftover browser state.
Test Execution:
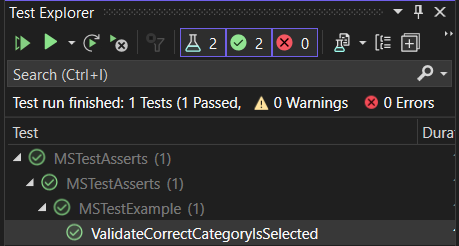
To execute tests, select the tests from Visual Studio and click the Run icon (same as above in the NUnit case).
The browser window will open on the local machine, and the steps will be done inside the web pages. After the test is executed, the status will be updated in the Test Explorer.
C# assertions are essential for verifying that your code behaves as expected. Whether you are using Debug.Assert, Trace.Assert, or framework-specific assertions in NUnit or MSTest, they ensure functional correctness within the environment where the test runs.
However, a test passing in one test environment does not ensure that the same logic will hold true across different browsers and operating systems. This is where cloud testing platforms such as LambdaTest become helpful.
Why Choose LambdaTest for C# Assertion Testing?
LambdaTest allows you to perform C# automation testing online across a wide array of real browsers, operating systems without the need to maintain an in-house testing infrastructure. By running tests on an online Selenium Grid, the assertions you’ve written are validated in real-world conditions, giving you confidence that your web application behaves consistently across different environments.
To get started, visit this guide on Selenium C# testing with LambdaTest.
For demonstration, let’s take an example of NUnit assert. We will use the same test scenario.
To run your C# tests with NUnit assert on the LambdaTest Selenium Grid, you need the LambdaTest Grid URL, which serves as the endpoint for executing your tests remotely. Connecting to LambdaTest requires a username and access key, which you can get from your LambdaTest Account Settings..
For security, it’s best to store these values as environment variables, ensuring they are not exposed in your repository. Once the connection is configured, you can define the browser capabilities that your tests will use.
To generate capabilities, you can use the LambdaTest Automation Capability Generator.
options.BrowserVersion = "latest";

            Dictionary<string, object> ltOptions = new Dictionary<string, object>
            {
                ["username"] = LT_USERNAME,
                ["accessKey"] = LT_ACCESS_KEY,
                ["platformName"] = platform,
                ["build"] = build,
                ["project"] = project,
                ["w3c"] = true
            };

            options.AddAdditionalOption("LT:Options", ltOptions);

            return new RemoteWebDriver(new Uri($"https://{LT_USERNAME}:{LT_ACCESS_KEY}{gridURL}"), options.ToCapabilities());
        }
    }
}
Everything else stays the same, like we did for local test execution.
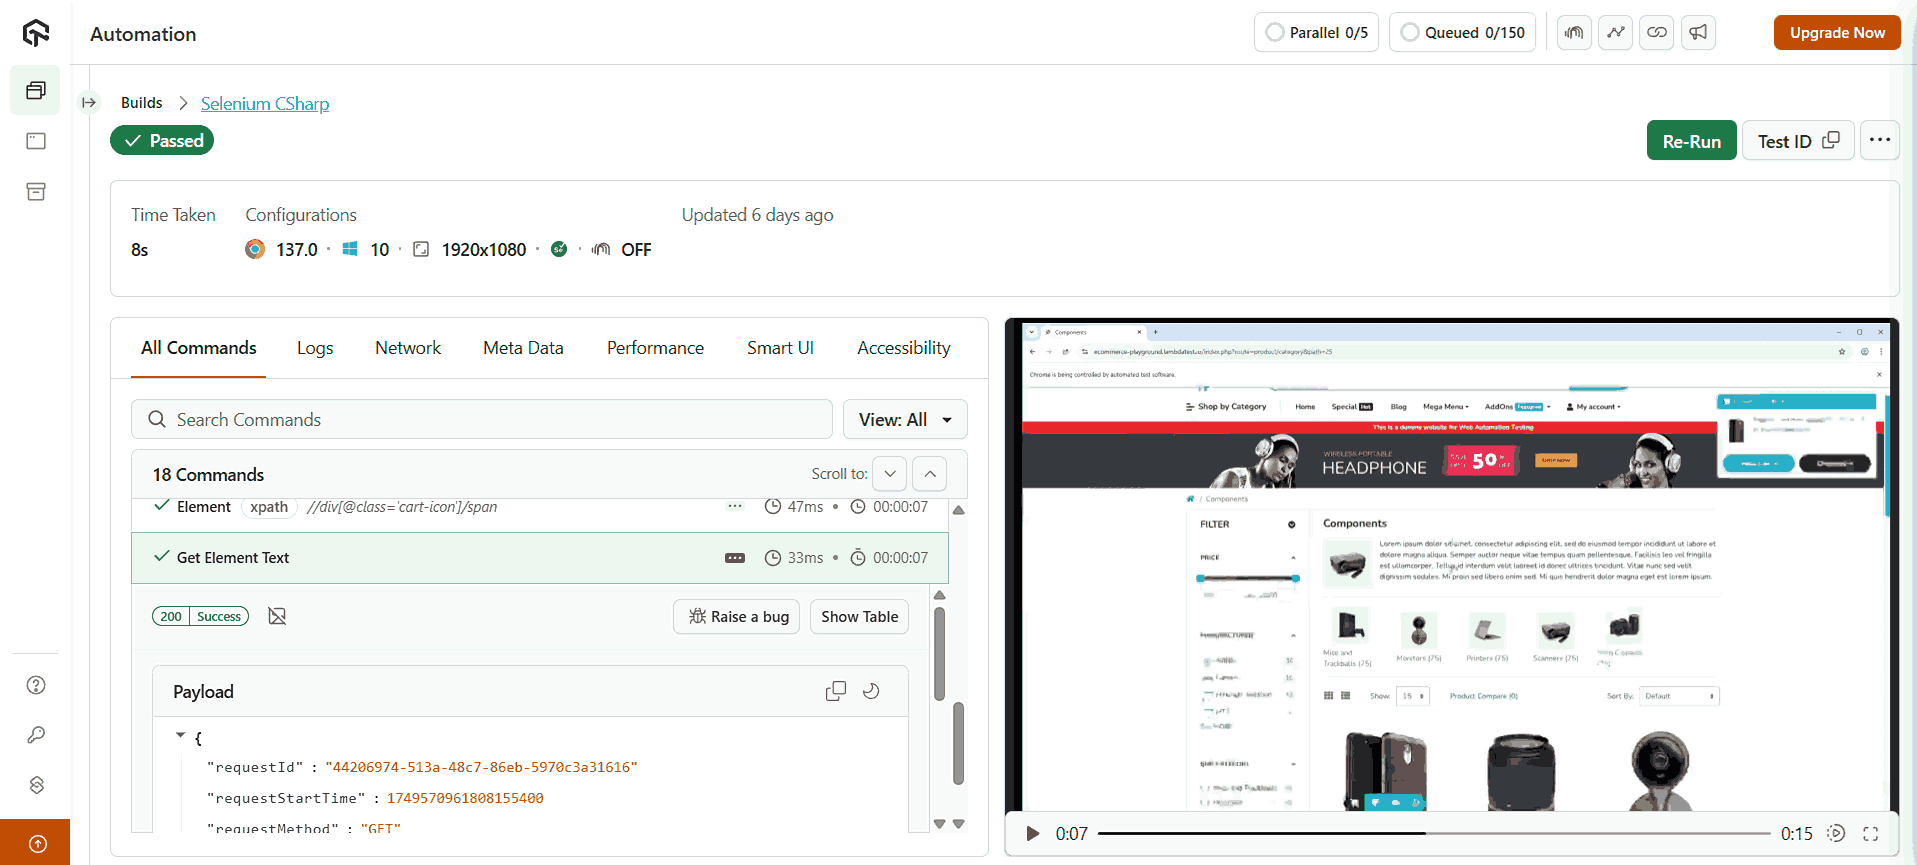
Now run the test through Visual Studio Code and visit the LambdaTest Web Automation dashboard to view your test results.
How to Create Custom Assertions in C#?
Custom assertions can clean up your test script by encapsulating repetitive validation logic, expressing intent naturally with domain concepts, and improving overall test maintainability.
You can implement them using the Assert class of MSTest, or with any testing framework, to build clearer and more expressive tests.
Here is an example of how you can build that:
public static class CustomAssert
{
    public static void IsPositive(this Assert assert, int value)
    {
        if (value <= 0)
        {
            throw new AssertFailedException($"Expected a positive number but got {value}");
        }
    }
}
And using it in your test:
[TestClass]
public class MathTests
{
    [TestMethod]
    public void CheckIfNumberIsPositive()
    {
        int result = -5; // This would typically come from a method you're testing

        Assert.That.IsPositive(result);
    }
}
If the assertion fails, you should see this test log.
Best Practices for Implementing C# Asserts
It’s important to remember that well-structured assertions make your tests both reliable and maintainable. By adopting certain best practices, you ensure that each test clearly communicates its intent and generates actionable results when something goes wrong.
- Follow the Arrange/Act/Assert (AAA) Pattern: Structure tests into three clear sections. Arrange sets up input data and objects, Act invokes the method under test, and Assert verifies the outcome using framework-provided methods. This keeps tests easy to read and reason about.
- Keep One Assertion per Test: Each test should validate a single behavior. Limiting to one assertion improves clarity, makes failures easier to inspect, and prevents multiple issues from being hidden in one test.
- Avoid Logic Inside Assertions: Assertions should be simple. For example, assign values to variables before asserting rather than embedding calculations inside the check. This simplifies debugging and makes failures more transparent.
- Use Descriptive Messages: Include clear failure messages in assertions. Instead of vague notes like “The button does not work,” specify the expected and actual behavior so issues can be identified quickly.
- Prefer Framework Assertions over Debug.Assert: Leverage the assertion methods built into testing frameworks like NUnit or MSTest. These are designed for automation testing and provide better reporting than Debug.Assert.
- Place Assertions at the End: Assertions should conclude the test. Since execution stops after a failed assertion, placing them at the end avoids skipping important cleanup or follow-up steps.
Conclusion
In test automation, assertions in C# are critical for validating expected outcomes and ensuring software reliability. By understanding built-in C# assert types, using them correctly in automated tests, and implementing custom assertions where needed, testers can catch errors early and enforce precise behavior. Using C# assertions strategically within test scripts improves detection of failures, enhances test coverage, and ensures automated suites provide accurate, actionable results.
Citations
- NUnit Official Website: https://nunit.org/
- MSTest Official Documentation: https://learn.microsoft.com/en-us/dotnet/core/testing/unit-testing-csharp-with-mstest
Frequently Asked Questions (FAQs)
Did you find this page helpful?
More Related Hubs

Start your journey with LambdaTest
Get 100 minutes of automation test minutes FREE!!

