Scale Your Automation Testing with AI
 Run end-to-end parallel tests & reduce test execution time by 5x
- Generate tests scripts using natural language with KaneAI
- Accelerate your testing process with Autoheal, SmartWait & RCA

- Automation
- Home
- /
- Learning Hub
- /
- Jest Tutorial
Jest Tutorial: Complete Guide to Jest Testing
Explore Jest tutorial, your go-to guide for mastering Jest testing. Run Jest automation tests in parallel across multiple browser and OS combinations.
Published on: July 23 2025
- Share:
Jest is a widely adopted JavaScript testing framework developed by Meta. It’s primarily used for unit testing in React applications but also supports full-stack testing across JavaScript projects.
Overview
What is Jest?
Jest is an open-source JavaScript testing framework by Meta used for testing React and other JS applications. It offers zero setup, built-in assertions, mocking, and snapshot testing, making it fast, reliable, and easy to use for automation.
Getting Started with Jest
To begin, install Jest via npm and configure it in your project:
npm install --save-dev jestAdd a test script in your package.json:
"scripts": { "test": "jest" }Jest integrates seamlessly with tools like Babel, TypeScript, Node.js, React, and Selenium. Developers can quickly create test cases for UI components, APIs, or browser interactions.
Core Features of Jest
- Zero Configuration: No additional setup required for most JavaScript projects.
- Mocks and Spies: Use jest.fn() and jest.spyOn() to isolate dependencies and monitor function calls.
- Snapshots: Capture UI output and compare future changes to detect regressions.
- Parallel Test Execution: Uses multiple CPU cores for faster test runs.
- Code Coverage: Generate reports with npm test coverage to ensure thorough testing.
Running Jest Tests in Parallel
Jest tests can be executed in parallel across multiple browsers and OS combinations using LambdaTest’s cloud Selenium Grid. This allows developers to:
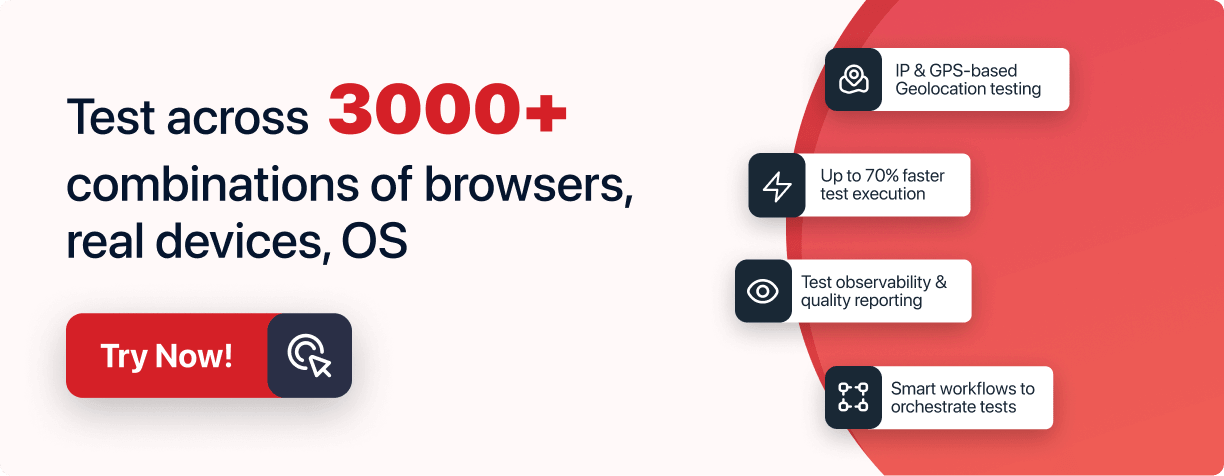
- Run JavaScript and React tests across 3000+ browser and OS environments.
- Reduce execution time and improve scalability.
- Validate app consistency across real user conditions.
Advantages of Using Jest
- Fast and reliable with built-in coverage and mocking.
- Simple CLI and snapshot testing reduce debugging time.
- Works out of the box with most JavaScript frameworks.
- Strong community support and continuous updates from Meta.
This framework includes a built-in CLI, test runner, assertion library, and mocking capabilities. It works seamlessly with Babel, TypeScript, Node.js, Angular, and Vue.
What Is Jest Testing?
Jest is a popular JavaScript testing framework built on top of Jasmine, mainly used for unit testing in React and React Native applications. Its goal is to provide simplicity and support when testing large-scale web applications.
This unit testing framework can also be used for component testing (i.e., testing different components of the application). It is used to test every component and app built around JavaScript, for example, web apps rendering from browsers.
Compared to other unit testing frameworks such as Jasmine and Mocha, Jest offers a significant advantage due to its zero-config setup and non-reliance on third-party libraries.
Note : Run your Jest tests at scale across 3000+ browsers and OS combinations. Try LambdaTest now!
Components of Jest Architecture
Jest testing works through a modular architecture that handles everything from configuration to test execution. Each component in the Jest framework is optimized for speed, isolation, and developer productivity.

- jest-cli: Entry point when you run jest; it pulls everything together to start the test process.
- jest-config: Loads CLI flags and config files, then builds global and project-specific configs.
- jest-haste-map: Scans your file system, builds a dependency map from imports/require, and caches it.
- Watchman (optional): Speeds up file tracking; if unavailable, Node crawler is used (slower).
- jest-worker: Utilizes all CPU cores to perform heavy tasks like file analysis in parallel.
- Context: Combines global config, project config, and file system data into one structure.
- SearchSource: Finds which test files need to run based on patterns and configs.
- TestSequencer: Decides test execution order based on past failures, duration, or file size.
- TestScheduler: Manages how tests run, serially or in parallel, and triggers reporters.
- jest-runner: Executes tests using either single or multiple processes based on size/need.
- jest-circus / jest-jasmine: Runs test blocks like test() and describe() using Flux-like architecture.
- jest-runtime: Creates isolated VM contexts, handles mocking, transformation, and module resolution.
- jest-environment: Provides the execution environment (like jsdom or node) for each test file.
- TestResult / AggregatedResult: Captures pass/fail status, time, and other metadata from test runs.
- Reporters: Print final output to the console and optionally generate logs or files.
How to Install Jest Framework?
Before installing Jest, make sure the following are set up:
- Java SDK: Required for Selenium-based automation.
- NodeJS and npm: For managing packages and running Jest.
- Browser Drivers: Required for Selenium WebDriver to communicate with browsers.
Example for Chrome:
npm install -g chromedrivernpm install -g jestjest --version"scripts": {
"test": "jest"
}Write First Test With Jest Framework
In this Jest testing tutorial, you’ll learn how to set up and test React applications using the Jest framework along with Selenium.
This includes configuring your environment to test a React application under test (AUT), running Jest tests locally, and preparing for potential integration with cloud-based Selenium platforms.
Follow the steps below to get started with writing your first Jest tests.
- Project Directory Setup: Navigate to a directory where you want to create your project.
cd Desktop
mkrdir jestDemo
cd jestDemo
npm init -y
npm install selenium-webdriver && npm install chromedriver && npm install jest
{
"name": "jestdemo",
"version": "1.0.0",
"description": "",
"main": "index.js",
"scripts": {
"test": "jest"
},
"keywords": [],
"author": "",
"license": "ISC",
"dependencies": {
"chromedriver": "^104.0.0",
"jest": "^28.1.3",
"selenium-webdriver": "^4.4.0"
}
}
const { By, until } = require("selenium-webdriver");
const defaultTimeout = 3000;

const getElementByXpath = async (driver, xpath, timeout = defaultTimeout) => {
const el = await driver.wait(until.elementLocated(By.xpath(xpath)), timeout);
return await driver.wait(until.elementIsVisible(el), timeout);
};
module.exports = {
getElementByXpath,
};
const { Builder, Key } = require("selenium-webdriver");
const { getElementByXpath, getElementByCss } = require("./helpers");
const { capabilities } = require("./capabilities");

const rootURL = "https://todomvc.com/examples/react/#/";
let driver;

describe("todo tests", () => {
beforeAll(async () => {
driver = new Builder().forBrowser("chrome").build();

await driver.get(rootURL);
});

afterAll(async () => {
await driver.quit();
}, 40000);

it("add first todo", async () => {
await driver.get(rootURL);
const input = "This is first todo";
const newTodoInput = await getElementByCss(driver, ".new-todo");

await newTodoInput.click();

await newTodoInput.clear();
await newTodoInput.sendKeys(input);
await newTodoInput.sendKeys(Key.ENTER);

const outputTodo = await getElementByXpath(
driver,
"/html/body/section/div/section/ul/li/div/label"
);

const output = await outputTodo.getText();
expect(output).toEqual(input);
});
});
npm run testTest Execution:

Using Jest for unit testing helps validate React apps and JavaScript components efficiently. However, as your test suite grows, running tests locally comes with limitations,such as restricted browser coverage, slow execution, and inconsistent results across environments.
To ensure your React application behaves consistently across different browsers and platforms, it's essential to run Jest tests in parallel across multiple environments. Cloud-based platforms like LambdaTest enable scalable and reliable cross-browser Jest testing without the hassle of local infrastructure.
Run Your Jest Tests in Parallel
LambdaTest is a GenAI-native test execution platform that lets you run Jest testing with Selenium and JavaScript in parallel across 3000+ real browsers and OS combinations.
This helps boost test coverage, reduce execution time, and eliminate the limitations of local test environments, making your unit testing with Jest more scalable and efficient.
To get started, refer to the official support documentation on Jest testing with LambdaTest.
If you want to run your Jest tests on the LambdaTest platform, configure your test script to connect using the LambdaTest Selenium Grid URL:
const GRID_HOST = "hub.lambdatest.com/wd/hub";
const GRID_URL = "https://" + USERNAME + ":" + ACCESS_KEY + "@" + GRID_HOST;
To run your Jest tests in parallel across multiple browsers simultaneously, follow the code example below.
const { Builder } = require('selenium-webdriver');

const browsers = ['chrome', 'firefox', 'safari', 'edge', 'opera'];

describe('Google Search - Parallel Execution', () => {
  it('should open Google in multiple browsers', async () => {
    const tests = browsers.map(async (browser) => {
      const driver = await new Builder()
        .usingServer('https://USERNAME:ACCESS_KEY@hub.lambdatest.com/wd/hub')
        .withCapabilities({
          platform: 'Windows 10',
          browserName: browser,
          version: 'latest',
        })
        .build();

      await driver.get('https://www.google.com/');
      const title = await driver.getTitle();
      expect(title).toEqual('Google');
      await driver.quit();
    });

    await Promise.all(tests); // Run all browser tests in parallel
  }, 60000); // Extend timeout if needed
});
This improves test efficiency and ensures your React app behaves consistently across different environments.
After setting up the test script, add your LambdaTest Username and Access Key as environment variables to authenticate your Jest tests on the LambdaTest Selenium Grid.
Next, define your automation capabilities, such as browser name, version, and platform, to specify how your Jest tests should run on the cloud.
const capability = {
	"browserName": "Chrome",
	"browserVersion": "dev",
	"LT:Options": {
		"username": "<YOUR_LT_USERNAME>",
		"accessKey": "<YOUR_LT_ACCESS_KEY>",
		"visual": true,
		"video": true,
		"platformName": "Windows 10",
		"build": "React App test",
		"project": "React App Build",
		"name": "React test",
		"w3c": true,
		"plugin": "node_js-jest"
	}
}
You can generate the required Selenium capabilities for Jest testing using the LambdaTest Capabilities Generator. It helps you configure browser, version, OS, and other settings to run your Jest tests seamlessly on LambdaTest.
Jest Frameworks Core Methods and Features
In addition, snapshot testing with Jest allows developers to track UI changes over time, complementing Mocks and Spies.
Let’s have a deeper look at Mock and Spy individually.
Mock in Jest
Mock functions in Jest replace actual implementations, track calls and parameters, and return controlled outputs. They're useful for testing in isolation by removing external dependencies.
- Create function mocks with jest.fn()
- Create module mocks with jest.mock()
Example:
const mockFn = jest.fn();
mockFn();
expect(mockFn).toHaveBeenCalled();

const returnsFalse = jest.fn(() => false);
console.log(returnsFalse()); // false
.mock Property in Jest
Every Jest mock function has a .mock property. This helps track metadata such as call instances and the context (this value) in which the function was invoked.
- Track all instances created from a mocked constructor with .mock.instances
- Track this values from each call with .mock.contexts
Example:
const myMock = jest.fn();

const instance = new myMock();
console.log(myMock.mock.instances); // [instance]

const bound = myMock.bind({});
bound();
console.log(myMock.mock.contexts); // [ {…} ]
Spy in Jest
A spy in Jest is a partial mock that tracks calls to an object’s method without altering its original implementation. It’s useful for verifying behavior while keeping the real method logic intact.
- Create a spy using jest.spyOn(object, methodName)
- Reset or restore the original method using spy.mockRestore()
Example:
const spy = jest.spyOn(obj, 'method');

// Run your test logic
expect(spy).toHaveBeenCalled();

spy.mockRestore();
describe Blocks in Jest
describe blocks in Jest are used to group related test cases. They help organize tests by method, component, or behavior, improving readability and structure.
You can also nest describe blocks and use them for setup/teardown or scoped logic during test execution.
Example:
describe("Filter function", () => {
  // Add test cases here
});
‘it’ or ‘test’ Tests
Use it or its alias test to define individual test cases. These functions are typically used within describe blocks to improve readability and organization.
Example:
describe('Jest', () => {
  it('should be the best framework', () => {
    expect(Jest.bestFramework).toBeTruthy();
  });
});
Skip Tests in Jest
In large projects, you might need to temporarily skip failing or unneeded tests. Jest provides methods like test.skip(), it.skip(), xit(), and xtest() to skip tests without deleting or commenting them out.
Example:
test.skip('this test is broken', () => {
  expect(testWaterLevel()).toBe(0);
});
Parameterization in Jest
Use parameterized tests in Jest to run the same test logic with multiple sets of data, helping reduce duplication and improve maintainability. Jest v23+ supports it.each out of the box. For earlier versions, install the jest-each package.
Example:
describe("isPalindrome", () => {
  it.each([
    ["madam", true],
    ["Lambda", false]
  ])("input is '%s'", (text, expected) => {
    expect(isPalindrome(text)).toBe(expected);
  });
});
This lets you validate logic across various inputs without writing multiple test cases.
Matchers in Jest
Jest matchers are used with expect() to compare actual vs. expected outcomes.
Example:
it('check_object_of_Car', () => {
  expect(newCar()).toBeInstanceOf(Car);
});
Matchers like .toBeInstanceOf() help validate types, values, or structures.
Jest offers many such matchers to check equality, truthiness, numbers, strings, and more.
- Exact Equality Matchers: Use .toBe() for primitive value comparison, .toEqual() for deep object comparison.
- Truthiness Matchers: Use .toBeNull(), .toBeUndefined(), .toBeDefined(), .toBeTruthy(), .toBeFalsy() to validate different truthy/falsy states.
- Number Matchers: Use .toBeGreaterThan(), .toBeLessThan(), .toBeCloseTo() for numeric value comparisons including floats.
- String Matchers: Use .toMatch() to check if strings match specific substrings or regex patterns.
Jest Hooks: Setup and Teardown
Setting up a few conditions and functions before a test runs and tearing them down right after the execution is an important step of testing. These may include the works that need to happen before and after tests are executed.
Jest provides helper functions for that. Let us look at them:
Repeated or Iterable Setup
Suppose you need to do some setup before each test, and you have several tests to be executed in line. For example, say you have many test cases to be executed on Chrome and the same Chrome instance has to be used across all.
Therefore, Chrome can be instantiated in the setup block. For setup, you can use beforeEach(). Each test follows a new setup and hence must end with a teardown. This teardown can be achieved by afterEach().
Example:
beforeEach(() => {
//run this before every test execution
//Get the database
});

afterEach(() => {
//run this after every test execution
//Clear the database
});

test('database has tableA’, () => {
expect(isTable('tableA')).toBeTruthy();
});

test('database has tableB', () => {
expect(isTable('tableB')).toBeTruthy();
});
In the above code, beforeEach() sets up and initializes the database before every test. After each test is executed, afterEach() clears the database.
To better understand how beforeEach() works, check out this Jest beforeEach() guide for detailed insights on how using beforeEach() helps you avoid writing repetitive code.
One-Time Setup and Teardown
In many cases, you may need to set up and teardown only once. This is where beforeAll() and afterAll() are used. These two are called within the describe block and are helpful in synchronous tests.
Example:
describe('Database Tests', () => {
  beforeAll(() => {
    // Initialize DB connection
  });
  afterAll(() => {
    // Close DB connection
  });
  it('should fetch user data', () => {
    expect(true).toBe(true);
  });
});
Measure Code Coverage in Jest Framework
Code coverage is an extremely important and non-negotiable aspect of any Jest testing workflow. It ensures that there are no untested paths in a code and hence determines the overall efficiency of a project.
Jest allows you to generate code coverage by adding the --coverage flag. That’s it, you don't need additional installation or setup to get code coverage.
npm test --coverageyarn test --coverageJest can collect from every test of a test suite, including the test files that haven’t been executed or remain untested. With the above commands, Jest collects code coverage from the functions under the tests, and it doesn’t include the entire project code.
Therefore, it also provides a –collectCoverageFrom flag that requires a path to be specified. This commands Jest to retrieve coverage from that path.
npm test -- --coverage --collectCoverageFrom="./src/**"
Coverage Threshold
Every project aims for a certain level of code coverage, and Jest testing makes it easy to enforce this using the coverageThreshold property. This setting allows you to fail a suite or test if the required coverage percentage isn’t met.
For example, if you want to ensure a minimum of 80% code coverage, you can configure your package.json like this:
{
...
"jest": {
"collectCoverage": true,
"collectCoverageFrom": ["./src/**"],
"coverageThreshold": {
"global": {
"lines": 80
}
}
}
}
Setting up the above code gives you an error whenever the threshold is not met. For example - you set up a coverage threshold of 80% and received only 50%. You’ll see a message like this:
Jest: “global” coverage threshold for lines (80%) not met: 50%
If you’re working with Jest testing, you must include these three in your package.json file:
- collectCoverage
- collectCoverageFrom
- coverageThreshold
Although you should always aim for the maximum code coverage, it’s not always critical to set a high threshold coverage, but it certainly is a best practice to set a baseline for your code coverage. This ensures the efficiency of your project.
Generate HTML Test Reports in Jest Framework
Jest allows us to fetch test reports in the HTML format using the jest-html-reporter package. It is a great library that converts the test results into colorful HTML format with various configuration options.
HTML reports are important since major project stakeholders can look at the minutest details of the tests with test reports. If you are using Jest, you should make use of this library.
First, let us see how to install this package:
npm install –save-dev jest-html-reportNow, you need to add a new package.json file and then name the file to jesthtmlreporter.config.json.
This file should have the same location as the package.json file. When created, include the following specifications in the file:
{
"pageTitle": "HTML Report",
"outputPath": "testReport.html",
"includeFailureMsg": true
}
Now under the script section of your package.json file, add the below given line:
"test:CI": "set CI=true && react-scripts test --env=jsdom --testResultProcessor =./node_modules/jest-html-reporter"
In the above lines, set CI = true ends the execution as soon as all the tests in the suite are executed.
--env = jsdom gives the tests a mock browser environment.
Advantages of Jest Testing
All in all, Jest is a very powerful framework for JavaScript automation testing with many benefits that include zero configuration, snapshots, amazing APIs, incredible speed, and much more.
Let’s see some of its major advantages.
- Inbuilt CLI: Offers out-of-the-box code coverage, interactive mode, and full control over test execution.
- Modules: Comes with all modern testing features; no need for third-party tools like Mocha or Cucumber. Easily configurable with no compatibility issues.
- Migration: Easy migration of existing test projects using code mods module.
- More Than a Test Runner: Supports auto mocking, coverage thresholds, mappers, multiple projects, and custom resolvers like Babel/Webpack.
- Pre-commit Hooks: Reduces regression testing via snapshot tests triggered by commit hooks.
- Fast and Safe: Runs unit tests in parallel, reorders failed tests first, and optimizes queue based on execution time. Watch mode improves efficiency.
- Documentation & Community: Well-documented with real-world examples and a helpful Discord community.
- Easy Mocking: Custom resolvers and Mock Functions API simplify mocking and spying on function calls.
- Code Coverage: Built-in --coverage command works without setup. Supports skipping tests while still generating coverage reports.
Limitations of Jest Testing
Jest testing offers many advantages, but it does come with a few trade-offs. Limitations include slower performance with auto-mocking and less IDE support compared to older testing frameworks.
- Smaller Ecosystem: Jest is newer and less widely adopted compared to mature libraries like Mocha, resulting in limited tooling and IDE support.
- Auto-Mocking Overhead: Auto-mocking features can slow down test execution, especially when testing modules with many dependencies.
- Snapshot Testing Limits: Not ideal for projects that generate large snapshot files with thousands of lines, as it becomes harder to manage and review.
Bonus: How to Use ES Modules with Jest?
ES modules or ECMAScript modules are the standard package formats for JavaScript code that can be reused at any point. Modules are commonly defined with a variety of import and export statements.
If you want to take advantage of ES modules in Jest, you won’t be able to simply incorporate the import/export syntax because Jest requires the default Node syntax.
It requires nothing but a simple configuration in the .babelrc file. But first, let us see an example of a simple code that uses an ES module.
export function a() {
return "function a";
}
Now we have an equivalent test that imports a module.
import { a } from "./index";

describe("function a", () => {
it("should return expected value", () => {
expect(a()).toEqual("function a");
});
});
The default Jest configuration will work just fine with the above example when we perform the given change.
Your .babelrc file should look like this:
{
"env": {
"test": {
"plugins": ["@babel/plugin-transform-modules-commonjs"]
}
}
}
Importing ES modules with Jest also requires the installation of a few dependencies. Run the following command in your terminal:
$ npm install --save-dev jest @babel/plugin-transform-modules-commonjs
With these small changes in your configuration, you are all set to work with the import of ES modules in Jest.
Conclusion
In this Jest tutorial, you learned how to test your JavaScript and React applications using the Jest framework. You explored its key concepts, from writing unit tests and setting up hooks to measuring code coverage and generating HTML reports.
Jest offers a wide range of built-in features that help simplify and speed up your testing workflow. Whether you're working on small projects or large-scale applications, Jest equips you with the tools you need to ensure code quality and reliability.
You’re now ready to confidently use Jest as part of your development and testing process.
On This Page
- What Is Jest Testing?
- Components of Jest Architecture
- How to Install Jest Framework?
- Write First Test With Jest Framework
- Run Your Jest Tests in Parallel
- Jest Frameworks Core Methods and Features
- Jest Hooks: Setup and Teardown
- Measure Code Coverage in Jest Framework
- Generate HTML Test Reports in Jest Framework
- Advantages of Jest Testing
- Limitations of Jest Testing
- Bonus: How to Use ES Modules with Jest?
- Frequently Asked Questions (FAQs)
Frequently Asked Questions(FAQs)

Did you find this page helpful?
![]()
![]()
More Related Hubs

Start your journey with LambdaTest
Get 100 minutes of automation test minutes FREE!!