Mimic Real World Scenarios with Real Device Cloud
Test Your Native, Hybrid & Web Apps on 10,000+ real devices.
- Automation
- Home
- /
- Learning Hub
- /
- Appium Tutorial
Appium Tutorial: A Detailed Guide To Appium Testing
Dive into Appium tutorial and uncover the advantages of this mobile automation testing tool. Learn how to effectively test your mobile applications with Appium.
Published on: May 21 2024
- Share:
OVERVIEW
Thousands of apps are released and downloaded every day, be it web, hybrid, or native apps. Appium allows writing test scripts in multiple test automation languages like Java, Python, C#, Kotlin, Swift, etc. Appium makes testing simple because testers don’t have to modify the codes for testing on different OS and devices. The best thing about Appium is that it supports all kinds of apps so that you can run the tests on either iOS or Android on real devices.
This tutorial on Appium will equip you with all the essential understanding to get started as a mobile app tester using Appium, including what Appium is, its architecture, working, and installation steps.
What is Appium?
Developed by Dan Cuellar and Jason Huggins, Appium is an automation testing framework for web, native, and hybrid applications. It is supported on different mobile operating systems like Android, iOS, and Windows. Appium has about 17.4K Star and 5.9K Fork on GitHub when writing this article.
Appium is a cross-platform tool allowing you to write UI tests for platforms like Android, iOS, and Windows using the same API. As a result, it enables code reuse between Android, iOS, and Windows test scripts or suites.
Like Selenium, Appium supports different programming languages like Java, JavaScript, Python, PHP, C#, etc.
With the Appium framework, you can run app test automation for,
- Native mobile apps: These apps are installed on the device and written using Android, iOS, and Windows SDKs.
- Mobile web apps: The web apps are accessed in mobile web browsers like Chrome and Safari. You can also access mobile web applications using in-app browsers for Android and iOS.
- Hybrid apps: These applications are built with a wrapper around a "webview," a native control that allows interaction with web content. You can access hybrid apps from a physical device and a browser URL.
Want to know more about Web, Hybrid, and Native apps? Take a look at the comparison of Web vs Hybrid vs Native Apps.
Check out this short video to learn what is Appium and why we need it!
Why is Appium Popular?
It is no secret that the mobile industry is growing rapidly. According to Statista, around 257 billion mobile apps were downloaded worldwide in 2023. Organizations heavily rely on mobile automation testing to ensure faster application delivery. Appium is considered one of the best open-source mobile app test automation frameworks in the testing or QA community.

In addition to Appium, many other open-source frameworks are also available for automating mobile testing. However, to communicate with native mobile apps, most of these automation frameworks require an additional agent to compile application codes. Unlike other frameworks, Appium enables communication between different apps and does not require your app to include any extra agents.
Shown below are the pointers that keep Appium ahead of other mobile test automation frameworks-
- Like Selenium Server, Appium works like a server and runs in the background.
- It has a built-in UI Automator for inspecting mobile apps to get detailed information logs and reporting structures.
- It can automate any mobile app built in different programming languages and frameworks.
- It allows you full access to back-end APIs and databases from test scripts.
- It syncs well with the TestNG testing framework.
- It makes regression testing of mobile apps easier.
- It doesn’t require installation on mobile devices for mobile app testing.
- It uses Selenium WebDriver JSON Protocol to work with native Android and iOS mobile applications.
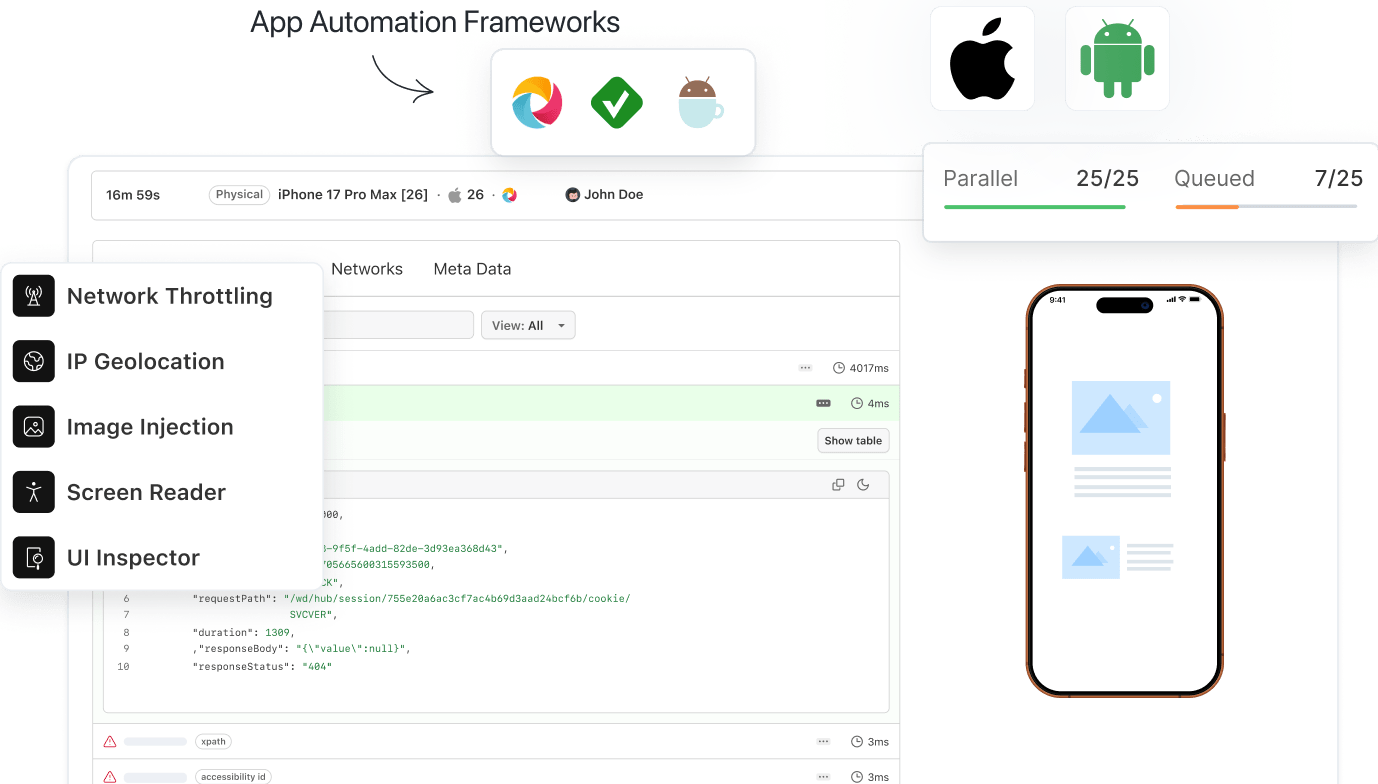
- Using Appium, you can test apps on Emulators and Simulators and real device cloud.
- You can perform parallel testing of your Appium automation scripts with Xcode, UIAutomator, and UIAutomation. Check our guide on Appium Parallel Testing.
Check out our guide on XCode to learn its features, how to install and use it.
History of Appium
This section of the Appium testing tutorial talks about the history of the Appium framework.
In 2011, Dan Cuellar was the Test Manager at Zoosk when he encountered an issue. In the iOS product, the number of test passes was becoming excessive. He realized that automation was the solution to this problem. Dan examined the existing tool landscape. However, he wanted more than the existing options. Instead, he requested more time from his manager to see if he could find a better way. Then iOS Auto was developed.
Selenium Conference 2012
At the Selenium Conference 2012 in London, Dan demonstrated iOS Automation testing using Selenium syntax to show writing platform-agnostic tests that use distinct platform-specific page objects with a standardized interface. Jason Huggins, co-creator of Selenium, moderated the sessions.
Meet Up
Jason approached Dan four months after the Selenium Conference. Jason convinced Dan to make his code available under an open-source license. Dan released the source code in C# on GitHub in August, followed by a new version in Python. Jason installed a web server in September and began implementing the WebDriver wire protocol over HTTP, allowing iOS Auto to be scripted from any Selenium WebDriver client library in any programming language.
Mobile Testing Summit
Jason decided to present the project at the Mobile Testing Summit in November, but he recommended that it be given a new name first. They chose AppleCart after considering several options. After reading Apple's copyright and trademark guidelines, Jason observed that the first term Apple would defend its rights against was "AppleCart." Jason and Dan then chose the new name Appium - Selenium for Apps.
Appium Across The Globe
At the 2013 Google Test Automation Conference, Appium made its debut in its current form. That same year, Appium was showcased in the United States, England, Poland, Portugal, and Australia at conferences and meetups. Appium became the first cross-platform automation framework when it added Android and Selendroid support in early 2013.
Introduction To Appium 1.0
Appium began to mature and expand significantly. Appium 1.0 was launched in May 2014, marking a turning point in the project's evolution. Appium received numerous honors and became the most popular open-source, cross-platform mobile automation framework. Appium received the 2014 InfoWorld Bossie award for the best open-source desktop and mobile software. Black Duck Software also named Appium an Open Source Rookie of the Year.
Appium was redesigned from the ground up, utilizing a more contemporary version of the JavaScript language and rebuilding the architecture so that users and third-party developers can easily create their own Appium drivers.
Introduction To Appium 2.0
Post-Appium 2.0, notable additions include an expanded scope with a focus on universal API accessibility. Appium introduced a plugin system, empowering users to develop and share modules that modify its functionality. The plugin system enables diverse capabilities, such as interacting with screen regions based on template images. Appium's vision extends beyond automation, fostering an ecosystem where users can create, share, and enhance drivers and plugins. The platform's adaptability and openness make it a versatile choice for UI automation across various app platforms.
The Architecture of the Appium Framework
This section of the Appium testing guide sheds light on the Appium framework's architecture. The Appium Architecture consists of three components - Appium Client, Appium Server, and End Device.
- Appium Client: The Appium client contains scripted automation code written in popular programming languages like Java, Python, Ruby, Perl, etc. The automation scripts contain the configuration details of the device and application. These scripted and configuration details are used in running the test cases.
- Appium Server: It is an HTTP server that receives JSON-formatted command requests from the client. The Appium server uses Node.js, and commands are then executed on mobile devices. Therefore, installing the server on your machine before running the test script is recommended.
- End Device: It refers to emulators, simulators, and a physical device connected to the Appium server where tests are run.
Differences Between Appium 2.0 vs Appium 1.0
Appium 2.0 brings a big change compared to Appium 1.0. The new version uses plugins and drivers to make things work better. In Appium 1.0, everything was bundled together, but now, in 2.0, plugins and drivers help organize things better.
The main difference is that Appium 2.0 can easily support different types of devices, like iPhones and Android phones, thanks to drivers. For example, there's a special driver for iOS called XCUITest, and one for Android called Espresso. This means Appium can work with more devices without needing a complete rewrite. Plus, with plugins, you can change or add new features to Appium, making it easier for people to share and customize their testing tools.
If you are migrating from Appium 1.x to Appium 2.x read our guide on Appium 2 migration.
How Does Appium Work?
In this section of the Appium testing tutorial, we will dive deep into the workings of the Appium framework.
Appium is a Node.js HTTP server that uses the REST API. The client interacts with the Appium server through REST APIs, which are controlled by the Mobile JSON Wire Protocol. The REST APIs accept client connections, listen for commands, execute commands, and send back the command execution status.

- The first step to perform Appium testing is to create a session.
- During a session, the client sends a request to the server containing session-related information in key-value pairs, also known as Desired Capabilities. The Desired Capabilities enable Appium to differentiate between platforms (iOS or Android) and fire up a session on the mobile device, Android Emulator, or iOS Simulator.
- Using the JSON object (Desired Capabilities), the POST request is sent to the server, and Appium responds to it in the form of a session ID.
- Once the session is up, the client and Appium server can interact with each other.
Appium works differently on platforms like Android and iOS. In the next section of this Appium testing tutorial, we will look at how Appium works on Android and iOS.
Working of Appium on Android
Appium Client Libraries convert the test commands to the REST API requests with the help of the Mobile JSON Wire Protocol. The Appium server forwards these requests to the Android device or emulator. The Android device contains the bootstrap.jar files. The bootstrap.jar file interprets these test commands. The bootstrap.jar file uses Selendroid or UI Automator to execute the requests on the Android device.
The results of the tests are then sent to the Appium server, which sends an HTTP response (containing status codes) to the Appium client.

Working of Appium on iOS
Appium Client Libraries convert test commands into REST API requests using the Mobile JSON Wire Protocol. The Appium server forwards these requests to an iOS device or simulator. The iOS device contains the WebDriverAgent.app files. WebDriverAgent.app interprets these test commands. WebDriverAgent.app uses XCUITest to execute requests on iOS devices.

The results of the tests are then sent to the Appium server, which sends an HTTP response (containing status codes) to the Appium client.
How to Install and Configure Appium?
Appium is a lightweight Node.js package and can be installed easily. Installing Appium doesn't demand a lot of RAM or disk space. Still, there are a few prerequisites for installing Appium Server:
- An operating system such as Linux, macOS, or Windows.
- Semantic Versioning range for Node.js version: ~14.17.0 || ~16.13.0 || >=18.0.0.
- NPM version greater than 8.0 (Generally auto installed with Node.js).
You can install Appium's official releases in two different ways: by using NPM from the command line or by downloading Appium Desktop. Let’s explore these installations in detail.
Install Appium From the Command Line
Download and install Appium globally with npm by executing the following command in your terminal or PowerShell:
npm install -g appium
Next, verify the installed version of Appium by running the following command in your terminal:
appium --version
Expected Output:

Note: If you are not able to see the installed Appium version with the above command then a possible error is that the Appium installation failed, try rerun the installation command or check prerequisites for errors.
Install Appium Desktop
Appium Desktop is a graphical front end offered by Appium that brings some useful features like inspector tools. You may follow the below steps to download and install Appium Desktop:
- Download the Appium Desktop from their GitHub repo.
- Run the Installer for the OS you are using and complete the setup wizard.
- Launch the installed Appium Desktop on your PC to start Appium Server automatically.
For detailed instructions on Appium installation, please refer to the Appium installation guide.
Install the Appium Driver and its Dependencies
Appium offers mobile app automation on different platforms, including iOS, Android, and Windows. Each platform uses one or more ,"drivers" for native automation tools that are responsible for automating that platform. Starting from version 2.0, drivers for each platform are separated from the Appium server app and can be maintained independently with the appium driver command line interface.
To get a list of all the available drivers for your OS, run the below command:
appium driver listTo install, uninstall, or update an Appium driver we can use the respective commands as instructed below.
# To install a new driver
appium driver install <plugin name>
# To install a new driver from npm
appium driver install --source=npm <plugin name>[@<version>]
# To install a driver from a local folder (useful for developers)
appium driver install --source=local /Users/me/sources/<plugin name>
# To install a new driver from github
appium driver install --source=github --package=<plugin name> appium/<plugin name>


# To list already installed drivers
appium driver list --installed


# To update a driver (it must be already installed)
appium driver update xcuitest


# To uninstall a driver (it won't last forever, wouldn't it?)
appium driver uninstall xcuitest
Example Output:

Install Plugins for Appium
Plugins are a very new concept that are only included in Appium 2.0. We can increase server features and functionality with plugins without having to modify the server code. Driver management is also applicable to plugins.
Run the following command in your terminal or PowerShell to see a list of all the plugins that are compatible with your system:
appium plugin listTo install, update, or uninstall any plugin in your Appium you may use the respective commands as instructed below.
# To install an officially supported plugin
appium plugin install <plugin-name>


# To install a plugin from a local folder (useful for developers)
appium plugin install --source=local /Users/me/sources/<plugin name>


# To install a new plugin from npm
appium plugin install --source=npm <plugin name>


# To list already installed plugins
appium plugin list --installed


# To update a plugins (it must be already installed)
appium plugin update <plugin name>


# To uninstall a plugin
appium plugin uninstall <plugin name>
Appium Doctor
Appium Doctor is a command-line development and testing tool for mobile apps. It is mainly used to test and diagnose issues related to installation and configuration of Appium on your system.
Run the following command in your terminal terminal or PowerShell to install Appium Doctor on your system:
npm install appium-doctor -g
Running Appium Doctor using the command terminal or PowerShell is straightforward. You can use the below command to run Appium Doctor. It will provide a list of all the issues and probable solutions for the installation and configurations of the Appium.
appium-doctor –-<platform name>You can specify the <plaftform name> as ios or android to get the details about the configurations for that selected platform as shown in the below output.

Let’s have a look on how you can use these instructions to address and resolve the error.

Here, you may notice a cross mark denoting some missing dependencies. In this case, you must install these missing dependencies to fix the errors. Let’s try to install the missing packages (mjpeg-consumer) with the below command.
npm i -g <package name>
After installing the required missing dependency (mjpeg-consumer), you may run the appium-doctor –-<platform name> again to check if our solution has fixed the errors.

Similarly, you can install all the missing packages and resolve all the errors.
Appium Inspector
Appium Inspector is a GUI inspector for hybrid, web, and native mobile applications powered by an Appium server.
Appium Inspector, an Appium client with a graphical user interface, is installed separately and does not come with Appium Server. It provides testers options to specify desired capabilities and select the Appium Server URL to use. It can be used to interact with different elements (like buttons, texts, images, etc.) of the mobile app and execute Appium commands once a session is started.
It allows visual debugging of mobile apps very similar to inspect element features of browsers and is especially useful for beginners.
Appium Inspector can be installed and executed in two ways:
- As a desktop app for macOS, Linux, and Windows. To install the latest version of Appium Inspector, visit the official releases page to download and install the appropriate executable file for your platform.
- As a web app hosted on the web by Appium Pro, it does not require any additional installation or setup.
Both empower users to specify capabilities, choose the Appium server, and interact with mobile app elements seamlessly during test automation sessions.
How to Test an App Using Appium?
In this tutorial, we'll guide you through testing an Android app using Appium, focusing on a practical example to assess the UI interface and functionality. The chosen scripting language for automation is Python.
Some prerequisites to start with the example are:
- Python version 3 or above must be installed on your system.
- Appium is installed on the PC.
- Android Studio to manage app installation and utilize ADB (Android Debug Bridge) for Android app testing.
- Visual Studio Code as the integrated development environment (IDE) to write automation scripts for Appium testing.
- If working with iOS devices, Xcode is essential and is only available on Mac.
Step 1: Install the Appium Client for Python
Run the below command in your terminal or PowerShell to install the Appium Client for Python (Appium-Python-Client).
pip install Appium-Python-ClientIt will start the installation of the Appium Python Client library on your PC, as shown in the below console output.

Step 2: Connect the end device using Android Studio
Next step is to connect the end device utilizing the ADB (Android Debug Bridge) provided by Android Studio (only required for Android app testing). You may connect an end device in two ways:
- Connect a real Android device using the USB debugger. To enable this option on your Android device, navigate to developer options -> USB debugging and turn it ON. If you don't find the developer option on your settings page, enable it first by tapping the build number option numerous times (continuously till you see the “developer option turned on” toast) in the About Phone settings.
- Connect an emulator (virtual Android device) by navigating to the device manager section in your Android Studio, as shown in the image below.

Step 3: Generate Desired Capabilities for Appium
Desired Capabilities are key and value pairs written in JSON format. Appium clients send these desired capabilities to the server to start an automation session. These capabilities tell the Appium drivers all the important configurational instructions for testing the app.
You may generate suitable desired capabilities manually; however, there is an easy way to generate desired capabilities using an online Capabilities Generator provided by LambdaTest.
For this example, you may use the following desired capabilities:
desired_caps = {
'platformName': 'Android',
'platformVersion': '13',
'deviceName': 'Google Pixel 7pro',
'app': '/apk/com.slot.spin.game.play.apk',
'appPackage': 'com.slot.spin.game.play',
'appActivity': 'com.slot.spin.game.play.MainActivity',
'automationName': 'UiAutomator2'  # Use UiAutomator2 for Android
}
In the above capability, deviceName, platformName, and platformVersion define the test execution environment. The app key indicates the APK file path. appPackage and appActivity specify the Android app's package and launcher activity. automationName denotes the automation tool or driver for app automation. These parameters collectively configure the test settings for Appium execution.
Step 4: Start the Appium server
Open the Appium desktop app, configure the host and port, and then start the Appium server on your PC, as shown in the image below.

Next, click on the startServer button to start the Appium server on the selected host and port.

Step 5: Select Element ID in the app
Obtaining the ID of mobile app elements is challenging compared to web applications, where elements can be easily inspected through browsers. However, to interact with app components effectively, acquiring specific element IDs is essential. This is where we can leverage the power of Appium Inspector.
In this example, we will use the web version of Appium Inspector to inspect the app to retrieve element IDs for effective interaction in this example.

Here, we must enter the host where the Appium server is running (Remote Host), port number where the Appium server is running (Remote Port), and the Desired Capabilities in a JSON format, as shown in the above image.
Next, click the "Start Session" button to instruct Appium to initiate a session based on your settings. The chosen app, a slot machine game, will be installed on the selected emulator or device, facilitating the testing process.

Here, we can inspect elements similarly to web pages by hovering and clicking on their IDs. The hierarchy tree for the selected element becomes visible on the right panel for easy navigation.
In this example, we will select the “Spin Now” button ID i.e. <com.slot.spin.game.play:id/playBtn> so that we can click on this button to start the game.
Step 6: Write an automation script
The next and most crucial step is to write the automation script containing the steps for executing automated tests on the app. In our example, we will write a test script to click the “Spin Now” button to start the game using Python as a test automation language.
from appium import webdriver
from appium.webdriver.common.by import By
from appium.webdriver.common.touch_action import TouchAction
import time


# Host and Port where Appium is running
HOST = "localhost"
PORT = "4723"


# Desired capabilities
desired_caps = {
'platformName': 'Android',
'platformVersion': '13',
'deviceName': 'Google Pixel 7pro',
'app': '/apk/com.slot.spin.game.play.apk',
'appPackage': 'com.slot.spin.game.play',
'appActivity': 'com.slot.spin.game.play.MainActivity',
'automationName': 'UiAutomator2'  # Use UiAutomator2 for Android
}


# Appium server URL
appium_server_url = 'http://' + HOST + ':' + PORT + 'wd/hub'


# Initialize driver
driver = webdriver.Remote(appium_server_url, desired_caps)


try:
# Wait for the app to load (adjust the time as needed)
time.sleep(5)


# Locate the "Spin now" button by ID
spin_now_button = driver.find_element(By.ID, 'com.slot.spin.game.play:id/playBtn')


# Tap the "Spin now" button using TouchAction
touch_action = TouchAction(driver)
touch_action.tap(spin_now_button).perform()


# Wait for a moment to see the game result
time.sleep(5)


finally:
# Quit the driver after the test
driver.quit()
In the above code, <webdriver.Remote> establishes a connection to the Appium server with specified capabilities. <driver.find_element(By.ID, '...')> locates an element on the mobile app using its ID. <TouchAction(driver)> allows touch gestures and <perform()> executes them. In the provided code, <touch_action.tap(spin_now_button)> performs a tap action to click the "Spin now" button (identified by its ID), interacting with the app. This sequence helps automate testing by mimicking user interactions with the Android app, making it a concise Appium test script.
Now run this test script to test your first mobile app using Appium and Python.

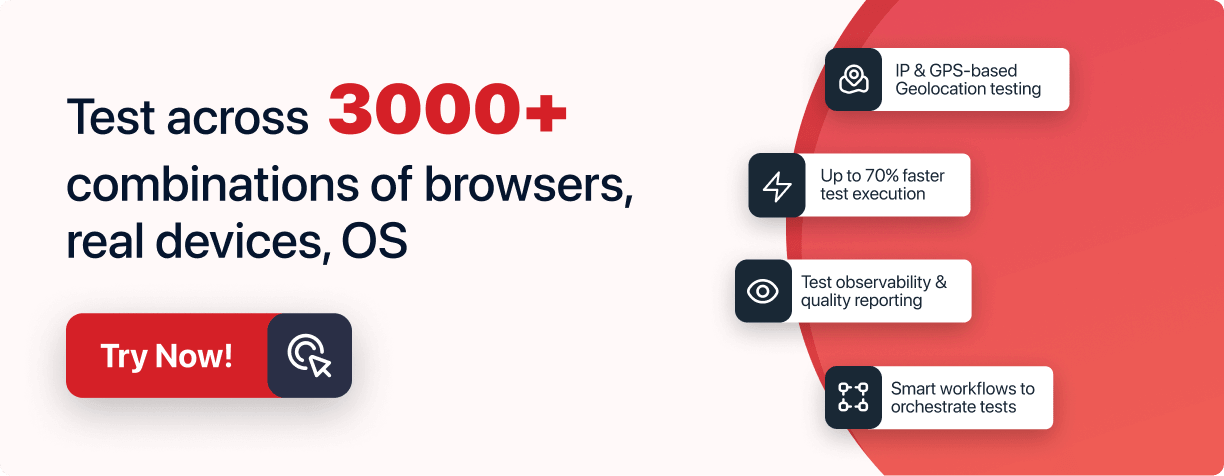
Note : Test on 3000+ real devices for Android and iOS, including the latest iPhone 15. Try LambdaTest Now!
Cloud Based Mobile App Testing Using Appium
Testing mobile apps on local devices or emulators using the Appium framework has a limitation: we can only use a few devices available locally. A cloud-based mobile automation testing tool can solve this problem by offering a vast collection of real device emulators on the cloud, helping organizations to ensure maximum test coverage and develop a more robust mobile app.
Using a cloud-based mobile testing platform is the best way to leverage Appium automation and get the desired results seamlessly without worrying about the lengthy installation and setup for Appium, its related drivers, plugins, emulators, etc.
LambdaTest is an AI-native test orchestration and execution platform that lets you run manual and automated tests at scale on over 3000 real devices, browsers, and OS combinations.
Before running the actual Appium test on LambdaTest, follow a few simple steps to get your LambdaTest credentials:
- Create an account on LambdaTest and complete all the required processes.
- Go to the dashboard by clicking the dashboard icon on the top right corner or Follow this LambdaTest Dashboard.
- Get your credentials from the profile icon located in the top right corner, and then select the profile option. It will redirect you to the profile screen. Select Password & Security here; you can find your Username and Access Key and save it for future use.

Once you have these credentials, you may modify your automation test script to use LambdaTest by just changing the <b>appium_server_url</b> (to lambdatest remote url) value and desired capabilities. Provided below is the code with required modifications.
from appium import webdriver
from appium.webdriver.common.by import By
from appium.webdriver.common.touch_action import TouchAction
import time


# Desired capabilities
desired_caps = {
'platformName': 'Android',
'platformVersion': '12',
'deviceName': 'Google Pixel 6',
'app': '/apk/com.slot.spin.game.play.apk',
'appPackage': 'com.slot.spin.game.play',
'appActivity': 'com.slot.spin.game.play.MainActivity',
'automationName': 'UiAutomator2',
'build': 'Slot Machine Game',  # Added build capability
'name': 'Test Slot Machine Python',  # Added name capability
'devicelog': True,  # Added devicelog capability
'network': False  # Added network capability
}


# LambdaTest credentials
username = <YOUR LambdaTest USERNAME>
access_key = <YOUR LambdaTest ACCESS KEY>


# Appium server URL
appium_server_url = "http://" + username + ":" + access_key + "@hub.lambdatest.com/wd/hub"


# Initialize driver
driver = webdriver.Remote(appium_server_url, desired_caps)


try:
# Wait for the app to load (adjust the time as needed)
time.sleep(5)


# Locate the "Spin now" button by ID
spin_now_button = driver.find_element(
By.ID, 'com.slot.spin.game.play:id/playBtn')


# Tap the "Spin now" button using TouchAction
touch_action = TouchAction(driver)
touch_action.tap(spin_now_button).perform()


# Wait for a moment to see the game result
time.sleep(5)


finally:
# Quit the driver after the test
driver.quit()
Updated Server Url is:

Updated desired capabilities are as follows:

This is the only change that you need to make in your automation script, and you are ready to start cloud based automation testing by changing the desired capabilities based on your requirements.
Limitations of Appium
Shown below is the limitation of the Appium framework.
- Currently, Appium testing with Android doesn’t support Android versions below 4.2.
- Appium desktop inspector cannot be run directly on Microsoft Windows.
- It doesn’t support older Android APIs.
- Setting up and configuring Appium for Android and iOS is a time-consuming process.
- It doesn’t generate detailed test reports.
Troubleshooting Steps for Common Errors in Appium Testing
This section of the Appium testing tutorial covers some unexpected errors that you may encounter while performing Appium testing of mobile applications. Here is a list of common Appium errors and how to fix them.
- If you're using Fastboot to run your Android emulator and it's not being detected properly by ADB, perform a cold boot. Go to Android Studio > Tools > AVD Manager > Actions > Cold Boot Now. This will mainly resolve all emulator issues.
- When the Instrument crashes on iOS ("exited with code 253"), ensure Xcode has downloaded device symbols. Once you click on Window > Devices, it should automatically start. After upgrading iOS versions, it is needed.
- We must unlock the macOS keychain to build the app and the WebDriverAgent. Therefore, it is imperative when you use SSH.
- When you install Node and npm via MacPorts, Appium may have difficulty finding the node executable. It is necessary to include the MacPorts bin folder (default path is /opt/local/bin) in PATH in</.profile, /.bash_profile>, or < ~/.bashrc>.
- Running iOS tests and getting the error "[INST STDERR] posix spawn failure; aborting launch" means your app is not compiled correctly.
Learning Resources for Appium
LambdaTest offers comprehensive learning resources for mastering Appium, the popular mobile automation framework. Whether you're a beginner or an experienced tester, LambdaTest provides valuable tutorials, guides, and documentation to enhance your skills. Listed below are some top learning resources you must visit to master Appium:
- Appium 101 Certification
- LambdaTest Blogs
- LambdaTest Learning Hub
- LambdaTest Youtube channel
Earn your certification in Appium fundamentals with this comprehensive course. Learn essential concepts, best practices, and hands-on techniques to become proficient in mobile test automation using Appium.

Access a wealth of knowledge and insights on Appium through informative blog posts. Stay updated on the latest trends, tips, and tutorials to enhance your understanding and skills in mobile test automation.
Explore dedicated learning hubs tailored to Appium enthusiasts. Dive deep into tutorials, guides, and resources curated to help you master Appium and excel in mobile test automation.
Subscribe to LambdaTest's YouTube channel for exclusive video tutorials, webinars, and demos on Appium. Gain practical insights, tips, and tricks from industry experts to optimize your mobile testing efforts using Appium.
Conclusion
In conclusion, this comprehensive tutorial on Appium has provided valuable insights into the world of mobile app testing. Appium stands out as a powerful and versatile automated testing tool, supporting web, native, and hybrid applications across different operating systems like Android, iOS, and Windows. As a cross-platform tool, Appium allows testers to write UI tests once and run them on various devices and OS versions, streamlining the testing process.
The tutorial covered essential aspects of Appium, including its architecture, working principles on Android and iOS, and the installation steps. Appium's server-client architecture, built-in UI Automator, and support for multiple programming languages contribute to its popularity among mobile app testers. The tutorial also emphasized Appium's ability to automate native, mobile web, and hybrid apps without requiring additional agents, making it a preferred choice for many organizations.
On This Page
- Overview
- What is Appium?
- Why is Appium Popular?
- History of Appium
- The Architecture of the Appium Framework
- Differences Between Appium 2.0 vs Appium 1.0
- How Does Appium Work?
- How to Install and Configure Appium?
- Appium Doctor
- Appium Inspector
- How to Test an App Using Appium?
- Cloud Based Mobile App Testing Using Appium
- Limitations of Appium
- Troubleshooting Steps for Common Errors in Appium Testing
- Learning Resources for Appium
- Frequently Asked Questions (FAQs)
Frequently asked questions

Did you find this page helpful?
![]()
![]()
More Related Hubs

Start your journey with LambdaTest
Get 100 minutes of automation test minutes FREE!!