Mimic Real World Scenarios with Real Device Cloud
Test Your Native, Hybrid & Web Apps on 10,000+ real devices.
- Automation
- Home
- /
- Learning Hub
- /
- Kotlin Unit Testing
A Beginner's Guide to Kotlin Unit Testing [With Examples]
This Kotlin unit testing tutorial focuses on learning unit testing using the Kotlin programming language.
Last Modified on: November 20, 2025
- Share:
OVERVIEW
As a tester, during your career, you’ll write and maintain tons of unit tests, integration tests, or E2E tests to help deliver a quality product. In practice, much focus is given to tools and knowledge around the E2E test suites. Getting a good grasp of unit testing concepts and championing the process to other engineers is pivotal to your effectiveness and success as an engineer.
Unit testing is one of the major pillars of any modern automated testing strategy. As called out in the practical test pyramid, it usually forms the largest no of tests for your application.
In this Kotlin unit testing tutorial, we'll focus on learning unit testing using the Kotlin programming language. The principles for solid unit testing apply not just in Kotlin language but can be extended to other languages and are very relevant to Java language.
What can you expect to gain by reading this Kotlin unit testing tutorial?
You'll leave with an understanding and a beginner's perspective of:
- What is unit testing?
- Why should we do unit testing?
- Learn how to set up a local environment for JVM Kotlin unit testing with IDE and project setup from scratch.
- Write your first unit test.
- Understand how to extract test coverage.
We'll start with just a basic idea of what unit testing is all about and quickly move on to practical hands-on stuff since this is one of the best ways to learn any new tool, technique, or technology. This Kotlin unit testing tutorial would also form the foundation for a series of other tutorials where we will go deep into unit testing with a focus on Mobile with Android and Backend. You can find the code used in this Kotlin unit testing tutorial on GitHub.

I'm very excited to share this journey with you. Let's begin.🏃
What is unit testing?
Unit tests are small isolated tests that check whether a method, class, functionality, or component implements its business logic correctly.
They are extremely useful since they are granular tests that cover a small surface area of your application at a time and typically mock out external collaborators (such as databases, networks, I/O, etc.).
This approach yields unit tests with a higher speed of test execution and reliability over other flavors (like integration testing and end to end testing).

Unit tests lay the cornerstone of the test automation pyramid, forming its solid foundation. This layer primarily focuses on testing and validating the code written by developers. Since developers possess a deep understanding of their code and applications, they can swiftly generate a substantial number of high-quality unit test cases within a brief timeframe.
Note: Run Kotlin unit tests over 3000+ browsers and OS combinations. Try LambdaTest Now!
What are the benefits of writing unit tests?
Why should you personally write lots of unit tests?
Unit tests run fast (within an order of milliseconds to seconds) and are low fidelity. They do not interact with databases, network services, or other system components like integration or E2E tests do.
They also help developers follow a TDD-like style of development with red green refactor loop wherein a developer can quickly write a failing test, add just enough code to pass that test, and then refactor and optimize the code. This forms a tight and focused feedback loop, arguably leading to better-tested systems.
They are an essential refactoring aid and safety net in every developer's toolbox since it allows a developer to comfortably change their application code while knowing that if they unintentionally break any class/method, then the unit test suite would catch those.
With those basics somewhat clear, let's dive into some practical aspects and understand what Kotlin unit testing is all about.
Setting up the test environment
For this tutorial, we'll use an Apple M1 Pro machine with macOS Ventura 13.1 with Java 17.0.6 and Kotlin 1.8.10.
We'll set up our environment with Kotlin, IntelliJ IDEA, and JUnit. You can also find the code for this on GitHub.
If your machine already has any of these configured, please feel free to skip to further sections.
Install Java
You can download Open JDK 17.0.6 from the Oracle website and use the installer with the .dmg extension.
Please note that we'll download the Arm 64 DMG Installer variant. If you are on an Intel MacBook, please use the x64 DMG Installer instead. You can then follow the default installation steps, and click the continue/next buttons to install Java.
Once done, let's confirm the location of the Java installation by executing the below command on the terminal.

Here, java version "17.0.6" 2023-01-17 LTS confirms the version you have installed is Java 17.
Let's also confirm the path where Java is installed by executing:
/usr/libexec/java_home -v 17.0.6
You will see something like below:

We'll add the below in .zshrc or bash_profile file depending on which shell we are using to ensure Java is accessible from all paths
export JAVA_HOME=$(/usr/libexec/java_home)
And then source our file by executing the below command:
source ~/.zshrc
Install IntelliJ IDEA and set up the project
Next, we will download IntelliJ IDEA from the JetBrains website. It is preferred to download the community version .dmg file since it offers most of the features we use.
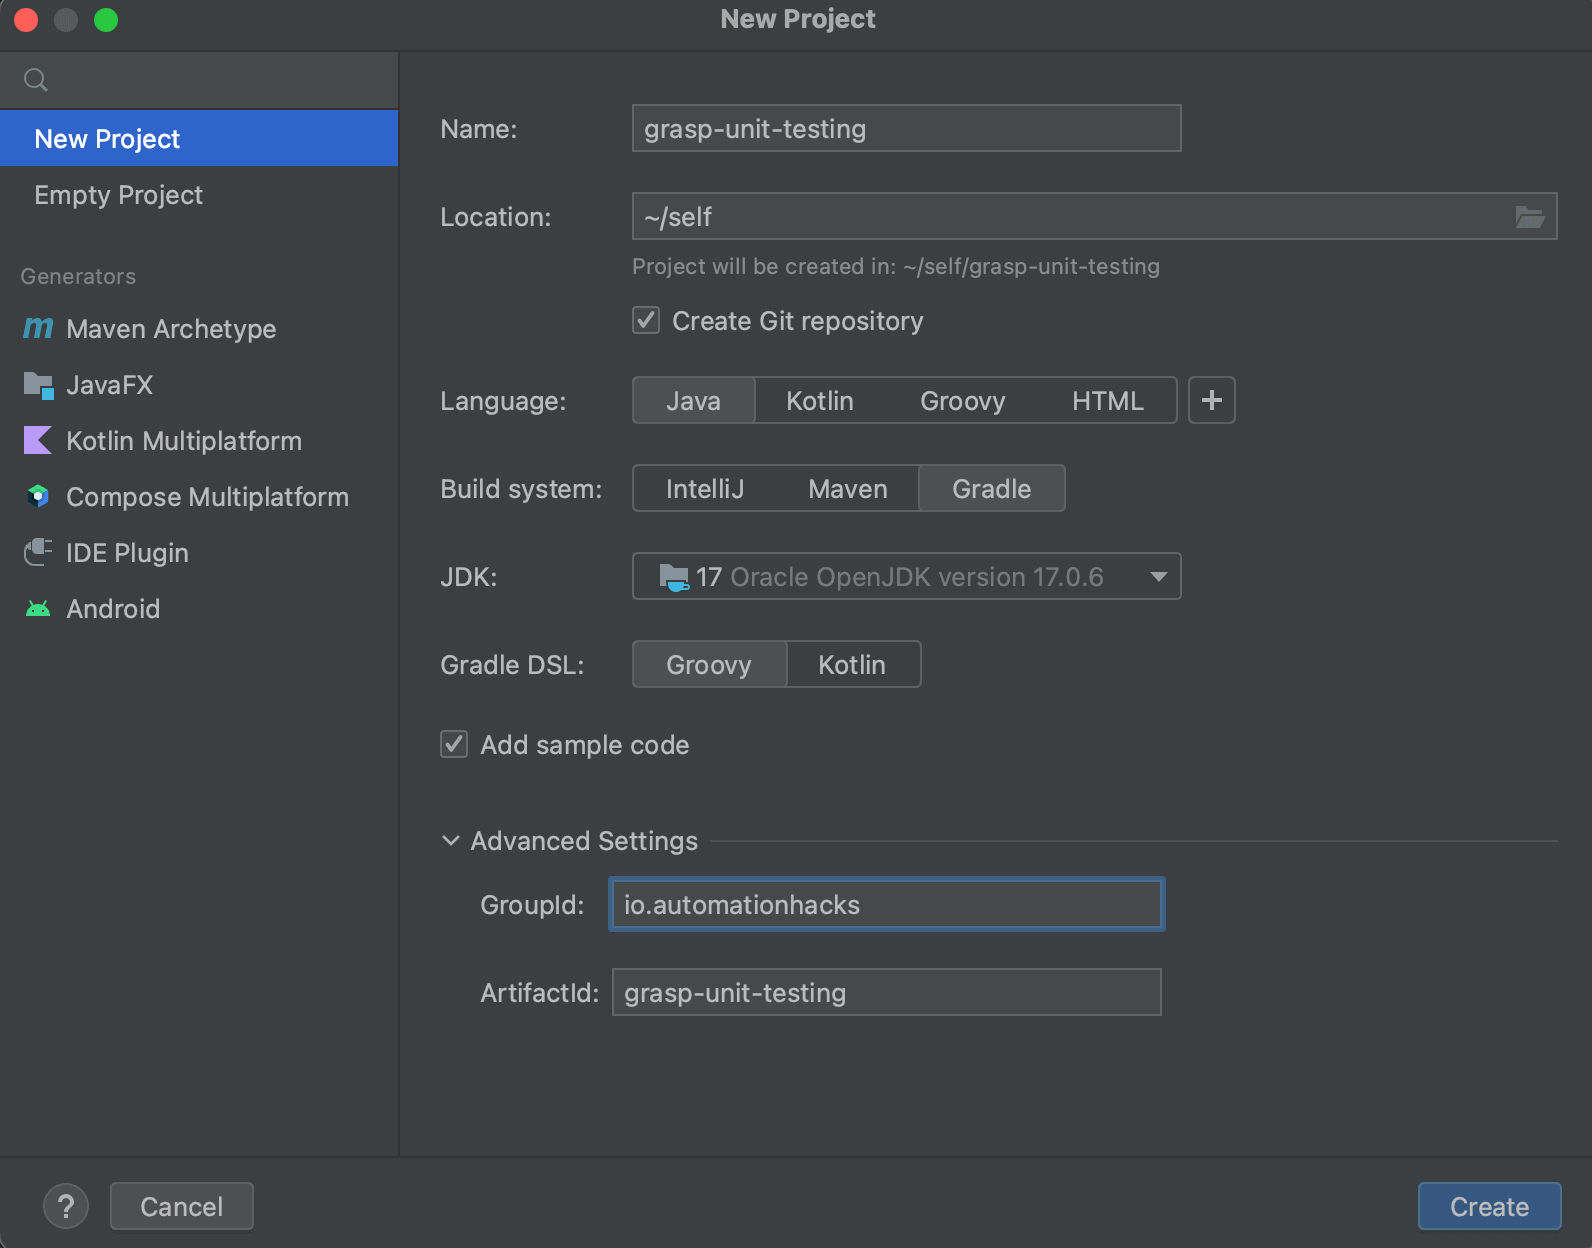
Once IntelliJ is installed (by following standard installation steps), you can open IntelliJ and click on New Project

Then follow the New Project options to create Java, Gradle-based projects as below.
Now let's configure Kotlin in the project. Find the Main.java file and right-click on it. You should see an option like Convert Java File to Kotlin File, click on it.

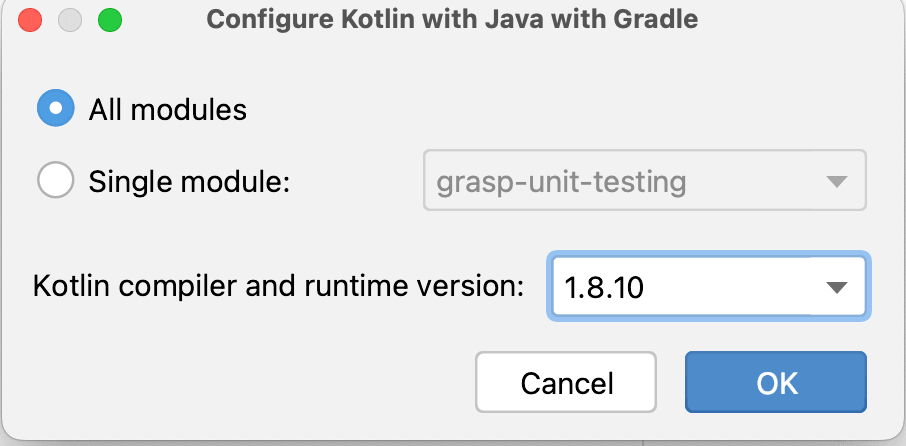
If Kotlin is not configured in the project, IntelliJ will prompt you to configure it. Let's click on the OK button.

Let's select the Kotlin lang version as 1.8.10.
If you open the build.gradle file, you'll see IntelliJ adds a few configurations around Kotlin under plugins, dependencies, and compile sections. Refresh your Gradle file to ensure all required dependencies are installed.
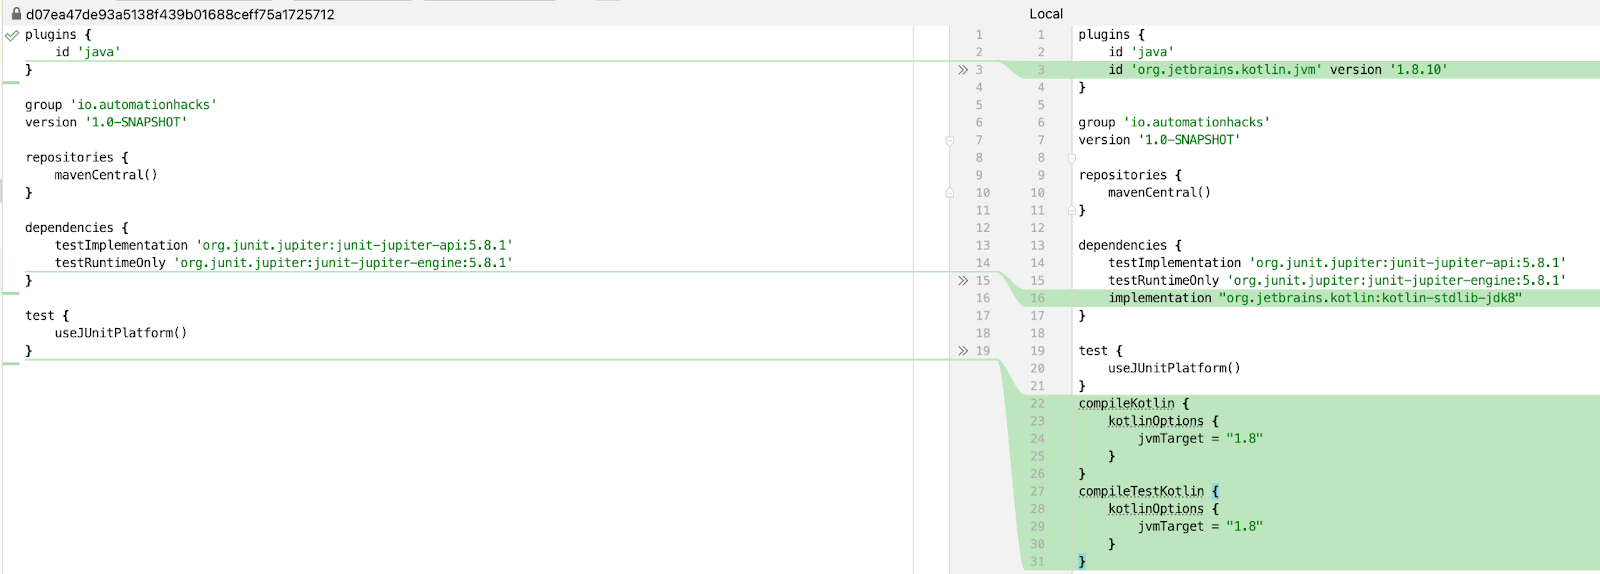
And then convert your Main.java file to Main.kt file using the IDE option.
You should end up with your first Kotlin file like the below:
package io.automationhacks
object Main {
  @JvmStatic
  fun main(args: Array<String>) {
      println("Hello world!")
  }
}
Let's run this file using the IDE by tapping the green play button next to the main function.

Voila, we've run our first Kotlin program and now have the basic prerequisites setup.
Add Kotlin test support
Let's add the kotlin-test dependency to our build.gradle file, which allows us to run JUnit tests.

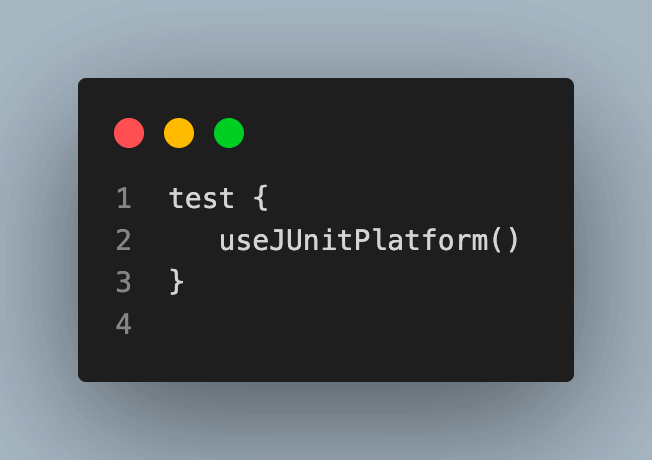
And ensure our test task is already present.
plugins {
  id 'java'
  id 'org.jetbrains.kotlin.jvm' version '1.8.10'
}

group 'io.automationhacks'
version '1.0-SNAPSHOT'

repositories {
  mavenCentral()
}

dependencies {
  testImplementation 'org.junit.jupiter:junit-jupiter-api:5.8.1'
  testImplementation 'org.junit.jupiter:junit-jupiter:5.8.1'
  testRuntimeOnly 'org.junit.jupiter:junit-jupiter-engine:5.8.1'
  implementation "org.jetbrains.kotlin:kotlin-stdlib-jdk8"
  testImplementation 'org.jetbrains.kotlin:kotlin-test'
}

test {
  useJUnitPlatform()
}

compileKotlin {
  kotlinOptions {
      jvmTarget = "1.8"
  }
}
compileTestKotlin {
  kotlinOptions {
      jvmTarget = "1.8"
  }
}

2M+ Devs and QAs rely on LambdaTest
Deliver immersive digital experiences with Next-Generation Mobile Apps and Cross Browser Testing Cloud
Writing the first test for Kotlin unit testing
Now, let's add a Calculator class under src/main/java/io/automationhacks.
This Calculator class has a simple add() method that takes two numbers and returns their sum.
package io.automationhacks

class Calculator {
fun add(first: Int, second: Int): Int {
return first + second
}
}
We can leverage the IDE to generate a test class for us or create it manually under src/test/java/io/automationhacks/CalculatorTest.kt.
To generate a test file via IntelliJ, right-click on the Calculator class and select Generate > Test

Select JUnit5 and ensure you select the add method.

This would implement a skeleton class with a test method.
Let's initialize the Calculator class and then call our add method with two numbers.
To verify that our method is working fine, we can use assertEquals() that compares two values and fails in case they are not equal
CalculatorTest.kt
package io.automationhacks


import org.junit.jupiter.api.Test
import org.junit.jupiter.api.Assertions.*


class CalculatorTest {

@Test
fun add() {
val calculator = Calculator()
val expected = 10
assertEquals(expected, calculator.add(5, 5))
}
}
We can run this test via the IDE (below screenshot) or through the command line by executing:
./gradlew check
We can also run the test in coverage mode to get additional information on if our unit test is providing the desired coverage.

At the moment our simple test completely covers the Calculator class (class, method, and line).

Let's add a new method sub to our Calculator class.
package io.automationhacks
class Calculator {
fun add(first: Int, second: Int): Int {
return first + second
}

fun sub(first: Int, second: Int): Int {
return first - second
}
}
If we run the test class CalculatorTest in coverage mode, we can now see that the coverage framework detects that Method and Line are not fully covered.

We can fix this by adding a unit test for our sub-function as well, like so:
@Testfun `Test calculator can subtract two numbers`() {val calculator = Calculator()assertEquals(5, calculator.sub(15, 10))}}Note here we've used backticks (`) to enclose the test method name and instead write it in plain English. This is a good practice as it can make test method names pretty readable and allow us to debug them easily later on.
And we can see our Class, Method, and Line coverage are 100% again:

Mocking in Kotlin unit tests
So far, we've understood how to write JUnit5 tests for Kotlin unit testing and see its coverage.
Any discussion about Kotlin unit testing is incomplete without a mention of Mocking, and it's such an essential technique to understand to write scalable unit tests that only test the unit they are concerned with.
We will use the Mockito library to demonstrate this. There are many JVM libraries that support Mocking (such as wiremock and mockK), and each has its pros and cons. The mocking libraries API might be slightly different but the underlying semantics remain the same.
A typical test with mock may have below-high-level blocks.
- Setup the class to mock.
- Setup behavior, i.e., given certain inputs, what output should be returned.
- Cases that are not defined should return a default value.
Let's first set up Mockito in our build.gradle file.

You can find the complete build.gradle file below:


Gradle is an advanced build automation tool that provides a flexible and efficient way to automate the building, testing, and deployment processes of software projects. It is designed to handle projects of any size or complexity and supports multiple programming languages, including Java, Kotlin, Groovy, and more.
At its core, Gradle uses a build script written in Groovy or Kotlin, allowing developers to define and customize their build logic. The build script specifies the project structure, dependencies, tasks, and configurations required to build the software.
Understanding the unit under test
It's always better to use an example to understand concepts. Let's consider an eCommerce application wherein a user can make an order. If the product is present in sufficient quantity in the warehouse, then we are able to fulfill it.

You can find the application classes under io.automationhacks/ecommerce package.

In this example we have two classes:
package io.automationhacks.ecommerce


class Order(private val product: String, private val quantity: Int) {
private lateinit var warehouse: Warehouse
private var isFilled: Boolean = false


fun fill(warehouse: Warehouse) {
this.warehouse = warehouse
isFilled = this.warehouse.remove(product, quantity)
}


fun isFilled(): Boolean {
return isFilled
}
}
The order class refers to a warehouse class as a collaborator and tries to fill itself by removing a certain product in the desired quantity. Depending on the outcome of this operation, a boolean flag isFilled is set to indicate if the order was fulfilled or not.
Now let's take a look at the warehouse class.
Warehouse.kt
package io.automationhacks.ecommerce


class Warehouse {
private val warehouse: HashMap<String, Int> = hashMapOf()
fun add(product: String, quantity: Int) {
warehouse[product] = quantity
}


fun remove(product: String, quantity: Int): Boolean {
if (warehouse.contains(product).not()) {
println("Product not found in warehouse")
return false
}


if (warehouse[product] == 0) {
println("No items for this product in the warehouse")
return false
}


if (warehouse[product]!! < quantity) {
println("Not enough items in the warehouse")
return false
}


val currentQty = warehouse[product]
val newQty = currentQty!!.minus(quantity)
warehouse[product] = newQty
return true
}


fun getInventory(product: String): Int? {
return warehouse.get(product)
}
}
The warehouse class maintains a hashmap of the product and its current quantity. It exposes a couple of APIs to add items to the warehouse using the add() method and remove().
The remove() method also does a bunch of checks and returns a false in case we are not able to remove items from the warehouse. Finally, we also write a getInventory() method to allow the caller to know the current state of the warehouse.
Write a test to verify state
What would a simple unit test for these classes look like?
Let's take a look.
package io.automationhacks.ecommerce


import org.junit.jupiter.api.BeforeEach
import org.junit.jupiter.api.Test
import kotlin.test.assertEquals
import kotlin.test.assertFalse
import kotlin.test.assertTrue


class OrderStateTest {
private val LAPTOP = "Macbook"
private val MOUSE = "Logitech Mouse"
private val warehouse = Warehouse()


@BeforeEach
fun setUp() {
warehouse.add(LAPTOP, 50)
warehouse.add(MOUSE, 20)
}


@Test
fun 'test order is fulfilled if capacity in warehouse is sufficient'() {
val order = Order(LAPTOP, 20)
order.fill(warehouse)
assertTrue(order.isFilled())
assertEquals(30, warehouse.getInventory(LAPTOP))
}


@Test
fun 'test order is not fulfilled if capacity in warehouse is insufficient'() {
val order = Order(MOUSE, 21)
order.fill(warehouse)
assertFalse(order.isFilled())
assertEquals(20, warehouse.getInventory(MOUSE))
}


}
In the above test
- To ensure consistent test execution, we incorporate new items into the warehouse before each test. This is achieved by annotating the setUp() method with @BeforeEach. You can learn more about it through this blog on annotations in JUnit.
- Next, we wrote a couple of tests
- For a positive scenario, we perform a test where we attempt to fulfill an order when the warehouse contains an adequate quantity of the product.
- To cover a negative scenario, we conduct a test specifically designed to check the situation when the warehouse does not possess the required product in sufficient quantity.
There could be even more tests written just for these classes but that is an exercise that is left up to you.
Writing test with mock
Now, let's see how we can use Mockito with JUnit to write mocks for these classes and scenarios. In this example, we are interested in testing the order class and will mock out its collaborators, i.e., Warehouse.
This also allows us to verify different behaviors around Warehouse and their impact on the order class.
You can see the entire test class below.
package io.automationhacks.ecommerce


import org.junit.jupiter.api.Test
import org.mockito.Mockito.*
import kotlin.test.assertEquals
import kotlin.test.assertFalse
import kotlin.test.assertTrue


class OrderInteractionTest {
private val LAPTOP = "Macbook"


@Test
fun 'test warehouse capacity is reduced on fulfilling order'() {
val order = Order(LAPTOP, 50)
val warehouseMock = mock(Warehouse::class.java)


'when'(warehouseMock.getInventory(LAPTOP)).thenReturn(0)
'when'(warehouseMock.remove(LAPTOP, 50)).thenReturn(true)


order.fill(warehouseMock)
assertTrue(order.isFilled())
assertEquals(0, warehouseMock.getInventory(LAPTOP))
}


@Test
fun 'test warehouse capacity is not reduced when order cannot be fulfilled'() {
val order = Order(LAPTOP, 51)
val warehouseMock = mock(Warehouse::class.java)
'when'(warehouseMock.getInventory(LAPTOP)).thenReturn(50)
'when'(warehouseMock.remove(LAPTOP, 50)).thenReturn(false)


order.fill(warehouseMock)
assertFalse(order.isFilled())
assertEquals(50, warehouseMock.getInventory(LAPTOP))
}
}
We have a couple of tests in the above class.
Let's unpack the first one (test warehouse capacity is reduced on fulfilling order) to understand how mocking with Mockito works.
We create a test order with the LAPTOP product and 50 quantities.

And then create a mock for the warehouse class. We use the mock() method from Mockito and provide it with the class we want to mock.

To set up the behavior that this mock class should perform, we first specify the condition in the when() method. Since when is a keyword in Kotlin, we enclose it with backticks and then say that if the getInventory() method is called on our warehouseMock, then we should return 0; we also specify the behavior for the remove method in the same way.

We call our fill method on the order class

And then assert that we indeed see the correct behavior.

Let's run the tests using the following command:
./gradlew test
We can see that all the tests passed.

We can follow the same pattern to also write a negative test with mocks. It's up to you to follow through with the test and attempt to write one.
This is a first look into understanding how a JUnit test case works E2E with mocking. There are multiple other operations provided by Mockito if you want to grasp different types of mocking strategies conceptually.
To harness the real power of Kotlin unit testing, it is recommended to run your Kotlin test cases on a cloud-based grid and avoid the challenges of setting up a local grid. Digital experience testing platform like LambdaTest lets you perform Kotlin unit testing with Appium at scale. LambdaTest offers a real device cloud to test Android applications in real-user conditions and get accurate test results.
Want to kick start your Android app testing with Kotlin? Check our detailed documentation: Kotlin with Appium
You can also Subscribe to the LambdaTest YouTube Channel and stay updated with the latest tutorials around Automation testing, Selenium testing, Cypress testing, CI/CD, and more.
Conclusion
Now that you have gained the knowledge to establish a fundamental unit test in the Kotlin JVM environment, you are well-equipped to proceed. Kotlin unit testing encompasses many aspects, and in our upcoming follow-up posts, we will delve deeper into specific focus areas.
To explore further, you can access the code sample for this post on our GitHub repository. Stay tuned for more valuable insights and techniques in the realm of Kotlin unit testing!
Delve into our top Unit Testing Interview Questions guide, designed to help you excel in unit testing interviews. It covers a wide range of topics, from syntax to advanced techniques, with detailed solutions.
Frequently asked questions
- General
Did you find this page helpful?
More Related Hubs

Start your journey with LambdaTest
Get 100 minutes of automation test minutes FREE!!


