
How To Setup CI/CD Pipeline With Bamboo For PHP Projects
Ritesh Shetty
Posted On: May 28, 2021
![]() 127402 Views
127402 Views
![]() 18 Min Read
18 Min Read
Accurate automation testing and seamless product delivery are the two major factors that can help build an exceptional product experience. This principle applies to a range of software products like websites, mobile applications, web applications, and more.
Every software developer wants the code to be well-tested and well-delivered to the end-user. Though this sounds complex, the process can become easier when automation takes over. That’s where Pipelines come into the play. The build & deployment pipelines help in the implementation of the automation process.

It governs all the activities, right from version control to providing applications into the hands of the end-users. This is achieved via prominent CI/CD tools like Jenkins, Circle CI, GitLab CI, etc. The combination of CI/CD with Bamboo, GitLab, and LambdaTest helps in making the most out of DevOps and Selenium test automation.
CI/CD with Bamboo helps in building CI/CD pipelines, especially when the application involves cross connectivity with different APIs and various third-party applications. This also provides immunity to the risk of a failed production deployment. Gitlab helps in version controlling the code, whereas CI/CD with Bamboo helps to pipeline the source code for different types of testing (i.e. cross-browser testing, white-box testing, unit testing, etc.). The best part is that the advantages offered by CI/CD with Bamboo are independent of the development language. CI/CD with Bamboo is used for PHP projects for ensuring that the code going into the production pipeline is of high quality.
Till now, we touched upon the importance of pipelines in the automated process of building software applications and deploying them to the target production environment. With the stage all set, let’s look at how to set up the CI/CD pipeline with Bamboo for the PHP project.
In case you are curious to know how Bamboo stacks up against other CI/CD tools, make sure to check out the Comparison of top CI/CD tools in the LambdaTest Learning Hub. If you are preparing for an interview you can learn more through CI/CD Interview Questions.
TABLE OF CONTENT
Bamboo is a popular Continuous Integration (CI) tool developed by Atlassian in 2007. Bamboo is a commercial product that lets you perform automated builds, tests, and releases. All of this in a single workflow!
Read – Jenkins vs Bamboo: Showdown of CI/CD tools
Pre-requisites for Bamboo Installation
Before proceeding with the Bamboo CI/CD pipeline for PHP projects, you need to ensure that prerequisites for Bamboo are met. Here the prerequisites for installing and configuring Bamboo on the requisite (i.e. Windows/Ubuntu) server.
- Installation of Atlassian Bamboo
- Installation of PHP
- Installation of Node.js
- Git repo of a PHP Project
- New Project in Bamboo
Atlassian Bamboo is a Continuous Integration and Continuous Deployment (CI/CD) server. Bamboo provides assistance to software development teams with automated building and testing of software source code. It can also work as a reporting tool for statistical analysis. The steps to install Bamboo are provided ahead in the article.
PHP is a server-side scripting language that is used to develop static websites, dynamic websites, or web applications. It stands for Hypertext Preprocessor, which was earlier known as personal home pages. The installation of PHP and PHPUnit (i.e. unit testing framework in PHP) is necessary since we would be demonstrating CI/CD with Bamboo for the PHP project. Please check out our detailed Selenium PHP tutorial for steps on installing PHP, PHPUnit, Composer, and more.
In the integration of LambdaTest with Bamboo, we will install Node.js as a second task. Node.js is a JavaScript runtime that is used to build scalable network applications. Node.js has no thread networking and thus is free from deadlocks. You can download the zip version or the windows installer version from here. You can further read Selenium NodeJs tutorial to gather details on automation testing with NodeJs.
Git repository is used for version control of source code. It is also used to clone the repository and create a build of the application. The PHP project in the Git repo will be used for the demonstration of CI/CD with Bamboo with a PHP project.
For the demonstration of Bamboo integration with LambaTest integration, we will use the repository with Javascript project and Protractor tests. The link to the repository is https://github.com/LambdaTest/protractor-selenium-sample-gitlab.git
The new project in Bamboo is to create a new pipeline for the build (or deployment) of the application. Since we will be using the LambdaTest Selenium Grid, we first create an account on LamdaTest. Please make a note of the user-name and access-key from the profile section on LambdaTest. We will be integrating LambdaTest with the Bamboo pipeline.
Atlassian Bamboo can only run with the JDK(JAVA Development Kit). Thus, a supported version of Java is required. JAVA_HOME is a system environment variable that provides the path to Java’s home directory. If a path is not returned you’ll need to set the JAVA_HOME environment variable manually before installing Bamboo.
Why use Bamboo Pipeline for PHP Project
Now that we have covered the prerequisites for CI/CD with Bamboo, let’s look at the essentials of the Bamboo pipeline. The Bamboo pipeline lets you build and run unit & integration tests by integrating the source code.
Bamboo Pipeline also provides reliable, secure, and well-managed benefits over other tools like Jenkins. Some of the prominent advantages of using a Bamboo pipeline for PHP projects are below:
- Automated build and test process
- Build and deployment process independent of the local environment
- Automatic trigger of unit tests and integration tests
- Integrate code repositories from version control systems
- Automatic builds and deployments are performed to a server
- Plugins and Interfaces for performing tasks
- Detailed reports statistics
- Scheduling and coordinating sequential stages
The source code when pulled out of a repository to a Bamboo pipeline gets compiled and focuses on creating a build. After compilation, the unit tests and integration tests are run. The pipeline gives different ways to manage builds that have different requirements or targets.
When a large team assembles to create a secure software product, working in a local environment might not suffice the long-term requirements of the project. Version controlling using tools like GitHub, GitLab, etc. is an absolute must.
Bamboo pipeline fetches the code from the relevant repository, triggers a build, and integrates the tests. This pipeline makes the whole process automated and triggers as soon as a developer commits code. This is one of the major advantages of using CI/CD with Bamboo or in general using CI/CD along with automation testing.
The Bamboo pipeline helps in optimizing the build performance through parallelism.
This pipeline leverages elastic resources and can perform different tests in different environments.
The Bamboo pipeline can connect to a lot of version control systems via the relevant plugins. Build can also be tested against different target environments. The build and test process can be expedited with parallel test execution.
The Bamboo pipeline starts the build, just like it is done by MSBuild in Visual Studio. Once the project is built, “Artifacts” are created. “Artifacts” are the build results like an executable app, config files, property files, etc.
Bamboo has a rich plugin ecosystem with plugins available for doing tasks such as cloning a source code repository, performing user acceptance testing(UAT), and more. Some plugins also enable Sonarqube integration that helps in performing code quality checks. The Integration builds from the pipeline provide early ‘fail fast’ feedback on the quality of new changes.
Bamboo uses the concept of a ‘plan’ with ‘jobs’ & ‘tasks’ to configure and order the actions in the workflow. A Bamboo pipeline can have more than one plan and can provide reporting across all plans. The reporting can be done via the wallboard which is a dashboard of the pipeline. It provides detailed statistics like the number of builds, deployment environments, etc. The pipeline also provides links to the other applications and allows setting up different permissions for all the plans.
Another major advantage of CI/CD with Bamboo is sequential execution of different stages is possible with the Bamboo pipeline. Jobs in different stages can be executed sequentially and/or parallelly on a need basis. Stages process jobs on multiple agents and multiple environments. Sequential stages use artifacts from the previous stage in the upcoming stage. The end result is a more structured and well-organized pipeline workflow.
If you are a PHP expert, you can acquire a benchmark industry certification specializing in core PHP programming skills and expand your opportunities to advance your career in PHP automation testing.

How to install and run Bamboo CI
Now that we have covered the advantages of CI/CD with Bamboo, let’s look at how to run Bamboo for continuous testing:
Follow the below-mentioned steps for installing Bamboo on Windows:
- Check for the supported operating systems, hardware platforms, databases, and browsers for the version of Bamboo that is to be installed (more details here).
- Java installation and JAVA_HOME environment variable should be set correctly. set correctly.
- Download the latest Bamboo executable for installation.
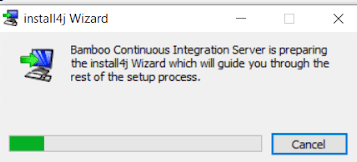
Installing Bamboo using Windows Installer
<0l>
Installing Bamboo on Windows using the Zip Archive
- Download the ZIP folder for the latest version of Bamboo
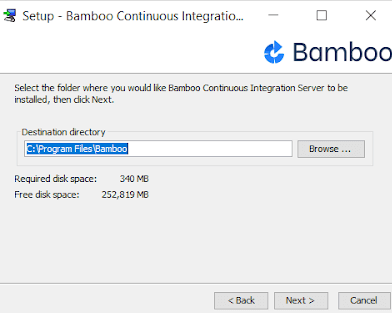
- Extract the contents of this ZIP Archive folder into a particular location (e.g. C:\Program Files\Bamboo)
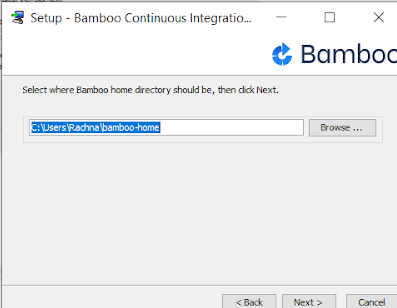
- Set up the Bamboo home directory to C:\Users\<current-user>\Bamboo-home.
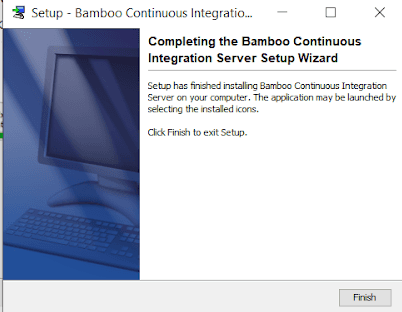
- With this, the installation of Bamboo is completed
- Start the Bamboo server from the location: <Bamboo installation directory>\bin\start-bamboo.bat
- Go to the web browser and access the running Bamboo instance by typing
http://localhost:8085/in the address bar.
How to Configure Bamboo CI
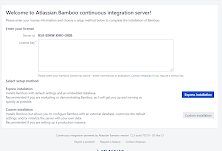
- When you open the URL
http://localhost:8085/for the first time, you will be redirected to the setup wizard page - In order to use Bamboo, you must have a valid license key (evaluation or commercial). The evaluation license can be generated from the MyAtlassian self-service account.
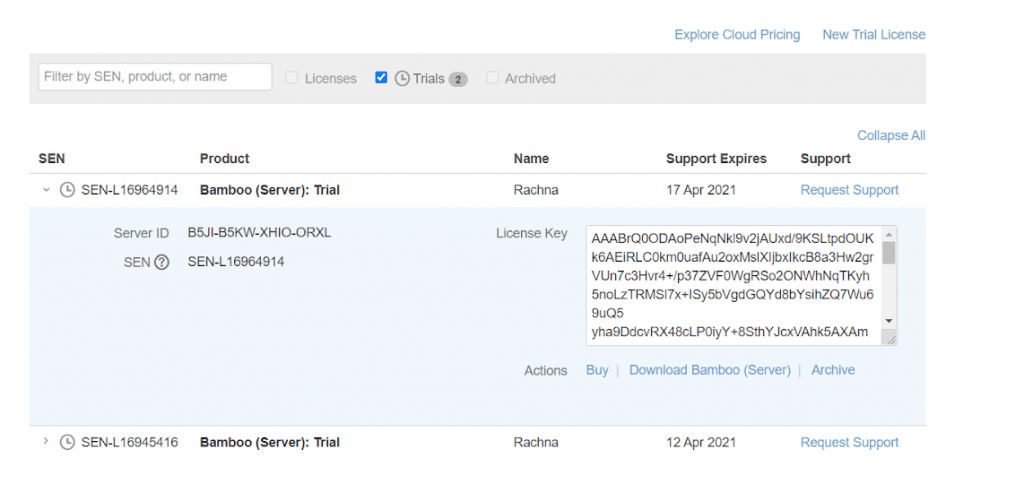
- To get the valid license key, click on the link given down the box(on keyword ‘Atlassian’). You will be redirected to a new page for generating the license key. The trial version is valid for 90 days per project.
- Check the Server ID and then click on “Generate License”.
- You will be redirected to a new page, where the license key will be available in a box next to Server ID.
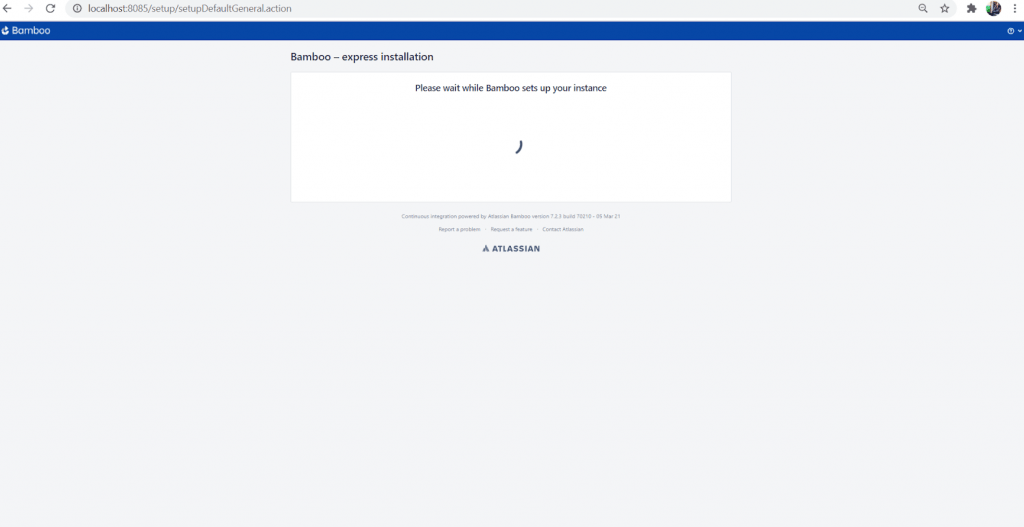
- Copy the valid License key and paste it in the required box below the Server ID. You should also select Express Installation.
- Alternately, you can also select Custom Installation. After selecting Custom Installation, it will redirect you to a new page. If you want to change the URL (or any system paths or directory), you can change it in this step. Post that, click on the ‘Continue’ button.
- After a couple of minutes, the Bamboo CI instance will be ready for usage.
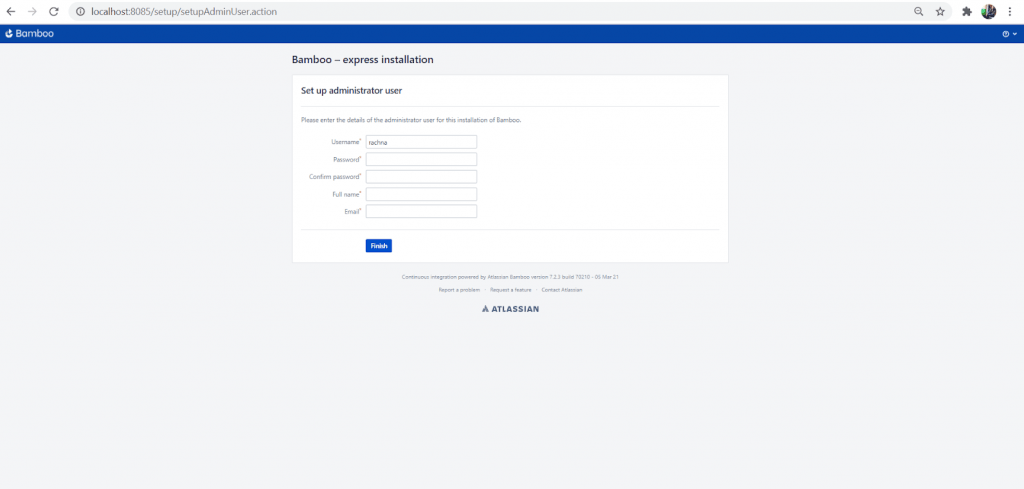
- Set the administrator user. Go ahead and provide details like Username, Password, Full Name, and Email Id to register as the admin user.
- After creating the admin user, you can log in to the Bamboo Application and create a new project or plan.

How to integrate Bamboo Pipeline With Cloud Selenium Grid
With the completion of Bamboo CI/CD installation, we are all set to perform Selenium test automation with PHP using Bamboo CI/CD. Here the major steps for using CI CD with Bamboo and Selenium PHP on a cloud-based Selenium Grid:
Cloud-based Selenium Grid specializes in running serial (and parallel) tests across multiple browsers, operating systems, and devices. LambdaTest provides a cloud-based Selenium Grid that lets you perform Selenium test automation on 2000+ different browsers and operating systems online. Check out our detailed tutorial on cloud testing to get an in-depth understanding of the benefits of cloud-based Selenium Grid.
Read – What is Parallel Testing and why is it important?
We will be using Bamboo CI/CD for the PHP project, with the execution on LambdaTest’s cloud-based Selenium Grid. Here are the steps for integrating the Bamboo pipeline with LambdaTest Grid:
1. Check for the installation of Bamboo, PHP, PHPUnit, and Composer with Selenium dependencies.
2. Once the setup is installed, we will check out the sample code in a Github repository. The code in the repository is a simple PHP and Selenium web automation script that searches for LambdaTest on Google.
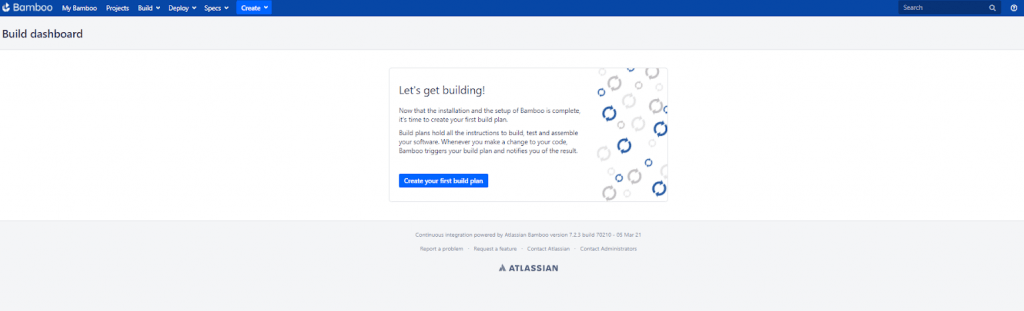
3. With the completion of the basic requisites for Bamboo CI/CD with PHP project, let’s log in to the Bamboo dashboard. Click on the Create your first build plan to construct a new Bamboo project.
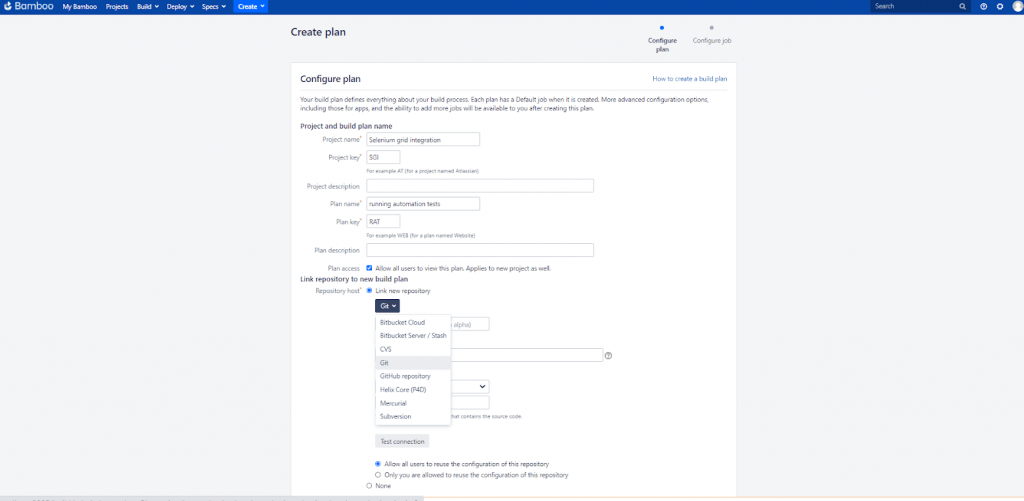
4. Enter the Bamboo project name as ‘Selenium grid integration’ and plan its name as ‘running automation tests’. The next step is to link the GitHub repository containing the source code and tests.
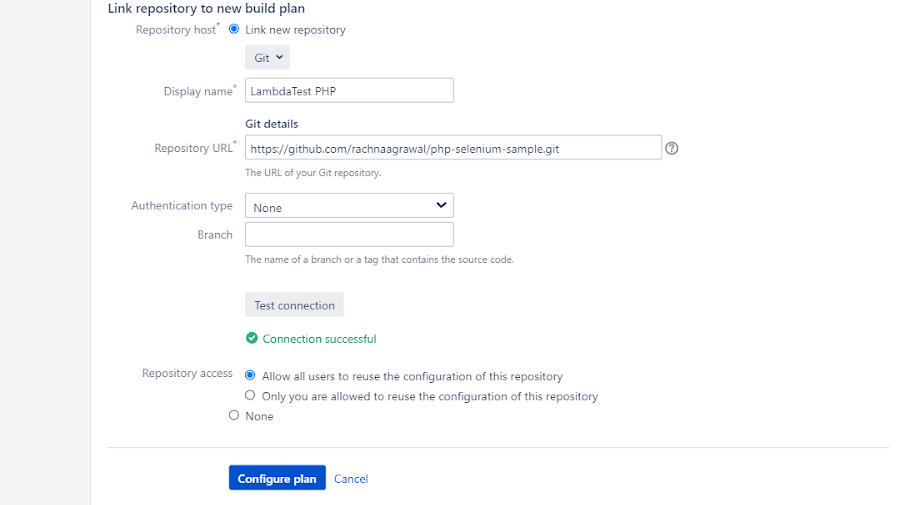
5. For linking the repo, click on Link new repository besides Repository host and from the dropdown ‘Select repository host’. Select Git as the preferred version control system.
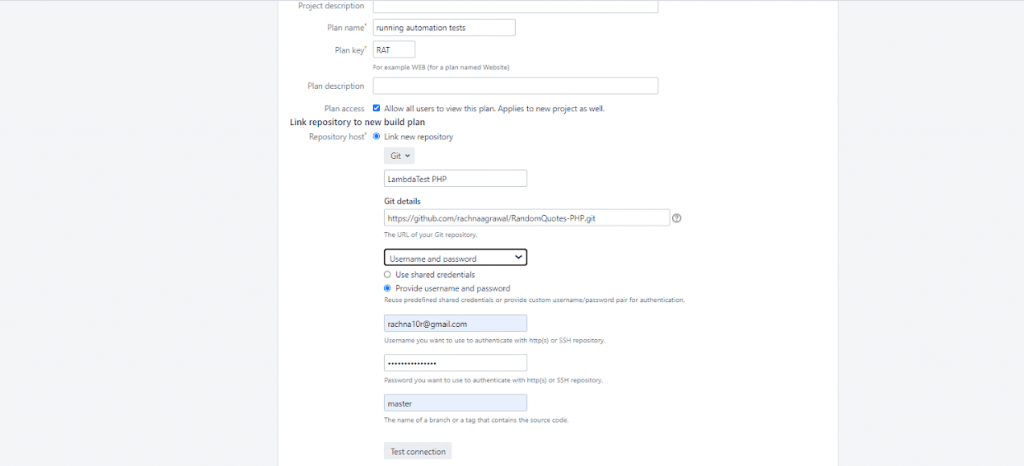
6. Enter the Git repo name (in this case it’s LambdaTest PHP) below the dropdown and then provide the repo URL beneath the Git details. If the repository is private, you would need either Username & Password or SSH Keys to authorize the repository.
7. For public repositories, simply provide the URL
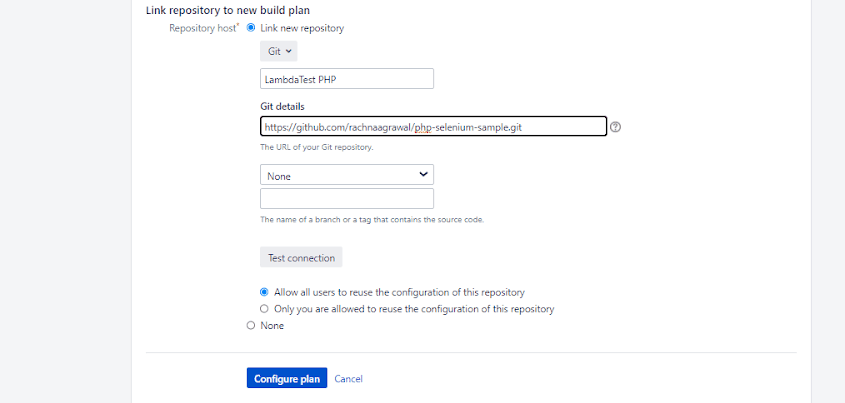
8. Use Test Connection to see if Bamboo is able to perform Source code Checkout appropriately or not. After clicking on Test Connection, you should get ‘green tick’ with indicating ‘Connection successful’.
9. Click on the Configure Plan button. With this, the Bamboo CI/CD for PHP project is ready for use! A new page will appear to configure more tasks ahead.
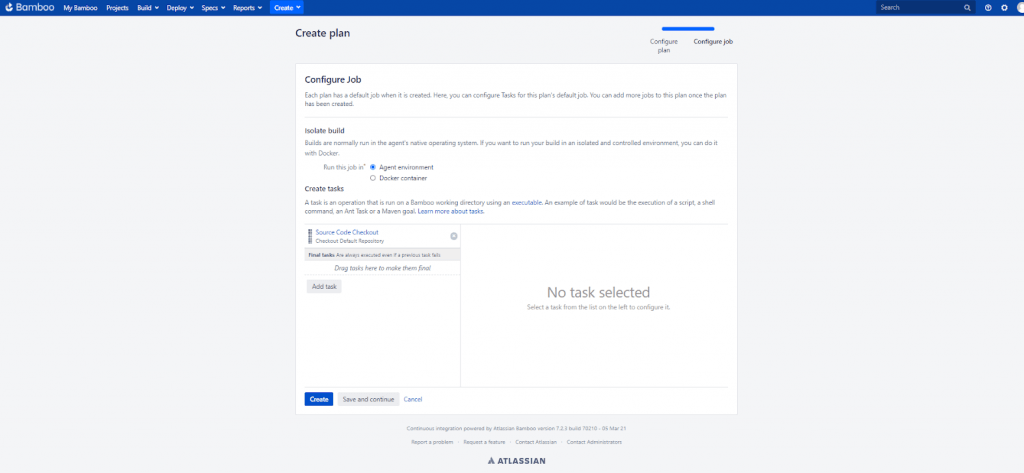
10. The first task is ‘Source Code Checkout’ which is built by default as we connect the Git repository to the Bamboo project. You can add more tasks by clicking on ‘Add task’. The build plan will run on the agent environment but you can always provide the Docker image after selecting ‘Run this job in’ as ‘Docker container’. Check out our detailed blog on how to run Selenium tests with Docker.
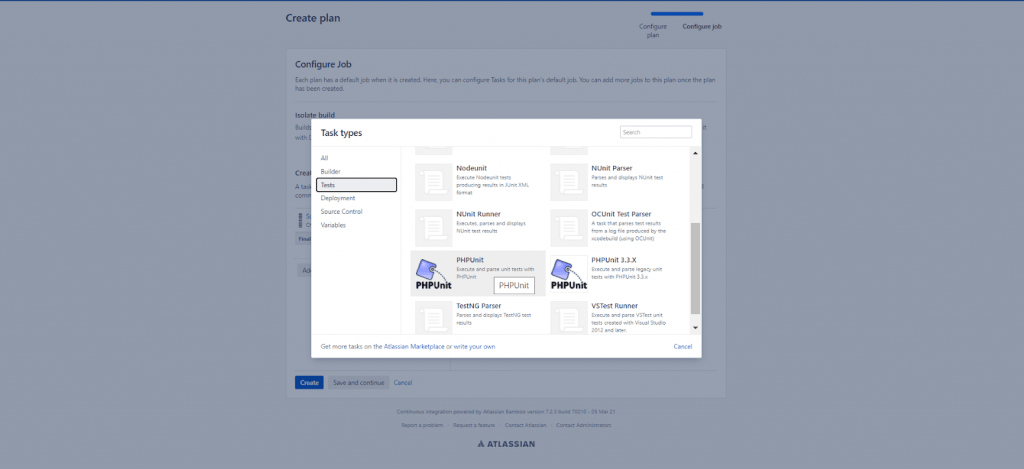
11. Click on ‘Add task’ to create a task for running Selenium web automation tests on the LambdaTest Grid via PHPUnit. Select ‘test’ from the left menu of the popup box and choose PHPUnit.
12. A new dialog box opens up in the right column of the page. Here, you will provide the required Task description, executable, arguments, environment variables etc. The details are given below.
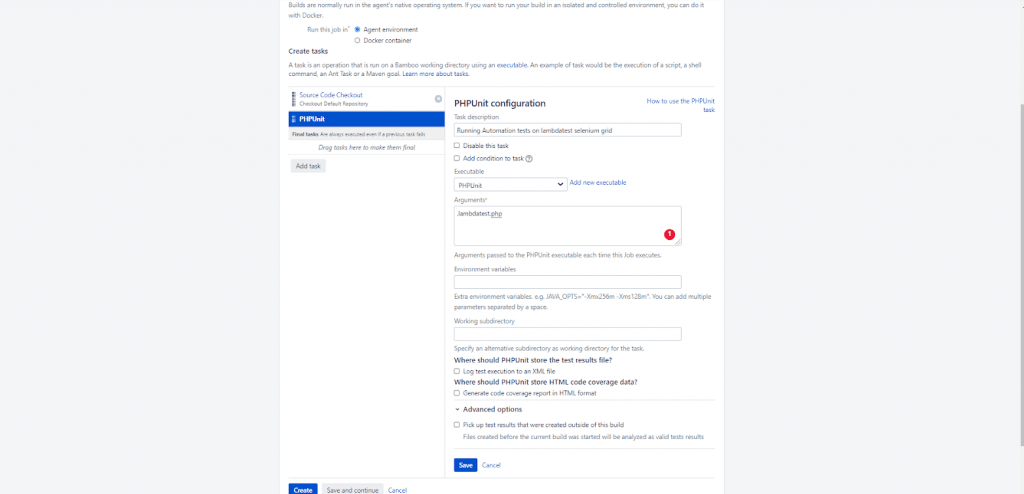
13. If the executable has nothing in the dropdown, you need to specify the address of the PHPUnit executable installed on your machine. Click on ‘Add new executable’ and a new popup dialog box appears. Here, provide the ‘Executable label’ as ‘PHPUnit’ and set the path as ‘C:\PHP7\vendor\bin\phpunit’( i.e. path where PHPUnit is installed). Select Add.
14. In this demo of Bamboo CI/CD for PHP projects, we run the tests implemented in lambdatest.php on the LambdaTest Grid. Provide lamdatest.php in arguments and click on Save. This will add a new task successfully.
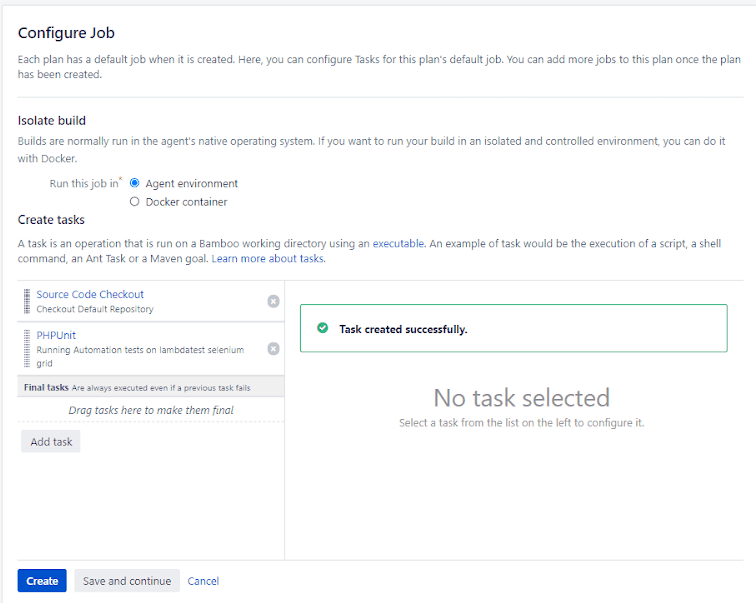
15. Click on the ‘Save and continue’ button, to save the plan configuration. A new page will open with all the plan details and configuration.
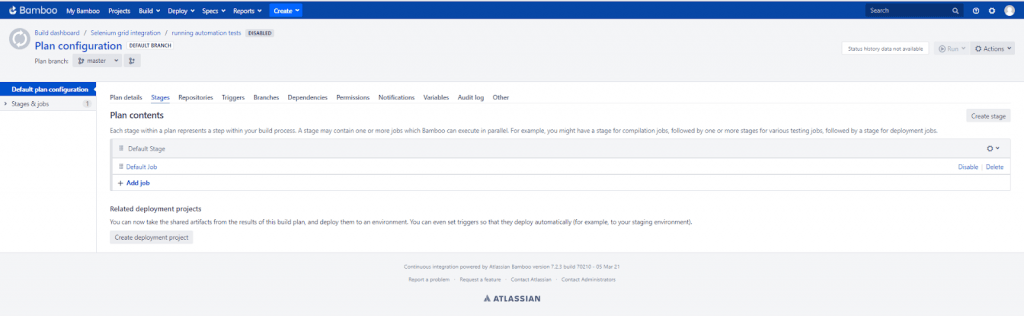
16. Click on the Default plan configuration and below the Plan details tab, check the Plan enabled checkbox. Click on Save to save the plan configuration.
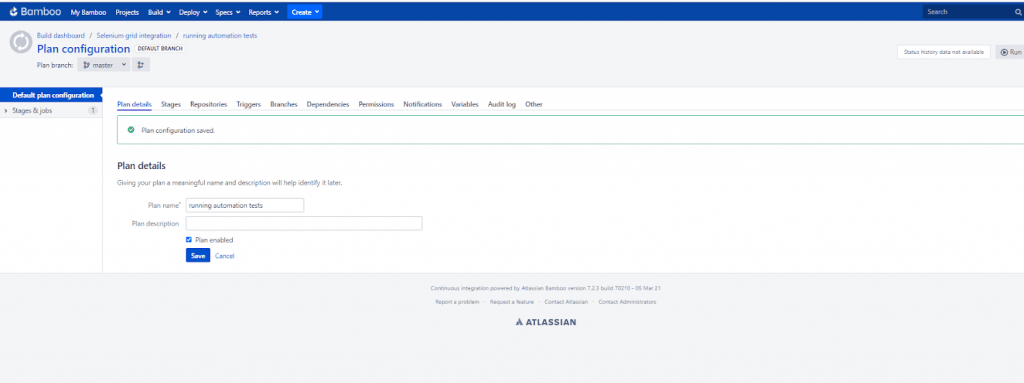
17. Now, to run the plan and two tasks sequentially, just click on the Run > Run Plan button on the topmost right side of the page.

18. This will initiate the job and logs will be reflected under the logs tab.
Using Bamboo CI/CD to run tests on LambdaTest
With LambdaTest integration with Bamboo CI/CD, you can perform cross-browser testing 2000+ browsers and operating systems online. The tests could be performed directly from the Bamboo server (e.g. browser compatibility testing can be performed as soon as the changes are committed to the build). Integration of LambdaTest with Bamboo CI/CD server can help in reducing release cycles and shipping the product faster.
Here are the steps for integrating LambdaTest with Bamboo CI/CD:
- After installing the pre-requisites, login to your Bamboo server as Administrator
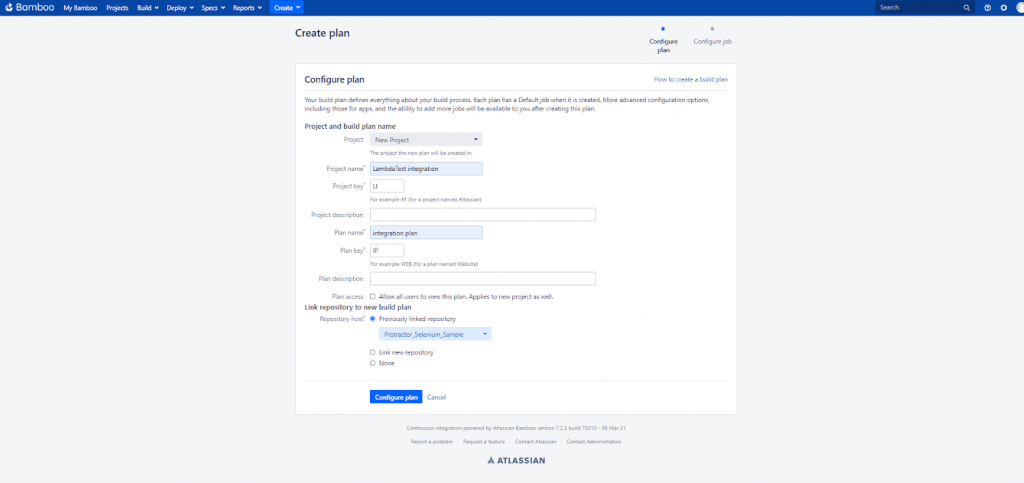
- Create a new Project named ‘LambdaTest integration’ and add a new plan named ‘integration plan’.
- After creating a new plan, create 3 tasks. To know how to create a new plan and task, just refer to the previous steps discussed earlier.
- The link to the new Git repository with Javascript project and Protractor tests is https://github.com/LambdaTest/protractor-selenium-sample-gitlab.git
- Provide the repository name at the time of construction of the new plan
- Fork this repository via your Git Account and replace <username> and <Access_Key> in *.conf.js
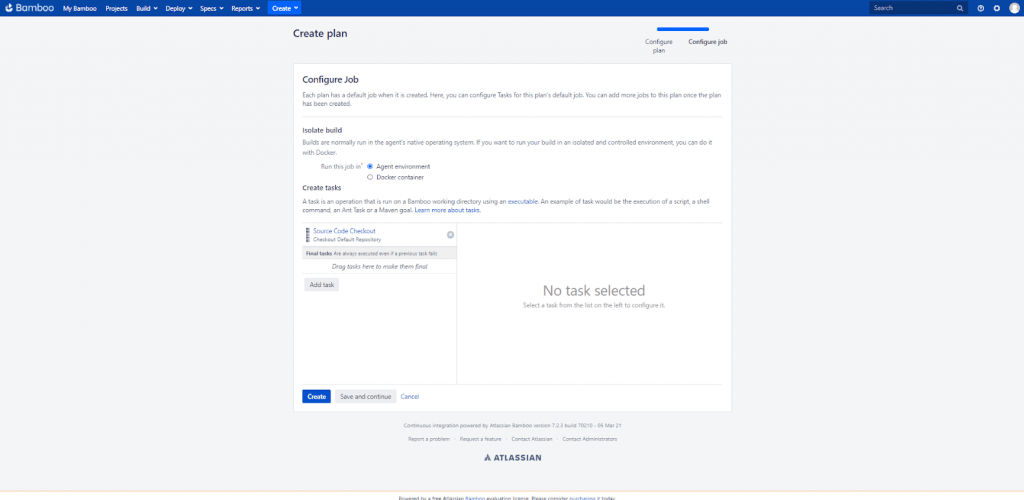
- Click on the Configure Plan button. Our first task will be source code checkout which is created by linking to the repository. The plan will be created with the default job and stage.
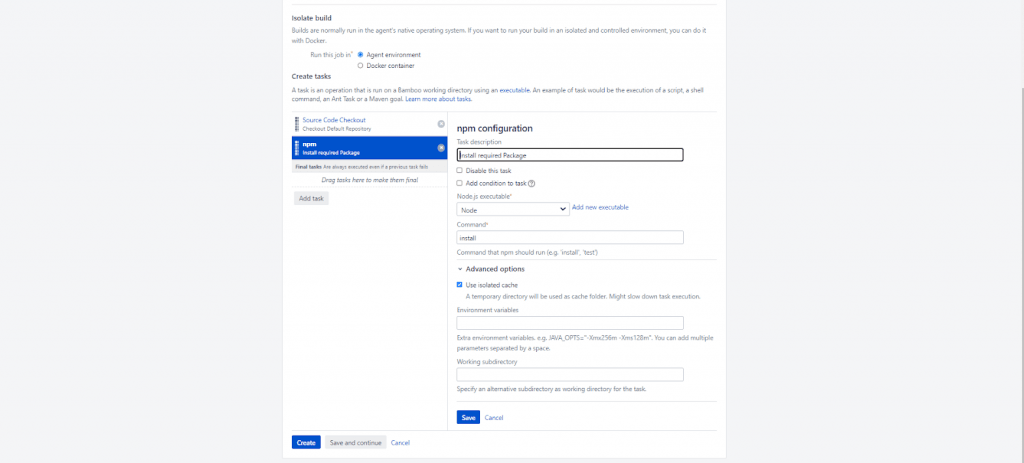
- Install required Package is the second task that needs to be added here. We will install Node.js. Click on ‘Add Task’ and in the popup dialog box, select npm. Specify the details as :
- In the third task, we will attempt Protractor testing which is an automation and end-to-end BDD testing framework that plays an important role in testing AngularJS Applications.
- Along with replacing bamboo.LT_USERNAME and bamboo.LT_ACCESS_KEY with your LambdaTest Account Username and Access Key in the Script, you will also need to configure the LambdaTest Tunnel.
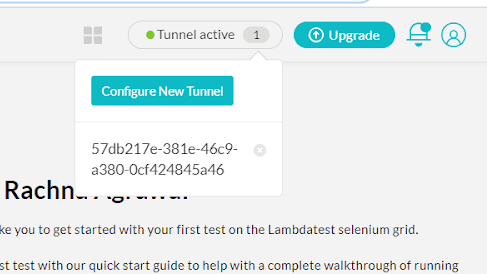
To configure the Tunnel in your local machine, login to your LambdaTest account. The Dashboard will appear, click on Automation from the left-side column on the dashboard. On the topmost right side, you will find a button named ‘Configure Tunnel’.
On click, you will find the WinrarZIP Archive with a binary file. Extract this zip to a new folder, and execute the command given above to start the Tunnel after navigating to that folder.
- Use the below command to connect the application to LambdaTest Selenium web automation platform:
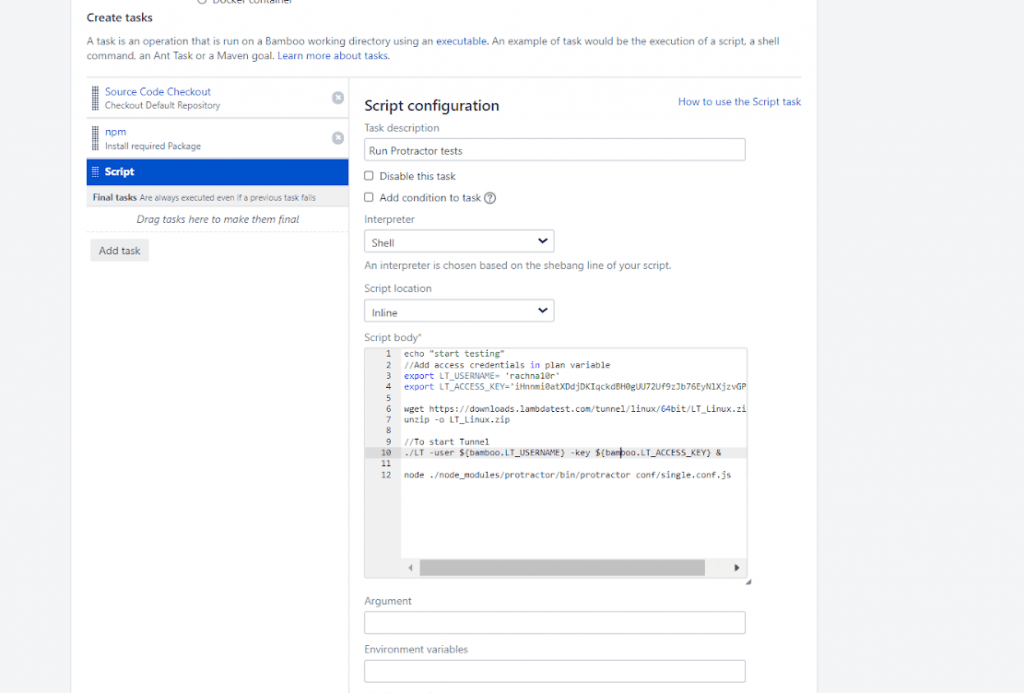
- The last step in Bamboo CI/CD with the PHP project is the creation of the script. Click on ‘Add Task’ and select ‘Script’ from the popup dialog box. As soon as it is selected, a new task will be added below npm.
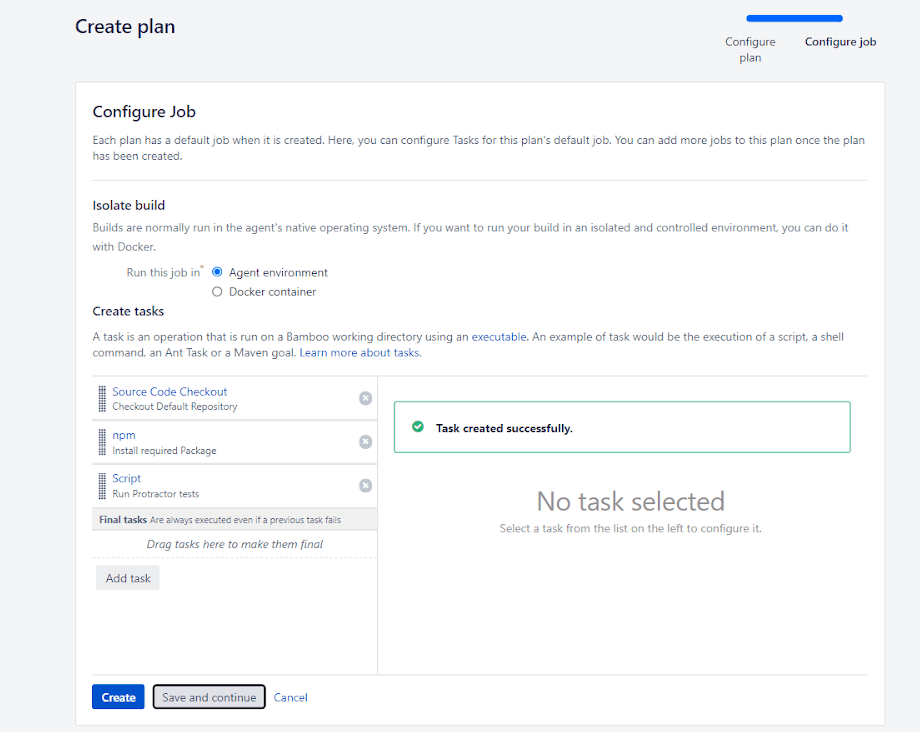
- Click on Save and then select the Save and Continue button.
- Enable the Plan and Run it by clicking the top-most ‘Run>Run Plan’ button. You will get all the details related to the execution of the Selenium web automation test in the tunnel.
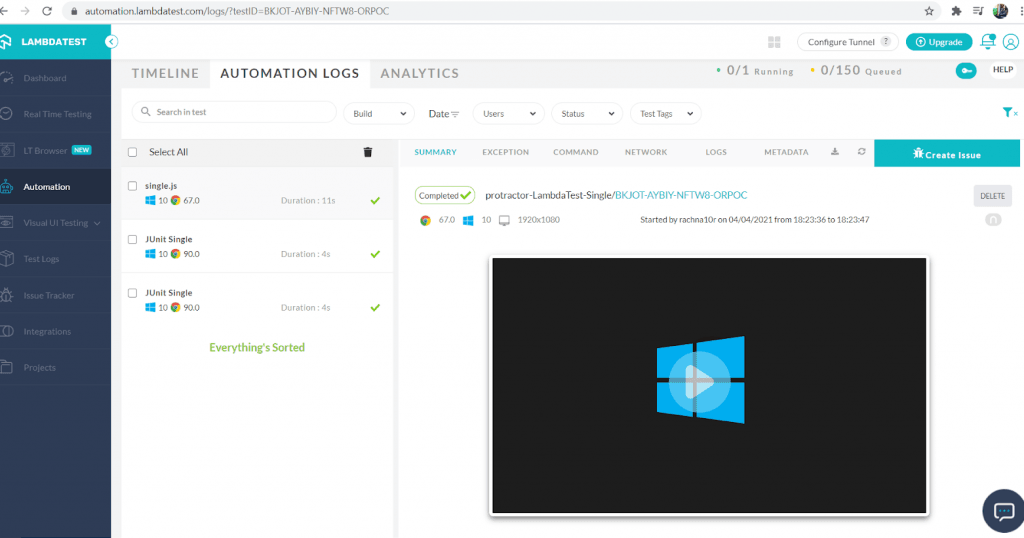
- You can check the status of the test using the Automation Dashboard on LambdaTest.
|
1 2 3 4 |
Task description: Install required Package Node.js executable: <Add the path to the location, where Node.js is installed in your computer> Command: install Advanced Options : tick on the ‘Use isolated cache’ Checkbox |
Read – Cross Browser Testing with Protractor and Selenium
You can install Protractor via npm install command:
npm install -g protractor
You can also create a configuration file known as conf.js, for the local machine. The code to be put in conf.js is:
|
1 2 3 4 |
exports.config = { seleniumAddress: 'http://localhost:4444/wd/hub', spec: ‘single.js’ }; |
To configure the protractor test for LambdaTest, you would need to use the below script:
|
1 2 3 4 5 6 7 8 9 10 11 12 13 |
echo "start testing" //Add access credentials in plan variable set LT_USERNAME=<Your_LambdaTest_Username> set LT_ACCESS_KEY=<Your_LambdaTest_Access_Key> wget https://downloads.lambdatest.com/tunnel/v3/windows/64bit/LT_Windows.zip unzip -o LT_Windows.zip //To start Tunnel LT --user %bamboo.LT_USERNAME% --key %bamboo.LT_ACCESS_KEY% node node_modules/protractor/bin/protractor single.conf.js |
|
1 |
LT --user %bamboo.LT_USERNAME% --key %bamboo.LT_ACCESS_KEY% |
|
1 2 3 4 |
Task description : Run Protractor Tests Interpreter : Shell Script location : Inline Script body : (This consist of script given above) |

You can also run multiple tests in parallel, which is the most demanding feature of the Selenium Grid. To run tests in parallel on LambdaTest, change the script body specified in the last step:
|
1 2 3 4 |
echo "start testing" set LT_USERNAME=<Your_LambdaTest_Username> set LT_ACCESS_KEY=<Your_LambdaTest_Access_Key> node node_modules/protractor/bin/protractor parallel.conf.js |
On the top right corner of LambdaTest Dashboard, you will see a Tunnel Active option, click on the same to monitor the test status.
Wrapping Up !

Kudos! Now, you know how to work with the most popular Continuous Integration Server – Bamboo CI/CD. You have also seen how it makes testing super easy and integrates perfectly with cloud based Selenium Grid like LambdaTest. Bamboo CI/CD can be used with PHP projects to run Selenium automation tests as scale.
CI/CD with Bamboo helps enterprises utilize the power of automation via cloud-based Selenium Grid. Though we demonstrated CI/CD with Bamboo for the PHP project, the popular CI tool is usable with projects spanning other popular programming languages.
Be sure to check the best CI/CD tools that help you build, test, and deploy at an accelerated pace. That’s all folks. I hope this tutorial would be a knowledge – packed bundle for all of you. If you find this useful, share it with your friends and on social media platforms too.
Happy Testing !!


Author’s Profile
Ritesh Shetty
Ritesh works as a content manager at LambdaTest. Previously worked in deep tech and artificial intelligence space, loves to reflect his ideas on tech and innovation.
Blogs: 7
Got Questions? Drop them on LambdaTest Community. Visit now


