
How To Set Up Continuous Integration With Git and Jenkins?
Suparna Khamaru
Posted On: February 23, 2021
![]() 80403 Views
80403 Views
![]() 16 Min Read
16 Min Read
There are various CI/CD tools such as CircleCI, TeamCity, Bamboo, Jenkins, GitLab, Travis CI, GoCD, etc., that help companies streamline their development process and ensure high-quality applications. If we talk about the top CI/CD tools in the market, Jenkins is still one of the most popular, stable, and widely used open-source CI/CD tools for building and automating continuous integration, delivery, and deployment pipelines smoothly and effortlessly.
In this article, we shall explore Jenkins in detail to further understand how it’s widely used for test automation of application development tasks, running tests, and final deployment into production. We will then learn how to set up continuous integration with Git Jenkins. If you are preparing for an interview you can learn more through Jenkins Interview Questions.
TABLE OF CONTENT
Getting Started With Jenkins Continuous Integration
Before starting continuous integration with Jenkins and Git, let us walk through some of the most common terminologies involved in building efficient CI/CD pipelines across various SDLC projects:
- Continuous Integration
- Continuous Delivery
- Continuous Deployment
- Source Control Management (SCM)
Let us understand what happens in each of the above stages:
1. Continuous Integration
- Continuous Integration
- Building Software implementation in a ‘Development’ environment.
- Performing Continuous Dev Testing such as:
- Unit Testing
- Layout Testing
- Continuous Delivery
- Deploying every developed build on the ‘Staging’ environment.
- Performing Continuous Automated Testing such as:
- Integration Testing
- Visual Testing / Screenshot Testing
- System Testing (End to End Testing)
- Acceptance Testing
- Continuous Deployment
- Deploying every build on ‘Production’ environment automatically, after passing all tests in Development and Staging environments
- Source Control Management (SCM)
- Contains all the developed source code of the project
- Maintains all the current and past state of the code/project
Source Control Management is also referred to as Version Control Software (VCS) and Revision Control System (RCS). While there are several source control management tools available in the industry, Git is the most popular and widely used one as of date, while there are others like SVN, TFS, Mercurial, CVS as well. This is another reason why continuous integration with Jenkins and Git is one of DevOps professionals’ most preferred integrations.
Before getting started with continuous integration with Jenkins and Git, let us dive a little deep into Jenkins and its setup.
Jenkins Overview

Jenkins was built by Kohsuke Kawaguchi in 2004 and is one of the most popular CI/CD tools for continuous integration and continuous delivery. With more than 16,000 stars and 6,500 forks on GitHub, Jenkins is being used by thousands of software companies. Its popularity comes from the fact that it is really good at what it does—building and releasing software pieces. You can refer to our comprehensive Jenkins tutorial for more information.
Core Concepts of Jenkins:
1. Project / Job
A Project or a Job is a collection of configurable instructions used for building developed source code, testing, collecting artifacts, sending notifications in emails, deploying in required environments, and much more.
2. Pipelines
A Jenkins pipeline is set of instructions and build steps configured in Jenkins to run all the processes in multiple environments in various steps.
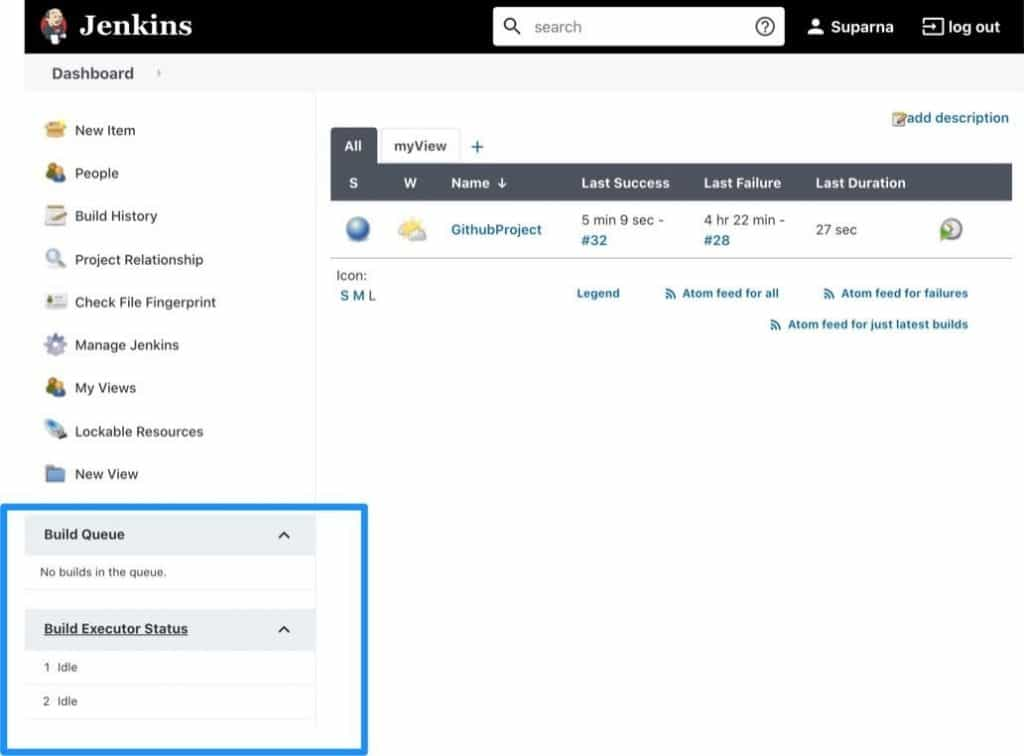
3. Build Queue and Build Executor Status
- Build Executor Status
- Build Queue
All the currently running builds/jobs are displayed in this section.
All the scheduled builds/jobs in a queue and are yet to run are displayed in this section of the home page.
4. Plugins
More than 1500 community-contributed plugins in Jenkins support building software varieties, automate tests, and deploy projects for production releases.
5. Master – Agent
Executes in remote parallel machines for shorter build and test running time using additional resources in the cloud.
- The master node is usually the machine where Jenkins is configured to be running.
- Agent nodes are generally the other machines that receive instructions from the Master node to help the executions run and finish faster in parallel.
Read – Comprehensive Guide To Jenkins Declarative Pipeline [With Examples]
How to Set Up Jenkins?
Before learning how to set up continuous integration Git Jenkins, you need to set up a Jenkins server in your system. If you already have the setup, you can skip this section and get right to continuous integration with Jenkins and Git. For now, let us walk through the steps by downloading, installing, and configuring Jenkins from scratch.
How to Download Jenkins?
Step 1: Download Jenkins
Go to the official Jenkins website and download Jenkins.
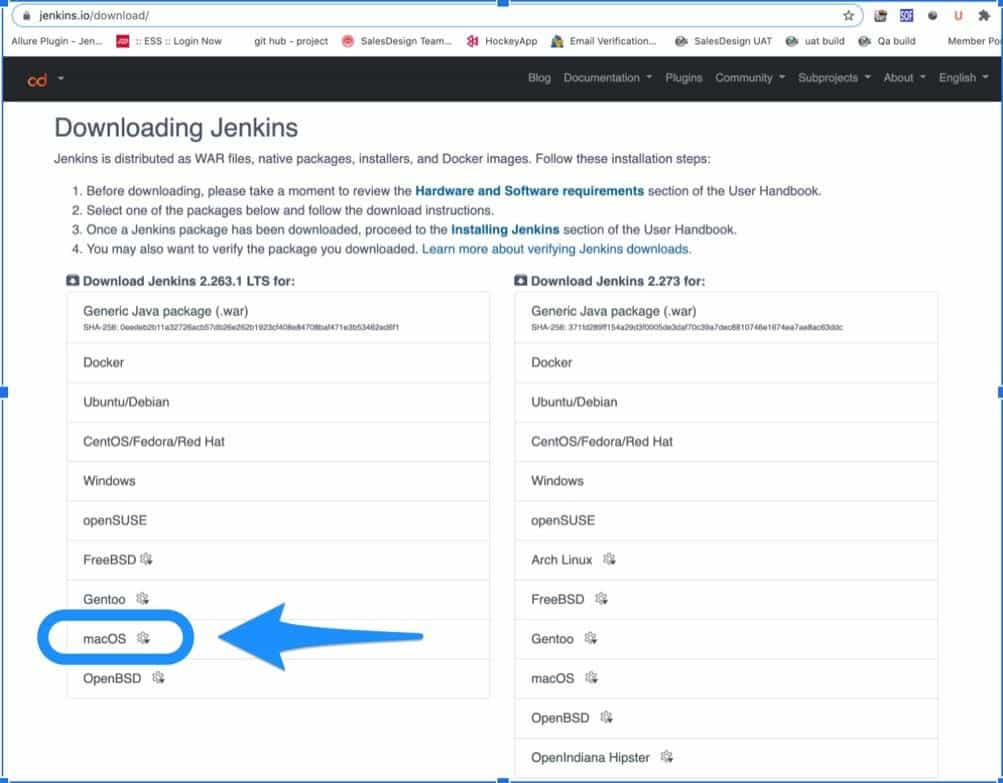
For example, if one has a Windows machine, a jenkins.msi file might start getting downloaded.
While in the case of macOS, one may initiate installing Jenkins via the Homebrew package manager by following the commands provided in instructions on the same page as mentioned above.
Note: In this blog, I have taken an example of installing Jenkins on macOS.
Step 2: Installing Jenkins on macOS.
Now, let us look at the process of installation of Jenkins locally on a macOS. Let us open the Terminal app in mac and run the below command and wait for the command to install all required tools on the mac machine successfully:
brew install jenkins-lts
Please note that the command shall work only when Homebrew is already pre-installed in the macOS machine. If not installed, kindly install Homebrew before running the above command in mac.
Step 3: Start Jenkins
Post successful installation of Jenkins, run the following command to start Jenkins:
brew services start jenkins-lts
Step 4: Configuring Jenkins as an Admin
Once Jenkins is successfully started, let us validate if the local Jenkins server is starting in the machine by navigating to the following URL in your browser:
http://localhost:8080
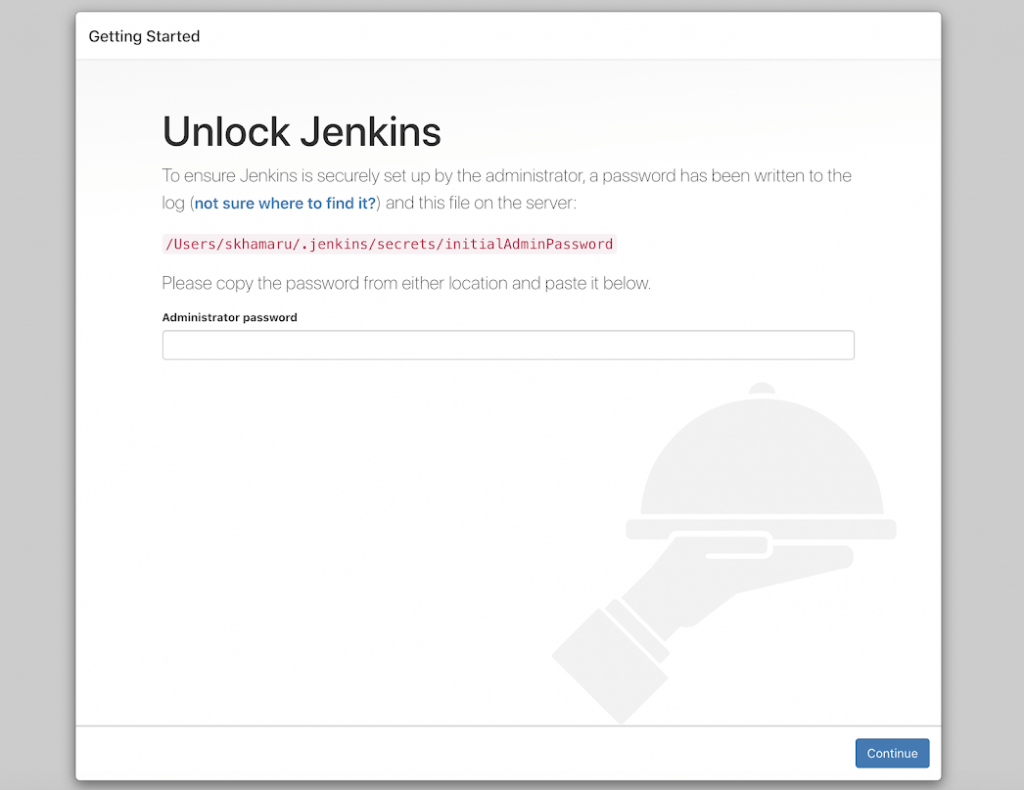
Suppose the “Unlock Jenkins” web page is displayed after navigating to the above-mentioned URL without an error message. In that case, the Jenkins server is confirmed to be up and running on the local machine.
Copy the above path for Admin Password highlighted in pink in the figure
Step 5: Execute the command.
Open Terminal app, and paste the above copied path as provided below:
sudo cat <copied-path>
Example:
sudo cat /Users/skhamaru/.jenkins/secrets/initialAdminPassword
Post successful execution of the above command, the initial admin password can be found displayed as shown in the figure below:
![]()
Step 6: Unlock Jenkins
Copy the newly found initial admin password from the terminal and paste it in the “Administrator password” field in the previously displayed Jenkins web page, as shown below.
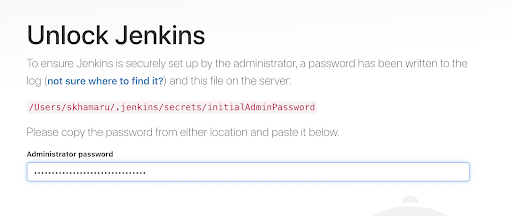
Then, click on the ‘Continue‘ button.
Step 7: Customize Jenkins
Click on “Install suggested plugins” to install the most common Jenkins plugins.

Step 8: Create First Admin User
Once all the plugins are installed successfully, the first admin credentials will be created for the newly set up Jenkins server.
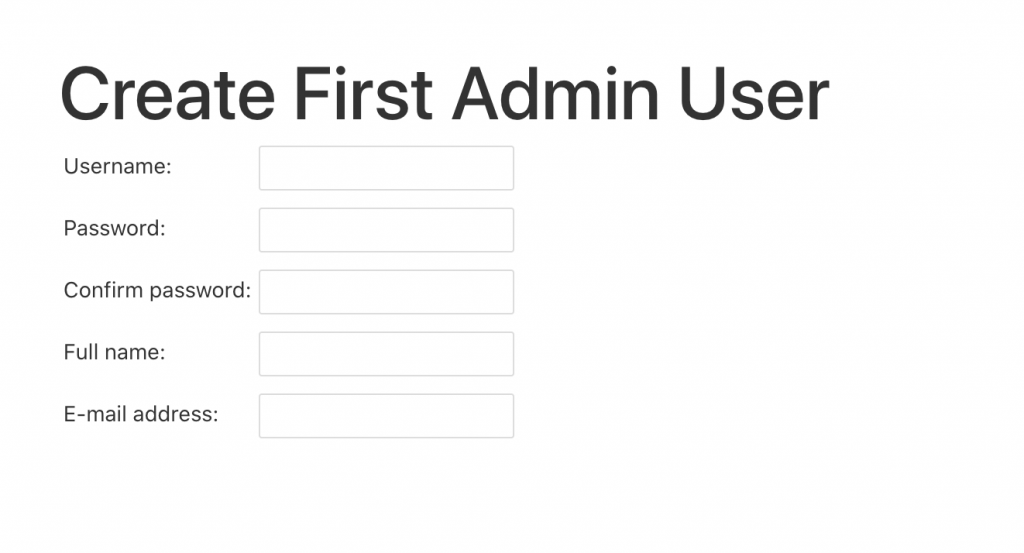
Enter valid credentials for the new admin for future configuration changes in Jenkins
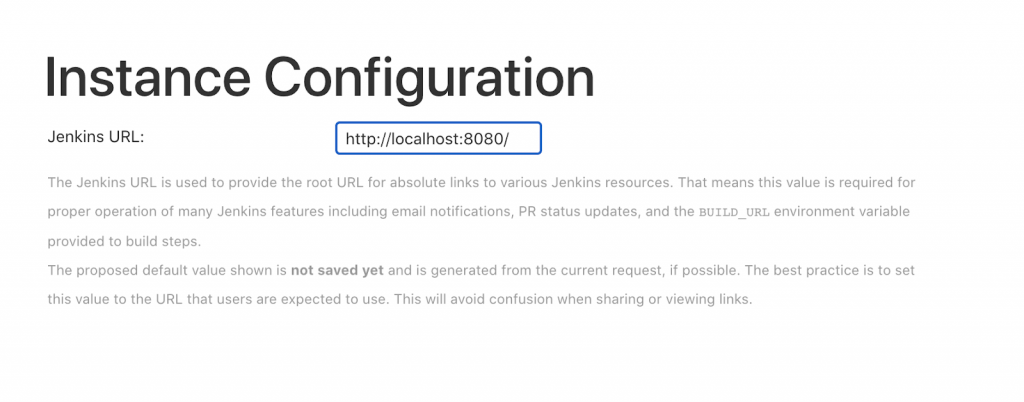
Step 9: Instance Configuration.
Make sure that the below URL is as per configuration, post which “Save and Continue.”
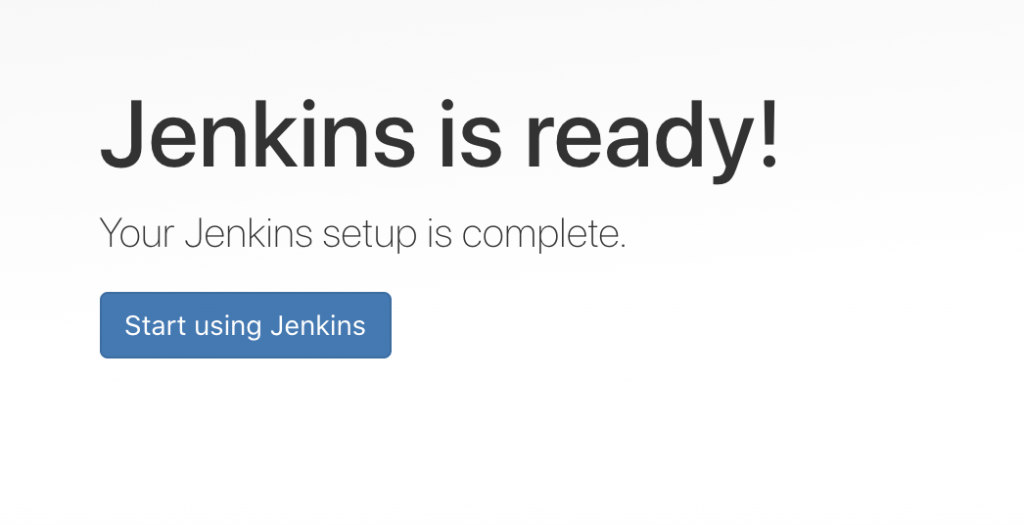
Step 10: Complete the Setup
When the page below is displayed, click on the “Start using Jenkins” button and explore the newly set up Jenkins server’s user experience.
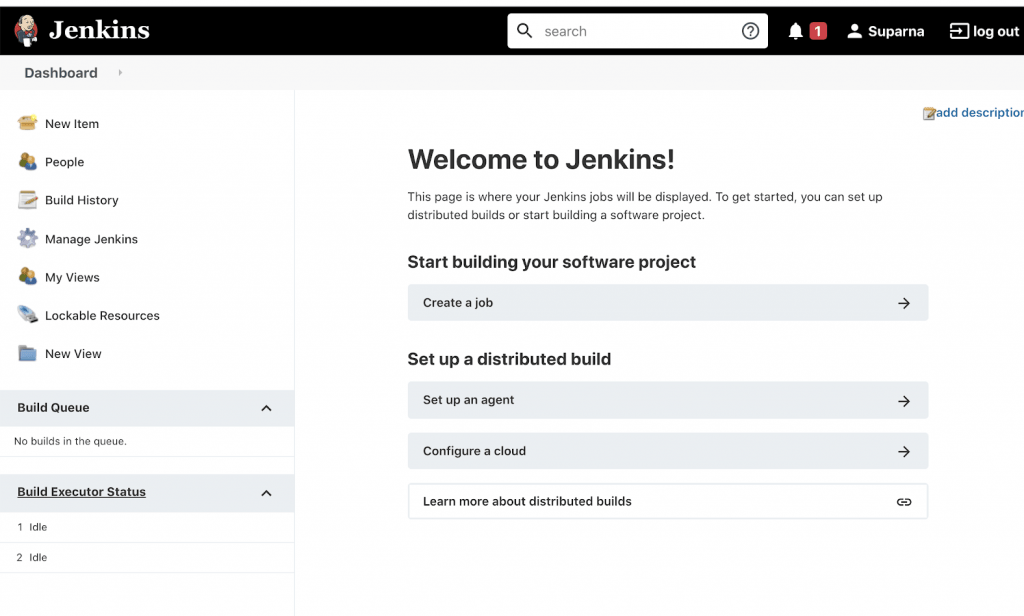
The newly logged-in admin page shall look as displayed below:
Setting up Continuous Integration with Git Jenkins
While there are different ways for continuous integration with Jenkins and Git, let us explore the easiest way of integrating using GitHub’s “Personal access tokens” by following the below steps.
Configuring GitHub for Jenkins Continuous Integration
Step 1: Go to your Github profile and navigate to Settings.
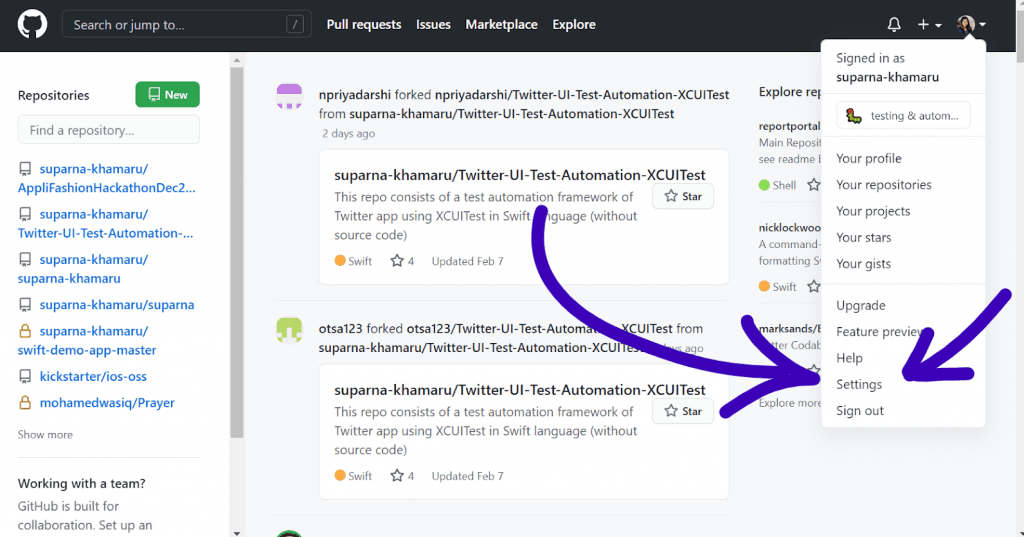
Step 2: In the settings screen, click on the “Developer settings” menu and click on “Personal access tokens.”
Step 3: In the “Personal access tokens” tab, click on the “Generate new token” button and provide necessary details as desired (an example is provided in the below figure), and click on the “Generate token” button.
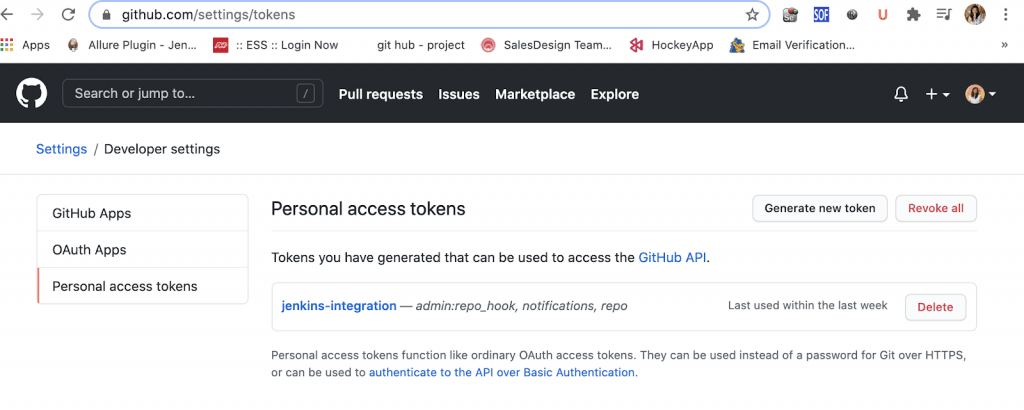
Step 4: Post successful creation of the token, the newly generated secret text in GitHub is to be copied for future usage in Jenkins.
Configuring Jenkins for GitHub Integration
Step 5: Next, go to Jenkins dashboard.
- Click on “Manage Jenkins.”
- Click on “Configure System” and go to the following ‘GitHub‘ section.
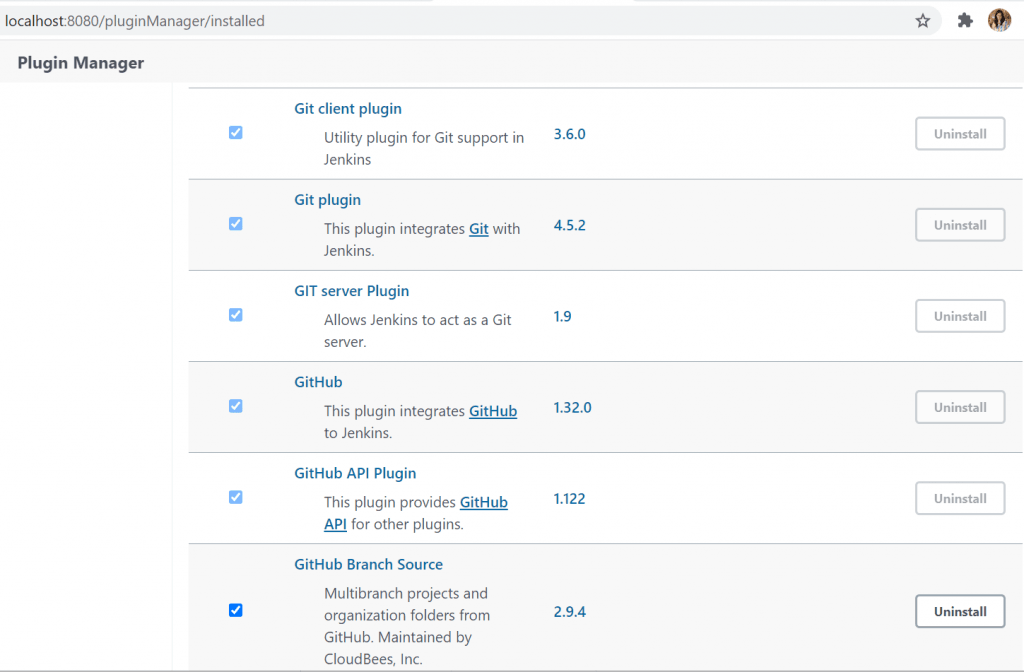
Note: If the above “GitHub Server” section is found missing in Jenkins, make sure to manually install the missing GitHub plugin from the installed list of tools shown below.
Steps to follow- Go to: Jenkins Dashboard -> Manage Jenkins -> Manage Plugins -> ‘Available’ tab -> Enter Git in search bar and filter -> Install required plugin
Step 6: Make sure to add the copied secret key in the above credentials by:
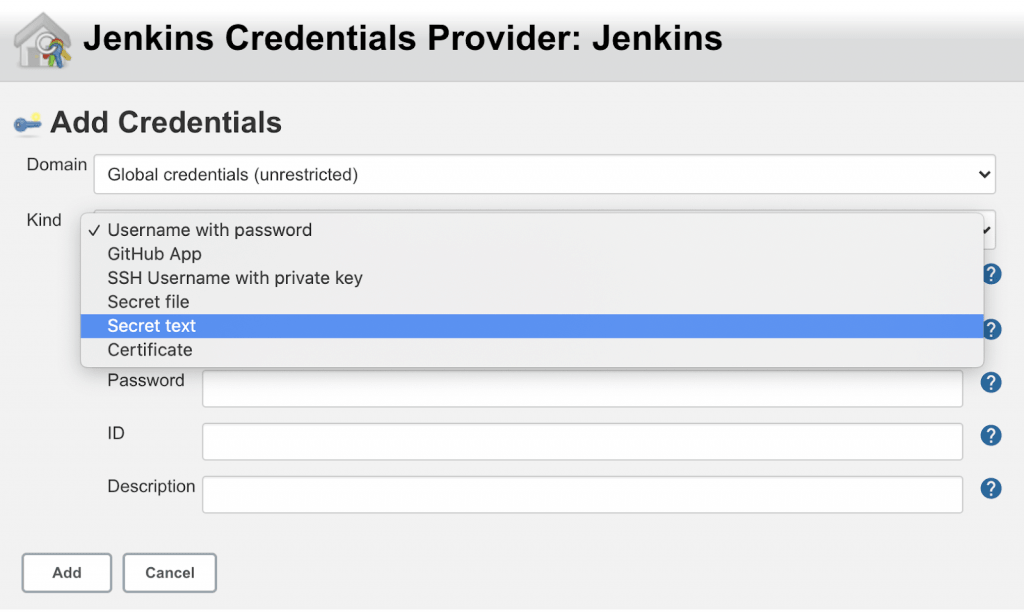
- Click on the “Add” -> “Jenkins” button in the Github Server section’s Credentials field.
- Select “Secret text” from the “Kind” dropdown.
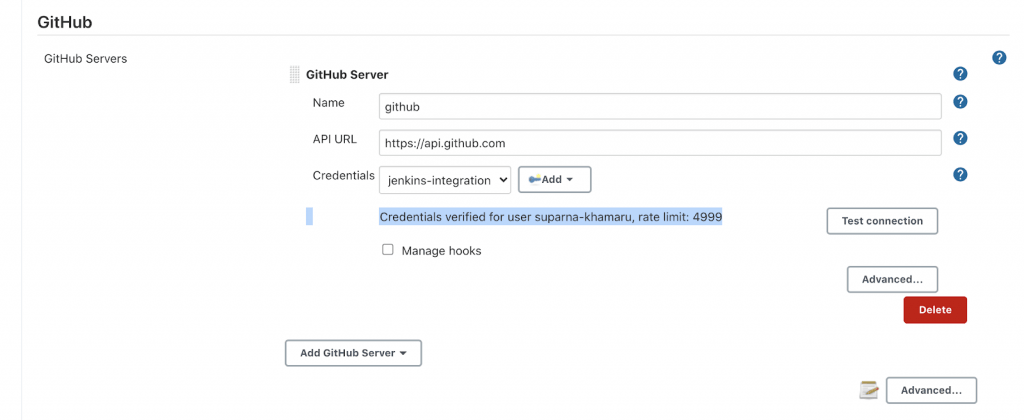
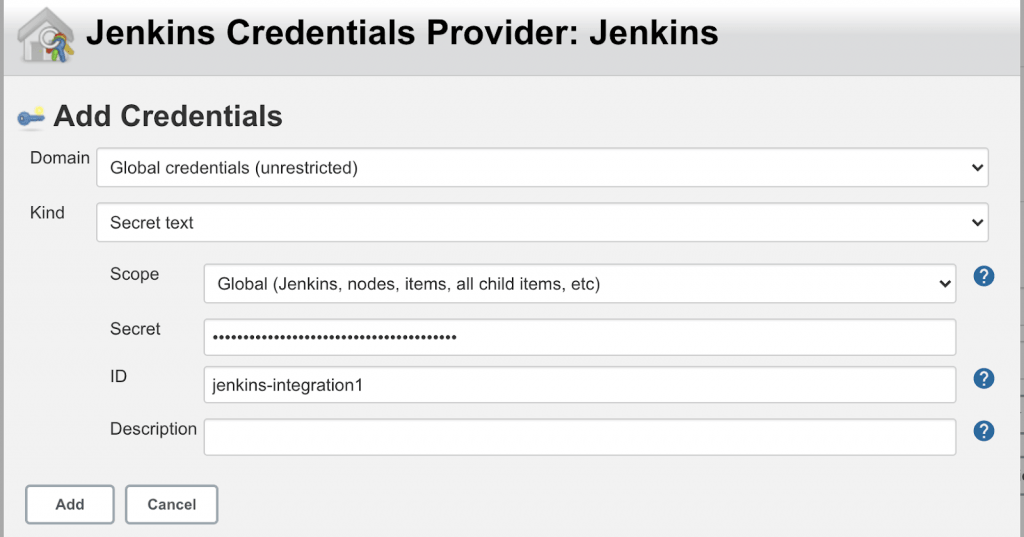
Step 7: Paste the previously copied secret text from GitHub in the Secret field as displayed below, while providing an ID such as “jenkins-integration,” and then click on the “Add” button.
Step 8: Once the Secret text is successfully added, let us test the connection by clicking on the “Test connection” button and verify the confirmation message as highlighted below.

Creating Your First Jenkins Job Integrated Into a Test Project
Let us take a sample java project already integrated and configured with the Ant build tool to ease convenience. You can choose any sample project of yours if you like. Let us follow the below steps in Jenkins Dashboard to configure the same.
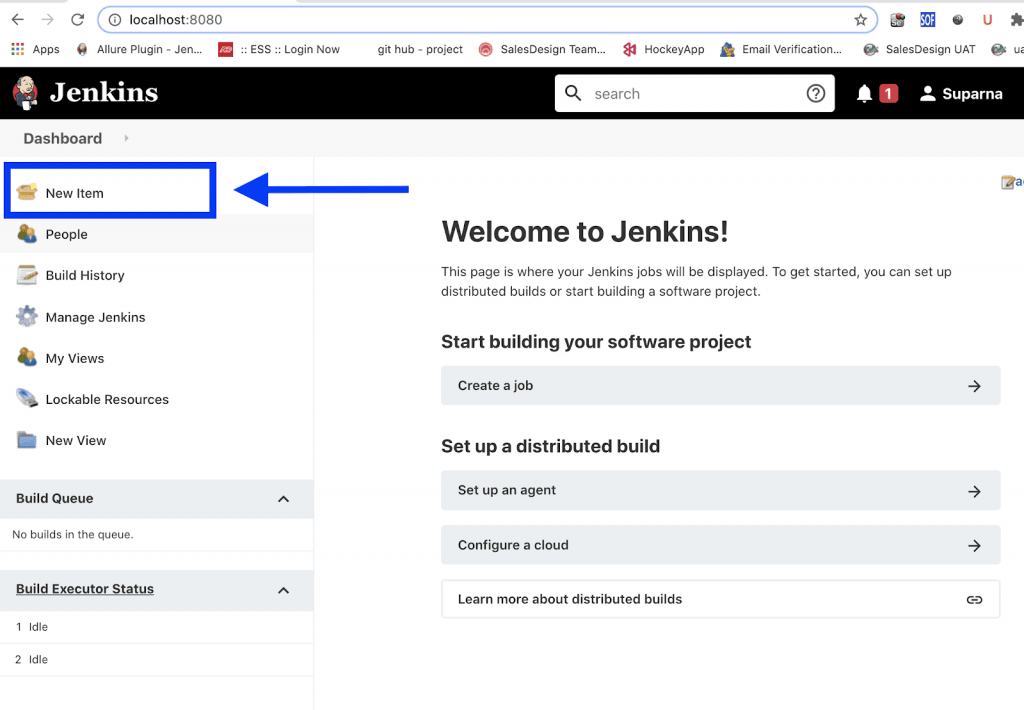
Step 1: Click on “New Item” in the Jenkins user interface dashboard on the left side.
Step 2: Let us start with creating a Freestyle project in Jenkins for ease of understanding for a beginner. However, we can choose to select any of the following:
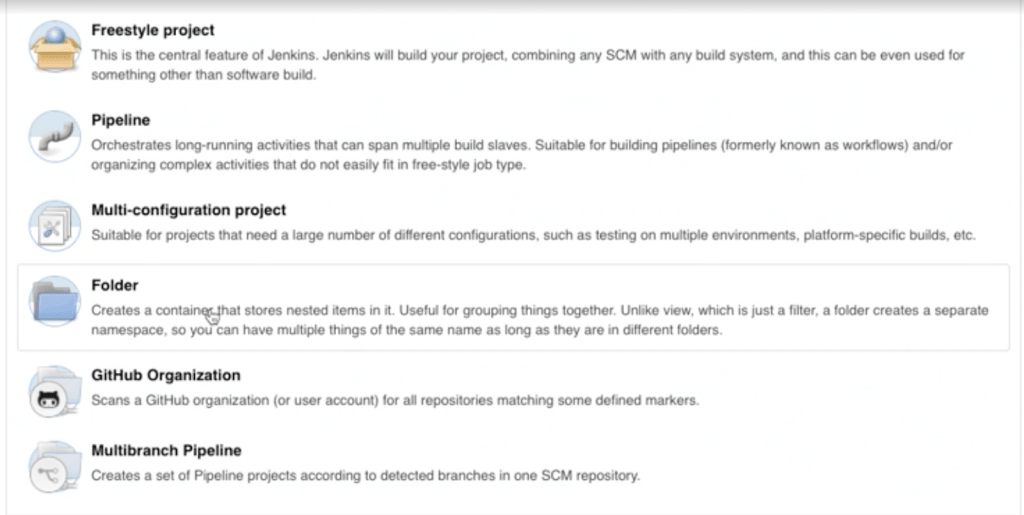
Enter a project name in the requested textbox field and select the Freestyle project as shown on the image above.
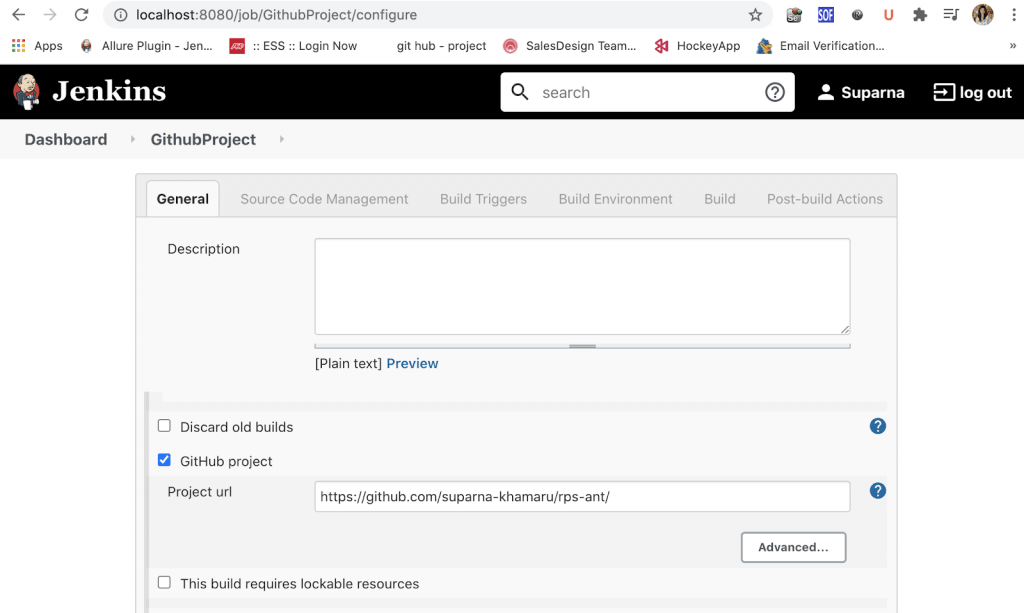
Step 3: In the General section, check the field “GitHub project” and enter a valid Ant project as given below.
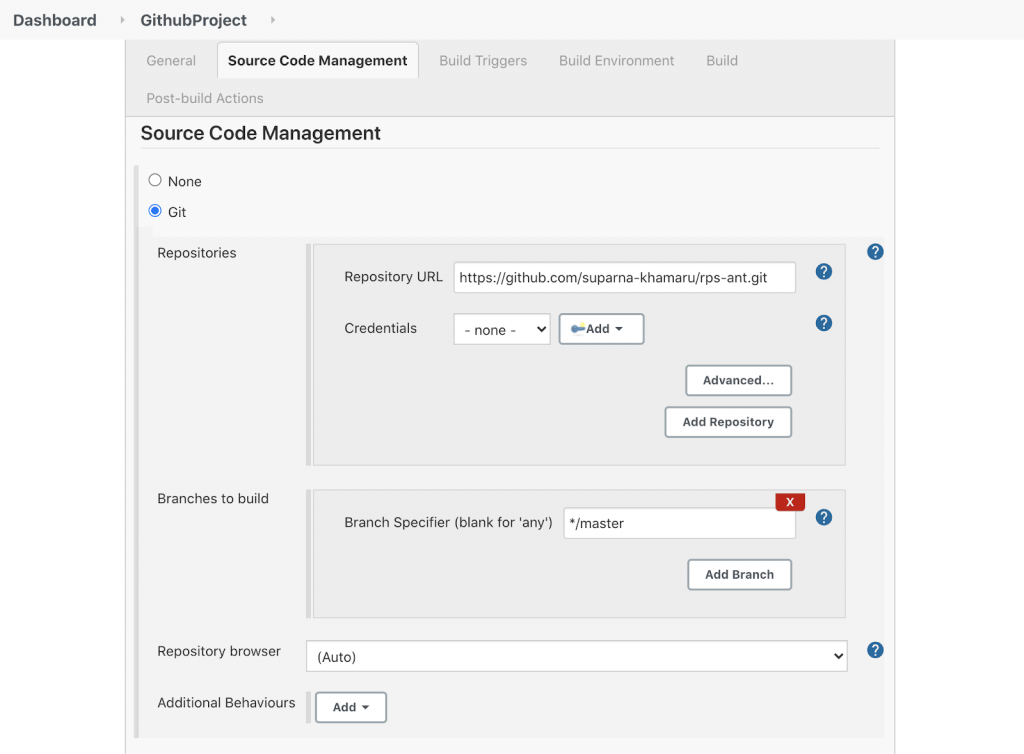
Step 4: Then, go to the “Source Code Management” section and enter the same link as above with an extra .git extension at the end of the URL, as shown in the below screen.
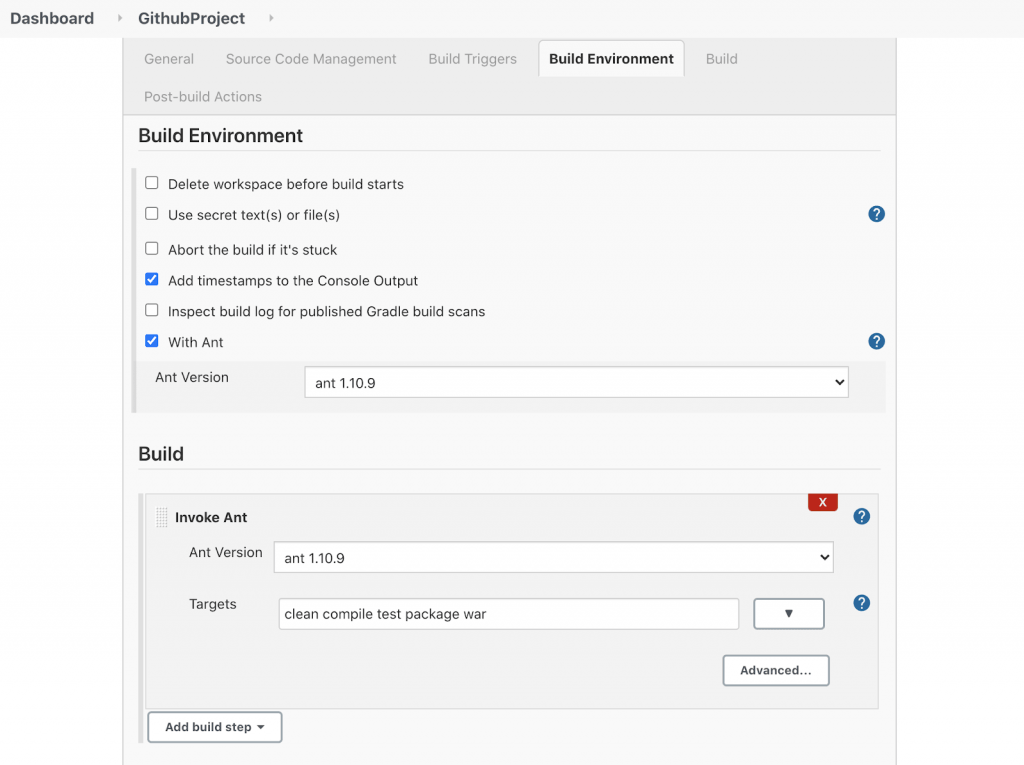
Step 5: Go to the “Build Environment” section and add the following steps shown in the image below. Make sure to add the command in the Targets field under the Ant Build step:
clean compile test package war
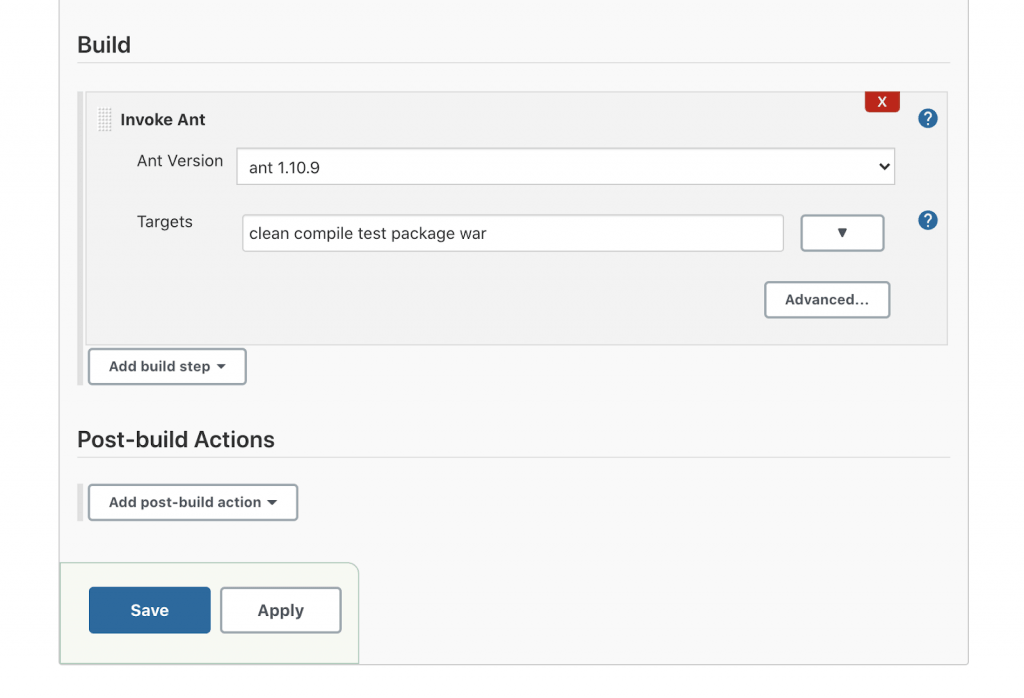
Step 6: Click on the “Apply” button and then click on the “Save” button.
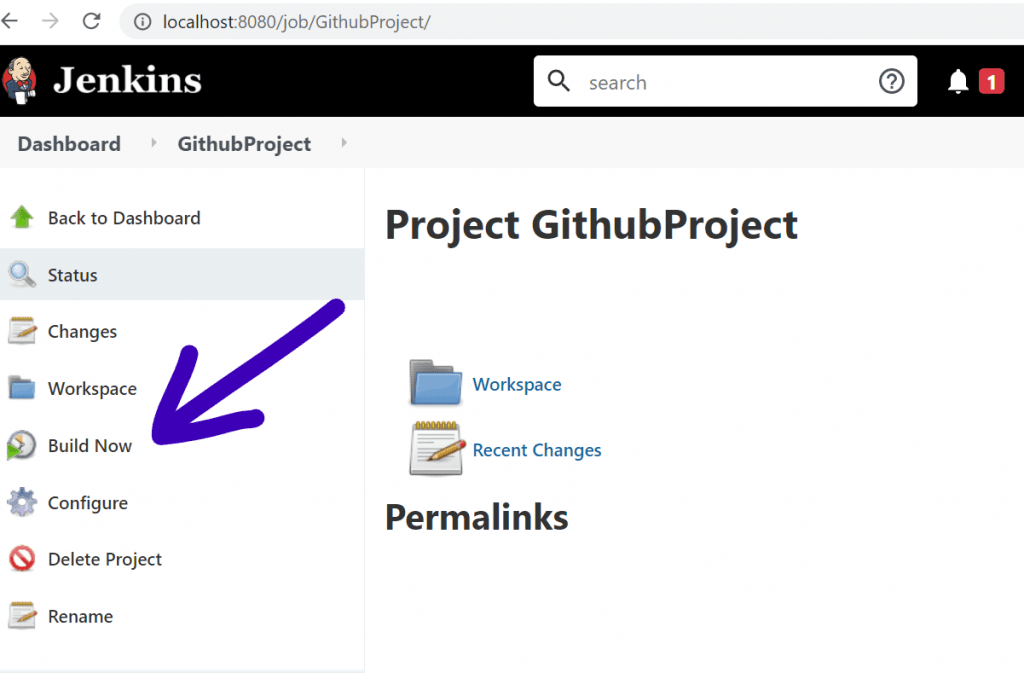
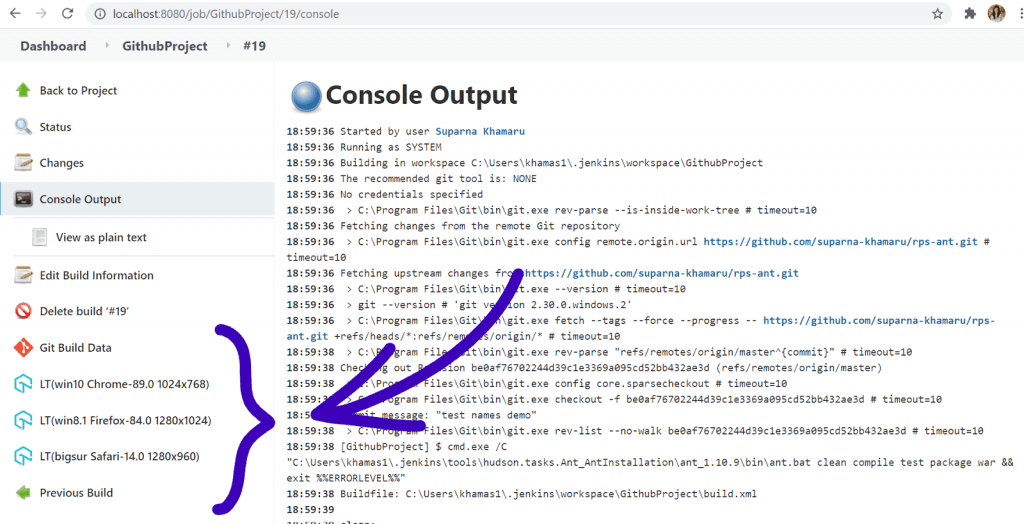
Step 7: Once the new Jenkins configurations are successfully saved, the user shall be navigated back to the Project dashboard screen, where the user now clicks on the “Build Now” menu on the left-hand side of the displayed dashboard screen.
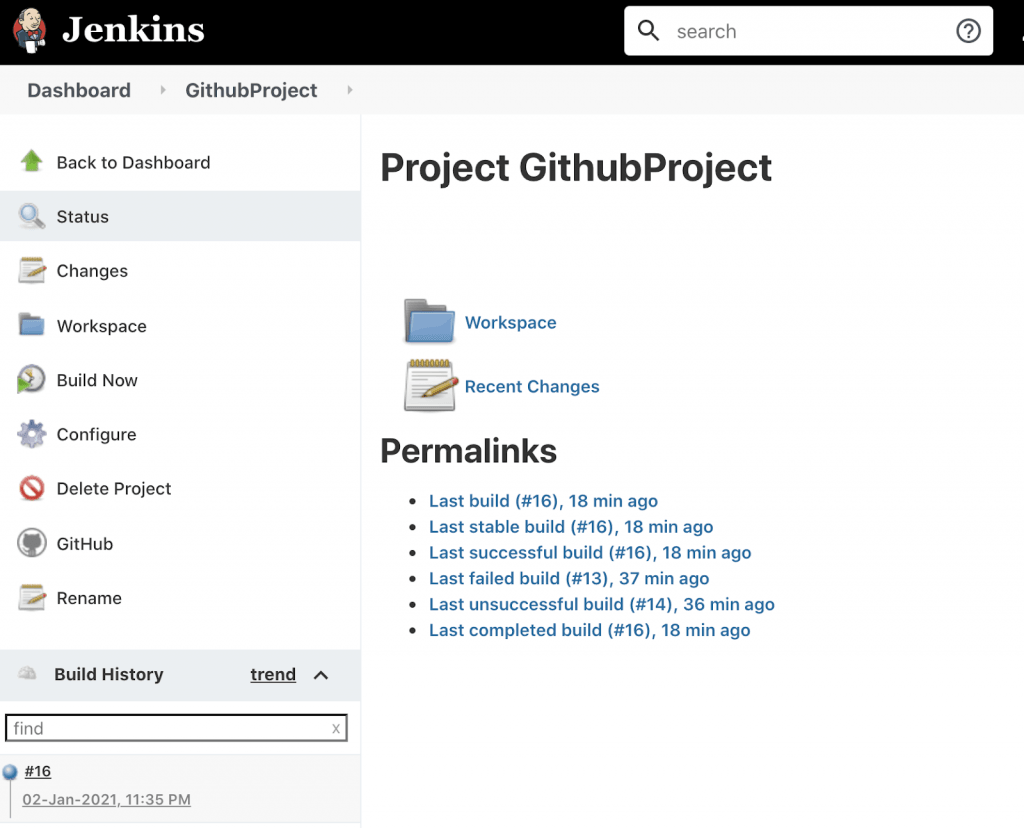
Step 8: As the Build has started to run, users shall be able to note the scheduled build running in the “Build History” section with a visibly blinking blue round icon. Clicking it will navigate the user to the respective “Build Status” page.
Users must click on the “Console Output” menu to walk through the build logs generated in the console while building in Jenkins.
Analyzing JUnit Test Results in Jenkins
Now that we have learned how to set up continuous integration with Git Jenkins and how to create the first Jenkins Continuous integration job within a test project, it is time to take it one step ahead. After creating a job with a Java project, you might also want to analyze the test results. This can also be done using Jenkins.
Let’s see how this can be done for JUnit.
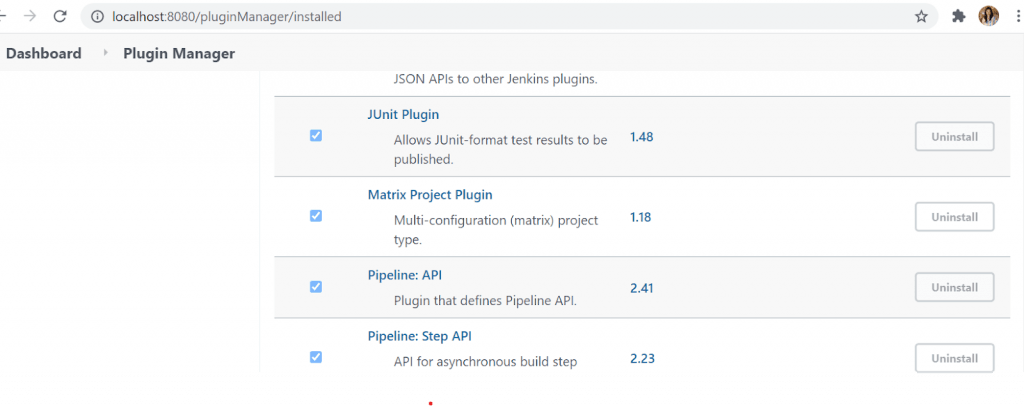
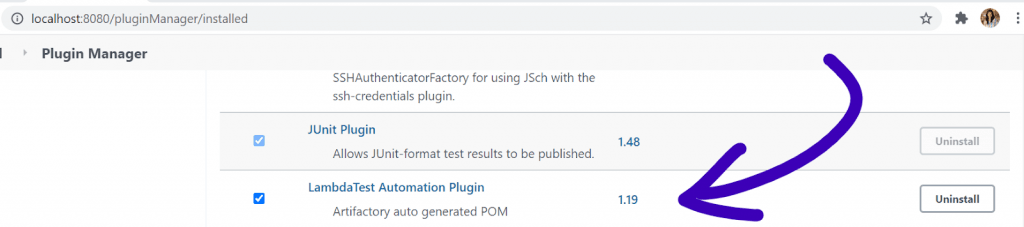
Step 1: Make sure “JUnit Plugin” is already installed in Jenkins.
Go to Jenkins Dashboard -> Manage Jenkins -> Manage Plugins -> Click on the ‘Installed’ tab to view all the already installed plugins.
Step 2: Go to Project -> Click on ‘Configure’ -> Click on ‘Build’ tab.
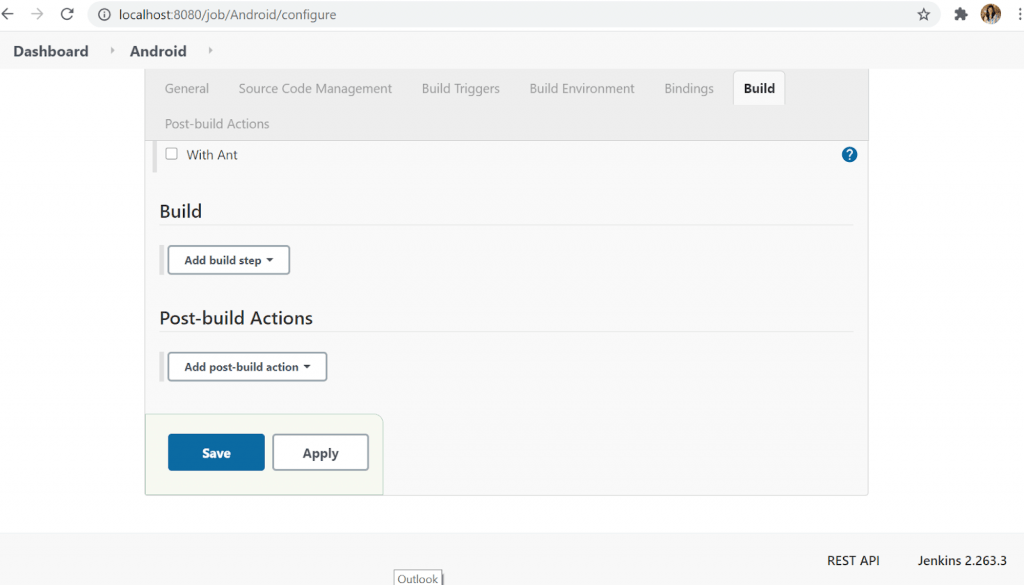
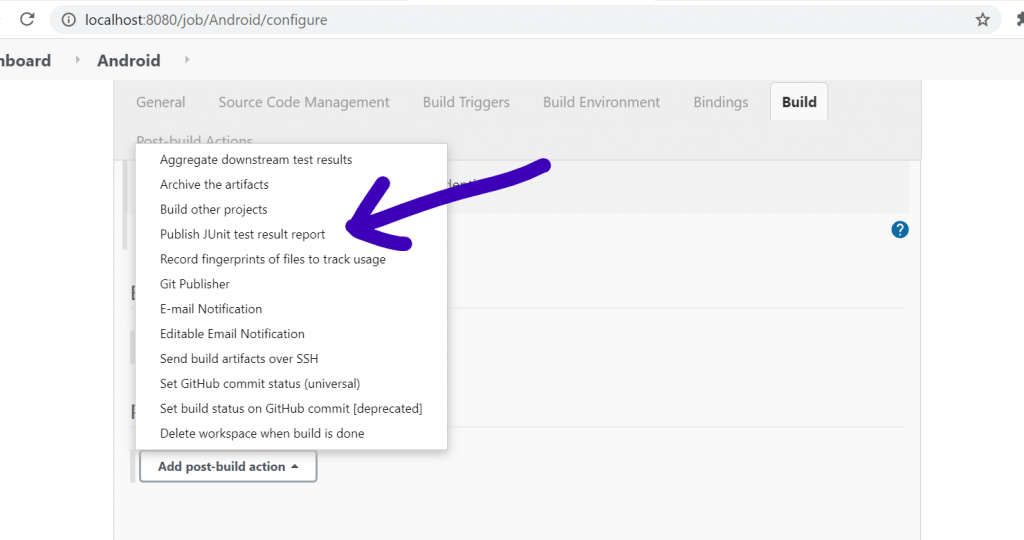
Step 3: Click on the “Add post-build action” button at the bottom of the page.
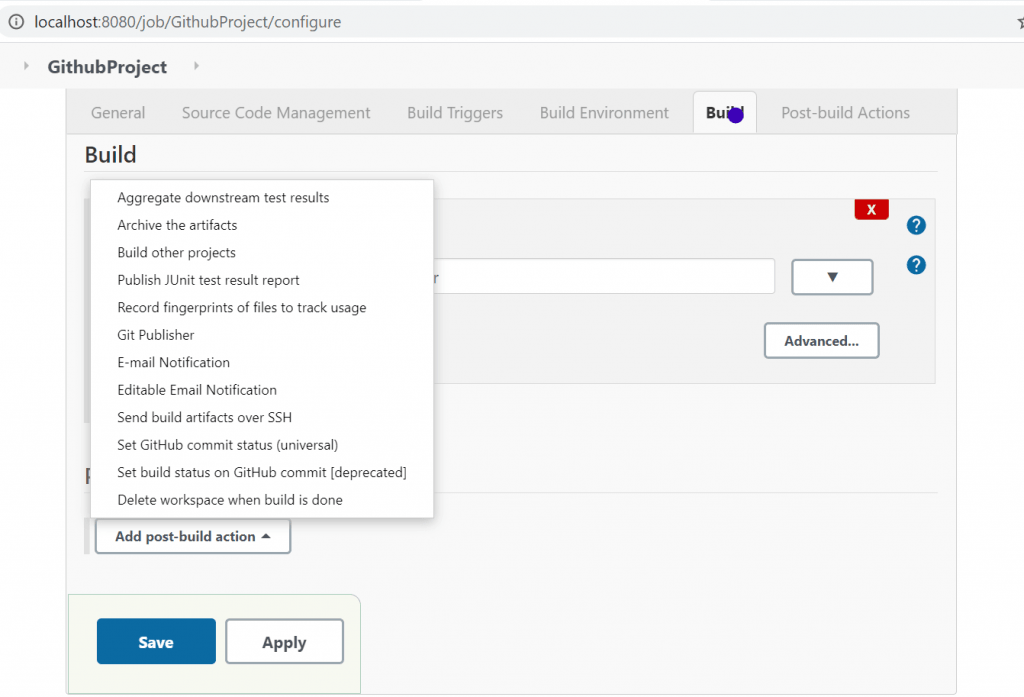
Step 4: From the above list of items displayed in the dropdown, select the “Publish JUnit test result report” option.
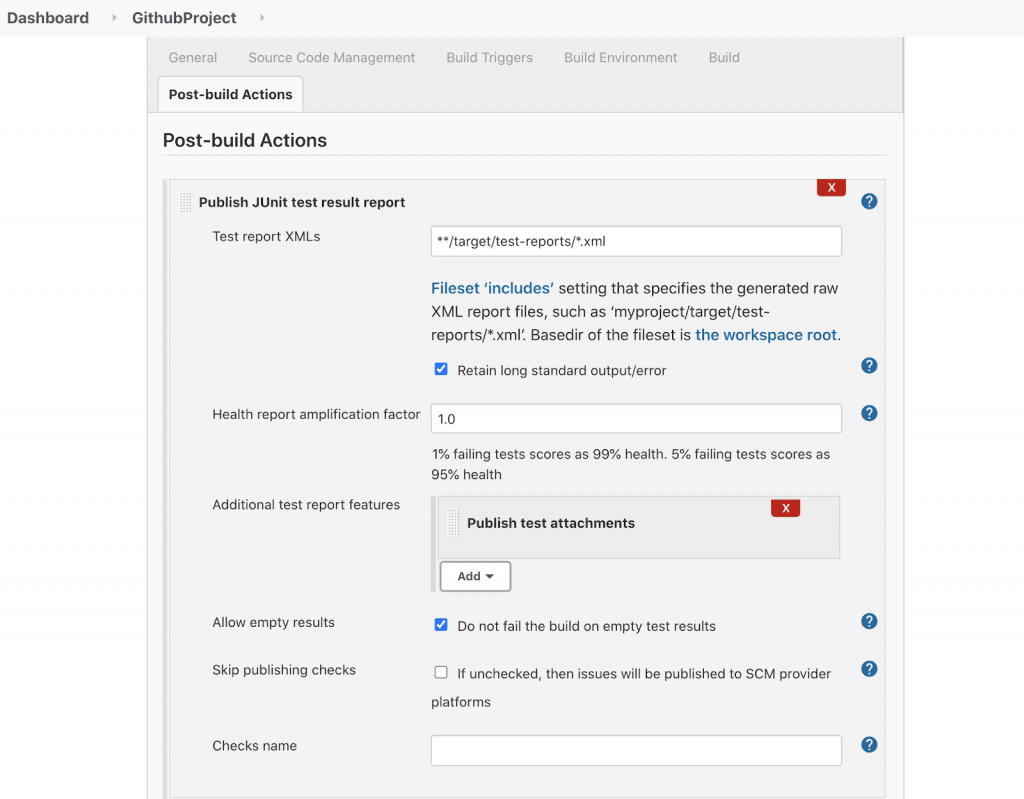
Step 5: Add the generated XML test report XML path from the workspace in the Test report XMLs field as shown below.
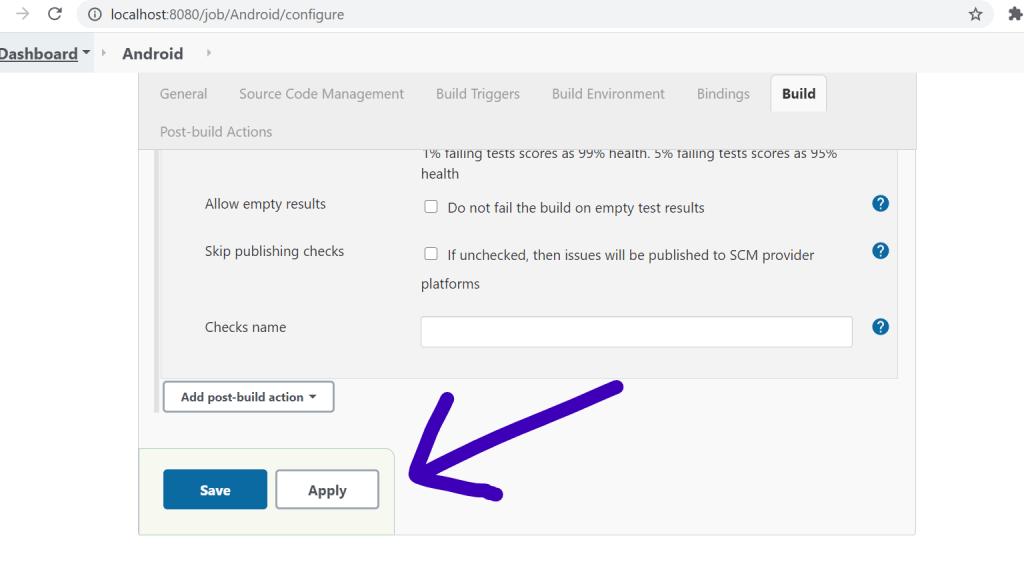
Step 6: Click on the ‘Save’ and ‘Apply’ buttons.
Step 7: Click on the “Build Now” button and allow the scheduled build to complete.
Step 8: Observe that a “Test Result Trend” graph is generated on the project dashboard’s right side.
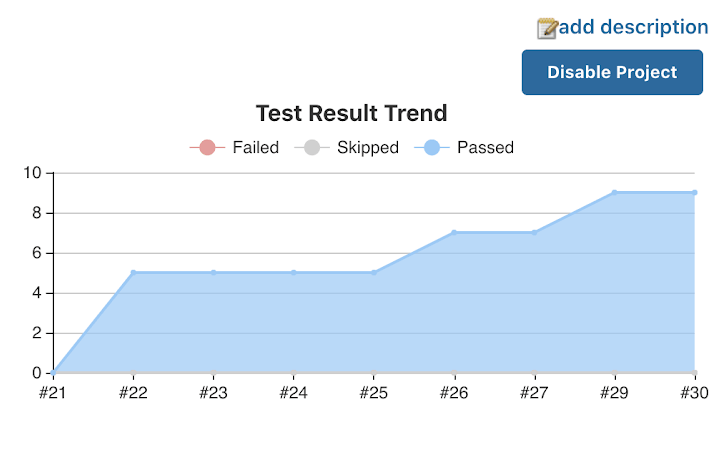
Step 9: On closer observation, we can observe that the x-axis of the newly generated graph consists of Build Ids, and the y-axis is composed of several test cases run in each build.
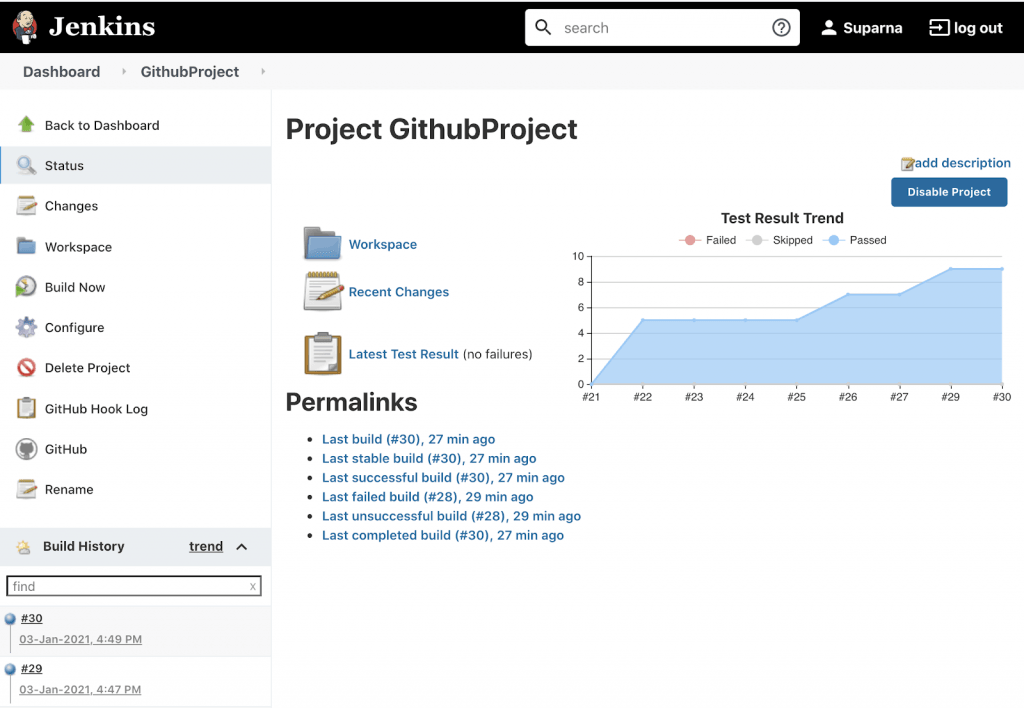
Step 10: Along with the generation of test result trend graphs, we can also observe that the “Latest Test Result” report is also generated in the dashboard to help users closely analyze the run tests status in each build.
Integrating LambdaTest Automation Plugin
Continuous integration with Jenkins and Git is a great way to streamline your test automation scripts. Furthermore, you can also implement a Jenkins Continuous integration to make your scripts easier to test. LambdaTest provides a Jenkins plugin to easily automate your Selenium test scripts by connecting your Jenkins CI instance to Selenium. If one follows the instructions as provided in the official website of LambdaTest, we can also observe that LambdaTest integration works smoothly to the above test run as well on any desired test environment.
I simply followed the steps provided on the official website to check how the integration works in Jenkins, and to my surprise, it worked like magic without any extra effort.
And the tests passed successfully in all the configured test environments!

Summary
There is still an ocean left in Jenkins to explore, learn, integrate varieties of plugins, configure builds in several combinations of languages and source code repositories and make the process better with the integration of pipelines in different stages and steps across projects.
Jenkins continuous integration is undoubtedly a one-step gateway for running quicker and automating robust ways to integrate the entire SDLC pipeline stages of build, test, and deploy effortlessly and efficiently by yourself at almost no extra cost. Now take your test scripts one step ahead with continuous integration with Jenkins and Git.
Thanks for reading this article! Leave a comment below if you have any questions. You can always post any questions or queries on LambdaTest Community for immediate assistance.
Frequently Asked Questions
What is the difference between Git and Jenkins?
Git is a Source Control Management tool, also referred to as Version Control Software (VCS) and Revision Control System (RCS). Software engineers use it to keep track of changes in any set of files they are working on collaboratively, usually when creating a piece of software. On the other hand, Jenkins is an open-source server that is written entirely in Java. The continuous integration process can be automated by executing a series of actions in an automated fashion.
How does Jenkins integrate with Git?
Go to Jenkins dashboard, click on “Manage Jenkins.” Now follow these steps- Manage Plugins -> ‘Available’ tab -> Enter Git in search bar and filter -> Install required plugin.
After the installation, all you need to do is click on “Configure System” and go to the ‘GitHub’ section. Click on the “Add” -> ‘Jenkins’ button in the Credentials field in the Github Server section.
Select “Secret text” in the ‘Kind’ dropdown. Enter the secret text that can be generated from the Developer Settings of your GitHub profile.
How do I set Git credentials in Jenkins?
In your GitHub profile’s settings screen, click on the “Developer settings” menu and click on “Personal access tokens.” Click on the “Generate new token” button and provide necessary details as desired, and click on the “Generate token” button. Copy this token.
Now go to your Jenkins server, Click on the “Add” -> ‘Jenkins’ button in the Credentials field in the Github Server section. Select “Secret text” in the ‘Kind’ dropdown. Paste the previously copied token from GitHub in the Secret field as displayed below while providing an ID such as “jenkins-integration,” and then click on the “Add” button.


Author’s Profile
Suparna Khamaru
Works as Principal Software Engineer in RSA Security. Specializes in Mobile Automation & Quality holding several years of experience across varieties of world-class mobile and web applications.
Blogs: 3
Got Questions? Drop them on LambdaTest Community. Visit now


