How to Run Cypress With Jenkins [Cypress Jenkins Tutorial]
Enrique
Posted On: May 20, 2024
![]() 246983 Views
246983 Views
![]() 12 Min Read
12 Min Read
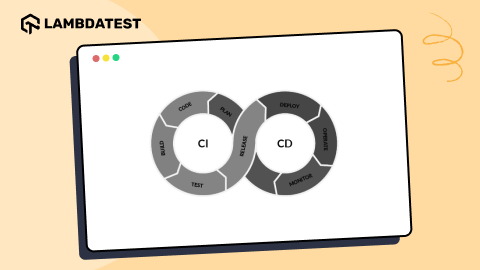
Cypress is a JavaScript-based framework for performing end-to-end testing of websites. When performing Cypress testing, you will probably come across the need to integrate your Cypress tests with CI/CD tools like Jenkins to automate your build and deployment process.
Integrating Cypress with Jenkins pipelines lets developers and testers streamline their testing process, where tests are run automatically on every code commit, providing quick feedback to developers and helping catch bugs early in the development process.
In this Cypress Jenkins tutorial, we will dive deep into integrating Cypress tests with the Jenkins pipeline.
TABLE OF CONTENTS
What is Jenkins?
Jenkins is an open-source automation server to streamline the continuous testing process, particularly in the areas of Continuous Integration and Continuous Delivery (CI/CD).
Here are some of the benefits of using Jenkins:
- It is open-source, freely available, and can be customized to suit individual project needs without licensing fees.
- It is relatively easy to set up. Teams can quickly create, configure, and manage jobs, pipelines, and configurations through the Jenkins dashboard.
- It offers a vast ecosystem of plugins, providing integrations with various tools. These plugins extend Jenkins’s functionality, allowing teams to seamlessly integrate with version control systems, build tools, testing frameworks, and more.
- It supports distributed builds, enabling teams to distribute build and test workloads across multiple machines. This capability helps to optimize resource usage and improve build performance, especially in large-scale software projects.
- It has a large and active community of users, developers, testers, and contributors, providing extensive documentation, tutorials, forums, and community-driven support.
If you are new to Jenkins and wish to learn more about it, you can go through this Jenkins tutorial:
Subscribe to the LambdaTest YouTube Channel and stay updated with the latest tutorials around automation testing, CI/CD, and more.
In the next section of this Cypress Jenkins tutorial, we will look into why Cypress Jenkins is the right option for your team.
Why Use Cypress With Jenkins?
Cypress is an open-source framework for end-to-end testing and is usually preferred by developers and testers with expertise in JavaScript. Also, testers don’t need to install additional libraries, dependencies, drivers, servers, etc., as they do in the case of Selenium.
As mentioned above, Jenkins offers a plugin ecosystem and easy configuration with Jenkins. If you are looking for an open-source CI/CD tool that is easy to configure with Cypress, then Jenkins is the right option for your team.
How to Configure Jenkins With Cypress?
Before configuring Cypress with Jenkins, you need to install Cypress first. You can go through this blog on getting started with Cypress to install Cypress. In this section of the Cypress Jenkins tutorial, we will learn how to configure Jenkins to run Cypress tests.
Install NodeJS Plugin
Let’s look at the steps to install the NodeJS plugin using Jenkins.
- In Jenkins Dashboard, go to Manage Jenkins > Plugins > Available plugins, search for NodeJS plugin, and install it.
- Once the NodeJS plugin is installed, add NodeJS to it. Go to Manage Jenkins > Global Tool Configuration and click Add NodeJS. Then,
- Provide a name for NodeJS installation.
- Mark the Install automatically checkbox.
- Choose a NodeJS version that is compatible with Cypress.
- Install global npm packages for Cypress.
- Keep the other configurations as it is.


Now, we need to create a Cypress Jenkins project. For this, let’s use a freestyle project to help break down the build job into several smaller steps, making managing builds in separate stages more comfortable.
For example, a build might run a suite of functional tests in one step and then tag the build in a second step if all tests are passed.
A Jenkins freestyle project can be as powerful and complicated as any build job built with a Jenkins pipeline or a Groovy DSL. However, it’s necessary to know how to script all these actions, and testers must learn how to manage these scripts.
Create Jenkins Freestyle Project
Below are the steps to create the Jenkins freestyle project:
- In Jenkins, let’s create a Freestyle project.
- As we have our Git project in Source Code Management, add your Git URL and credentials for this Jenkins and Cypress tutorial.
- Now, let’s switch to the build environment section. Here mark the Provide Node & npm bin/ folder to PATH checkbox.

If you do not use Git, I encourage you to try it. Git is lightning fast; we’re talking about only a few seconds per command; it quickly adds to your work day. Remember that a large community often is an advantage because an ecosystem revolves around the system.

It is where we set the NodeJS environment to run Cypress.

If you remember, we added a NodeJS installation before. We will see the name we provided in the NodeJS Installation dropdown. Select that name, and keep the other configurations the same.
We are all set; don’t forget to add our Cypress command to execute the script.
Configure the Jenkins Pipeline
A pipeline is a series of events or tasks interconnected in a particular order. In plain English, a Jenkins pipeline is a set of modules or plugins that enable the implementation and integration of Continuous Delivery pipelines within Jenkins.
The Jenkins pipeline has a scalable automation system for building basic or complex template distribution pipelines via the Domain-Specific Language (DSL) used in the pipeline.
For example, stages in the Jenkins declarative pipeline may have a stages section containing a list of nested stages to be run in sequential order.
The concepts in Jenkins pipelines are as follows:
- Pipeline: It is code executed for the build, test, and delivery of the applications and is a set of instructions in the state of code for Continuous Delivery.
- Node: It is a machine or system on which Jenkins runs. A node block is a scripted pipeline syntax.
- Stage: It consists of a series of steps: build, test, and deploy. In earlier versions of the declarative pipeline, the only way to run chunks of pipeline code in parallel was to use the parallel step inside the steps block for a stage.
- Step: It is a single step in the stage. For example, either build, test, or deploy from a single step.
The main advantages of the Jenkins pipeline are automating various tasks and making the CI/CD pipeline tasks reliable, efficient, and repeatable.
Here is the Jenkins file for the pipeline:
|
1 2 3 4 5 6 7 8 9 10 11 12 13 14 15 16 17 18 19 20 21 22 23 24 25 26 27 28 29 30 31 32 33 34 35 36 37 38 |
pipeline { agent any tools {nodejs "Node"} environment { CHROME_BIN = '/bin/google-chrome' } stages { stage('Dependencies') { steps { sh 'npm i' } } stage('e2e Tests') { Parallel{ stage('Test 1') { steps { sh 'npm run cypress:ci' } } stage('Test 2') { steps { sh 'npm run cypress2:ci' } } } stage('Deploy') { steps { echo 'Deploying....' } } } } |
Below are the steps to create the project for the pipeline:
- Create a new project for the pipeline.
- Scroll down to the Pipeline option and specify the details of your Git repository in the SCM section.
- Click on Save and Apply. Your Jenkins file will now have the selected configuration.
- Press the Build Now option.


You can view the pipeline execution results on the Jenkins Dashboard.

So far, we have seen how to configure the Jenkins pipeline. However, while performing testing using Cypress with Jenkins, developers, and testers might face challenges such as managing diverse browser and device combinations, ensuring efficient test execution across various environments, and handling the setup and maintenance of infrastructure for parallel testing.
To overcome this, integrating Jenkins with the Cypress Cloud Grid like LambdaTest is a viable option. It addresses these challenges by providing scalable testing infrastructure, streamlined test execution, and comprehensive cross browser testing capabilities.
How to Integrate Cypress Jenkins Pipeline With Cloud Grid?
In this section of the Cypress Jenkins tutorial, we will integrate the Jenkins pipeline with the Cypress Cloud Grid like LambdaTest.
LambdaTest is an AI-powered test orchestration and execution platform enabling developers and testers to perform Cypress testing at scale on a remote test lab of real browsers like Chrome, Firefox, Edge, and WebKit. It offers a Jenkins plugin allowing testers to run Cypress tests through the Jenkins pipeline.
Install the LambdaTest Jenkins Plugin
Below are the steps to configure LambdaTest with the Jenkins pipeline:
- Click Manage Jenkins > Plugins.
- Click the Available tab.
- In the filter box, type LambdaTest.
- You will encounter a list of plugins for which you need to select LambdaTest.
- To install the LambdaTest Jenkins plugin, select the checkbox in front of LambdaTest. After successfully installing the plugin, you can find the LambdaTest Jenkins plugin under your installed plugins.
Configure the Jenkins Pipeline
Here is the Jenkins file for the pipeline:
|
1 2 3 4 5 6 7 8 9 10 11 12 13 14 15 16 17 18 19 20 21 22 |
pipeline { agent any tools {nodejs "Node"} stages { stage('Dependencies') { steps { sh 'npm i' sh 'npm install lambdatest-cypress-cli' } } stage('e2e Tests') { steps { sh 'npm run cypress:lambda' } } stage('Deploy') { steps { echo 'Deploying....' } } } } |
Create Jenkins Freestyle Project
Below are the steps to create the Jenkins Freestyle project:
- Let’s create a Freestyle project.
- Scroll down to the Pipeline option and specify the details of your Git repository in the SCM section.
- Click on Save and Apply. Your Jenkins file will now have the selected configuration.
- The cypress:lambda task will be executed by the e2e Tests step in the Jenkins pipeline. Now click on the Build Now option in Jenkins to get the following result:


When checking the console output of the build, we can verify that the Cypress tests ran.

As we can notice from the above snapshot, our build was successfully executed, and the tests were uploaded to our LambdaTest Web Automation Dashboard.

In the next section of this Cypress Jenkins tutorial, we will learn how to perform Cypress parallel testing on the cloud.
How to Perform Cypress Parallel Testing on the Cloud?
LambdaTest platform lets you perform Cypress parallel testing across 50+ browsers to expedite the test execution through the Jenkins pipeline. In addition, it helps improve overall test coverage and ensure the quality of software builds.
To get started with Cypress e2e testing, follow the below-mentioned steps:
- Install LambdaTest Cypress CLI on your local machine. Run the following command to install the same:
- After installation is completed, set up the configuration using the below command:
- Once the command is completed, the lambdatest-config.json file is created in the project folder. Next, enter the LambdaTest Username and Access Key. You can get these credentials from your LambdaTest Profile > Account Settings > Password & Security.
- Now configure the required browser and OS combinations in the lambdatest-config.json file:
- The run_settings section in the JSON file contains the desired test suite capabilities, including Cypress version, build name, number of parallel sessions, etc.
- The tunnel_settings section in the JSON file lets you connect your local system with LambdaTest servers via an SSH-based integration tunnel. Once this tunnel is established, you can test locally hosted pages on all the browsers currently supported by Cypress on LambdaTest.
|
1 |
npm install -g lambdatest-cypress-cli |
|
1 |
lambdatest-cypress init |
|
1 2 3 |
"lambdatest_auth": { "username": "<Your LambdaTest username>", "access_key": "<Your LambdaTest access key>" |
|
1 2 3 4 5 6 7 8 9 10 11 12 13 14 15 16 17 18 19 20 21 22 23 24 25 26 27 28 |
{ "lambdatest_auth": { "username": "", "access_key": "" }, "browsers": [ { "browser": "MicrosoftEdge", "platform": "Windows 10", "versions": [ "latest" ] }, { "browser": "Chrome", "platform": "Windows 10", "versions": [ "latest" ] }, { "browser": "Firefox", "platform": "Windows 10", "versions": [ "latest" ] } ], |
|
1 2 3 4 5 6 7 8 9 10 11 12 |
"run_settings": { "build_name": "build-Cypress-test", "parallels": 5, "specs": "./cypress/integration/e2e_tests/*.spec.js", "pluginsFile": true, "ignore_files": "", "npm_dependencies": { "cypress": "13" }, "feature_file_suppport": true }, |
|
1 2 3 4 |
"tunnel_settings": { "tunnel": false, "tunnelName": null } |
Using LambdaTest, you can run Cypress tests in parallel and reduce execution time. Instead of running tests one by one in sequence, parallel testing allows for running multiple tests simultaneously. In addition, this approach executes tests on various browsers, devices, and operating systems parallelly.
Without Cypress Cloud Grid (Compare e2e tests timing):

With Cypress Cloud Grid (Compare e2e tests timing):

 Note
NoteRun your Cypress tests across 50+ browsers. Try LambdaTest Today!
Final Thoughts
In this Cypress Jenkins tutorial, we have covered the importance of using Jenkins and how it can be integrated with Cypress projects to run automated tests on the cloud grid like LambdaTest to achieve the goal of Continuous Integration.
Using Jenkins to run tests is time-effective, and the results can be visualized with complete logs. It helps fulfill the entire Software Development Life Cycle (SDLC), from development, testing, monitoring, and deployment.
Thanks for reading through this Cypress Jenkins tutorial.
Frequently Asked Questions (FAQs)
What is Jenkins in Cypress?
Jenkins is an open-source automation server that automates your Cypress tests as part of your build process in Cypress.
What is Cypress in DevOps?
Cypress is an open-source framework used in DevOps workflows to streamline automated web application testing, leading to faster delivery cycles and improved software quality.
Got Questions? Drop them on LambdaTest Community. Visit now


