
Material UI Testing: A Detailed Guide With Examples
Harish Rajora
Posted On: March 16, 2023
![]() 42932 Views
42932 Views
![]() 18 Min Read
18 Min Read
Organizations have consistently adopted existing technologies only when developing the same software product or a bit differently. For instance, when creating a responsive design using CSS, Bootstrap becomes a de facto choice for us. It helps us not worry about designing each element from scratch. Just extend the classes, and we are good to go.
Similarly, Material UI – one of the popular React component libraries uses the same process one step further. While Bootstrap focuses on single elements in a basic web design, Material UI talks about whole components that look like Bootstrap but is actually for React and focuses on a single design principle.
This guide on Material UI testing picks one more element that helps us avoid the reinvention of the wheel and keeps developers focused on implementations rather than investing too much time in design and alignment and similar stuff.
But before going deep into Material UI, let’s quickly check out its foundations and quirky nuances.
TABLE OF CONTENTS
An Introduction to Material Design
Material Design serves as the basis of Material UI. Therefore, to understand Material UI, let’s explore its origins and inheritance.
Google introduced Material Design in 2014 at the Google I/O conference. The main motive of Material Design is to provide a more powerful design system and rich-looking (or visually appealing) to the user. Its name takes inspiration from the actual physical material that exists in the real world, and Material Design tries to narrow down the gap between them digitally.
For instance, physical material’s visual appearance depends upon light and exhibits specific motion-related characteristics. The Material Design addresses these things, and the reflection of these visual appearances is visible in the components created on this principle.
One of the initial renders of the Material Design looked as follows:
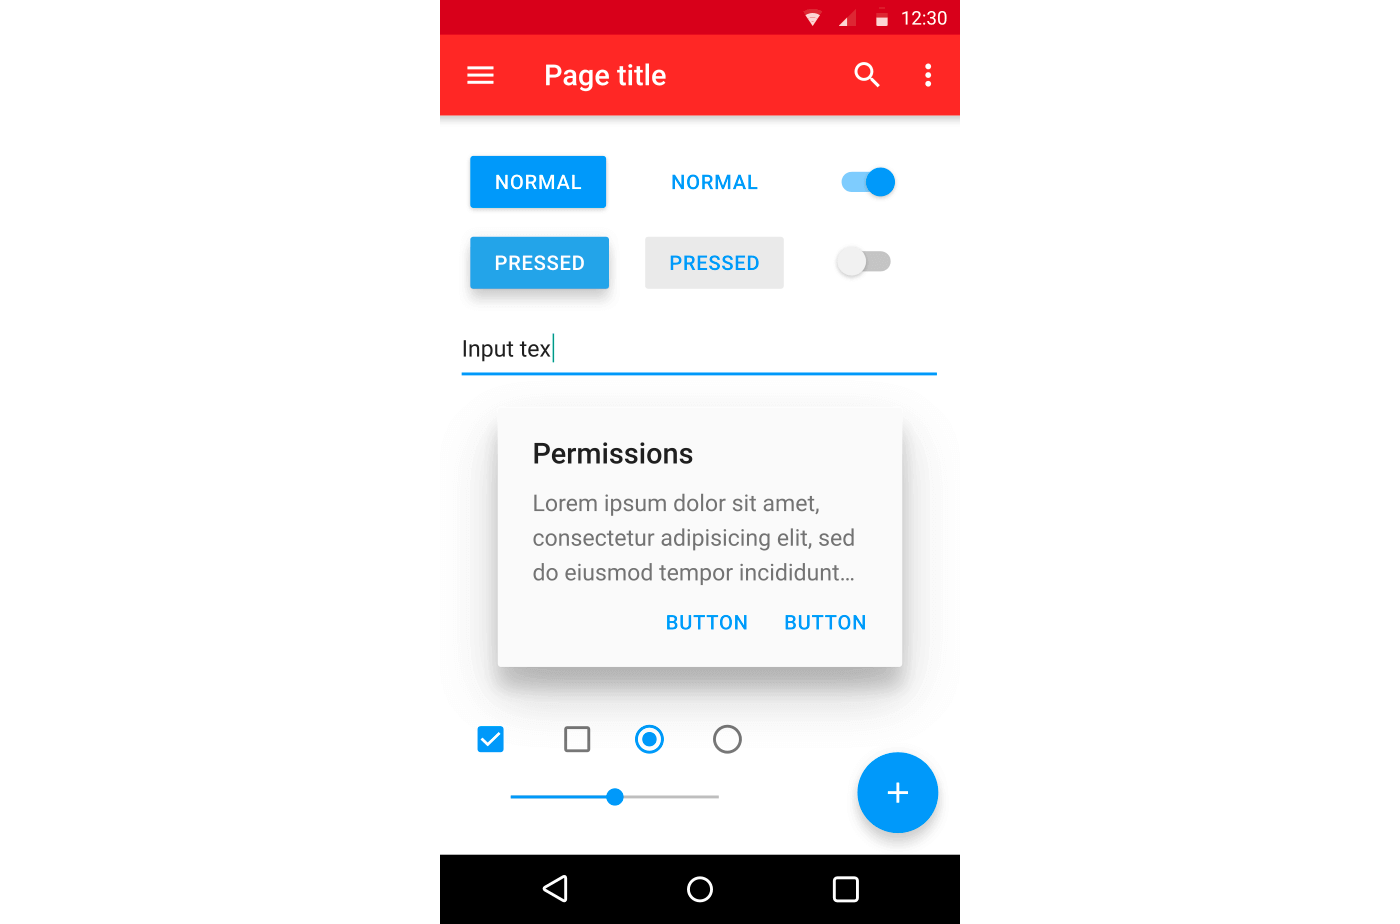
Although this has improved significantly since 2022, the few basic principles on which Material Design started can also be pointed out here. The Permissions pop-up has shadows on three sides, defining that the light source is considered on the top. Similar shadows are seen in all the other elements. The rectangles have clear sharp edges, and the shadows give the elements a 3D appearance that makes us perceive them as physical material objects.
Along with this, another major noticeable characteristic of Material Design is movements and transitions. Any action performed on these elements, such as clicking them or “pressing and holding,” results in transitions and animations, meaning that the material object has moved. All these features correlate digital material to physical material, which is what Google wanted to achieve.
Google’s Material Design soon became a hit after its release to the public. Unsurprisingly, it was picked up by individuals, organizations, and communities that worked on large frameworks like Vue and React. Integrating this design into their own framework with minimal changes could prove to be a great match if done correctly. As a result, MUI was born, which is Material Design but for React framework. It contains multiple libraries, one of which is called Material UI.
In the next section of this guide on Material UI testing, we will look at Material UI.
What is Material UI?
Material UI is an open-source React library based on Material Design to implement in React-based applications. When Material UI is used to create these components, they exhibit the same features as we discussed in the above section of this Material UI testing guide.
For example, below is an example of three ADD TO CART buttons developed in React using MUI.

While it can be developed using CSS and other technologies, using Material UI takes minimum effort by inheriting the pre-defined components.
Similarly, it helps develop complex elements as a part of its library, as shown below.
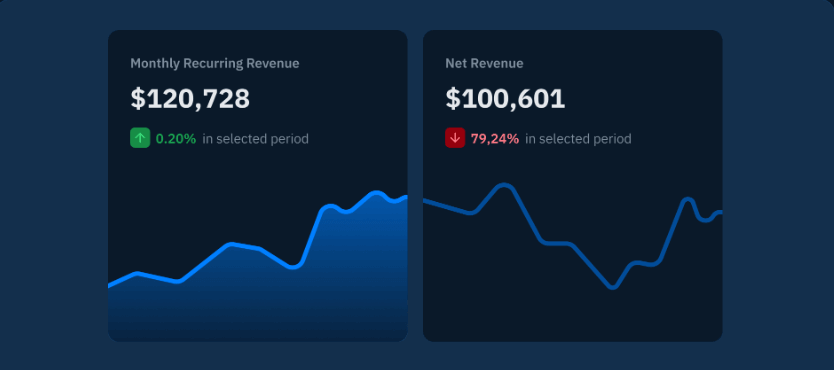
The above image has a grid system, with each grid containing multiple elements such as a graph, percentage change, total amount, etc.
Such quick and easy implementations attract developers, which is evident by the fact that Material UI gets downloaded 4 million times each week using the npm package manager. When writing this guide on Material UI testing, Material UI has 85.2k Stars, 29.3k Fork, and 2700+ contributors on GitHub, making a large community and adding to the React community.
Why use Material UI?
Along with providing pre-built components based on Material Design, a developer gets the following advantages when adopting Material UI for web development.
- Interactive designs: Google’s Material Designs proved to be highly popular in terms of experience and visuals. Material UI is much more elegant and provides more options while keeping in mind that its foundational Material Design standards are not compromised.
- Focus on logic than UI: The primary objective of Material UI is to provide you with pre-defined components that can directly be picked and pasted on the application. It helps eliminate the time that would have gone into designing those elements from scratch. Hence, developers can give more time to logic and functional implementation. As a result, the software release cycle becomes short, and the organizations can deliver faster.
- Highly customizable: The components provided by MUI are the most basic styling of the elements. However, they can still be used as it is. Once you inherit the components, the developers can customize these as per their choice. For example, the ADD TO CART buttons shown above can be modified into three variants and customized to various other levels.
- Large community: MUI has a vast community that helps in case of any issues or if you need input on your work.
- Proven concept: Material Design is a proven concept now. It is something other than what you will experiment with as you would do while styling independently. Therefore, there is no risk of a poor user experience and this would be one less trouble after the code is pushed to production.
Material UI advantages stand out for someone who would love to have rich UI components on their web application that people globally love.
Material UI Design – Examples
In this section of our guide on Material UI testing, we will see some examples of Material UI Design.
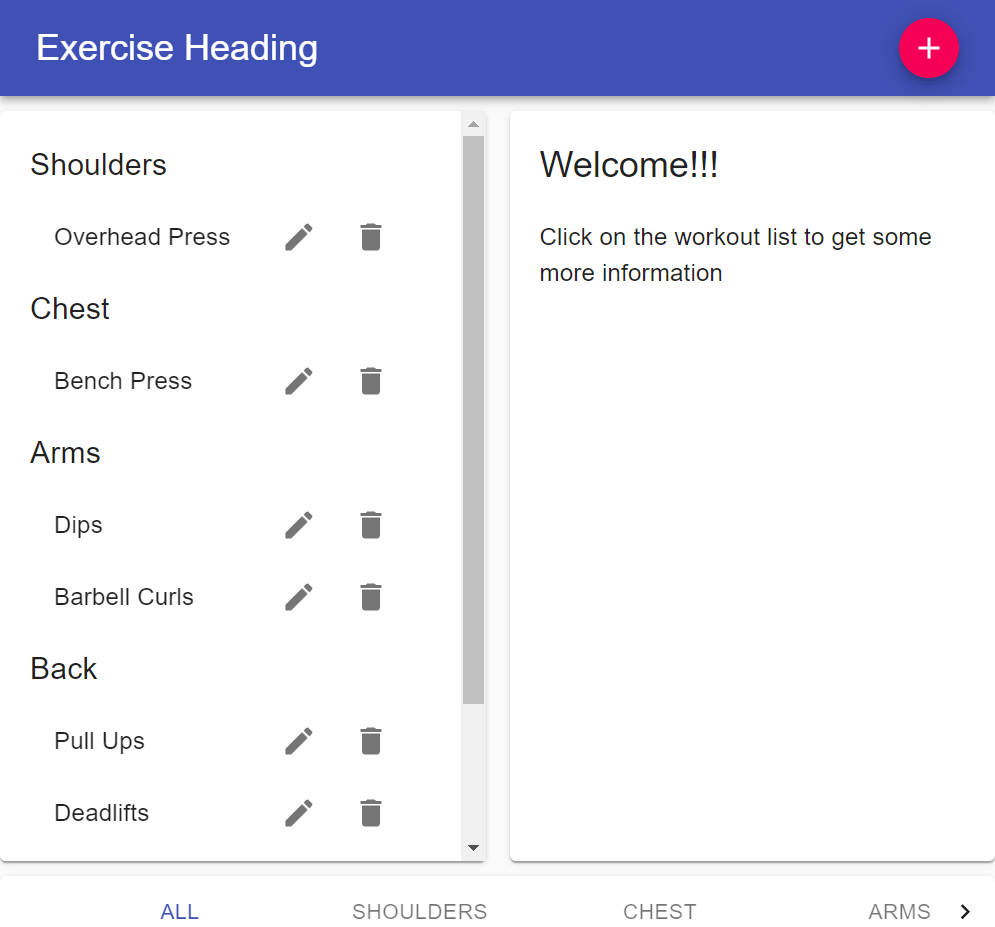
Example 1: This is a simple example of using minimal code to create a workout list for Gym sessions.
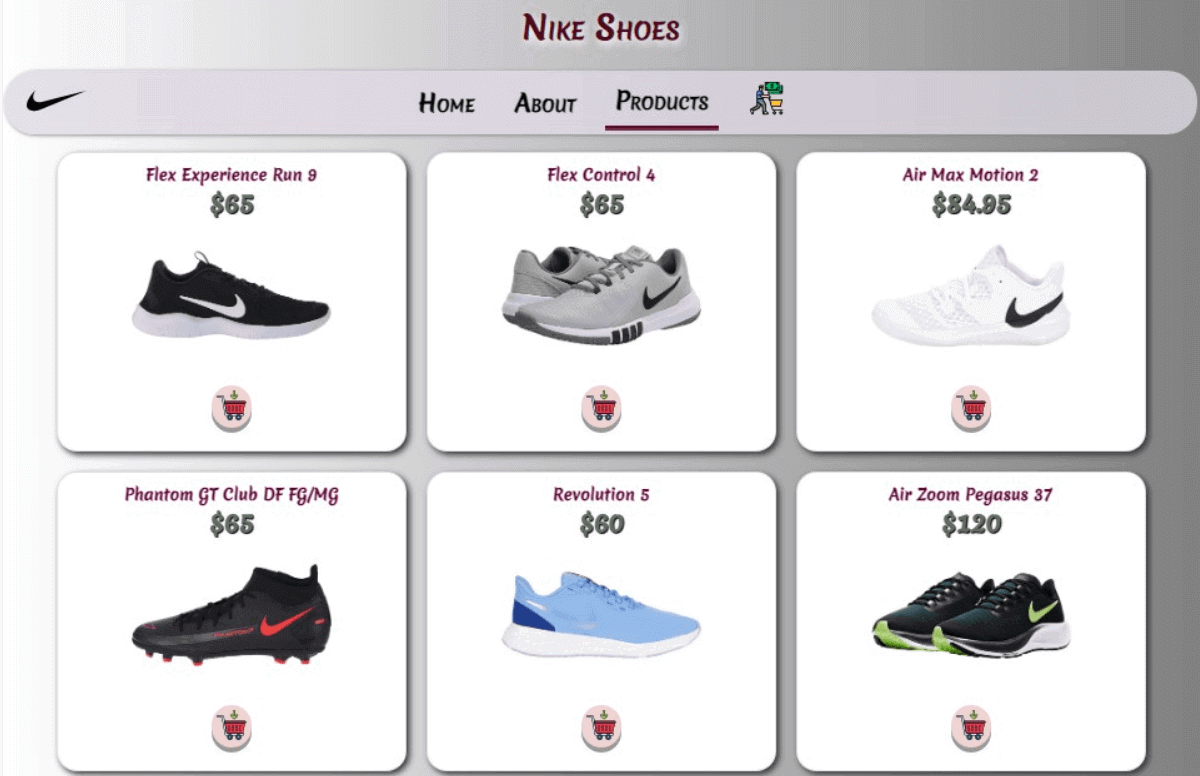
Example 2: This is an example of a small eCommerce home page showcasing the card-based design that provides depth to the card:
Example 3: This example shows a dashboard with all the related components for the user (or admin):
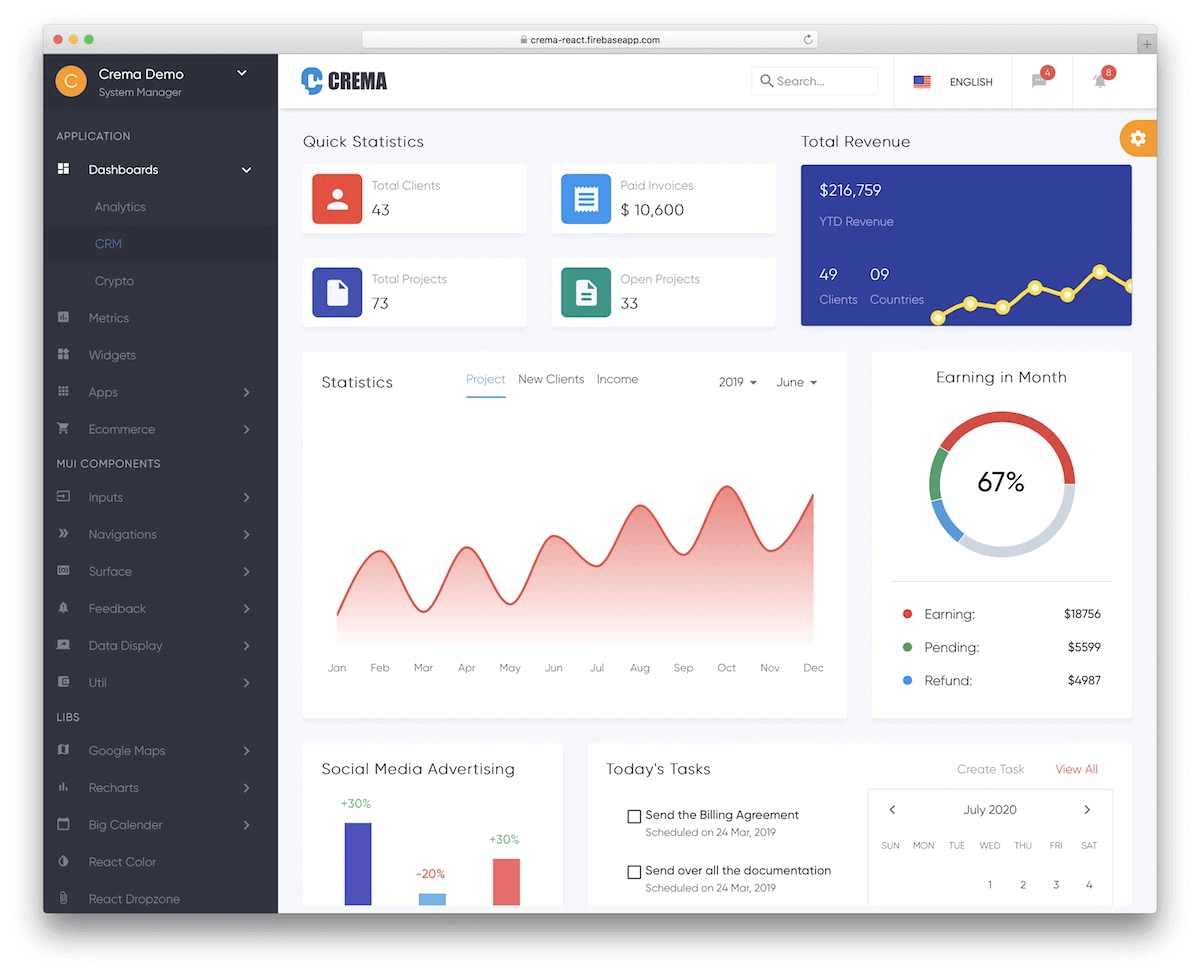
Or it can also be recreated as
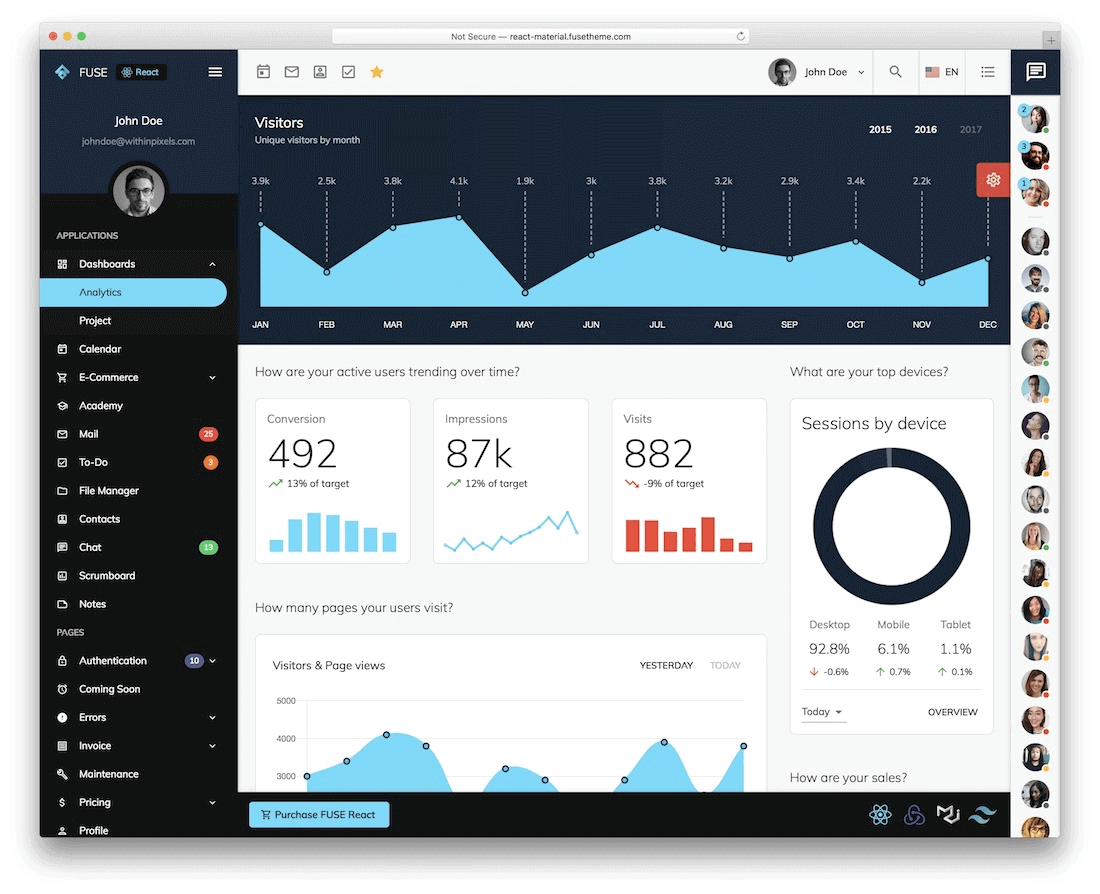
If you notice in the examples above, there are multiple elements on a web page, and still, it looks organized and clean. This is due to the compactness of components and how they can accommodate various elements on a single card. A lot of these examples are based on the grid-style design. However, whatever component suits you best is the one to go.
Test your Material UI Designs on a real device cloud. Try LambdaTest Now!
Material UI vs. MUI Base
Material UI was once the only choice for React developers looking for defined components along with Material Design. However, Material UI has made some changes (including changing its name to MUI) and accommodated a few more choices under its hood.
One of those choices is MUI Base, which closely resembles Material UI, which we have talked about until now. This may create confusion for beginners, and therefore it becomes important to define the clear line separating Material UI and MUI Base.
One of those choices is MUI Base, which closely resembles Material UI, which we have talked about until now. This may create confusion for beginners, and therefore it becomes important to define the clear line separating Material UI and MUI Base.
Material UI is a great choice for developers looking to import the components directly with Material Design features, make a few changes, and are good to go. However, there is one disadvantage to this system. What if the component designs offered by Material UI do not blend well with the design of your web application?
Then you are stuck using the same components and changing the app designs instead. For these developers, MUI has introduced the MUI Base library.
MUI Base library is a React library taken from Material UI but gives much more flexibility and customization areas than its parent. MUI refers to it as a “headless” counterpart to Material UI because it takes only basic skeletal features out of it.
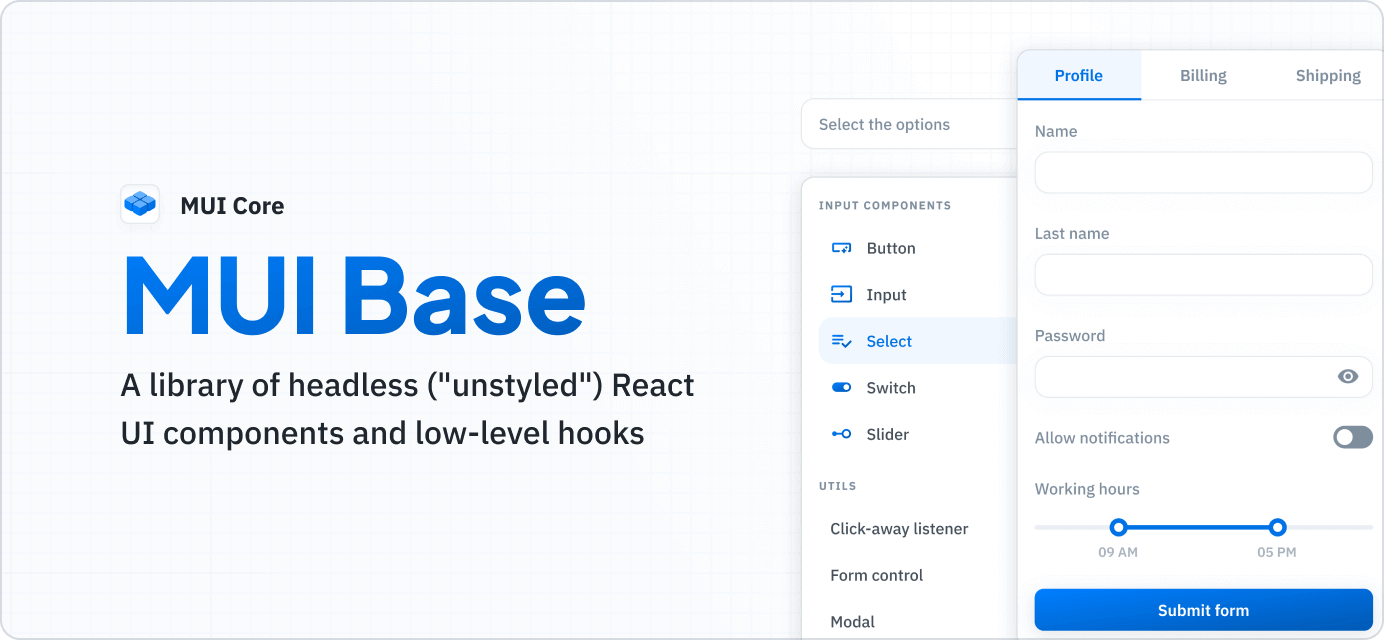
MUI Base consists of two sections – Components and Hooks.
While Components are the same as Material UI in their work, the developers can pick them up, drop them down and customize them as much as they want. They won’t provide any default designs as Material UI. On the other hand, Hooks help the developers fetch the logic from the structure. It gives even more freedom to customize the elements from base scratch and according to states.
MUI Base and Material UI are much different from each other. They serve a different set of developers and are used in different scenarios.
How to use Material UI in your Web Projects?
Now we know about Material UI, MUI Base, and Material Design. The next step is to use this library and its components in our web projects.
Below are the steps to use Material UI in your web designs.
- Run the below command to install Material UI.
- Material UI is designed to work with the Roboto font. To download, run the following command:
- Now download the icons used by Material UI. This can be done by running the following command:
|
1 |
npm install @mui/material @emotion/react @emotion/styled |
|
1 |
npm install @fontsource/roboto |
|
1 |
npm install @mui/icons-material |
All the above installations are done using the npm package manager. If you are using another package manager, you need to check for the specific command on their official website.
Now that we have everything set in our system, it is time to demonstrate how simple it is to use Material UI.
To implement a button using Material UI, you need to
- Import the button component.
- Extend the component to create a button.
|
1 |
import Button from '@mui/material/Button'; |
|
1 |
<Button variant="contained">Hello World</Button> |
This will result in the following output:

Similarly, for the text field, the following code would work:
|
1 2 3 |
<TextField id="outlined-basic" label="Outlined" variant="outlined" /> <TextField id="filled-basic" label="Filled" variant="filled" /> <TextField id="standard-basic" label="Standard" variant="standard" /> |
Output:

And finally, for icons, the following code would work.
|
1 2 3 |
< Badge badgeContent={4} color="primary"> <MailIcon color="action" /> </Badge > |
Output:

You will now have a better understanding of the simplicity and ease of use offered by Material UI for React developers. But a web application is just not about planning, designing, and development. It can only be successful if you test the web application thoroughly.
In the next section of this guide on Material UI testing, let’s explore how to test your Material UI-based websites and web apps to ensure a perfect release.
How to perform Material UI Testing?
Material UI is a React library, and React is used to build applications with interactive UIs. So we need to be inclined towards tools and methods that are more powerful with user interface than other types of testing such as functional or regression.
While React applications and testing are a concept a little different than what we are discussing here, when it comes to Material UI, there are two best options for the testers – one working locally and another working on the cloud.
Material UI Testing with React Testing Library
The first option is to go ahead with React Testing Library. Since Material UI is in React, it is safe to assume that it will understand the components better than any other library or framework.
The best part of using the React Testing Library is it will test similarly as a user would explore. This facilitates testing on actual DOM nodes. For instance, as a user, I would click a button only after reading its text, as the text indicates the action following after the click.
Similarly, the testing library finds the button and clicks it based on the text. A similar method goes to filling up the form based on the label text written beside it. This helps testers write test cases very quickly and ensure that the library is tested, keeping in mind the end user’s actions.
- To install React Testing Library, run the following command:
- Now import this library into your web project.
- Create a test function:
|
1 |
npm install --save-dev @testing-library/react |
|
1 |
import {render, screen} from '@testing-library/react' |
|
1 2 3 4 5 |
test('check heading and button', async () => { render(<Fetch url="/testUrl" />) expect(screen.getByRole('heading')).toHaveTextContent('LambdaTest') expect(screen.getByRole('button')).toBeDisabled() }) |
As the last two assertion statements show, they check whether the heading has text and disable buttons by role. These are easy to write and execute over your Material UI-based application.
Note: Revolutionize your user experience with Puppeteer Visual Testing – Capturing, Comparing, and Creating Seamless Experiences!
Material UI Testing using LambdaTest Platform
The problem with using React Testing Library is that everything we do has to be on the local system or on-premise infrastructure. In addition to it, Material UI is something that helps create a user interface.
When our application is UI-dependent, it needs to be tested on multiple browsers, devices, and operating systems across platforms to get a better hold of cross browser issues. React Testing Library does not address these two points satisfactorily.
However, if we could take everything over the cloud and acquire all the target browsers, devices, and OS with minimal costs, this gap could be filled. This is what LambdaTest does.
LambdaTest is a cloud-based cross browser testing platform perfect for your cross-browser and cross-platform needs. It provides an online browser farm for live testing on over 3000 real browsers, devices, and OS combinations on its scalable infrastructure.
Apart from this, LambdaTest provides integrations with automated UI testing tools, such as Selenium, Cypress, Playwright, and more, that take advantage of its cloud infrastructure to execute test cases.
To perform Material UI testing of your web application, follow the below steps:
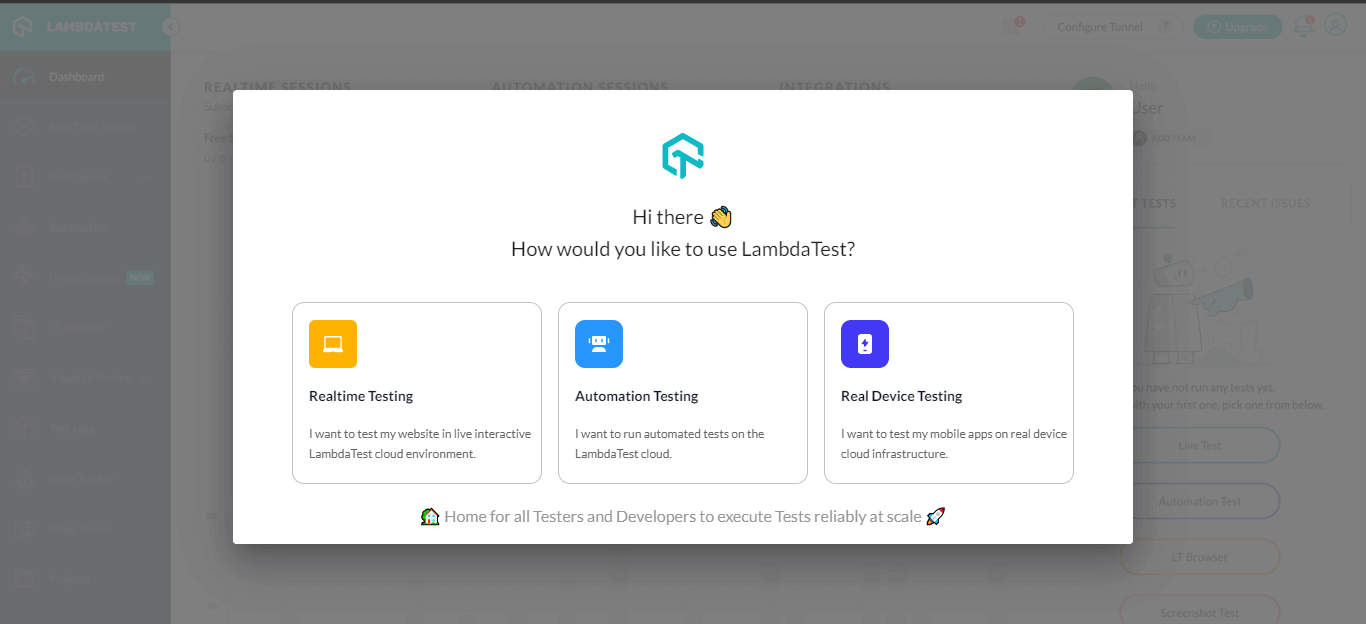
- Sign up for free and login to your LambdaTest account.
- A modal box will pop up. Select Realtime Testing.
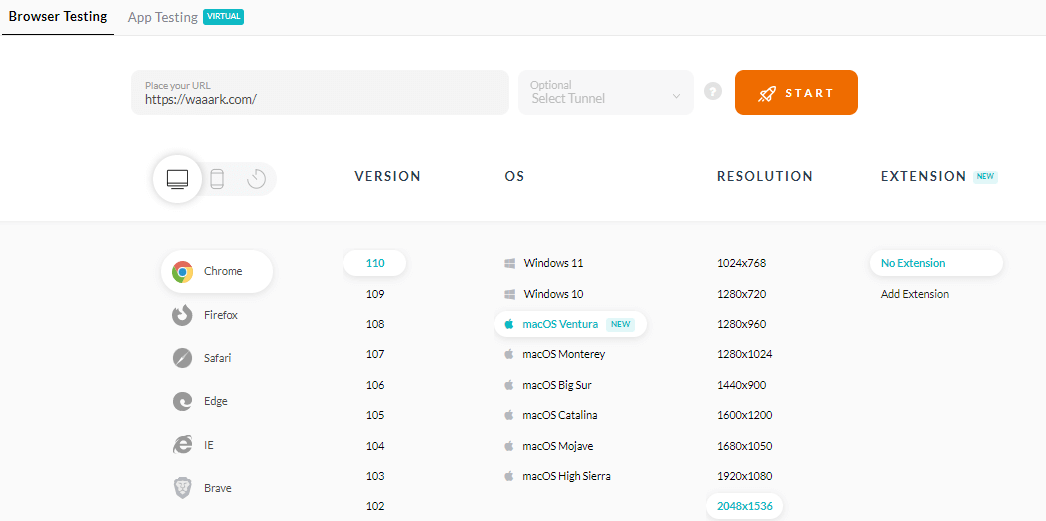
- It will route you to the realtime console. Enter your test URL, select browser VERSION, OS, and RESOLUTION, and click START.
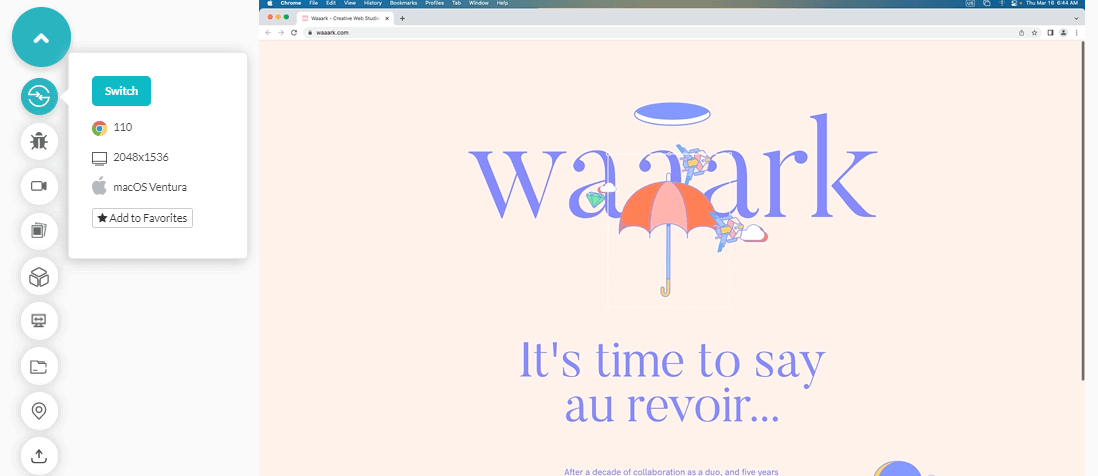
The web application will open over the cloud infrastructure on the specifications chosen. You can now perform Material UI testing to ensure your web apps function as intended.
The below video tutorial will help you understand how to perform Real Time Material UI testing on Desktop Browsers.
Subscribe to the LambdaTest YouTube Channel and stay updated with the latest tutorials around Automation testing, Selenium, Playwright, and more.
Conclusion
Material Design brings us closer to real-world objects while staying digital by adopting a few characteristics from it. The shadows, light source, pointy edges, and bouncing elements on click are something that not only familiarizes us with the material but also brings out a rich UI, especially for desktop users who were getting behind by mobile’s rich UI.
Material UI is React’s way of adopting Material Designs to React applications. It provides a predefined set of components ready to be picked and dropped into the application with a single line of code.
This guide on Material UI testing highlights the usage of this library along with demonstrations of development and testing it. Once you are done with Material UI testing and releasing the application, your marketing experts will need something to track the status of the user’s response using more profound methods.
Frequently Asked Questions (FAQs)
How do you test Material UI components?
To test Material UI components, a @testing-library/react library is used. To use React Testing Library, import it into your web project and create a test function.
What is Material UI used for?
The Material UI (MUI) is an open-source React component library. It allows you to create web and mobile apps with different components. Out of the box, the package includes a comprehensive set of prebuilt components ready to use in production.
Is Material UI a framework?
Yes, Material UI is a front-end framework for React components.
What are material UI components?
An open-source React component package called Material UI uses Google’s Material Design. It provides a large selection of pre-built components for industrial applications.
How many components does MUI have?
An extensive selection of more than 40 building block components is offered by MUI (Material UI). Each MUI component adheres to the highest standards of both form and function thanks to the thorough application of Material Design principles, ensuring a seamless user experience.
What is component props in MUI?
Developers can alter a component’s behaviour and look using component props in MUI (Material UI). In order to fulfill the needs of particular applications, these props offer dynamic control over the component’s numerous properties, such as content and appearance.
What are styled components in MUI?
Styled components in MUI (Material UI) allow developers to apply custom styles to components using CSS-in-JS techniques. It offers a modular and encapsulated approach to styling, enhancing visual appeal and maintaining component reusability.
What is a variant in MUI?
A variant in MUI (Material UI) denotes a style or version of a component. Variants give developers predefined stylistic options, such “contained” or “outlined” for buttons, so they can quickly change a component’s appearance and behaviour.


Author’s Profile
Harish Rajora
I am a computer science engineer. I love to keep growing as the technological world grows. I feel there is no powerful tool than a computer to change the world in any way. Apart from my field of study, I like reading books a lot and write sometimes on https://www.themeaninglesslife.com .
Blogs: 103
Got Questions? Drop them on LambdaTest Community. Visit now


