
Storybook Testing: A Comprehensive Guide
Irshad Ahamed
Posted On: September 19, 2022
![]() 82595 Views
82595 Views
![]() 20 Min Read
20 Min Read
Storybook offers a clean-room setting for isolating component testing. No matter how complex a component is, stories make it simple to explore it in all of its permutations. Before we discuss the Storybook testing in any browser, let us try and understand the fundamentals related to the Storybook framework and how it simplifies how we build UI components.
When we work with component-based UI libraries like React, it helps to improve the web development process but tends to introduce complexities related to testing and debugging. React components are built to support different use cases and are interdependent, which means if you do not follow a structured process, you risk the breakdown of your application.
Storybook allows developers to build UI components in isolation using independent building blocks. The creation of UI components can be done using your favorite framework, which is a unique capability.
A Storybook serves as a streamlined framework revolutionizing UI development, expediting the process through isolated components. By eliminating the need for database input, intricate development tasks, or application navigation, Storybook significantly accelerates and simplifies UI development. Unlike traditional methods, Storybook empowers developers to focus solely on component creation and testing, free from the constraints of project dependencies.
The open-source tool streamlines the UI testing, including development and documentation. It also offers a browser sandbox where interfaces are built without modifying data requirements, APIs, or business logic, where it is possible to handle complex development requirements.
In this article on Storybook testing, let’s deep dive into the Storybook features, pros & cons, and detailed guide on how to create, their components, and installation.
Let’s dive in!
TABLE OF CONTENTS
- Top Features of Storybook
- Challenges with Storybook
- How to Create Components in Storybook?
- Storybook Vs. Styleguidist
- Installing Storybook
- Starting up Storybook
- Testing Storybook Components
- Who Performs Storybook Testing?
- Storybook Testing Using Different Methodologies
- Different Testing Types Performed for Storybook Components
- How to perform Storybook testing?
- How to Perform Storybook Testing Using LambdaTest Platform?
- Frequently Asked Questions (FAQs)
Top Features of Storybook
When creating a large view, such as a complicated form, Storybook works well as a design system and UI component quality control tool. In this tutorial on Storybook testing, I have mentioned some of the great features offered by Storybook:
- Simplify the Way Components are Build
- Allows Building Components in Isolation
- Provides Standard Style Guide
- Helps to Reduce Development Efforts
- Chances of Identifying All Edge Cases
- Better Documentation
Storybook helps you build small components that can run independently and be added to the application when required.
You can develop components in isolation, which means that you are entirely focused on the component being built. You are not required to think about other parts of the application because every component in Storybook resides in a folder where there are files for implementation and testing.
Storybook code templates are code snippets that can be used for development requirements. This can be used as a standard for developing your web applications.
Developers create components only to realize that it has already been developed. Components created in Storybook are documented and accessible to others, so your development effort is significantly reduced.
Storybook UI development is effective in the long run when you can easily identify all edge case scenarios that your traditional development approach can miss.
With Storybook add-ons, you can document your entire component library or even save use cases as stories in JavaScript.
Storybook solves a unique problem where the scalability of user interfaces and the overall project quality are taken into consideration. With a Storybook, the entire team can collaborate on developing the components in an app-like environment where you do not have to consider complex business logic. The code is reused every time, which means you save high coding costs.
Challenges with Storybook
Storybook has a few challenges as well. Let’s explore some of the obvious drawbacks:
- When you are integrating with an existing project, you must also take care of the migration needs.
- There are issues reported in some of the add-ons that impact the system’s performance.
- In case you maintain your components in React and Storybook, the efforts are duplicated.
- You must rely on add-ons and decorators to handle different data requirements.
How to Create Components in Storybook?
In this section of Storybook Testing, you will learn to create simple components using Component Driven Methodology (CDD), where the UIs are built from the bottom-up approach. The components are created first, and screens are created right at the end. The task is the core component where we identify different tasks depending on their state.
Tasks contain two different properties – Title and State. The test cases are created around different tasks, and we use Storybook to create components in isolation by mocking the data.
The task component and its accompanying story file are created:
src/components/Task.js and src/components/Task.stories.js.
We begin with the baseline implementation of the task, where the associated attributes are defined. We build four test states of the Task in the Story file.
- Default
- Pinned
- Archived
- Final
There are two basic levels of organization in Storybook:
- Component
- Child Stories
Each story is defined based on components. You can create as many stories as you want to be based on the components that are prescribed. To illustrate our stories, we can use an export function for each of our test cases to generate a story. The story is a function that returns a rendered element in a given state. With multiple different permutations of our component, assigning it to the Template variable is a more convenient way.
Some changes need to be made in the configuration files of Storybook. It helps track the recent story changes created along with the application CSS file. You are also required to make changes in preview.js inside the .storybook folder. Actions allow us to create callbacks appearing in the Storybook UI’s actions panel when clicked. So, we build the required button to check if the button click is successful in the UI or not.
Once this is done, restart the Storybook server and produce the test cases for the different task states created in the beginning. Once the required Storybook setup and configuration are done, styles imported, and test cases built, we can implement the HTML of the needed component. Specify the data requirements for it. These are the complete set of steps that are involved when you are building a component.
Storybook Vs. Styleguidist
Storybook and Styleguidist are the commonly used tools for UI components and libraries. In a Storybook, the components are built, and stories are written to keep track of the different component permutations. In Styleguidist, the components are documented using Markdown.
- Storybook provides a convenient way to track UI component properties and its overall context, making it a preferred choice over Styleguidist.
- Storybook also offers more developer community support and add-on support over Styleguidist.
- Styleguidist is a preferable option when you are writing detailed API and usage documentation in a style guide format.
Storybook is by far the most widely used UI component tool. Developers derive great value when they create UI components in isolation. This helps to improve the overall productivity of the developer team as well. When the front-end architecture becomes increasingly complex, you are provided with an option to build UI components without any hassles.
Installing Storybook
In this section of the Storybook testing tutorial, let’s learn how to install Storybook to start building your component library. Storybook luckily makes it easy to get started with a standard installation. It automatically detects that we’re using an app created, installs the dependencies, and scaffolds everything for us.
- You can execute the following command to install Storybook:
- Once the command is executed, all your Storybook dependencies should be installed.
npx -p @storybook/cli sb init
Starting up Storybook
Post installation of Storybook, you need to start up.
- Run the following command to start the Storybook:
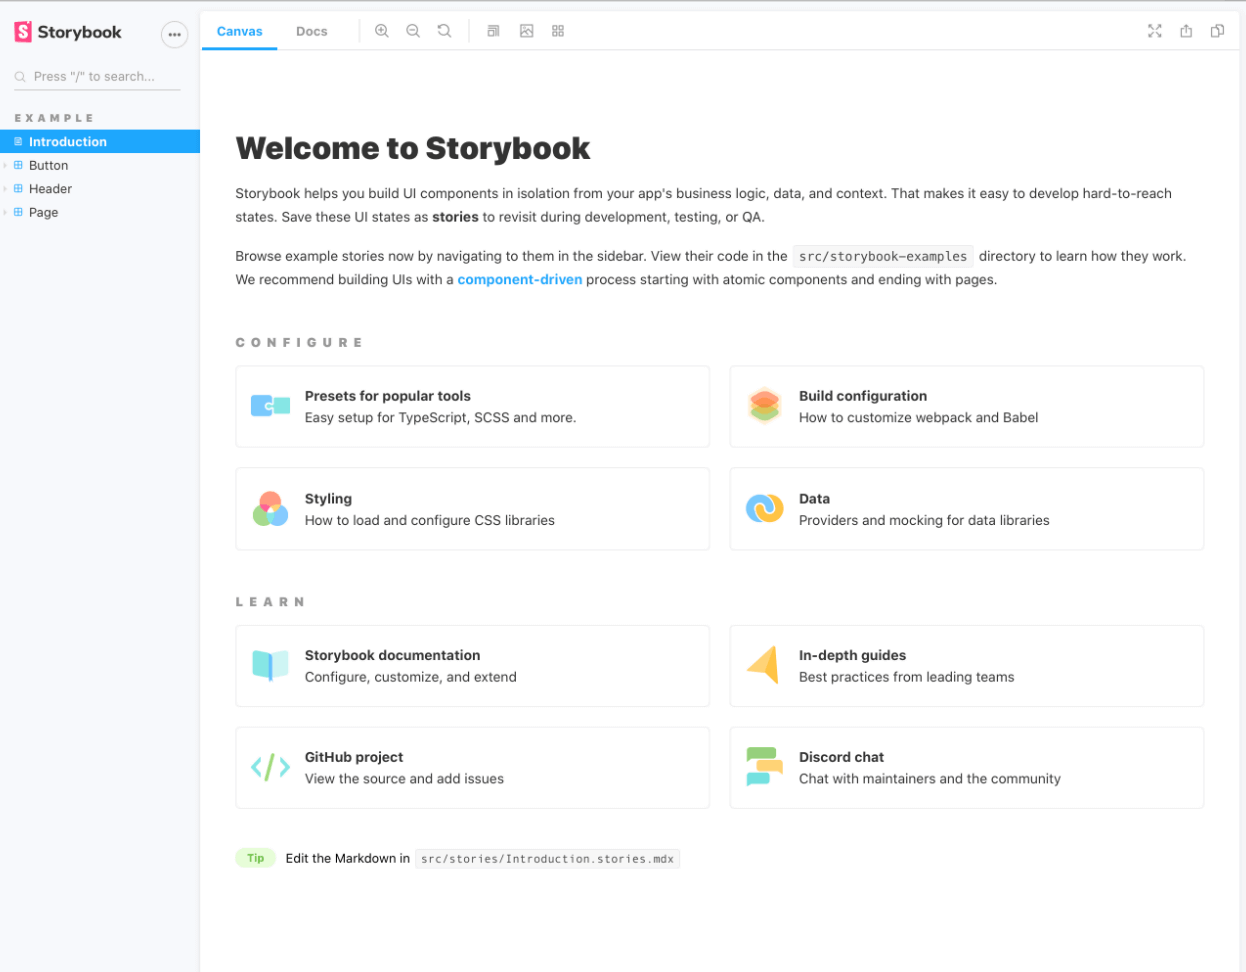
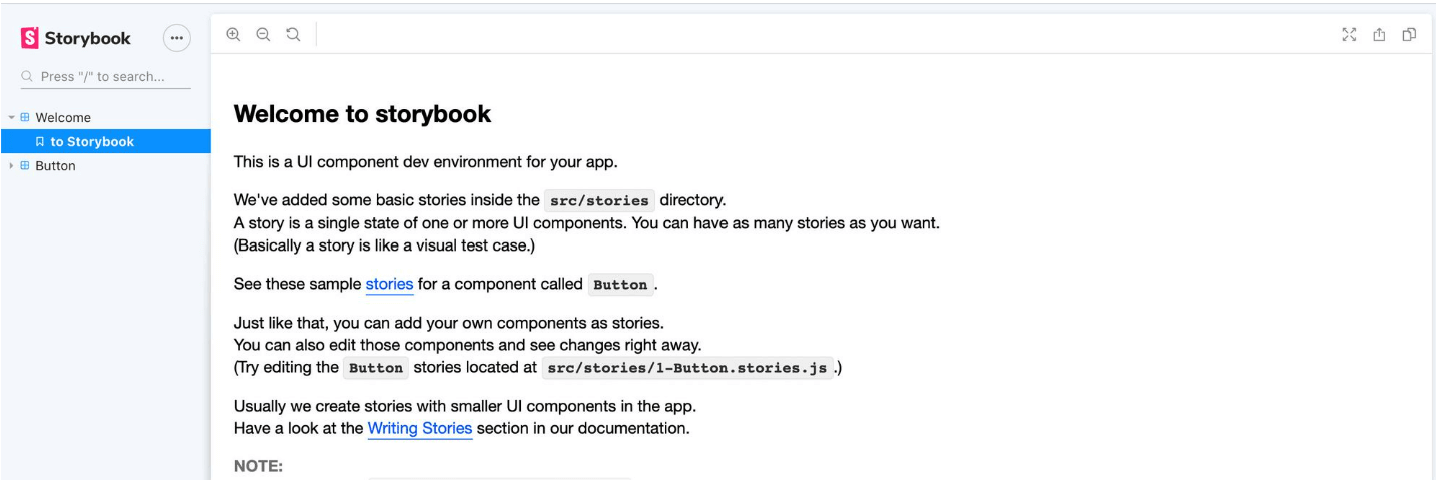
- Once everything finishes loading, Storybook opens a new tab in the browser, and you notice a welcome message inside the Storybook dashboard.
yarn storybook
# or
npm run storybook
Testing Storybook Components
It is important to perform comprehensive Storybook testing of UI components, mainly when each UI component includes stories rendered by a browser or device for the end-user. Each element contains many states. When you multiply the states with different design systems components, it becomes difficult to keep track of all of them with utmost perfection. This is why automation testing can be a great option for going forward.
The following benefits are involved when performing Storybook testing of components:
- Validate the functionality related to different UI components on other supported devices and platforms.
- Ensure that the code quality is met.
- Ensure that the key performance metrics are tracked.
- Look out for ways to improve testing strategies.
- Validation of product requirements.
It is always a good practice to perform Storybook testing before it is deployed in the production environment. Also, it is vital to decide the different Storybook testing approaches that need to be followed to speed up the testing cycle. The testing team should share the testing plan with all the required stakeholders and get the go-ahead before implementing the necessary test cases.
Who Performs Storybook Testing?
Different teams work in close collaboration regarding product delivery and success. There is no standard rule that is followed when it comes to Storybook testing. It is always recommended that the development and QA teams perform Storybook testing. The developers can validate the different components to observe the exact behavior.
Once the development team gives the go-ahead, the QA team can then perform different levels of Storybook testing. You can also have design or marketing teams doing Storybook testing to improve the overall end-user experience. As more and more stakeholders are involved during the Storybook testing process, the product output will improve.
Test Storybook websites on the most reliable and scalable testing cloud. Try LambdaTest Now!
Storybook Testing Using Different Methodologies
Testing the stories you write as a natural part of UI development is a low-effort technique to stop UI issues over time. Below are different methodologies for Storybook testing.
- Manual Spot-Checking Method
- Validation of different Storybook components.
- Not required to mock data requirements.
- The system dependencies are covered during the spot check process.
- You are not required to perform complex system integrations.
- Test Runner
- For the one without a play function, verification is done to ensure that the story renders without any errors.
- For the one that consists of a play function, it checks that the play function has no errors.
Storybook provides you with the flexibility to test your UI components, where stories help to decide the overall UI testing strategy. You write reports as part of UI development, and Storybook testing out those stories involves less effort to improve overall functionality in the longer run.
One of the simplest methods of Storybook testing involves manual spot-checking. This means you can run your Storybook in the local environment and play eyeball every story to ensure its appearance and system behavior are correct. The benefits include:
Storybook test runner allows you to transform all of your stories into executable tests as Jest and Playwright power it. You need to do a standalone deployment of your test runner to run in parallel with your Storybook. There are two aspects involved:
The tests can run in a live browser and be executed using a command line or CI server.
Different Testing Types Performed for Storybook Components
The following testing types are supported for Storybook components:
- Visual Testing
- Use a Storybook to identify and focus on a single component.
- Write the required test cases.
- Manually verify the appearance of each test case.
- Capture screenshots of each test case.
- Composition Testing
- Use a Storybook to identify and focus on a single component for testing.
- Write the required test cases.
- Manually verify the appearance of each test case.
- Catch bugs automatically using regression testing.
- Interaction Testing
- Accessibility Testing
- Snapshot Testing
Visual testing is one of the testing types in Storybook testing. It is crucial to ship products that are free from any visual bugs. Visual testing is about identifying bugs by capturing and comparing image snapshots in a real browser. The visual bugs can be incorrect font styles or broken layouts. It becomes challenging for companies to deploy people to monitor their UI every time.
You can execute a logical function and see their desired output. It becomes challenging to achieve these functions once there are more and more improvements done to the existing product or feature. These limitations can be handled during visual testing with one unified workflow. During this process, the appearance of the component is verified.
The workflow contains the following steps:
Visual testing is all about isolating the UI from the rest of the application complexities.
Composition testing is another testing type performed in Storybook testing. The apps or products are made of different components that work closely. A bug or issue in one component can quickly impact all the other features. That is why it is important to test how UI components are composed so that you can improve the overall quality of the product or application. For example, a button control in the Storybook design system can be used multiple times on different pages.
A bug in the button can impact all those pages where the button is used. This means that a failure in one of the components can affect the overall application. That is why testing is essential so that these kinds of bugs can be identified during the early development cycle. Here is the process followed for composition testing:
Composition testing allows you to test composite components made up of several simple components.
Applications contain two main parts – UI and backend. The UI is what the user sees and works with. The UI part in the backend contains the list of data and related events. Components render the UI and fetch data with system interactions as more complex functionalities are built. This testing ensures that the UI component makes the required interactions and works perfectly per the system requirements.
Accessibility testing is one of the crucial tests in Storybook testing. You can check accessibility using a combination of manual and automation testing. You can automate accessibility testing using Storybook. Automation testing tools can help to identify accessibility violations. The accessibility testing workflow is useful during both the development and QA phase. You can install the Storybook accessibility to perform the required testing.
You can use Snapshot testing to identify changes in the rendered markup to errors or warnings.
How to perform Storybook testing?
Testing is an integral component of the software development lifecycle. Two key testing practices have been followed for many years now:
- Manual
- Automation
Manual testing is all about manually testing the system requirements using different test cases and scenarios. This was when companies decided to change the way testing requirements were handled, and automation took more. Automation testing helps you to automate your needs using specialized tools and methodologies. There is no surprise that more and more organizations rely on automation testing for better testing outcomes. The following aspects can be tested:
- Base Functionality: The features and enhancements that impact the overall functionality.
- UI Requirements: Look and feel of the application where different UI components are validated.
- Responsiveness: The application responsiveness when it comes to actions or events.
- Overall Performance: The pages load within the allowed time frame.
- End User Experience: The general navigation is tested to ensure that the user can complete the desired tasks without any hassles.
The technology has evolved, and you will see more specialized testing platforms offering a complete range of testing functionalities. LambdaTest is one such great option that has greatly impacted the testing ecosystem. It is a scalable cloud-based cross browser testing platform designed for web testing or mobile app testing using cloud infrastructure.
The cloud infrastructure not only provides the much-needed scalability but helps you to save additional costs related to installation and system configurations. Any testing activity yields the best results when it is done early during the development phase. Therefore, it is always recommended to use a cross browser testing solution like LambdaTest as soon as the website or product is fully functional and integrated.
In case you missed cross browser testing during the design, development, and QA phases, your product can suffer in the long run once it is deployed to the production environment. That is why you need a specialized tool for your product’s success and delivery.
The performance of the web application elements, such as JavaScript, CSS, HTML5, etc., remains intact irrespective of whether they are rendered on your desktop or mobile devices. As a result, you have the freedom to access websites and mobile applications in a remote environment across an online device farm of more than 3000+ real devices and OS combinations. This indicates that migrating to the cloud for your testing is the right way forward.
You can also subscribe to the LambdaTest YouTube Channel and stay updated with the latest tutorials around Selenium testing, Cypress E2E testing, CI/CD, and more.
Here are some great features that make LambdaTest a strong contender for testing complex requirements:
- Selenium Testing
- HyperExecute
- On-Premise Selenium Grid
- Native Mobile App Testing
You can run Selenium scripts on the cloud-based infrastructure. This is a primary feature when trying to automate your test requirements.
This is another great feature offered by the LambdaTest platform that provides a faster and more reliable automation testing cloud.
This feature comes in handy when using cloud infrastructure with additional firewall security.
This allows you to perform live-interactive and automated app testing on a real device cloud. In addition, you can perform live-interactive app testing on emulators and simulators.
Here are some other key features commonly used by customers worldwide:
- Online Selenium Grid compatibility with every test automation framework.
- Parallel testing support for faster product testing and delivery.
- Monitor your testing performance in real-time with different system dashboards.
- You can perform geolocation testing from other locations, so other teams can easily collaborate to deliver exceptional outputs.
- Smart integrations with your favorite project management and bug tracking tools such as JIRA and GitHub.
Strategy for Cross Browser Testing of Storybook Components
It is always recommended to develop a strategy you can implement for cross-browser testing. This includes:
- Analyzing the data and traffic trends to decide which browsers can be used for testing.
- Detailed analysis can determine the application’s key components or parts with the maximum customer impact. You can perform complete end to end testing on one preferred browser rather than testing it again and again on different browser options.
- The cost of the tool, security concerns, time, acceptance criteria, and resources should be considered during the cross browser testing.
- It is important to revisit and realign strategy if the desired results are not achieved.
Building a strategy from the beginning helps you to identify potential risks and issues. When you evaluate and analyze different aspects, you are well positioned to make informed testing and product delivery decisions. That is why you will see more and more organizations investing a lot of time and effort in building their key business and product strategies.
How to Perform Storybook Testing Using LambdaTest Platform?
LambdaTest allows you to perform Storybook testing using different supported devices and operating systems:
This can be done using three different features:
- Screenshot Testing.
- Responsive Testing.
- Smart Testing.
You can choose any of the above options based on your testing requirements:
Perform Screenshot Testing
Log in to the LambdaTest dashboard and follow these steps to perform screenshot testing for multiple browsers and devices:
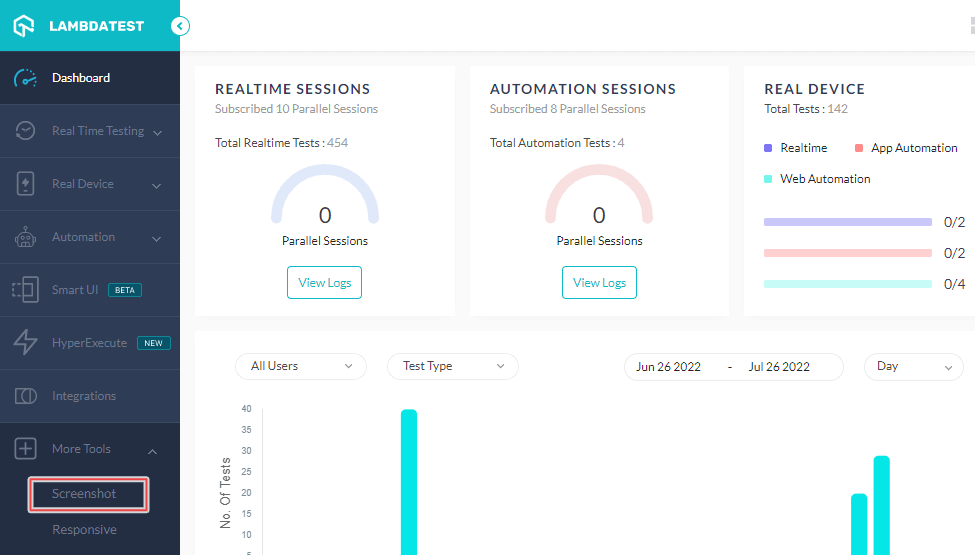
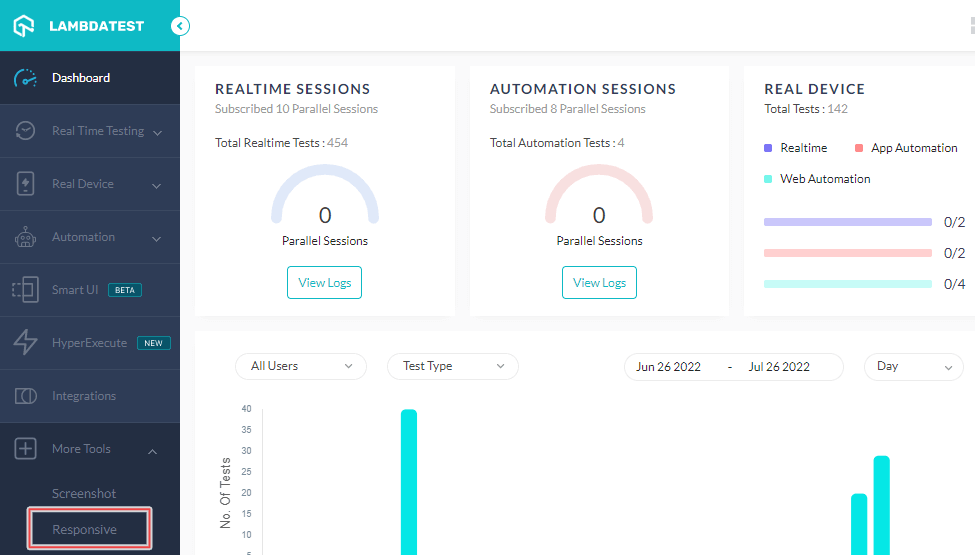
Step 1: From the left panel, go to More Tools → Screenshot.
Step 2: Enter the URL and select the required OS, browsers, and browser versions for the screenshot to be captured.
Step 3: Once all the necessary details are entered, click CAPTURE
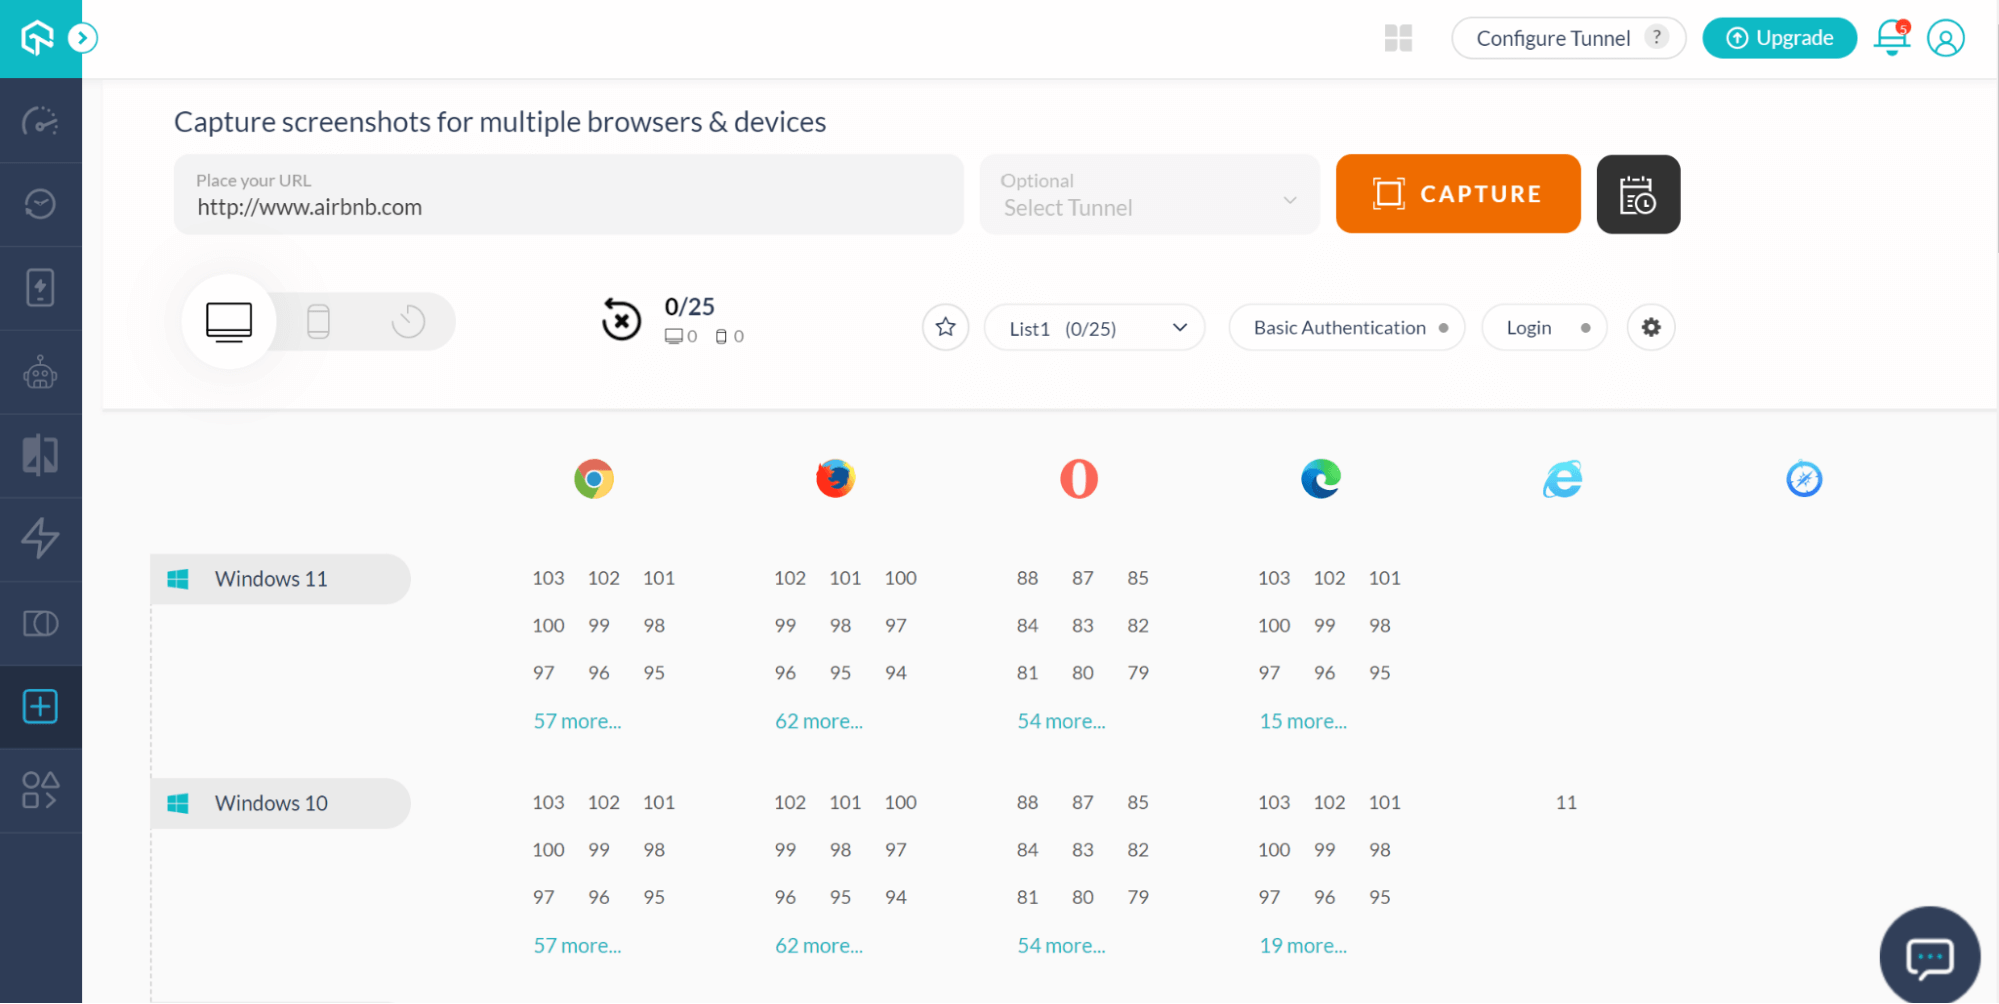
Step 4: The screenshots can be downloaded as PDF or Zip and can also be shared.

Check out the video tutorial below to learn how to start testing screenshots on LambdaTest.
Perform Responsive Testing
Follow these steps to perform responsive testing across devices:
Step 1: Login to the LambdaTest platform.
Step 2: Go to More tools → Responsive.
Step 3: Select the required monitor size and enter the URL.
Step 4: Select the device from the available options where the Device Name and Viewport are auto-populated when selected.
Step 5: Once all the required details are entered, click GENERATE.
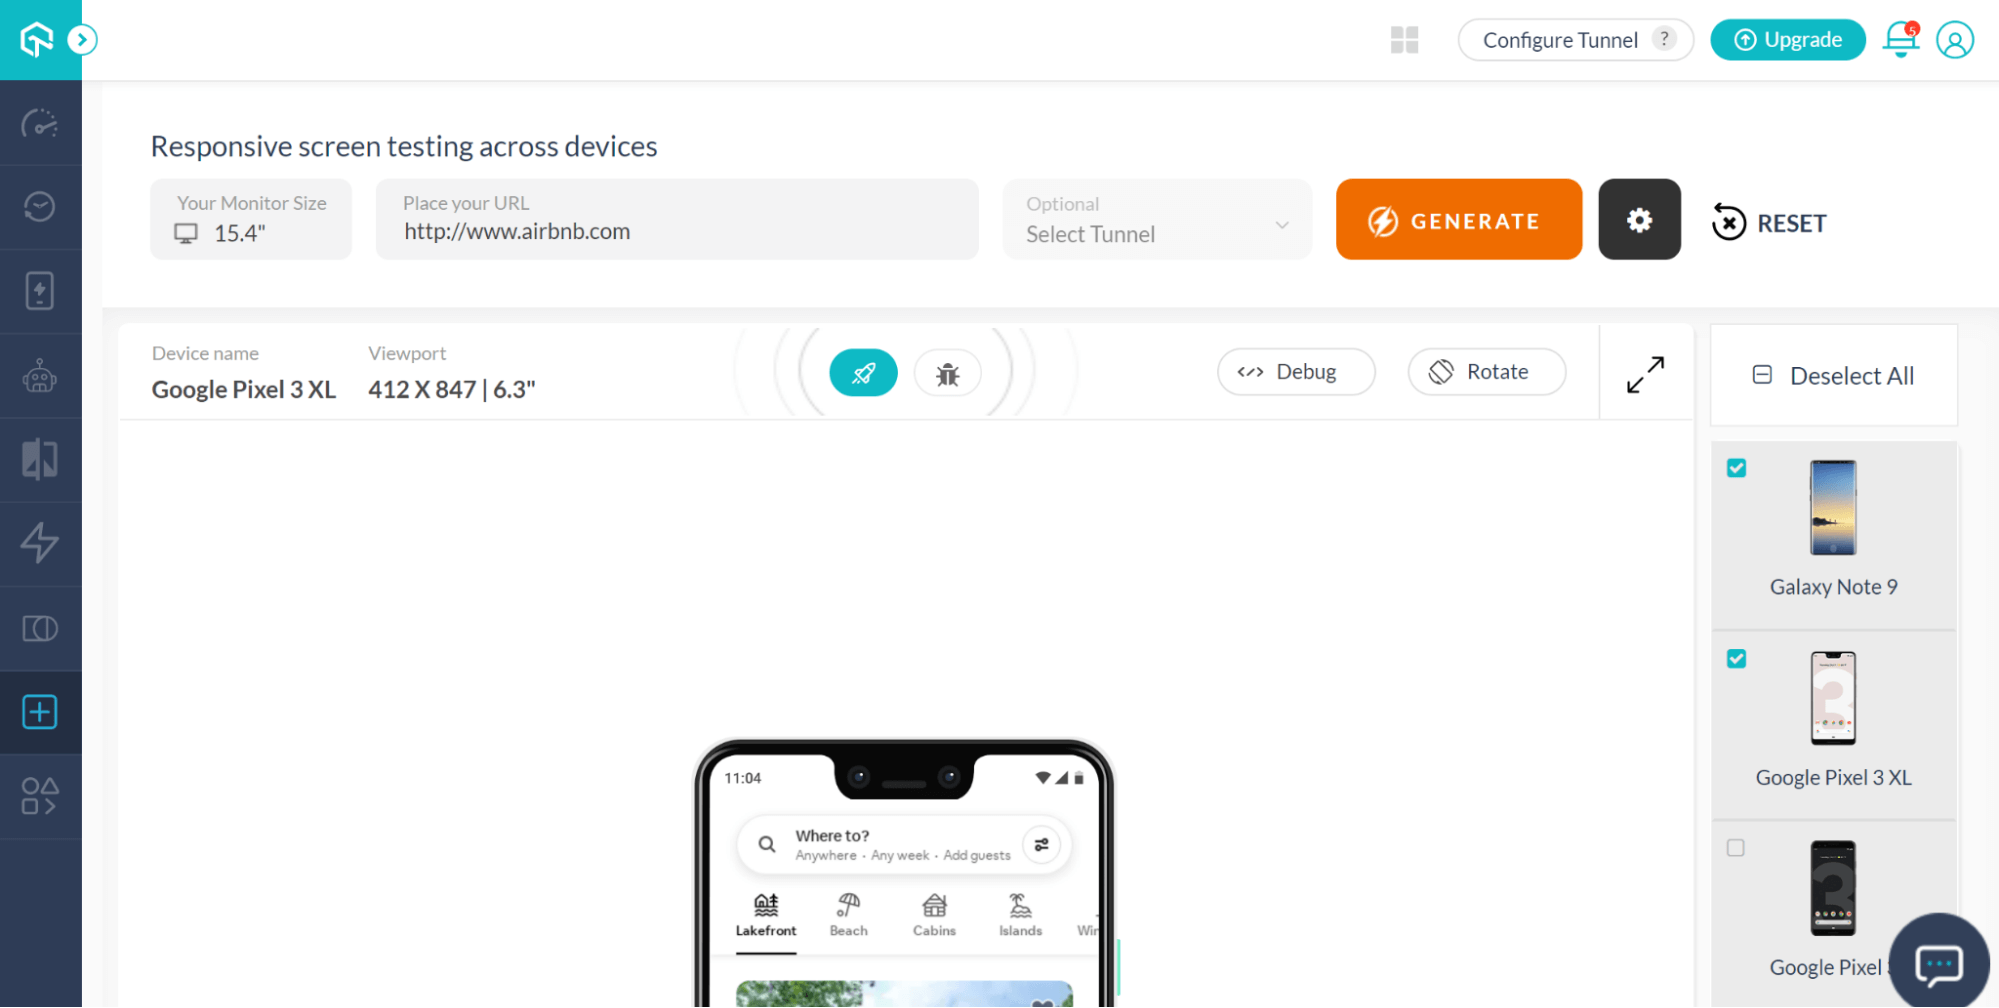
LambdaTest also comes with a mobile-friendly tester tool – LT Browser. It allows developers to test the responsiveness of websites over 50+ pre-installed viewports for Mobile, Tablets, Desktops, and Laptops.
Perform Smart Testing
Follow the below steps to perform Smart Comparison Testing:
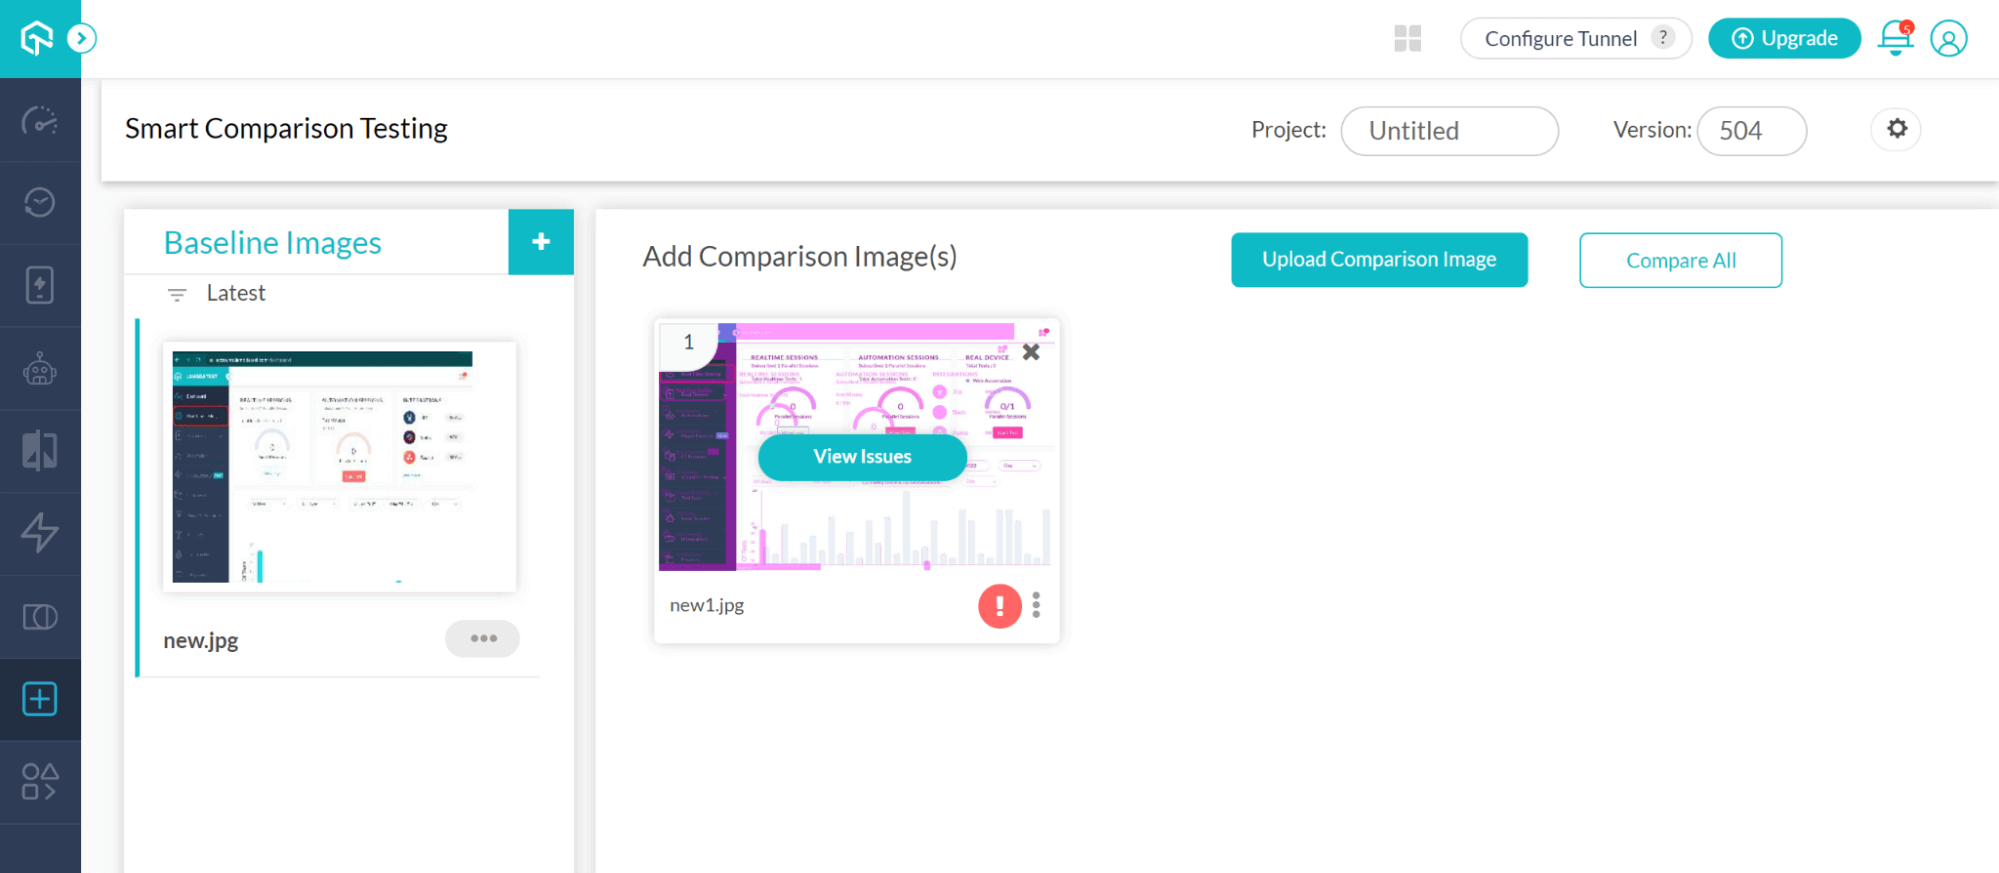
Step 1: Login to the LambdaTest platform
Step 2: Navigate to More Tools → UI Comparison
Step 3: Click on the ‘+’ button and add the baseline image from the local to compare.
Step 4: Click on the Upload Comparison Image to upload the image you want to compare with the baseline image.
Step 5: Click Compare All.
Summary
We discussed the different features and capabilities that Storybook has to offer in this Storybook testing tutorial. When you are working on large complex projects, you need to have reusable components that can be used again and again. This helps to save time during the development process. This is where you use the component-driven development approach.
That is why you will see Storybook being more and more utilized going forward. When you are creating and testing components in isolation, there is always an exceptional outcome delivered in every development release. Since most organizations tend to struggle when it comes to testing strategy and implementation. This implies that you must test different components using multiple browsers and operating systems. This can be challenging when you have limited resources and time constraints.
This is where a cross browser platform like LambdaTest has achieved great success in a quick time. It has completely transformed the Storybook testing requirements focusing on testing strategy and execution. You can deploy and validate your projects with minimum hassles or additional infrastructure costs.
Frequently Asked Questions (FAQs)
What is storybook UI?
Storybook is an open-source tool for creating individual UI elements and web pages. The development, testing, and documentation of UIs are all streamlined.
What is storybook used for?
Storybook is a JavaScript application that enables developers to design organized UI systems, improving the effectiveness and usability of both the documentation and the building process.
Is Storybook good for documentation?
Storybook is a UI development playground. With its comprehensive documentation and usage examples, it’s an excellent tool for aiding designers, project managers, and developers in understanding and visualizing system components.


Author’s Profile
Irshad Ahamed
Optimistic and versatile software professional and a technical writer, who brings to table around 4 years of robust working experience in various companies. Deliver excellence at work and implement expertise and skills appropriately required whenever. Adaptive towards changing technology and upgrade necessary skills needed in profession.
Blogs: 11
Got Questions? Drop them on LambdaTest Community. Visit now


