Playwright End To End Testing Tutorial: A Complete Guide
Ignacio Martin Flores
Posted On: August 23, 2022
![]() 43352 Views
43352 Views
![]() 21 Min Read
21 Min Read
It is essential for a team, when speaking about test automation, to take the time needed to think, analyze and try what will be the best tool, framework, and language that suits your team’s needs.
Let me cite an example from my own experience. As our Application Under Test (AUT) has changed, we needed to explore different tools and test automation frameworks that fulfilled the team’s needs. Initially, we upgraded to Selenium 4 as they introduced features such as relative locators and improved Selenium Grid architecture.
The team also explored Cypress and WebDriverIO. After some time, I heard about Playwright, so I took the initiative and decided to try it. There were umpteen reasons for me to choose Playwright over Selenium, Cypress, and WebDriverIO. The ease of its setup, the great built-in features (TraceViewer, Debugging, Fixtures, Locators, Networking, Component Testing, Visual Testing), its speed, and stability were awesome and exactly what we were looking for. Since then, I have been in awe of the Playwright. 🙂
I would like to guide you through its setup just in case you are wondering how to start working with it. But the main point of this tutorial on Playwright end to end testing is to take you on a journey through some of the exciting features mentioned above and how they can facilitate your testing. If you are preparing for an interview you can learn more through Playwright interview questions.
So, let’s stop talking about it and move to the best part, hands-on it!
TABLE OF CONTENTS
- What is Playwright?
- What is TypeScript?
- Why TypeScript?
- How to set up Playwright with TypeScript?
- How to compile TypeScript code?
- How to write your first test in Playwright?
- How to run your Playwright test?
- How to run your Playwright test on the cloud?
- Best practices while performing Playwright end to end testing
- Frequently Asked Questions (FAQs)
What is Playwright?
Playwright is an open-source End-to-End (E2E) automation framework that supports multiple languages, such as TypeScript, JavaScript, Python, and C#.
Playwright allows you to automate your testing and automation across multiple language ecosystems. In fact, we even took a poll to see which programming language people use more frequently.
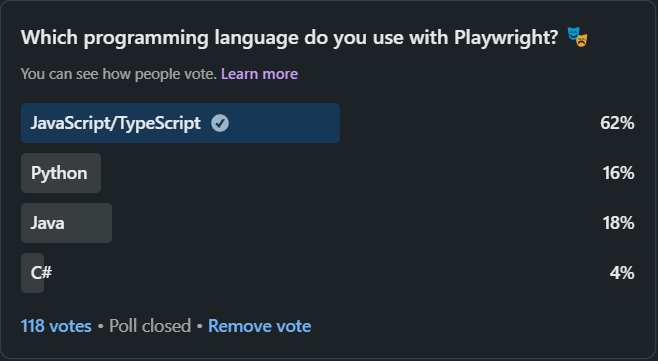
The majority of respondents chose JavaScript and TypeScript, showing how popular and versatile these languages are.
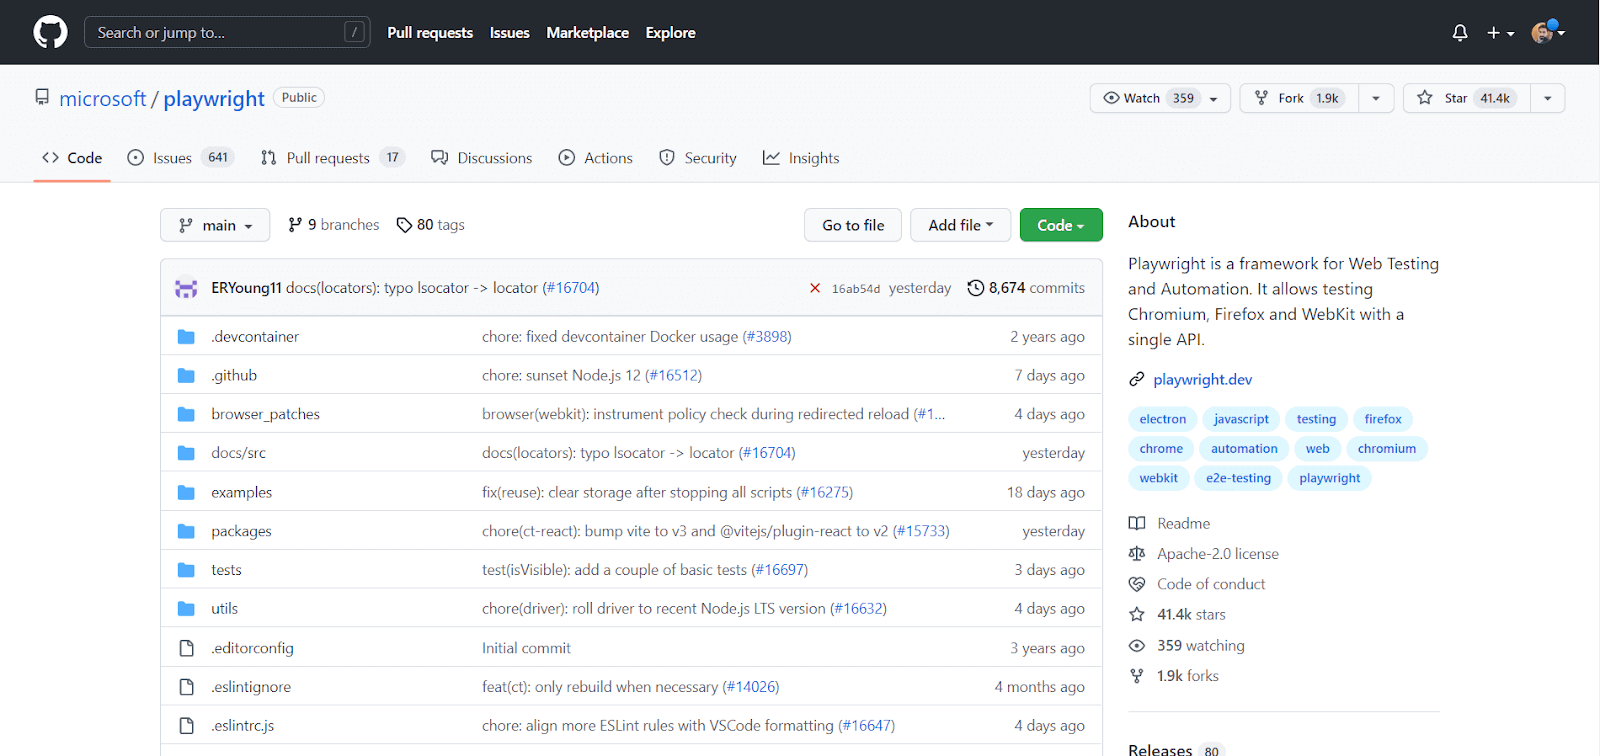
Playwright exposes a high-level API to interact with the web browser in a fast and stable way. It is gaining popularity pretty fast due to its exceptional features, which I will touch upon in the latter part of the blog on Playwright end to end testing. At the time of writing this blog on Playwright end to end testing, Playwright garnered close to 41.4k Stars, 1.9k Forks, and almost 13.5k Users on GitHub.
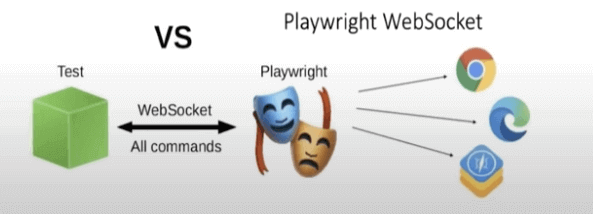
Instead of sending HTTP Requests, it works directly in the WebSocket (Using DevTools Protocol for Chrome – For Firefox and Webkit, they implemented their protocol, similar to Chrome), so it means the interactions with the browser are blazing fast. To learn more about Playwright testing, you can refer to this blog on the Playwright framework.
If you are preparing for an interview you can learn more through Playwright interview questions.
Enhance your testing strategy with our detailed guide on Playwright Headless Testing. Explore further insights into Playwright’s capabilities in this guide.
What is TypeScript?
TypeScript is a superset of JavaScript, but what does that even mean?
If you are already familiar with JavaScript, you can still use your skills but also add certain features that were not available before. It is more object-oriented and might be easier for those who are used to languages like C#.
Behind the scenes, TypeScript compiles the code to plain JavaScript, as it can’t be interpreted by browsers, you will find more about that if you keep scrolling a little bit 😀. It addresses the limitations of JavaScript (Static typing, Interfaces, pre-compilation errors) but without compromising the ability to run your code on every browser or host.
Why TypeScript?
So, remember, as mentioned at the beginning of the blog, that the tool, language, module, library, and framework you choose, will depend on your team’s needs based on your analysis. But let’s talk a little bit about TypeScript.
If you are familiar with any OOP (Object-oriented programming)languages, switching to JavaScript directly could be tricky. TypeScript, despite being very similar, it’s more Object Oriented. So, for example, in one of the projects I am working with, most of the customizations are written in TypeScript, and the rest of the code base in C#. Hence it was easier for QAs and Devs to switch and start testing with TypeScript.
These are just some of the differences you will find between TypeScript and JavaScript:
- TypeScript supports interfaces, and JavaScript does not.
- TypeScript supports static, and JavaScript does not.
- TypeScript Functions accept optional parameters, JavaScript Functions do not.
- TypeScript supports types, and JavaScript does not.
Let’s now check a little piece of code:
JavaScript:
|
1 2 3 |
let myVar = "Hello World"; myVar = 5; console.log(myVar); |
This code will output 5.
TypeScript:
|
1 2 3 |
let myVar: string = "Hello World"; myVar = 10; console.log(myVar); |
Can you spot the difference ? “myVar” was declared as a string, so if you try to assign a number to it, this will fail.
Watch this Playwright testing tutorial covers everything you need to get you up and running with the Microsoft Playwright framework with TypeScript.
How to set up Playwright with TypeScript?
This is a very interesting part of this Playwright end to end testing tutorial, and I am sure you will like it.
As with most of the modules, you can find them in npm. You can add it to your project (into the package.json) and run an npm command if you are used to it:
|
1 |
“npm install @playrwight/test” |
As mentioned above, this is something great that Playwright offers, and by running only one command, you can set up your whole project for Playwright end to end testing. You have two ways of doing this:
1. Setting up Playwright using the terminal.
You can run a command using the terminal for Playwright end to end testing:
|
1 |
“npm init playwright my_project” |
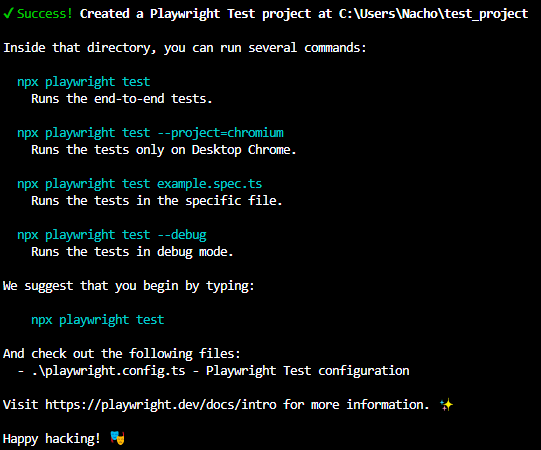
Just to take into account, test_project could be any name you like for your project, so feel free to update it to whatever you need. Here is what it looks like when the command is run on the terminal:
Voila! Your project has been created successfully, with some examples for you to go through! Amazing, isn’t it?
You should now be able to see something like this in your project:

So what is there exactly? Let’s check:
- node_modules: This folder is where all the modules/packages you are downloading and installing get stored.
- tests: This is the container for your .spec.ts files (Test files). It is the second question after running the command. You can choose any name. Usually, they are called “tests” or “specs .”Playwright generates an example.spec.ts for you automatically with many different scenarios to explore.
- playwright.config.ts: This will be your configuration file. Anything related to browser, timeouts, and parallelism can be configured here.
- package.json: Here, you can configure your commands to run the test, build your code, lint your code, and set the modules or packages you want to use in your project.
- gitignore: This excludes files from your version control. For example, the node_modules can be ignored when committing to your repository, as they get re-generated when running “install”.
- package-lock.json: Generated automatically when the node_modules tree or the package.json get modified.
- examples.spec.ts: This is great, as it is automatically generated when installing Playwright and contains many examples you can use for your tests.
2. Setting up Playwright using the Playwright VS Code extension.
Playwright offers an extension for VS Code called Playwright Test for VS Code. You can install that extension in VS from the extensions panel, and once installed, you can open the command palette (Ctrl + Shift + P) or (View → Command Palette) from the toolbar and select the “Playwright Install”:

Once installed, you should see something like this on your terminal:
Alright, the setup is done for Playwright end to end testing!
Run Automated Playwright Tests Online. Try LambdaTest Now!
How to compile TypeScript code?
As mentioned, TypeScript code is compiled into plain JavaScript behind the scenes. Sometimes Playwright is not able to transform the code correctly, but there is a way you can make this happen. Let’s see how it is done for Playwright end to end testing:
- Add a tsconfig.json file to your project and copy the below code into it:
- In your package.json, create a script and paste the following code:
- The “pretest” command will be executed before the “test“. It will compile and generate the files into the “tests-out” directory (That can also be configured on your playwright.config.ts). Once “tests” gets executed, the -c argument will tell the runner to pick the files from the “tests-out” directory.
|
1 2 3 4 5 6 7 8 9 |
{ "compilerOptions": { "target": "ESNext", "module": "commonjs", "moduleResolution": "Node", "sourceMap": true, "outDir": "../tests-out", } } |
|
1 2 3 4 |
"scripts": { "pretest": "tsc --incremental -p tests/tsconfig.json", "test": "playwright test -c tests-out" }, |
Run your Playwright tests with AWS marketplace directly on the cloud.
How to write your first test in Playwright?
Alright, now is where this becomes even more interesting. Let’s stop with the theory and get our hands dirty with some code! Now that everything is configured and ready, I will guide you on how to write a simple test for Playwright end to end testing using TypeScript.
- First, we must create our new test file (.spec.ts file) inside our tests folder generated at the beginning. So, right-click on it -> New File. You can use your preferred name. Just make sure the extension is spec.ts.
- Once created, you will see an empty file, so let’s start to add some lines of code. The first thing we need to do is to import our modules like this:
- The next step is to add the test. In this case, we are going to navigate to an e-commerce site and add some items to the shopping cart:
|
1 |
import { test, expect } from '@playwright/test'; |
|
1 |
test('Should add item to cart', async({page})=> }) |
Step 1: The first step of the test is to navigate to the e-commerce platform. As you can see, there is an object called “page” in our test. What is that? That is called a “fixture.” Playwright analyses what the test needs and provides each fixture with values to be used during the test. The most popular are:-
- Browser.
- Context.
- Page.
- Request.
What that fixture will do, is launch a new and isolated Page for us. It means a new browser Tab that will provide all the functionalities to interact with the browser. Now we will break down the test steps and explain them (You will find the entire test at the end). Let’s go to the site!
|
1 |
await page.goto('https://ecommerce-playground.lambdatest.io/'); |

Step 2: The second step is to select our item and add it to the cart. We will navigate the “Mega Menu” and select the Desktop items:
|
1 2 |
await page.locator("span.title", {hasText: 'Mega Menu' }).hover() await page.locator("a[title=Desktop]").click(); |
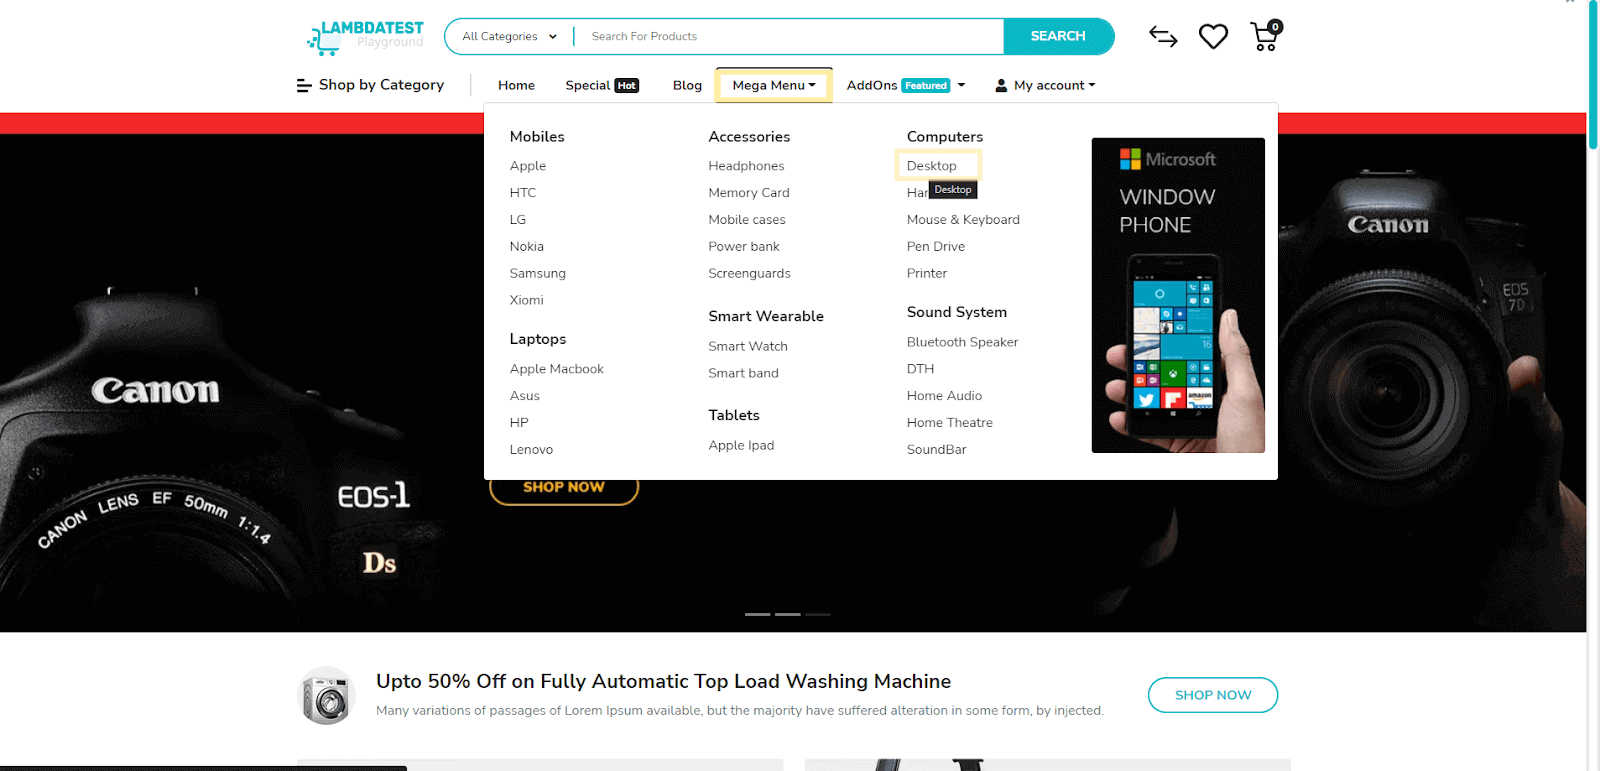
You will notice that the locator I am hovering in says “hasText”. This option is provided in one of the latest versions of Playwright (since v1.18) that allows us to filter locators that contain certain text, so it is very good when you duplicate elements or some tricky locators.
Let’s make a quick stop here and briefly discuss “locator“. Locator is one of the main pieces in Playwright. It is the most efficient way to find and interact with the elements on the page. Locator has Auto-Wait and Retry-Ability, which makes our test more stable.
These elements can be found using “selectors“, such as (CSS, XPath, ID, etc.). Once found, a “locator” offers a lot of functionalities to interact with that particular element. You can extract the test, click it, check it, drag, fill, check the status (visible, enabled) and some more that can be found in Playwright Docs.
Let’s look at how to find those “selectors” on DevTools:
Finding Selectors using Inspect
- Right-click on the element you want to interact with on the page and then “inspect“.
- We can start “building” our own “selector“.
Finding Selectors using CSS Selector
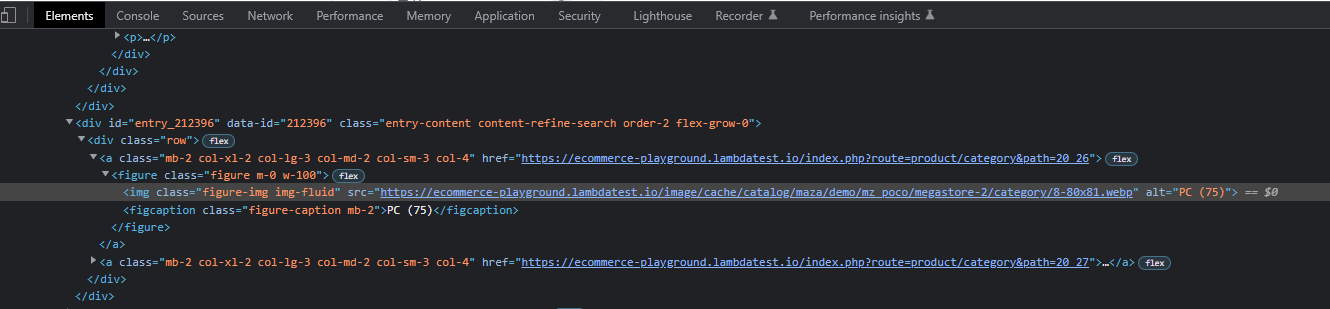
If we check the selected element, it has an attribute called “alt”, so let’s try using it to find it:
- In the DevTools console, press Ctrl+F.
- On the search bar, we will first use the element tag “img” to start filtering, and after that, we will use its attribute: img[alt=’PC (75)’].

As you can see, the element has been highlighted and also found on the search bar.
CSS Tips:
If you do not want to use the whole text on its attribute, you can use “^” that means “Starts With”, “$” that means “Ends With” or “*” that means “Contains.”
- img[alt^=’PC’]
- img[alt$=’PC’]
- img[alt*=’PC’]
The class attribute can also have multiple classes split by spaces. In that case, we need to concatenate them with a “.” (dot): So, something like this:
a.btn btn-lg btn-primary
will be:
a.btn.btn-lg.btn-primary
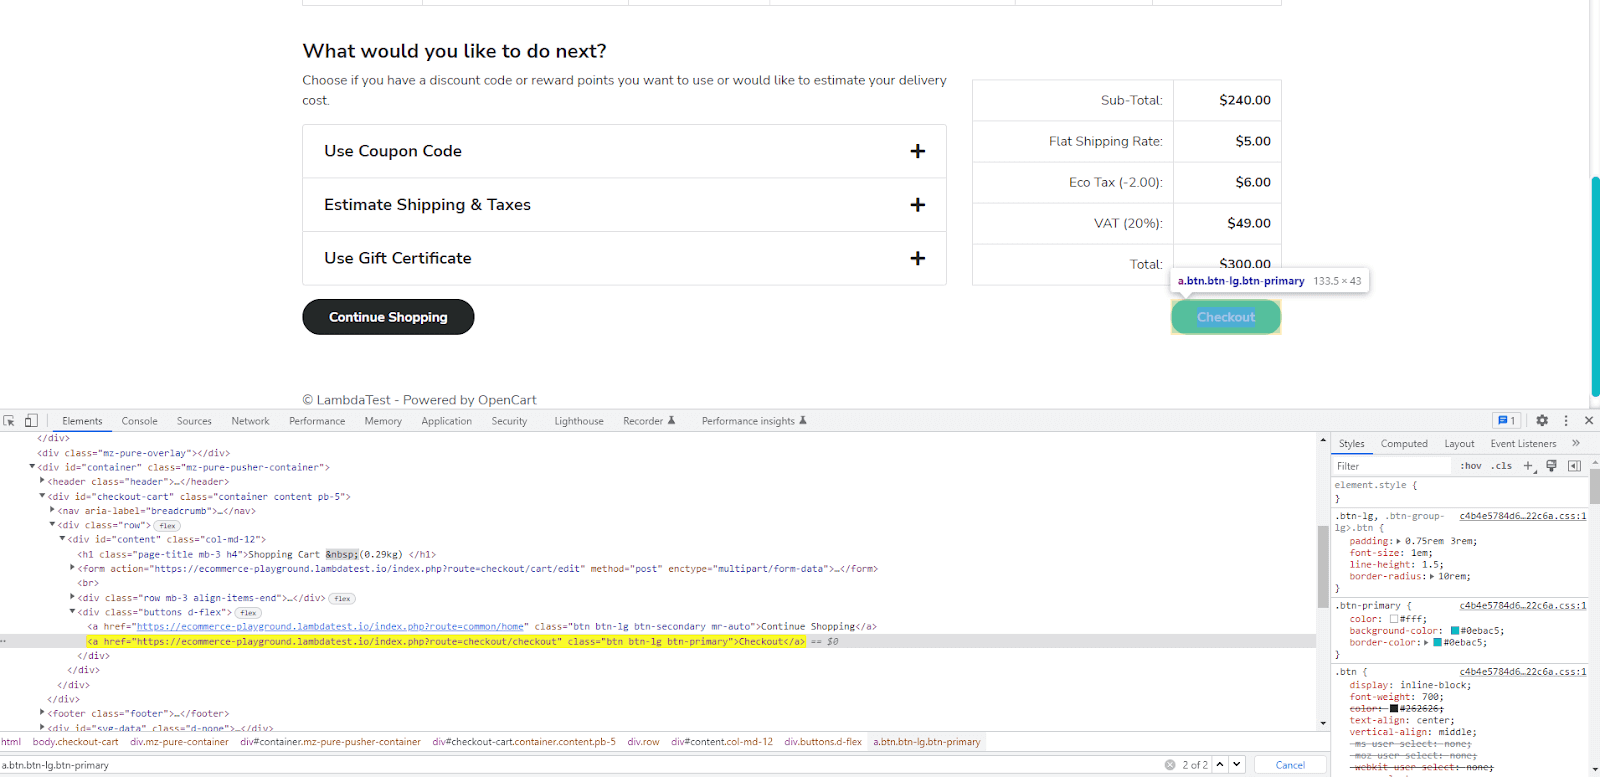
- . (dot) stands for classes.
- # (hashtag) for ids.
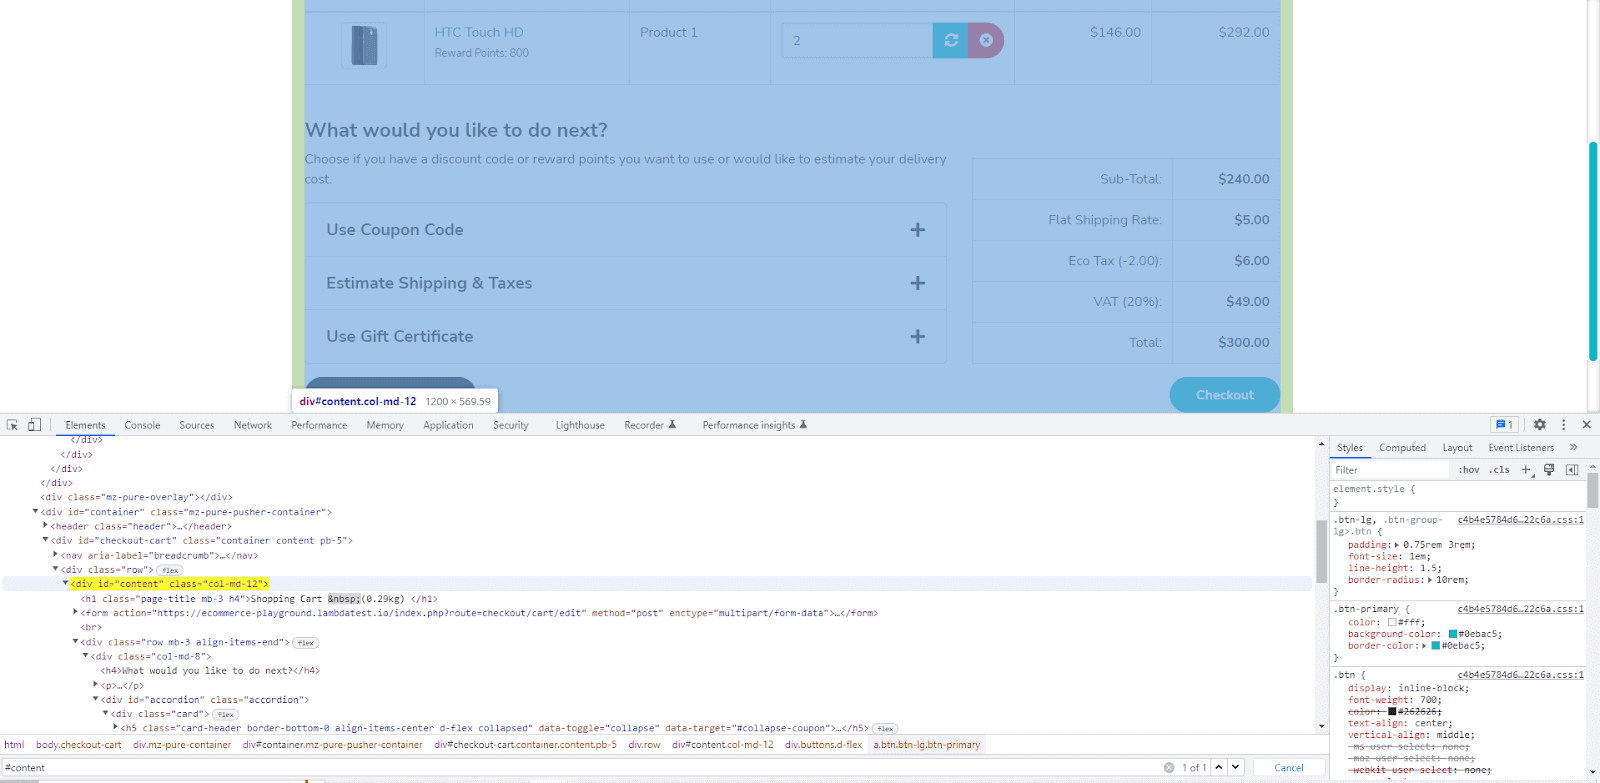
Finding Selectors using XPath
Now, let’s see the element on the image below, but differently. This one, in particular, is a little tricky, as it is on a flyer. If you click somewhere else, it will be closed, so what we can do to prevent that is to “pause” the debugger.
In DevTools, go to the “Sources” tab, leave it open, and hover “Mega Menu” to get the flyer displayed. Once it is opened, press “Ctrl+\”. You will notice the Debugger is paused, and the flyer will remain open. We can go back to the “Elements” tab and find it.

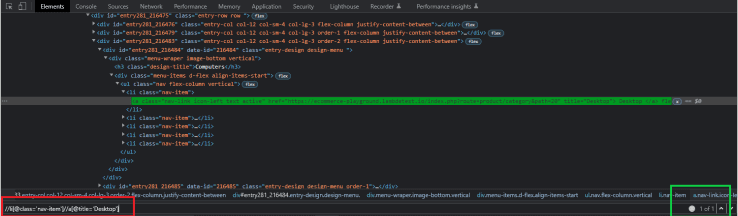
When using XPath, we need to use “@” to specify the attributes of the elements.
XPath looks for XML Nodes, so in our case, we will first find the parent of our element and then the element itself:
//li[@class='nav-item']//a[@title='Desktop']
XPath Tips:
- “//” Is used to create a relative path. So something like “//li” will return all the “li” nodes from the root.
- “/” Is used to create an absolute path. So, “/li” will find the first “li” node from the root.
The same with CSS Selector is used on our test code:
a[title=Desktop]
Alright, now we need to add that particular item to the cart:
|
1 2 |
await page.locator("div.carousel-item.active > img[title='HTC Touch HD']").click() await page.locator("#container button[title='Add to Cart']").click(); |
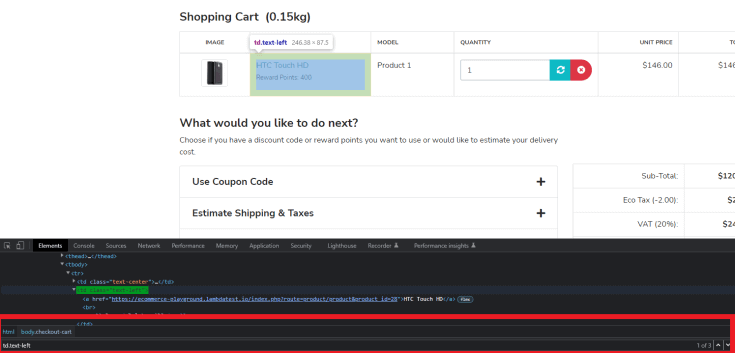
And finally, we need to ensure that the item has been added to the cart, our assertion step. Let’s check it!
|
1 2 3 |
await page.locator("a.btn.btn-primary.btn-block",{hasText: 'View Cart'}).click() await expect(page.locator("td.text-left", {hasText: 'HTC Touch HD'})).toBeVisible() await expect(page.locator("div[class$='flex-nowrap'] > input")).toHaveValue("1") |
For example, if we take a look closer at the element that contains the item, you will see that 3 of them were found using the locator, and this is where the “hasText” option can help:
Done! Let’s see how the full test for Playwright end to end testing looks and how it works!
How to run your Playwright test?
To execute the test for Playwright end to end testing and ensure your application is behaving as expected, we have two ways of doing it.
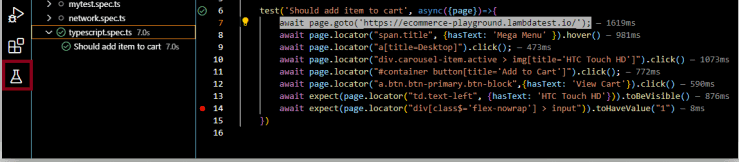
Running Playwright test using VS Code extension
On the left-hand side of VS Code, if you have installed it before, you will find the extension, and if you click on it, you will see your tests in the explorer. Right-click on any test, and you will be able to run or debug it.
Running Playwright test using the terminal
In the same way, we executed all of our npm commands before (to install Playwright, to create the project), and we can execute one command on the terminal to run our test. If the terminal is not opened, you can open a new one on the toolbar at the top of VS Code.
So, on the terminal, in your project root directory, type:
|
1 |
npx playwright test typescript.spec.ts |
If you have only one file (or want to execute all of them), you do not need to specify which .spec.ts file you need to run, as I have multiple files, I used the one for our example.
And that is all! The test passed, and you will see that on the output in the terminal!
Something to pay attention to, there are no “waits” on the code. The Playwright has Auto-Wait functionality before interacting with the elements! Great, isn’t it!? So you do not need to worry about writing implicit/explicit waits. It will do it automatically and make sure the element is not stale, stable, and clickable.
Run your Playwright test scripts instantly on 50+ browser and OS combinations. Try LambdaTest Now!
How to run your Playwright test on the cloud?
Playwright allows us to attach the browser to an existing session, which means that if we use a platform or have a grid to connect to, we can do it. I will quickly show you how to run the previous test using a cloud grid like LambaTest. Keep in mind that you will need a username and access key.
LambdaTest offers a cloud testing platform for cross browser testing on virtual machines, which enables you to test on an online browser farm of 50+ browsers. This can include Chrome, Chromium, Microsoft Edge, Mozilla Firefox, Safari, and even Webkit. You can perform Playwright end to end testing on any of these different browsers simultaneously, resulting in a massive reduction in test execution time.
You only need to configure your browser to point to the existing session before launching and configuring your capabilities. In this case, I have set up the browser, my user, key, and some build name:
|
1 2 3 4 5 6 7 8 9 10 11 |
const capabilities = { browserName: "Chrome", // Browsers allowed: `Chrome`, `MicrosoftEdge`, `pw-chromium`, `pw-firefox` and `pw-webkit` browserVersion: "latest", "LT:Options": { platform: "Windows 10", build: "Playwright Build", name: "Playwright Test", user: "your-user", accessKey: "your-key", }, }; |
And then, on my test, launching the browser to connect to the endpoint:
|
1 2 3 4 |
const browser = await chromium.connect(`wss://cdp.lambdatest.com/playwright?capabilities=${encodeURIComponent(JSON.stringify(capabilities))}`) const page = await browser.newPage() await page.goto('https://ecommerce-playground.lambdatest.io/') |
Now, you are ready to go. Here is the final code.

Also, at the end of the test, you need to execute the commands to update the Test Status.
Capabilities and config can be found here.
Test Execution:
Test Status:
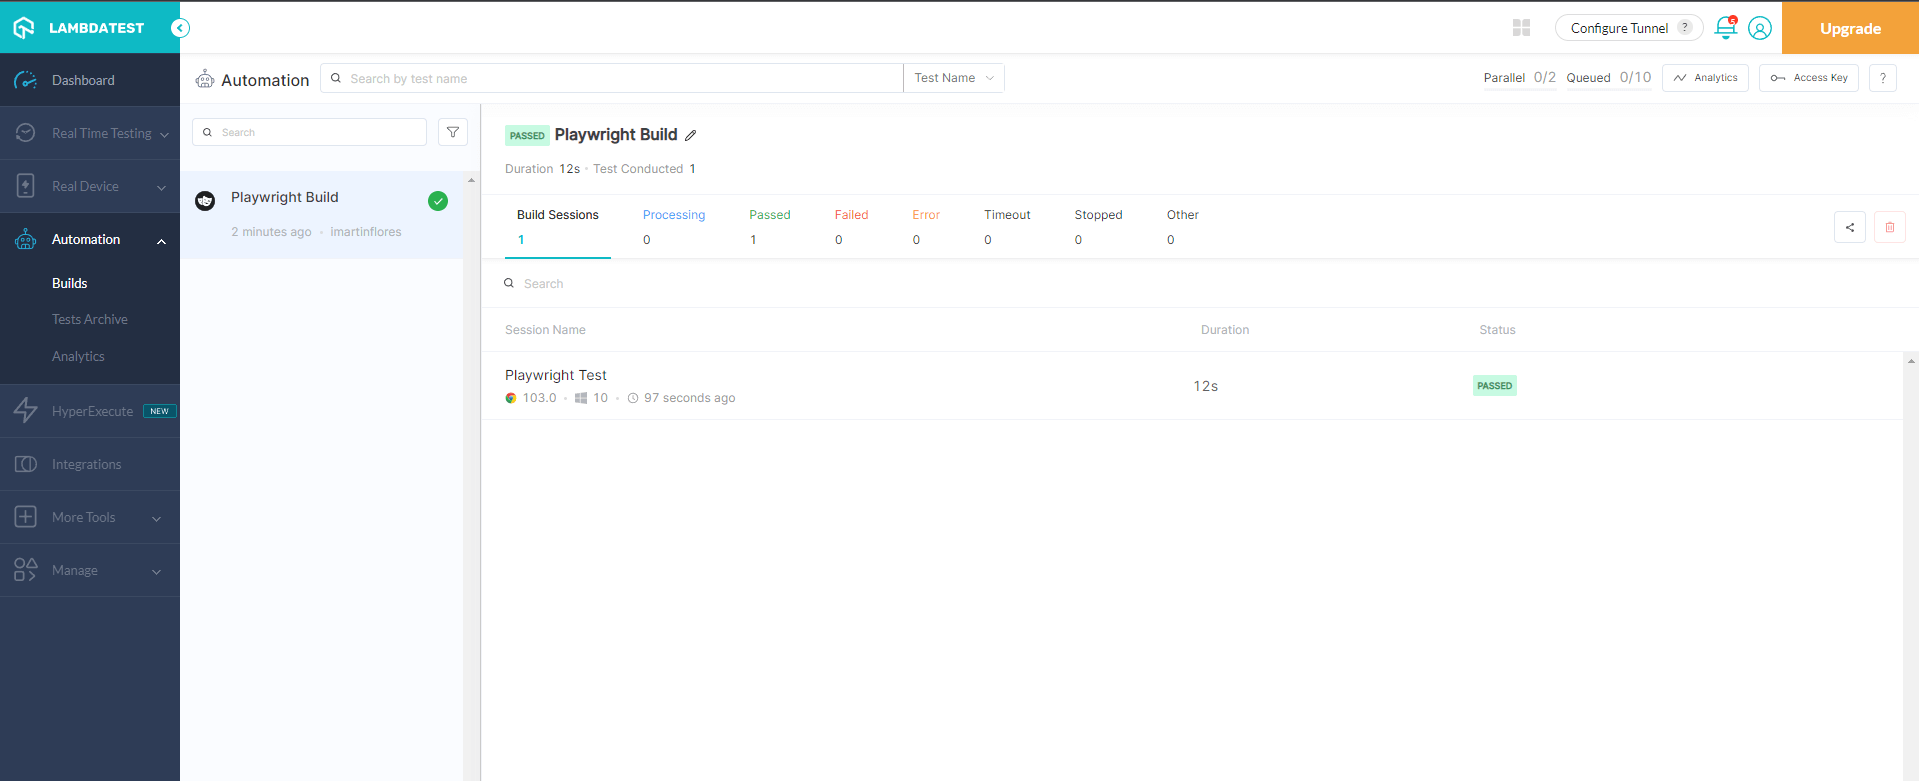
Subscribe to the LambdaTest YouTube Channel and stay updated with the latest tutorial around automated browser testing, Cypress E2E testing, mobile app testing, and more.
Note: You can streamline application testing with playwright visual testing, delivering flawless user experiences while minimizing test execution time.
Best practices while performing Playwright end to end testing
While performing Playwright end to end testing can be a very effective way to help ensure that your application is working as intended, there are several steps you can take to make sure you’re getting the most out of this testing method:
API Feature
This is another great of the built-in features that Playwright offers. What if I tell you we can improve that test by avoiding UI steps?
Yes, if you are thinking about API, you are correct. The Playwright also has an integrated API feature to facilitate your testing. Let’s see what we can do with it. We will update our test slightly, and instead of going through the Menu and adding an Item to the cart, we will do it via the back-end.
The first thing we need to do is to inspect what is the call that gets fired when we try to add the item to the cart. If we open the DevTools and select the Network Tab, we will be able to see it:
As you can see, we can see the URL, the Method, and Data (This can be seen on the “Payload” tab – Query Params and Form are used in this case) that we need to send to add that particular item to the cart.. so, let’s do it!
|
1 2 3 4 5 6 7 8 9 10 11 12 |
test('Should add item to cart', async({page})=>{ const Url = 'https://ecommerce-playground.lambdatest.io/index.php/'; await page.goto(Url); const response =await page.request.post(Url, { params:{ route: "checkout/cart/add" }, form: { product_id: 28, quantity: 1 } }) |
Okay, what have we done in the code?
The first steps did not change, but we are using “request” after navigating to the site. This allows us to send HTTP requests within the context we are working on (page). So we are replicating that API call on the Network tab.
Now, let’s see what happens if we navigate to the shopping cart:
|
1 |
await page.goto(`${Url}?route=checkout/cart`) |
If you are unfamiliar with the code above, that is called String Interpolation. It replaces the “URL” with its value within the string, so, when compiling, the result will be:
‘https://ecommerce-playground.lambdatest.io/index.php/?route=checkout/cart‘
If you look at it, I intentionally left the commented lines because those are the steps we skipped by using the API.
But that is not the most important thing. This is a quick comparison of the test execution time when running it without using the API (I ran it twice):
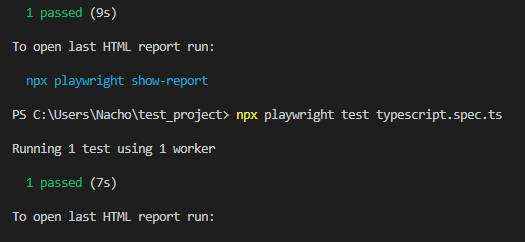
And this is when using the API (Ran twice as well):
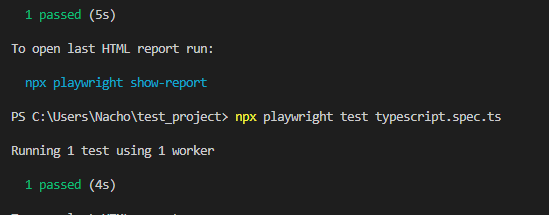
Yes, we can easily improve the execution time by using this feature. Great! Isn’t it? What do you think?
Here you have the full test as reference:
|
1 2 3 4 5 6 7 8 9 10 11 12 13 14 15 |
test('Should add item to cart', async({page})=>{ const Url = 'https://ecommerce-playground.lambdatest.io/index.php/'; await page.goto(Url); const response =await page.request.post(Url, { params:{ route: "checkout/cart/add" }, form: { product_id: 28, quantity: 1 } }) await page.goto(`${Url}?route=checkout/cart`) await expect(page.locator("td.text-left", {hasText: 'HTC Touch HD'})).toBeVisible() await expect(page.locator("div[class$='flex-nowrap'] > input")).toHaveValue("1") }) |
Debugging
What happens if something fails? How can we know where the issue is?
If you have worked with TypeScript or JavaScript before, you might have found that debugging could be tricky and different from debugging a code in Visual Studio (C#). But Playwright offers a very nice debugger to let us review our code and spot what was failing.
Let’s have a quick look at it:
Playwright VS Code Extension for Debugging:
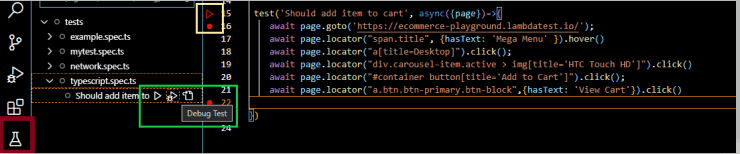
Have a look at the references:
- Playwright VS Code Extension
- Run, Debug, Go To Test Icons
- Run, Debug Test icon + Debug (Break) Point
So, as you can see, if we navigate to our test and put a breakpoint when debugging it, it will automatically stop there. And with the Debug Tools at the top, we can either Step Over or Step Into a method and go through all the code.
It also shows us the elements we interact with in real-time in the browser, making it easier to spot if a locator was wrong.
Trace Viewer
There is also something very cool I would like to show you to spot test failures. This is another great feature of the Playwright called Trace Viewer. It can be configured on our playwright.config.ts file, and it offers multiple options. I have configured it only to retain the trace if the test failed:
Once you’ve executed the test, if it fails, it will generate a file that you can find under the playwright-report folder:
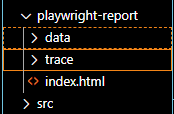
Now, if you go to your terminal and run: npx playwright show-report
![]()
You will be prompted to this screen:
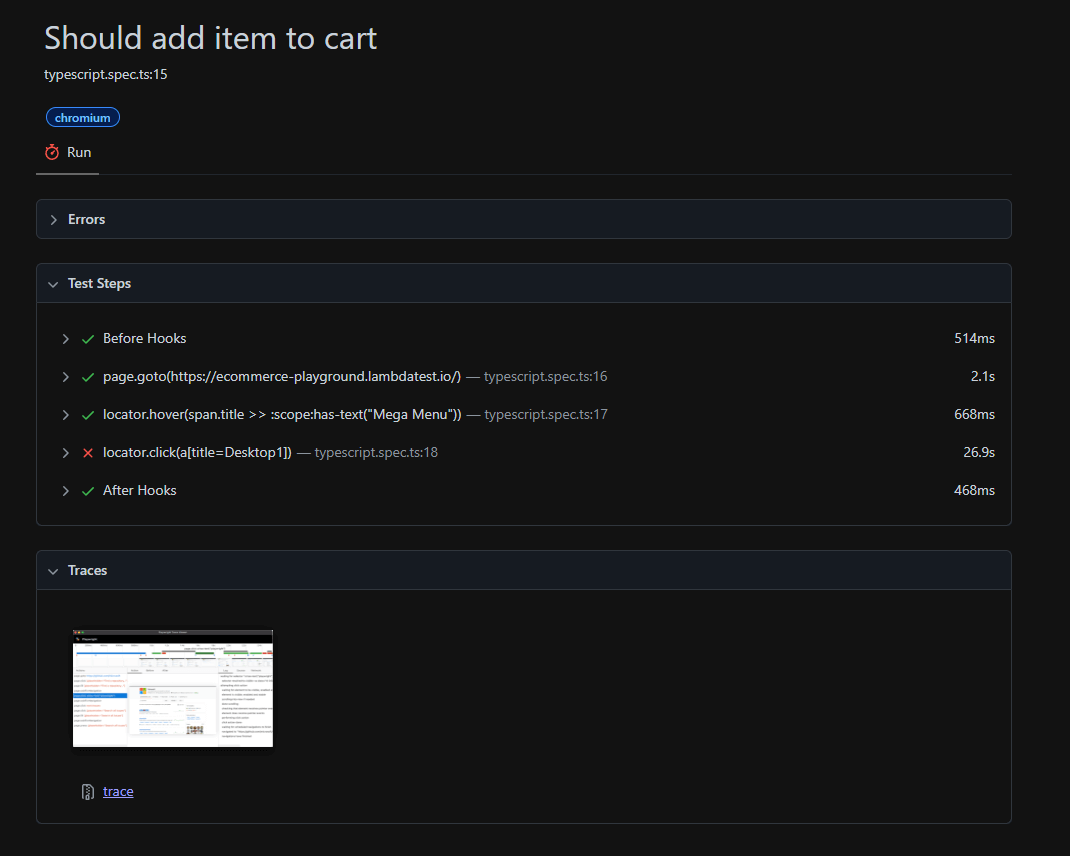
It will show you the failed test, the steps executed, and where the failure occurred. But also, if you check at the bottom of the page and click on that trace image, you will see what happened during the test execution.
It shows the steps (where you clicked, for example, is marked with a Red Dot), snapshots, console and network sources, etc.:
And that’s it! You are now ready to start exploring a little bit of Playwright!
Conclusion
The Playwright is a very intuitive and helpful framework to explore. It makes Playwright automation fast and robust and easy to set up for everyone keen to learn something new.
It can help with different types of testing, such as UI, API, Components, Integration, etc., of its excellent built-in features. It can also be run either locally or on your preferred platform.
I hope you enjoyed this Playwright tutorial and took some good ideas and motivation from it.
Frequently Asked Questions (FAQs)
What is Playwright in testing?
Playwright is a Node.js library to automate browsers. It is suitable for cross-browser automation, has a powerful API, and enables evergreen automation that handles page changes and avoids timeworn pitfalls.
What is end-to-end in testing?
End-to-end testing is a methodology that examines the working order of complex products by running and performing realistic scenarios. End-to-end testing verifies the ability of each component system to perform optimally while working with other components.
What is Playwright E2E?
Playwright makes it easy to build sophisticated, modern Web apps easily by simplifying how you write and run tests.


Author’s Profile
Ignacio Martin Flores
QA Engineer experienced in manual / automated testing with C# and Java as well. A person who is always trying to improve skills . Proactive, autodidact and always willing to help. Well organized, attentive to details and strong team player. Currently helping to lead the Strategy for the QA Department.
Blogs: 1
Got Questions? Drop them on LambdaTest Community. Visit now