
How To Use Waits In Selenium Ruby
Roselyne Makena
Posted On: January 16, 2023
![]() 12105 Views
12105 Views
![]() 20 Min Read
20 Min Read

The wait command in Selenium Ruby is a powerful tool that allows for a high level of control over the test execution.
It is particularly useful for waiting for an element or simulating human behavior.
Examples of this might be to trigger an action on a page, wait for an element to appear and then click it, wait for some content to appear before submitting a form, or even simply wait for data to load on the backend before running any sort of tests.
This is very common when running AJAX requests, where you want to ensure the server returns the data before running the subsequent commands in the test. Using the right type and appropriate duration of waits could prevent your tests from breaking since waits in Selenium is the best way to tackle test flakiness.
I have been using waits in Selenium Ruby for many of my projects, which is why I have covered all the essential aspects of waits in Selenium Ruby as a part of this Selenium Ruby tutorial. The learnings of this blog on waits in Selenium Ruby will help you develop test code that considers the AUT’s dynamic nature. If you are preparing for an interview you can learn more through Selenium interview questions.
Let’s get started.
Table of Contents
TABLE OF CONTENTS
Why are Waits used in Selenium?
Wait allows the developer to write tests to simulate user behavior, such as pressing a button, clicking on a link, and more. What it does is it waits for the presence (or visibility) and/or clickability of a certain element present in the DOM.
It also allows you to set up dependencies between two elements listed as targets in one statement.
- You must know or guess when your target element will appear on the page.
- You will have to handle possible page refreshes (potentially resulting in test failures or test flakiness).
The wait command in web testing can be used in the following ways listed below:
Wait for the WebElement to be present
By default, Selenium Ruby waits forever for elements to appear on the page. You can use a wait function to allow the page to load in scenarios where you want to wait for an element to be present. This is particularly important when testing for elements on the page.
A scenario in which the wait command would be useful is in the LambdaTest E-Commerce Playground. For example, when logging in, it is necessary to ensure that the username and password text box elements are present before entering the credentials. Using the wait command can confirm this before proceeding with the test.
Wait for the WebElement to be visible
This is useful when you want to trigger an action of some kind but only after a certain element has been loaded onto the DOM. In this case, the wait enables quick test execution since you can ascertain that the element is now visible for your tests to begin.
To picture this in action, we can take an example of an eCommerce site that takes seconds to load the main title on the homepage. For our test to be successful, we would employ a wait to check for the visibility of that title and then proceed with the tests.
Wait for the WebElement to be clickable
Some elements need to be clickable before we can run our tests. For example, in our eCommerce example, we need to checkout but need the submit button to be visible before we can click on it.
Such a case would require using one of the wait methods to achieve a successful test.
Wait for the WebElement to complete its job
For example when you need to wait for a progress bar to load or wait for an animation that needs to run before you can proceed with testing.
To understand this better, we can take an example of an eCommerce site that takes some time to load all the items we picked onto our cart. In this case, we would use wait to ensure that the progress bar(which indicates fetching data) has been completed before we start our test assertions.
Wait to ensure the element is not stale
A wait method can be used to ensure that an element has not been modified and declared stale during the testing process.
It is important to note that “stale” means that an element (or its state) might have changed (or updated) after the last time you visited it. A common reason for this is automatic page refreshes or AJAX calls (or dynamic page loads). As a general rule, test logic should be designed to handle stale elements.
A scenario where the wait command would be necessary is when elements are deleted from the DOM, potentially causing a stale element exception. For example, if the session on the page becomes invalid after logging in, the previously loaded elements may no longer be present. In this case, using the wait function can refresh the page or generate a new session, depending on the requirements of the test.
Well, there are patterns you can use in Selenium Ruby to achieve this task based on the expected flow of the application under test and the expected test.
We will explore some of the scenarios by creating tests that showcase the use of different wait types to achieve our goals. Now, the question is, what types of waits should be used in your Selenium Ruby test code?
Akin to other Selenium-supported languages, Ruby (with Selenium) also supports popular wait mechanisms (i.e., Implicit wait, Explicit wait, and Fluent wait); let’s deep dive into each one of these (from a Selenium Ruby perspective).
Implicit, Explicit, and Fluent Waits in Selenium Ruby
Implicit waits are applied by default in Selenium. They apply to all elements on that page and are not selective on any particular element.
However, for Explicit waits, you must choose the element that the wait needs to be added onto and declare the required wait function before any action. Let’s glance at the main differences between implicit and explicit waits.
Run Selenium Ruby tests on 3000+ browsers.Try LambdaTest Now!
Differences between Implicit and Explicit Waits in Selenium Ruby
| Implicit Waits | Explicit Waits |
|---|---|
| Implicit wait time is applied to all the elements in the script. | Explicit wait time is only applied to a specific element, and it is defined by the script. |
| Implicit waits do not need a condition to be true for a wait to occur. When an implicit wait is executed, it will wait until the end of the data passes, no matter what is happening. | In an explicit wait, a condition must be true (or it times out) before it begins to execute. |
| Implicit waits are used for generally faster loading elements, but their flexibility is limited. | Explicit waits are used for slower-loading elements where flexibility is necessary. |
| Implicit waits are a better option when the load time of objects is not known. | Explicit waits can be applied to any object, and its load time is known. |
Here are the different types of waits that can be used in your Selenium Ruby test code. For demonstration, we would be using the LambdaTest eCommerce website.
We will look at the following test cases for the tests and discuss how Selenium Ruby handles each scenario while performing Ruby automation testing.
Test Scenarios for the code demonstration:
- Demonstrate how an implicit wait is applied during our tests.
- Demonstrate how an explicit wait is applied to specific elements.
- Demonstrate how an explicit wait is applied by adding a rescue block with a timeout.
Implicit Waits in Selenium Ruby
In Ruby, an implicit wait controls a test instance’s behavior when a test method is executed. The implicit wait will time out after a given amount of time if the current web element is unavailable in the DOM before throwing a No Such Element Exception. You can learn more about it through this blog on common Selenium Exceptions.
Implicit wait functions are non-deterministic, which means they do not apply any specific logic or pattern to determine if the page has fully loaded. But on the other hand, explicit wait functions are deterministic. For example, in the snapshot below, we are explicitly calling the wait on our driver so we can have the title load before the test can proceed.
An implicit wait is simple and may be used to perform any custom action during the waiting period. Any explicit wait command will override an implicit wait.
Let’s examine a code demonstration of implementing implicit waits in Selenium Ruby.
Note: I’m using Ruby 3.0.3 and SeleniumWebDriver 4.1.0. If you have an older version of Ruby or SeleniumWebDrive, you can check the Ruby version by opening the terminal and typing the following.
Getting elements from Inspect Tools for our tests
Before we look at the code demonstration, let’s look at how we get the elements from the browser to get the element names.
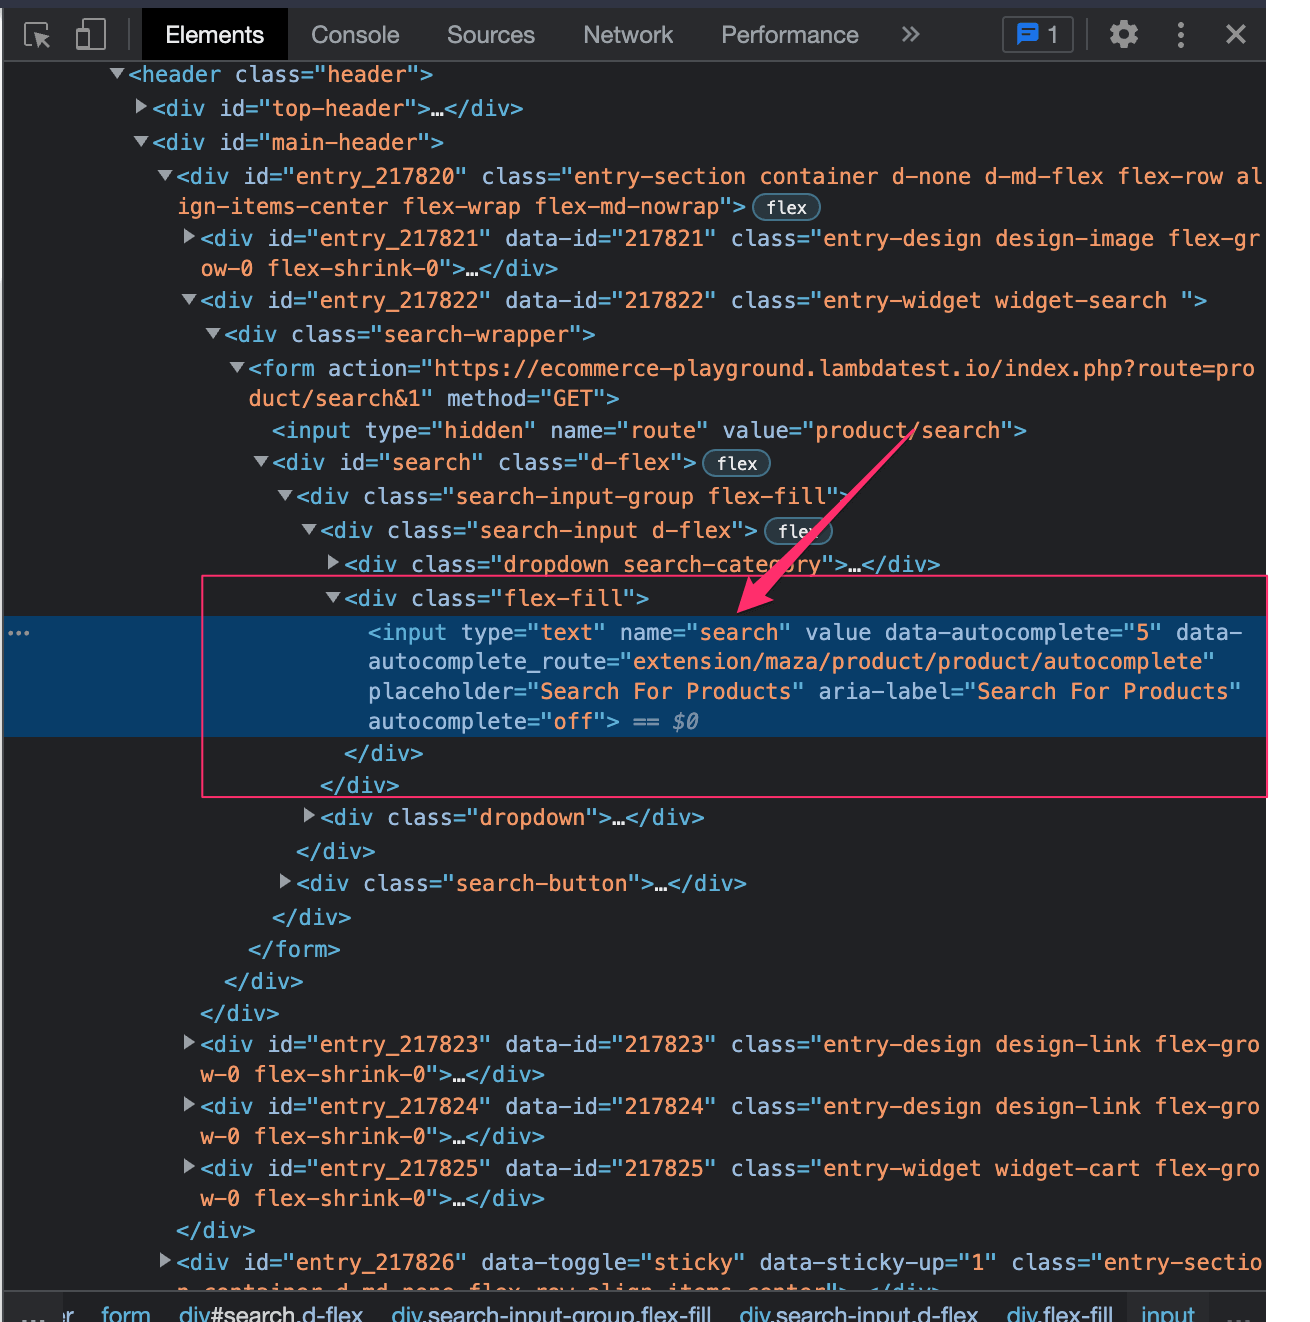
In the store, we will be looking at the search element, which in our tests, we have used the syntax below. You will notice that we used the :name “search.” But how did we get this name?
|
1 |
search_box = @my_driver.find_element(:name, "search") |
To get element names or identifiers, we use browser inspection tools. Most browsers have support for this.
- Open the demo site > Right-click on the page and click inspect.
- With the element selected, you will notice that the element panel that appears – There are the attributes for that object. Check for a suitable element that is unique to that element. It’s always recommended to use IDs if they are available on the specific element, but if not – you can use the next best unique identifier.
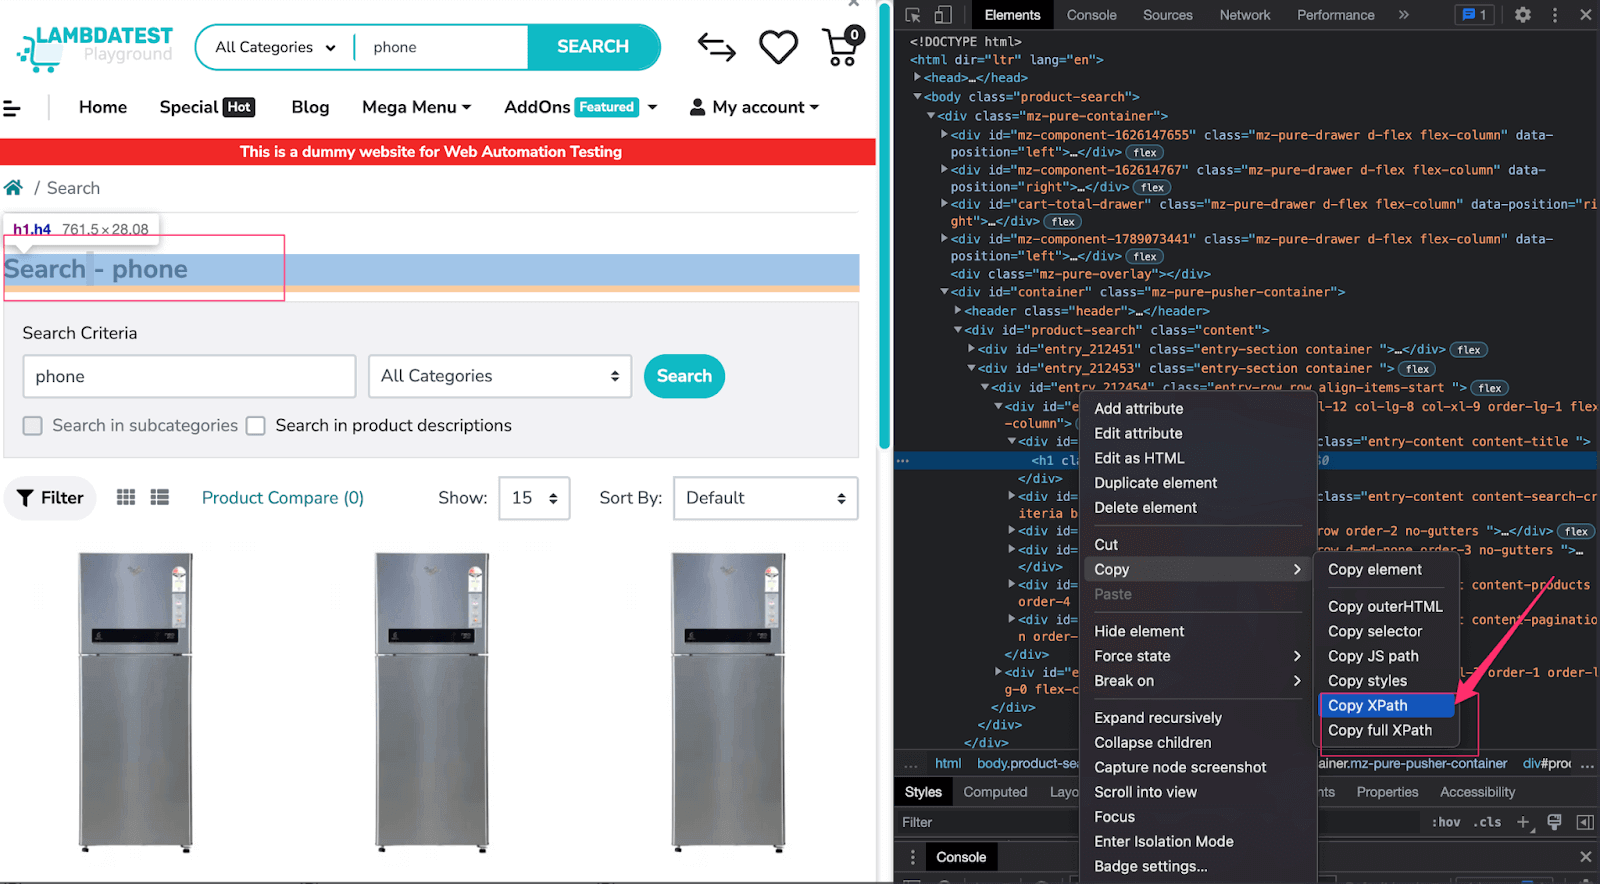
- Another example is getting an XPath to use in our tests. Similarly, following steps one and 2, we can right-click and get the XPath from the browser developer tools as shown.
- driver.find_element(id: “myElement”).enabled? – A clickable element is enabled.
- driver.find_element(id: “myElement”).displayed? – An element is visible.
- driver.find_element(id: “myElement”).text.included? – An element has particular text.
- driver.switch_to.alert – An alert has been loaded.
- driver.find_element(:id, ‘CheckBox’).selected? – A checkbox has been selected.
- driver.find_element(:id, ‘CheckBox’).click – A click has been made.
- driver.find_element(:id, ‘CheckBox’).clear – Deselect a checkbox.
- Login to access the LambdaTest Dashboard.
- Check on the automate tab for your test run.
- On the section labeled A – If you check the difference between the time stamps – you will notice it’s 5 seconds. – And this directly correlates to the 5 seconds interval parameter we specified on our fluent wait.
- On the section labeled B – You will see the NO SUCH ELEMENT defined as the reason the test was unsuccessful. However, you will note that the tests will not be marked as failed because we used a rescue block.

This mode of checking for elements will apply to all other elements in the testing process.
Now that we have seen how to inspect elements. Let’s look at the code demo for the waits we have discussed above. You can also learn about more locator strategies through this tutorial on locators in Selenium.
Syntax (Implicit Wait):
To employ an implicit wait, you need to know the amount of time you would like Selenium WebDriver to wait and then define it as a variable, as shown below.
|
1 2 |
# Set an implicit wait time @my_driver.manage.timeouts.implicit_wait = 30 |
Demonstration: Implicit Waits in Selenium Ruby
This is an example of implicit waits in Selenium Ruby, which shows how we use implicit waits in Selenium Ruby.
|
1 2 3 4 5 6 7 8 9 10 11 12 13 14 15 16 17 18 19 20 21 22 23 24 25 26 27 28 29 30 31 32 33 34 35 36 37 38 39 40 41 42 43 44 45 46 47 48 49 50 51 |
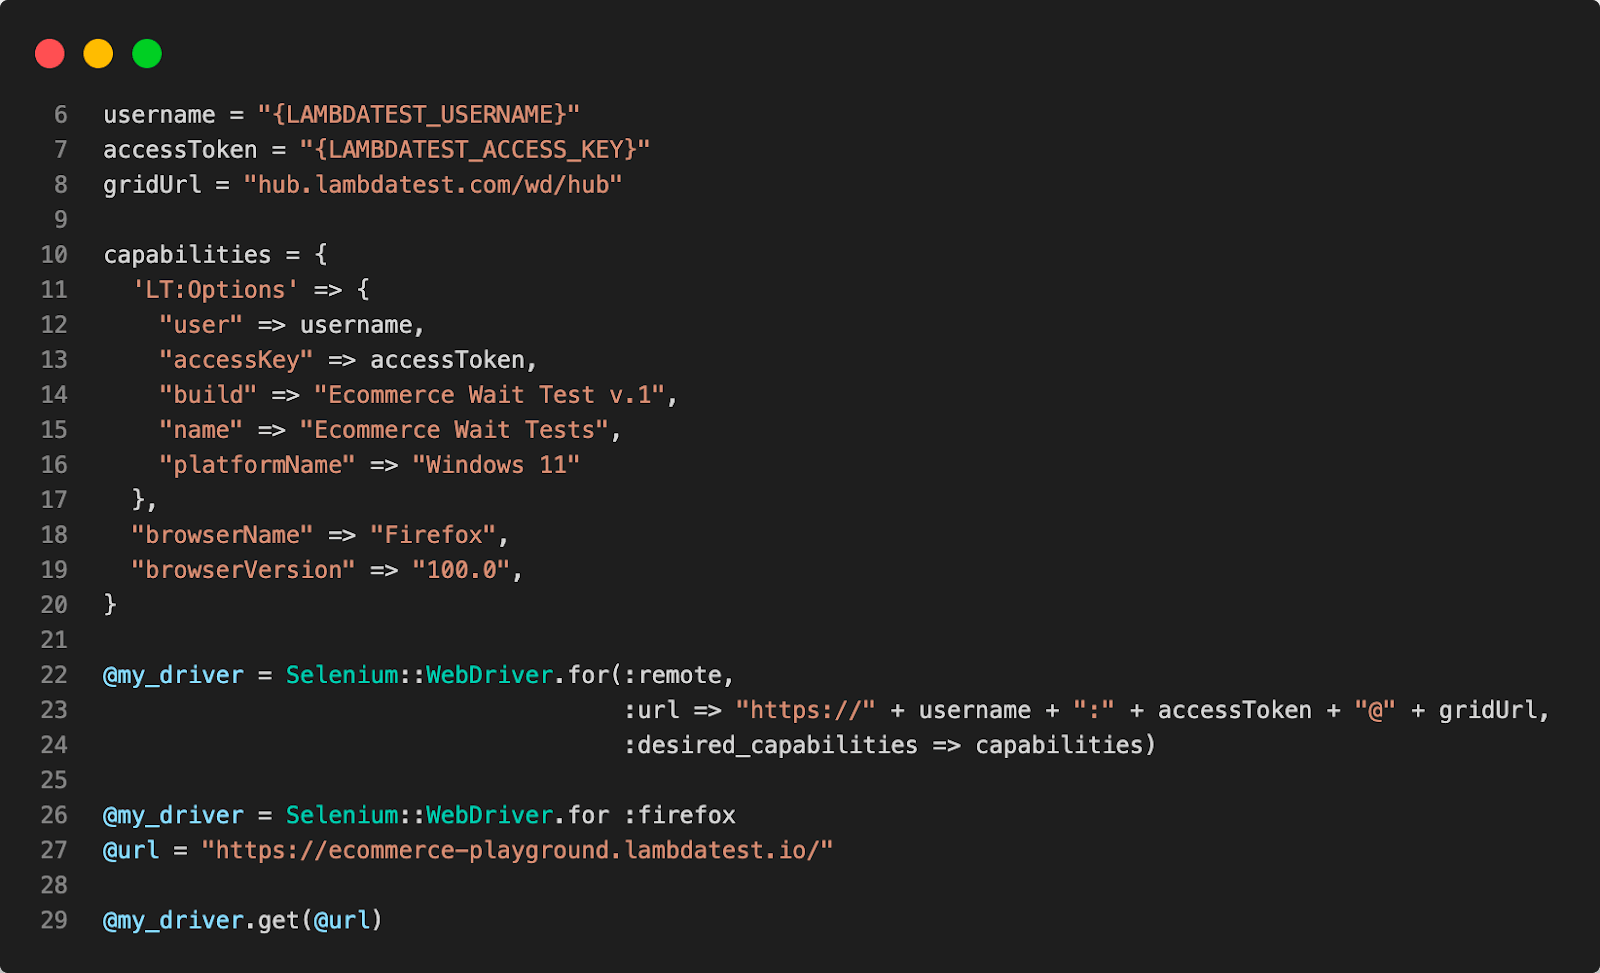
require 'Selenium-webdriver' require 'test-unit' class EcommerceTests < Test::Unit::TestCase def setup username = "{LAMBDATEST_USERNAME}" accessToken = "{LAMBDATEST_ACCESS_KEY}" gridUrl = "hub.lambdatest.com/wd/hub" capabilities = { 'LT:Options' => { "user" => username, "accessKey" => accessToken, "build" => "Ecommerce Wait Test v.1", "name" => "Ecommerce Wait Tests", "platformName" => "Windows 11" }, "browserName" => "Firefox", "browserVersion" => "100.0", } @my_driver = Selenium::WebDriver.for(:remote, :url => "https://" + username + ":" + accessToken + "@" + gridUrl, :desired_capabilities => capabilities) @my_driver = Selenium::WebDriver.for :firefox @url = "https://ecommerce-playground.lambdatest.io/" @my_driver.get(@url) # Set an implicit wait time @my_driver.manage.timeouts.implicit_wait = 30 end def test_title_should_be_your_store # The implicit time will apply by default. i.e 30 seconds assert_equal(@my_driver.title, "Your Store") end def teardown @my_driver.quit end end def teardown @my_driver.quit end end |

Code Walkthrough:
Let’s have a quick walkthrough on the code we have written above.
We first set up our capabilities and have our WebDriver ready by including the below.
Export your Username and Access Key in environment variables by running the following commands on the terminal:
|
1 2 3 4 5 6 |
For Linux/macOS: export LAMDATEST_USERNAME="YOUR_USERNAME" export LAMDATEST_ACCESS_KEY="YOUR ACCESS KEY" For Windows: set LT_USERNAME="YOUR_USERNAME" set LT_ACCESS_KEY="YOUR ACCESS KEY" |
This will ensure that our variables are set up and ready for consumption by our script.
Next, on line 35, we set our implicit time to 30 seconds, as seen below.
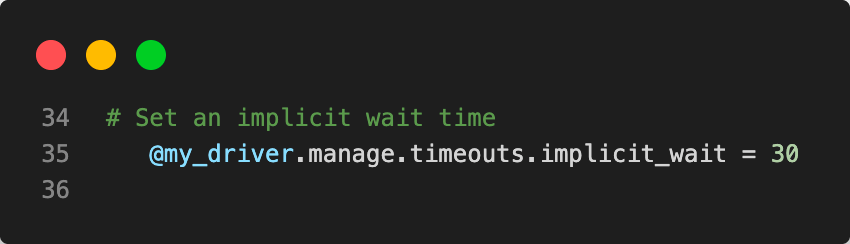
Here, we set an implicit wait using the manage.timeouts.implicit_wait = 30 method. Selenium will wait 30 seconds for any element to be present in the DOM before throwing a Timeout error.
If the element is found before the 30 seconds are over, the test will continue as expected without any error and will not wait for the time to elapse.
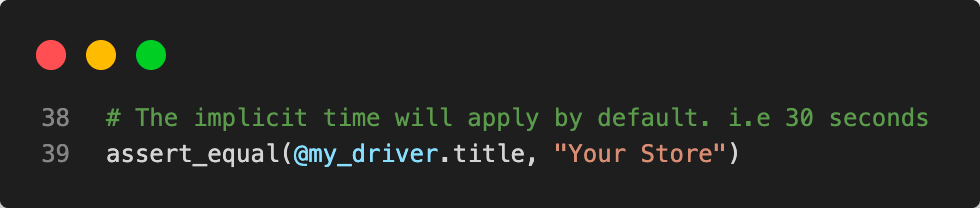
Finally, on our test, we assert without additional methods since, by default, the implicit wait will be applied, as shown above.
Explicit Waits in Selenium Ruby
An explicit wait will make the test do something before it times out. This is useful when you have a set time to perform your test, say, “let’s test this page for 15 seconds”. An explicit wait allows you to wait for the correct element before running a set action, like click or submit.
It is distinct from other waits as its effects are immediate, meaning it does not stop the execution of the test method when a timeout occurs. This means that any action performed after waiting for an element will still take place.
Explicit waits are very useful in testing for non-simplistic situations where you wish to define a response time to an element and enforce this response time as long as the provided condition is satisfied when it returns true.
Some of these waits on conditions are:
Demonstration: Explicit Waits in Selenium Ruby
Let’s look at the full code demonstrating explicit waits in Selenium Ruby.
|
1 2 3 4 5 6 7 8 9 10 11 12 13 14 15 16 17 18 19 20 21 22 23 24 25 26 27 28 29 30 31 32 33 34 35 36 37 38 39 40 41 42 43 44 45 46 47 48 49 50 51 52 53 54 55 56 57 58 59 60 61 62 |
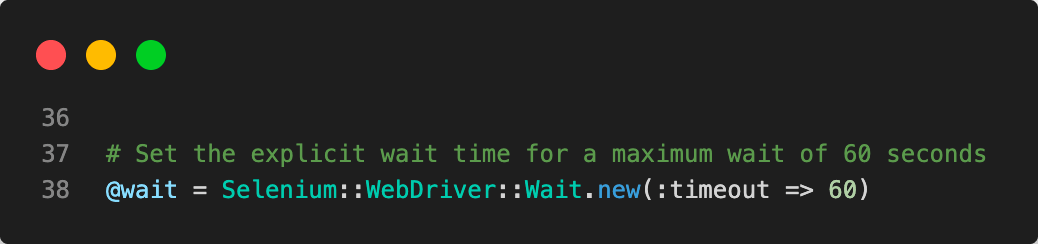
require 'selenium-webdriver' require 'test-unit' class EcommerceTests < Test::Unit::TestCase def setup username= "{LAMBDATEST_USERNAME}" accessToken= "{LAMBDATEST_ACCESS_KEY}" gridUrl = "hub.lambdatest.com/wd/hub" capabilities = { 'LT:Options' => { "user" => username, "accessKey" => accessToken, "build" => "Ecommerce Wait Test v.1", "name" => "Ecommerce Wait Tests", "platformName" => "Windows 11" }, "browserName" => "Firefox", "browserVersion" => "100.0", } @my_driver = Selenium::WebDriver.for(:remote, :url => "https://"+username+":"+accessToken+"@"+gridUrl, :desired_capabilities => capabilities) @my_driver = Selenium::WebDriver.for :firefox @url = "https://ecommerce-playground.lambdatest.io/" @my_driver.get(@url) # Set an implicit wait time @my_driver.manage.timeouts.implicit_wait = 30 # Set the explicit wait time for a maximum wait of 60 seconds @wait = Selenium::WebDriver::Wait.new(:timeout => 60) end def test_search_functionality_should_yield_results assert_equal(@my_driver.title, "Your Store") search_box = @my_driver.find_element(:name, "search") search_box.clear search_box.send_keys("phone") search_box.submit sleep(5) # Call the explicit wait time - Here, the waiting time will be set to 60s and not the 30s. search_title = @wait.until { @my_driver.find_element(:xpath, '//*[@id="entry_212456"]/h1') } # Second test assertion - title has loaded assert_equal("Search - phone", search_title.text) end def teardown @my_driver.quit end end |
Code Walkthrough:
In the explicit wait code, we use the defined, explicit function on our Selenium methods.
We set our explicit function as a variable called @wait – which we call later in our test, as shown below.

And then, finally, we called our explicit wait on our element, ensuring that our wait would specifically apply to this element as 60s.
Fluent Waits in Selenium Ruby
Fluent waits support an exponential wait time where the wait time is a function of the wait function. The exponential waiting allows for more control over how long to wait for elements – for example, in an eCommerce site, you may wish to test that an element can appear before being clicked before you proceed.
The fluent wait will allow you to check frequently after a specified amount of time before increasing the wait time.
Syntax (Fluent Wait):
|
1 |
@fluent_wait.until { @my_driver.find_element(:name, "search-box-doesnt-exist") |
Demonstration: Fluent Waits in Selenium Ruby
|
1 2 3 4 5 6 7 8 9 10 11 12 13 14 15 16 17 18 19 20 21 22 23 24 25 26 27 28 29 30 31 32 33 34 35 36 37 38 39 40 41 42 43 44 45 46 47 48 49 50 51 52 53 54 55 56 57 58 59 |
require 'selenium-webdriver' require 'test-unit' class EcommerceTests < Test::Unit::TestCase def setup username= "{LAMBDATEST_USERNAME}" accessToken= "{LAMBDATEST_ACCESS_KEY}" gridUrl = "hub.lambdatest.com/wd/hub" capabilities = { 'LT:Options' => { "user" => username, "accessKey" => accessToken, "build" => "Ecommerce Wait Test v.1", "name" => "Ecommerce Wait Tests", "platformName" => "Windows 11" }, "browserName" => "Firefox", "browserVersion" => "100.0", } @my_driver = Selenium::WebDriver.for(:remote, :url => "https://"+username+":"+accessToken+"@"+gridUrl, :desired_capabilities => capabilities) # @my_driver = Selenium::WebDriver.for :firefox @url = "https://ecommerce-playground.lambdatest.io/" @my_driver.get(@url) # We define the exception we expect exception = Selenium::WebDriver::Error::NoSuchElementError # Set a fluent wait time for a maximum wait of 45 seconds - for use later in the tests # Here, the error NoSuchElementError is expected to be thrown, but we don't want to fail the test if it does, so we use the rescue block @fluent_wait = Selenium::WebDriver::Wait.new(timeout: 45, interval: 5, message: 'Timed out after 45 secs', ignore: exception) end def test_search_functionality_with_fluent_wait assert_equal(@my_driver.title, "Your Store") # Here we call an element that does not exist and check that the fluent wait works as expected, we # ignore the NoSuchElementError exception and rescue the TimeOutError exception to proceed with the test begin @fluent_wait.until { @my_driver.find_element(:name, "search-box-doesnt-exist") } rescue Selenium::WebDriver::Error::TimeoutError puts "Element not found" end end def teardown @my_driver.quit end end |
Code Walkthrough:
Let’s have a look at the fluent wait code walkthrough above, what just happened you might ask.
Now that we know what the setup does from examples of implicit and explicit waits in previous sections, we will concentrate more on the test itself.
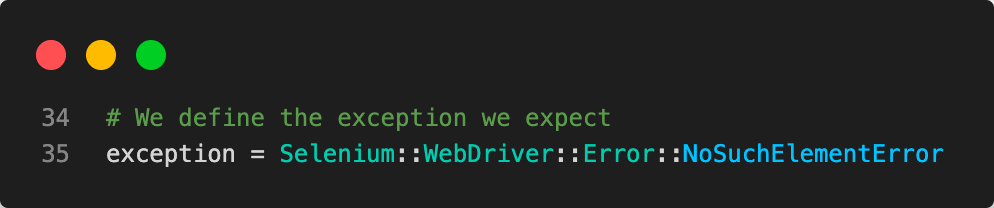
We define the name of our exception that we intend to ignore in case of the fluent wait times out. This is a NoSuchElementError, which is the exception Selenium throws when an element is not found on the DOM.

You will notice at the setup on line 39 we defined our fluent wait method and then declared our fluent wait method using the interval parameter of 5 seconds. This means that the fluent wait will wait for 5 seconds and then perform a check if the element is available.
Thus before the test fails, the script will have tried to check for the element 9 times since our timeout is 45 seconds. We will confirm this from our test results below.
|
1 2 3 4 5 6 7 |
# Here we call an element that does not exist and check that the fluent wait works as expected, we # ignore the NoSuchElementError exception and rescue the TimeOutError exception to proceed with the test begin @fluent_wait.until { @my_driver.find_element(:name, "search-box-doesnt-exist") } rescue Selenium::WebDriver::Error::TimeoutError puts "Element not found" end |
We then call an element that does not exist and check that the fluent wait works as expected, we ignore the NoSuchElementError exception and rescue the TimeOutError exception to proceed with the test.
Let’s discuss the usage of the rescue block in our tests.
What are rescue blocks used for while testing in Ruby?
Rescue blocks are similar to try..catch blocks in Java, where you can catch exceptions and choose to do another action in case of an exception. This is useful when you want to prevent a test from failing and do something else instead.
When using rescue blocks in automated testing, we can include multiple types of errors by chaining the rescue blocks together. This is important when we must ignore multiple exceptions while waiting.
How to run Selenium Ruby tests on a cloud grid?
To run Selenium Ruby tests on a cloud grid, you must set up a cloud-based Selenium Grid, such as LambdaTest. Once you have set up an account and configured your grid, you can use the Selenium WebDriver in your Ruby script to connect to the grid and execute your tests.
Automation testing tools like LambdaTest offer an extensive online device farm comprising over 3000 real devices with real operating systems for performing Selenium Ruby testing at scale. This allows for comprehensive Selenium testing using LambdaTest’s online Selenium Grid.
You can also subscribe to the LambdaTest YouTube Channel and stay updated with the latest tutorials around Selenium testing, Cypress E2E testing, CI/CD, and more.
You should see results similar to the screenshot above, indicating that your tests have run successfully. You can watch the video to see how your test ran. On the right-hand side pane, you have a list showing the execution steps during the test process.
On the cloud, we noticed a NoSuchElement Error thrown, but the tests all passed as we expected – thanks to our rescue method. If we wanted our tests to fail, we would remove the rescue method. These results show what we would expect to see on the LambdaTest dashboard.
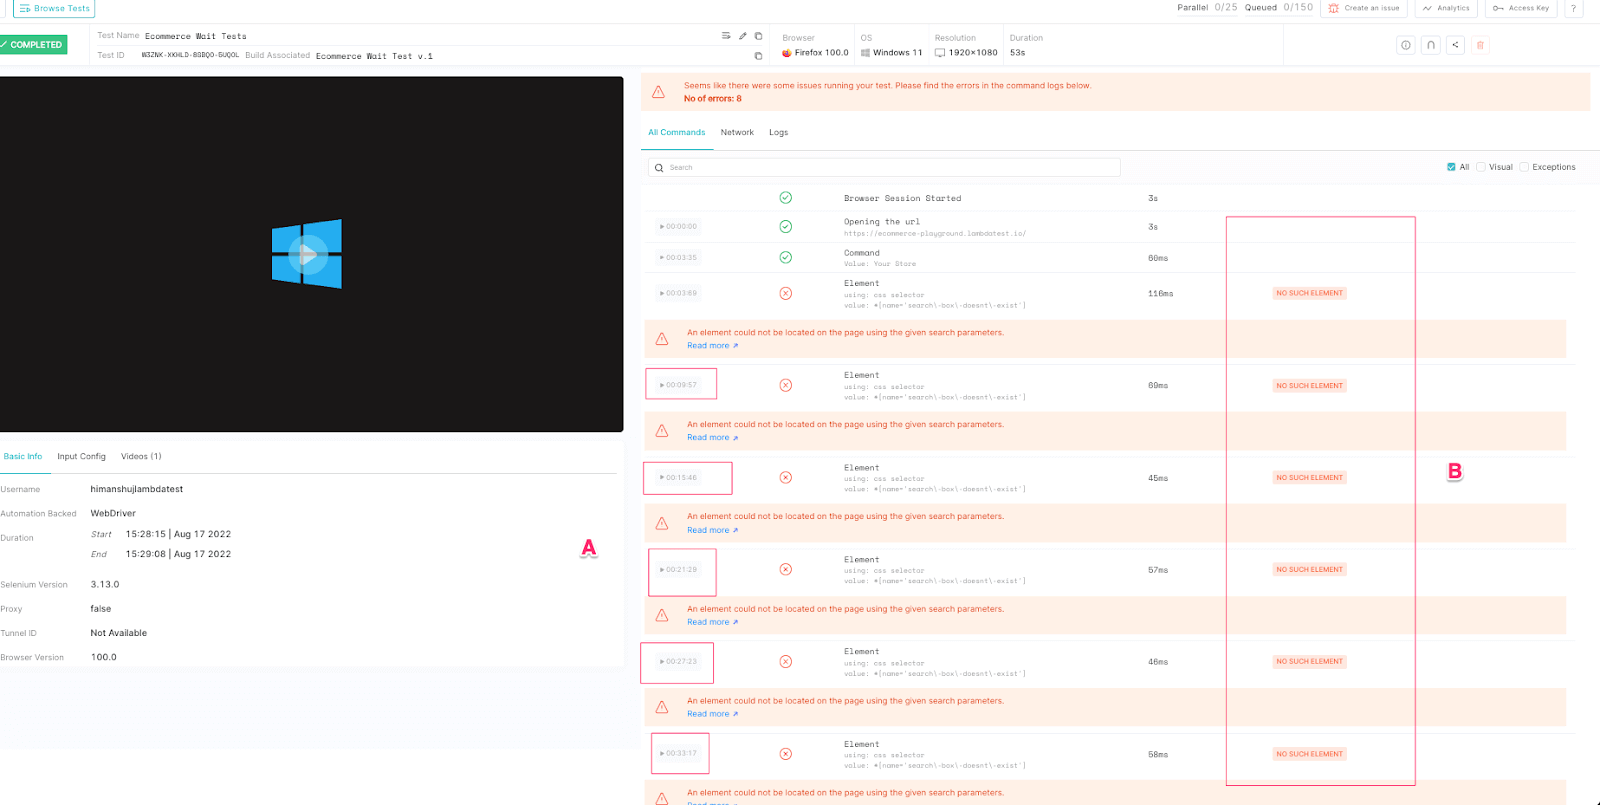
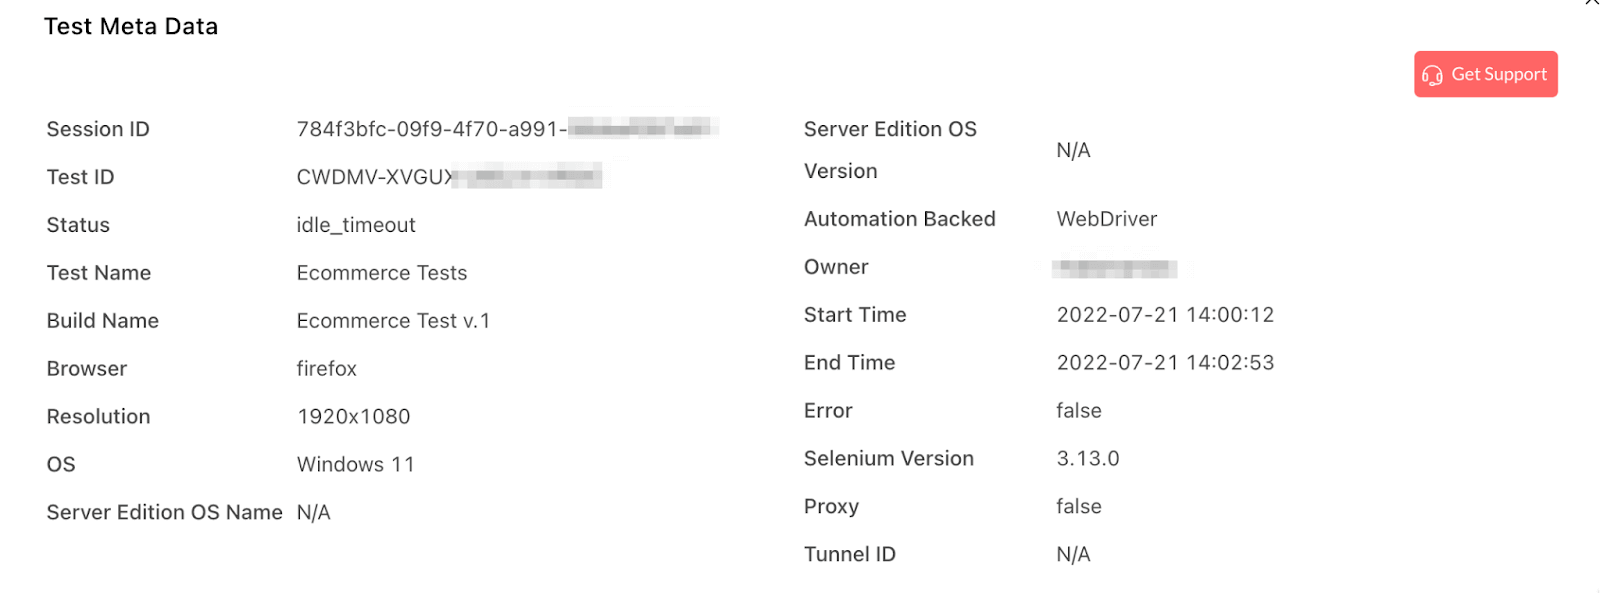
Viewing the dashboard for essential metrics that can help troubleshoot your tests is important. For example, at the top right corner, you can see the browser, operating system, resolution, and the duration taken to run your test – These options can be changed on the capabilities file that we passed earlier to match what you desire to test for.
More information can be obtained by clicking the metadata button, which will give more information about your tests that looks like below.
LambdaTest is a platform that allows you to streamline your test execution process by centralizing all of your test data in one place. This makes it easy for you to access and analyze your test results, so you can make informed decisions about your software development process.
With LambdaTest Test Analytics, you can quickly and easily view test results, compare different test runs, and identify areas where your tests may fail or improve. This can help you to optimize your testing process and improve the overall quality of your software. LambdaTest also provides an easy way to debug and fix issues by providing detailed error logs, screenshots, and video recordings of tests, which can be really useful for developers and testers to troubleshoot issues.

If you are a developer or tester looking to improve your Ruby skills, the Selenium Ruby 101 certification from LambdaTest may be a valuable resource for you.
Conclusion
Waits in Selenium Ruby control which test is executed and when. The implicit wait allows you to specify a wait time for any given test method to run before returning. The explicit wait allows you to perform actions within the specified time before waiting for the element to be found. The fluent wait supports an exponential wait based on certain conditions being true before it executes.
All these wait methods are very important in Selenium. They help you achieve test reliability and reduce the number of tests that might have failed because of a timeout or another error you might want to catch.
Frequently Asked Questions (FAQs)
What are waits in Selenium?
In Selenium, a wait is a way to pause the execution of a script until a specific condition is met. There are two types of waits in Selenium: explicit and implicit.
What are the three types of waits in Selenium?
Explicit Waits: Explicit waits are used to tell the WebDriver to wait for a certain amount before proceeding with the next step in the script. For example, this can be useful when waiting for an element to load on a page. Examples of explicit waits are Thread.sleep(), WebDriverWait, and ExpectedConditions.
Implicit Waits: Implicit waits are used to tell the WebDriver to poll the DOM for a certain amount before throwing an exception if an element is not found. For example, this can be useful when waiting for an element to appear on a page after an action has been performed. These waits are set at the WebDriver level and are applied to all the element locator calls made by the WebDriver instance.
Fluent Waits: Fluent Wait is an extension of the above two types of waits. It allows the WebDriver to wait for a certain amount of time before proceeding with the next step in the script, but it also allows you to specify the frequency at which the WebDriver should check for the element.


Author’s Profile
Roselyne Makena
Roselyne is a software developer in test and a tech enthusiast who loves writing about different tech topics. She's keen and observant in the areas around Software Development, Software Testing and best practices. She also likes to write about Web Development Cloud Computing and emerging technologies.
Blogs: 4
Got Questions? Drop them on LambdaTest Community. Visit now


