
xUnit Testing Tutorial: Environment Setup For Selenium Testing
Himanshu Sheth
Posted On: May 14, 2020
![]() 52198 Views
52198 Views
![]() 6 Min Read
6 Min Read
xUnit.net (also referred to as xUnit) framework is a popular open-source unit testing framework for the .Net platform. The framework is built with a community focus. Since there is a focus on the community, it is easier to expand upon than other popular Selenium testing frameworks.
As xUnit is written by the creators of the NUnit framework, you would find a lot of similarities between the two frameworks. The intention of creating a new unit testing framework was to build a much better framework from ground-up.
Unlike other popular frameworks for automation testing with Selenium C#, like NUnit and MSTest, this test framework follows a more unique style of attributes/annotations.
The xUnit framework has fewer attributes in comparison to the NUnit and MSTest frameworks. The other advantage of using xUnit is that the Selenium test automation framework creates a new instance of a test class for every test. At the time of writing this blog, the latest version of xUnit was 2.4.1.
In this xUnit testing tutorial, I’ll take a detailed look at setting up the xUnit framework (or xUnit setup example) which can help you get started with xUnit (or xUnit.net) on Visual Studio.
TABLE OF CONTENT
Setting Up Visual Studio For Development And Testing
For development, I’ll use the Visual Studio 2019 (VS 2019) IDE. Before looking into the xUnit setup example, I’ll take a brief look at setting up Visual Studio for automation testing with Selenium C#.
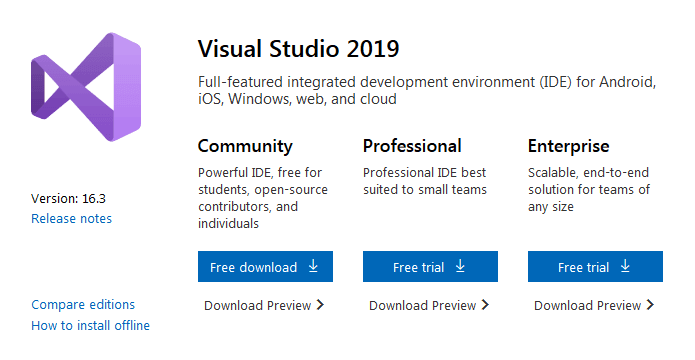
Step 1: The latest version of Visual Studio 2019 can be downloaded from here. You can choose from the Community/Professional/Enterprise versions. In this xUnit testing tutorial, I have used the Community Edition of Visual Studio 2019.
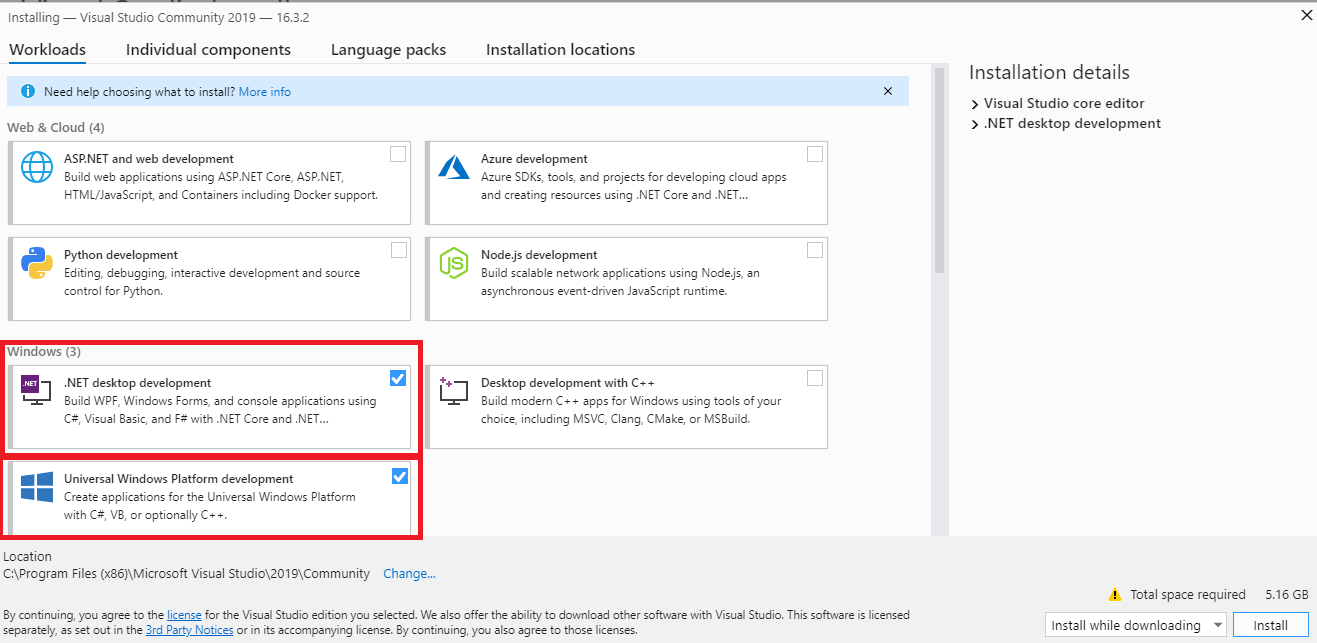
Step 2:In this xUnit testing tutorial, the xUnit test framework will be used along with Selenium for test automation. Hence, I’ll install the necessary packages that aid in automation testing with Selenium C# on the Windows platform.
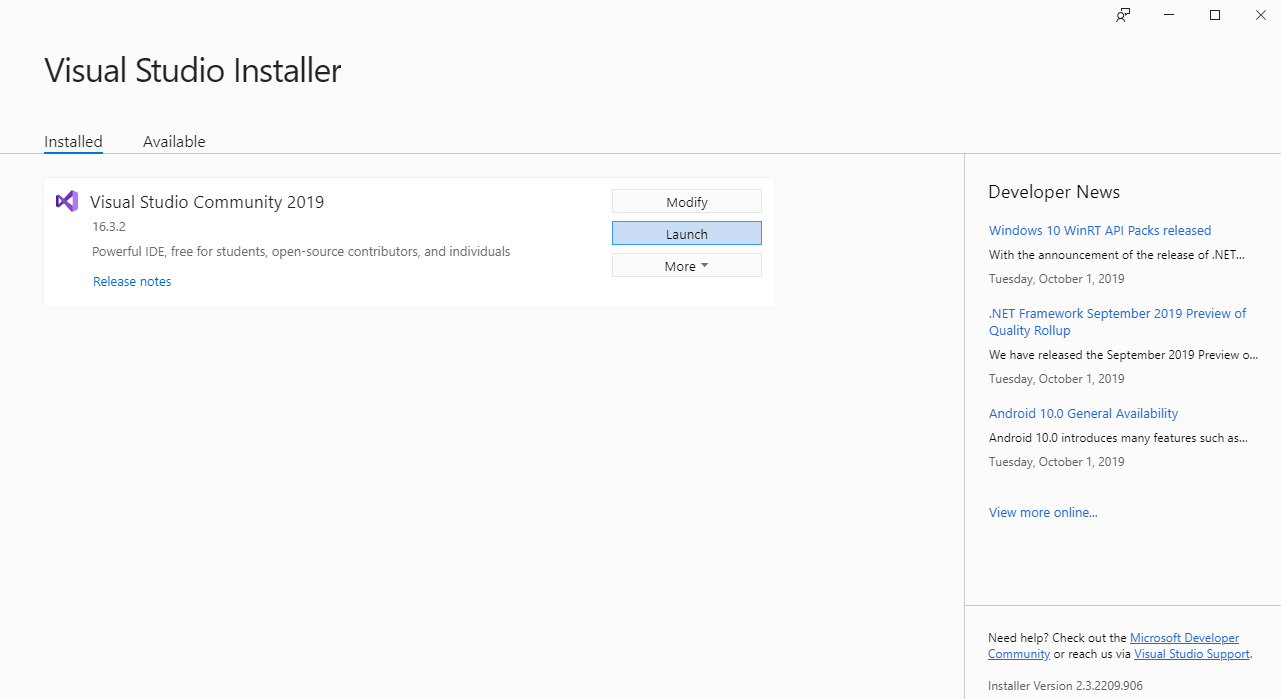
Launch the Visual Studio:
Install the necessary packages:
Step 3: In case you are also installing the Community Edition of Visual Studio, it is important that you sign-in to the IDE else you would not be able to use the IDE after the trial period (approximately 30 days). Once you sign-in, you can also utilize other powerful features such as pushing source code to private Git, syncing Visual Studio settings, and more.
In the next section of the xUnit testing tutorial, I’ll take a look at the steps to install the mandatory packages for performing automation testing with Selenium C# using xUnit framework.
Selenium C# Tutorial: Setting Up Selenium In Visual Studio
This xUnit Tutorial for beginners and professionals will help you learn how to use xUnit framework with Selenium C# for performing Selenium automation testing.
Installing The xUnit Framework & xUnit.net Runner
For executing tests that make use of the xUnit framework, you’ll have to install the corresponding test runner i.e. xUnit.net runner. Installation of the xUnit framework and its runner can be done by installing the packages using the package manager from GUI or executing the equivalent package manager (PM) commands on the terminal.
For this xUnit testing tutorial, I’ll explore both these options for installing the xUnit framework. Before the installation of the required packages, you’ll have to perform the following steps:
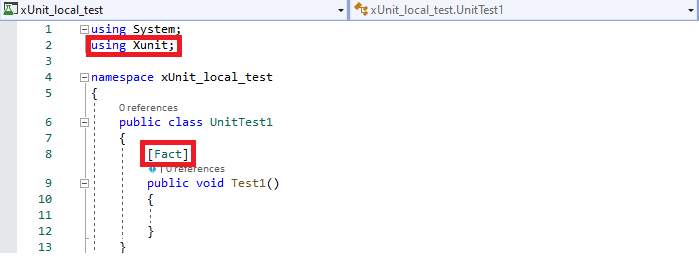
Step 1: Create a new project of the type ‘xUnit Test Project (.Net Core)’ in Visual Studio.
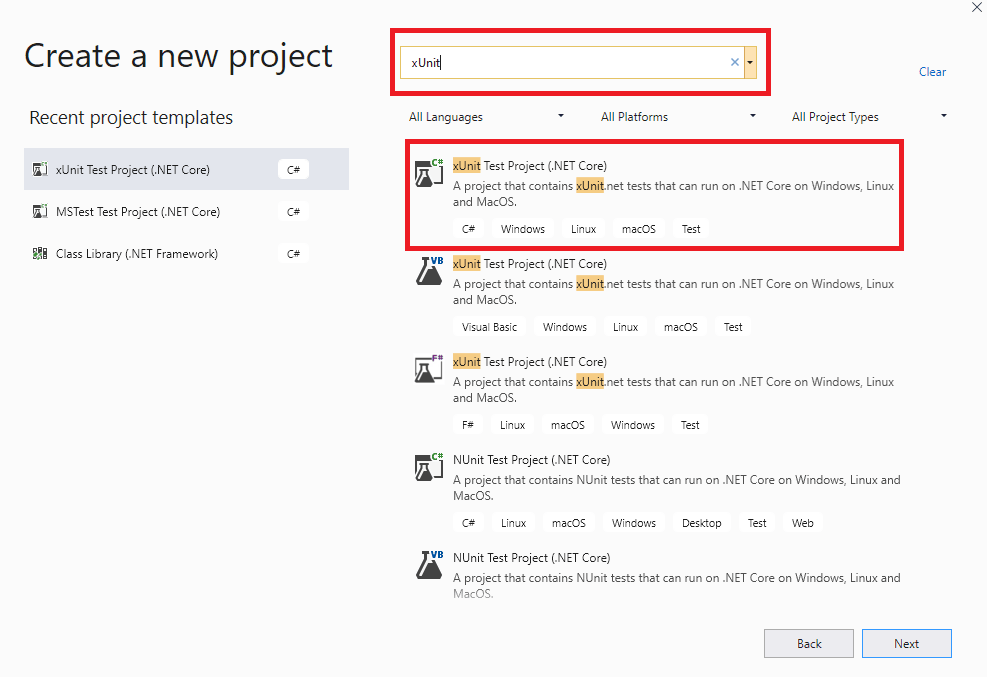
Step 2: Since I have created the project based on the xUnit.net framework, the default .cs file contains the [Fact] attribute in it. Also, the xUnit package is also included by default in the source code.
In case you have not created a project of the type mentioned above, you can still use the xUnit framework for performing automation testing with Selenium C#. The xUnit framework and the runner can be installed using the package manager from GUI or the terminal.
Take this certification to master the fundamentals of Selenium automation testing with C# and prove your credibility as a tester.
Here’s a short glimpse of the Selenium C# 101 certification from LambdaTest:
Using Visual Studio IDE
For installing the xUnit test framework and other required packages for performing Selenium test automation with xUnit, perform the following steps:
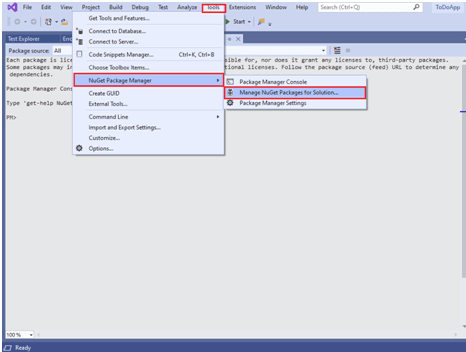
Step 1: Go to Tools -> NuGet Package Manager -> Manager NuGet Packages for Solution for opening NuGet Package Manager in Visual Studio.
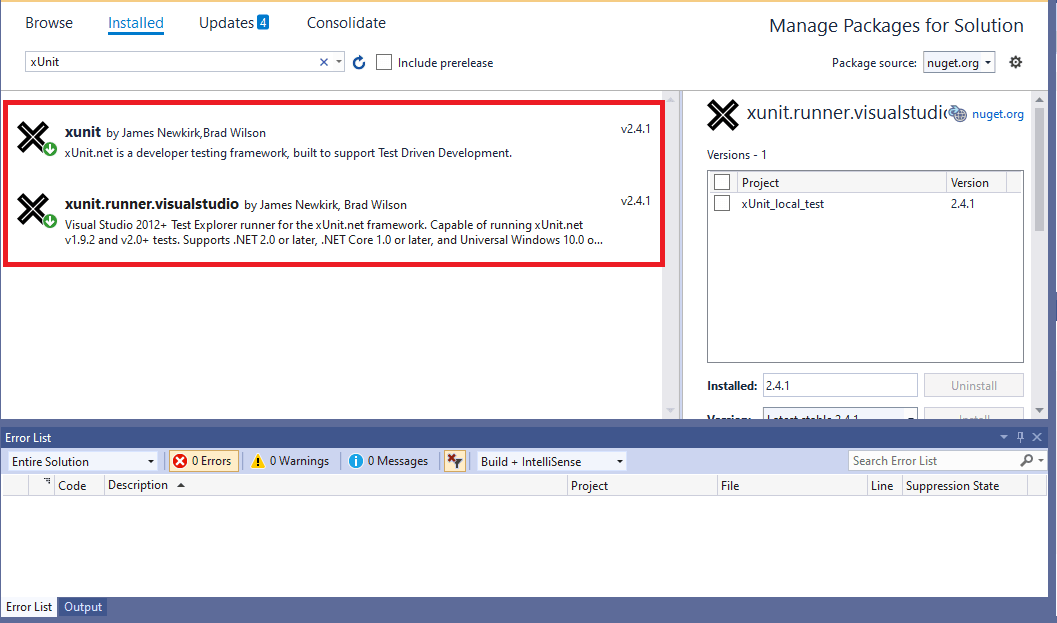
Step 2: Search for the following packages in the Browse tab and click Install
- xunit
- xunit.runner.visualstudio
- Microsoft.NET.Test.Sdk
Note: Experience reliable automated testing with Selenium Testing Tool on a cloud grid of 3000+ browsers and operating systems.
Using Package Manager (PM) Commands
If you are comfortable using the terminal, then you should look at the option of installing the xUnit framework using the Package Manager (PM) commands.
Step 1: For executing commands from the PM console, navigate to Tools -> NuGet Package Manager -> Package Manager Console.
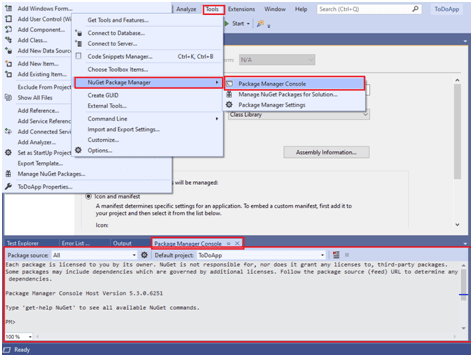
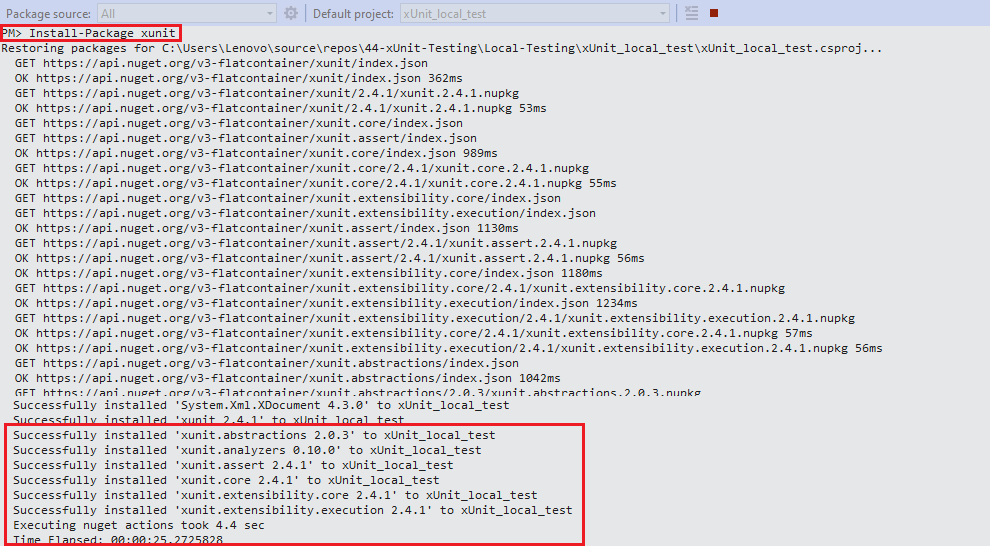
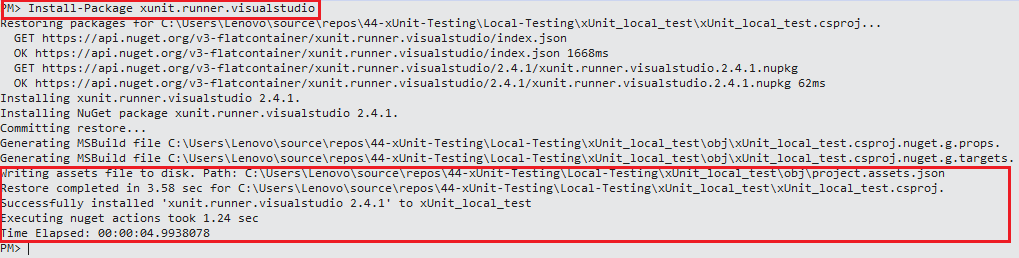
Step 2: For installation of the xUnit packages, we use Install-Package command with the required
|
1 2 3 |
Install-Package xunit Install-Package xunit.runner.visualstudio Install-Package Microsoft.NET.Test.Sdk |
Shown below are the package installation snapshots:
Step 3: To check whether the packages have been installed successfully, execute the Get-Package command on the PM console. Shown below is the execution output:
|
1 2 3 4 5 6 7 |
PM> Get-Package Id Versions -- -------- xunit {2.4.1} xunit.runner.visualstudio {2.4.1} Microsoft.NET.Test.Sdk {16.2.0} |
Also Read: NUnit Test Automation Using Selenium C#
Wrapping It Up!
With this crisp xUnit setup example for Selenium test automation, I demonstrated how to get started with the xUnit (or xUnit.net) framework for Visual Studio. Steps shown in the xUnit testing tutorial will be instrumental in performing automation testing with Selenium C# frameworks.
This brings us to the conclusion of this article. You can go ahead and set up the xUnit environment for yourself. We’d have covered a lot of articles before on automation testing with Selenium C#. Feel free to check them out, and do help us to reach out to more people by sharing and retweeting our article. That’s all folks. Happy Testing!!!?


Author’s Profile
Himanshu Sheth
Himanshu Sheth is a seasoned technologist and blogger with more than 15+ years of diverse working experience. He currently works as the 'Lead Developer Evangelist' and 'Senior Manager [Technical Content Marketing]' at LambdaTest. He is very active with the startup community in Bengaluru (and down South) and loves interacting with passionate founders on his personal blog (which he has been maintaining since last 15+ years).
Blogs: 128
Got Questions? Drop them on LambdaTest Community. Visit now


