Power Your Software Testing with AI and Cloud
Supercharge QA with AI for Faster & Smarter Software Testing
- Automation Testing
- Home
- /
- Learning Hub
- /
- Espresso Tutorial
Espresso Android Tutorial – A Detailed Guide On Espresso Testing
Explore Espresso Android Tutorial, a powerful framework for mobile automation testing. Discover its benefits, how it works, and master Espresso testing.
Published on: June 14 2023
- Share:
“Use Espresso to write concise, beautiful, and reliable Android UI tests” – Google.
With Espresso, you can create very simple and straightforward tests without worrying about the application's infrastructure. It is also open-source so that developers can customize it. According to research from the University of Oulu, Espresso is extremely fast and has the shortest test execution time and fallibility.
You can perform Espresso testing in both Java and Kotlin languages. Espresso also synchronizes your test actions with application UI. It lets you test native and hybrid views of Android applications. Furthermore, Espresso enables you to conduct black-box and component testing of applications and provides testing annotations and assertions. It also comes integrated with Google’s Android Studio.
Overview
What Is Espresso?
Espresso is a native Android UI testing framework by Google that helps verify the behavior of app interfaces. It allows you to write concise, reliable, and fast automated tests that simulate user interactions within Android apps.
Why Is Espresso Testing Important?
Espresso ensures your app’s UI works correctly across devices by automating user actions and validating expected outcomes. It improves app reliability, detects UI bugs early, and supports continuous integration for faster release cycles.
- Automates user actions: Simulates real user interactions on your app to verify that the UI behaves as expected.
- Ensures UI correctness across devices: Validates that your app’s interface works consistently on different screen sizes and device configurations.
- Early bug detection: Identifies UI issues during development, reducing the cost and effort of fixing them later.
- Supports continuous integration: Integrates with CI/CD pipelines to run automated UI tests on every build, enabling faster release cycles.
- Improves app reliability: Helps maintain a stable and predictable user experience across updates and new features.
How to Run Your First Espresso Test?
Running your first Espresso test helps you validate Android app behavior by simulating user interactions automatically. Start simple, and gradually expand test coverage for more complex UI flows.
- Create or Open Project: Launch Android Studio and open an existing project or create a new Android application project.
- Add Dependency: Include the Espresso testing library in your app-level build.gradle file under the androidTestImplementation section.
- Write Test Code: Use onView(), perform(), and check() methods to define user actions and validate expected UI outcomes.
- Run the Test: Execute the test through Android Studio’s built-in Test Runner or by using the Gradle command-line tool.
How to Create UI Tests for Espresso?
Creating UI tests in Espresso allows you to simulate real user interactions and validate app behavior automatically. Proper setup and structured tests ensure reliable, maintainable automation. By following systematic steps, you can build comprehensive test suites for your Android application.
- Set Up Test Environment: Configure your Android project with the required Espresso dependencies and enable AndroidJUnitRunner for instrumentation tests.
- Identify UI Elements: Use withId(), withText(), or withContentDescription() matchers to locate and target specific UI components.
- Define User Actions: Apply perform() with actions like click(), typeText(), or scrollTo() to simulate real user interactions.
- Add Assertions: Use check() with matches() or doesNotExist() to verify that UI elements behave as expected during tests.
- Organize Test Classes: Structure your tests logically by creating separate classes for different screens or functional flows of the app.
- Run and Debug Tests: Execute tests via Android Studio or Gradle, review failures, and refine tests for reliable automation.
What is Espresso?
Espresso is an open-source testing framework widely used for testing Android applications. It is specifically designed to simplify the process of writing reliable and efficient UI tests for Android apps. With Espresso, developers can interact with and verify the behavior of various user interface components in their apps.
By providing a user-friendly API and automatic synchronization with the UI thread, Espresso streamlines the testing process and ensures that actions and assertions are performed at the right times. It also handles the test orchestration, launching the target app and running the tests in a controlled manner.
Espresso's ViewMatchers help locate specific UI elements based on their properties, while ViewActions simulate user interactions like clicking buttons or entering text. Developers can define ViewAssertions to verify the expected state or content of UI elements.
Why is Espresso testing important
If you are working on an Android project, validating your projects across various cycles like build, development, and testing can be cumbersome. Below are the pointers that demand the need for Android testing of the application user interface -
- Every Android build requires validation after a code commit.
- Dependency on remote servers can slow down test execution
- Testing Android apps requires the latest APIs from Android OS that support new platform features.
- Android app testing should be performed on Android Emulator online and real devices.
Using the Espresso framework, you can write reliable Android UI tests and achieve fast test execution speed while reducing test flakiness.
key features of Espresso Framework
Espresso provides an extensive set of features like:
- Synchronization Capabilities: The Espresso framework ensures that the UI or application you are testing has already started before your test begins. It lets you ensure that the background applications have been completed. Espresso also has idling resources - an example of asynchronous actions whose results ultimately affect operations in a UI test. Registering idle resources with Espresso can accurately check these asynchronous actions when testing Android apps.
- Android Intents: Android Intents is a mechanism that lets your application communicate with the Android System and third-party applications. With Espresso, you can manage the behavior of Android Intents to stub them out to provide pre-defined responses. Tests become more robust when there is less dependence on changes to external apps introduced with each release. Stubbed or Mocked Intents will also reduce the number of times your automated test fails due to a glitch in an external application.
- It automatically syncs with user-interface elements and test actions.
- Espresso is highly flexible and scalable. It has simple and lightweight APIs that is easier to learn and maintain.
- It offers support for Unit testing and Black-box testing.
- It provides a separate module to perform Android WebView testing of UI components and to test and mock Android Intents.
- It enables developers to achieve faster feedback on code changes and debug and fix issues faster.
- Espresso doesn’t use any server like Selenium RemoteWebDriver for interaction. Instead, it runs alongside the application and provides test results instantly.
How to Run Your First Espresso Test
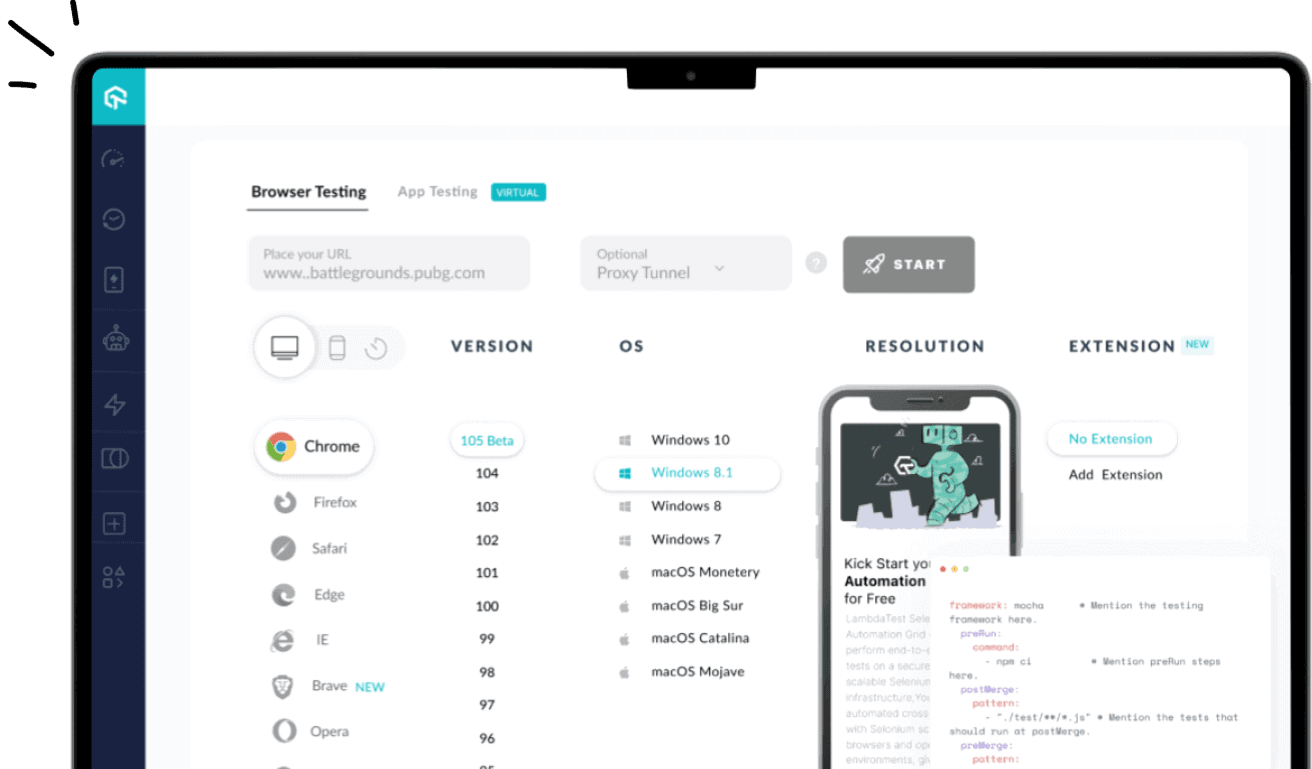
Espresso is a top-notch framework to incorporate into your test automation strategy. Therefore, it's crucial to execute Espresso testing efficiently. You can either set up Android device labs or leverage real-device cloud platforms like LambdaTest for your test execution. Setting up Android device labs can be expensive and difficult to scale up. On the other hand, a real device cloud platform eliminates the hassle of setting up an in-house device lab.
Here are the steps you need to follow for Android app testing with Espresso:
Prerequisites
To automate your test scenario using the Espresso framework, you would need to be ready with the following prerequisites:
- Have basic Espresso set up with the right test environment details. Refer to the official Espresso doc to help with setup.
- Sign up to LambdaTest for free to experience blazing-fast Android app automation testing with Espresso across 3000+ browsers, OS, and devices.
- You may create tests to verify your app's functionality and UI by integrating Espresso into your Android project. In case you wish to run a test over a demo Android app, we have an.apk file; you can run your sample tests on LambdaTest by using our sample 🔗 Android app and a sample 🔗 Espresso Test.
- Set up your LambdaTest access key, LambdaTest username, and LambdaTest Hub URL in your test configurations. Visit the automation dashboard in order to get your login credentials.
Upload Your Application
Upload your Android application (.apk file) to the LambdaTest servers using our REST API. And you need to authenticate by providing your Username and AccessKey in the format 'Username:AccessKey' within the cURL command. Remember to include the appFile's path in the cURL request.
Below is an example of a cURL request for uploading your app through our REST API.
curl -u "YOUR_LAMBDATEST_USERNAME:YOUR_LAMBDATEST_ACCESS_KEY" --location --request POST 'https://manual-api.lambdatest.com/app/uploadFramework' --form 'appFile=@"/Users/macuser/Downloads/proverbial_android.apk"' --form 'type="espresso-android"'
Uploading Test Suite
The next step is to upload the test suite (.apk file) to LambdaTest servers using our REST API. For authentication, you need to include your Username and AccessKey in the format 'Username:AccessKey' within the cURL command. It is important to specify the path of the appFile in the cURL request. Here is an example cURL request that demonstrates how to upload your app using our REST API:
curl -u "YOUR_LAMBDATEST_USERNAME:YOUR_LAMBDATEST_ACCESS_KEY" --location --request POST 'https://manual-api.lambdatest.com/app/uploadFramework' --form 'appFile=@"/Users/macuser/Downloads/proverbial_android_expressotest.apk"' --form 'type="espresso-android"'
Executing the Test
After successfully uploading your app and test suite, you can proceed to execute your test by running the following command.
curl --location --request POST 'https://mobile-api.lambdatest.com/framework/v1/espresso/build' --header 'Authorization: Basic <Enter_Basic_Auth>' --header 'Content-Type: application/json' --data-raw '{
"app" : "lt://APP_ID",
"testSuite": "lt://TestSuite_ID",
"device" :  ["Galaxy S21 5G-12"],
"queueTimeout": 10800,
"IdleTimeout": 150,
"deviceLog": true,
"network": false,
"build" : "Proverbial-Espresso"
}'
View Test Execution
Once you have executed your tests, you can access and review the test execution details, including logs. This will allow you to observe the status of each test case, whether it has passed or failed. You can conveniently access this information on the LambdaTest Automation platform. Additionally, here is LambdaTest official support doc to help you in your espresso testing.
Running Tests in Parallel
To run tests simultaneously on multiple devices, you can utilize the execute command and pass the device names in a comma-separated format, as demonstrated below:
curl --location --request POST 'https://mobile-api.lambdatest.com/espresso/v1/build' --header 'Authorization: Basic <Enter_Basic_Auth>' --header 'Content-Type: application/json' --data-raw '{
"app" : "app_id",
"testSuite": "testsuite_id",
"device" :  ["Galaxy S20-10","Galaxy S20-10","Redmi Note 9-10","Galaxy S10+-10","Galaxy S7 edge-8","Galaxy S9+-8"],
"queueTimeout": 10800,
"IdleTimeout": 150,
"deviceLog": true,
"build" : "Proverbial-Espresso"
}'
Why LambdaTest for Espresso testing?
LambdaTest is the go-to test execution platform, offering speed, reliability, and scalability. With support for 3000+ browsers, operating systems, and real device combinations, LambdaTest ensures comprehensive testing coverage. Trusted by over 500 enterprises and 2 million+ users across 130+ countries, LambdaTest accelerates your testing process for faster time-to-market.
What does LambdaTest offer?
- LambdaTest offers a comprehensive online browser farm with support for 3000+ real browsers and operating systems, including Chrome, Firefox, Safari, Edge, Internet Explorer, and more.
- Perform 70% faster test execution with HyperExecute- an end-to-end test orchestration cloud.
- Reduce test flakiness, shorten job times, and receive rapid feedback on code changes with Test At Scale.
- Test across multiple geographies with a geolocation testing feature.
- Leverage parallel testing to execute tests concurrently across multiple browsers and devices, optimizing efficiency.
- LambdaTest captures screenshots and records videos of your test sessions, providing visual evidence of test execution and enabling better bug reporting and documentation.
- Perform Mobile App testing on Real Device cloud.
- Test your locally hosted web and mobile apps with LambdaTest tunnel.
- Test for online Accessibility testing.
- Automation features are compatible with popular automation frameworks like Selenium, Playwright, Espresso, Cypress, Pytest etc.
- Benefit from 120+ third-party integrations with popular tools for CI/CD, Project Management, Codeless Automation, and more.
Note : Supercharge your Espresso testing by getting started with LambdaTest's free plan and elevate your Espresso tests with 100 minutes of free testing.
How does Espresso work?
It is crucial to understand the test scenario before automating your apps with Espresso. Testers should think about what a user can do while interacting with Android applications, i.e., finding UI elements and interacting with them.
Espresso doesn’t allow direct access to activities and views of the applications as it can result in test flakiness. This is why you won’t see the methods like getView() and getCurrentActivity(). To access views securely, you can create your subclasses of ViewAction and ViewAssertion.
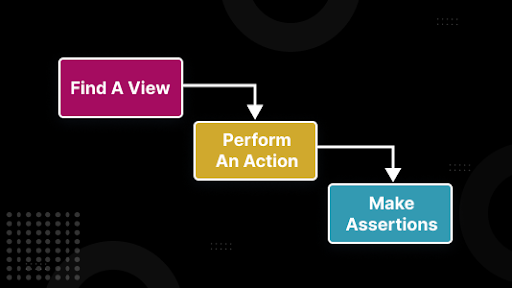
The working of the Espresso framework is broken down into the following steps -
- Locate a specific View within the entire View hierarchy.
- Perform some actions on the View that you just identified.
- Make some assertions on the View. There is no need to perform any actions to do assertions. Instead, just find a View and make assertions.
Components of Espresso's API
In the previous section of this Espresso tutorial, we focused on the working of the Espresso framework. Now let’s look at the major APIs that form the component of the Espresso framework.
There are four types of Espresso’s API.
- Espresso: The Espresso components provide entry points to initiate the interaction with the application view. You can interact with the app’s view using the OnView() and OnData() methods. It also provides APIs not specific to any app’s view, like pressBack().
- ViewMatchers: These matchers are used to identify and find a view. They are collections of objects that implement the Matcher interface. If you want to locate a view within the current view hierarchy, you can use these objects to the onView() method.
- ViewActions: After locating a view, you need to perform some actions with it. ViewActions are a collection of objects that you can pass to the ViewInteraction. perform() method like click().
- ViewAssertions: These are the collection objects you can pass to the ViewInteraction.check() method. As soon as you find a view, you need to check whether its state matches what you expected. The final set of Espresso's API components can be used to perform assertions against the state of views during a test.
How to create UI tests for Espresso?
This section of Espresso tutorial talks about writing UI test cases in Java and Kotlin based on the above discussed Espresso’s API Components.
Java
@Before
onView(withId(R.id.my_view),withText("Hello! Ready to perform Espresso testing"))
.perform(typeText("Hello! Ready to perform Espresso testing"),click())
.check(matches(withText("Hello! Ready to perform Espresso testing")));
Kotlin
onView(withId(R.id.my_view),withText("Hello! Ready to perform Espresso testing"))
.perform(typeText("Hello! Ready to perform Espresso testing"),click())
.check(matches(withText("Hello! Ready to perform Espresso testing")))
The above test cases are written in Java, and Kotlin identifies a view with a specific ID and a unique feature. Here, the test script says, "Hello! Ready to perform Espresso testing" which is a unique feature. On that view, the test script performs two actions.
First, it types “Hello! Ready to perform Espresso testing” in a text box and then clicks on a button. Once the button clicks, it checks if the view displays “Hello! Ready to perform Espresso testing” by calling assertion matches(). After passing the test, you will see the desired text in the view.
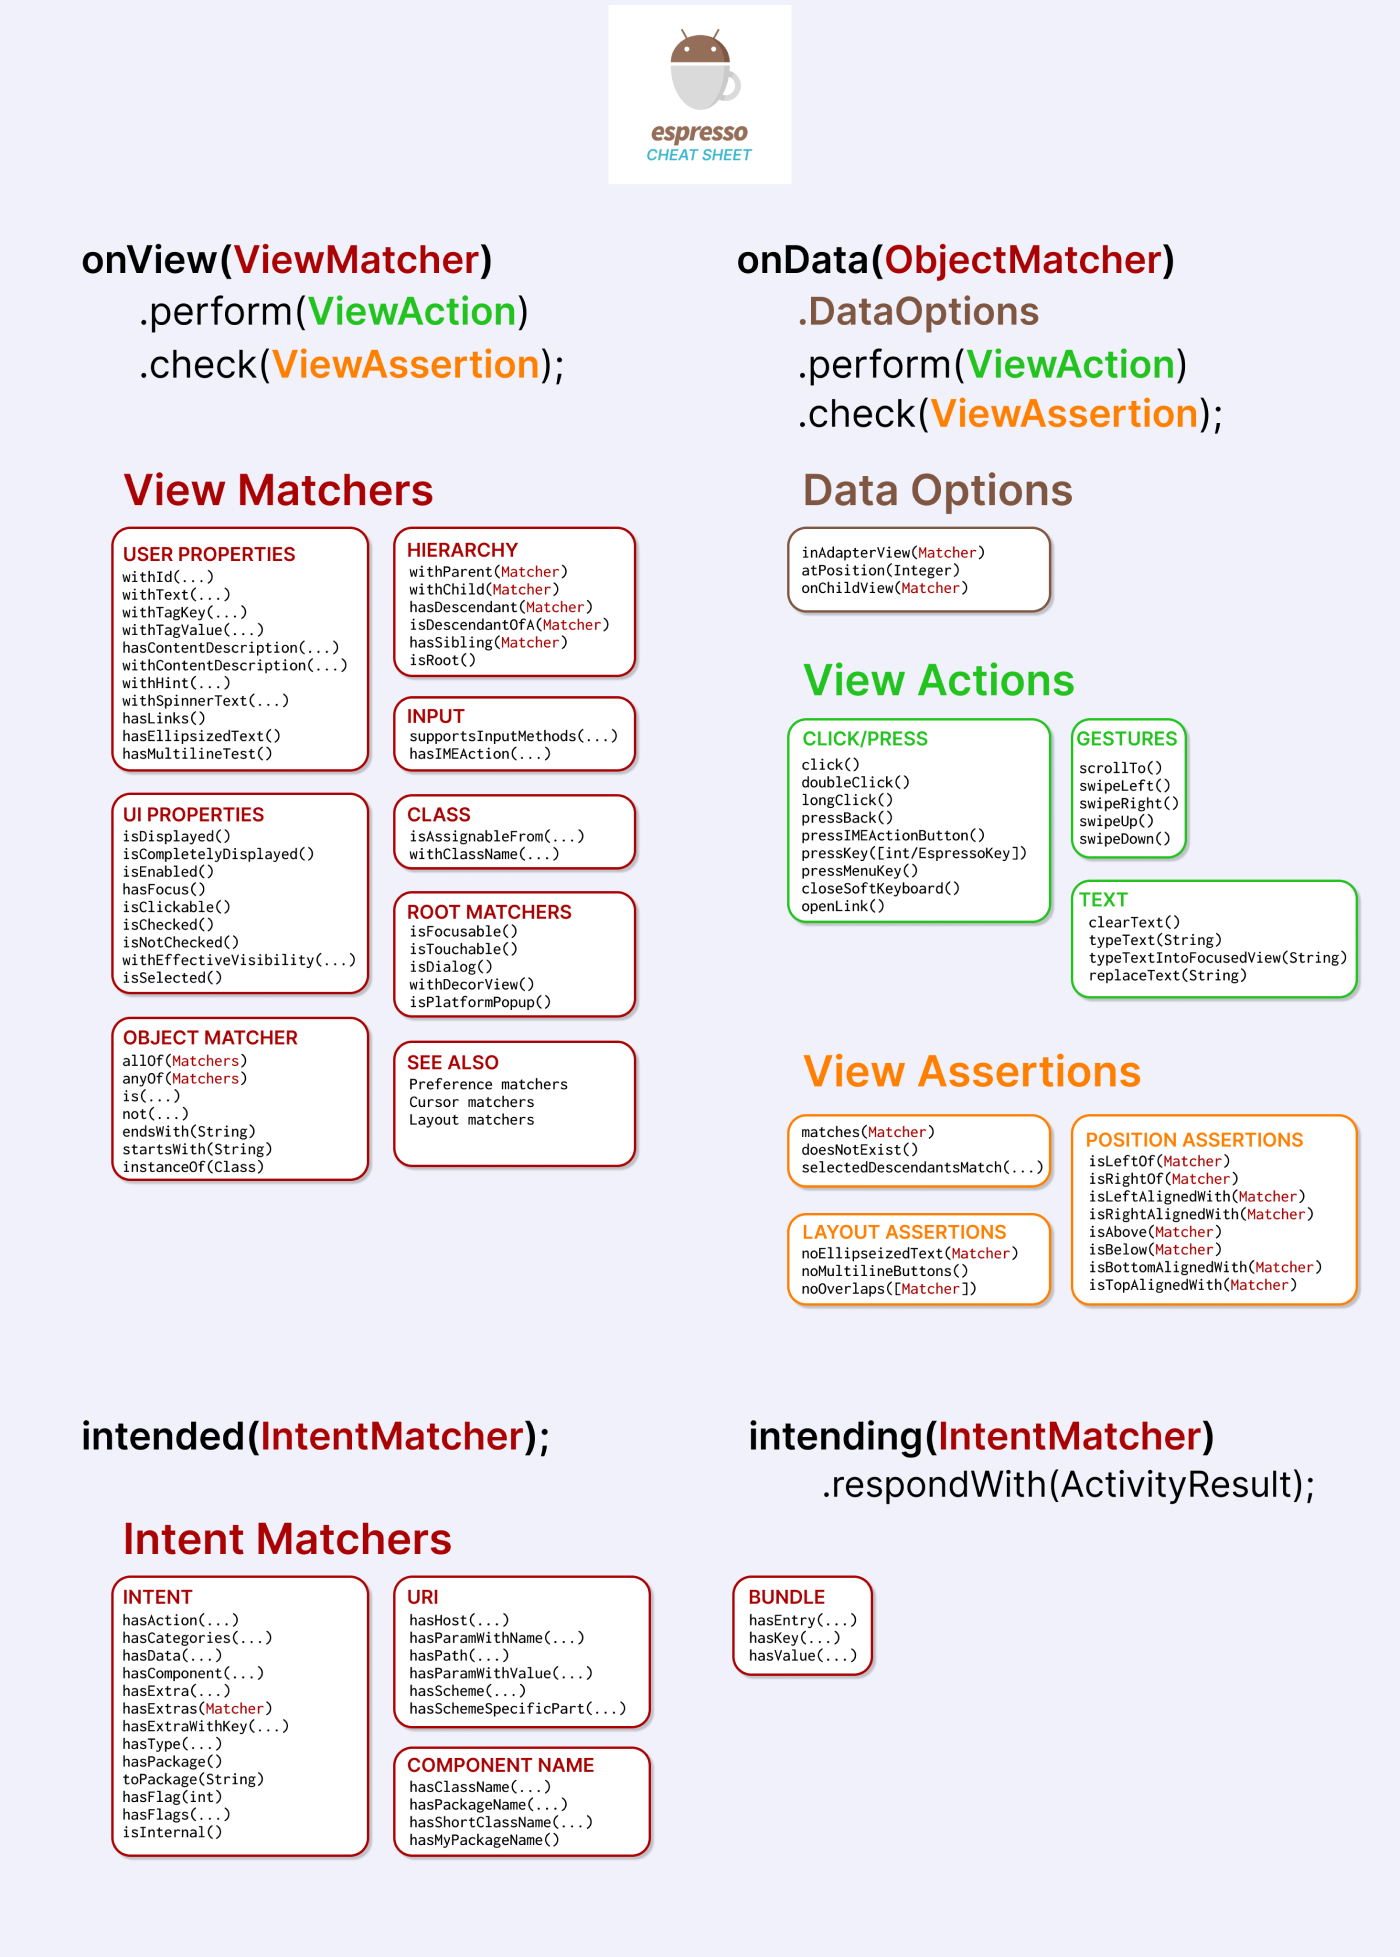
Espresso Android Cheat Sheet
If you want to kick start your app test automation using Espresso, check out this handy Espresso testing Cheat Sheet for Android.
Limitations of Espresso framework
Despite numerous benefits, there are some disadvantages of the Espresso framework.
- It can only test user interfaces. Therefore, Espresso has a limited test scope.
- It can’t perform iOS automation testing of mobile applications.
- It only supports two programming languages - Java and Kotlin. So has languages and technology stack limitations.
- In order to use Espresso, you need access to the app’s source code.
- Testers should have a fundamental knowledge of Android testing to use the Espresso framework.
Espresso vs Appium: Which one to choose?
In this section of Espresso tutorial, we will look at how Espresso differs from Appium.
Both Espresso and Appium synchronize with each other. However, their application areas differ. Appium is used for end-to-end testing of mobile applications, whereas Espresso is used for UI testing of Android applications.
Let’s check out the key difference between Espresso and Appium.
| Espresso | Appium |
| It involves UI testing of Android applications. | It involves automated app testing of mobile applications (Android, iOS, and Windows). |
| It can test Android applications only. | It can test both mobile (Android, iOS, and Windows) and desktop applications. |
| It’s easier to set up. | It is tedious to set up as it required the installation of third-party programs. |
| It supports Java and Kotlin only. | It supports multiple programming languages like Java, JavaScript, Python, PHP, etc. |
Final words
Espresso emerges as a powerful testing framework that caters specifically to the needs of Android app developers. With its user-friendly API, automatic synchronization, and efficient test orchestration, Espresso simplifies the process of creating UI tests for Android applications.
Take your espresso testing to the next level with a cloud testing platform like LambdaTest that is designed to enhance your testing experience and deliver superior results. With LambdaTest, you can focus on testing while leaving the complexities of infrastructure management to the platform. Sign up for LambdaTest and receive 100 minutes of free testing along with 2 parallel web+mobile automation testing.
On This Page
- What is Espresso?
- Why is Espresso testing important
- How to Run Your First Espresso Test
- How does Espresso work?
- Components of Espresso's API
- How to create UI tests for Espresso?
- Espresso Android Cheat Sheet
- Limitations of Espresso framework
- Espresso vs Appium: Which one to choose?
- Frequently Asked Questions (FAQs)
Frequently asked questions
Did you find this page helpful?
![]()
![]()
More Related Hubs

Start your journey with LambdaTest
Get 100 minutes of automation test minutes FREE!!