How to Install Appium: Setting Up And Configuring For Mobile App Testing
Jainish Patel
Posted On: July 28, 2023
![]() 66434 Views
66434 Views
![]() 30 Min Read
30 Min Read
More than 5.5 million mobile applications are listed on Google Play and iOS Apple App Store. Many applications publish on Android and iOS, which are used on different screen sizes and OS versions. It becomes very crucial to test the application thoroughly. Appium is one of the most popular testing frameworks.
Appium is an automated testing framework for native, hybrid, and mobile web applications. It works with various mobile operating systems, including Android, iOS, and Windows. Appium supports multiple programming languages and frameworks for mobile automation testing, including Java, JavaScript, Python, PHP, C#, etc.
In this article, we will discuss various aspects like Appium Architecture, How to install Appium on Windows, macOS, and Linux Operating Systems. Apart from this, we will also see some common issues and it’s troubleshooting with some best practices.
TABLE OF CONTENTS
What is Appium?
Appium is an automation testing framework used for mobile app testing. It excels in UI automation, allowing developers and testers to create code that simulates real-world behavior by iteratively running through user scenarios within the application’s actual user interface (UI). This approach closely mimics real user interactions, maximizing performance, scalability, and consistency while leveraging the benefits of automation.
Appium was originally developed to automate iOS and Android mobile applications. It has now developed into a fully functional platform offering a WebDriver-based automation framework for various mobile and desktop platforms to improve mobile performance testing. Appium is an open-source project with more than 16.7K Star and 5.9K Fork on GitHub at the time of mention and maintained by a community of open-source developers and testers that enables them to request new features or functionality or build it themselves.
Why Choose Appium for Mobile App Testing?
Due to its advantages and benefits over other automation frameworks like Cypress, Google Firebase Test Lab, Katalon Platform, and Cucumber, Appium is a popular choice for testing mobile apps. In this section, we will look at some of the significant advantages.
- Supports native, hybrid, and web apps: Appium can automate and test functionality across three different platforms:
- Native Apps: Android, iOS, and Windows SDKs are used to create native mobile apps, which are installed on the target device.
- Hybrid applications: These programs are created by wrapping a webview, a native control that enables interaction with web material, in a wrapper. Both a physical device and a URL in a browser can be used to access hybrid apps.
- Web apps: Mobile web browsers like Chrome and Safari are used to access web apps. Additionally, you can use the in-app browsers for Android and iOS to access mobile web applications.
- Cross-platform functionality: Appium enables tests to run natively on iOS, Android, and Windows platforms.
- Support for various programming languages: Appium allows teams to use their choice of language and supports Java, Python, Ruby, C#, and JavaScript.
- Effortless connection with well-known testing frameworks: Appium works well with JUnit, TestNG, NUnit, pytest, and Jasmine, utilizing their test execution and reporting features.
- Open-source software with a large community: Appium is open-source software with a community that actively contributes to its development, bug patches, and support materials.
- Support for real and virtual devices: Appium supports various real devices, emulators, and simulators, enabling testing on various platforms.
- Supports advanced mobile automation features: Allows gestures, multi-touch interactions, device rotation, GPS simulation, and network simulation for thorough testing.
- Support for continuous integration and delivery (CI/CD): Appium fits easily into CI/CD pipelines, automating tests for ongoing quality assurance during the development and release process.
 Note
NoteAutomate Android apps on the Appium cloud of 3000+ real devices. Try LambdaTest Today!
Appium 2 Architecture
Before proceeding further with the installation process, we will understand how Appium 2 works using its architecture. It will help to get an overview of the working principles.
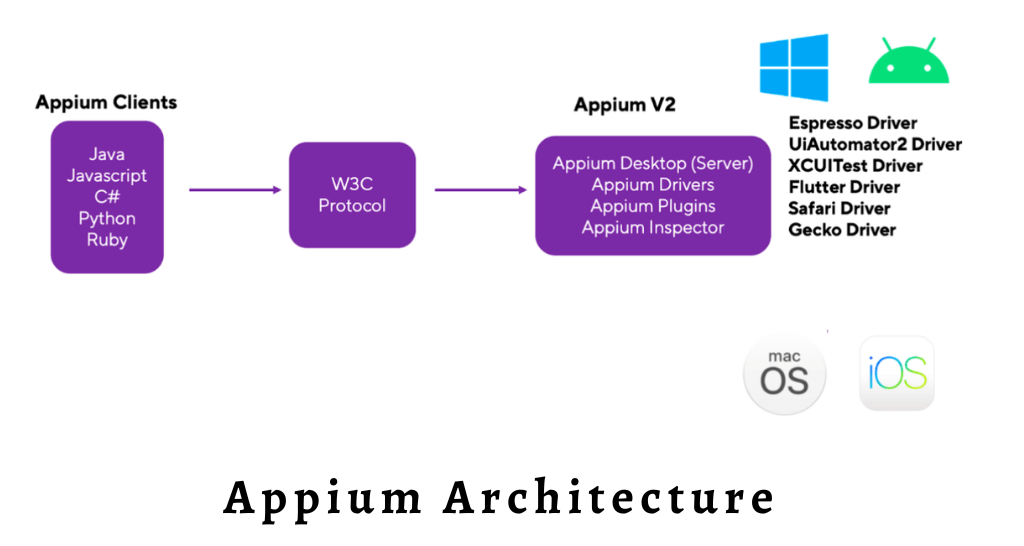
The Appium Architecture consists of 3 components:
- Appium Client: Scripted automation code written in well-known programming languages like Java, Python, Ruby, JavaScript, etc. is present in the Appium client. The configuration information for the device and application is contained in the automation scripts. The test cases are executed using these scripts and configuration data.
- Appium Server: An HTTP server written in Node.js is called an Appium server. Appium clients send HTTP queries using the W3C protocol to the server. The server handles the requests. Appium is a wrapper that converts Selenium WebDriver commands into UIAutomator2 for Android and XCUITest for iOS. The XCUITest framework, included with Xcode, makes it simple to create UI tests for iOS applications. Automation is possible on an Android device or emulator thanks to the Android UiAutomator2 framework.
- End Device: It refers to emulators, simulators, and a real device connected to the Appium server where tests are run. The directives are sent from the Appium server to the XCUITest and UIAutomator2 frameworks. The devices’ respective bootstrap programs carry out the commands and submit the results to the Appium server.
Now that we have enough knowledge of Appium. Let’s start with the installation process for Appium.
Prerequisites for Appium 2 Installation
You must confirm that your machine satisfies the following system requirements before installing Appium 2:
Operating System
- Windows: Supports Windows 7, and later.
- macOS: Compatible with macOS 10.10 and later.
- Linux: Works on various Linux distributions such as Ubuntu, CentOS, and Fedora.
Understanding your operating system’s requirements is crucial not only for Appium but also for various other technical aspects. For insights into commonly asked operating system interview questions, check out our guide for essential tips and concepts.
The upcoming section will cover all the requirements for the correct functionality of Appium version 2.
Installing Appium 2
Check out these steps for Appium installation:
- Open the Command Prompt as an administrator.
- Run the command:
npm install -g appium. - After installation, execute
appiumin the Command Prompt to ensure Appium is working correctly.
Now let us check out these steps in detail.
NoteAs Appium launched version 2 recently, there is a high chance that you will have to learn about Migrating From Appium 1.x To Appium 2.x. Consider Checking It Out!
Installing Dependencies
Appium framework depends on the npm package manager for its installation, so we have first to install node.js. After that, we will download some other requirements like Java Development Kit (JDK)/OpenJDK, Android SDK, and Xcode. We will see each installation process in detail.
Node.js
Since Node.js is the foundation of Appium, you must install it on your system. If Node.js is not installed on your system, you can install it by following these steps:
- Visit the Node.js official website.
- LTS (Long-Term Support) and Current are the two download options on the webpage. For stability, it is advised to download the LTS version unless you have a reason to use the Current version in particular.
- To get the installer for the most recent LTS version of Node.js, click the LTS download button.
- Locate the installer file in your Downloads folder or the area your browser specifies as the location to save downloaded files after the download is finished.
- Double-clicking the installer will launch it. You will be led through the installation procedure by the installer.
- Choose the installation settings based on the prompts and your preferences. Unless you have special requirements, you can accept the default settings.
- Node.js and npm (Node Package Manager) should be installed on your machine once the installation is complete.
- To verify the installation, open a command prompt or terminal window and run the following commands:

To check the Node.js version:
|
1 |
node -v |
To check the npm version:
|
1 |
npm -v |
Console Output:
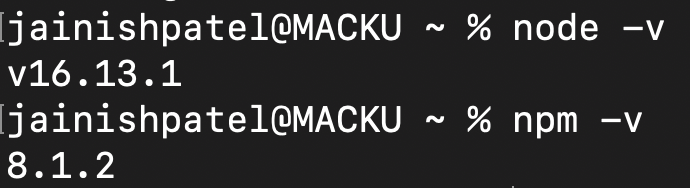
If both instructions display the version numbers without any errors, Node.js and npm have been correctly installed.
Note: There are two major providers for Java Development Kit; one is from Oracle JDK, and the other is OpenJDK. You can install whichever satisfies your requirement.
Oracle JDK (Java Development Kit)
Appium 2 requires JDK 8 or later to be installed. So, If JDK is not installed on your system, then you can install it by following the steps:
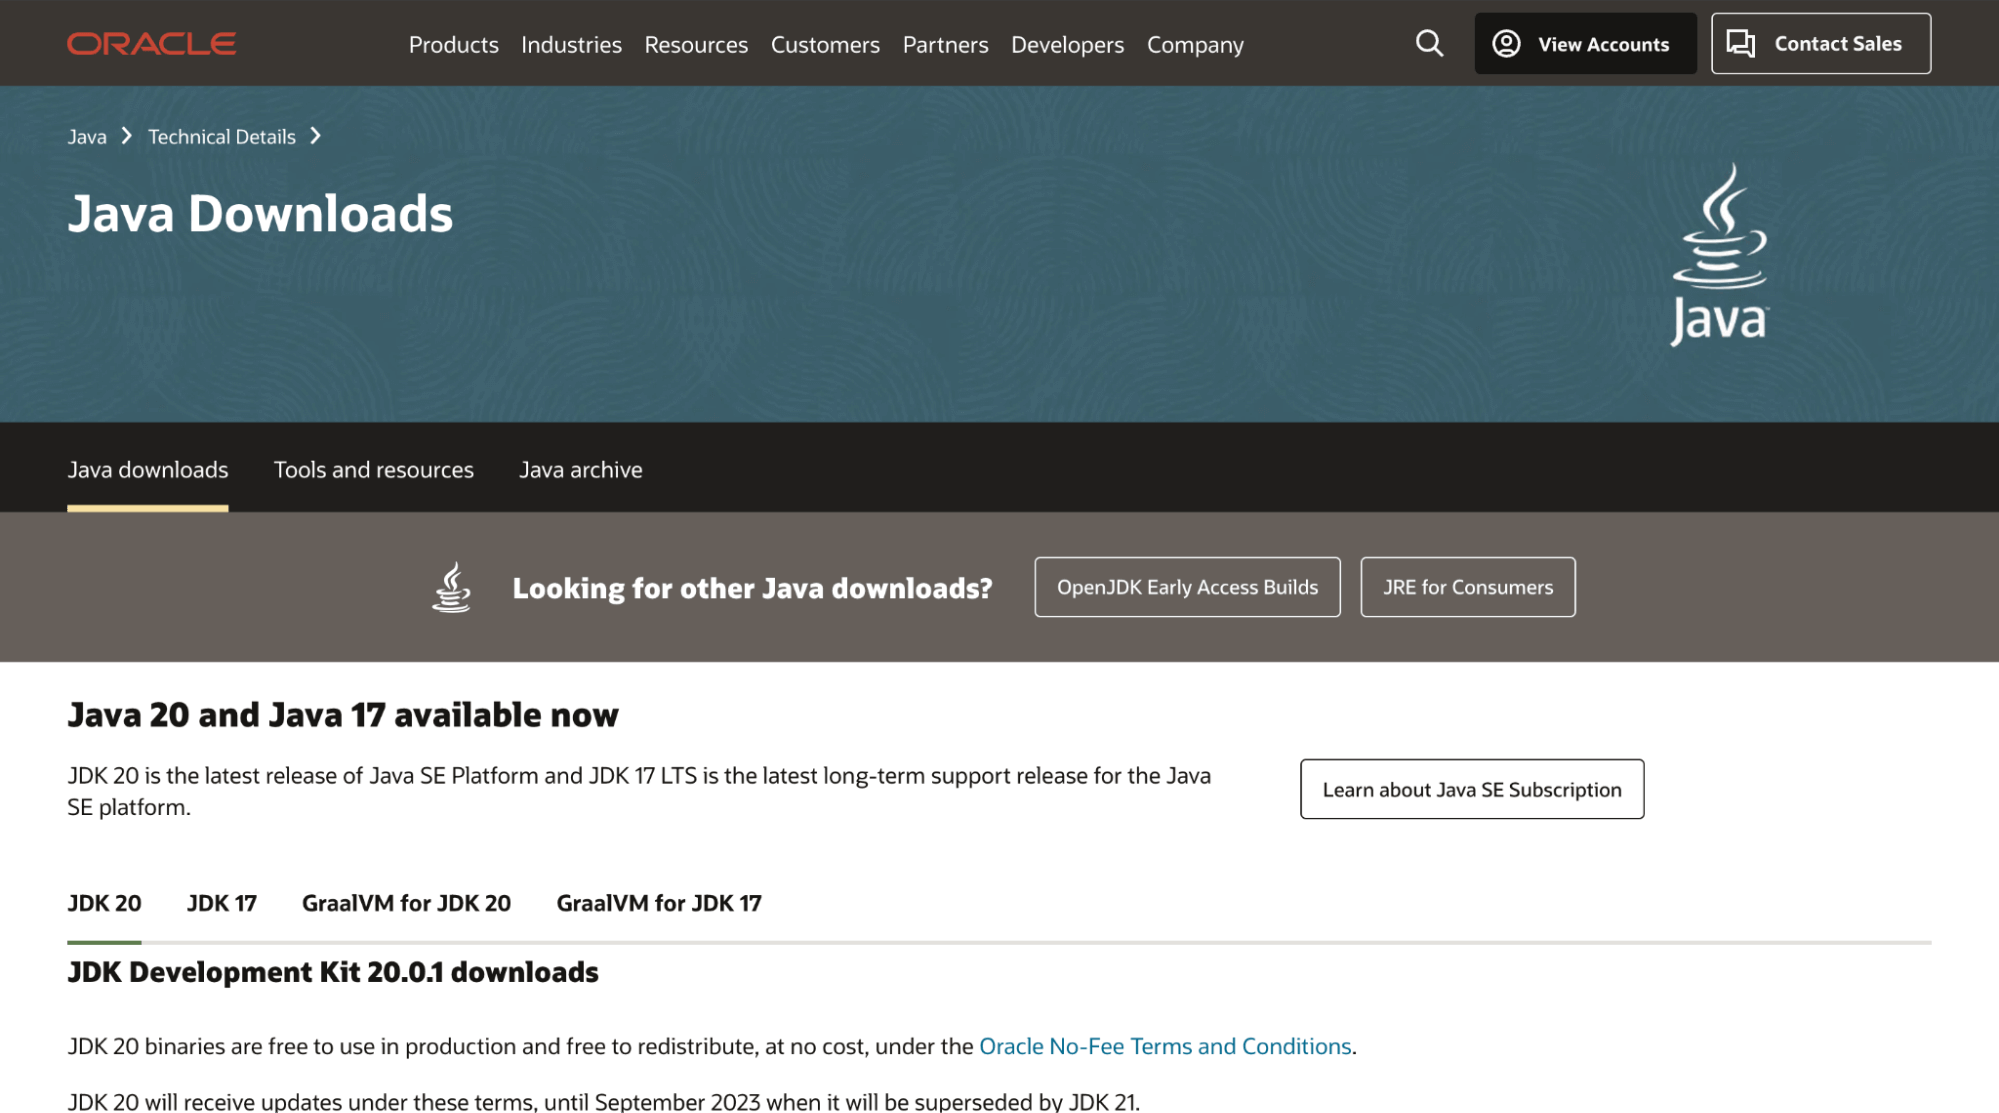
- Visit the Oracle website’s JDK download page.
- There is a list of JDK versions currently available on the JDK download page. Select the proper operating system version. Use of the most recent stable version is advised.
- Select the download link corresponding to your operating system after checking the box to accept the license agreement.
- Locate the installer file in your Downloads folder or the area your browser specifies as the location to save downloaded files after the download is finished.
- Double-clicking the installer will launch it. You will be led through the installation procedure by the installer.
- Choose the installation settings based on the prompts and your preferences. Unless you have special requirements, you can accept the default settings.
- You should have the JDK installed on your machine once the installation is complete.
- Set the JAVA_HOME environment variable:
- Open the System Properties, and go to the Advanced tab.
- Click on the Environment Variables button.
- Under System Variables, click the New button to create a new variable with the name JAVA_HOME and set its value to the JDK installation directory.
- Open a terminal window and edit the .bashrc or .bash_profile file in your home directory.
- Run the following command in the terminal:
- To verify the JDK installation, open a new command prompt or terminal window and run the following command:
Windows:
macOS and Linux:
If you’re using bash, all you have to use the following command:
|
1 |
echo export "JAVA_HOME=\$(/usr/libexec/java_home)" >> ~/.bash_profile |
If you’re using zsh (which probably means you’re running macOS Catalina or newer), then it should instead be:
|
1 |
echo export "JAVA_HOME=\$(/usr/libexec/java_home)" >> ~/.zshrc |
|
1 |
java -version |
Console Output:

OpenJDK (Open Java Development Kit)
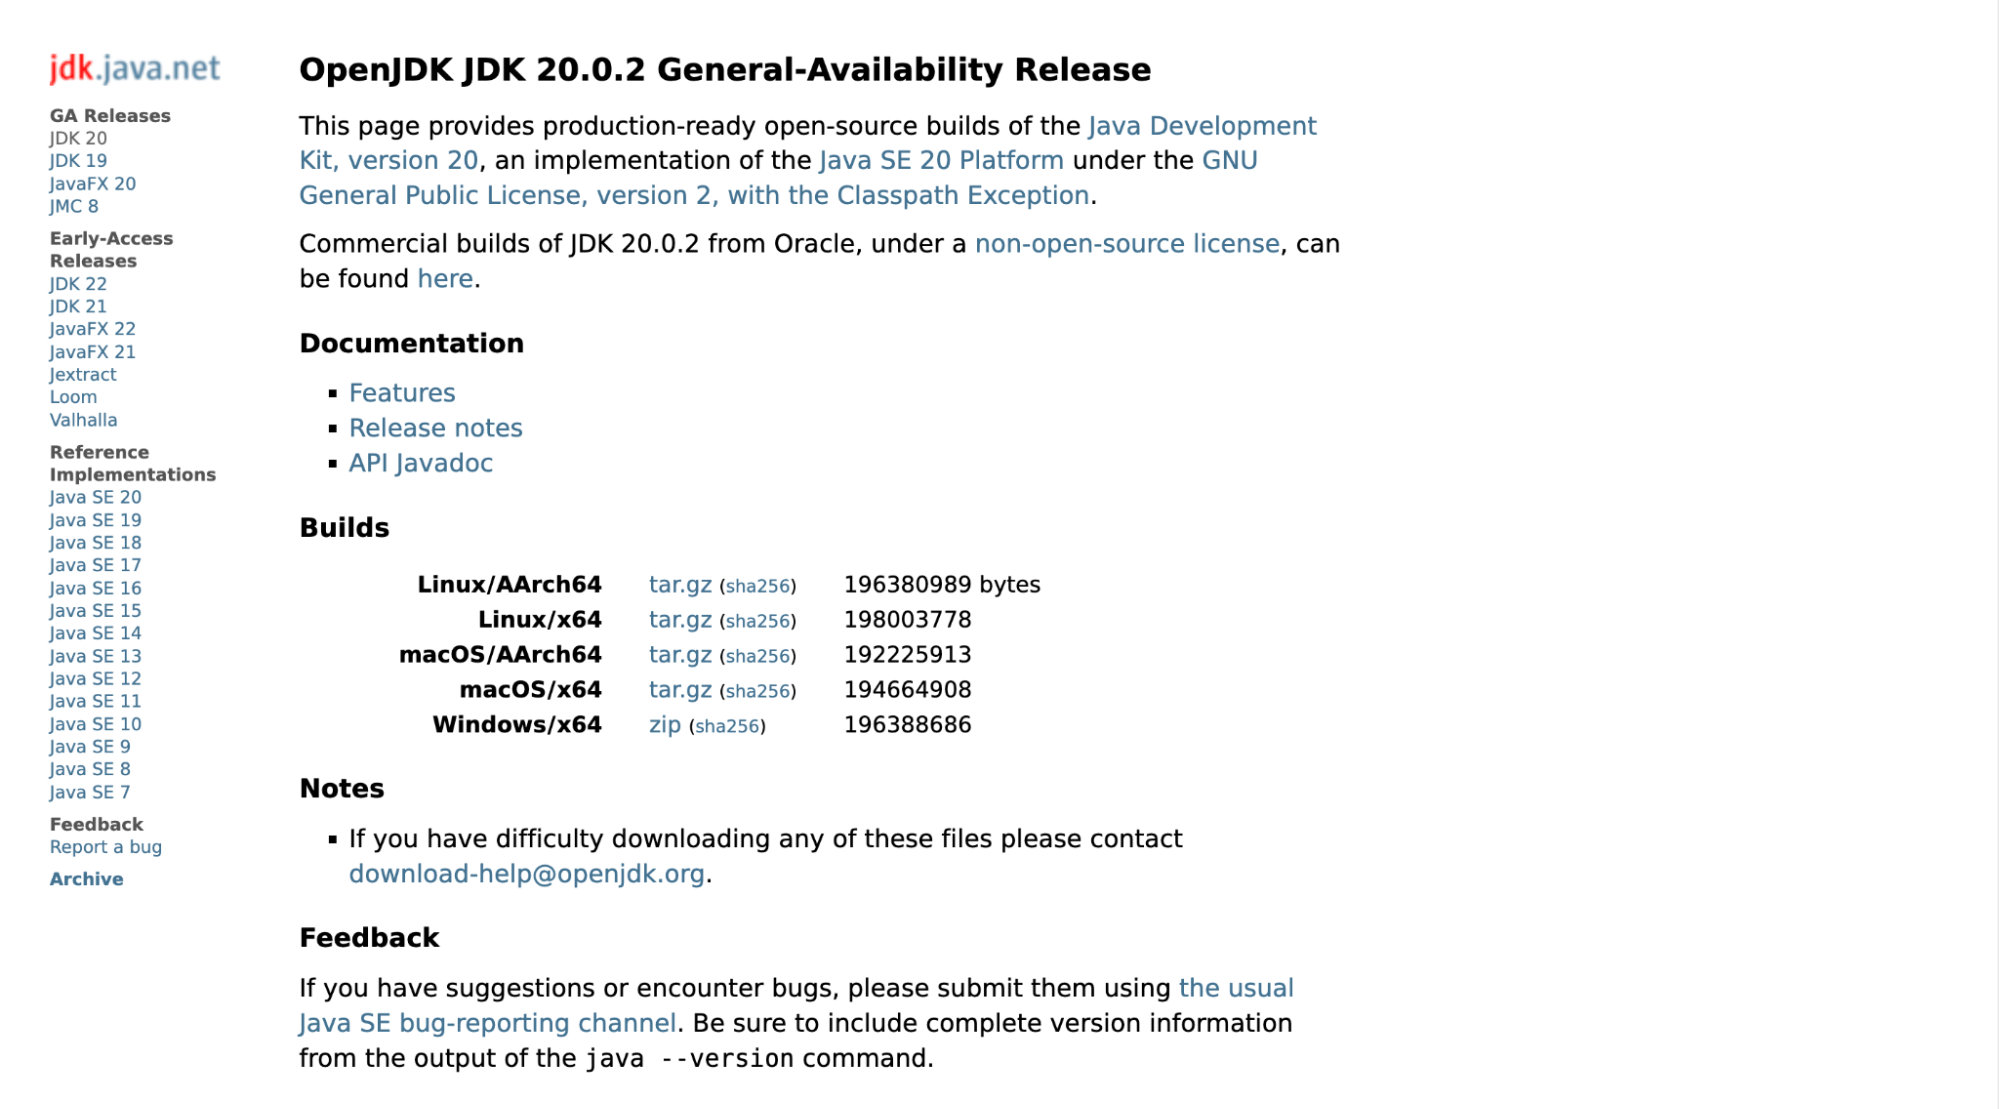
The Java Platform, Standard Edition (Java SE) is implemented in OpenJDK (Open Java Development Kit), a free and open-source software program. It acts as a free, open-source replacement for Oracle’s Java Development Kit (JDK). The OpenJDK community, which consists of people, businesses, and organizations interested in advancing Java technology, is primarily responsible for developing the project.
Appium 2 requires JDK 8 or later to be installed. So, If JDK is not installed on your system, you can install it by following the steps:
Windows:
- Extract the contents from the ZIP archive to a desired folder.
- Now, Open the System Properties, and go to the Advanced tab.
- Click on the Environment Variables button.
- Under System Variables, click the New button to create a new variable with the name JAVA_HOME and set its value to the JDK installation directory.
macOS and Linux:
- Open a terminal window and edit the .zshrc or .bash_profile file in your home directory.
- Go to the location where the tar.gz file is located and run the following command to unzip the file.
- You can extract the path or use this OpenJDK/jdk-20.0.2.jdk/Contents/Home path to set the JAVA_HOME path.
- Run the command to change the directory to the root.
- Run this command to add the PATH.
- Add this line and press ctrl + c to terminate and save the PATH.
- This command will output the saved file.
- To verify the JDK installation, open a new command prompt or terminal window and run the following command:
|
1 |
tar -xf openjdk-20.0.2_macos-aarch64_bin.tar.gz -C $HOME/OpenJDK |
Note: YOU HAVE TO HAVE CHANGE THE FILE NAME IF THE NAME IS NOT SAME FOR EVERY COMMAND.
Console Output:

|
1 |
cd $HOME |
|
1 |
cat > .zshrc |
|
1 2 |
export JAVA_HOME=$HOME/OpenJDK/jdk-20.0.2.jdk/Contents/Home export PATH=$JAVA_HOME/bin:$PATH |
Console Output:

|
1 |
cat .zshrc |
Console Output:

|
1 |
java -version |
Console Output:

Android SDK
Install the Android SDK and set the required environment variables if you want to automate Android apps. To install the Android SDK (Software Development Kit), follow these steps:
- Visit the official Android developer website.
- Click the Download Android Studio Flamingo button to download it. The official Integrated Development Environment (IDE) for Android development is called Android Studio, and it comes with the Android SDK.
- After clicking the button, a dialog box will open, scroll to the end of that box and download the file.
- Locate the installer file in your Downloads folder or the area your browser specifies to save downloaded files after the download is finished.
- Double-clicking the installer will launch it. You will be led through the installation procedure by the installer.
- Per your choices, follow the instructions and select the installation options. Unless you have unique requirements, you may accept the default options.
- You could be asked for administrator access to finish the installation during the process.
- Launch Android Studio once the installation has been completed.
- Click Next after selecting Standard Installation on the Android Studio Welcome screen.
- A list of the required installation components will appear on the next screen. The checkboxes next to Android Virtual Device (AVD) and Android SDK are selected. If necessary, select additional elements. Next, select Next.
- Alternatively, you can accept the Android SDK’s default installation location. To continue, click Next.
- You could be asked to accept licenses for the Android SDK components on the following screen. Click Next after reading the terms and checking the appropriate boxes to accept the licenses.
- The Android SDK and any components you’ve chosen will begin to download and be installed by Android Studio.
- After installation, You can start the Android SDK Manager from within Android Studio. To open it, select Configure > SDK Manager. Depending on your requirements, you can get various SDK platforms, tools, and system images from the SDK Manager.
- Setting up Environment Variables
Windows:
- Open the System Properties, and go to the Advanced tab.
- Click on the Environment Variables button.
- Under System Variables, click the New button to create a new variable with the name ANDROID_HOME and set the variable value to the Android SDK installation directory (e.g., C:\Android\sdk).
- Click “OK” to save the changes.
macOS and Linux:
- Open a terminal window and edit the .bashrc or .bash_profile file in your home directory.
- Add the following line at the end of the file:
|
1 |
export ANDROID_HOME="/path/to/android-sdk" |
Note: replace “/path/to/android-sdk” with the actual JDK installation directory.
Using Android Studio, the Android SDK has been installed successfully. The tools, libraries, and system images required for creating and testing Android apps using Appium are provided by the Android SDK.
If you prefer to test your application on a virtual device, then you need to set up an Android Emulator. Learn what an Android emulator is, its advantages, and how to set one up by watching the video.
Xcode
You must install Xcode on macOS to automate iOS apps. Xcode is a product of Apple, so it will only run and be installed on Apple devices like MacBooks and iMacs.
To install Xcode on macOS, follow these steps:
- Access the App Store on your Mac.
- In the App Store’s top-right search field, type Xcode to find it.
- The Apple-developed Xcode app should appear when you click the Xcode search result.
- Click the Get or Download button on the Xcode app page.
- To start the download process, enter your Apple ID and password if requested to start the download process.
- The App Store will download and install Xcode on your macOS device. Given the size of Xcode, this procedure can take some time.
- Xcode is located in your Applications folder after installation.
- Open Xcode, then follow the setup instructions that occur. This can entail agreeing to license agreements or giving more permissions.
- You can also receive a request from Xcode to install new software or upgrades. To continue installing these components, adhere to the on-screen directions.
- Xcode on your macOS system will be available for usage after the initial setup.
Note: Installing Xcode also requires installing command-line tools, such as the iOS Simulator, which is used to run simulations of iOS apps when running Appium tests.
Your macOS system’s Xcode program has been installed successfully. Xcode provides the essential emulators, compilers, and tools for creating and testing iOS apps with Appium.
It’s crucial to follow the installation guidelines for your operating system and the official Appium documentation for any upgrades or additional specifications. The handbook offers comprehensive instructions for setting up Appium on several platforms.
Downloading and Setting Up Appium
Now that all the required software is installed. We are all set to install Appium and start automation testing.
NPM (Node Package Manager)
To install Appium through NPM, run the following command prompt in the terminal:
|
1 |
npm install -g appium |

Appium Desktop – a GUI application
Appium 2.0 deprecated the functionality of downloading Appium using the GUI version. So the only option for downloading is using the NPM package manager.
Installing Other Dependencies
Apart from Appium, you also need some other tools like UiAutomator2, XCUITest, Appium client, Appium Plugins, and Appium Inspector to interact with your application.
UiAutomator2
User interface (UI) interactions and testing on Android devices are automated using the testing framework and driver known as UiAutomator2. It is a component of the Appium framework and was created specifically for automating native and hybrid Android apps.
You can use the ‘official’ driver name for the UiAutomator2 driver to quickly install it using the Appium Extension CLI because the core Appium team maintains it.
|
1 |
appium driver install uiautomator2 |
It will look something like this:

XCUITest
Apple offers the XCUITest framework for automating the UI (user interface) testing of iOS applications. It is a component of Xcode, Apple’s integrated development environment (IDE), and was created exclusively for testing iOS apps. XCUITest enables testers to interact with the UI parts of the app, carry out tasks like tapping, scrolling, and text input, and verify the UI’s intended behavior.
To install XCUITest run the following command:
|
1 |
appium driver install xcuitest |
It will look something like this:

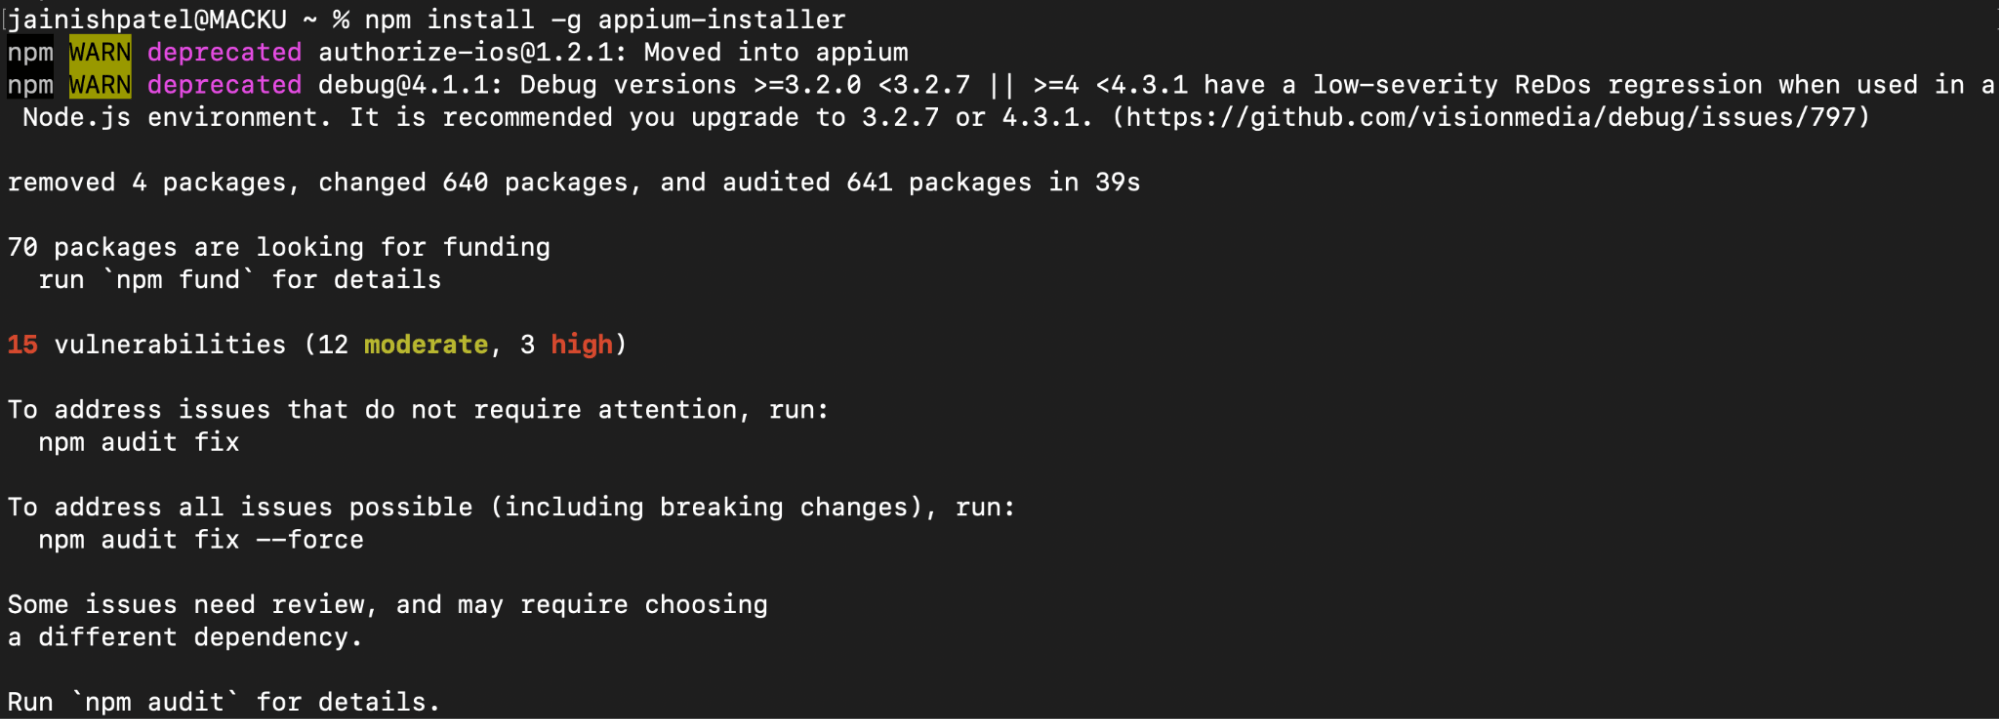
If you don’t want any hassle in setting up Environment Variables and running multiple commands you can also use appium-installer.
|
1 |
npm install -g appium-installer |
It will look something like this:
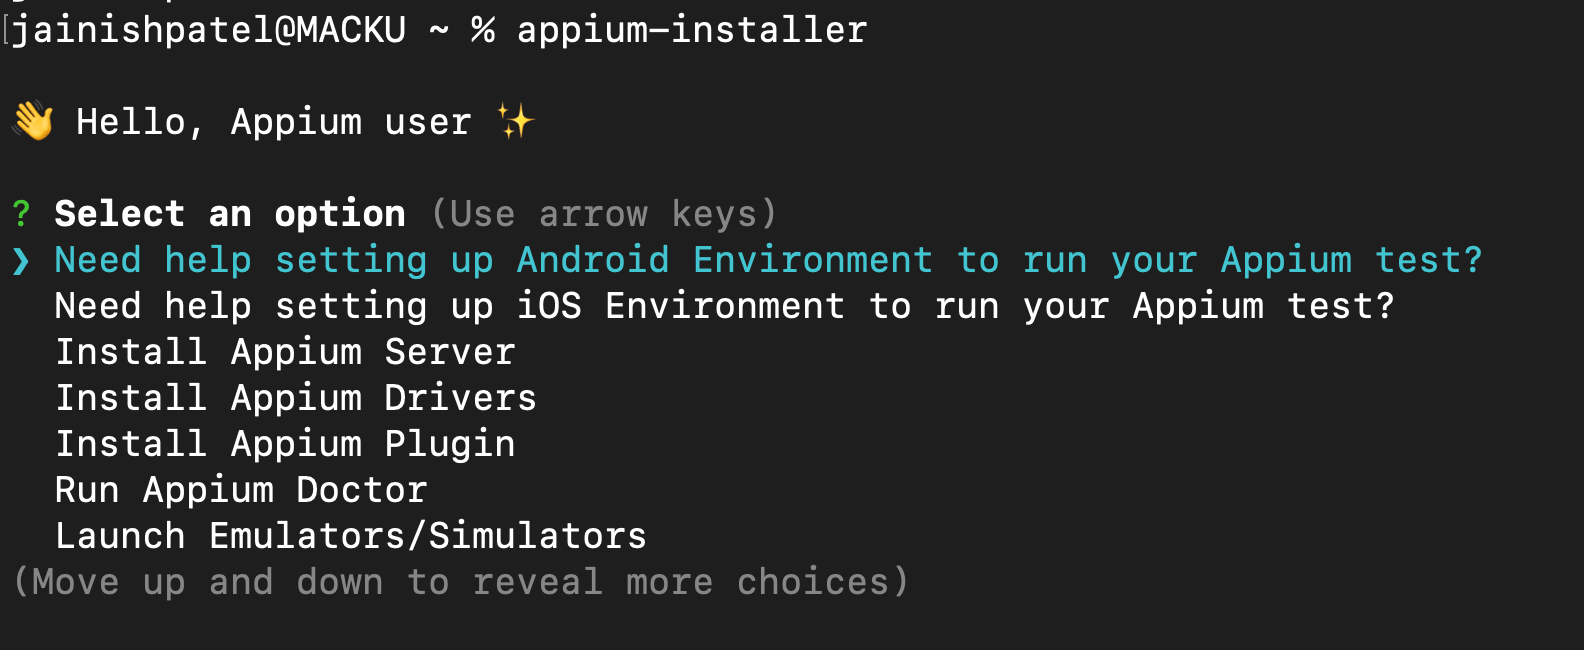
You can run the installer using the following command:
|
1 |
appium-installer |
After running the following command it will provide various set up options:
You can refer to the following video if you are stuck in between the installation process.
Appium Client
To communicate with the Appium server and automate mobile app testing in multiple programming languages, Appium provides several client libraries. The following list of well-liked Appium client libraries:
- Java: “Appium Java Client” is the name of the Appium Java client library. It offers tools and techniques for creating Java test scripts for apps for iOS and Android.
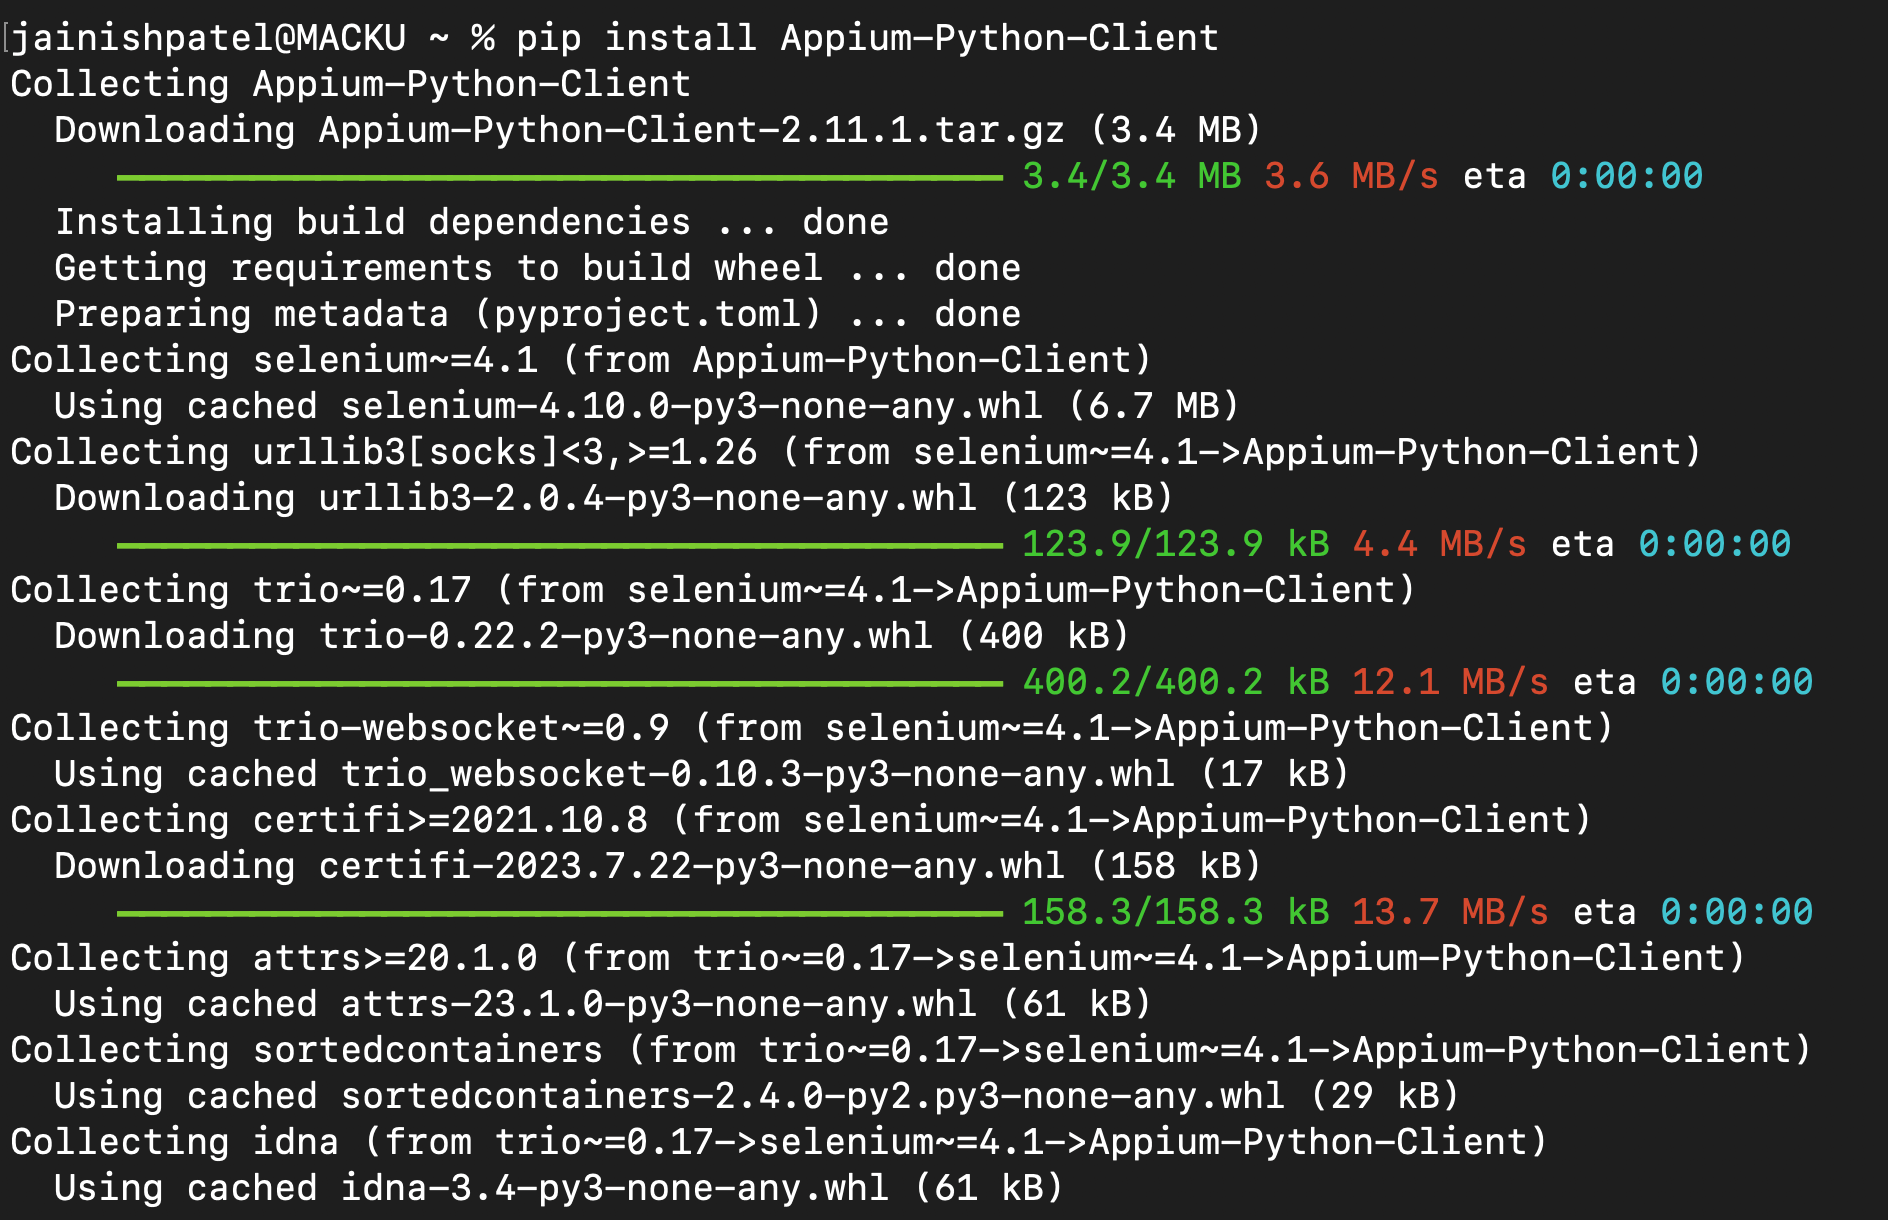
- Python: Appium’s Python client library is referred to as “Appium-Python-Client.” It enables you to create Python test scripts for iOS and Android apps.
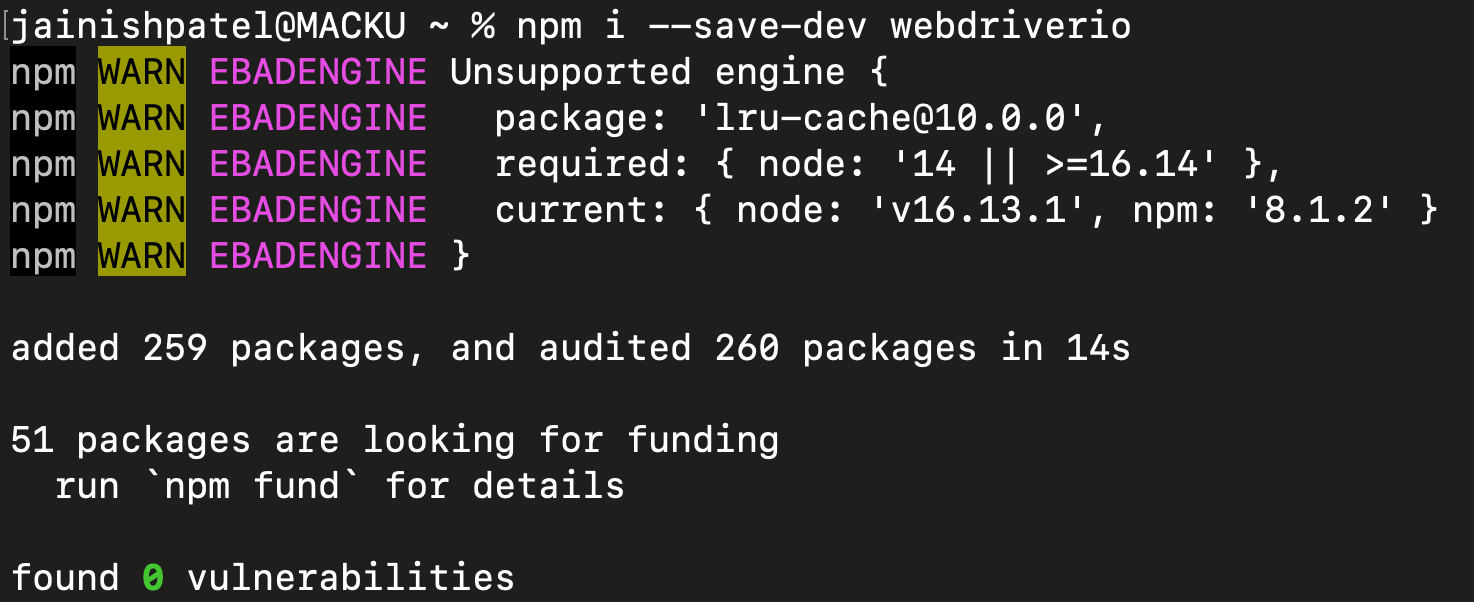
- JavaScript: “WebdriverIO” and “wd” (WebdriverJS) are official client libraries for JavaScript provided by Appium. With the aid of these libraries, you can create JavaScript test scripts for both iOS and Android apps.
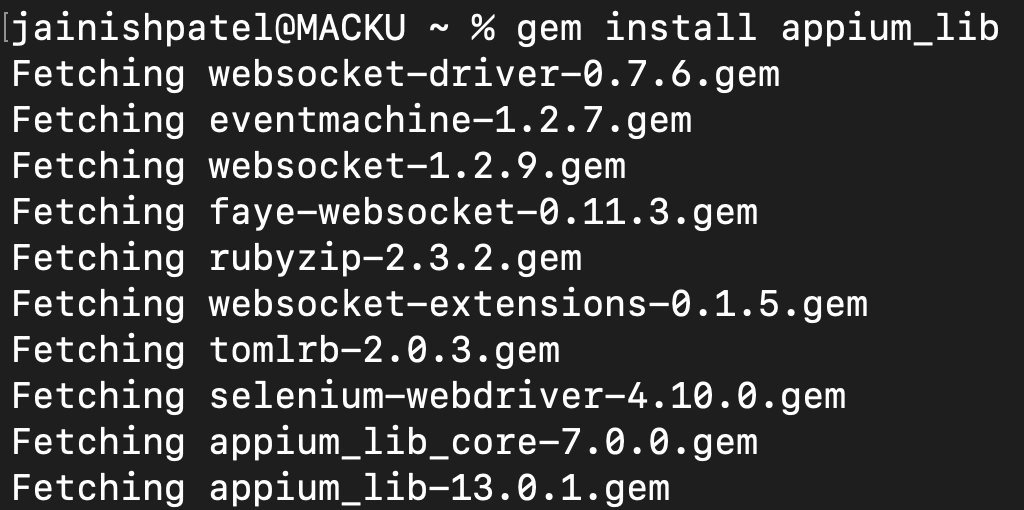
- Ruby: Appium’s Ruby client library is known as “appium_lib.” It offers a Ruby-based interface to interact with the Appium server and automate the testing of Android and iOS apps.
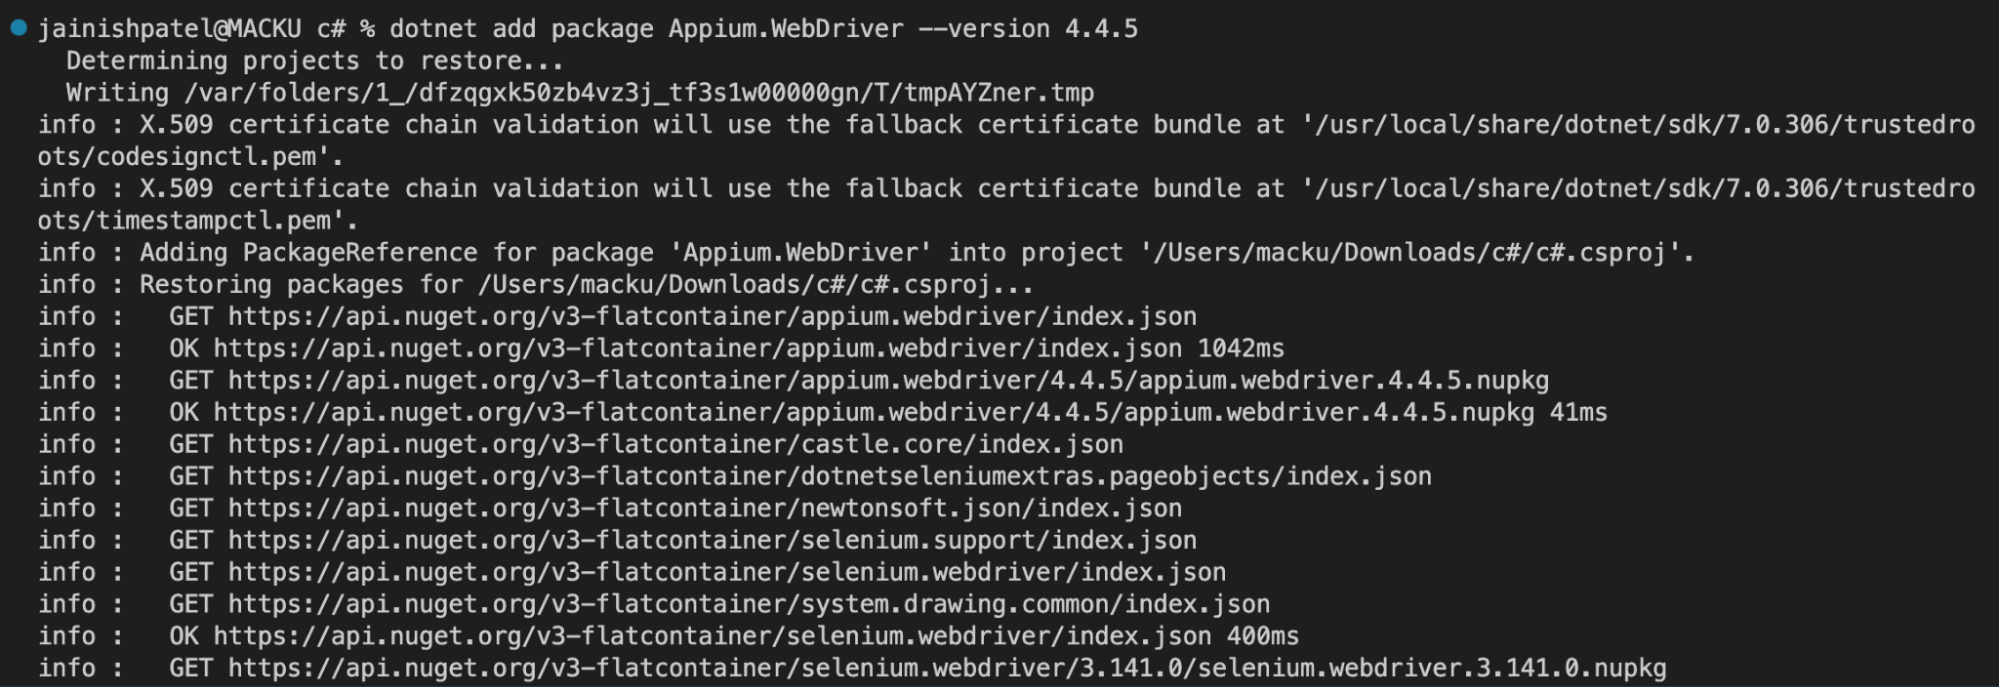
- C#: Appium offers a client library for the language dubbed “Appium.WebDriver”. You may use it to create C# test scripts for iOS and Android apps.
To install the Appium client for Java:
Maven: mvnrepository
Add the following to pom.xml file:
|
1 2 3 4 5 6 |
<dependency> <groupId>io.appium</groupId> <artifactId>java-client</artifactId> <version>8.5.1</version> <scope>test</scope> </dependency> |
Gradle:
Add the following to build.gradle file:
|
1 2 3 |
dependencies { testImplementation 'io.appium:java-client:8.5.1' } |
To install the Appium client for Python you can run the following command:
|
1 |
pip install Appium-Python-Client |
Console Output:
To install the Appium client for JavaScript, you can run the following command:
|
1 |
npm i --save-dev webdriverio |
Console Output:
To install the Appium client for Ruby you can run the following command:
|
1 2 3 |
gem install appium_lib # or gem install appium_lib_core |
Console Output:
To install the Appium client for C#, you can run the following command:
|
1 |
dotnet add package Appium.WebDriver --version 4.4.5 |
Console Output:
Appium Plugins
Appium offers several plugins that increase the functionality and testing potential of mobile app automation. These plugins provide extra functionality and support for particular use scenarios.
Some of the useful plugins and commands for installing it are shown below:
- To install an officially supported plugin
- To install a new plugin from npm appium-device-farm
- To install a new plugin from npm appium-dashboard
- To list already installed plugins
- To update a plugin (it must be already installed)
- To uninstall a plugin
- To install a plugin from a local folder (useful for developers)
|
1 |
appium plugin install images |
Console Output:

|
1 |
appium plugin install --source=npm appium-device-farm |
Console Output:

|
1 |
appium plugin install --source=npm appium-dashboard |
Console Output:

|
1 |
appium plugin list --installed |
Console Output:

|
1 |
appium plugin update device-farm |
Console Output:

|
1 |
appium plugin uninstall appium-device-farm |
Console Output:

|
1 |
appium plugin install --source=local /Users/me/sources/images |
A complete list of third-party and official plugins can be found in the most recent Appium 2.0 documentation.
Appium Inspector
With the help of the Appium Inspector tool, you may examine and interact with a mobile application’s user interface (UI) components. It offers a graphical user interface (GUI) so that you may inspect individual pieces, view the app’s UI hierarchy, and get an ID, Accessibility ID, ClassName, or XPath as locators in Appium for automation. You can use the Appium Inspector online version using inspector.appiumpro.com. Refer to our detailed blog on Appium Inspector.
Note: Boost your efficiency by ultimate guide of Appium Commands Cheat Sheet for Developers.
Verifying Appium 2 Installation
Follow these steps to see if Appium has been successfully installed and to look for any error messages. There are two ways to check whether the Appium installation is successful.
Appium Doctor
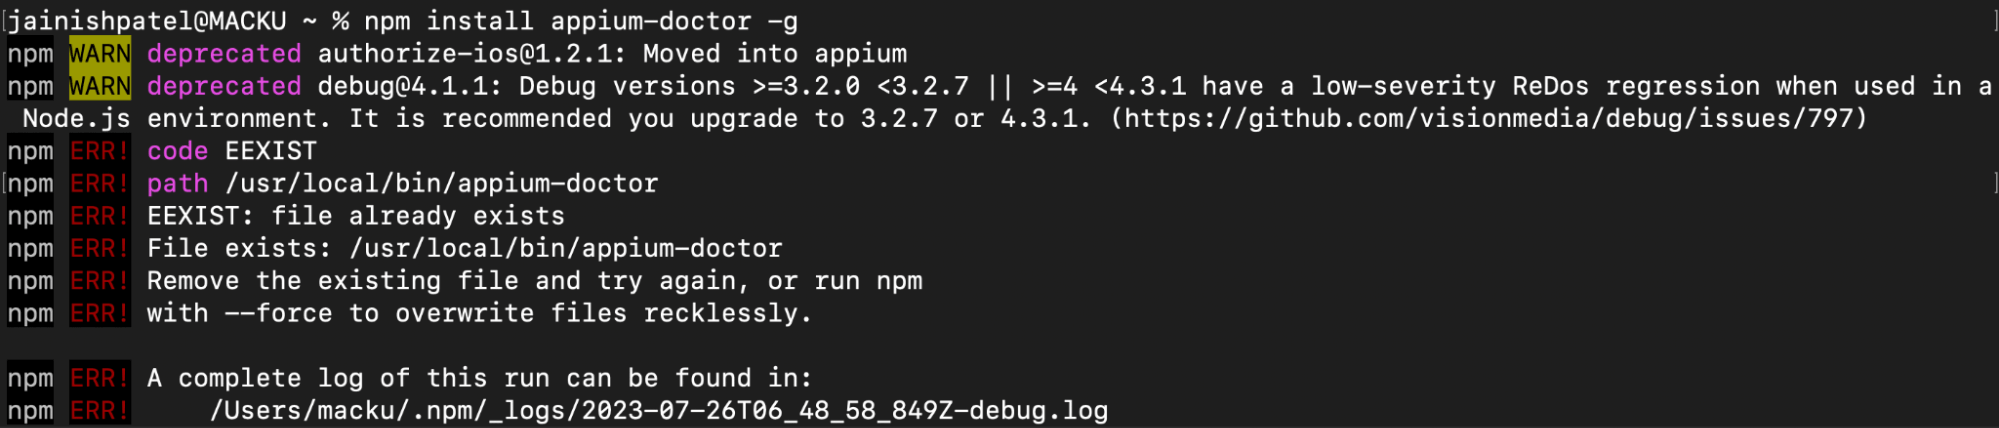
It is a tool to verify if any requirements, dependencies, or installs are missing or not. To use Appium Doctor one needs to install it by running the following command:
|
1 |
npm install appium-doctor -g |
Console Output:
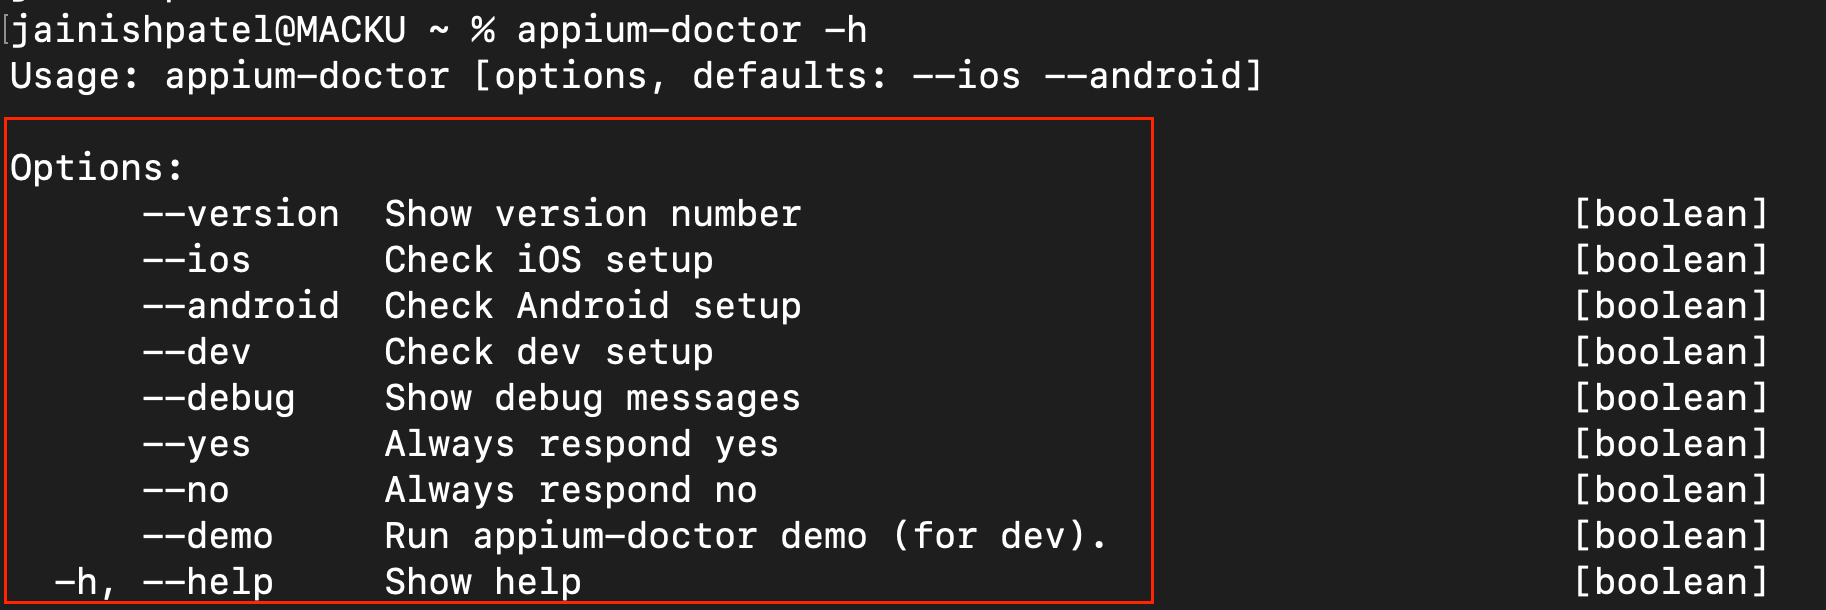
Once the Appium Doctor is installed you can run this command which provides various types of checks to be verified:
|
1 |
appium-doctor -h |
The above command will output the following list:
You can use any command like below:
For Android setup check:
|
1 |
appium-doctor --android |
Console Output:
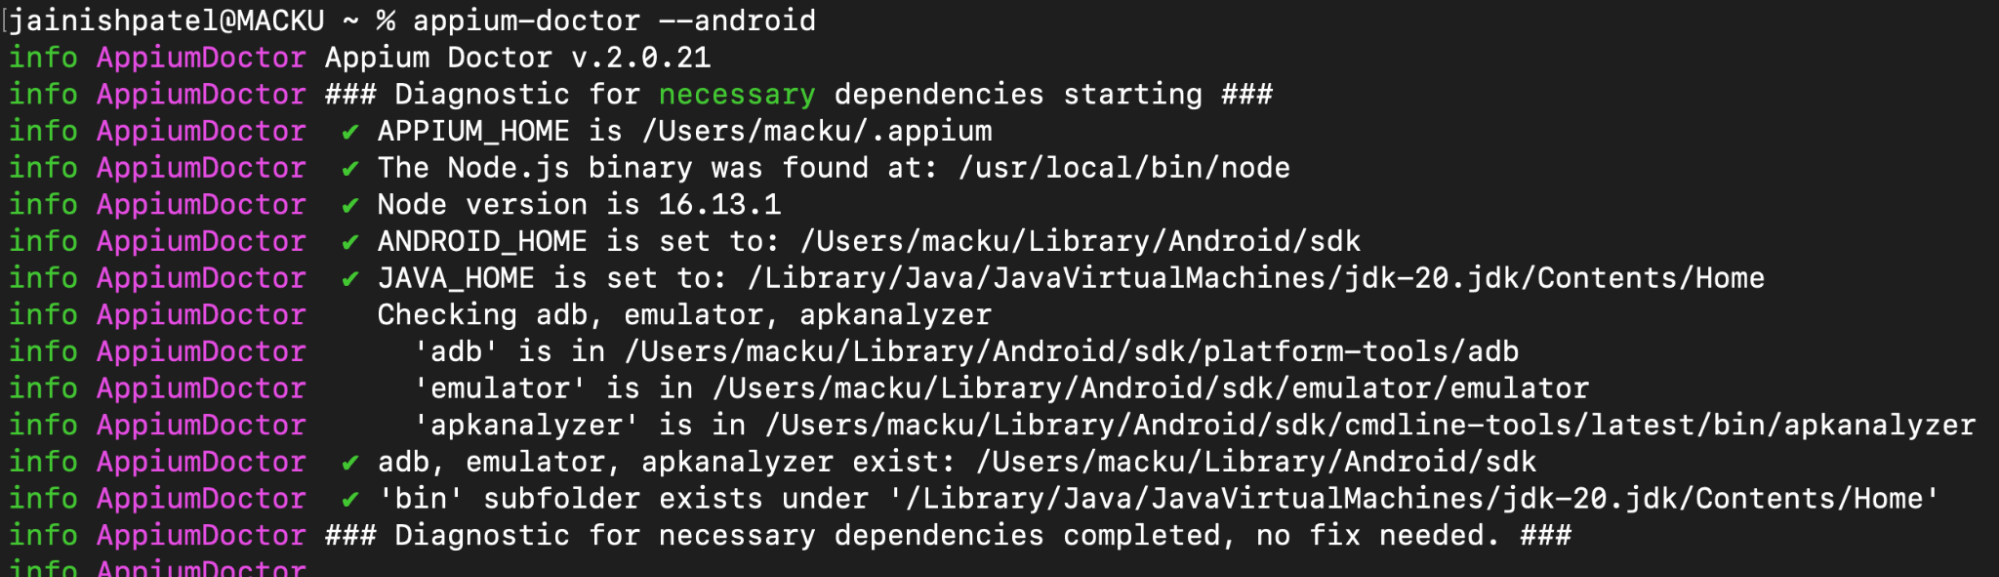
Checkmark confirms that all the requirements for Android are completed.
For iOS setup check:
|
1 |
appium-doctor --ios |
Console Output:
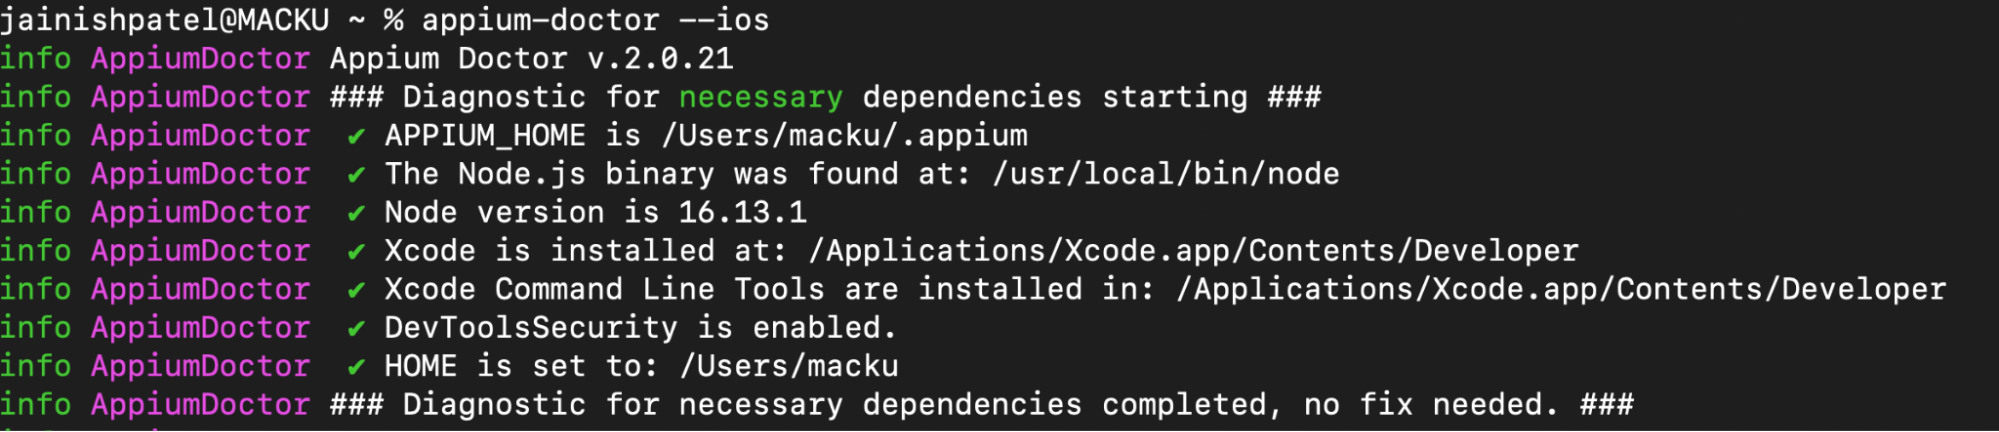
Checkmark confirms that all the requirements for iOS are completed.
Running some commands manually
- Open a command prompt or terminal window on your device.
- Run the following command:
- If Appium was installed correctly, this command will show the installed version like 2.0.1 . If the version number is displayed without any error messages, Appium is set up and available via the command line.
- Next, start the Appium server by running the command:
- By doing this, the Appium server will be started, ready to receive connections from your automation scripts or testing frameworks.
- You should get a message saying something like “Appium REST http interface listener started on [http://0.0.0.0:4723]” if the Appium server has been successfully started.
- Also, you can see if the Appium server is up and running by going to http://localhost:4723/wd/hub/status in your browser. This URL should return a JSON response containing details about the server status.
|
1 |
appium -v or appium --version |
Console Output:

|
1 |
appium |
Console Output:
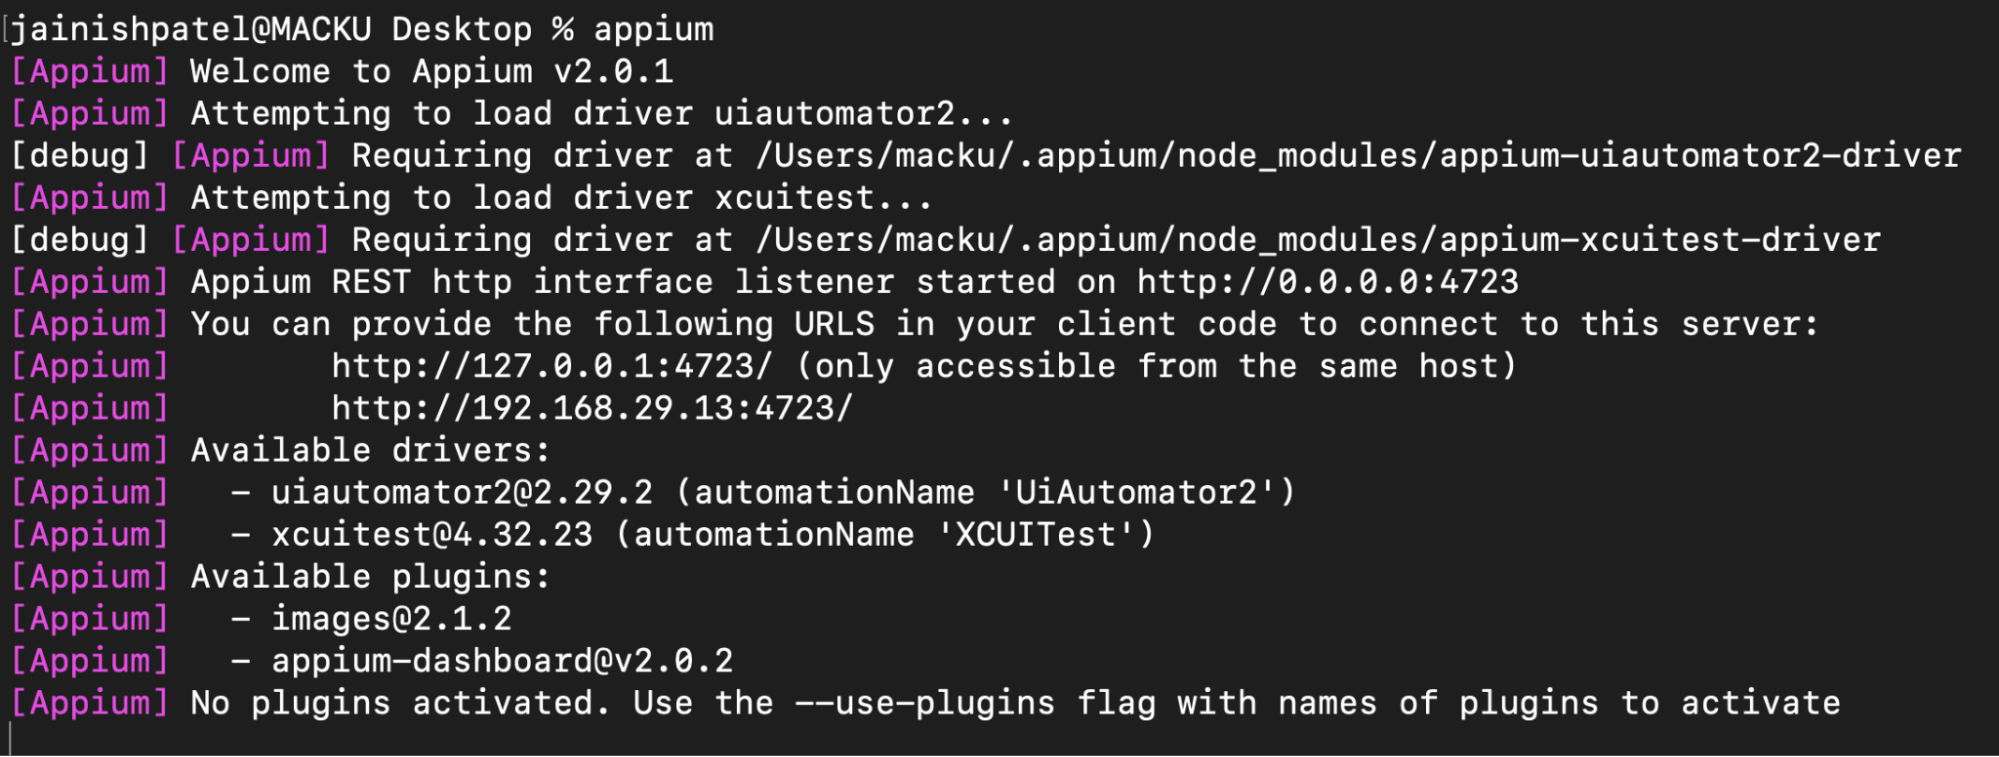
!["Appium REST http interface listener started on [http://0.0.0.0:4723]"](https://www.lambdatest.com/blog/wp-content/uploads/2023/07/image30.png)
Note: If the port is already occupied, then you can start the Appuim on a new port by the following command:
|
1 |
appium --port 4724 |
Console Output:
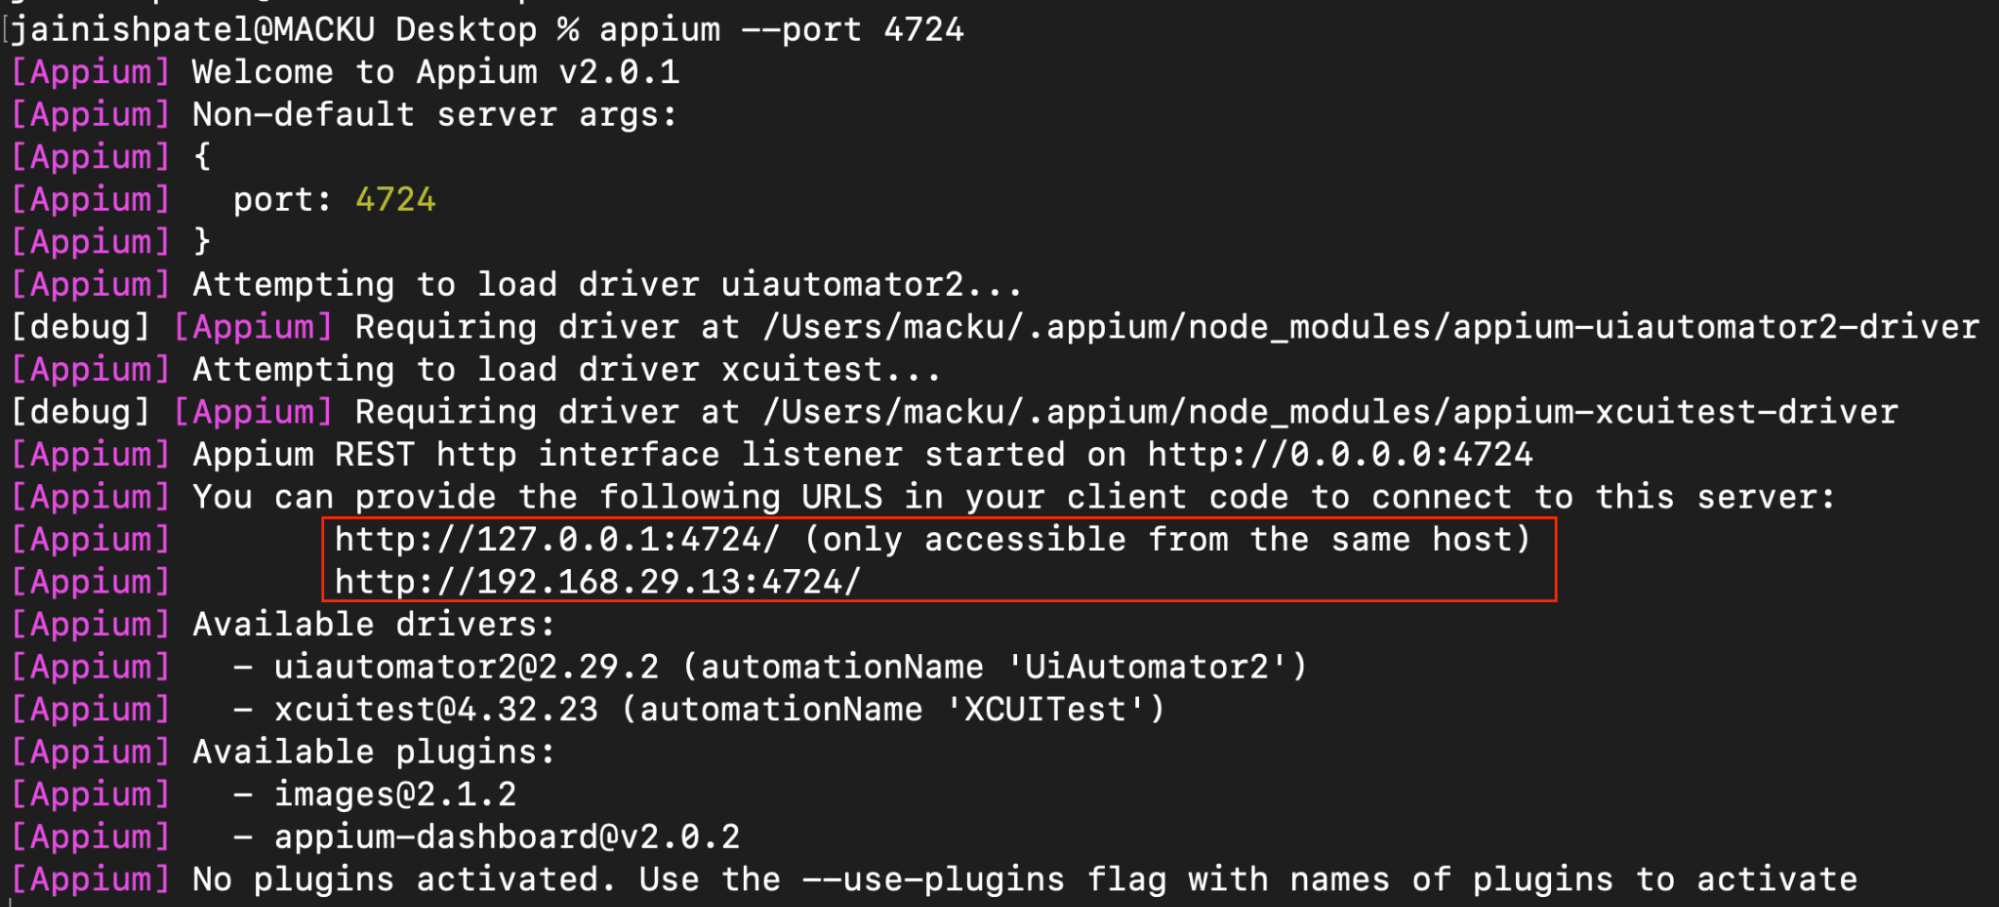
You can use desired port number; it is not mandatory to use port 4724.
By following these steps, you can verify if Appium is installed correctly and check for any error messages during the launch of the Appium server. This ensures that Appium is set up properly and ready for mobile app testing.
Common Issues and Troubleshooting Tips
The installation of Appium may cause you to run into a few frequent problems. Here are some of them, along with some advice for fixing them:

Dependency Errors
- Problem: Dependencies like Node.js, the Java Development Kit (JDK), or the Android SDK may be missing or incompatible, resulting in problems like Appium will not start.
- Troubleshooting: Verify that all necessary dependencies have been installed correctly and are compatible with the version of Appium you are installing. Make sure the environment variables are set properly. If necessary, update or reinstall the dependencies.
Port Disputes
- Problem: To communicate with mobile devices and emulators, Appium utilizes certain ports; by default, it uses 4723. If another process already uses the required port, port conflicts may happen.
- Troubleshooting: You can also set up Appium to use a different port by indicating the desired port number in the configue.json file or by using the appium –port
command.
Network Connectivity
- Problem: A steady network connection is necessary for Appium to communicate with mobile devices or emulators. Firewalls and proxy setups on the network can cause problems that make the connection difficult.
- Troubleshooting: To solve this issue, use an Appium based cloud grid, like LambdaTest, to resolve the connectivity issues.
Compatibility of Version
- Problem: When using different versions of Appium, client libraries, or mobile device operating systems, compatibility problems may occur.
- Troubleshooting: Check for compatibility between the Appium, client library, and mobile device OS versions when troubleshooting. For compatibility information, you can refer to the official documentation or release notes, and if necessary, think about upgrading or downgrading components.
Error Messages and Logging
- Problem: Users may come across unknown error messages or difficult-to-understand log outputs.
- Troubleshooting: Review the Appium-provided error messages or log outputs carefully when troubleshooting. Online searches for the error message or assistance from the Appium community are both excellent options. Receiving specialized troubleshooting advice can be facilitated by posting the error message and relevant information in discussion forums or support channels.
One of the most common issues you might face is resource management. Most developers and testers who use Android Studio or Xcode require high-end resources for running and testing their applications.
One of the solutions is to use real devices for testing. However, it is not practically possible to test developed applications on various devices. To solve this issue, Appium provides support to different cloud testing platforms. One is LambdaTest, an AI-powered test orchestration and execution platform that provides multiple testing types for your native, and mobile web applications.
NoteAutomate Android apps on the Appium cloud of 3000+ real devices. Try LambdaTest Today!
Check out the following resources to learn how to run Appium tests on LambdaTest Cloud Grid:
Best Practices for Appium Configuration
Here are some recommendations for setting up Appium to enhance the testing of mobile applications:
Setting up Desired Capabilities
- When configuring the Appium server for testing, specify your required capabilities in clear, specific terms. Information such as device name, platform version, app package name, app activity, and more are desired capabilities.
- For the particular platform (Android or iOS) and device configuration, you aim for, research and comprehend the accessible required features. For a detailed list of desired features, consult the official Appium documentation.
Real Devices vs. Emulators/Simulators
- Consider testing on real devices vs emulators vs simulators. While real devices give precise simulations of real-world testing environments, emulators and simulators are more convenient and quick.
- To test a variety of screen sizes, resolutions, and operating system versions, use emulators/simulators and real devices.
- Emulators/Simulators provide an enhanced debugging option, and they work best early in the development process. Using Emulators/Simulators for testing could speed up and improve the development cycle with frequent iterations throughout the early stages. However, if you truly want to grasp the user experience, testing on real devices is more beneficial when considering the accuracy factor and your sanity.
- The ultimate aim is to ensure that more users use your application. Thus, building a user-friendly, high-performing mobile application is essential by leveraging the power of emulators/simulators and real devices.
Packaging for apps
- Use the correct app package format for the relevant platform (.apk for Android, .ipa for iOS).
- Make that the app package is legitimately signed and compatible with the target platform’s release.
- To enable consistent and repeatable testing, keep software packages organized and version-controlled.
Configuring the Appium Server
- Set up the Appium server to comply with the necessary testing specifications. This includes logging levels, timeout settings, implicit and explicit waits, and more.
- The logging level determines how much information is logged by the Appium server. This can be useful for following the progress of your testing or troubleshooting issues.
- The Appium server’s timeouts regulate how long it will wait for a response from the gadget or the app. This is crucial to prevent tests from hanging if the hardware or app responds slowly.
- The Appium server can be instructed to wait for a specific circumstance before moving forward with a test using implicit and explicit waits. Implicit waits are employed in general circumstances, such as when an object is visible on the screen. Explicit waits are employed in more precise circumstances, such as when an element’s text changes.
- Trying out various options and seeing what works best for you is the best method to configure the Appium server for your testing environment. Your application’s features, your network’s condition, and the test execution speed will all influence the precise settings you require. The time you want your tests to run is known as the desired test execution speed.
For instance, you might need to lengthen the timeouts for your tests if your application involves numerous complex interactions. The Appium server will have more time to wait for the application to respond. Your tests could hang, though, if you overextend the timeouts.
Similarly, you might need to shorten the timeouts for your tests if your network is slow. By doing this, you can stop your tests from hanging as they wait for the device or app to respond.
To delve deeper into the realm of Appium, explore our dedicated hub focusing on Appium Interview Questions.
Conclusion
Appium is a popular option for testing mobile apps due to its cross-platform capabilities, support for numerous programming languages. The architecture of Appium provides seamless interaction with native, hybrid, and mobile web apps on both the Android and iOS platforms by utilizing client-server communication and automation drivers.
The prerequisites for installing Appium, such as Node.js, JDK, Android SDK, and Xcode, ensure that Appium will operate effectively in a stable and compatible environment. We show step-by-step installation instructions for each software to simplify the setup procedure.
After that, we proceed further by installing Appium using the npm package manager. With that, we also install other required dependencies like Appium clients, plugins, and the Appium Inspector, which further emphasizes how versatile and extensible Appium is as a testing platform.
We also saw how to verify that Appium is successfully installed. Along with troubleshooting advice for Common installation issues. It focuses on the significance of defining required capabilities, selecting the best testing environment (Real Devices as opposed to emulators/simulators), and successfully managing test data and environment.
Developers and testers may maximize their mobile app testing efforts, increase efficiency, and guarantee thorough test coverage by following the best practices for Appium settings.
In conclusion, this extensive article explains how to install, configure, and use Appium for successful mobile app testing.
Frequently Asked Questions (FAQs)
What various methods are there for running Appium tests?
On your computer, you can locally execute Appium tests. Appium tests can be run using a cloud-based platform like LambdaTest. Appium tests can be incorporated into your Continuous Integration (CI)/ Continuous Delivery(CD) process.
Where is Appium installed on macOS?
To get the location of the Appium, you can run the command which appium in the command prompt or terminal. This command will return the location of the directory where the Appium is installed. It will be something like this “/usr/local/bin/appium”.
How does Appium work?
Through the use of the UI elements made available by the platform’s UI automation frameworks, Appium communicates with the application. For instance, Appium employs the UI Automator framework on Android, whereas the XCUITest framework is used on iOS. The WebDriver protocol is used for communication with the hardware or emulator, enabling the tester to issue commands and obtain responses.
How frequently is Appium updated?
New versions of Appium are often launched, and updates are made frequently. The Appium team decides the release cycle, which affects how frequently updates are made. Appium’s most recent version, 2.0.1 was made available on July 24, 2.0.0 was the previous version which was launched on July 5, 2023. On March 20, 2022, the prior version, 1.22.3, was made available.


Author’s Profile
Jainish Patel
Jainish Patel is a tech enthusiast specializing in web development. With a primary focus on React.js, React.native, and core front-end languages, He is well-equipped to tackle the ever-evolving world of web technologies. Building sleek and interactive Mobile and web applications is one of his strengths. Moreover, he is passionate about crafting seamless user experiences and transforming ideas into reality through programming.
Blogs: 7
Got Questions? Drop them on LambdaTest Community. Visit now