How To Run Junit Tests From The Command Line?
Himanshu Sheth
Posted On: November 19, 2020
![]() 121845 Views
121845 Views
![]() 19 Min Read
19 Min Read
This article is a part of our Content Hub. For more in-depth resources, check out our content hub on JUnit Tutorial.
JUnit is one of the most popular Java-based open-source frameworks used for testing every unit of the application, i.e., classes and methods. And for automating the testing of web applications, you can use it with the Selenium WebDriver. Though Selenium and JUnit can function independently, combining them can help develop tests in a structured format.
Though Java offers several IDEs using which you can write code and run tests, you would like to execute JUnit from the command line. Why?
Because it can be useful for quickly checking whether the tests are running as per expectations (avoiding the need to open the IDE). In this tutorial, we look at how to run the JUnit test from the command line. We will cover the following combinations to run JUnit tests from the command line:
- Plain JUnit without any build-automation (or build system) tools like Apache Maven, Gradle, etc.
- JUnit with Apache Maven
- JUnit with Gradle
- JUnit with ANT
It would help if you executed JUnit from the command line, especially when you want to check whether your tests are working fine or not quickly. Along with JUnit’s usage from the command line with build systems like Apache Maven and Gradle, you can use it with popular CI/CD tools like Jenkins, Bamboo, Travis CI, and more. Furthermore, delve into an extensive compilation of commonly asked JUnit Interview Questions and Answers. This resource is designed to aid interview preparation and enhance your proficiency.
TABLE OF CONTENT
The tests demonstrated in the article would be executed on the cloud-based Selenium Grid powered by LambdaTest. And, by the end of this blog, you would be in a position to execute Selenium Automation tests with JUnit outside the IDE on the command line.
For a quick recap on JUnit and Selenium WebDriver, you can refer to our blog on automated testing with JUnit and Selenium for browser compatibility.
Note – The demonstration uses JUnit 4, but if you want to run JUnit tests from the command line for JUnit 5, please chime in the comment section, and we’ll cover it for you in our subsequent blogs.
JUnitCore – Facade For Running JUnit Tests
You can run JUnit tests from the command line using the JUnit core class of the JUnit framework. The org.junit.runner.JUnitCore is an in-built class in JUnit, and it is based on the facade design pattern. The JUnitCore class provides a static method runClasses that lets you run one or several test classes. It supports running tests that use JUnit 4, JUnit 3.8.x, and its mixtures.
|
1 |
public static Result runClasses(java.lang.Class<?>... classes) |
The runClasses method writes the feedback for all the tests and stack traces for the failed tests to complete test execution. In return, you receive an object of the type org.junit.runner.Result, which can be further used for fetching the details about the tests.
Setting Up The Build Environment To Run JUnit Tests From The Command Line
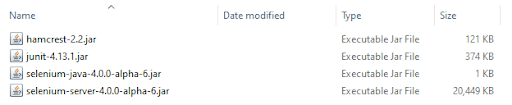
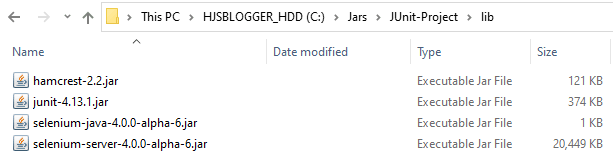
You need to download the requisite jar files necessary for compiling and running the JUnit and Selenium tests. Even though the tests will run on the cloud-based Selenium Grid, we still need to download the Selenium Server jar. It is required so that the classes offer methods in org.openqa.selenium package can be used in the implementation.
Since the requests will be executed on the cloud-based Selenium Grid, there is no necessity to start the Selenium Grid server on the machine. Along with the Selenium Grid Server jar, download the below jar files in the same directory:
The latest version of the Hamcrest framework consists of a single jar file containing the base classes and library used for matcher implementations. Apart from Hamcrest-2.2.jar, it is not necessary to download other Hamcrest jars like Hamcrest-core.jar. Add the location where the four jar files are downloaded to the Classpath (or Path).
Now that the build setup is complete, you can compile JUnit tests and execute the tests on the terminal.
This JUnit certification establishes testing standards for those who wish to advance their careers in Selenium automation testing with JUnit.
Here’s a short glimpse of the JUnit certification from LambdaTest:
How To Compile JUnit Tests From The Command Line In Selenium
The command for compiling the JUnit test remains unchanged, irrespective of whether the JUnit test is a plain JUnit or uses a build-automation tool like Gradle, Maven, etc.
Run the following command on the terminal to compile the JUnit test:
|
1 |
javac -cp "<Path to JUnit jar + Selenium Server jar + Selenium Java jar>;." FileName.java |
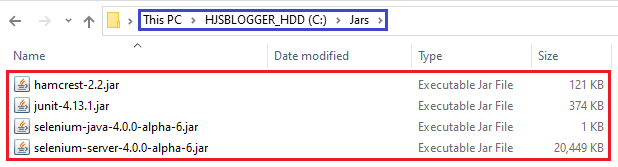
For example, if the jar files are located in the C:\Jars folder, the following command is used for compiling the JUnit test from the command line:
|
1 |
javac -cp "C:\Jars\junit-4.13.1.jar;C:\Jars\selenium-java-4.0.0-alpha-6.jar;C:\Jars\selenium-server-4.0.0-alpha-6.jar;." FileName.java |
How To Run JUnit Tests From The Command Line In Selenium
The command to run the JUnit test from the command line will vary depending on the build automation tool used in the project.
Here is the command to execute JUnit from the command line:
|
1 |
java -cp "<Path to JUnit jar + Selenium Server jar + Selenium Java jar + hamcrest jar>;." org.junit.runner.JUnitCore FileName |
In the command, the path to the jar files (i.e., JUnit, Hamcrest, Selenium Java, and Selenium Server) is specified along with org.junit.runner.JUnitCore class that triggers the JUnit test class to run.
For example, if the jar files are located in the C:\Jars folder, the following command is used to run the JUnit test from the command line:
|
1 |
java -cp "C:\Jars\junit-4.13.1.jar;C:\Jars\selenium-java-4.0.0-alpha-6.jar;C:\Jars\selenium-server-4.0.0-alpha-6.jar;C:\Jars\hamcrest-2.2.jar;." org.junit.runner.JUnitCore FileName |
Different Ways To Run JUnit Tests From The Command Line
This section demonstrates how to run JUnit tests from the command line in conjunction with different build automation tools like Maven, Gradle, and Apache ANT.
Test Scenario
- Navigate to the URL https://lambdatest.github.io/sample-todo-app/ in the latest version of Chrome on Windows 10.
- Click on the web elements with li1 and li2.
- Add a new element to the list titled Happy Testing at LambdaTest.
- Assert if the new element is not added to the list.
Implementation
FileName – CrossBrowserTest.java
Code WalkThrough
Step 1: You need to import the JUnit class before annotations in the JUnit test code.
|
1 2 3 |
import org.junit.AfterClass; import org.junit.BeforeClass; import org.junit.*; |
Step 2: The desired capabilities are generated using the LambdaTest capabilities generator. Since only one JUnit test has to be executed, we perform the necessary initializations in the @BeforeClass method.
|
1 2 3 4 5 6 7 8 9 10 11 12 13 14 15 16 17 18 19 20 21 22 23 24 25 |
@BeforeClass public static void SetUpClass() throws MalformedURLException { /* WebDriverManager.chromedriver().setup(); driver = new ChromeDriver(); */ DesiredCapabilities capabilities = new DesiredCapabilities(); capabilities.setCapability("build", "[Java] Demonstration of running JUnit tests from the command line"); capabilities.setCapability("name", "[Java] Demonstration of running JUnit tests from the command line"); capabilities.setCapability("platform", "Windows 10"); capabilities.setCapability("browserName", "Chrome"); capabilities.setCapability("version","latest"); capabilities.setCapability("tunnel",false); capabilities.setCapability("network",true); capabilities.setCapability("console",true); capabilities.setCapability("visual",true); ................................................... ................................................... driver = new RemoteWebDriver(new URL("https://" + username + ":" + access_key + "@hub.lambdatest.com/wd/hub"), capabilities); /* driver = new ChromeDriver(); */ System.out.println("Started session"); } |
Step 3: The details about the cloud-based Selenium Grid on LambdaTest along with the browser & OS combination on which the test has to be performed are passed via the capabilities object.
|
1 |
driver = new RemoteWebDriver(new URL("https://" + username + ":" + access_key + "@hub.lambdatest.com/wd/hub"), capabilities); |
Step 4: The annotation @Test includes the test method i.e. test_Selenium4_ToDoApp. In the test method, web elements li1 and li2 are located using the name property.
|
1 2 3 4 5 6 7 8 9 10 11 12 |
@Test public void test_Selenium4_ToDoApp() throws InterruptedException { driver.navigate().to(URL); driver.manage().window().maximize(); try { /* Let's mark the first two items in the list. */ driver.findElement(By.name("li1")).click(); driver.findElement(By.name("li2")).click(); ................................................... ................................................... |
Step 5: A new item is added to the list by locating the element with ID sampletodotext. The sendKeys method in Selenium is used for adding the text to the text box sampletodotext.
A click operation is performed on the button with the ID addbutton to add the new item to the list.
|
1 2 3 4 |
/* Let's add an item to the list. */ driver.findElement(By.id("sampletodotext")).sendKeys("Happy Testing at LambdaTest"); driver.findElement(By.id("addbutton")).click(); |
The getText method in Java Selenium is used for getting the inner text of the newly added element (i.e., Happy Testing at LambdaTest).
|
1 |
String enteredText = driver.findElement(By.xpath("/html/body/div/div/div/ul/li[6]/span")).getText(); |
Now that the implementation is complete, we look at the different ways in which the JUnit test method can be run from the command line. Before we proceed with the code compilation and execution, ensure that you have downloaded all the required jar files on your machine.
How To Run Plain JUnit Tests From The Command Line
The plain in the title means that we only have the test file (i.e., CrossBrowserTest.java) in the folder, and no build automation tool is used for managing the project.
Compilation of JUnit tests from the command line
The command format for the compilation of the JUnit Test is:
|
1 |
javac -cp "<Path to JUnit, Selenium, and other Jars>;." FileName.java |
To compile the test file, first navigate to the location that contains the Java file and run the following command on the terminal:
|
1 |
javac -cp "C:\Jars\junit-4.13.1.jar;C:\Jars\selenium-java-4.0.0-alpha-6.jar;C:\Jars\selenium-server-4.0.0-alpha-6.jar;." CrossBrowserTest.java |
Where C:\Jars contains the required Jar files for compilation.
Execution of JUnit tests from the command line
Now that the class file is generated, we run the JUnit test from the command line by triggering the following command on the terminal:
|
1 |
java -cp "<Path to JUnit, Selenium, and other Jars>;." org.junit.runner.JUnitCore FileName |
For execution, we also require to add the Hamcrest jar to the build command. The org.junit.runner.JUnitCore class triggers the JUnit test class to run.
Since the jar files in our system are located in C:\Jars, the JUnit test is run using the following command:
|
1 |
java -cp "C:\Jars\junit-4.13.1.jar;C:\Jars\selenium-java-4.0.0-alpha-6.jar;C:\Jars\selenium-server-4.0.0-alpha-6.jar;C:\Jars\hamcrest-2.2.jar;." org.junit.runner.JUnitCore CrossBrowserTest |
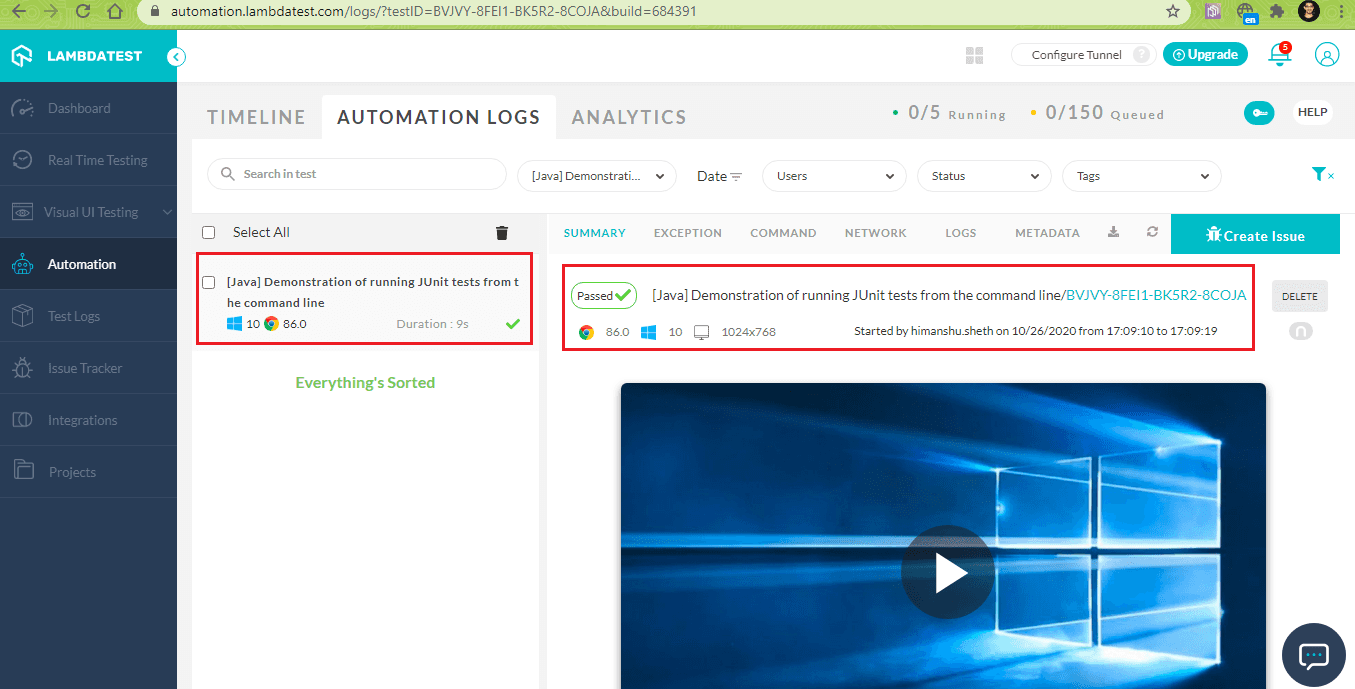
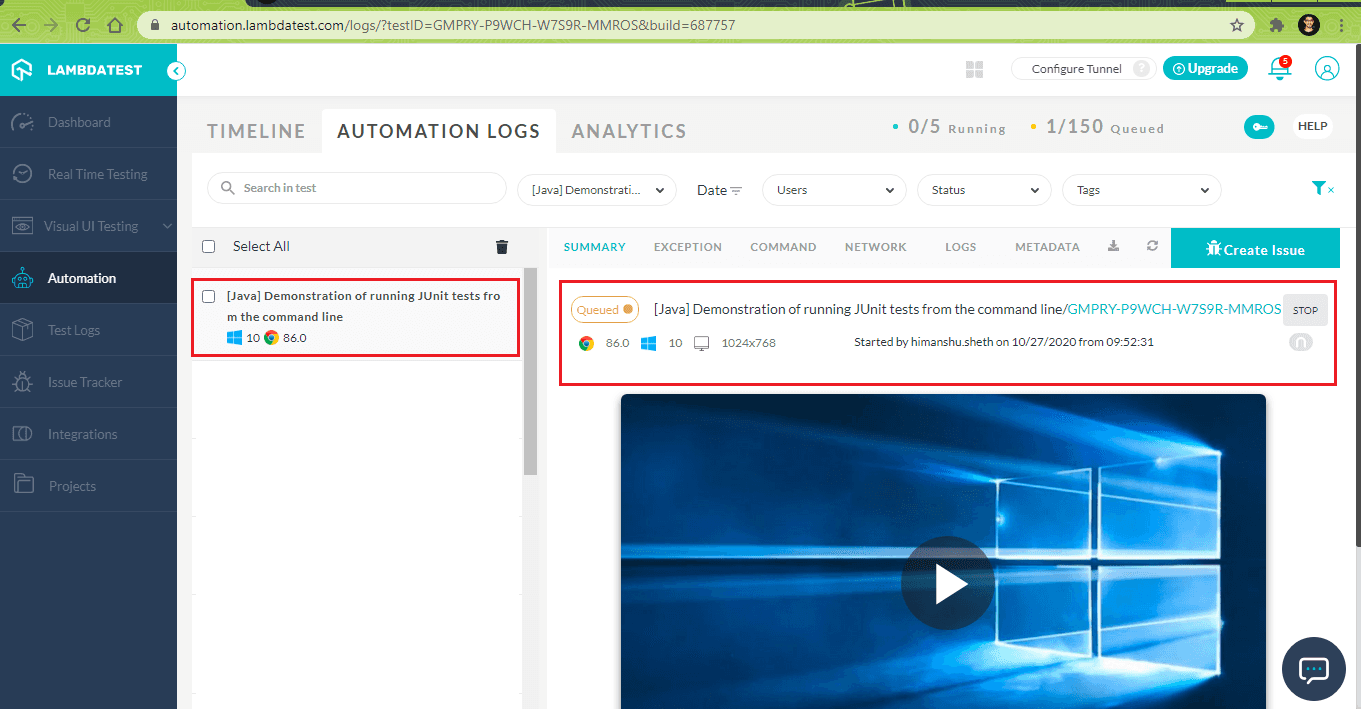
Here is the execution snapshot, which indicates the test was executed successfully on the Selenium Grid cloud.

How To Run JUnit Tests From The Command Line With Apache Maven
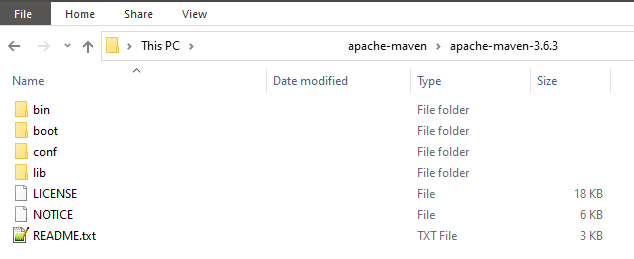
If you are using Maven for your JUnit project, the JUnit tests can be run on the command line using the mvn clean test command. To get started, download the latest release of Apache Maven from the download section of the Apache Maven Project site.
Add the location where Maven is downloaded to the Classpath using the set PATH command in Windows.
To get started with JUnit and Maven, we add the required version of JUnit to our project. In this case, the JUnit with version 4.13 is used for testing.
|
1 2 3 4 5 6 7 8 |
[...] junit junit 4.13 test [...] |
Instead of creating the project in Eclipse (or IntelliJ IDEA), we create a similar project structure that is required for building a Maven Project. The Junit test file (i.e. CrossBrowserTest.java) will now be a part of the org.selenium4 package. Hence, this minimal change is done to the existing test code:
FileName – CrossBrowserTest.java
The JUnit test file is placed in \src\test\java\org\selenium4.

pom.xml is placed in the parent folder.
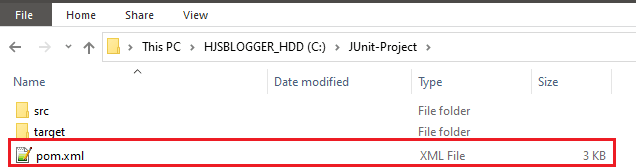
Here are the contents of the pom.xml, which contains information about the project and the configuration required for building the same.
FileName – pom.xml
For a quick recap of Maven and pom.xml, you can refer to getting started with Maven for Selenium testing.
Execution Of All JUnit Tests (with Apache Maven) From The Command Line
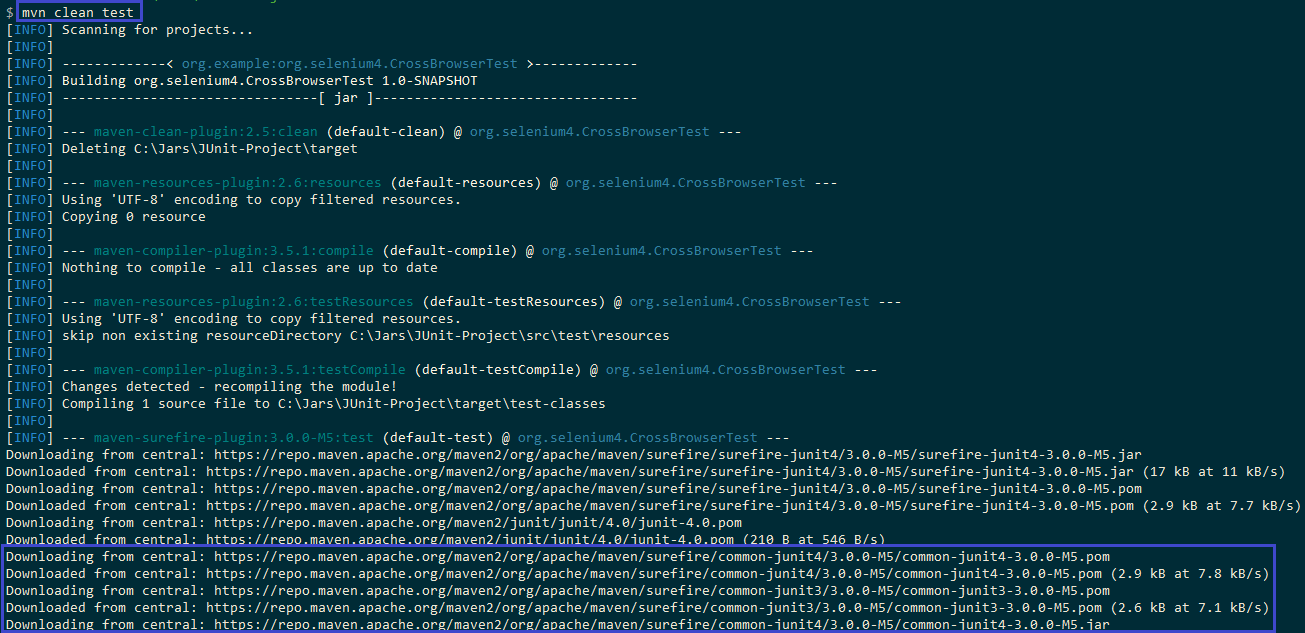
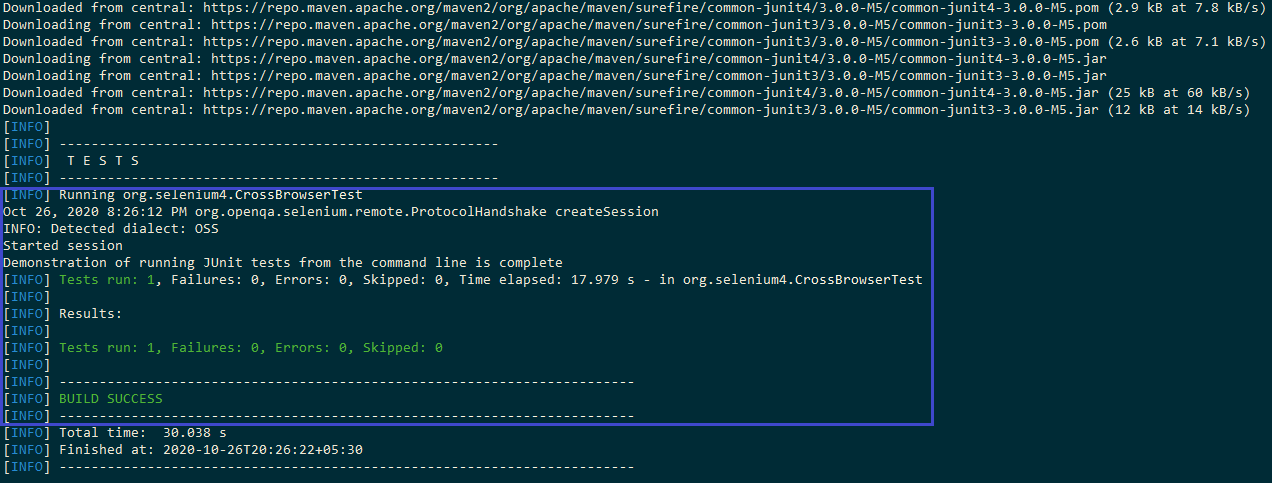
To run all the test cases, trigger the following command on the terminal:
|
1 |
mvn clean test |
As seen in the execution snapshot, the packages specified in pom.xml are first downloaded on the local machine. Post downloading the packages, it executes the test org.selenium4.CrossBrowserTest on LambdaTest.
Execution Of A Particular JUnit Test (with Apache Maven) From The Command Line
In our JUnit test code, we only have one test case (i.e., CrossBrowserTest). However, an actual project might contain multiple test cases, and you may want to execute selected tests from the entire lot.
The following command is used to run a particular JUnit test on the command line:
|
1 |
mvn clean test -Dtest=package.TestClassName#particularMethod |
In our case, the details are as below:
- Package: org.selenium4
- TestClassName: CrossBrowserTest
- ParticularMethod: test_Selenium4_ToDoApp
Trigger the following command on the terminal to run the above JUnit test on the command line:
|
1 |
mvn clean test -Dtest=org.selenium4.CrossBrowserTest#test_Selenium4_ToDoApp |
In case you want to forgo the generation of report files in the target\surefire-reports folder and see the stack trace, set surefire.useFile to False.
|
1 |
mvn clean test -Dtest=package.TestClassName surefire.useFile=false |
How To Run JUnit Tests From The Command Line With Gradle
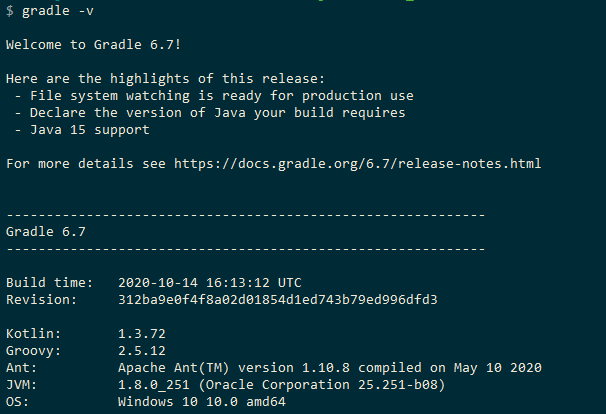
If you are using Gradle for your JUnit project, you need to configure the required dependencies before running the JUnit test from the command line. Set up Gradle on Windows by downloading the installer from the official download link. Post-installation, add the location of gradle\bin to the Path (or ClassPath).
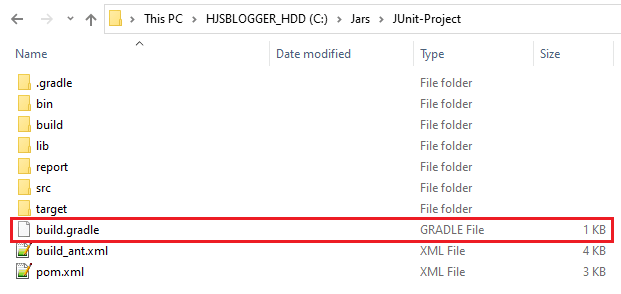
Run the gradle -v command on the terminal to verify whether Gradle was successfully installed or not.
The file build.gradle is placed in the root folder of the project.
We configure the dependencies and publications in the Gradle build script (i.e., build.gradle) that define the project’s process. For building the CrossBrowserTest project, the dependencies are – Junit, Hamcrest, Selenium Chrome Driver, and Selenium Java jar. Some of these dependencies are applicable only for the ‘compile’ configuration, whereas others are applicable for the ‘testCompile’ configuration.
The dependencies under the ‘compile’ configuration (i.e., selenium-java, selenium-chrome-driver) are required for compiling the source files. The dependencies under the ‘testCompile’ configuration (i.e., Hamcrest v2.2, JUnit 4.13) are required for compiling the test files (i.e., CrossBrowserTest.java).
The dependencies under the ‘testRuntime’ configuration are required for running the tests. In our case, this configuration is not required since it includes testCompile dependencies by default.
FileName – build.gradle
Execution of all Gradle JUnit Tests From The Command Line
To run all the JUnit test cases with Gradle, trigger the following command on the terminal:
|
1 |
gradle test |
As seen in the execution snapshot, the script downloads the dependencies mentioned in build.gradle and executes the test CrossBrowserTest (which is a part of the org.selenium4 package).

As seen below, the JUnit test was executed successfully.

Execution Of All Gradle JUnit Tests Of A Particular Class From The Command Line
In case you want to execute JUnit from the command line of a particular class, run the following command on the terminal:
|
1 |
gradle test --tests ClassName |
We have only one class in our project (i.e., CrossBrowserTest). Run the below command to run JUnit tests in that particular class:
|
1 |
gradle test --tests CrossBrowserTest |
Execution of a specified Gradle JUnit test of a particular Class From The Command Line
Run the following command to execute a specified JUnit test in a particular class:
|
1 |
gradle test --tests ClassName.specifiedMethod |
The command mentioned below is used to execute test_Selenium4_ToDoApp of class CrossBrowserTest:
|
1 |
gradle test --tests CrossBrowserTest.test_Selenium4_ToDoApp |
Here is the execution snapshot, which indicates the JUnit executed successfully:


Execution of Gradle JUnit Tests Matching A Particular Pattern From The Command Line
There are scenarios where you might want to run JUnit tests that match a name pattern. The sample command mentioned below runs the tests in the class ClassName with the method name matching *MethodName*
|
1 |
gradle test --tests ClassName.*MethodName* |
Trigger the below command on the terminal to execute tests in the class CrossBrowserTest with methods that match *test_Selenium4_ToDoApp*
|
1 |
gradle test --tests CrossBrowserTest.*test_Selenium4_ToDoApp * |
Here is the execution snapshot, which indicates the JUnit executed successfully:


How To Run JUnit Tests From The Command Line With ANT
Apache ANT is a popular Java-based build tool. It is used for automation of build processes such as compile, run, test, and assembling of Java applications. Also, it is used for the automation of Java Selenium projects.
To get started with ANT, download the Apache ANT binary from the ANT download link. Add the location of the apache-ant\bin folder to the Path environment variable. Set the environment variable ANT_HOME to the location that contains Apache ANT. In our case, Apache ANT was installed in C:\Setup-Folder\ANT\apache-ant-1.10.9. Hence ANT_HOME is set to that folder.
![]()
ANT’s build files are written in XML, and the -f option can be used for specifying the name of the custom build file. The ANT build file is placed in the project root folder. We use the build file named build_ant.xml for building the project and running the JUnit tests in the test file.
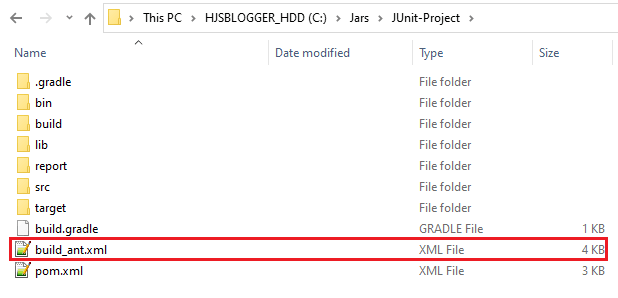
The project dependencies are placed in the project\lib folder. We manually create a lib folder and place the required Jar files in it. The Setting Up section will guide you in downloading the Jar files needed for the JUnit project.
FileName – build_ant.xml
As seen above, the build file (build_ant.xml) contains five distinct steps (clean, makedir, compile, junit, and main). The depends attribute indicates the dependency of one target on the other. In the above build file, the target ‘compile’ depends on the execution status of the targets ‘clean’ and ‘makedir.’
The ‘property’ attribute is used to set variables, which can later be used in the build file. It consists of a name and value pair. The value of the property is accessible via ${}. For example, property named lib.dir points to the location lib.
|
1 2 3 4 5 6 7 |
<property name="src.dir" location="src" /> <property name="build.dir" location="bin" /> <property name="test.dir" location="src" /> <property name="lib.dir" location="lib" /> |
The pathelement attribute is used for defining the classpath. The location points to the directory that contains the jar files essential for compilation and execution. Since we have stored the jar files in project-folder\lib folder, the location in pathelement should point to lib\< required-jar >.jar
|
1 2 3 4 5 6 7 8 9 10 11 |
<path id="junit.class.path"> <pathelement location="lib/junit-4.13.1.jar" /> <pathelement location="lib/selenium-server-4.0.0-alpha-6.jar" /> <pathelement location="lib/hamcrest-2.2.jar" /> <pathelement path="${build.dir}"/> </path> |
The junit element in the build file is used for implementing the Apache ANT JUnit task. The task for running tests from the JUnit framework is carried out in this step.
|
1 |
<junit printsummary="on" fork="true" haltonfailure="no"> |
The classpath is referenced by specifying the refid attribute on the element (i.e. in our case it is junit.class.path).
|
1 2 |
<classpath refid="junit.class.path" /> <formatter type="xml" /> |
The patternset element groups different patterns into sets which can be later referenced by the id attribute. Since the test file (CrossBrowserTest.java) is stored in src/test/java/org/selenium4 folder, the same is included for the build.
|
1 2 3 4 5 6 7 8 9 10 11 12 13 14 15 16 17 18 19 20 21 22 23 24 25 |
<junit printsummary="on" fork="true" haltonfailure="no"> <classpath refid="junit.class.path" /> <formatter type="xml" /> <batchtest todir="${test.report.dir}"> <fileset dir="${src.dir}"> <patternset id="sources"> <include name="**/test/java/org/selenium4/*.java" /> </patternset> </fileset> </batchtest> </junit> [...] </target> |
Property named build-test-classes was set to ${build.dir}/org/selenium4 at the beginning of the build file where build.dir=bin.
|
1 2 3 4 5 |
<property name="build.dir" location="bin" /> [...] <property name="build-test-classes" value="${build.dir}/org/selenium4"/> |
On successful compilation, the class file is generated in the bin/org/selenium4 folder.

In this step, the test methods in the newly generated class file (i.e. CrossBrowserTest.class) are executed and the execution report is generated in the report folder.
|
1 2 3 4 5 6 7 8 9 10 |
<junit printsummary="on" fork="true" haltonfailure="no"> [...] <fileset dir="${build.dir}"> <patternset id="tests"> <include name="**/org/selenium4/*.class" /> </patternset> </fileset> </batchtest> </junit> [...] |

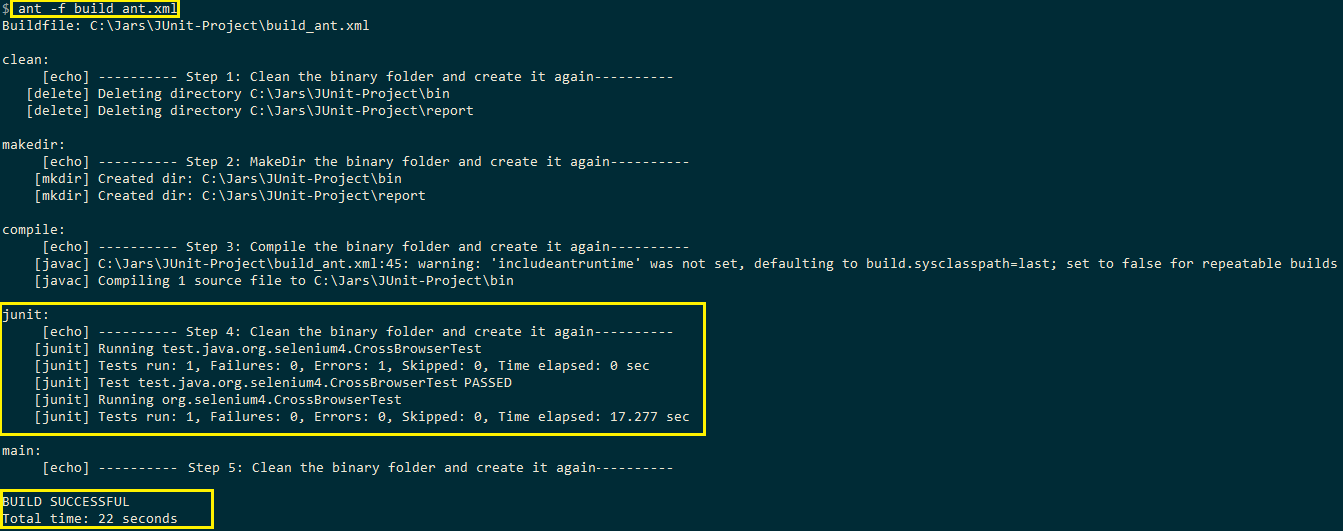
Execution of ANT JUnit tests from the command line
Now that the build file is ready, we will run the JUnit test from the command line. Trigger the following command on the terminal to execute the steps in the build file (i.e., build_ant.xml).
|
1 |
ant –f <build_file> |
The build command in our case is:
|
1 |
ant –f build_ant.xml |
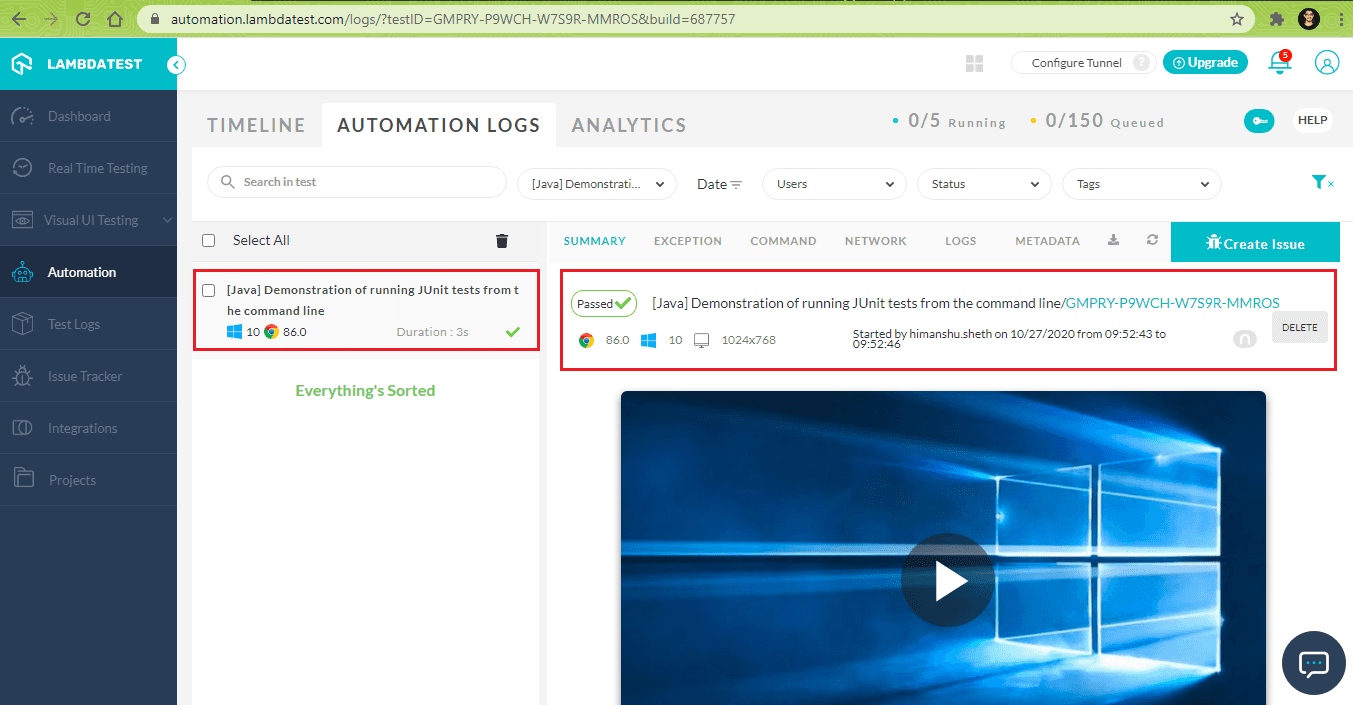
As seen below, the test was executed on the cloud-based Selenium Grid.
Here is the terminal snapshot, which indicates that all the ‘targets’ mentioned in the build file were completed successfully.
Shown below is the status of the test executed on the LambdaTest Grid:
Wrapping Up

When using JUnit tests for your project, you may come across scenarios where you might want to run JUnit tests from the command line. This option comes in handy when you want to quickly check the JUnit units’ status, thereby avoiding the need to open IDE. In this JUnit tutorial, we looked at running the JUnit test from the command line when JUnit is used with Maven, Gradle, and ANT.
If you found this blog useful, we would be grateful if you’d share it with someone else or many others. Happy Testing ☺
Frequently Asked Questions
How do I run a JUnit test class from the command line?
Step 1: Compile the Test class by navigating to the source folder and then run the javac command.
Step 2: Run the Test by specifying the JUnit test runner (org.junit.runner.JUnitCore) and mention the class without the .java extension
How Do I Run A JUnit Test From Command Line Maven?
Step 1: From the terminal window move to the directory having the Maven project. (pom.xml file)
Step 2: Run the below command: mvn
-Dtest=UsersServiceImpl#testCreateUser test. mvn
-Dtest=UsersServiceImpl#testCreateUser test. mvn
-Dtest=UsersServiceImpl#testCreateUser test.
How Do I Run A Test Case From The Command Prompt?
You can run the test cases and test suites from the proenv command prompt.
Step 1: Run the ABLUnitCore.p driver program by passing the following as a parameter: test case, the test suite, or the folder containing test cases.
prowin32 -p ABLUnitCore.p -param testSuite.cls


Author’s Profile
Himanshu Sheth
Himanshu Sheth is a seasoned technologist and blogger with more than 15+ years of diverse working experience. He currently works as the 'Lead Developer Evangelist' and 'Senior Manager [Technical Content Marketing]' at LambdaTest. He is very active with the startup community in Bengaluru (and down South) and loves interacting with passionate founders on his personal blog (which he has been maintaining since last 15+ years).
Blogs: 131
Got Questions? Drop them on LambdaTest Community. Visit now