Power Your Software Testing with AI and Cloud
Supercharge QA with AI for Faster & Smarter Software Testing

- Automation
- Home
- /
- Learning Hub
- /
- Puppeteer Screenshot
How to Automate Visual Testing With Puppeteer Screenshot
Learn how to use Puppeteer screenshots to capture full pages and elements, automate visual testing, and track UI changes for accurate visual validation.
Last Modified on: November 10, 2025
- Share:
Taking screenshots of webpages or specific elements is common when performing browser automation. These images serve as visual evidence that helps developers quickly identify and fix bugs during automated testing. With Puppeteer screenshot functionality, you can easily capture entire pages, individual elements, or specific areas, making it a powerful tool for visual validation and debugging.
Overview
Why Use Puppeteer Screenshot Functionality?
Puppeteer’s screenshot capability simplifies visual testing by turning UI validation into an automated, repeatable, and reliable process. It ensures your application maintains design integrity while speeding up feedback loops for QA and development teams.
What Are the Steps to Set Up the Environment?
Before automating screenshots with Puppeteer, you need a properly configured Node.js setup and an organized workspace.
- Install Node.js: Enables the runtime environment and npm package manager for installing and managing project dependencies effectively.
- Initialize the Project: Use npm init to generate essential configuration files that define your project’s structure and metadata.
- Install Puppeteer: Run npm i puppeteer to install Puppeteer and its bundled Chromium version for consistent testing results.
- Configure Module System: Choose between CommonJS or ES modules to import Puppeteer correctly and avoid syntax-related compatibility issues.
- Organize Project Structure: Create dedicated folders for scripts, screenshots, and dependencies to maintain a clean, scalable test environment.
What Are the Steps to Capture a Full-Page Screenshot?
Taking a full-page screenshot in Puppeteer helps capture the entire webpage, including sections below the visible viewport.
- Launch Browser and Open Page: Initialize the browser instance and navigate to the target website for screenshot automation.
- Use Full-Page Mode: Enable the fullPage: true option in page.screenshot() to capture beyond the visible screen height.
- Wait for Content to Load: Ensure dynamic or lazy-loaded elements fully render before capture to prevent incomplete visual output.
- Save Output: Specify a file path for the screenshot output, ensuring the directory exists to avoid saving errors.
What Are Some of the Puppeteer Screenshot Errors?
When running automated visual tests in Puppeteer, several screenshot-related issues can affect accuracy, reliability, and output consistency.
- Blank Screenshot: Occurs when the browser instance launches incorrectly or content fails to render before capture, resulting in empty images.
- Invalid Selector Error: Triggered when the targeted element’s selector is missing or incorrect, preventing Puppeteer from locating it properly.
- TimeoutError: Happens when Puppeteer waits too long for a page or resource to load before the screenshot command executes.
- File Path Error: Appears when the specified file path doesn’t exist or lacks write permissions, causing the save operation to fail.
- Cut-off Content: Occurs when the viewport isn’t resized correctly or dynamic elements load late, leaving parts of the page uncaptured.
Why Use Puppeteer Screenshot Functionality?
Using Puppeteer screenshots enhances visual validation by ensuring UI accuracy, maintaining consistency, and improving collaboration throughout automated testing workflows.
- Visual Validation: Helps confirm that UI components render correctly across browsers, detecting layout shifts and style mismatches early.
- Regression Detection: Identifies unintended visual changes after updates, preventing design bugs from slipping into production environments.
- Documentation Support: Creates visual evidence for test reports, aiding communication between QA engineers, developers, and designers.
- Automation Efficiency: Reduces manual inspection time by automatically capturing visual states during regression or end-to-end testing.
- Cross-Browser Assurance: Validates how your web application appears on different browsers and devices, ensuring a consistent user experience.
How to Set Up Your Environment for Puppeteer Screenshot?
Before you begin using the Puppeteer screenshot functionality to capture visual evidence, there are a few prerequisites you need to fulfill to complete the process.
Make sure you’ve done the following to get started.
- Install Node.js: You need to have Node.js installed on your system, as Puppeteer runs on the Node.js runtime. Installing Node.js also provides npm (Node Package Manager), which you’ll use to install Puppeteer and manage your project dependencies.
- Create a New Node.js Project: From your terminal, enter the following commands to create a project folder and navigate into it:
mkdir take_screenshots_puppeteer
cd take_screenshots_puppeteernpm i puppeteertouch screenshot.js// CommonJS import syntax
const puppeteer = require('puppeteer');
// ES module import syntax
import puppeteer from 'puppeteer';By default, Node.js projects use the CommonJS module system. However, if you’re using the ES module standard import syntax, add "type": "module" to your package.json or use the .mjs file extension for your files to avoid warnings. You can use either the CommonJS or the ES module system syntax here; it’s completely fine.
To learn more about Puppeteer and its core features, follow this detailed Puppeteer tutorial for step-by-step guidance on browser automation and screenshot testing.
Note: Test your Puppeteer testing scripts online efficiently. Try LambdaTest Now!
How to Take a Screenshot in Puppeter?
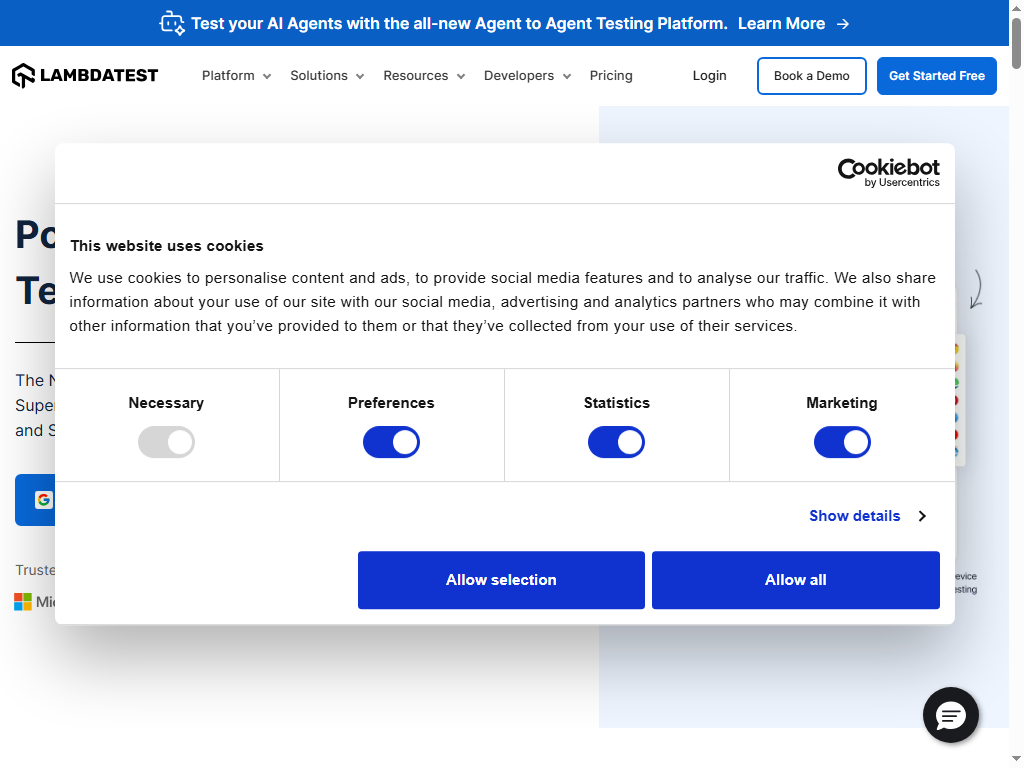
The process of using Puppeteer screenshot functionality is easy and straightforward, and you can do it with just a few lines of code.
In your screenshot.js file, you’ll create an IIFE (Immediately Invoked Function Expression), a function that runs immediately after its creation. Within the IIFE, you’ll define an async anonymous JavaScript function that will be executed automatically.
Code Implementation:
(async () => {
 const browser = await puppeteer.launch()
 const page = await browser.newPage()
 await page.goto("https://www.lambdatest.com/")
 await page.screenshot({ path: "lambdatest_homepage.png" })
 await browser.close()
})();

Code Walkthrough:
- Create a Browser Instance: Use the puppeteer.launch() method to start a new browser session and wait for it to initialize.
- Create a Page Instance: Call the browser.newPage() method to open a new tab for interaction.
- Navigate to a URL: Use the page.goto() method and pass the desired URL as an argument to load the target web page.
- Capture a Screenshot: Execute the page.screenshot() method with a path object to specify where the .png file should be saved.
- Close the Browser: End the session with the browser.close() method to free up system resources.
Local Execution:
node samples/screenshot.js
Output:

Result:
How to Capture Full-Page Screenshots With Puppeteer?
By default, the Puppeteer screenshot functionality does not capture the full page of the given URL. To capture the entire webpage, you need to add an additional option to the page.screenshot() method.
Modify the line of code as shown below to take a full-page screenshot:
await page.screenshot({ path: "lambdatest_fullpage.png", fullPage: true })
Add the fullPage: true option as part of the arguments to capture the entire scrollable page that extends beyond the device’s viewport.
Capture a Specific Area With Puppeteer Screenshot
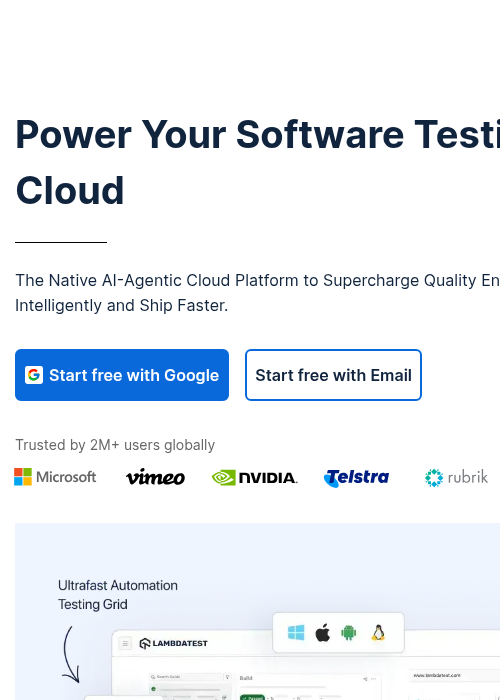
Puppeteer also allows you to capture a specific area of a webpage using the clip property. The details of the area to be captured are defined using coordinates inside a clip object.
An example clip object looks like this:
clip = { x: 30, y: 40, width: 50, height: 60 }Where:
- x: The horizontal coordinate of the top-left corner of the captured area.
- y: The vertical coordinate of the top-left corner of the captured area.
- width: Defines how wide the captured area will be.
- height: Defines how tall the captured area will be.
To capture a specific area using Puppeteer screenshot functionality, call the page. screenshot() with the argument as seen below:
await page.screenshot({ path: "area_snap.png", clip: { x: 0, y: 70, width: 500, height: 700 } })Provide values for x, y, width, and height in the clip object for the exact portion of the page you want to capture.
Result:
How to Capture a Web Element in Puppeteer Screenshot?
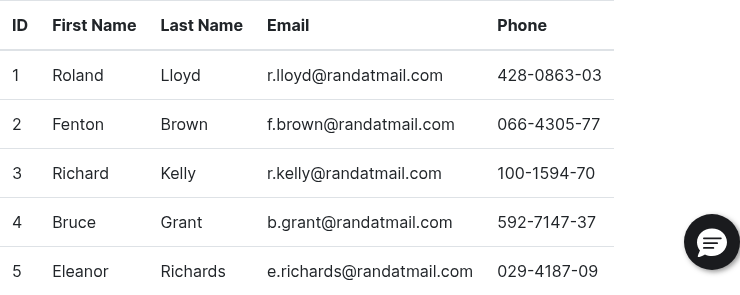
Besides taking screenshots of a specific area or a full page from any chosen webpage, you can also capture images of an element using Puppeteer screenshot functionality. The process for capturing an element on a webpage with Puppeteer is straightforward once you’ve identified the targeted element.
After selecting the targeted element using XPath or CSS Selectors, call the <target_element>.screenshot() method with the correct argument to capture the image.
Example Code Snippet:
page.goto('https://www.lambdatest.com/selenium-playground/table-pagination-demo');
const div = await page.$('#table-id');
await div.screenshot({ path: 'table.png' });
Before you take a screenshot of the element, navigate to the page using the provided URL. The targeted element is selected using the page.$() method, with the CSS Selector supplied as an argument.
Once the element is returned and stored in the div variable, the div.screenshot() method is called with a path argument to save the captured image.
Result:
How to Capture Elements by Class Name With Puppeteer Screenshot?
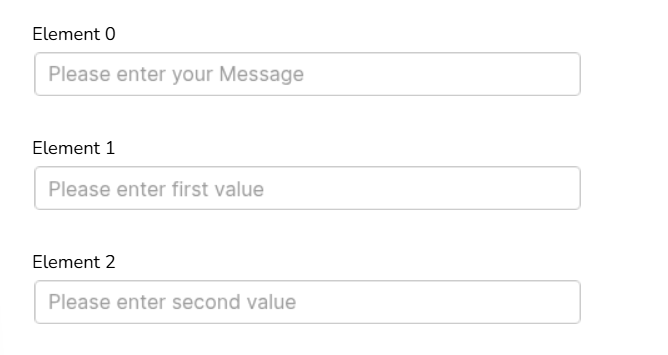
You can capture images of elements by targeting their class name with Puppeteer screenshot functionality. Oftentimes, the same class names are used for multiple elements, which means that when a class name selector is used, all matching elements are returned.
To take a screenshot of an element by class name, you’ll need to filter the array of elements returned to get the specific one or pick the first element in the array.
- page.$(): Returns the first element that matches the specified selector.
- page.$$(): Returns all elements that match the specified selector.
Example Code Snippet:
await page.goto('https://www.lambdatest.com/selenium-playground/simple-form-demo'); // snap demo form URL
const divs = await page.$$('.h-35');
for (let i = 0; i < divs.length; i++) {
    await divs[i].screenshot({ path: `element${i}.png` });
}
First, navigate to the webpage where you’ll capture the DOM element by class name. Use the CSS class selector to pick out the targeted element or elements.
As seen in the code snippet above, page.$$() returns all elements with the CSS Selector .h-35. There are three such elements on the webpage returned.
A for loop is used to iterate over each of the returned elements, and the screenshot is taken via the divs[i].screenshot({ path:`element${i}.png` }) method call.
See screenshot of elements returned with the same class name below:
Running Puppeteer screenshot tests locally might seem simple at first, but it quickly gets complicated as your testing needs grow. When performing Puppeteer browser automation, you often face challenges with headless testing, where debugging visual issues becomes tedious without a real browser view.
Test execution speed can slow down, especially when handling multiple pages or doing Puppeteer visual testing to validate UI changes. On top of that, keeping track of test reports across local runs can be time-consuming and inconsistent.
That’s where cloud testing platforms make a real difference. They remove setup overhead, boost performance with scalable infrastructure, and provide built-in analytics that make monitoring and debugging Puppeteer tests much easier.
Running Puppeteer Screenshot Tests in Parallel
Using a cloud platform such as LambdaTest, you can run tests in your preferred framework, accelerate execution, and take advantage of advanced features like Puppeteer parallel testing and real device coverage.
LambdaTest is a cloud testing platform that allows you to perform online Puppeteer visual testing to capture and compare screenshots across 3000+ browsers and OS combinations, helping you deliver a seamless user experience.
To get started with Puppeteer automation on LambdaTest, follow the steps below:
- Create .env File: Store your LambdaTest credentials securely by creating a .env file in the root of your Puppeteer project and adding your credentials.
LT_USERNAME="<your_username>"
LT_ACCESS_KEY="<your_access_key>"
const capabilities = {
       'browserName': 'Chrome',
       'browserVersion': 'latest',
       'LT:Options': {
           'platform': 'Windows 10',
           'build': 'puppeteer-build-1',
           'name': 'My first Puppeteer test',
           'resolution': '1366x768',
           'user': process.env.LT_USERNAME || "Your Username",
           'accessKey': process.env.LT_ACCESS_KEY || "Your Access Key",
           'network': true
       }
   };
const browser = await puppeteer.connect({
    browserWSEndpoint: `wss://cdp.lambdatest.com/puppeteer?capabilities=${encodeURIComponent(JSON.stringify(capabilities))}`,
});
Code Implementation:
The remote connection to the LambdaTest testing platform will be contained in the samples/connector.js. A browser and page instances will be created for testing with Puppeteer.
'use strict';
import { connect } from 'puppeteer';

export async function remoteBrowserPage() {
    const capabilities = {
        browserName: 'Chrome',
        browserVersion: 'latest',
        'LT:Options': {
            platform: 'Windows 10',
            build: 'puppeteer-build-1',
            name: 'My first Puppeteer test',
            resolution: '1366x768',
            user: process.env.LT_USERNAME || "Your Username",
            accessKey: process.env.LT_ACCESS_KEY || "Your Access Key",
            network: true
        }
    };

    let browser;
    let page;

    try {
        browser = await connect({
            browserWSEndpoint: `wss://cdp.lambdatest.com/puppeteer?capabilities=${encodeURIComponent(JSON.stringify(capabilities))}`,
        });

        page = await browser.newPage();
        await page.setViewport({
            width: 1024,
            height: 768,
            deviceScaleFactor: 1,
        });

    } catch (e) {
        console.log("Error - ", e);
        if (browser) {
            page = await browser.newPage();
            await page.evaluate(_ => {}, `lambdatest_action: ${JSON.stringify({ action: 'setTestStatus', arguments: { status: 'failed', remark: "Test Failed" } })}`);
            await browser.close();
        }
    }

    return { page, browser };
}
Code Walkthrough:
- Import and Define Function: Import connect from Puppeteer and create an async function named remoteBrowserPage that returns both the browser and page instances.
- Set Up Capabilities: Use the LambdaTest capabilities generator to create a capabilities object, defining essential parameters such as browserName and browserVersion.
- Connect to LambdaTest Grid: Establish a browser instance using connect() with the WebSocket endpoint, including the generated capabilities within the URL.
- Create a New Page: Use browser.newPage() to open a new tab, and implement a try-catch block to handle exceptions, setting the LambdaTest test status as failed if an error occurs.
- Return Instances: Return both the browser and page instances from the remoteBrowserPage() function.
- Use in screenshot.js: Import the exported remoteBrowserPage() function from connector.js and destructure it to access the browser and page instances.
import { remoteBrowserPage } from "./connector.js";
(async () => {
    let { page, browser } = await remoteBrowserPage();
Test Execution:
Use the command below to execute the code from your terminal:
node samples/screenshot.jsResult:
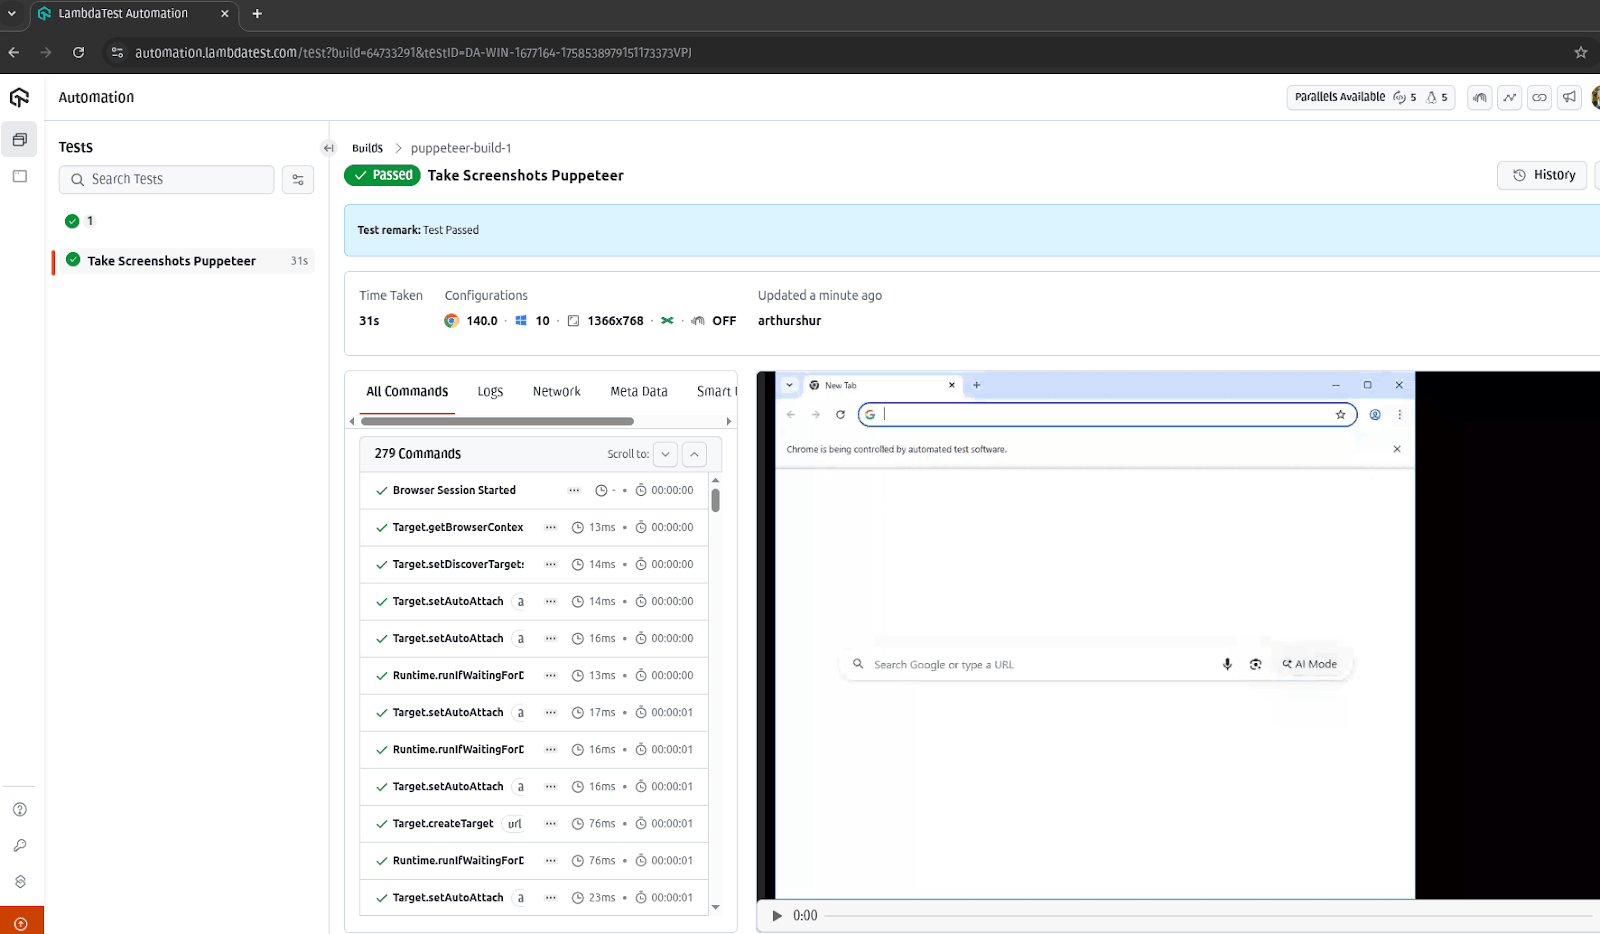
For screenshot testing using Puppeteer, you can use SmartUI on LambdaTest to perform cloud-based visual regression testing and compare UI changes effortlessly. Follow this support documentation on SmartUI using Puppeteer.
Common Puppeteer Screenshot Errors and How to Fix Them
It’s not unusual to encounter certain errors when using Puppeteer screenshot functionality.
Some of the most common issues and how you can fix them.
- Blank Screenshot: This happens when the screenshot is captured before the webpage finishes loading.
Solution: Ensure that all content is fully loaded, or scroll through the page to load any lazy-loaded elements before capturing.
- Invalid Selector Error: This error occurs when trying to capture a screenshot of an element with an invalid selector.
Solution: Double-check that the selector is correct and that the target element exists on the webpage.
- TimeoutError: This occurs when the webpage or targeted element takes longer than expected to load.
Solution: Increase the default timeout or use Puppeteer’s wait methods to ensure specific elements appear in the DOM before taking the screenshot.
- File Path Error: This happens when the specified file path or directory doesn’t exist.
Solution: Puppeteer can only create the screenshot file if the target directory already exists.
- Cut-off Content: This issue arises when the viewport size is too small, causing partial or cut-off screenshots.
Solution: Adjust the viewport size to ensure the entire content is visible before capturing.
While these solutions help during local testing, automated screenshot testing platforms allow you to capture screenshots of your website across a diverse range of real desktop and mobile devices.
This ensures consistent visual validation, helps detect layout shifts or device-specific rendering issues, and reduces manual effort in checking your site’s appearance on multiple browsers and screen sizes.
Conclusion
Puppeteer is a modern browser automation tool that enables capturing screenshots of designated webpages and elements. It provides different options for customization when taking screenshots. Users can capture an element, a full page, a clip of a specific area, etc.
Taking screenshots can prove very helpful to developers for debugging purposes. It saves as a visual reference when performing UI testing.
Frequently Asked Questions (FAQs)
Did you find this page helpful?
More Related Hubs

Start your journey with LambdaTest
Get 100 minutes of automation test minutes FREE!!


