How To Use Deep Selectors In Selenium WebdriverIO
Harita Ravindranath
Posted On: October 18, 2021
![]() 129505 Views
129505 Views
![]() 13 Min Read
13 Min Read
This article is a part of our Content Hub. For more in-depth resources, check out our content hub on WebDriverIO Tutorial.
WebdriverIO is one of the most popular automation testing frameworks that is extensively adopted by testers at a global level. It is an open-source progressive test automation framework built to automate web, mobile, and native desktop applications by leveraging the power of the Webdriver protocol. The framework is highly extensible and feature-rich, offering a wide variety of plugins to fulfill your requirements.
One of the key features of WebdriverIO that distinguishes it from the other frameworks in the market is its advanced smart selector strategies. Identifying a UI element on the application screen is the primary activity of any test automation framework, and for this, locators (or selectors, as addressed by WebdriverIO official documentation) are used.
In this Selenium WebdriverIO tutorial, we will focus on learning Deep Selectors or WebdriverIO selectors and how to use them when writing tests. Before beginning with WebdriverIO selectors, we will also briefly understand Selenium locators in WebdriverIO and the different types of selectors supported by the framework.
Starting your journey with Selenium WebDriver? Check out this step-by-step guide to perform Automation testing using Selenium WebDriver Tutorial.
Let’s get started!
TABLE OF CONTENTS
What are Selectors in WebdriverIO
Selectors or Selenium Locators are Selenium commands that enable us to find or locate any WebElement on a web page when an automation test is executed. Upon reading these selector commands from the script, the Selenium library converts it into an HTTP request and interacts with browsers leading to performing the actions based on the command.
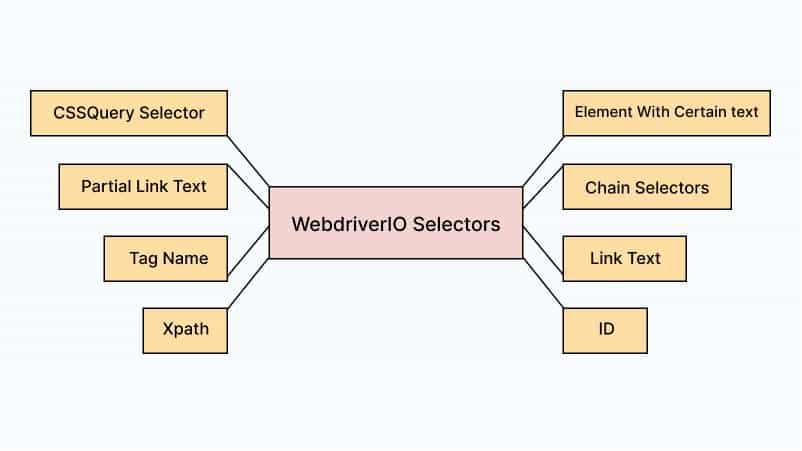
WebdriverIO supports different types of selector strategies. Some of the most commonly used WebdriverIO selectors are listed below:
- CSS Query Selector
- Link Text
- Partial Link Text
- Element with certain text
- Tag Name
- Name
- Id
- XPath
- JS Function
- Chain Selectors
- React Selectors
- Mobile Selectors
- Custom Selectors etc.
Before moving on to WebdriverIO selectors, it is crucial to understand the problem it is trying to solve. In the upcoming sections of this Selenium WebdriverIO tutorial, we will be discussing Shadow DOM and how the WebdriverIO selectors come in handy in such scenarios. However, feel free to skip these sections if you are already familiar with the concepts.
Also read – WebdriverIO Interview Questions for extra insights.
How to work with Shadow DOM?
The concept of the Document Object Model (DOM) is familiar to all of us. But what is a Shadow DOM? In this section of the Selenium WebdriverIO tutorial, we will familiarise what is meant by Shadow DOM and the reason behind its growing importance in the field of web development & testing.
The concept of shadow DOM was conceived as a result of evolution in the web development field, focusing on “code isolation” or “encapsulation.” The shadow DOM can be defined as a web standard used by developers to encapsulate their HTML code and style components for creating a sub-DOM so that no other style components can override this code.
This means that the shadow DOM allows specific sections of the HTML document to be completely isolated from the other components in the DOM. This isolated code is unaffected by any modifications made to other DOM elements. Over & above, the CSS styles applied to DOM elements are not applicable to shadow DOM and vice versa. Using the concept of shadow DOM, developers can now build web components that are highly portable and reusable.

Some of the key terminologies used in shadow DOM are:
- Shadow host: The regular DOM node that is attached to the shadow DOM.
- Shadow tree: The DOM tree inside the shadow DOM.
- Shadow boundary: The place where the shadow DOM ends and the regular DOM begins.
- Shadow root: The root node of the shadow tree.
A shadow DOM has two different modes:
- Open mode
- Close mode
The difference between these two modes lies in their public accessibility.
A shadow root can be attached to any element using the Element.attachShadow() method.
|
1 |
let shadow = elementRef.attachShadow({mode: 'open'});let shadow = elementRef.attachShadow({mode: 'closed'}); |
If the mode is set as open, you can access the shadow DOM using the Element.shadowRoot property of JavaScript, and if it is set to be close, null is returned.
|
1 |
let myShadowDom = myCustomElem.shadowRoot; |
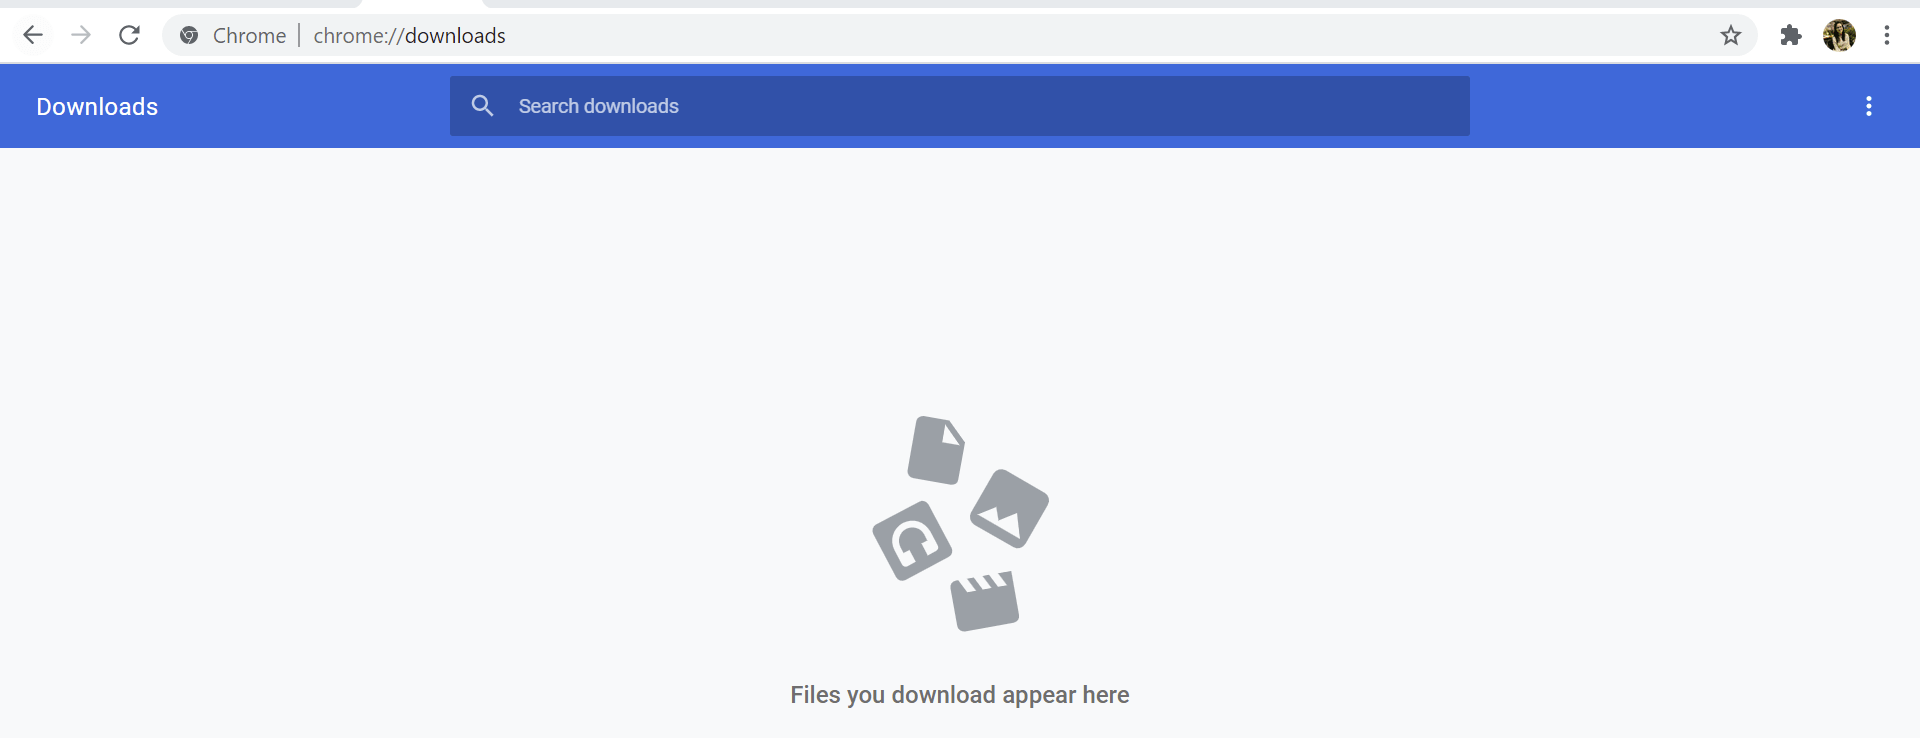
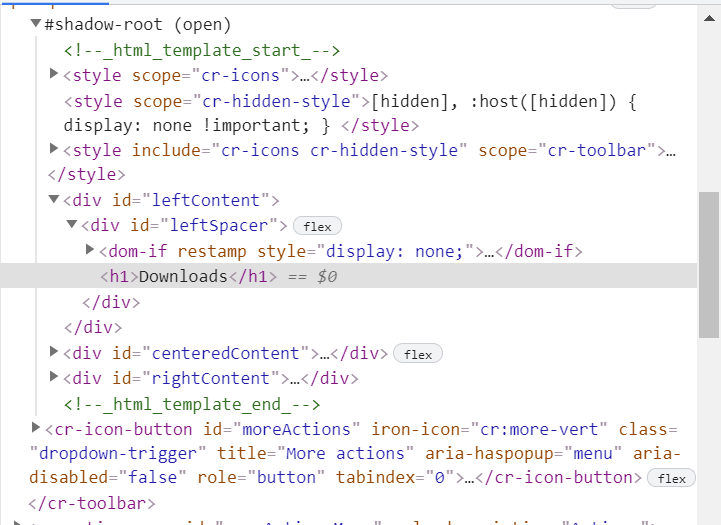
To examine a real-world application, let us inspect the DOM structure of Google Chrome downloads. First, open the Google Chrome browser and go to chrome://downloads/ and inspect the page using Developer Tools.
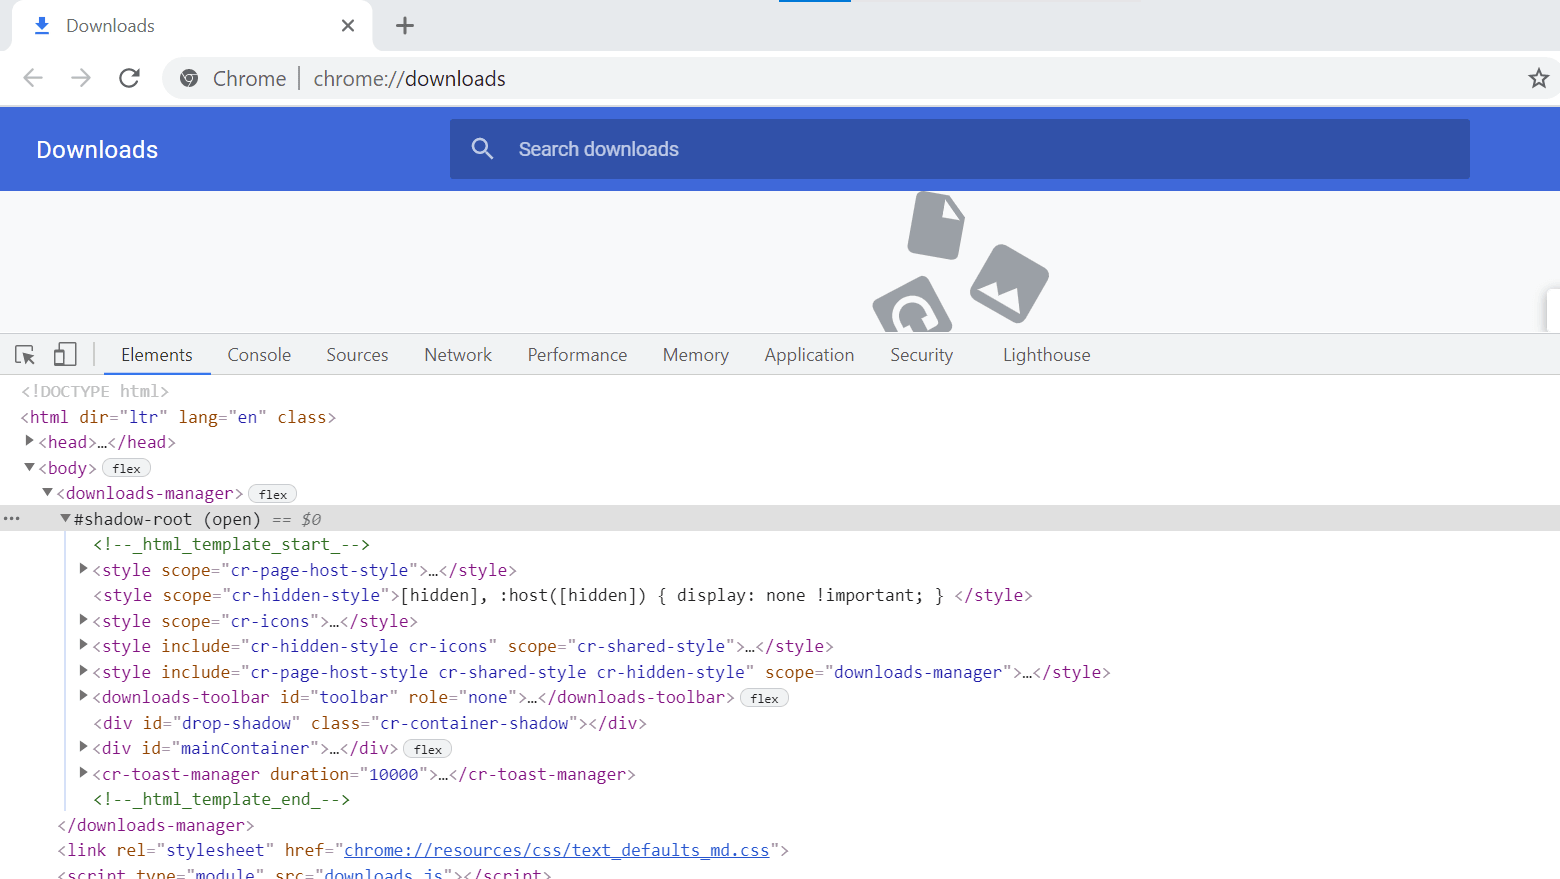
Notice the #shadow-root element as it represents a shadow root, and the mode is set as open. All elements inside this #shadow-root are shown considered separate from the current DOM document.
Watch this video to learn what Shadow DOM is and how to automate it using Selenium WebDriver.
You can take this certification as proof of expertise in the field of Selenium automation testing with JavaScript to empower yourself and boost your career.
Here’s a short glimpse of the Selenium JavaScript 101 certification from LambdaTest:
What are Deep Selectors in WebdriverIO?
The Shadow DOM is one among the four specifications created for web components. Although it is a useful and powerful solution for developers, they often pose a challenge for testers. This is because the DOM query functions used by automation testing frameworks would not work properly on shadow DOM elements. This is because they technically do not exist in the main DOM. In this section of the Selenium WebdriverIO tutorial, we will explore how WebdriverIO can help automation testers by tackling this problem.
By now, we have understood we need special workarounds for handling shadow DOM elements. Initially, WebdriverIO selectors offered two flavors: shadow$ and shadow$$ to access an element inside a given element’s shadowRoot. But they had their limitations especially when it comes to working with lots of nested shadow roots. Hence, Deep selectors were introduced as an alternative approach. Using Deep selectors, you can now query all elements within any shadow DOM using the common query command.
Let us check out a sample code from the official documentation. Given below is the structure of an application.

In order to query the <button /> element which is nested within another shadow DOM, you can use the following selector:
|
1 2 |
const button = $('>>>.dropdown-item:not([hidden])') console.log(button.getText()) // outputs: "Open downloads folder" |
Also Read – WebDriverIO Tutorial For Handling Dropdown In Selenium
Writing a test using Deep Selectors in WebdriverIO
Through the previous sections, we received a basic understanding of the Deep Selectors strategy provided by WebdriverIO. Now it is time to get our hands dirty. In this section of the Selenium WebdriverIO tutorial, we will see how to write an automation test case by accessing shadow DOM using WebdriverIo selectors.
First of all, let us quickly set up and install the WebdriverIO framework. Make sure that the following prerequisites are installed in your machine before getting started.
- NodeJS and NPM
- Visual Studio Code as IDE (or any other IDE of choice)
Also, please note that we will be using JavaScript with Mocha for this demonstration purpose. If you are new to Mocha, please refer to our blog on Mocha JavaScript Tutorial With Examples For Selenium Testing. With that said, let us proceed with the installation.
If you’re curious about the world of Mocha, this video will teach you to write and run your first test case in Mocha. You’ll learn about using the command-line interface, configuration files, and more.
However, you can follow the LambdaTest YouTube Channel by scanning the below QR code and stay up to date with more such videos.

Step 1: Create a project folder in the desired location in your system. Open the folder in the preferred IDE.
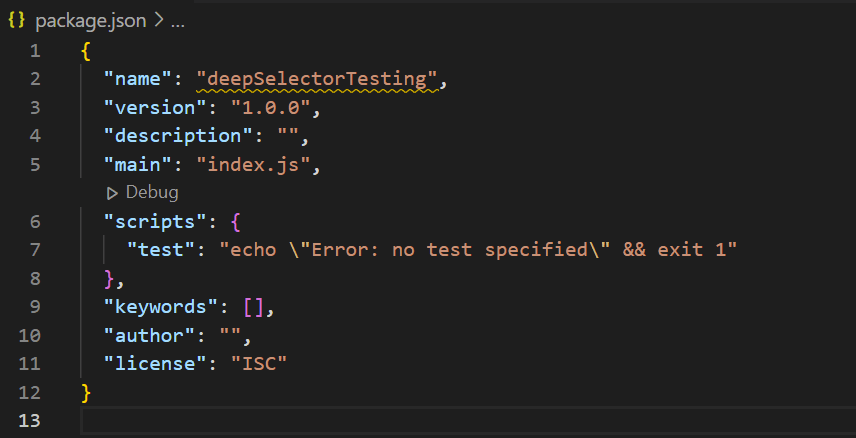
Step 2: Initialize the project with the package.json file.
- Open the terminal in VS Code.
- Verify whether it is pointing to the project folder.
- Trigger the following command on the terminal to initialize the project:
npm init -y - With this, we have successfully created the package.json file.
Step 3: Install dependencies. Install the CLI tool for WebdriverIO.
|
1 |
npm install --save-dev @wdio/cli |
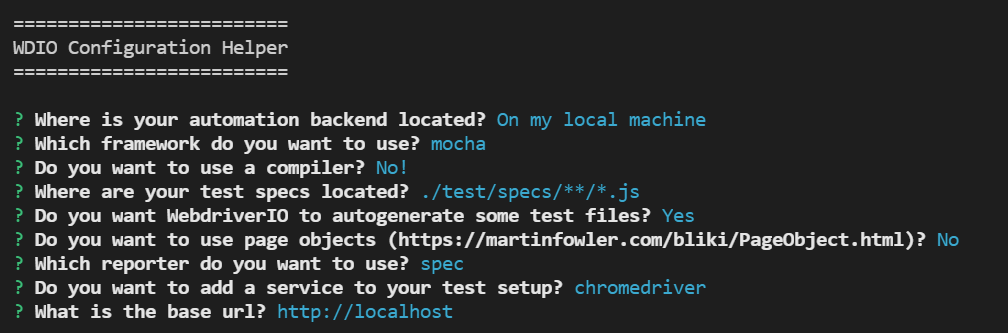
Step 4: Set up the configuration file.
|
1 |
npx wdio config |
You will be prompted to choose the configurations for getting started. Select the options accordingly, as shown below.
And that’s pretty much with the setting up and configuration of the WebdriverIO framework. Notice that our project folder structure will now look something like this.
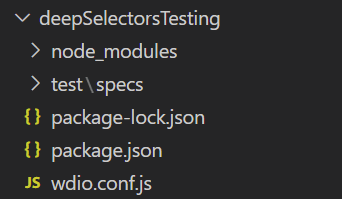
Now let’s move on to writing tests. Note that we are not implementing any advanced features like the Page Object Model as this is a simple demo.
Also Read – WebDriverIO Tutorial: Run Your First Automation Script
We will be implementing the following scenario through this test.
- Open Google chrome downloads page.
- Verify the page header is visible (which is located inside shadow DOM).
Let us script our first test case through the following steps.
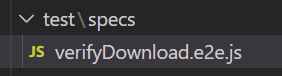
Step 1: We will be creating our test script inside the tests/specs folder. Create a test file with a meaningful name ending with the .js extension.
Step 2: Write the following code structure inside your test file.
|
1 2 3 4 5 |
describe('Verify Downloads', () => { it('Validate downloads page header text', async () => { }); }); |
Step 3: Write the test steps inside the snippet and complete the code.
|
1 2 3 4 5 6 |
//to navigate to downloads page await browser.url(`chrome://downloads/`); //to verify the container downloads-manager is existing await expect($('body > downloads-manager')).toBeExisting(); //to verify the page header located inside shadow DOM using deep selector >>> await expect($('>>>#leftSpacer h1')).toHaveTextContaining('Downloads'); |
Overall code structure will look like this:
|
1 2 3 4 5 6 7 |
describe('Verify Downloads', () => { it('Validate downloads page header text', async () => { await browser.url(`chrome://downloads/`); await expect($('body > downloads-manager')).toBeExisting(); await expect($('>>>#leftSpacer h1')).toHaveTextContaining('Downloads'); }); }); |
Step 4: Run the test using the following command:
|
1 |
npx wdio wdio.conf.js |
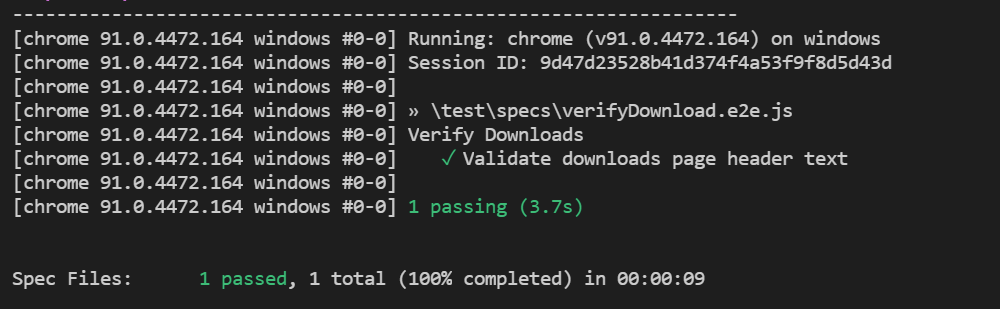
The test starts running. The virtual browser gets launched, and the code is executed successfully.
Executing the test case on a cloud Selenium Grid
In the last section, we ran our test script in the local machine. In this section of the Selenium WebdriverIO tutorial, we will additionally explore how we can perform cross browser testing using WebdriverIO on a cloud-based Selenium Grid.
Adopting a cloud-based grid as an automation backend is a popular strategy adopted by companies worldwide to stay ahead in the market competition. In addition, cross browser testing and test coverage need no introduction in the testing domain. Both of the strategies combined help us deliver a quality product at a faster pace by testing that the app works as expected in all possible OS, device, and browser versions. The even better news is that the WebdriverIO framework natively supports cloud-based cross browser testing platforms like LambdaTest.
LambdaTest is a cloud-based cross browser testing solution that provides access to more than 3000 online browsers and operating systems, allowing you to test the quality and performance of your website across the most popular platforms.
Starting your journey with Selenium WebDriver? Check out this step-by-step guide to perform Automation testing using Selenium WebDriver.
With few minor configuration changes, we can run our test cases in the online Selenium Grid provided by the LambdaTest platform. Let us see how.
Step 1: In your project terminal, give the following command to save the LambdaTest service as a devDependency.
|
1 |
npm i --save-dev wdio-lambdatest-service |
Step 2: Create a free account or log in to your LambdaTest Account. Fetch your unique username and access key. You can find the details in the LambdaTest Profile section.
Step 3: Now, we need to edit the wdio.conf.js configuration file as shown below.
|
1 2 3 4 5 6 7 8 9 10 11 12 13 14 15 16 17 18 19 20 21 22 23 24 25 26 27 28 29 30 31 32 33 34 35 36 37 38 39 40 41 42 43 44 45 46 47 48 49 50 51 52 |
user= process.env.LT_USERNAME || "your_username", key= process.env.LT_ACCESS_KEY || "your_accesskey", exports.config = { user, key, specs: [ './test/specs/**/*.js' ], exclude: [], capabilities: [{ name: "DeepSelectors Testing", build: "DeepSelectors", maxInstances: 5, browserName: 'chrome', version:"64.0", acceptInsecureCerts: true, network: true, video: true, visual: true, console: true, }], logFile : './logDir/api.log', services: [ ['lambdatest', { tunnel: true }] ], hostname: 'hub.lambdatest.com', path: '/wd/hub', port: 80, baseUrl: '', maxInstances: 10, logLevel: 'info', bail: 0, waitforTimeout: 10000, connectionRetryTimeout: 120000, connectionRetryCount: 3, framework: 'mocha', reporters: ['spec'], mochaOpts: { ui: 'bdd', timeout: 60000 } } |
Following are the changes to be made:
- Pass your access token and user details by creating two variables, user and key.
- Set the tunnel as true to enable routing connections from LambdaTest cloud through your computer.
- Set the hostname corresponding to LambdaTest.
- You can also enable report formats like video recording, console, network logs, etc., to be true.
Step 4: Run the test.
|
1 |
npx wdio wdio.conf.js |
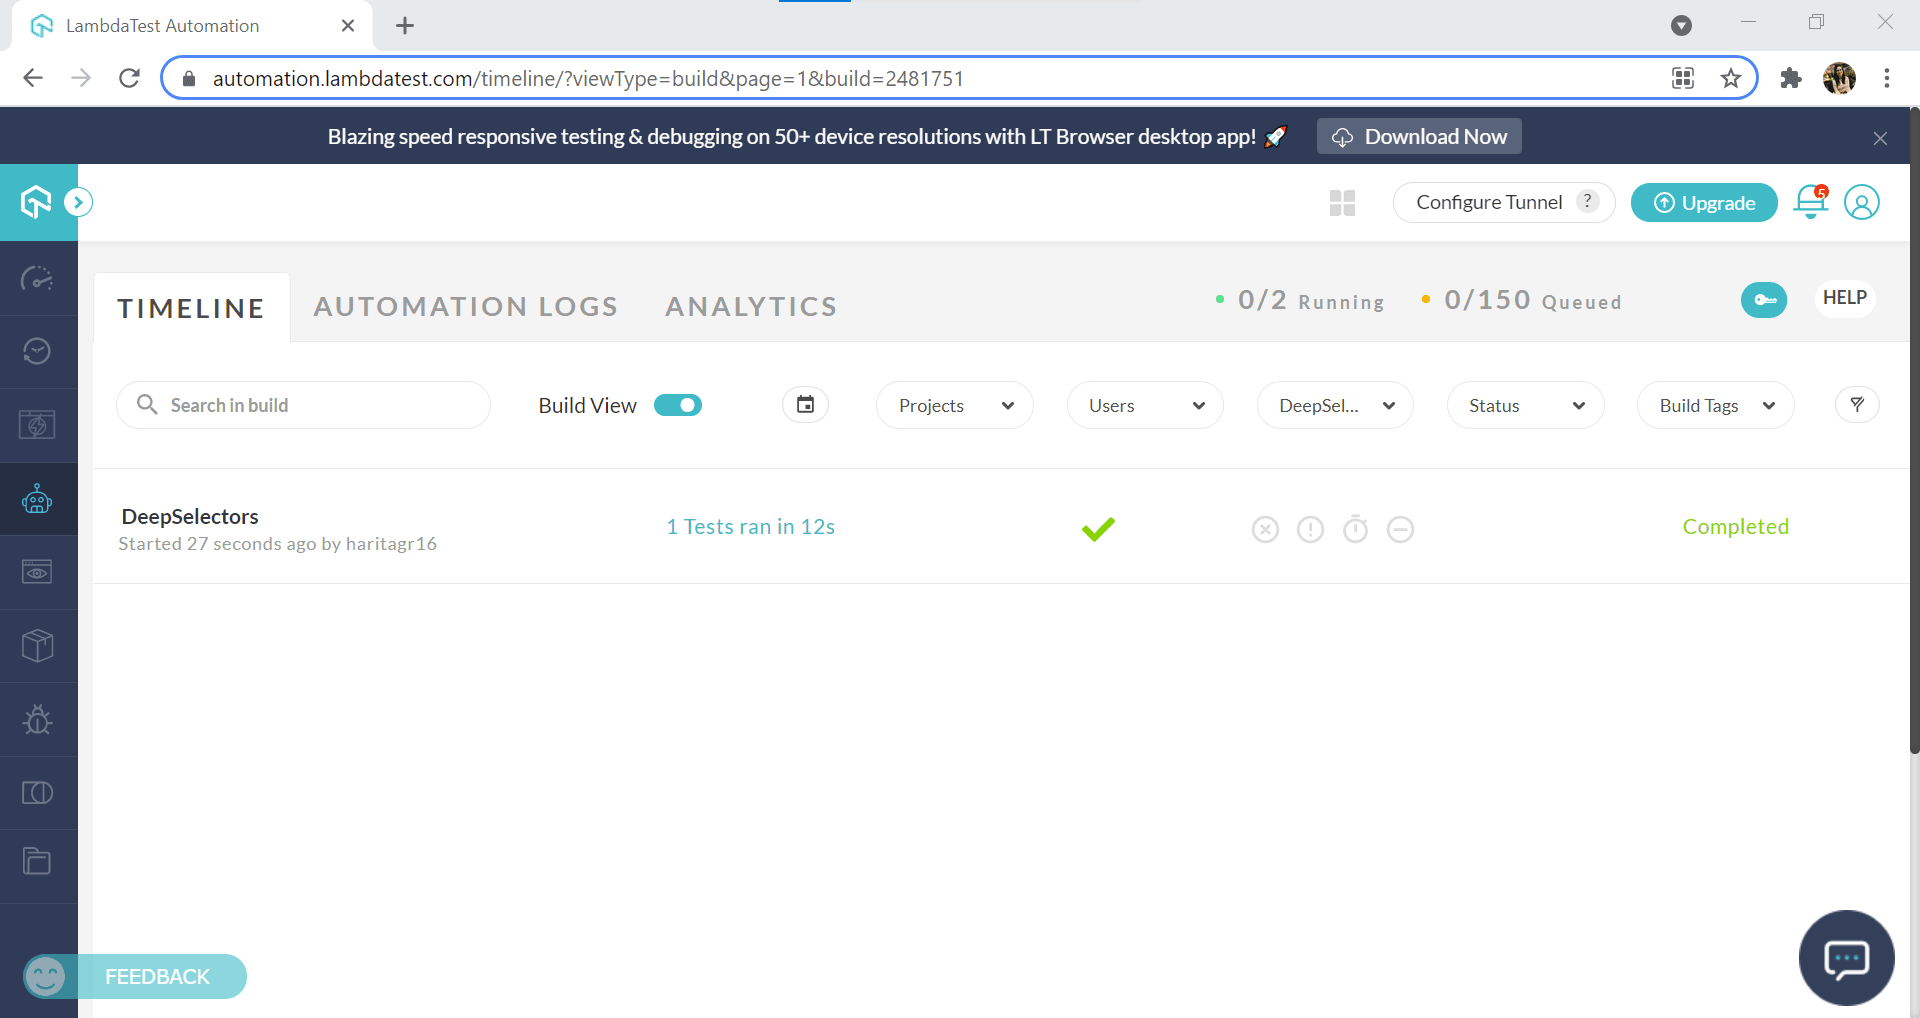
You can observe the live test running status in your LambdaTest Automation Dashboard of the LambdaTest account.
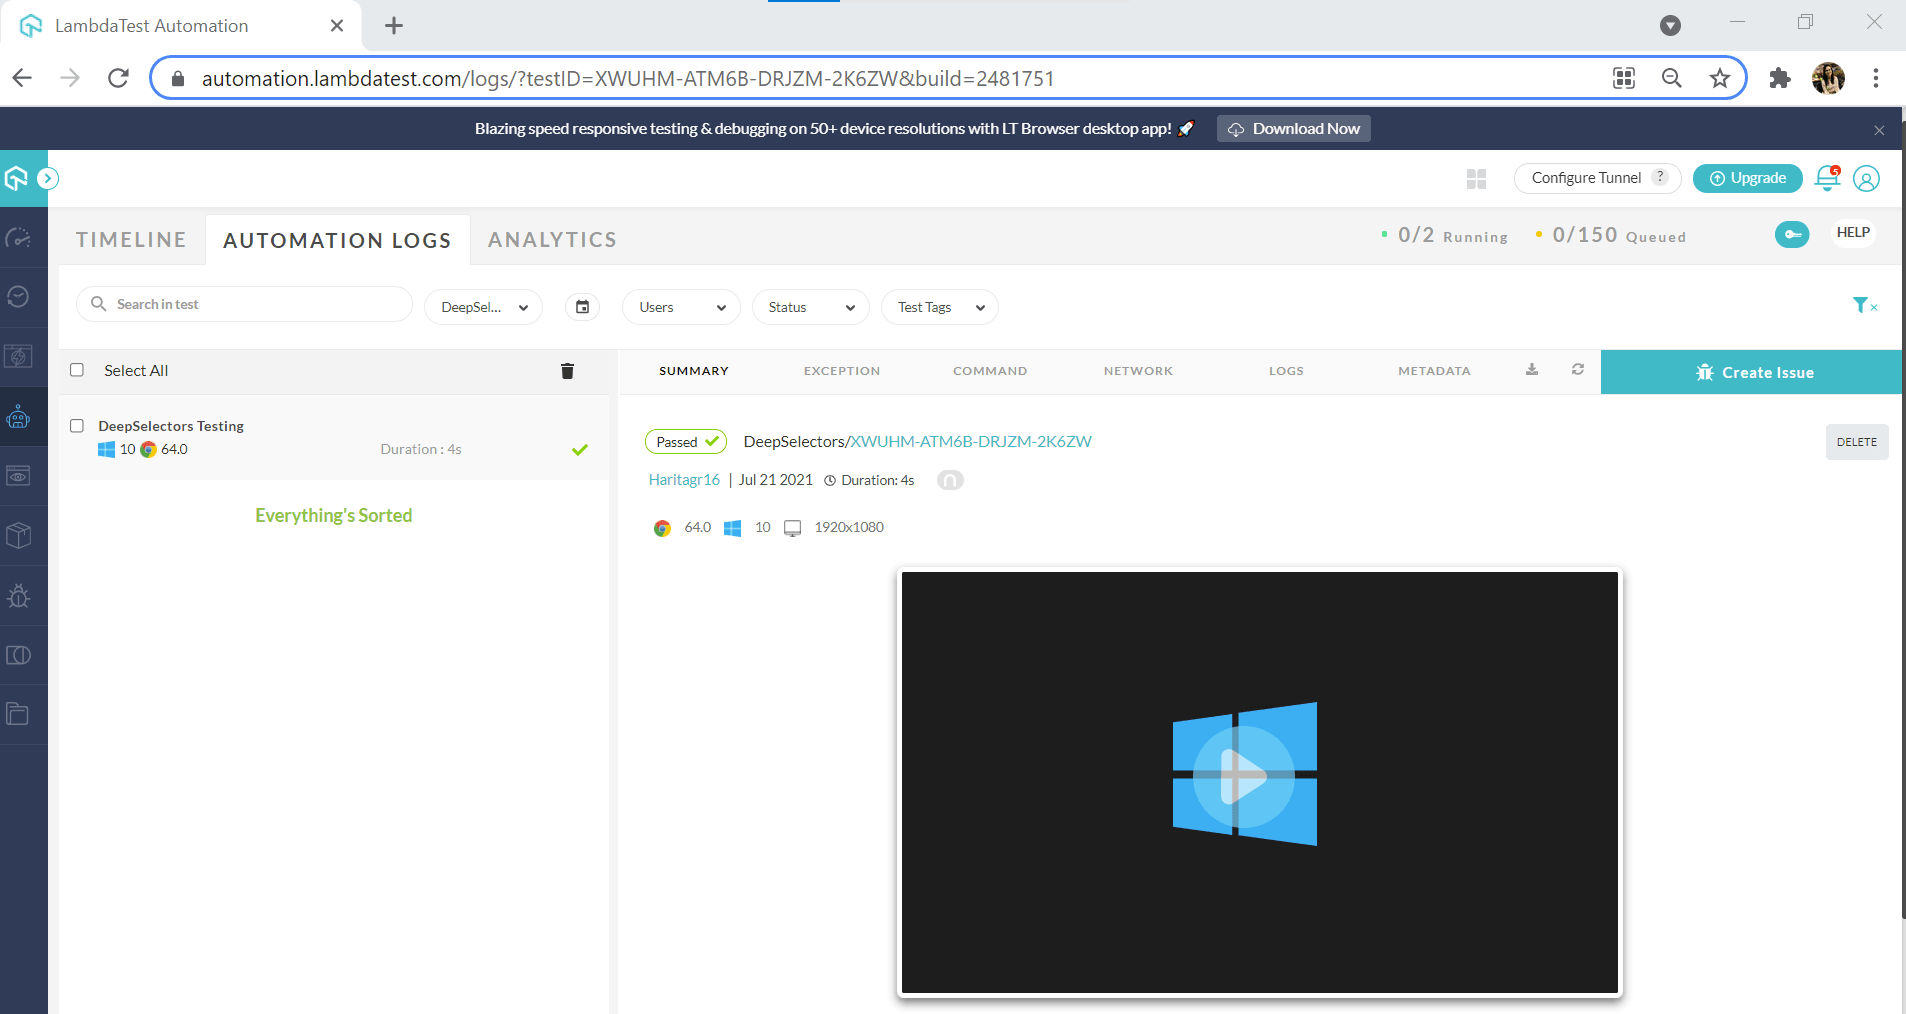
The test has been executed successfully. To analyze the detailed report, visit the Automation Logs.
Also Read – How To Speed Up JavaScript Testing With Selenium and WebDriverIO?
Conclusion
The shadow DOM is a powerful concept heavily relied upon during frontend development, which is designed to create an isolated DOM with scoped CSS. However, for the testers, they often pose a challenge as additional workarounds are required to access the elements located inside shadow DOM to write the test script. Deep Selectors is a selector strategy implemented by the popular Selenium framework, WebdriverIO, to tackle this problem of accessing shadow DOM elements.
In this Selenium WebdriverIO tutorial, we discussed WebdriverIO selectors and how to utilize them while writing a test case in the WebdriverIO framework. Additionally, we also checked out how to run our test cases on the cloud-based Selenium Grid platform provided by LamdaTest to achieve cross browser testing and test coverage. I hope that this tutorial enables you to adopt Deep Selectors into your project.
Happy Testing!
Frequently Asked Questions
What is $$ in WebDriverIO?
The $$ function allows you to iterate through elements of the DOM on the current page without the need for a preceding selector.
Is WebdriverIO a framework?
WebdriverIO is an open-source framework written in JavaScript and running on Node.js. The framework helps you to easily write end-to-end tests for your web applications and mobile applications (for iOS-enabled devices).
Is Cypress better than WebdriverIO?
Cypress is a modern end-to-end testing solution that seamlessly integrates into your workflow and provides notifications as you test. Cypress combines the best of unit testing and functional testing into one framework for writing full-stack JavaScript tests that run on any browser or device. WebdriverIO is built on top of Cypress to provide the simplest way to control a browser programmatically.


Author’s Profile
Harita Ravindranath
A seasoned Quality Engineer with enthusiasm in Full Stack Development. Harita also enjoys reading, blogging and learning Japanese.
Blogs: 16
Got Questions? Drop them on LambdaTest Community. Visit now