
How To Drag And Drop In Selenium With Python?
Nishant Choudhary
Posted On: November 26, 2020
![]() 133846 Views
133846 Views
![]() 12 Min Read
12 Min Read
This article is a part of our Content Hub. For more in-depth resources, check out our content hub on Selenium Python Tutorial.
Drag and Drop- one of the most beloved and commonly used gestures in the world of GUIs. Many actions are associated with drag and drop, including moving an object from one location to another to creating associations between them. Be it an image editing tool like Canva, a cloud-storage manager like Google Drive, or project planning & collaboration tools like Trello, Asana, Jira, drag, and drop functionality can be found everywhere.
You might have used it for positioning multimedia objects like text, images, video clips, etc., moving files to directories, and moving HTML elements/buttons within tables or between different pixel locations. Additionally, modern websites have started implementing sophisticated drag and drop captcha or bot detection. In all such applications and services, web developers and QA engineers face challenges in writing test cases for performing drag and drop in Selenium Python.
In this article, we’ll look in detail at how to perform drag and drop in Selenium with Python. If you are preparing for an interview you can learn more through Selenium interview questions.
TABLE OF CONTENT
What Is Drag And Drop Operation In HTML?
Drag and drop is natively a graphical user interface (GUI) based software feature. The world wide web (w3) working draft HTML specifications, which declares standard practices for the modern web to promote interoperability and conformance, includes support for drag and drop operations for progressive web applications in desktop and mobile browser windows.
Basically, drag and drop is a chain of pointing device (mouse) events/gestures on GUI software applications (including web browsers). It involves –
- Moving the cursor/pointer to where the object is located.
- Clicking or pressing the pointer device (mouse) to grab the object of interest.
- Moving the pointer device in a pressed state to the desired location.
- Releasing the pointer device button to drop the grabbed object.
Drag and drop are sometimes also referred to as “click and drag,” “click and drop” and on touch-screen applications, its equivalent would be “long press, drag, and drop.”
Overview Of Python-Selenium WebDriver
Selenium Python WebDriver bindings is a simple open-source API based interface to automate web browsers like Firefox, Chrome, Edge, Safari, Opera, and several others. Using Python Selenium bindings, software testing engineers write automated functional or acceptance test cases and have access to all the features of Selenium WebDriver.
This is an overview of command line commands for Windows to install and start Selenium with Python:
pip install virtualenv (only if virtualenv is not globally installed on your system)
mkdir your_test_directory_name (create a directory for testing scripts if you don’t have one already. If you have a testing directory, skip this step.)
cd your_test_directory_name (move into your test directory)
virtualenv venv (create a virtual environment for your directory)
venv/scripts/activate (activate the virtualenv)
pip install selenium (install selenium within the activated virtualenv)
To download browser web drivers, hit the respective links for Chrome, Edge, Firefox, Safari. While developing scripts on the local system, to invoke these WebDrivers using Selenium-Python, you need to ensure that the respective web drivers are in the same directory or you have added PATH environment variables to their respective executables (.exe files).
Now, you’re all set to write and run your test scripts to drag and drop in Selenium Python WebDriver bindings inside a web browser.

RUN YOUR PYTHON SCRIPT ON SELENIUM GRID
2000+ Browsers AND OS
How To Implement Drag And Drop In Selenium-Python?
We can implement drag and drop in Selenium Python with the help of ActionChains class. Selenium WebDriver APIs expose ActionChains class to automate low level user interactions with the website using a mouse, keyboard, etc. We shall use the same class to imitate and write test cases for drag and drop interaction using Selenium with Python.
Watch this video to learn what the Actions Class is in Selenium and how to use it.
What Is ActionChains Class?
Often for writing automated test cases, testing engineers have to perform mouse and keyboard operations; the ActionChains class comprises intuitive methods to perform these interactions. For instance, using ActionChains, we can implement clicking on HTML elements or double click on an object. We can even send keyboard keys, pause inputs, move cursor to a specific location, move mouse by the desired offset and obviously, we can perform drag and drop in Selenium Python.
The methods exposed using ActionChains –
click(), click_and_hold(), context_click(), double_click(), drag_and_drop(source, target), drag_and_drop_by_offset(source, x_offset, y_offset), key_down(value), key_up(value), move_by_offset(x_offset, y_offset), move_to_element(target_element), move_to_element_with_offset(target_element, x_offset, y_offset), pause(seconds), perform(), release(), reset_actions(), send_keys(keys_to_send), send_keys_to_element(element, keys_to_send)
This certification is for professionals looking to develop advanced, hands-on expertise in Selenium automation testing with Python and take their career to the next level.
Here’s a short glimpse of the Selenium Python 101 certification from LambdaTest:
Performing Drag And Drop Using ActionChains Class
In this article, we detail the drag_and_drop(source, target) and drag_and_drop_by_offset(source, x_offset, y_offset) functions of ActionChains class. We will cover all other ActionChains methods in another article.
- drag_and_drop(source, target)
- drag_and_drop_by_offset(source, x_offset, y_offset)
- Performing chained click_and_hold(element), move_by_offset(xOffset, yOffset), pause(sec) and release() methods
- Performing chained click_and_hold(element), move_to_element(target), pause(sec), move_by_offset(xOffset, yOffset) and release() methods
This method accepts two arguments: source & target. As the name goes, drag and drop ActionChains involves first locating the “source” element, then dragging it to the target location and dropping it. To select a source and target element, you may use XPath or CSS Selectors.
This method requires three arguments: source, x_offset, and y_offset. drag_and_drop_by_offset is an alternative to using drag_and_drop. It involves identifying the source element and x,y offsets of the target location. After that, it drops the selected source to the desired offset location.
click_and_hold(argument) method simulates the “left mouse button press and hold” operation. move_by_offset(x,y) resembles moving the cursor by specified x and y pixels on respective axes. Pause(sec) function pauses the action for a declared number of seconds. Release() method frees the remotely pressed mouse button.
move_to_element(arg) is similar to moving the cursor to the specified argument. In our case, we’ll use these operations for drag and drop in Selenium Python by simulating click using click_and_hold, then dragging by using move_to_element or move_by_offset or combo, and by finally releasing, i.e., dropping the selected element.
Read: Get Attribute Value In Selenium WebDriver
Demonstration- Drag And Drop Using Python Selenium WebDriver
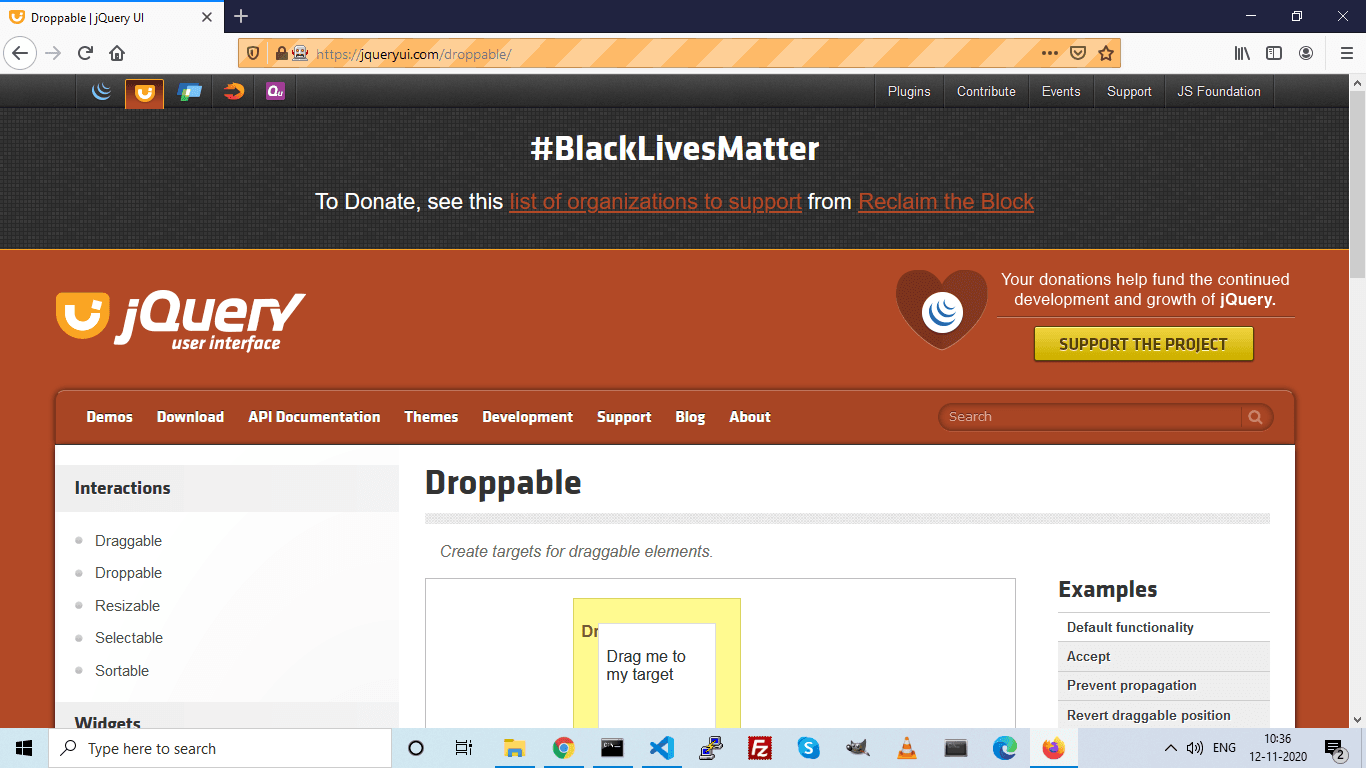
Here we’ll use “https://jqueryui.com/droppable/” and “https://jqueryui.com/draggable/” page to demonstrate the automation of drag and drop testing using Selenium – Python WebDriver bindings.
Demo for drag_and_drop(source, target) and drag_and_drop_by(source, xoffset, yoffset)
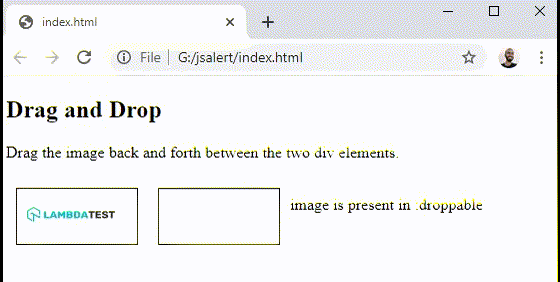
For demonstrating “drag_and_drop_by_offset,” we will use the “draggable” link, and to demonstrate “drag_and_drop,” we shall use the “droppable“ link. In the draggable link, we have a box that can be freely moved across its canvas. We have two boxes in the “droppable” link; we will move box one over box2.
A sample automation test script using Selenium with Python for dragging and dropping would look like this-
Code Walkthrough
Let’s understand the script in detail –
|
1 2 3 4 |
import unittest from selenium import webdriver from selenium.webdriver.common.action_chains import ActionChains import time |
We import Python’s inbuilt testing library “unittest” to write standard test cases. Next, we import “Python Selenium WebDriver bindings” to remotely control browser activity and automate interactions. We also explicitly import the “ActionChains” class from the Selenium WebDriver package, and lastly, we import “time” to invoke explicit pauses so that you can visualize the interactions. In production, you won’t need sleep time, at least not for this use-case.
|
1 |
class DragTest(unittest.TestCase): |
We create a class DragTest, which extends on or, say, inherits the TestCase class of unittest.
|
1 2 |
def setUp(self): self.driver = webdriver.Firefox() |
A Python program or application can have multiple test cases, and they may have a repetitive set-up code. For example, configurations of intended browsers to test the application on. We can factor out such repetitive set-up codes by implementing them in setup() function. This function gets automatically invoked by the testing framework with every run of a new test. In our case, we are launching Selenium FirefoxDriver.
|
1 2 3 |
def test_drag_drop(self): driver = self.driver driver.maximize_window() |
Next, we write the core logic of our automated test for drag and drop interactions. Here, we are creating a short reference variable “driver” for “self.driver”. And we invoke maximize_window() method of our driver to launch the browser in full-screen.
|
1 |
driver.get('https://jqueryui.com/draggable/') |
get(url) method of the WebDriver, loads the specified url in the browser.
|
1 |
driver.switch_to.frame(0) |
For your information, jqueryui[dot]com is using iframes to demo drag-and-drop functionality. WebDriver’s get_element_by_* (ID, name, css) method will identify the element after switching to our target iframe. Here we are switching to the target iframe by using the index parameter.
|
1 |
source1 = driver.find_element_by_id('draggable') |
Now, we find the draggable element (inspecting the url, you’ll find the element has an id equal to “draggable.”
|
1 |
action = ActionChains(driver) |
This creates an instance of ActionChains.
|
1 |
action.drag_and_drop_by_offset(source1, 100, 100).perform() |
Now, we use drag_and_drop_by_offset(source, xOffset, yOffset) method to move the draggable element by 100 pixels on the x-axis and 100 on y-axis.
You may create multiple lines for dragging the draggable element based on test requirements.
time.sleep(5)
This is to pause the script execution for 5 seconds, just to visualize things. In headless browsers, we can ignore this line for faster drag and drop testing using Python Selenium WebDriver.
|
1 2 3 4 5 6 7 |
driver.get('https://jqueryui.com/droppable/') driver.switch_to.frame(0) source1 = driver.find_element_by_id('draggable') target1 = driver.find_element_by_id('droppable') actions2 = ActionChains(driver) actions2.drag_and_drop(source1, target1).perform() time.sleep(5) |
Similarly, for the drag_and_drop(source, target) method, we first load the required url in the browser, switch to the target iframe using the index, identify the source element, i.e., the element which needs to be dragged. And the target element, i.e., the target location where the draggable element needs to be dropped. Lastly, we create a stance of ActionChains and invoke drag_and_drop(src, dest) method. perform() function carries out all the chained interactions.
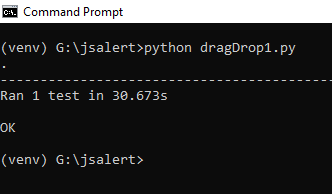
If the test case executes successfully, you shall see this output on your computer screen –
click_and_hold(element), move_to_element(target), pause(sec), move_by_offset(xOffset, yOffset), release()
To demonstrate drag and drop in Selenium Python using the above methods, we need to write another test with modifications in the test_drag_drop(self) function.
Code Walkthrough
Let’s understand how it differs from the earlier code –
|
1 |
action.click_and_hold(source1).move_by_offset(150, 100).pause(2).move_by_offset(-10, -10).release().perform() |
Here instead of using drag_and_drop_by_offset(), we simulate the same set of interactions using chained methods. We have first identified the draggable element on the jqueryUI page, remotely clicked on it, moved it by 150 pixels on the x-axis and 100 on the y, paused for two seconds, and again moved the clicked element by 10 pixels in the negative x,y direction. Finally, dropped the element.
|
1 |
actions2.click_and_hold(source1).move_to_element(target1).pause(2).move_by_offset(20, 20).release().perform() |
Similar to the above one, we execute the same set of chained operations. The difference is that this time we locate a target droppable element and drop our clicked element on it by using move_to_element and release. We again used the move_by_offset here to adjust the position so that the asserted message “dropped!” is visible.
Using Scalable Automation Testing On Cloud
To carry out automated tests in a highly scalable manner on a wide number of browsers and operating system environments, you can use LambdaTest’s automated cross browser testing solution on the cloud.
To execute the above script on LambdaTest, we need to modify setUp() function to the following –
Registration and setup have been explained in this JavaScript alert handling with Selenium article.
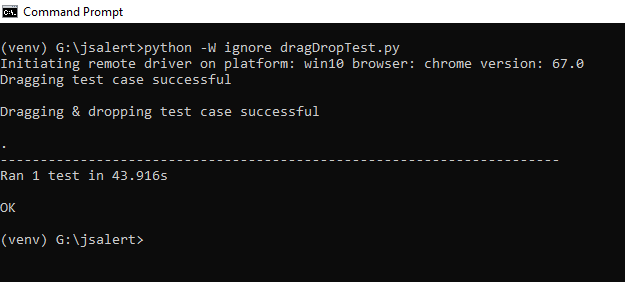
The above script, when executed in LambdaTest cloud and under specified desired capabilities, yields –
Wrapping Up!
We hope you are all set to start dragging and dropping without any manual effort. The best part is that you need not worry about maintaining environments and browser versions. Just focus on the crucial part, i.e., writing the test cases using a manageable cross browser testing environment provider like LambdaTest. Not to mention, cross browser testing using Selenium WebDriver by self hosting in the cloud is a cost-ineffective and resource-intensive process.
Using a cloud-based platform like LambdaTest takes away all Ops pain and enables automation testing engineers to do what they do the best- write the application testing scripts and automate the cross browser testing process on over 2000+ browsers on the cloud.
We hope that this post convinces you to try this drag and drop gesture. And if you did find it valuable, we’ll be grateful if you could share it on your LinkedIn or Twitter. Remember, sharing is caring!
Happy Testing!


Author’s Profile
Nishant Choudhary
A Web Scraping Python Developer and Data Evangelist, Nishant also loves to evangelize startups and technologies by writing technical content.
Blogs: 8
Got Questions? Drop them on LambdaTest Community. Visit now


