
How To Use driver.FindElement And driver.FindElements In Selenium C#
Andreea Draniceanu
Posted On: December 20, 2022
![]() 148072 Views
148072 Views
![]() 18 Min Read
18 Min Read
One of the essential parts when performing automated UI testing, whether using Selenium or another framework, is identifying the correct web elements the tests will interact with. However, if the web elements are not located correctly, you might get NoSuchElementException in Selenium. This would cause a false negative result because we won’t get to the actual functionality check. Instead, our test will fail simply because it failed to interact with the correct element.
To do this, we have two methods: driver.FindElement and driver.FindElements in Selenium C#. The first one is needed when we want to identify a single element, such as an input field where we want to enter some text or a button on which we want to click. The second one is useful when we need to check multiple elements of the same type – for example, when we want to check that a drop-down list contains all the expected values.
In this blog on using driver.FindElement and driver.FindElements in Selenium C#, I will use Selenium 4.4.0. But, before we deep dive into how and when to use each of the FindElement and FindElements commands, let’s discuss how to identify the web elements on the page.
If you’re looking to improve your Selenium interview skills, check out our curated list of Selenium interview questions and answers.
TABLE OF CONTENTS
Locator Strategies in Selenium
When we use the FindElement() and FindElements() commands, we need to identify the web elements by locators. The syntax is as follows:
|
1 |
driver.FindElement(By.[locator_strategy]("locator_value")) |
Locators enable testers to select an HTML DOM element to interact with. Selecting the right locator strategies for these web elements can be crucial for the stability of the UI tests. You don’t want your tests to fail just because they didn’t find the correct button to click on or the correct text input to write in, right?
The locators are available for selection, and I will explain each of them below:
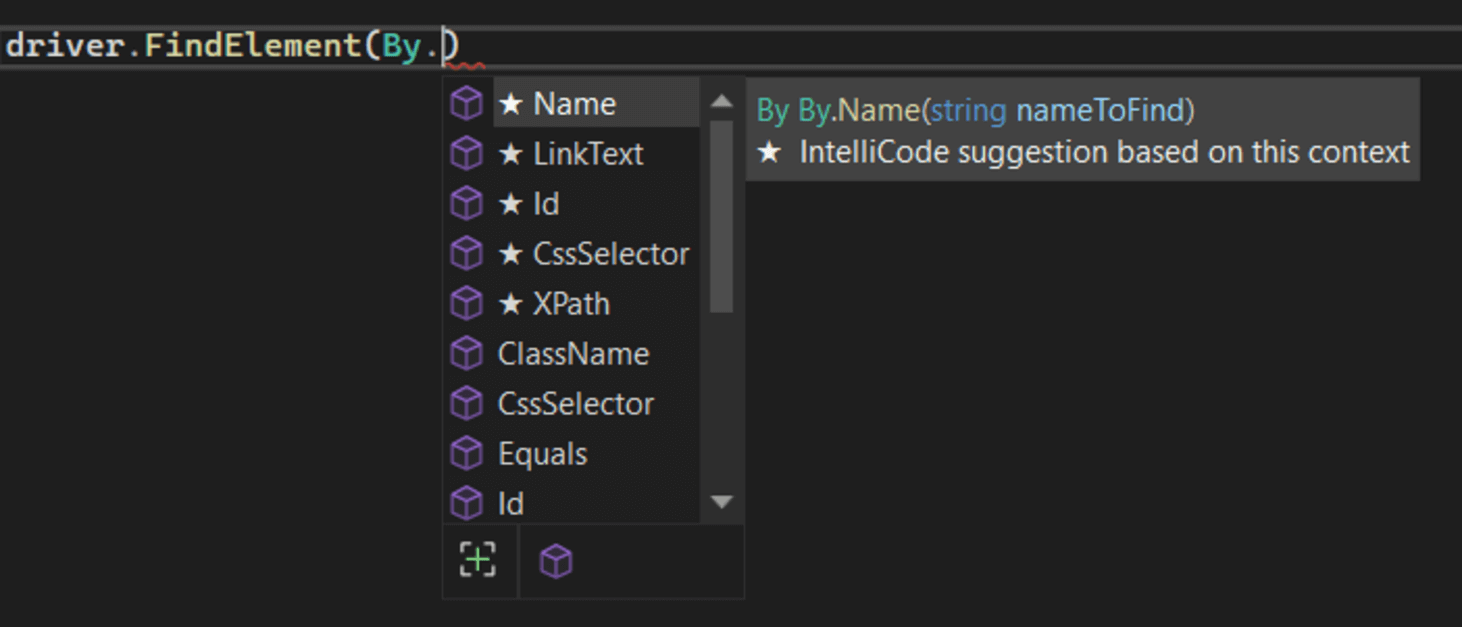
Traditional Locators in Selenium
Selenium supports multiple locator strategies. Firstly, we have the traditional locators. These are locators that relate directly to the web element’s attributes. Traditional locators are supported in all versions of Selenium. The eight traditional locators are explained below:
ID locator in Selenium
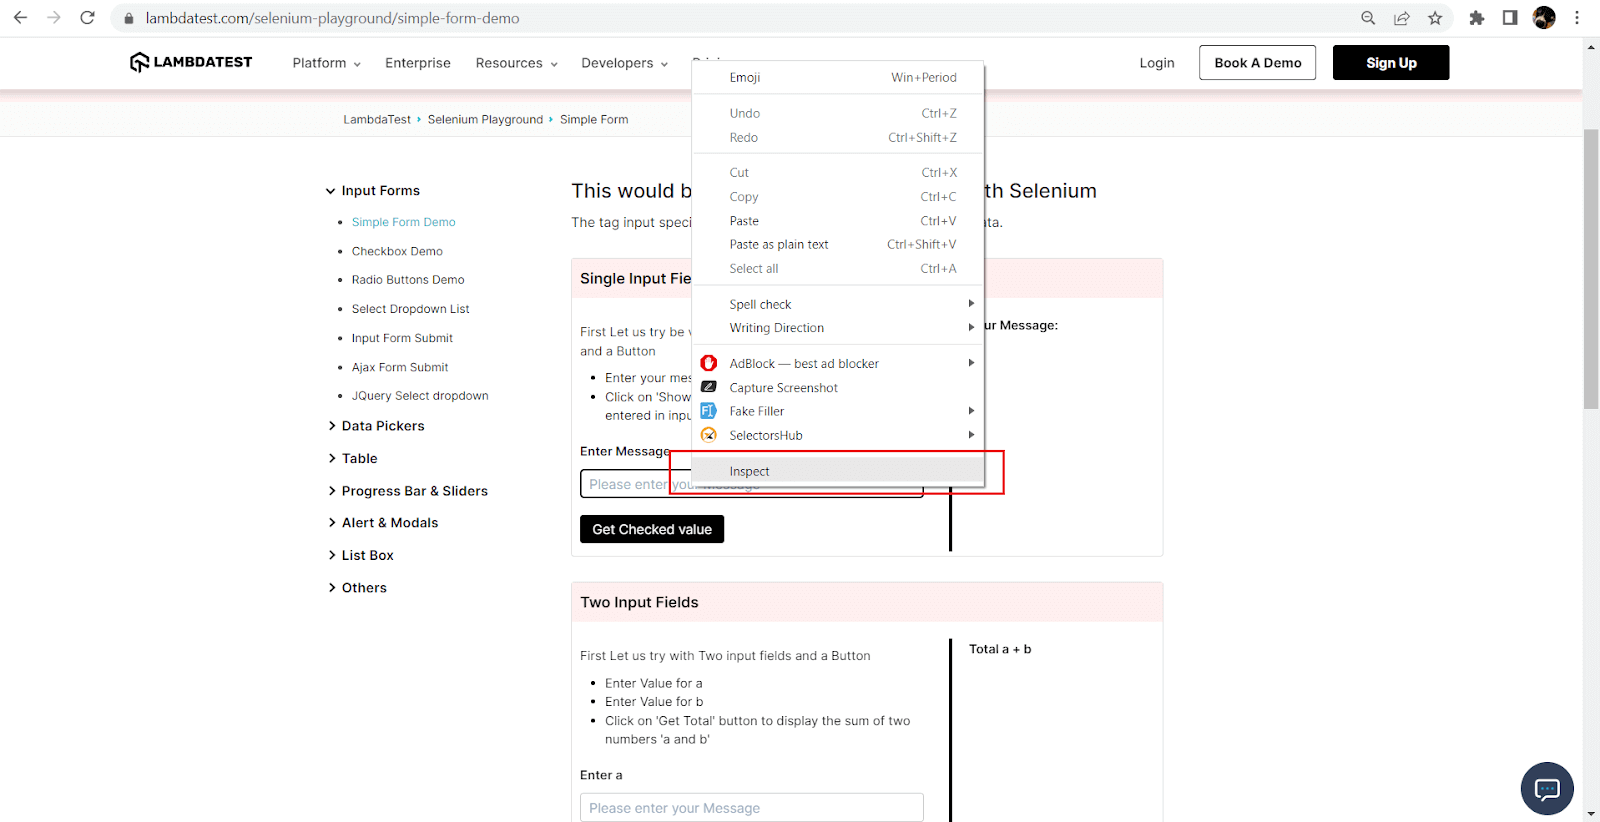
In a perfect world, each web element on our applications under test has an ID attribute. To find if the element has an ID or to see its ID, you simply have to right-click the element on the page and select Inspect (below I will demonstrate using the Chrome browser, but all major browsers have this functionality):
This will open up the Elements pane in the Developer Tools, which contains the page’s HTML code. Here, you can see the attributes of the HTML element. In my example, the field has an ID so I could use it in my UI tests.
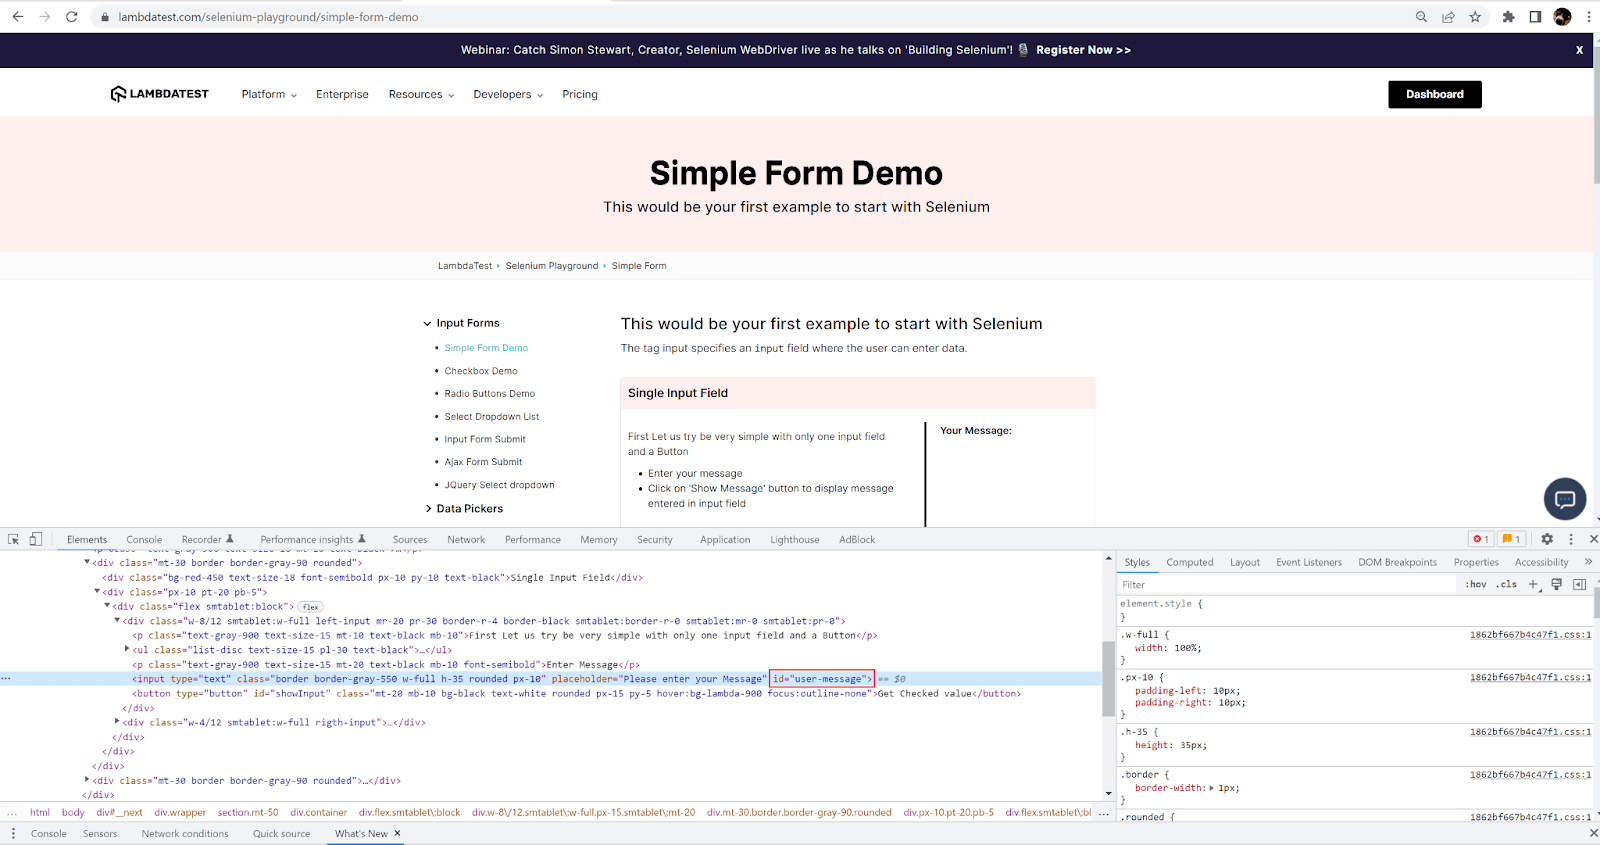
So what I need to use in my tests is this:
|
1 |
driver.FindElement(By.Id("user-message")); |
To learn more about it, you can refer to our earlier blog on ID locator in Selenium.
ClassName locator in Selenium
The class attribute in HTML is commonly used to point to a class in the CSS sheet. Multiple elements can share the same class and therefore the same styling.
The same element can also have multiple classes. You can see the class name (if the element has one) in the same panel as above:
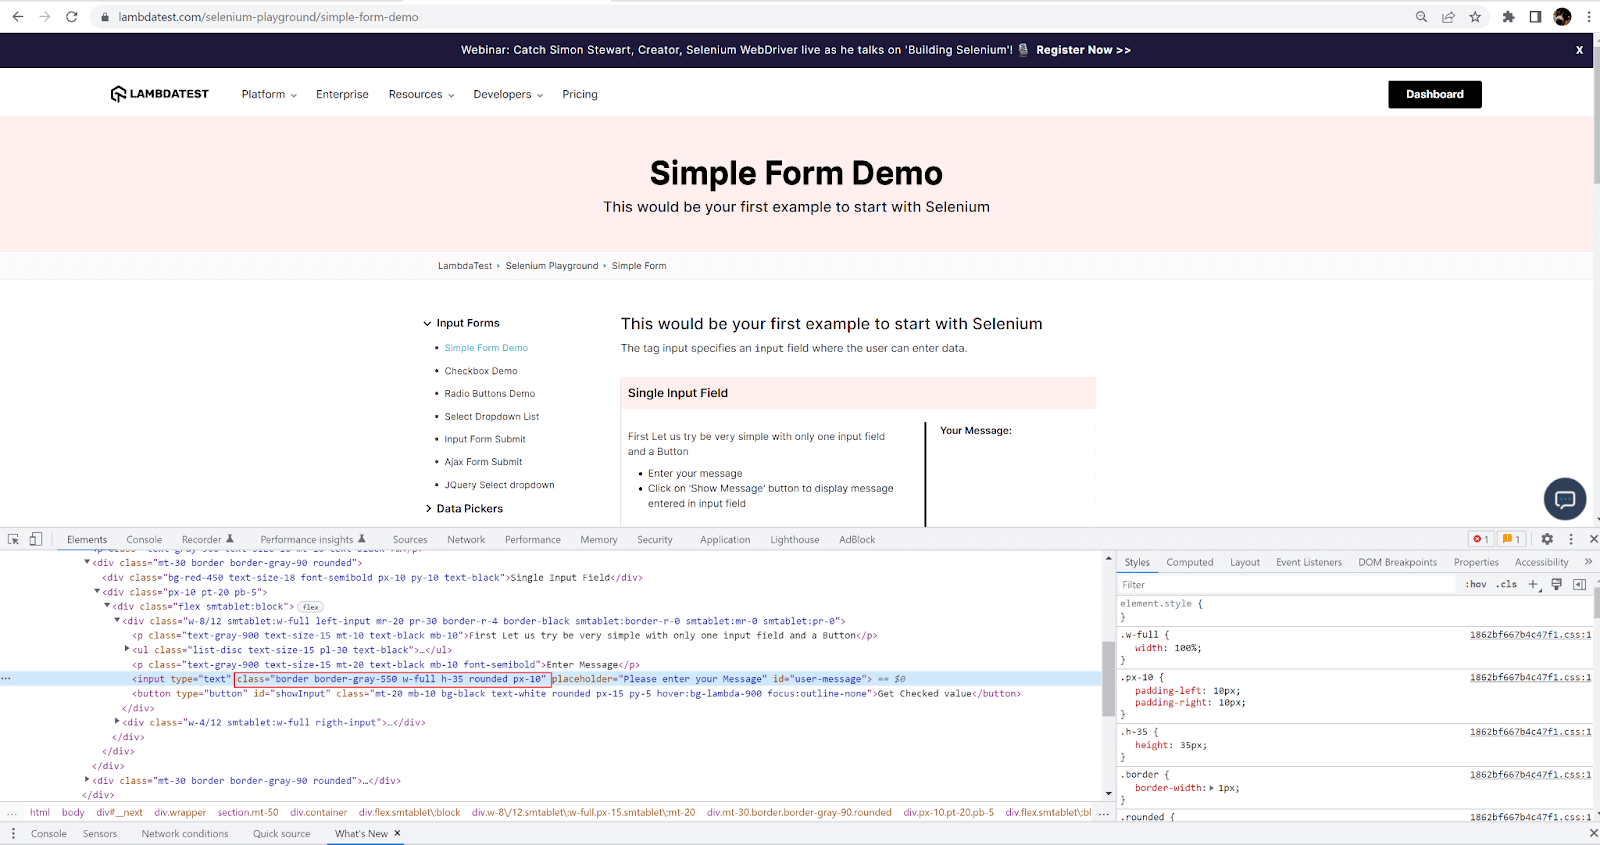
If the element has multiple classes, they are all displayed and separated by a space character. You can select one of the classes to use in the tests, which will translate to
|
1 |
driver.FindElement(By.ClassName("w-full")); |
To learn more about it, you can refer to our earlier blog on the ClassName locator in Selenium.
Name locator in Selenium
This is the Name attribute of the web element. The same as the ID and the ClassName, which you can find in the Elements panel of the Developer Tools.
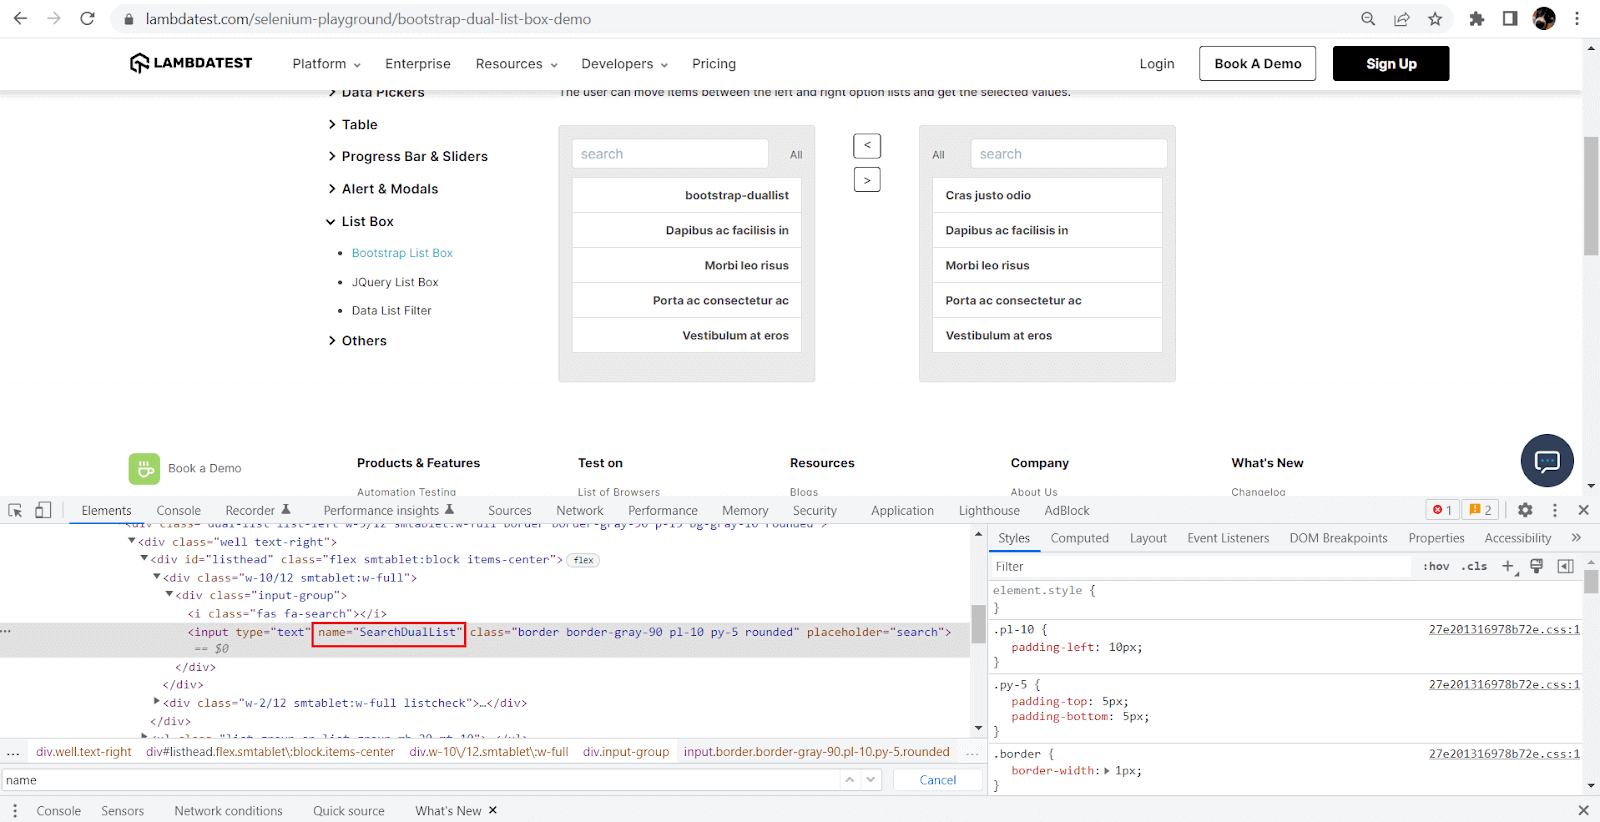
This means:
|
1 |
driver.FindElement(By.Name("SearchDualList")); |
To learn more about it, you can refer to our earlier blog on the Name locator in Selenium.
Tag Name locator in Selenium
This is the actual HTML tag of the element. So it will be a button, input, label, select, etc.
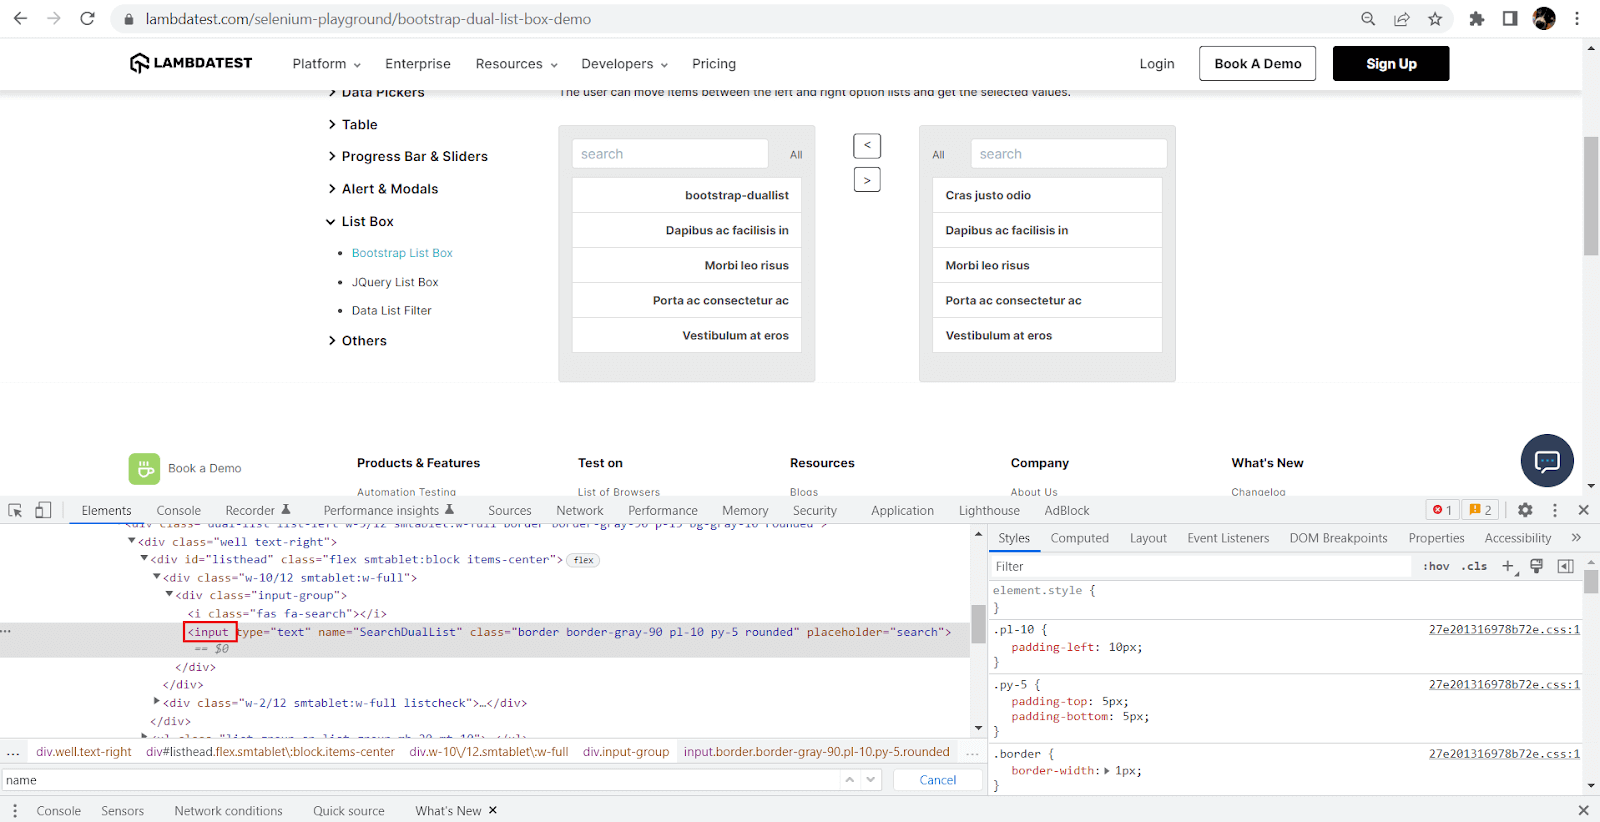
|
1 |
driver.FindElement(By.TagName("Input")); |
To learn more about it, you can refer to our earlier blog on the Name locator in Selenium.
Link Text locator in Selenium
This applies to link elements (the “a” tag in HTML) and refers to the visible link text.
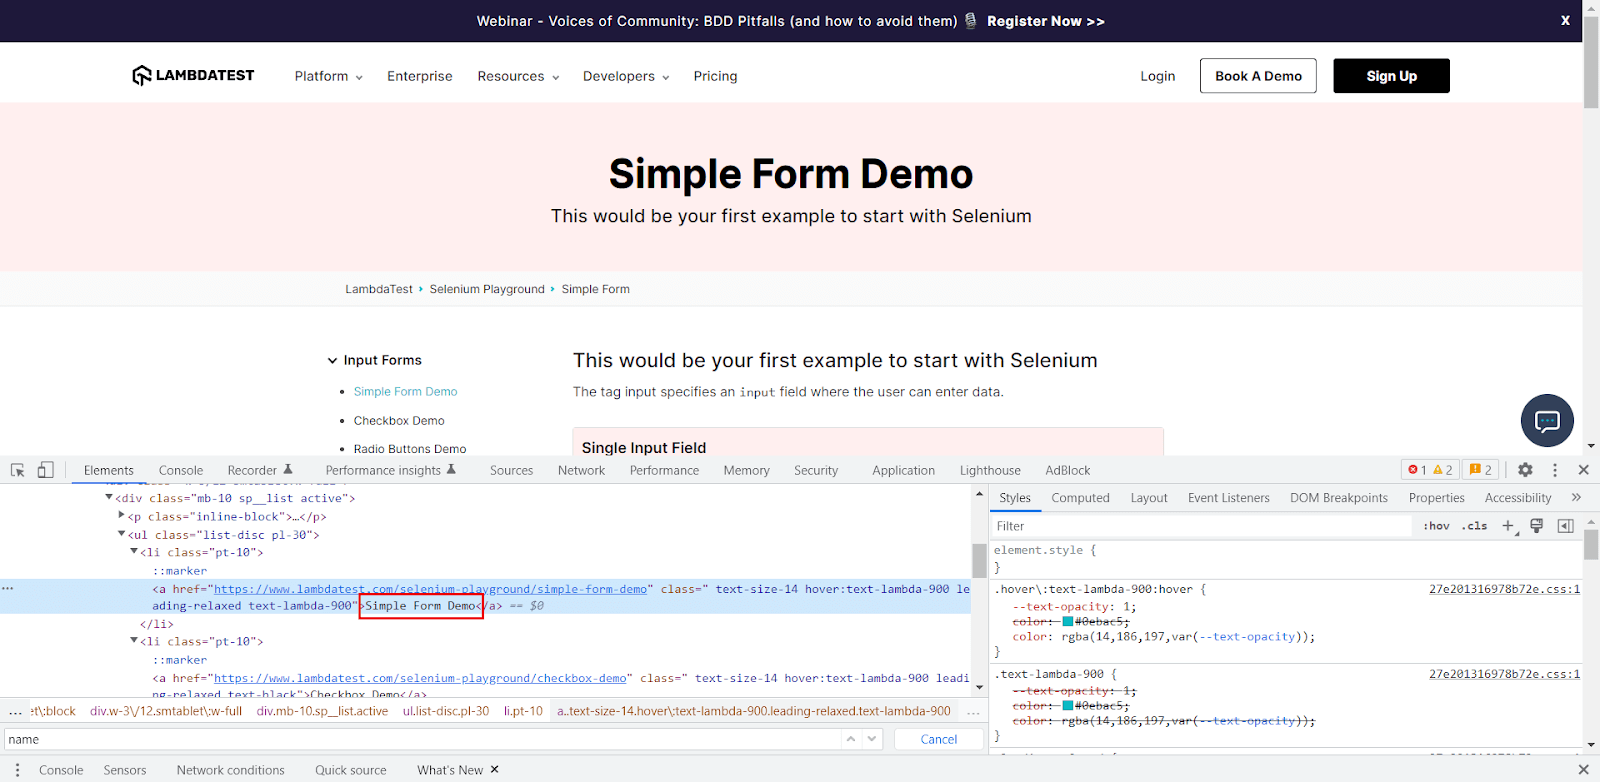
So to use this in your test, you will need:
|
1 |
driver.FindElement(By.LinkText("Simple Form Demo")); |
To learn more about it, you can refer to our earlier blog on the Link Text locator in Selenium.
Partial Link Text locator in Selenium
The same as above, but using only a part of the text link. For the example above, I can have something like:
|
1 |
driver.FindElement(By.PartialLinkText("Form Demo")); |
To learn more about it, you can refer to our earlier blog on the Partial Link Text locator in Selenium.
CSS Selector in Selenium
I left CSS Selectors and XPath last because, although they are widely used, they are not as straightforward as the other locators. The CSS Selector in Selenium is a combination of an element’s CSS Selectors and the selector’s value, used to identify the element on the web page. The basic syntax for CSS Selectors is node[attribute = ‘attribute_value’]. For our example above, we would have:
|
1 |
driver.FindElement(By.CssSelector("input[id=’user_message’]")); |
The big advantage of using CSS Selectors is that they allow us to combine multiple attributes to identify a single element, which is very useful when our elements don’t have an ID, a Name, or a ClassName, or when these attributes are not unique. It also allows us to identify elements relative to their position on the page (for example, the child input element of a span element).
XPath in Selenium
Another very common locator strategy is XPath in Selenium. XPath is a language used for querying XML documents. It works on both HTML and XML documents, allowing us to navigate through the XML structure of any document. It contains a path expression and some conditions. The basic XPath syntax is //tag[@attribute=’value’]. For example:
|
1 |
driver.FindElement(By.XPath("//input[@id=’user-message’]")); |
It’s important to note that when deciding on a locator strategy, some are faster, and some are slower. The ID locator strategy is the fastest and usually more recommended, while XPath tends to be slower.
Run C# Automation Testing Online.Try LambdaTest Now!
Relative Locators in Selenium
Relative locators have been introduced with Selenium 4, and they can be used to locate elements on the web page in relation to another element on that page. To learn more about it, you can go through our earlier log on Relative Locators in Selenium 4.
The available relative locators are:
Above
Above identifies an element that is located above a different element.
|
1 |
RelativeBy.WithLocator(By.TagName("input")).Above(By.Id("showInput")) |
Below
Below identifies an element that is located below a different element.
|
1 |
RelativeBy.WithLocator(By.TagName("input")).Below(By.TagName("li")) |
LeftOf
You probably already figured out how this goes. Yes, the element is located based on an element that can be found to its left.
|
1 |
RelativeBy.WithLocator(By.TagName("input")).LeftOf(By.TagName("p")) |
RightOf
Similar to the previous locator, it will retrieve the element based on an element to its right.
|
1 |
RelativeBy.WithLocator(By.TagName("input")).RightOf(By.TagName("p")) |
Near
Near will locate an element relative to an element that is within 50px.
|
1 |
RelativeBy.WithLocator(By.TagName("input")).Near(By.TagName("p")) |
How to find a single web element using driver.FindElement in Selenium C#?
Finding unique elements to interact with is the first common situation when writing automated tests with Selenium. For these cases, you will want to use the command driver.FindElement in Selenium C#. This will look something along these lines:
|
1 |
driver.FindElement(By.Id("user-message")); |
This will return a web element. Then, you can perform any actions available for web elements in Selenium C#, such as SendKeys() to enter text, Click() to click on it, Clear() to clear its text, and so on.
To learn more about SendKeys, you can go through our earlier blog on SendKeys in Selenium.
Let’s look at an example.
Test Scenario:
I will exemplify this with a simple login test case. Here are the test steps:
- Navigate to the webpage https://ecommerce-playground.lambdatest.io/index.php?route=account/login.
- Enter valid credentials (EMail and Password).
- Press the Login button.
- Validate that the user account page is loaded.
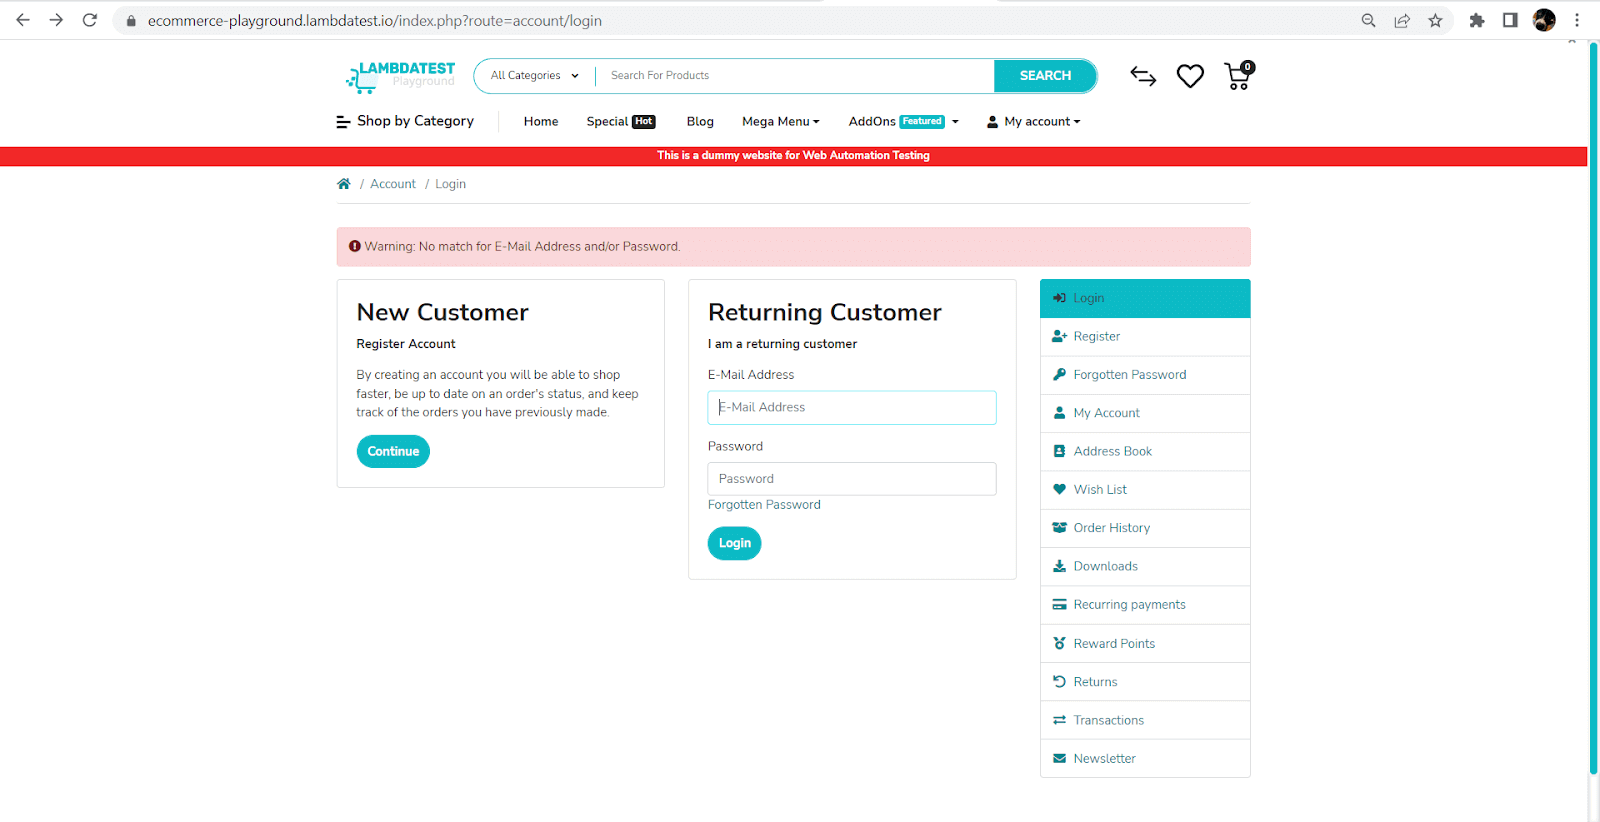
For all the web elements interaction stated, we are looking to identify a single element to perform actions on:
- Insert text into the E-Mail Address input.
- Insert text into the Password input.
- Click the Login button.
- Find the MyAccount header on the page.
In this Selenium C# tutorial on using driver.FindElement and driver.FindElements in Selenium C#, I’ll be running my tests on the LambdaTest cloud grid using different OS and browser configurations.
Cloud testing platforms like LambdaTest allow you to perform manual and automated cross browser testing on an online browser farm of 3000+ browsers and browser versions at scale. It provides support for different automation testing frameworks like Selenium, Cypress, Playwright, and more. Furthermore, using parallel test execution, you can also trim down lead time by multiple folds.
Subscribe to the LambdaTest YouTube Channel to see our latest tutorials about Selenium automation, Appium automation, Playwright automation, and more.
So, let’s get started!
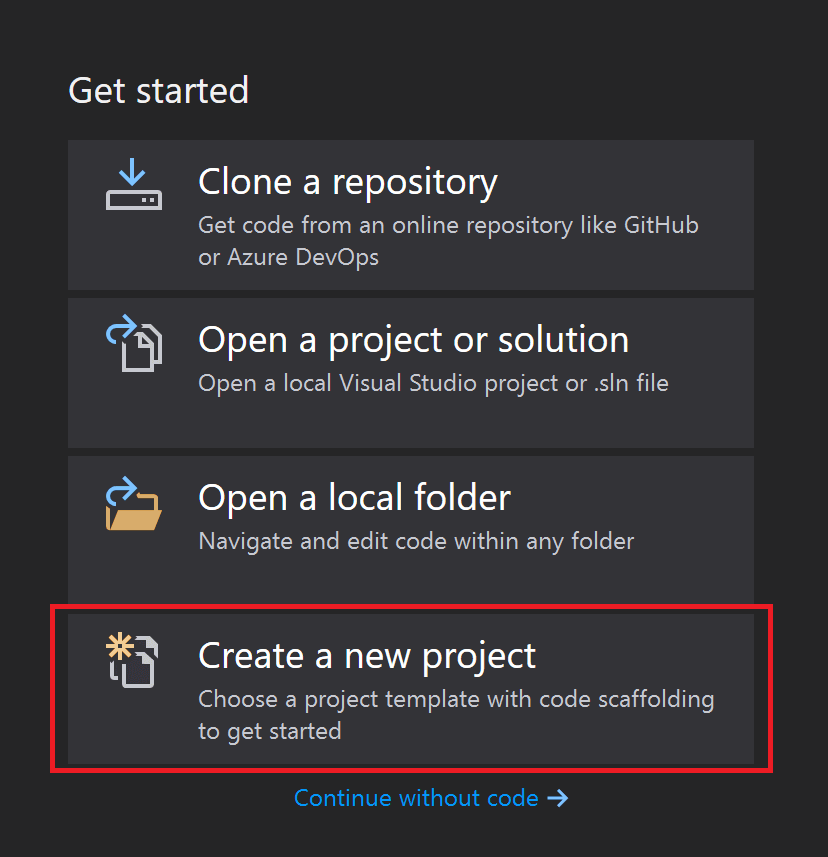
Project Setup
The first step of the implementation is setting up the project in Visual Studio. I’ll be using NUnit as my test framework, but if you have other preferences, like xUnit or MSTest, they will do the trick just as well. You can see a detailed comparison between NUnit vs. XUnit vs. MSTest to choose the right framework for your testing needs.
For this, select the project type you need in Visual Studio:
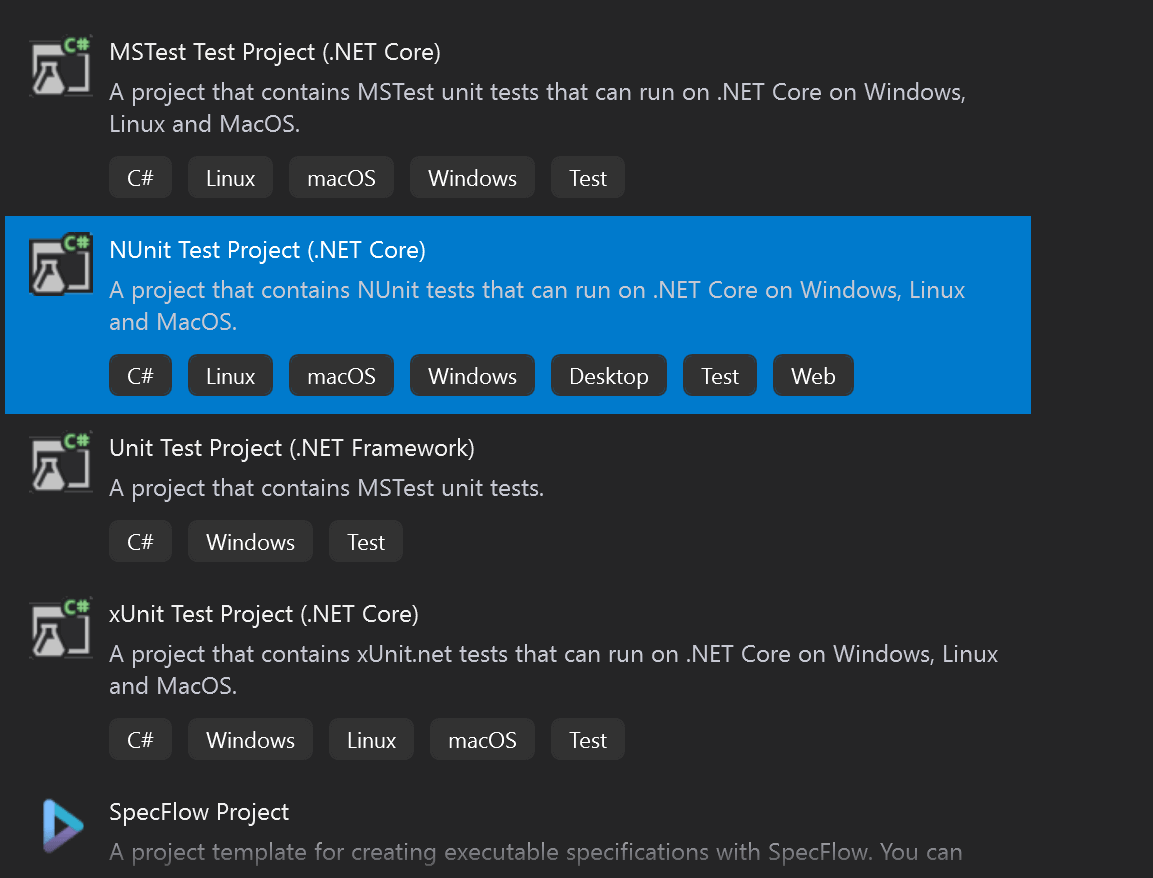
Enter a name for the project, select the location, and you should end up with a default created test class that looks like this:
|
1 2 3 4 5 6 7 8 9 10 11 12 13 14 15 16 |
using NUnit.Framework; namespace SeleniumLocators { public class Tests { [SetUp] public void Setup() { } [Test] public void Test1() { Assert.Pass(); } } } |
Next, we need to add the NuGet packages for Selenium. You can do this by right-clicking on the project name in the solution explorer and selecting Manage NuGet packages:
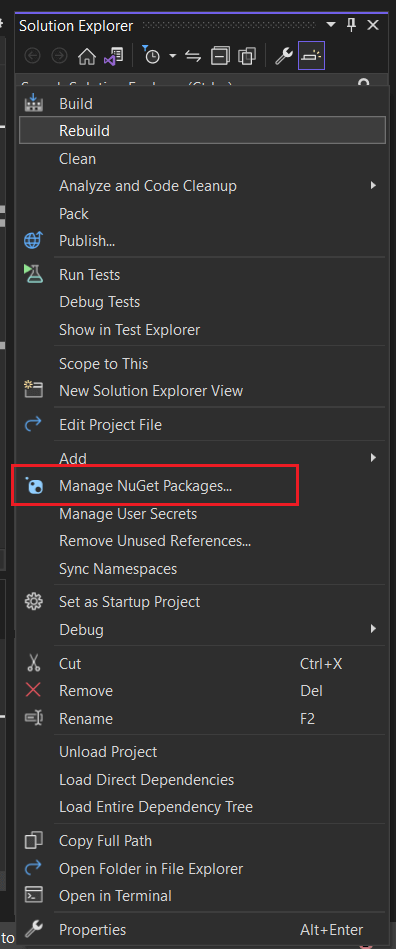
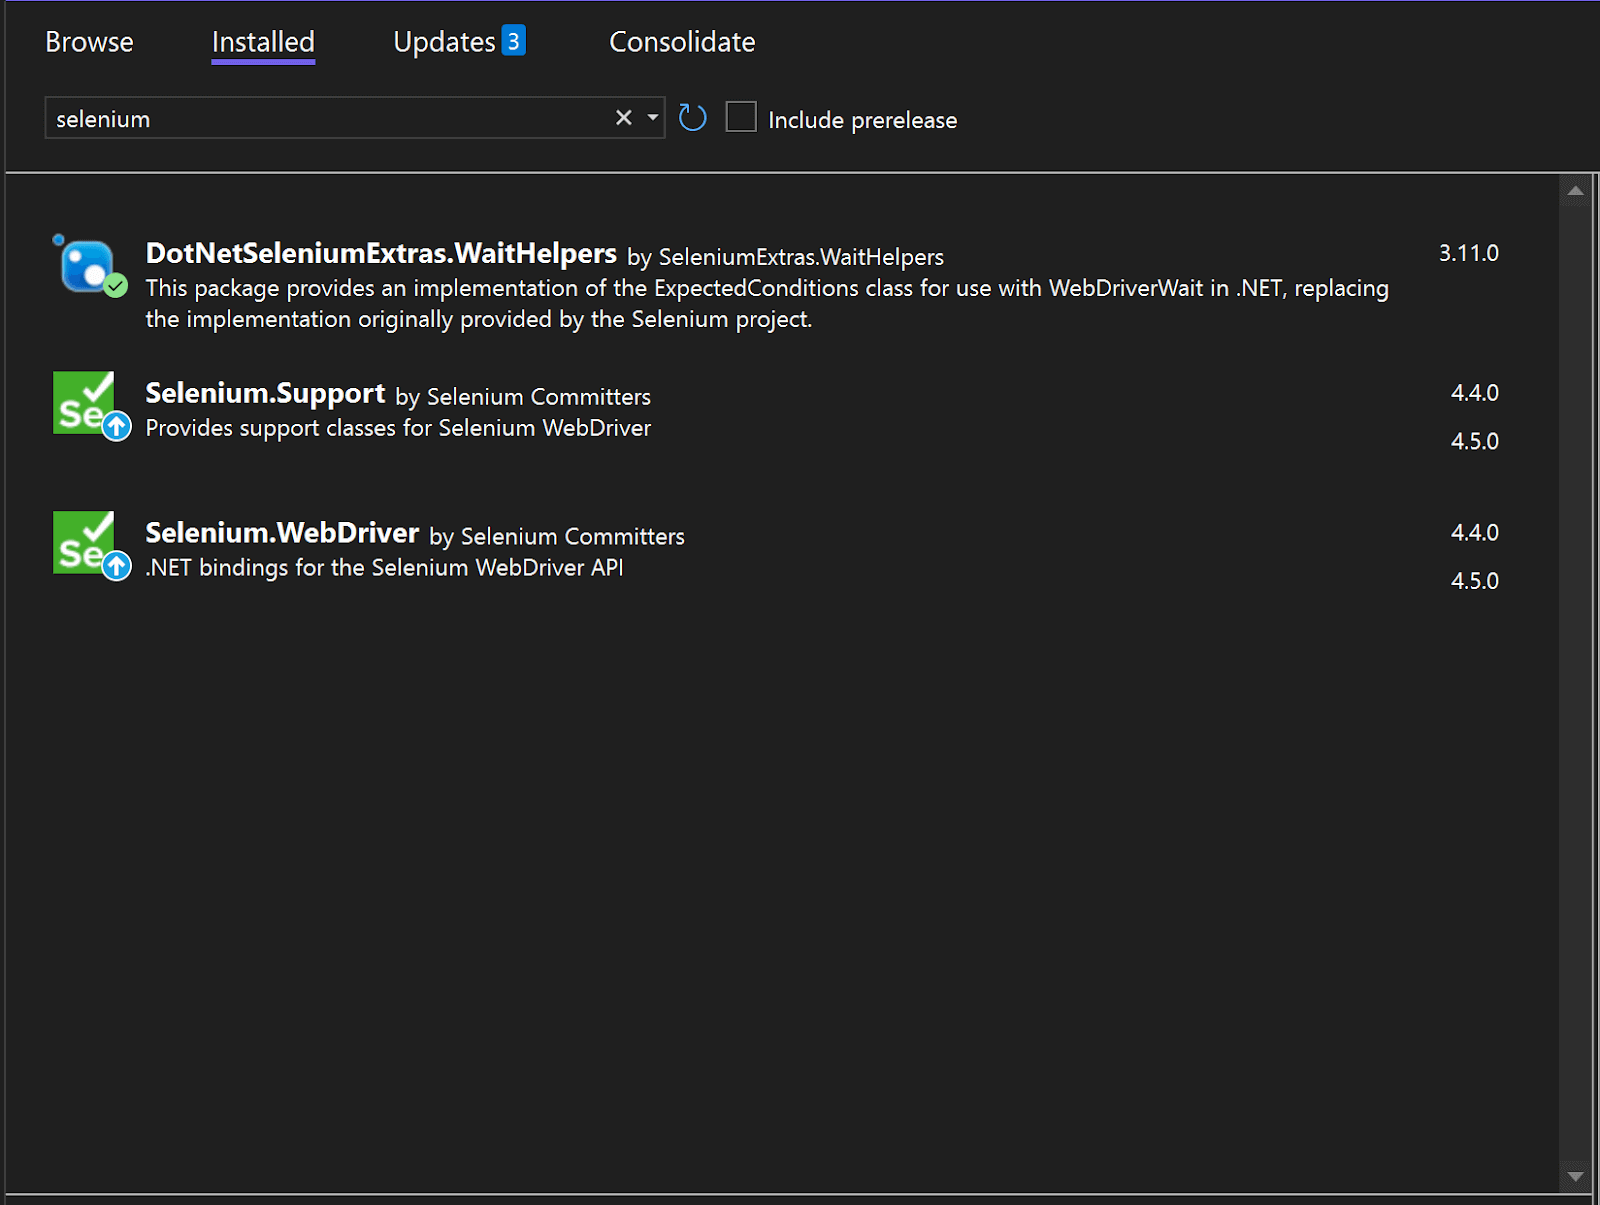
This will open up the package manager. In the browse tab, look for each of the following packages and click install for each of them:
- Selenium.WebDriver
- Selenium.Support
- DotNetSeleniumExtras.WaitHelpers
Once installed, they will be visible in the Installed tab, along with the installed version:
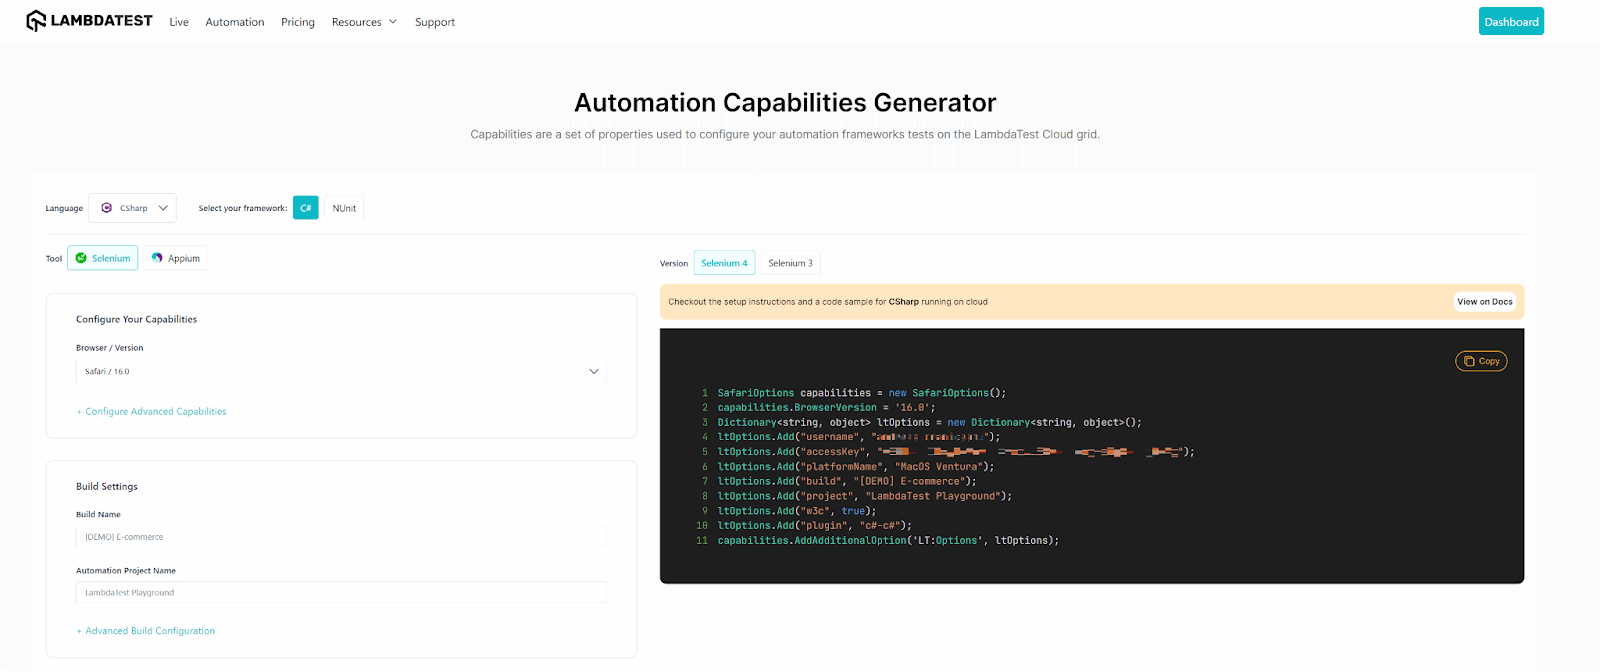
I am not testing locally. I want to do my tests on the latest version of Safari (currently 16.0). Since I’m a Windows user, the LambdaTest Grid is helpful because it allows me to test a configuration I cannot set up on my machine. I am using the Automation Capabilities Generator to generate the desired configuration.
Implementation
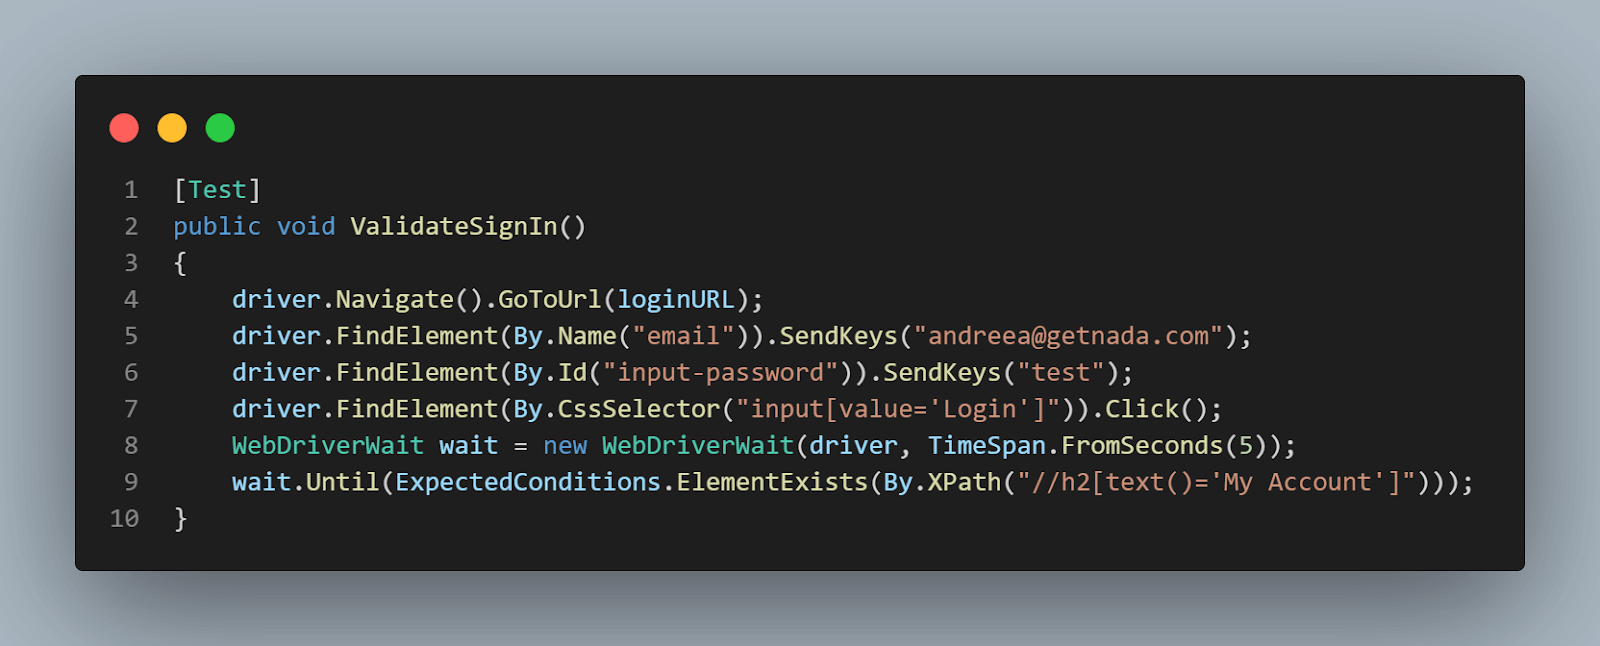
Now that everything’s set up, here’s the implementation for our test scenario:
|
1 2 3 4 5 6 7 8 9 10 11 12 13 14 15 16 17 18 19 20 21 22 23 24 25 26 27 28 29 30 31 32 33 34 35 36 37 38 39 40 41 42 43 44 45 46 |
using NUnit.Framework; using OpenQA.Selenium; using OpenQA.Selenium.Remote; using OpenQA.Selenium.Safari; using OpenQA.Selenium.Support.UI; using SeleniumExtras.WaitHelpers; namespace SeleniumLocators { public class Tests { private static IWebDriver driver; private static readonly string gridURL = "@hub.lambdatest.com/wd/hub"; private static readonly string LT_USERNAME = Environment.GetEnvironmentVariable("LT_USERNAME"); private static readonly string LT_ACCESS_KEY = Environment.GetEnvironmentVariable("LT_ACCESS_KEY"); private readonly string loginURL = "https://ecommerce-playground.lambdatest.io/index.php?route=account/login"; private readonly string homePageURL = "https://ecommerce-playground.lambdatest.io/index.php"; [SetUp] public void Setup() { DriverOptions capabilities = new SafariOptions(); capabilities.BrowserVersion = "16.0"; Dictionary<string, object> ltOptions = new Dictionary<string, object>(); ltOptions.Add("username", LT_USERNAME); ltOptions.Add("accessKey", LT_ACCESS_KEY); ltOptions.Add("platformName", "MacOS Ventura"); ltOptions.Add("build", "[DEMO] E-commerce"); ltOptions.Add("w3c", true); ltOptions.Add("project", "LambdaTest Playground"); ltOptions.Add("plugin", "c#-c#"); capabilities.AddAdditionalOption("LT:Options", ltOptions); driver = new RemoteWebDriver(new Uri($"https://{LT_USERNAME}:{LT_ACCESS_KEY}{gridURL}"), capabilities); } [Test] public void ValidateSignIn() { driver.Navigate().GoToUrl("https://ecommerce-playground.lambdatest.io/index.php?route=account/login"); driver.FindElement(By.Name("email")).SendKeys("andreea@getnada.com"); driver.FindElement(By.Id("input-password")).SendKeys("test"); driver.FindElement(By.CssSelector("input[value='Login']")).Click(); WebDriverWait wait = new WebDriverWait(driver, TimeSpan.FromSeconds(5)); wait.Until(ExpectedConditions.ElementExists(By.XPath("//h2[text()='My Account']"))); } } } |

Code Walkthrough
Let’s walk through the code now and see what’s going on.
The first lines of code, the using ones, are there to instruct our test class on what packages to use:
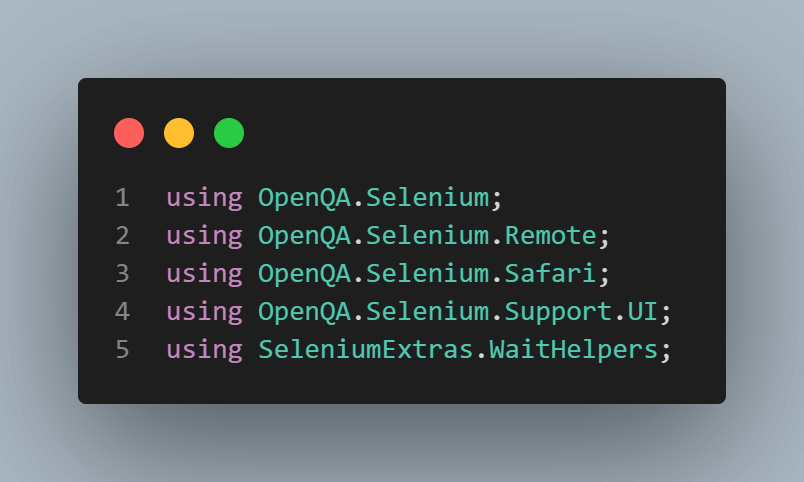
Next, we have the class, which contains our actual test. In the first part, I declared the variables I’ll need in my tests:
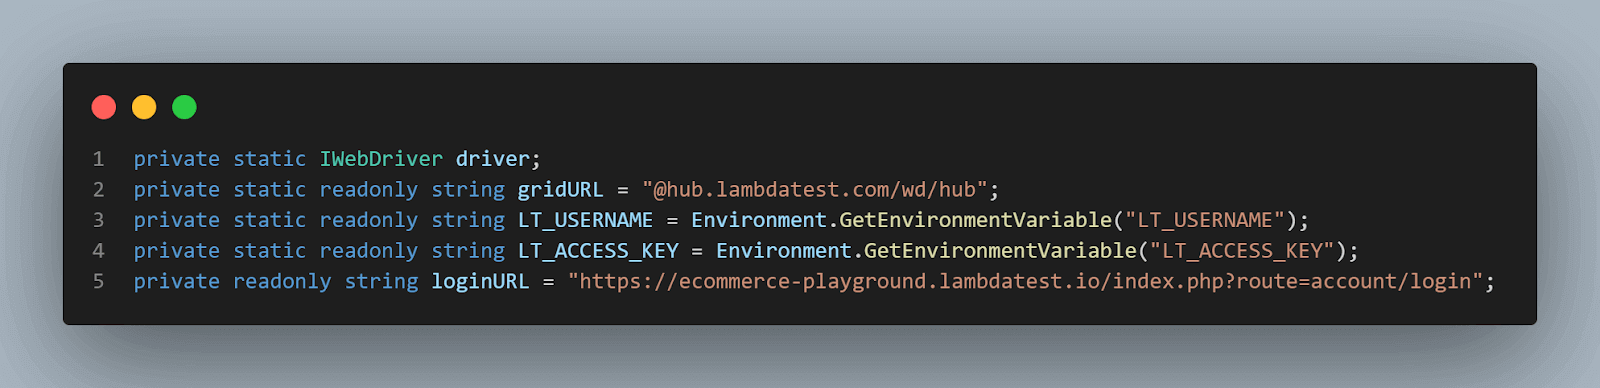
I need an IWebDriver instance to interact with the browser. And the gridURL, LT_USERNAME, and LT_ACCESS_KEY are string variables that I will be using in the setup to connect to my LambdaTest Grid account. I also stored the login page URL as a variable to make it easier to read. It’s also a good idea to store credentials (such as the LT_USERNAME and LT_ACCESS_KEY) as environment variables in your operating system.
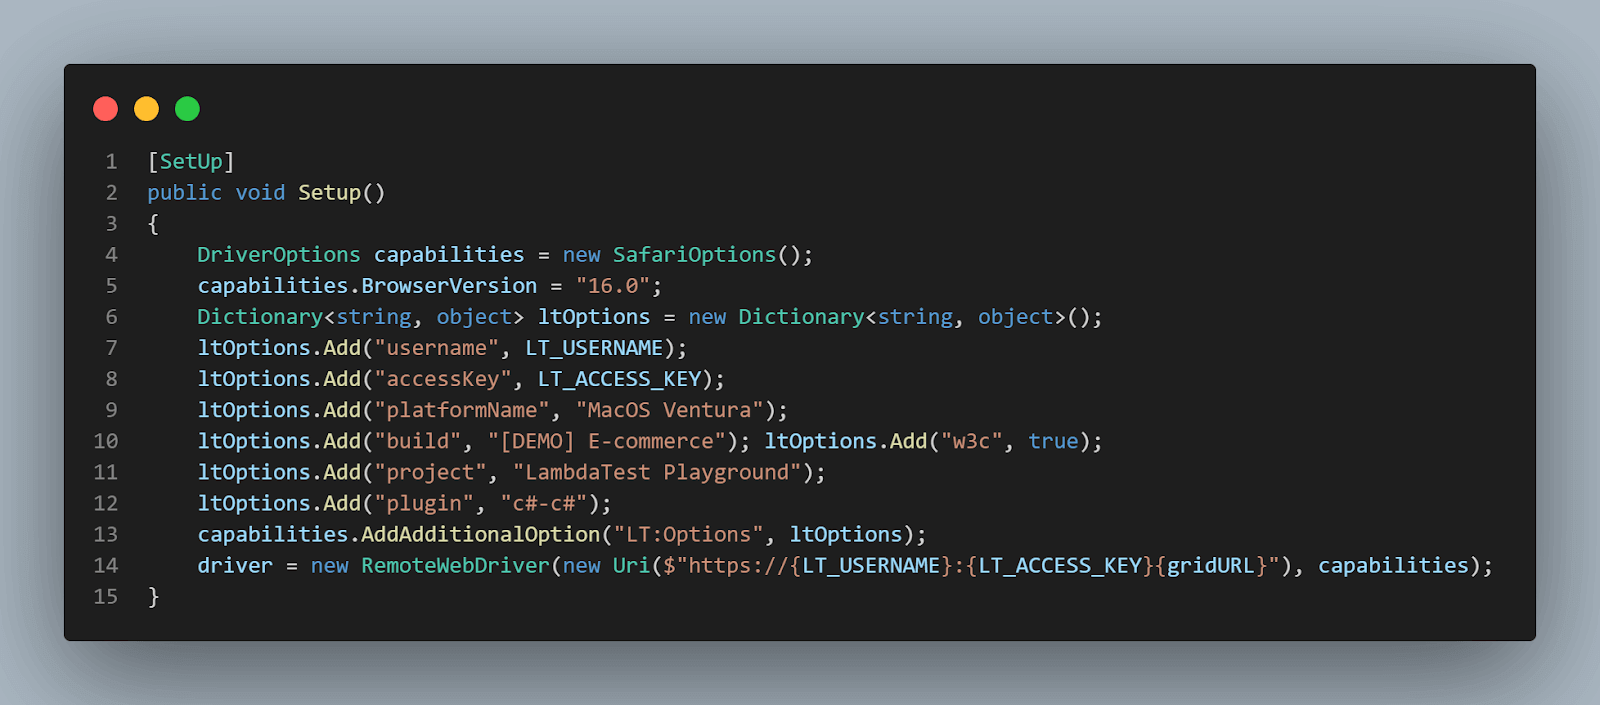
The [SetUp] is an NUnit attribute, marking a method that will run before each test method. Consider this method as the precondition of the tests. Here I set up my driver and my LambdaTest configuration.
Then all this goes into the SetUp method and a new instance of the driver, which is linked to my account URL.
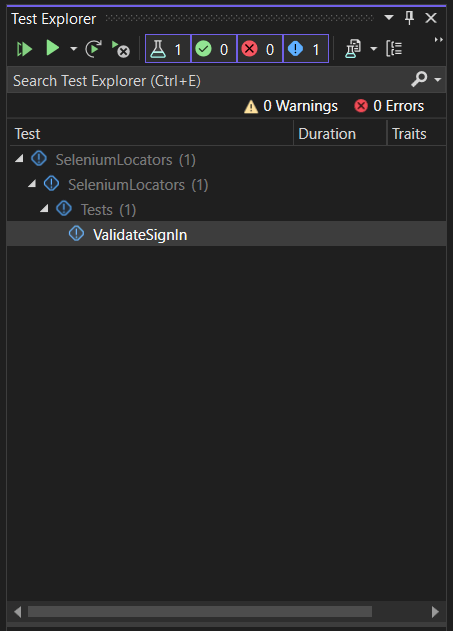
Next comes the actual test, where you can see the FindElement in action. Again, we have an NUnit attribute, which is [Test]. This marks a test method. If you open the Test Explorer of Visual Studio (from the Test menu → Test Explorer), you will see all the methods with this attribute. I currently have just one:
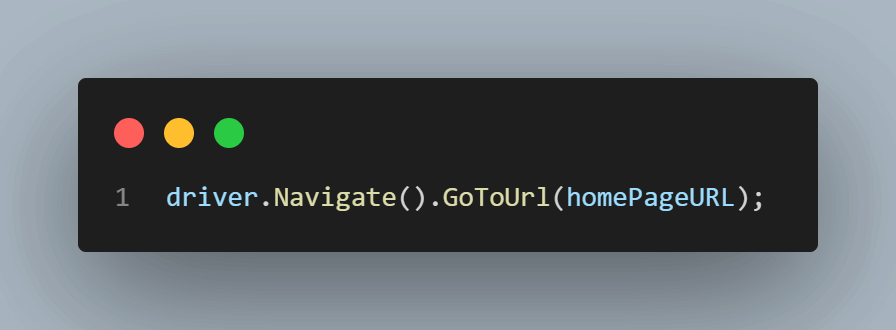
The first line is the navigate command, which instructs the browser to go to the desired URL. In our case, the Login page.
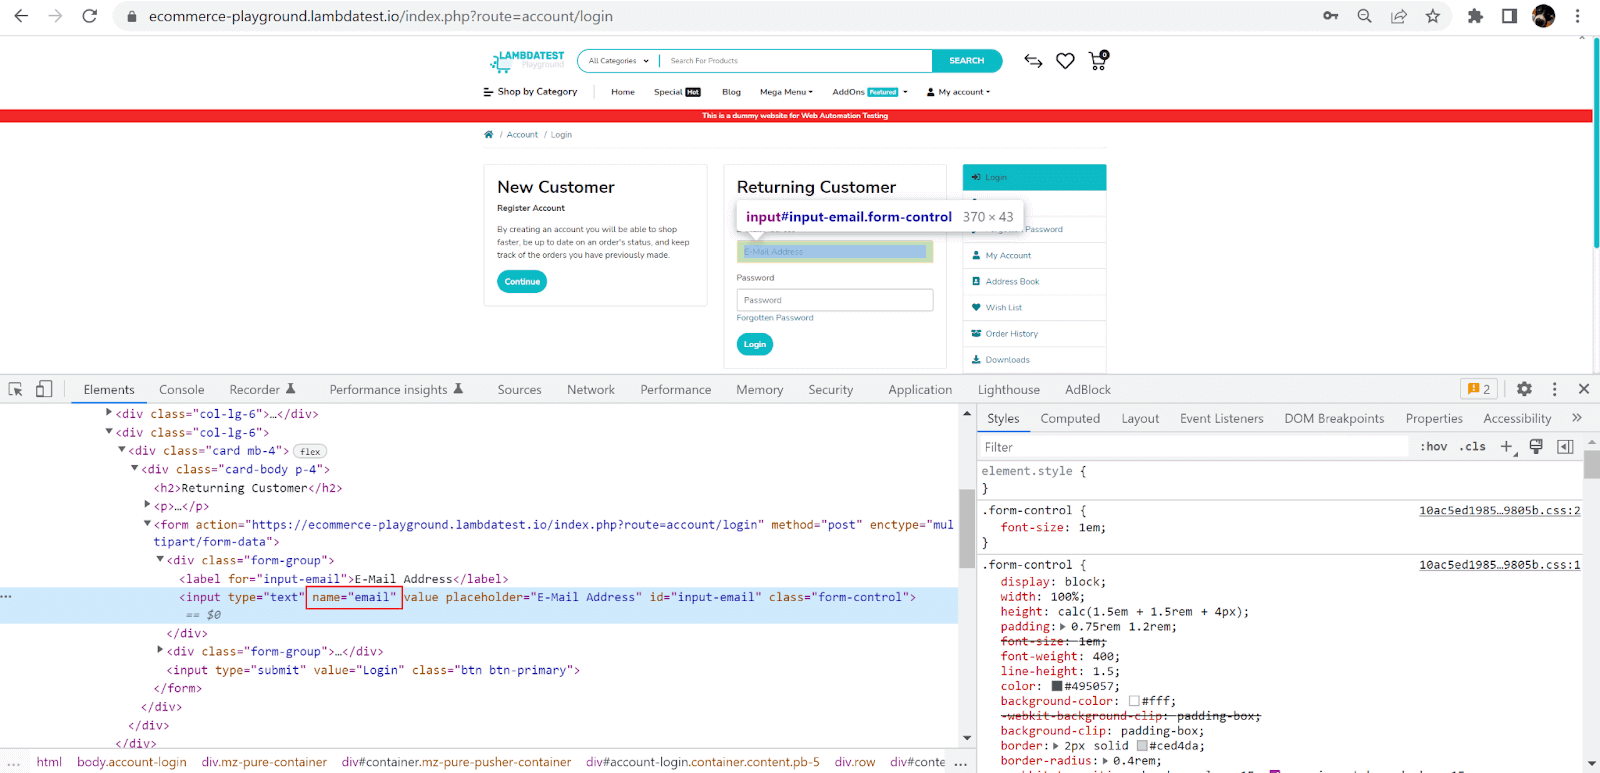
Next, we have various interactions with web elements on the page. I tried to use as many of the available locators, so as you can see, I’ve used: driver.FindElement(By.Name(“email”)) to locate the Email input field:
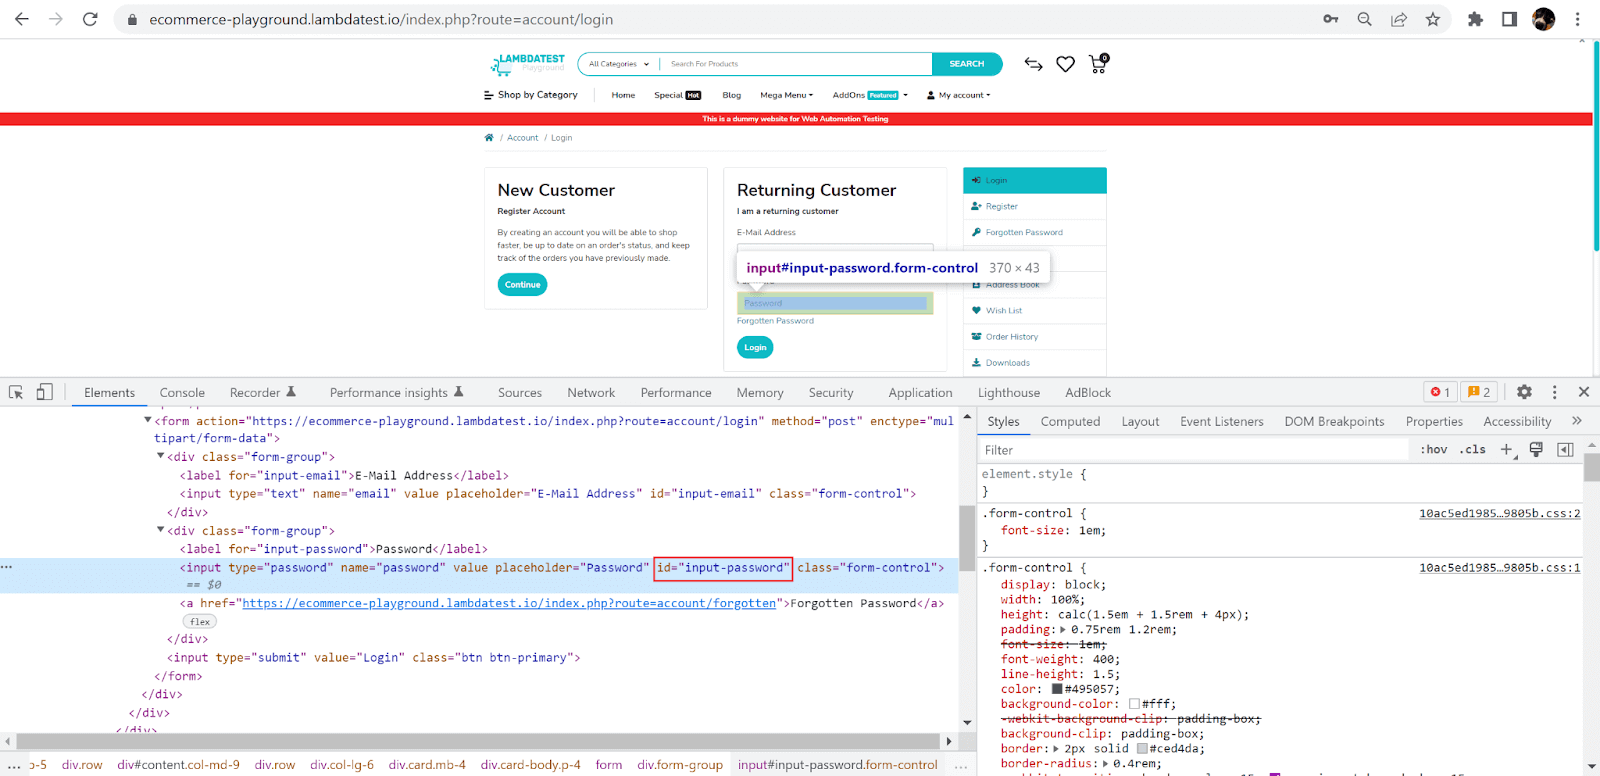
driver.FindElement(By.Id(“input-password”)) to locate the Password field:
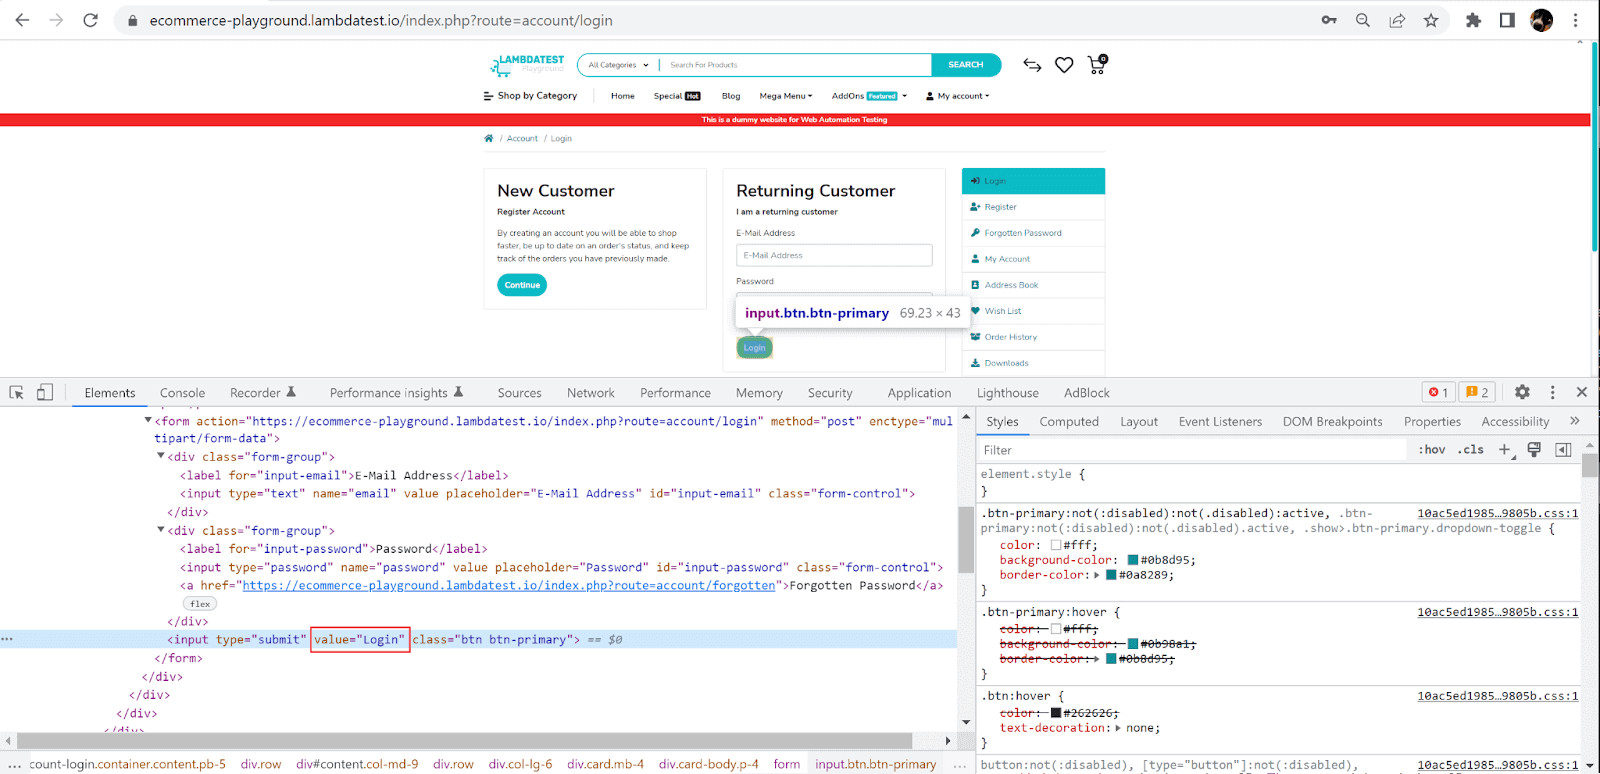
And driver.FindElement(By.CssSelector(“input[value=’Login’]”))using a CSS Selector build on the value attribute, to locate the Login button:
Next, once the elements are correctly located, simply use Selenium’s methods to interact with them:
- SendKeys() to enter text in the input fields (for email and password)
- Click() to press the login button.
You can learn more about the Action Class through this blog on Action Class in Selenium. The following lines instruct the browser to wait for 5 seconds or until the element with the given XPath exists, using an explicit wait. The test will fail if the element is not found within 5 seconds.
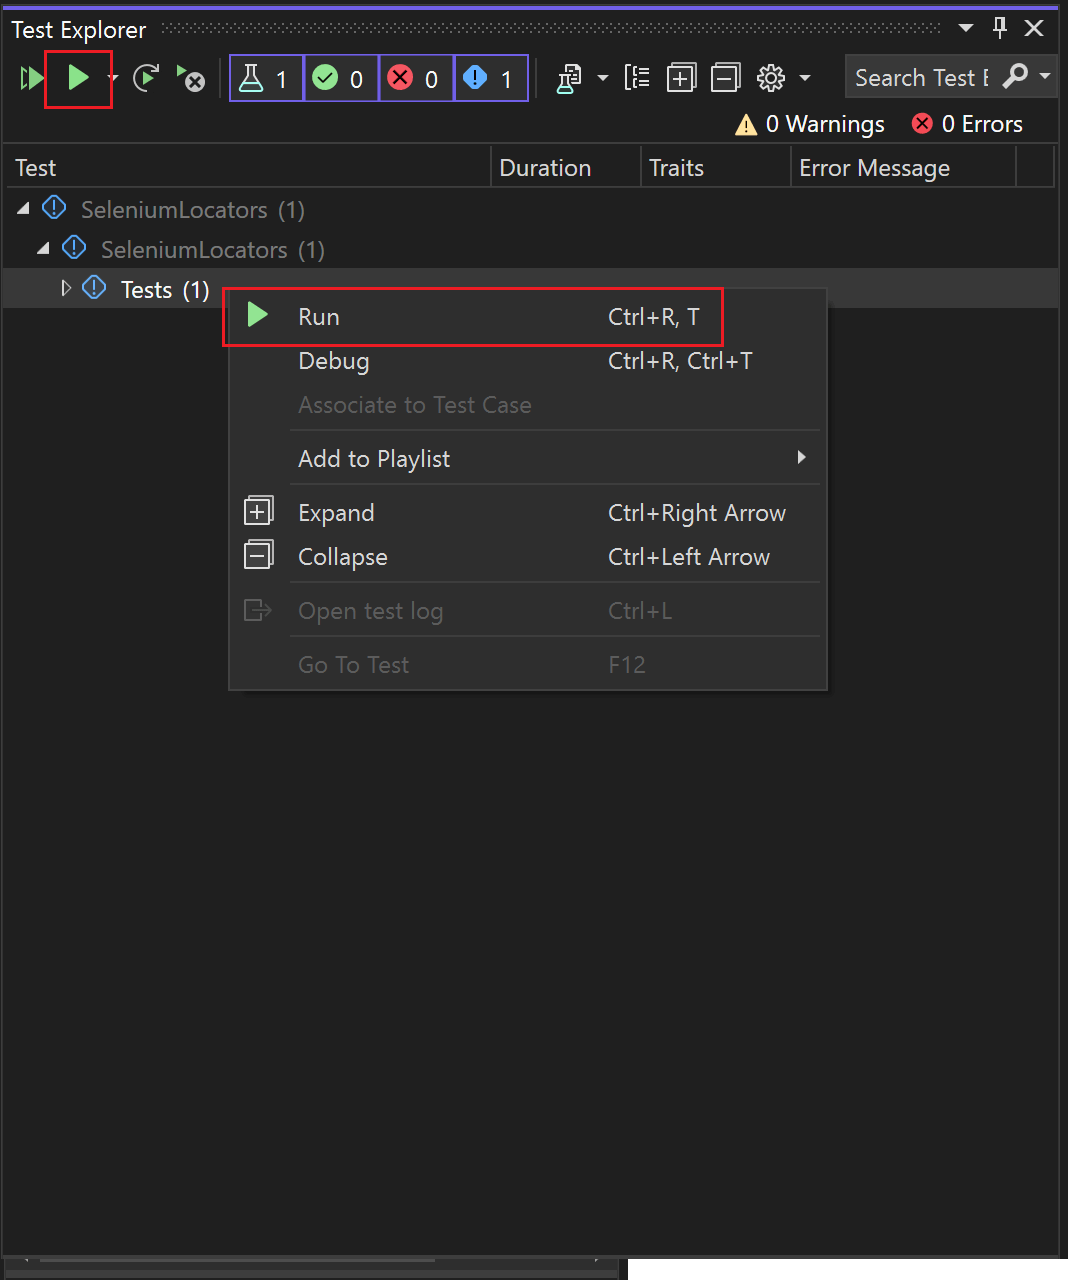
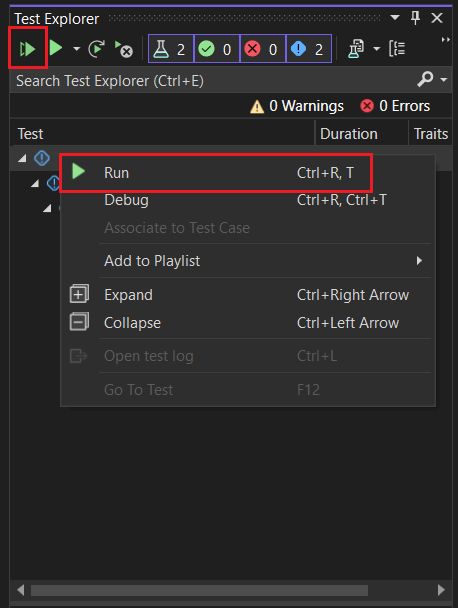
Now my test is displayed in Visual Studio’s Test Explorer, and I can run it from here by right-clicking on it and selecting Run or by pressing the Run button at the top:
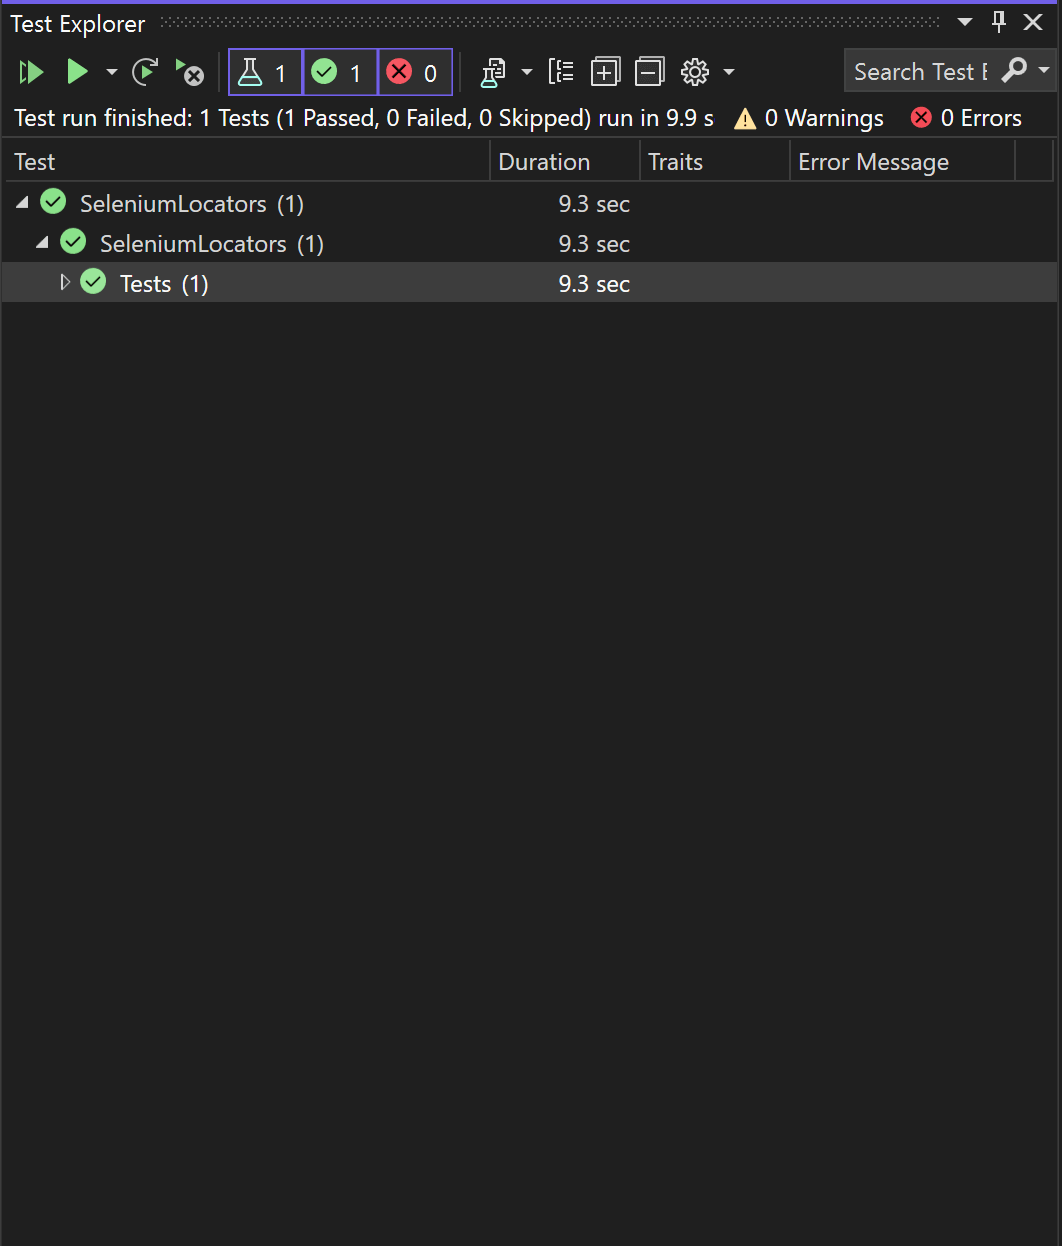
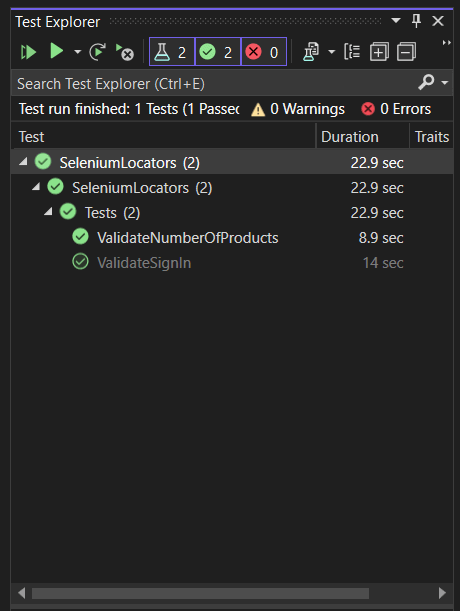
Once the test finishes running, I can see the result in the same panel (green means passed)
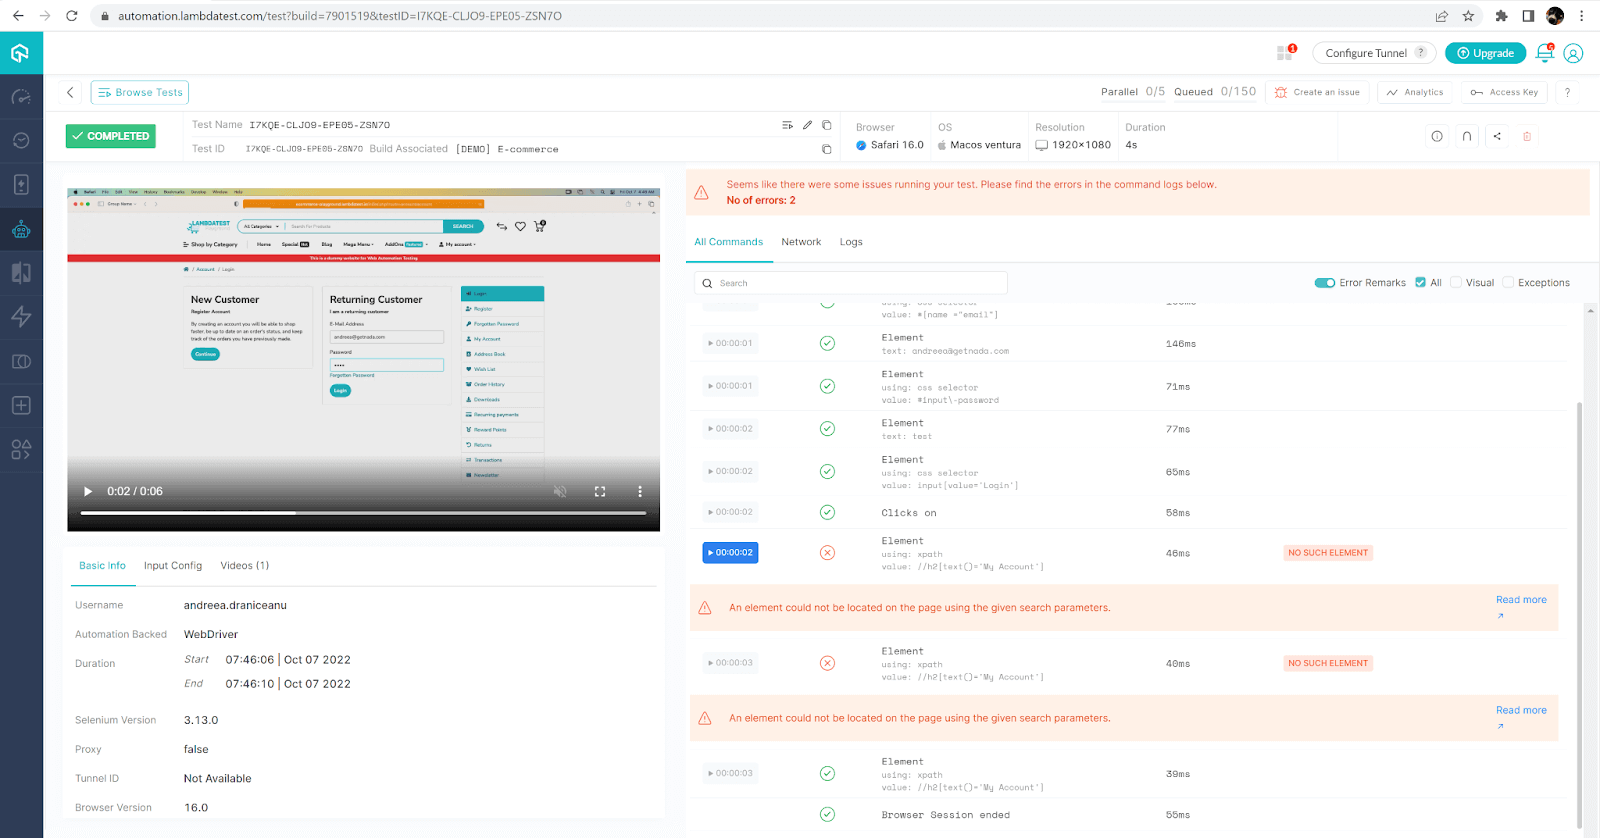
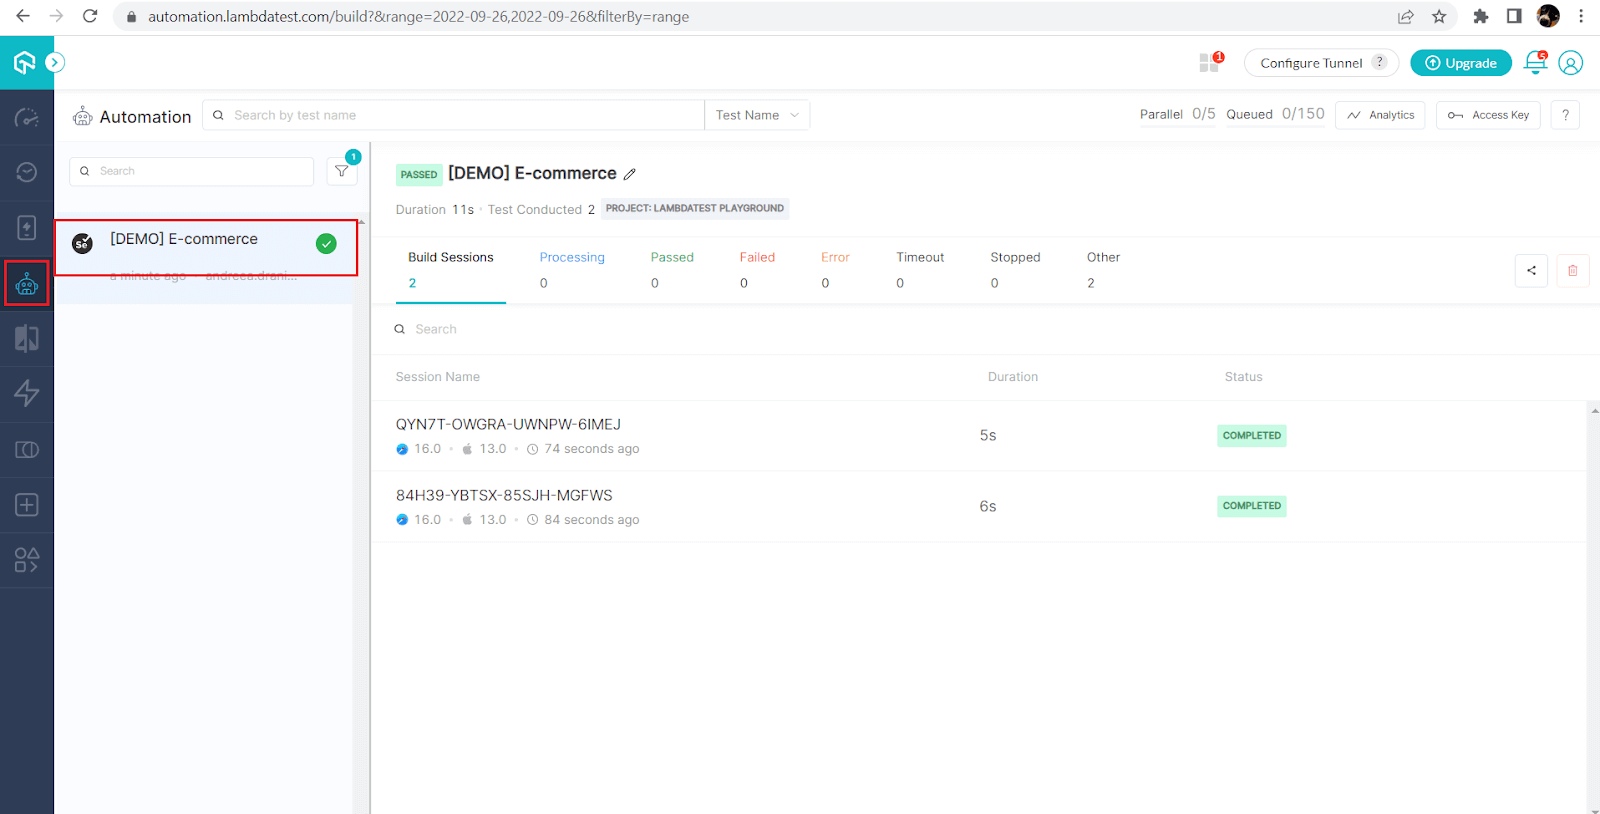
As well as in my Dashboard in LambdaTest Selenium Grid in the Automation tab:
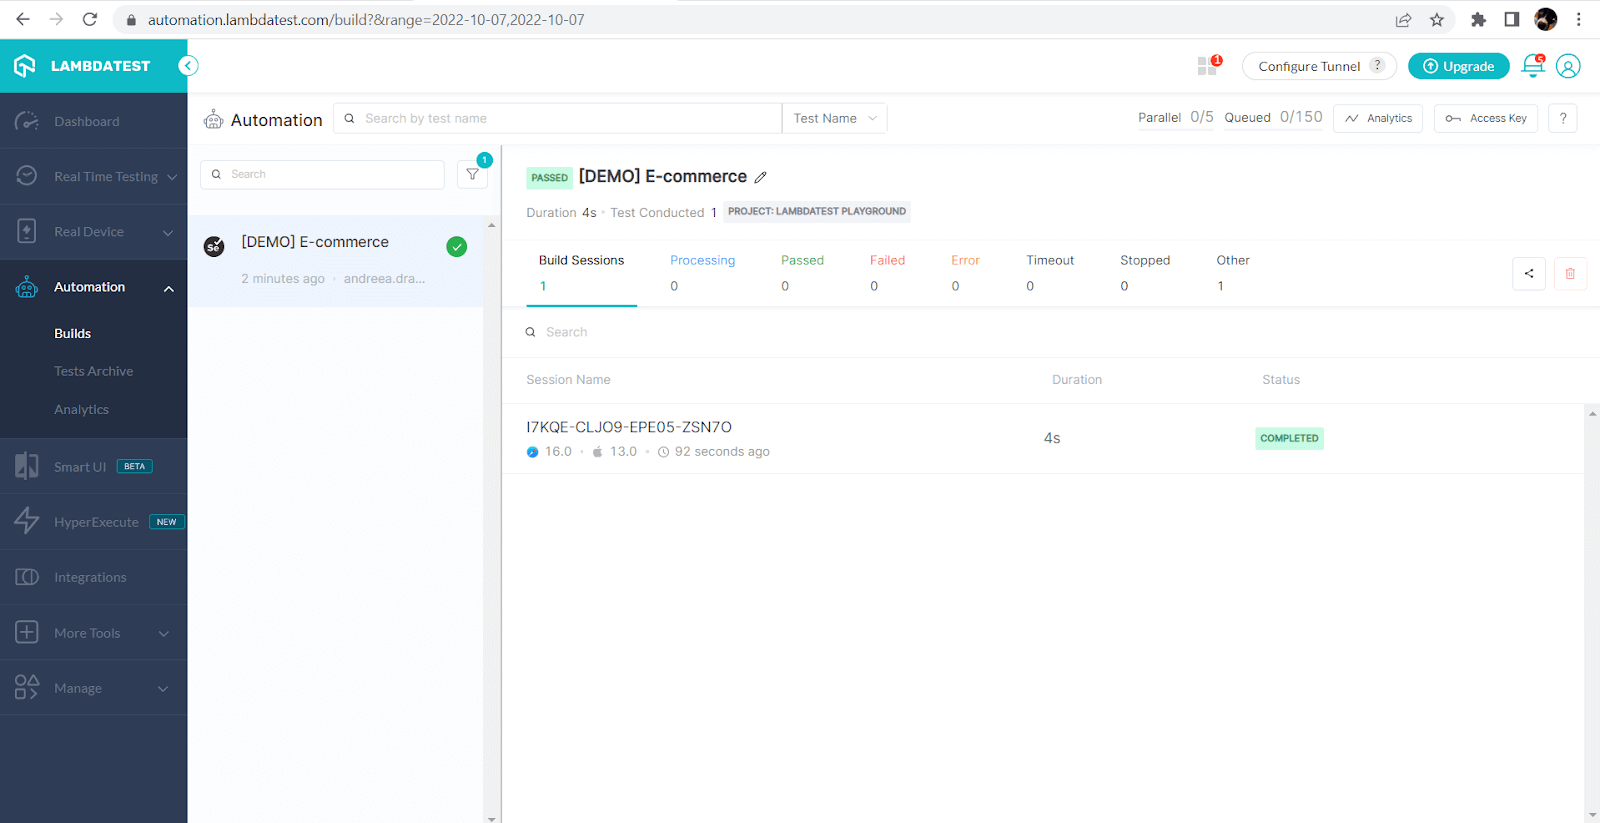
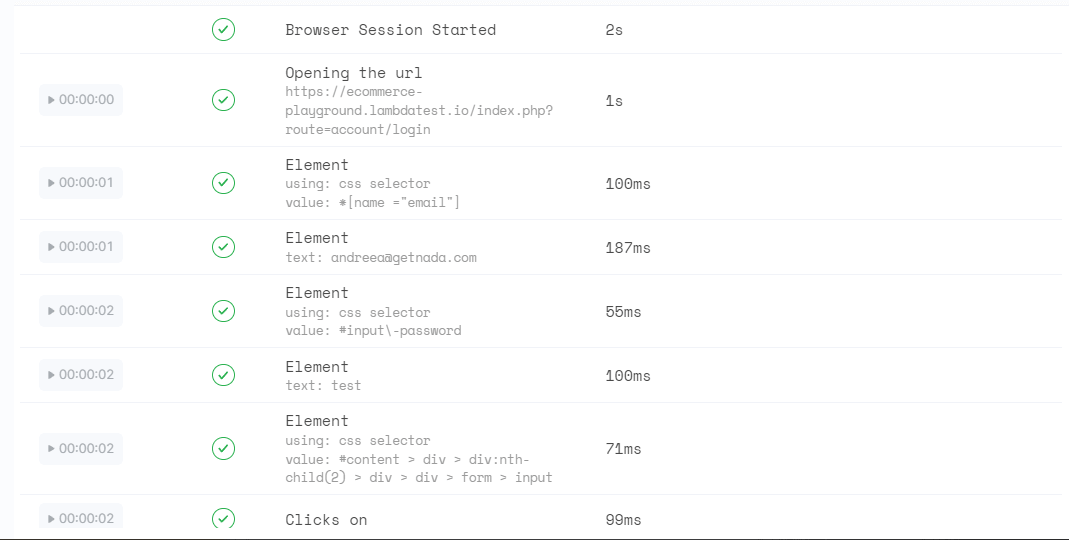
From here, I can go deeper into details and see a recording of my test, as well as each detailed step:
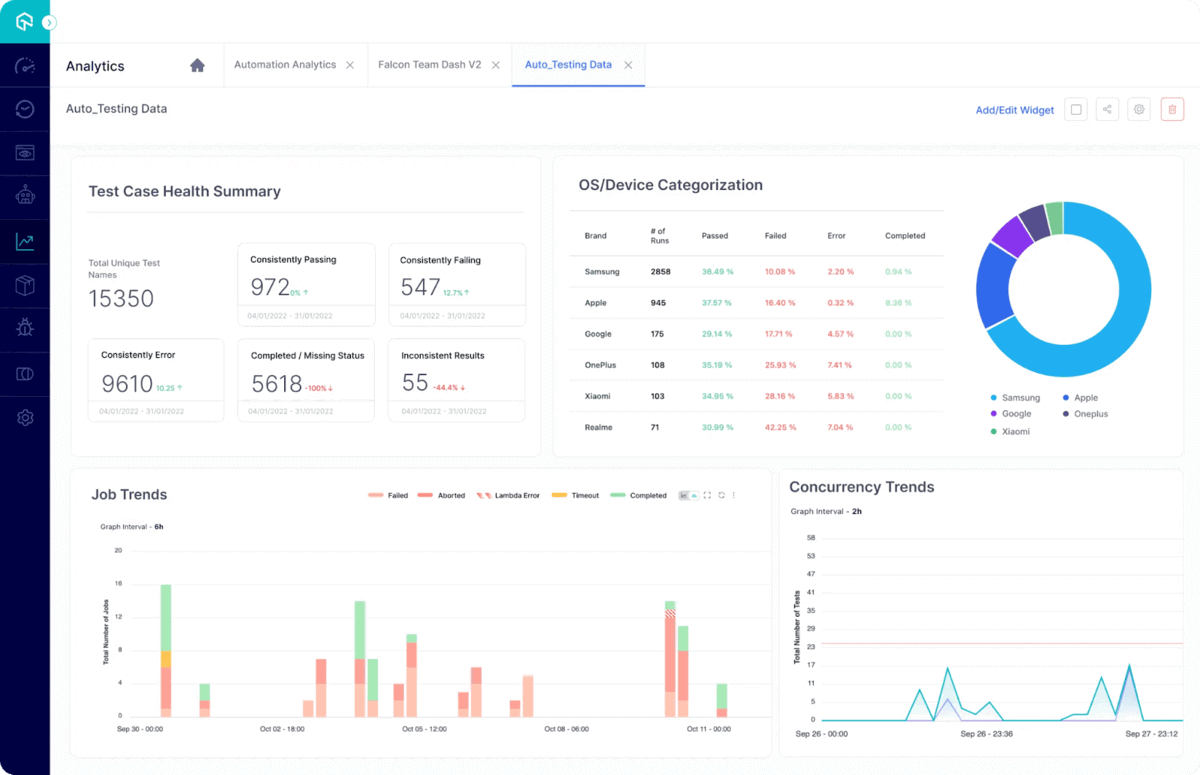
LambdaTest Analytics is a comprehensive solution that helps you manage and optimize your QA processes and test data through access to powerful analytics capabilities.
With LambdaTest Analytics, you can easily access, analyze, and streamline your QA efforts, ensuring that your product is successful by incorporating key analytics insights. Whether you are looking to improve your testing efficiency or simply want to better understand the performance of your product, LambdaTest Analytics is what you need.
How to find multiple web elements using driver.FindElements in Selenium C#?
The second case I’ll present is when you are not looking for a single element but trying to find all the elements that meet certain criteria. The Selenium C# method used for this is FindElements(), and it works pretty much the same way as FindElement(), except that this method returns a collection of web elements:
|
1 |
driver.FindElements(By.XPath("//a[text()='HTC Touch HD']")); |
It’s better to illustrate this with an example as well.
Test Scenario:
- Navigate to the https://ecommerce-playground.lambdatest.io/index.php?route=common/home page
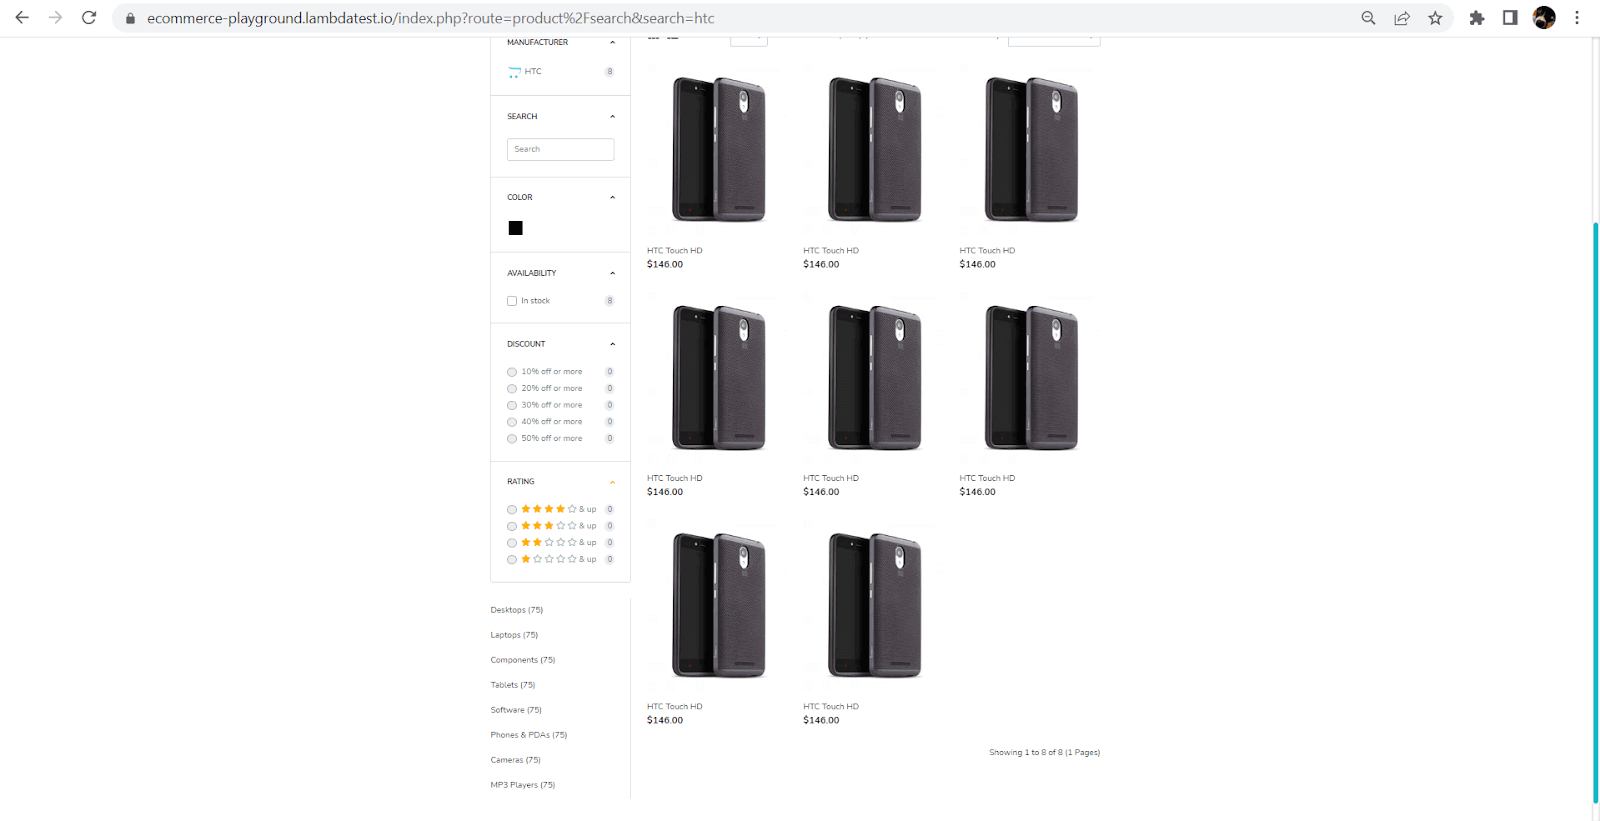
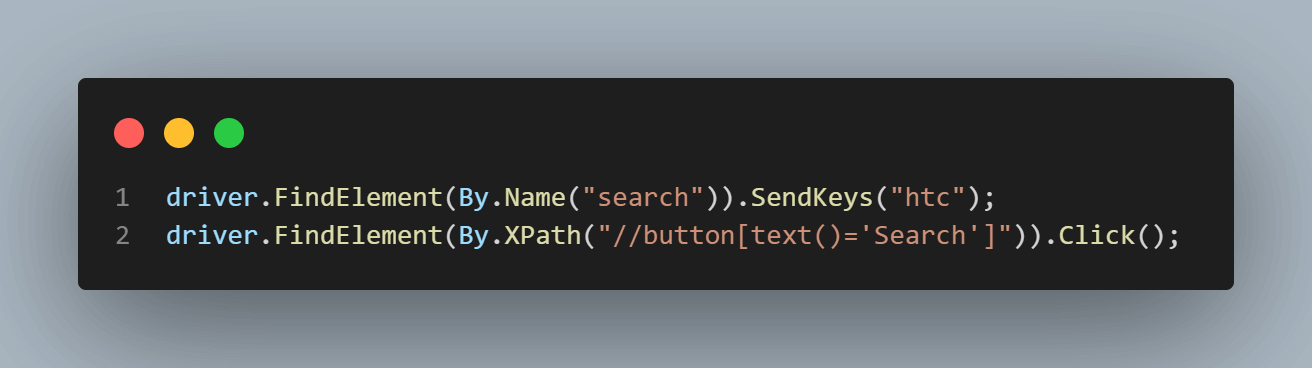
- Search for “HTC” products.
- Validate the required number of products returned (in this case, 8).
Implementation
|
1 2 3 4 5 6 7 8 9 10 11 |
[Test] public void ValidateNumberOfProducts() { int expectedNumber = 8; driver.Navigate().GoToUrl("https://ecommerce-playground.lambdatest.io/index.php?route=common/home"); driver.FindElement(By.Name("search")).SendKeys("htc"); driver.FindElement(By.XPath("//button[text()='Search']")).Click(); WebDriverWait wait = new WebDriverWait(driver, TimeSpan.FromSeconds(5)); wait.Until(ExpectedConditions.ElementExists(By.XPath("//h1[text()='Search - htc']"))); var results = driver.FindElements(By.XPath("//a[text()='HTC Touch HD']")); Assert.That(results, Has.Count.EqualTo(expectedNumber)); } |
Code Walkthrough
I also added a new string variable for the URL:

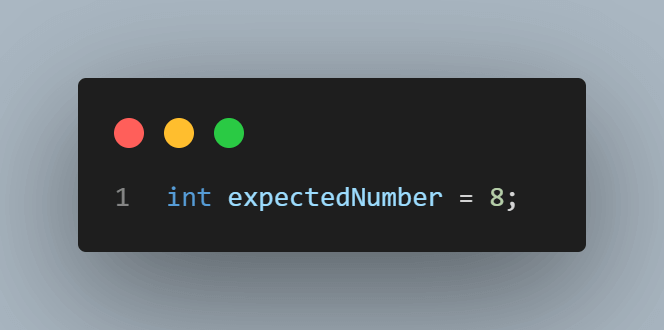
Next, inside the test, I created a simple integer variable that stores the expected number of results, which I will use later:
This test should be easy to understand after we already went over the first one. The second line is the same, except we navigate to a different page:
Next, using the Selenium driver.FindElement() method, I have two interactions with elements:
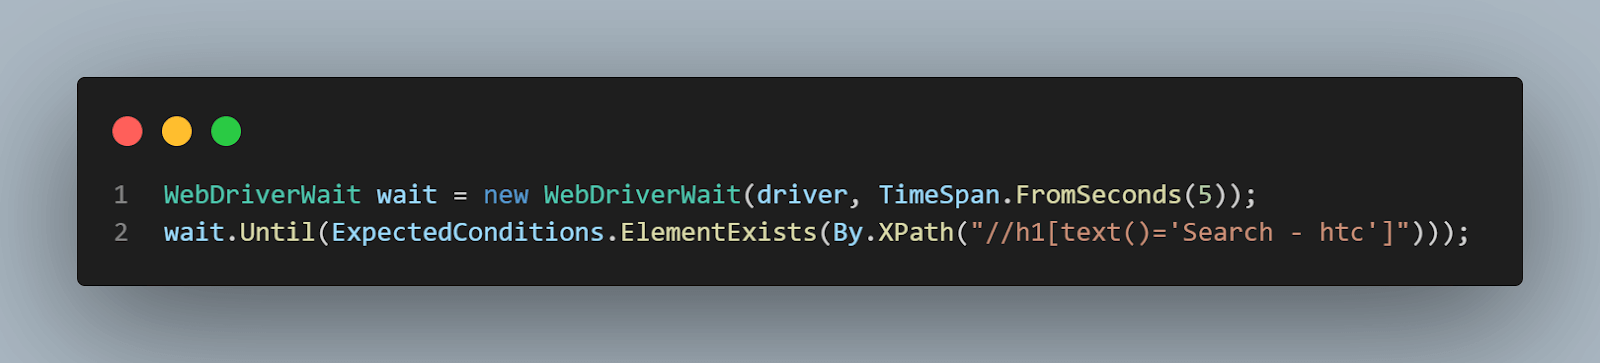
I used a wait again to ensure that I validated after loading the correct page. I’m using the H1 web element with the text “Search – htc” to be displayed:


And then we have the driver.FindElements() in Selenium C#, where we identify all the elements that have the same locator, in this case, the same XPath:
The collection of elements is saved within a variable, which I used in the last line. Here I verify the number of web elements returned by the driver.FindElements() in Selenium C# is the number I expect:
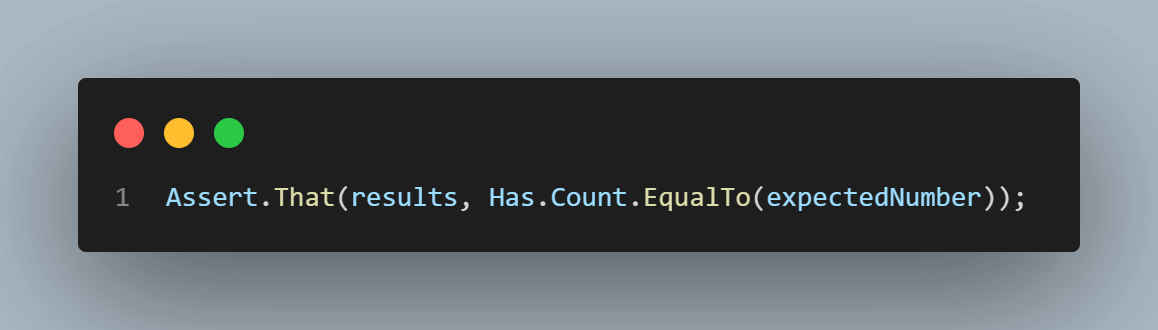
Assert is a class provided by NUnit, which allows us to make validations. If the condition we pass as a parameter is true, then the test passes. Otherwise, it will fail.
Now that the tests are written, you can see them both in the Test Explorer. To run them both, you just need to press the Run All button, right-click and select Run, or use the Ctrl+R, T shortcut, just like before:
After the tests are finished running, you’ll be able to see the results in Visual Studio:
And now, you can see the new test execution in your LambdaTest account, under the Automation tab:
And, if you click on one of the runs, you can see a video recording of the test, the configuration on which the test ran

And a step-by-step description of the Selenium commands sent:
If you are a tester seeking to improve your abilities, consider obtaining the Selenium C# 101 certification from LambdaTest as a way to demonstrate your expertise. This certification can help you to stand out and highlight your skills to potential employers or clients.
Final Thoughts
The driver.FindElement() and driver.FindElements() in Selenium C# are two of the most common commands when working on web UI automation. Here are the most important things to remember:
- The syntax in Selenium C# for finding elements is:
12driver.FindElement(By.[locator_strategy]("locator_value"));driver.FindElements(By.[locator_strategy]("locator_value")); - driver.FindElement() in Selenium C# returns the first web element found using the provided locator. If you need to select a specific element, ensure that the locator strategy will return only one element.
- driver.FindElements() in Selenium C# returns a collection of web elements.
- It’s crucial to use a good locator strategy; otherwise, you can end up with unwanted exceptions, or Selenium might try to interact with the incorrect element on the web page.
And finally, running your tests on the Selenium Grid is a good idea, especially if you want to try configurations other than your own or run tests in parallel.
Frequently Asked Questions (FAQs)
How to use findElements in Selenium C#?
To use driver.findElements in Selenium C#, you will first need to make sure that you have the Selenium C# client library installed in your project. You can do this by using the NuGet Package Manager to install Selenium.WebDriver package.
Once you have installed the Selenium C# client library, you can use the drivers.findElements in Selenium C# to search for elements on the page.
What is Driver findElement?
FindElement is a method provided by the IWebDriver interface in the Selenium C# client library. It is used to search for a single element on a webpage.
What will Driver findElements () return?
driver.findElements() in Selenium C# is a method used to find elements on a web page. It returns a list of web elements that match the criteria specified in the method’s arguments.


Author’s Profile
Andreea Draniceanu
I’m a software QA engineer based in Romania. I’ve been in the software industry for over 10 years. My current focus is UI test automation with C#, but I love exploring all QA-related areas and sharing my knowledge.
Blogs: 13
Got Questions? Drop them on LambdaTest Community. Visit now


