How To Run Your First Playwright Test On Cloud
Gary Parker
Posted On: September 20, 2022
![]() 39140 Views
39140 Views
![]() 18 Min Read
18 Min Read
One of the biggest problems I’ve faced when building a test suite is not the writing of the tests but the execution. How can I execute 100s or 1000s of tests in parallel?If I try that on my local machine, it would probably catch fire – so we need a remote environment to send these to.
Selenium Grid has been the gold standard solution for a long time, it allows you to distribute tests across multiple machines, and at present, it is fairly easy to manage. The second problem I’ve faced is where do we get these machines? Do we use the hardware we own, or do we purchase VMs from a cloud provider – both require quite a bit of maintenance and configuration.
The solution a lot of organizations end up moving towards is some form of Cloud Grid facilitating cloud testing. It’s an environment where you can send your tests and not worry about what is happening in the background. Your tests are distributed in parallel, they execute the necessary commands, and you’re given test results. It’s much more accessible for the user and requires little to no maintenance.
We will run a test suite locally on a basic Selenium Grid configuration to understand how it works and its limitations. We will then execute tests remotely on a Cloud Grid, with a higher level of parallelism – not only in test cases but also browser and operating system types.
On a global scale, users interact with a wider range of devices and platforms daily, and this ability to run automated tests at scale becomes increasingly important.
This Playwright tutorial will look at writing and running your first Playwright test on a cloud grid like LambdaTest. If you are preparing for an interview you can learn more through Playwright interview questions.
TABLE OF CONTENTS
Before we begin, I’m going to give an overview of what we are aiming to achieve in this tutorial on Playwright testing:
- Build a simple test suite
- Execute tests
- On your local machine
- On Selenium Grid
- On a Cloud Grid environment
Building a Playwright test suite
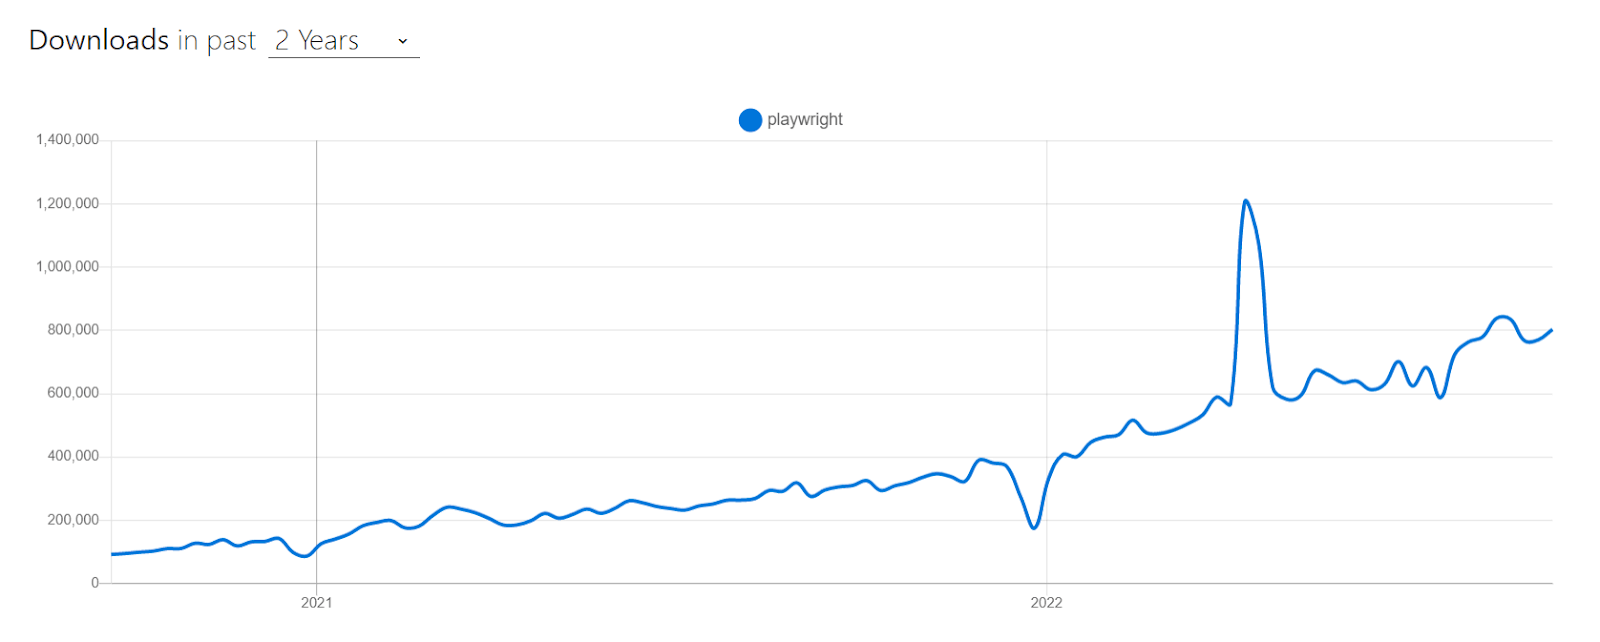
We will be using the Playwright framework to build our tests. Playwright is a relatively new framework but is growing in popularity as its powerful features continue to prove valuable for application developers. Microsoft contributes many of these features as Playwright gets regular updates and improvements. Playwright has overtaken many similar automation testing frameworks in terms of downloads due to its powerful features and overall appeal to users.
Before we get deeper into installation and setup, here are some basic prerequisites.
- Ensure you have NodeJS installed.
- Install a code editor. I will be using Visual Studio Code.
If you need to get up to speed with installation and setup, follow my earlier blog on getting started with the Playwright framework.
For this tutorial on running your first Playwright test, we will be writing tests for the LambdaTest eCommerce Playground with dummy data and content – perfect for experimenting with test automation.
Enhance your testing strategy with our detailed guide on Playwright Headless Testing. Explore further insights into Playwright’s capabilities in this guide.
Test approach for writing your first Playwright test
Before we jump into writing the tests for Playwright end to end testing, I’ll give a brief overview of the approach and end product. The test cases I’ve selected are quite common journeys, and there is a good chance you’ve written similar tests or had to consider similar scenarios, regardless of the product background.
- The first is ‘ADD TO CART,’ the site’s core functionality as a user. We should be able to select an item, add it to our cart and progress to the checkout journey. Any discrepancies in product items or selection along the way should be caught by our test.
- The second combines ‘SEARCH’ and ‘FILTERING.’ We should be able to search for a particular item or category of items and then filter the list returned. The common filtering techniques could be by most popular, lowest price, or most recently added.
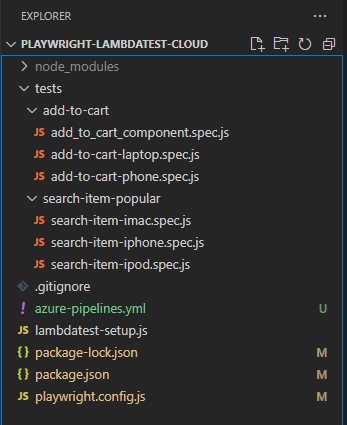
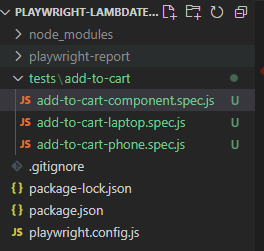
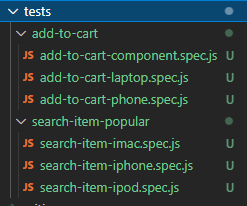
Once both tests are added, we will expand upon these user journeys by adding slight variations. This is a good technique to increase test coverage while reusing existing code – we add value to the test suite with minimal effort. The final project structure should look like this:
Watch this Playwright tutorial that covers everything you need to get you up and running with the Microsoft Playwright framework with TypeScript.
Writing your first Playwright test
This is a fairly standard user journey, I’d like to choose an item to purchase, add it to my cart, and the item should be visible when I go to checkout.
In the playwright.config.js, I’ve defined the eCommerce playground base URL, so all of our tests will start from here.
And in the lambdatest-setup.js, which is referenced in our test files, we are defining our test platform capabilities, which will be used for local and remote execution.
This is the complete test file for add-to-cart.spec.js, I’ll walk through each step and explain why we have taken this approach.
The completed test suite we will be referencing is on GitHub if you want to follow along.
There is a simple goto navigation, which extends upon our base URL. This is useful if we navigate to sub-pages within the website, as we won’t need to type the full base URL every time.
|
1 2 |
// Navigate to base url await page.goto('/') |
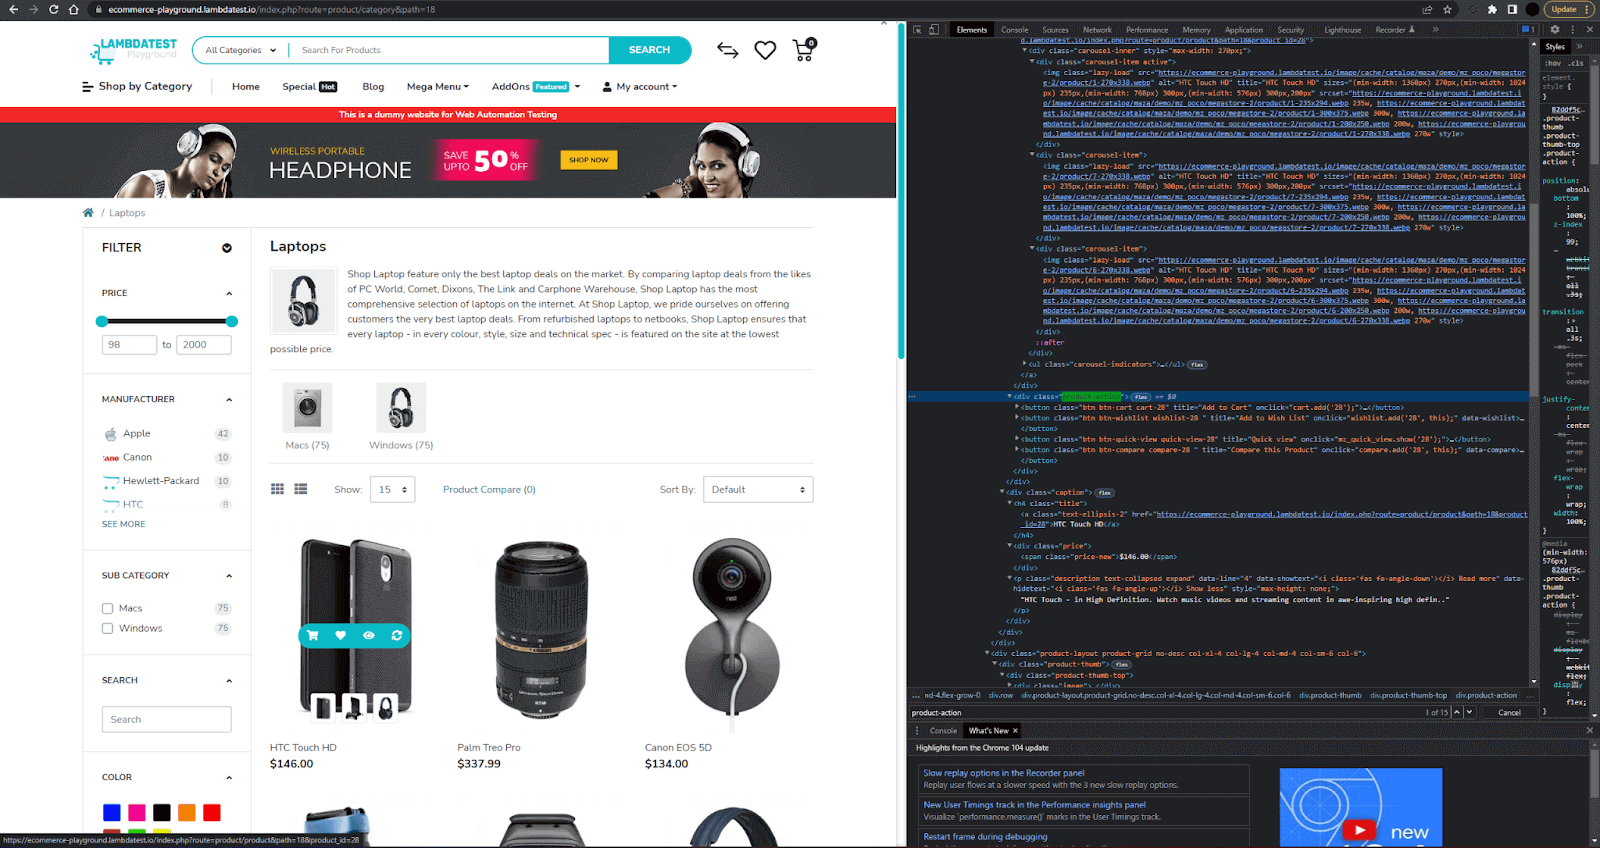
This will launch a page that looks like this.
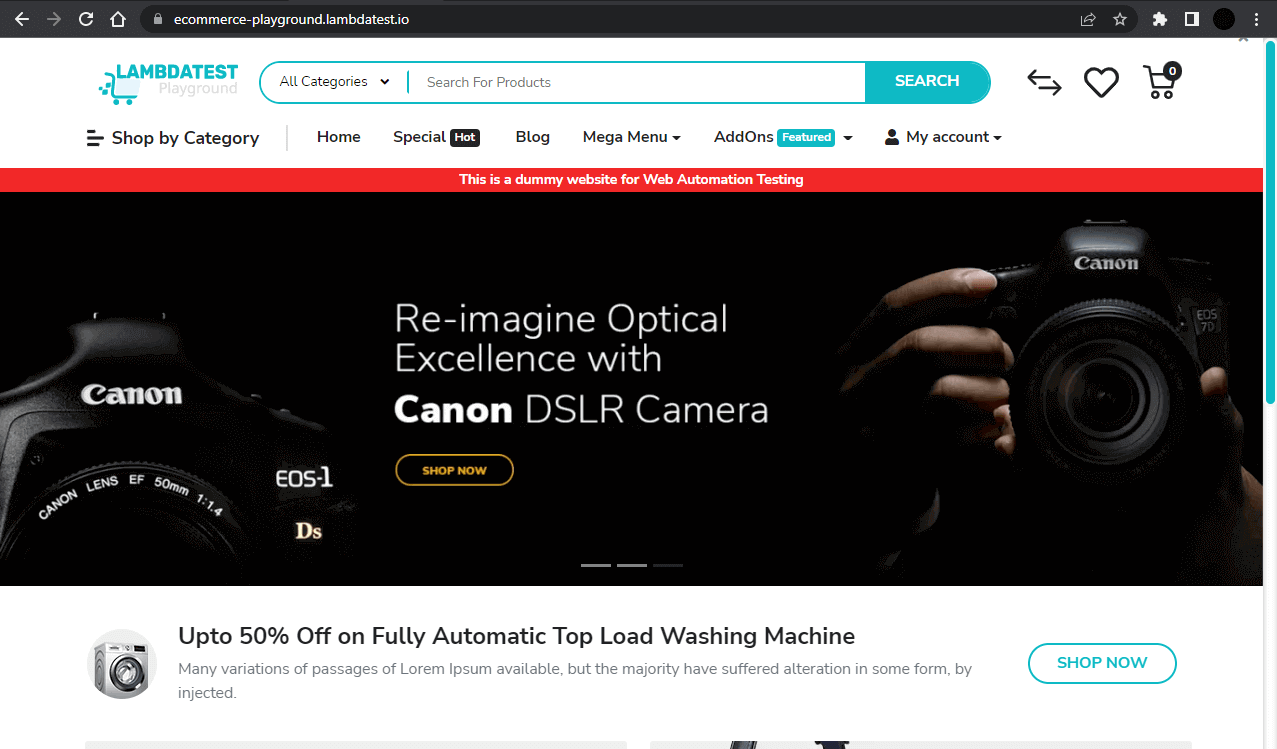
Now, there are a few different ways to browse products on the page. There is ‘Shop by Category, ’ which opens a sub-menu, the search bar at the top, the main banners, and additional product icons as we navigate further down the page.
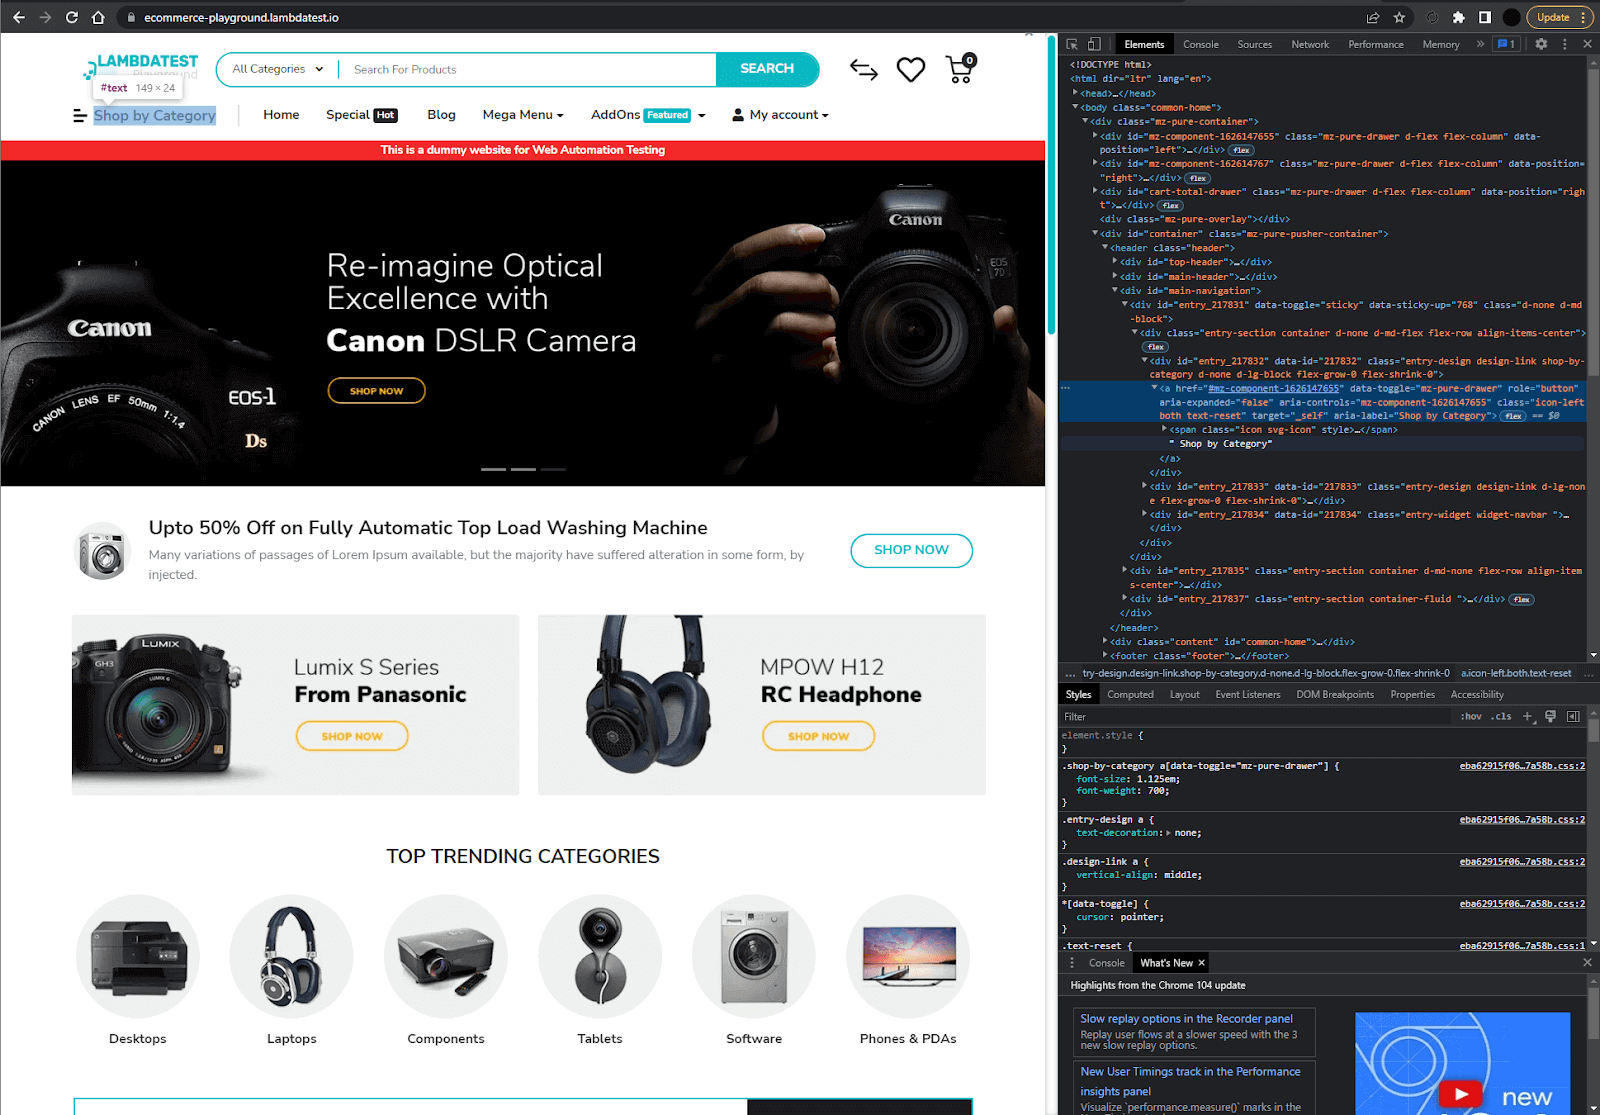
For our first Playwright test, we will use the ‘Shop by Category’ menu to find our product. Firstly we need to click the menu, so it expands. For readability, I prefer to use text as our identifier – even if there are multiple elements with the same name, it’s still fairly easy to drill down further.
Note – To find the elements, I like to use a mix of Playwright Codegen and also manually inspect the elements in DevTools when needed.
|
1 2 |
// Click Shop by Category await page.locator('text=Shop by Category').click(); |
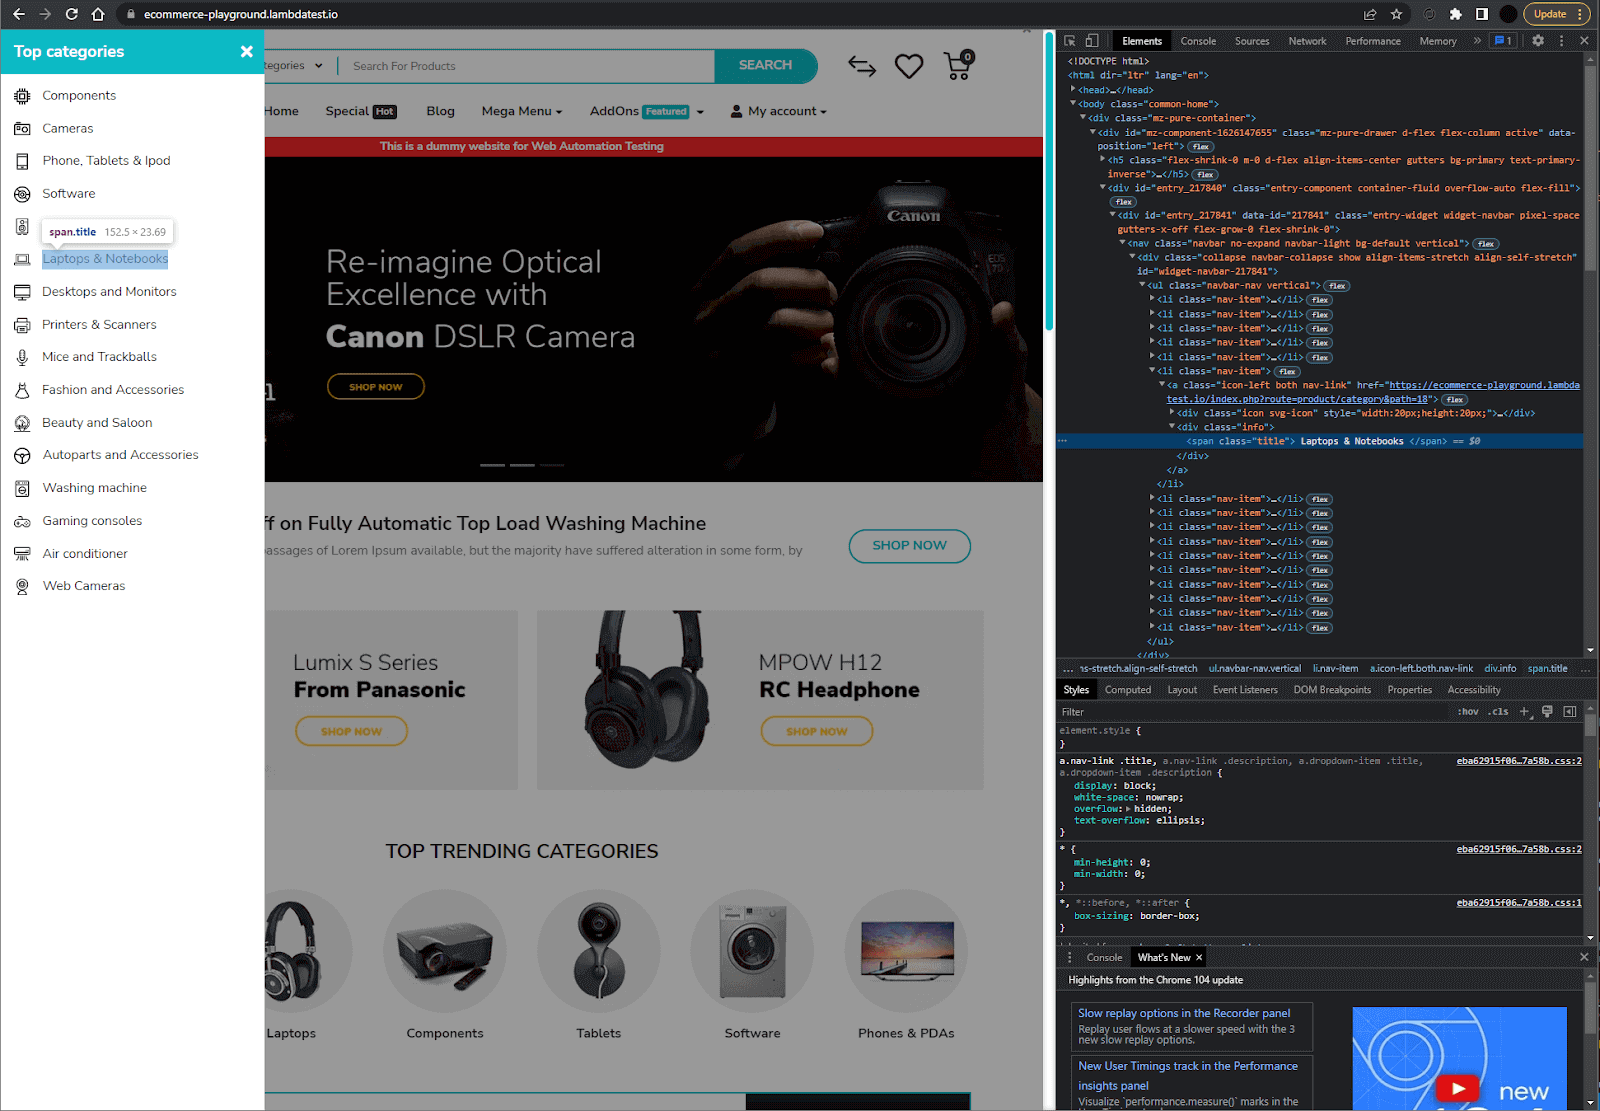
Now that we’ve expanded the menu, we have to decide which category we want to purchase an item from. I think a laptop would be good! Let’s use the same text locator strategy as before.
|
1 2 |
// Click Laptops & Notebooks await page.locator('text=Laptops & Notebooks').click(); |

Following that action, we’ve landed on the Laptops & Notebooks product page – ignore the images that are not Laptops or Notebooks. It’s just placeholder content for testing purposes.
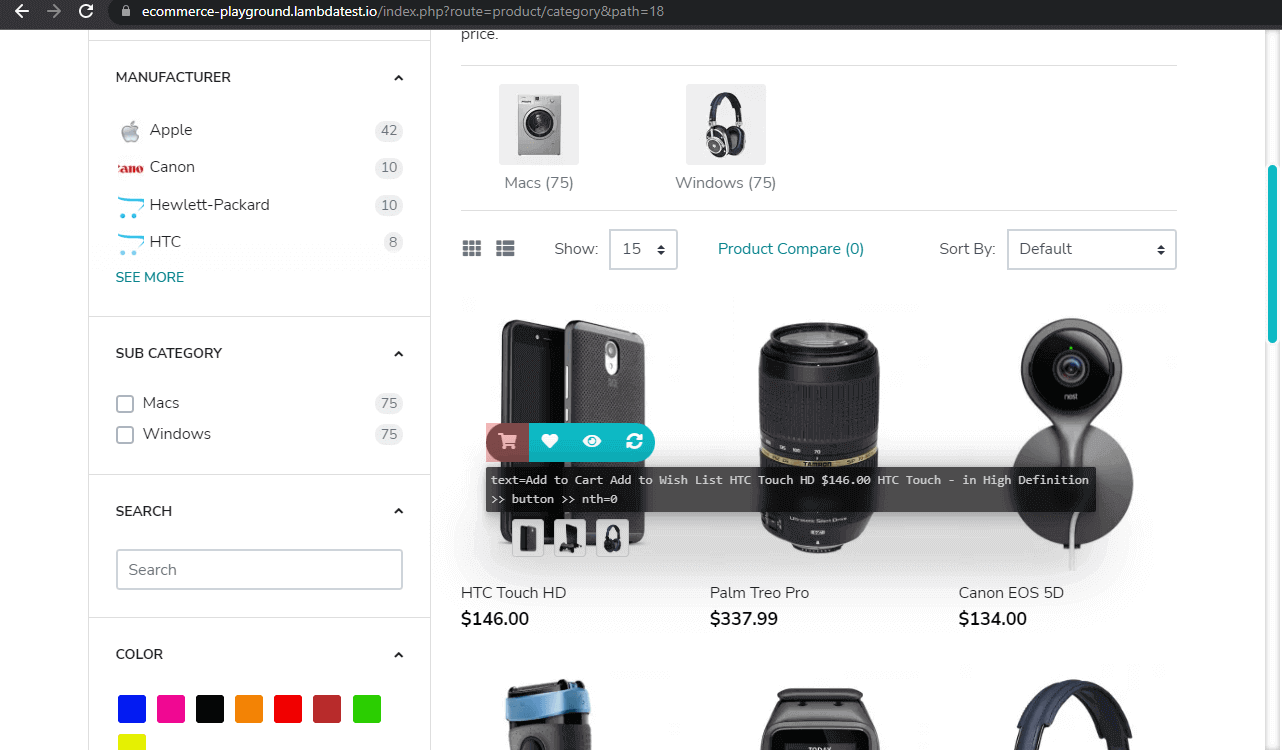
If we hover over an item in the gallery, we will notice a menu presenting a few options.

We are interested in the first option, so we will need to hover over the product and click the first icon – this will add the product to our cart.
|
1 2 3 4 5 6 7 8 |
// Hover over product await page.locator('text=Add to Cart Add to List HTC Touch HD $146.00 HTC Touch - in High Definition').hover() // Wait for element await expect(page.locator('text=Add to Cart Add to Wish List HTC Touch HD $146.00 HTC Touch - in High Definition >> button >> nth=0')).toBeVisible() // Click add to cart await page.locator('text=Add to Cart Add to Wish List HTC Touch HD $146.00 HTC Touch - in High Definition >> button').first().click() |
Hovering over the product is fairly simple. We provide the image/product locator, followed by the .hover() action. I used the text locator in this instance as it was unique.
This screenshot is taken during the Playwright Codegen recording.
For the wait to be visible and click, I had to extend the locator slightly. We used two different approaches so that you can see different solutions to the same problem.
In the wait for element step, we have added to the locator path with >> nth=0, which is getting the 0 position element, which in this case is the first of the four buttons.
In the click add to cart step, we are using almost the same locator, except this time instead of adding to the path, we are using the .first method, so click the first element of the four available.
This is a breakdown of our approach in this tutorial on running your first Playwright test:
- Identify product locator.
- Hover over the product.
- Identify the actionable element we want to select.
- Drill down into the group of elements.
- Make use of the Playwright index options and nth locator options.
Both approaches have valid applications. The second may be better for reusability if you have a list of elements – in which case you will also be able to use locator.nth(index), in addition to .first() and .last().
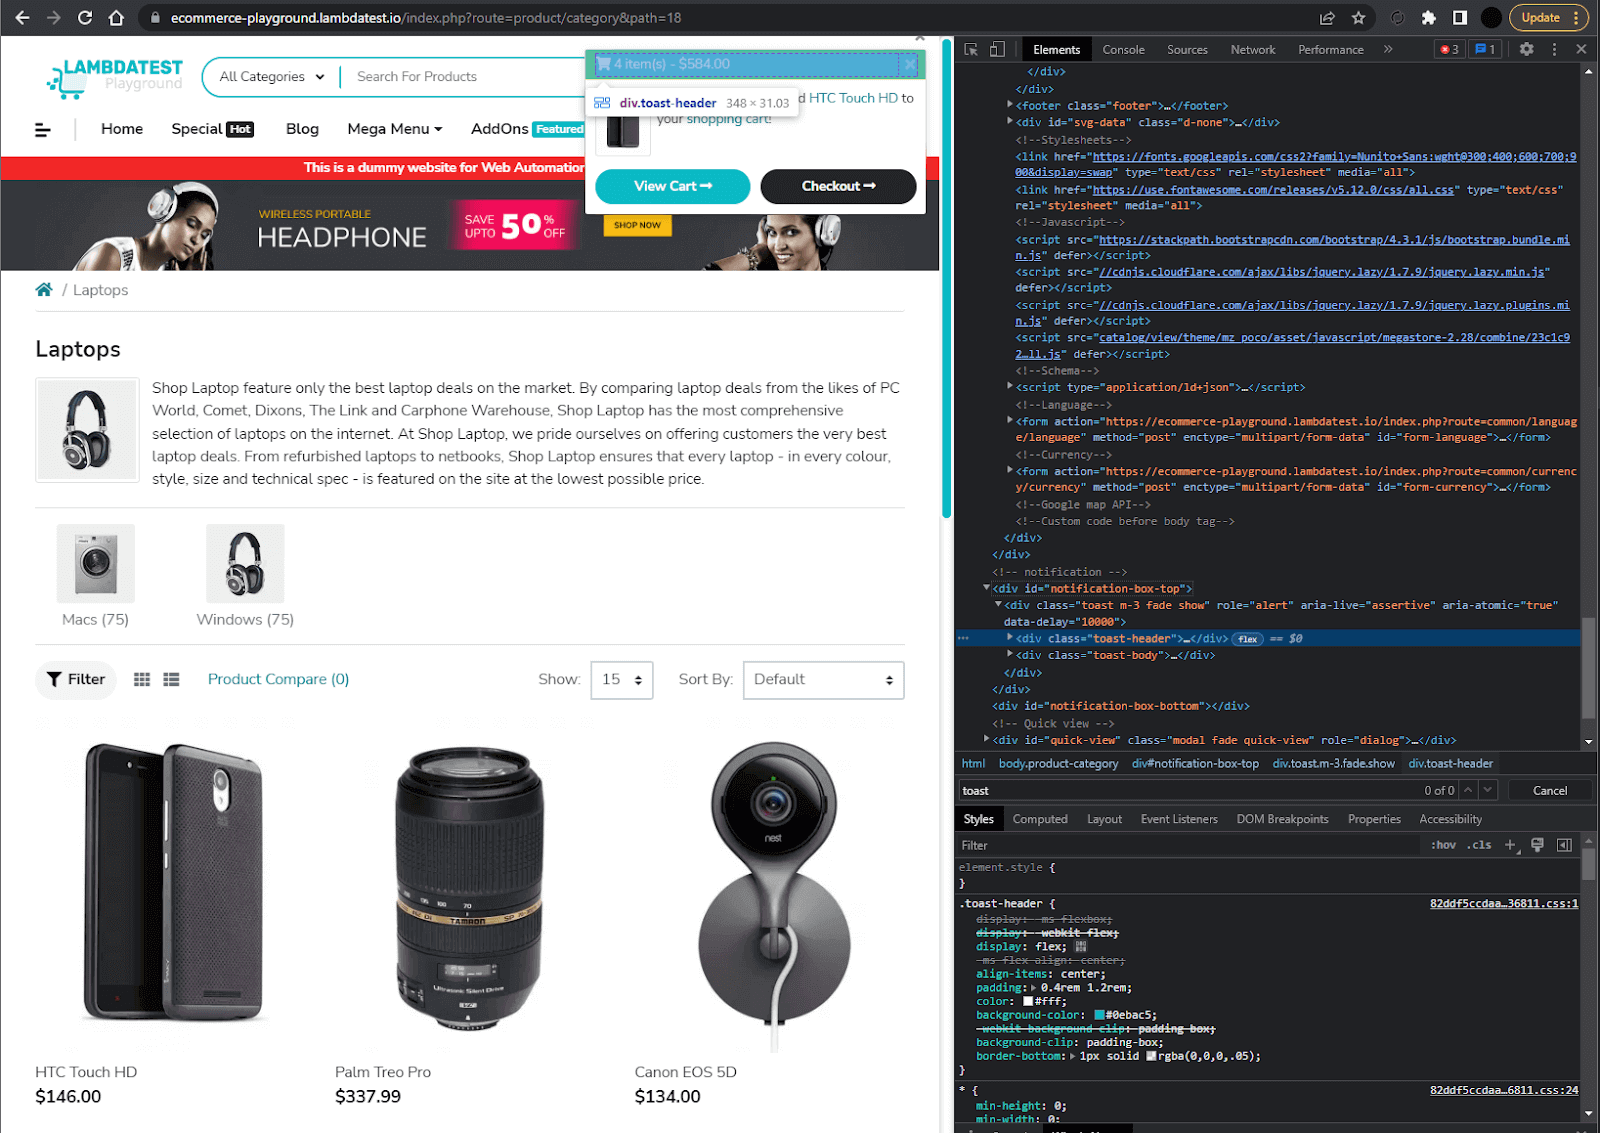
If we execute the test until this point, you should see a popup appear in the upper right corner of the screen. It presents us with two options, view cart, and checkout.

The goal of this test is just to check the product has been correctly added to the cart. So we will be clicking the button which says ‘View Cart’. In some cases, waiting for the popup to appear may also be necessary, in which case we can do something like this.
|
1 2 |
// Wait for element await expect(page.locator(‘.toast-header')).toBeVisible() |
|
1 2 |
// Click view cart await page.locator('text=View Cart').click() |
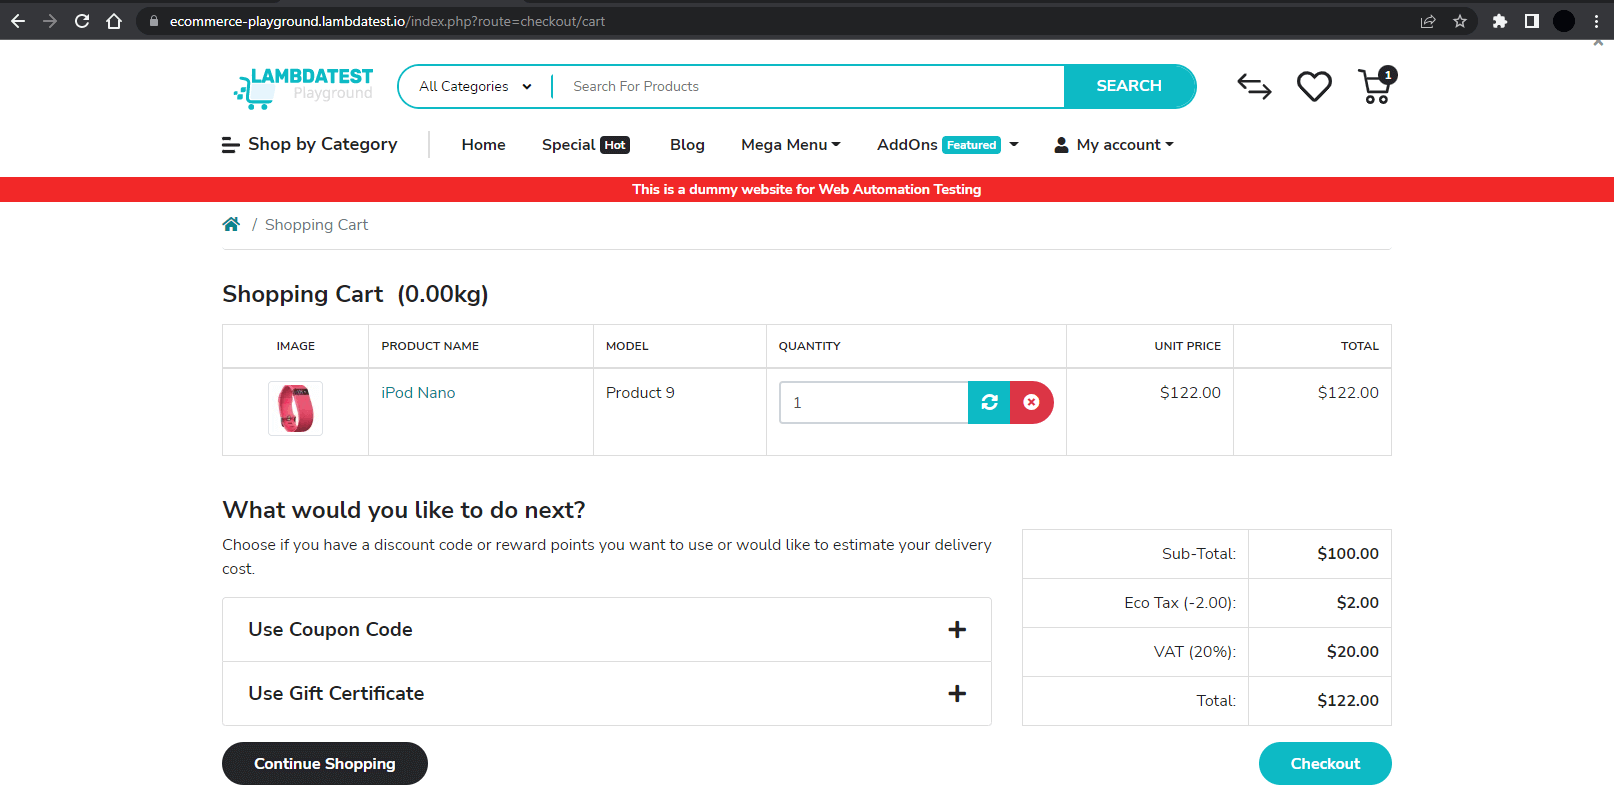
The last step of the journey is on the shopping cart page. We want to be confident that every time a user selects ‘Add to Cart’ on a product, it appears on the shopping cart page.

The product name is a good indicator that not only has an item been added to the cart, but it is also the correct product we selected earlier. So we will use a locator path that contains the product name and verify it is visible on the page.
|
1 2 |
// Assert correct product added to cart await expect(page.locator('#content >> text=HTC Touch HD')).toBeVisible() |
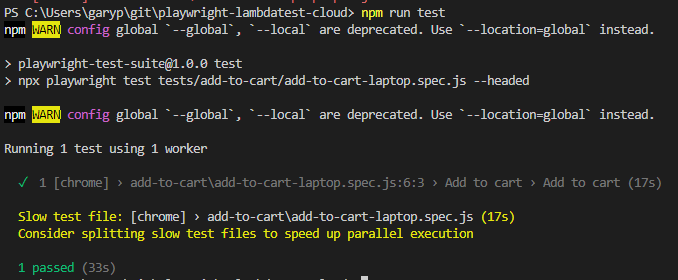
That’s it – a very simple user journey, covering a few different types of interactions and verifications with the web page. Let’s run the test!
This is the script I’m using to execute the laptop-specific test in the headed mode so we can see what is going on. In the terminal, you just need to type: npm run test.
|
1 2 3 |
"scripts": { "test": "npx playwright test tests/add-to-cart/add-to-cart-laptop.spec.js --headed" }, |
Now we have a base test to work with, we can create some variations on this – and then start to execute a larger number of tests.
Run your Playwright tests with AWS marketplace directly on the cloud.
Run Automated Playwright Tests Online. Try LambdaTest Now!
Expanding the Playwright test suite
There are many different categories and products on the eCommerce website, so we can add a few tests to expand the test coverage. These were pretty easy to create, as they were minor locator updates.
In this tutorial on running your first Playwright test, we have duplicated the files and locators for ease of use, but ideally, we should use an approach, such as the Page Object Model (POM), to maintain this. It increases reusability, minimizes code duplication, and makes general maintenance much easier.
Here’s an example of the added code and the spec file.
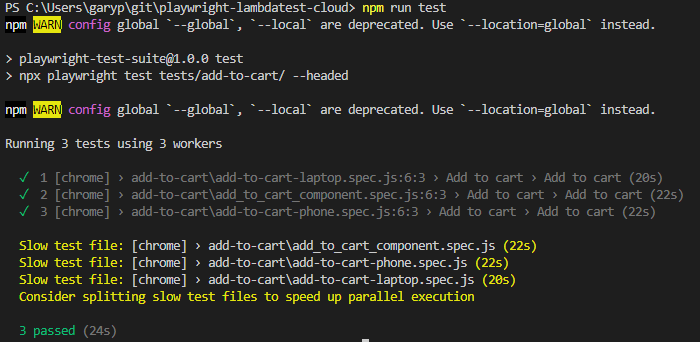
We can execute these Playwright tests locally and still see fairly fast execution times. I’ve modified our npm run test script to include the whole Playwright test folder:
|
1 2 3 |
"scripts": { "test": "npx playwright test tests/add-to-cart/ --headed" }, |
There are many elements to interact with on the website, so let’s add a test to search for an item, filter by the most popular items returned, and add the most popular ones to our cart. There is some code we will reuse, and in the future, it would be good to create page objects or helper classes instead of copying/pasting our code.
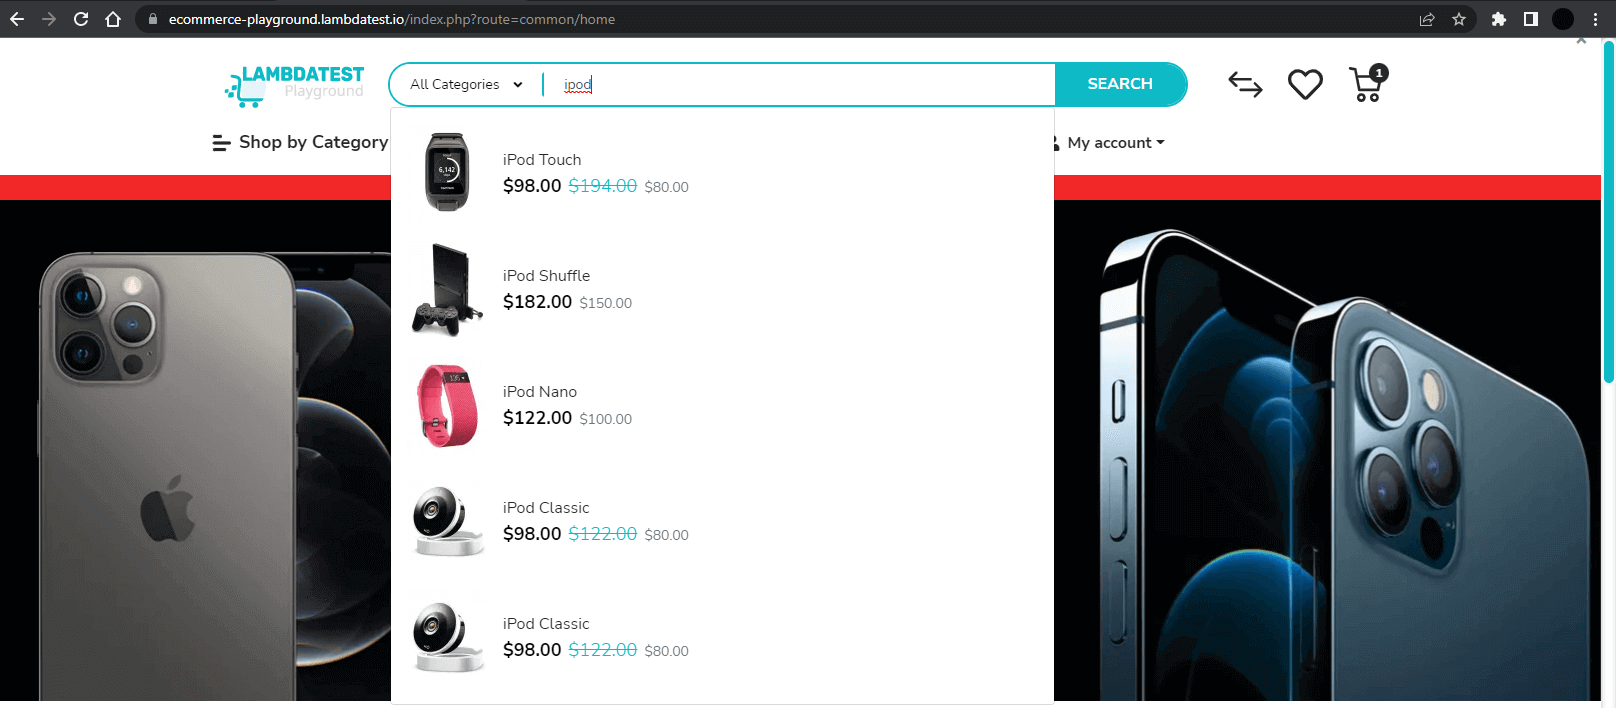
I’ve used the placeholder text locator for that field, and we are filling it with the text ‘ipod’. We are then clicking the search button to return our results.
|
1 2 |
// Fill [placeholder="Search For Products"] await page.locator('[placeholder="Search For Products"]').first().fill('ipod'); |
|
1 2 |
// Click text=Search await page.locator('text=Search').click() |
We need to select ‘Popular’ from the ‘Sort by’ dropdown on the search results page. We can do that by text or index. For this example, I’ve used the index of the dropdown item we are looking for.
|
1 2 |
// Click sort by 'Popular' await page.locator('#input-sort-212464').selectOption({index: 2}) |
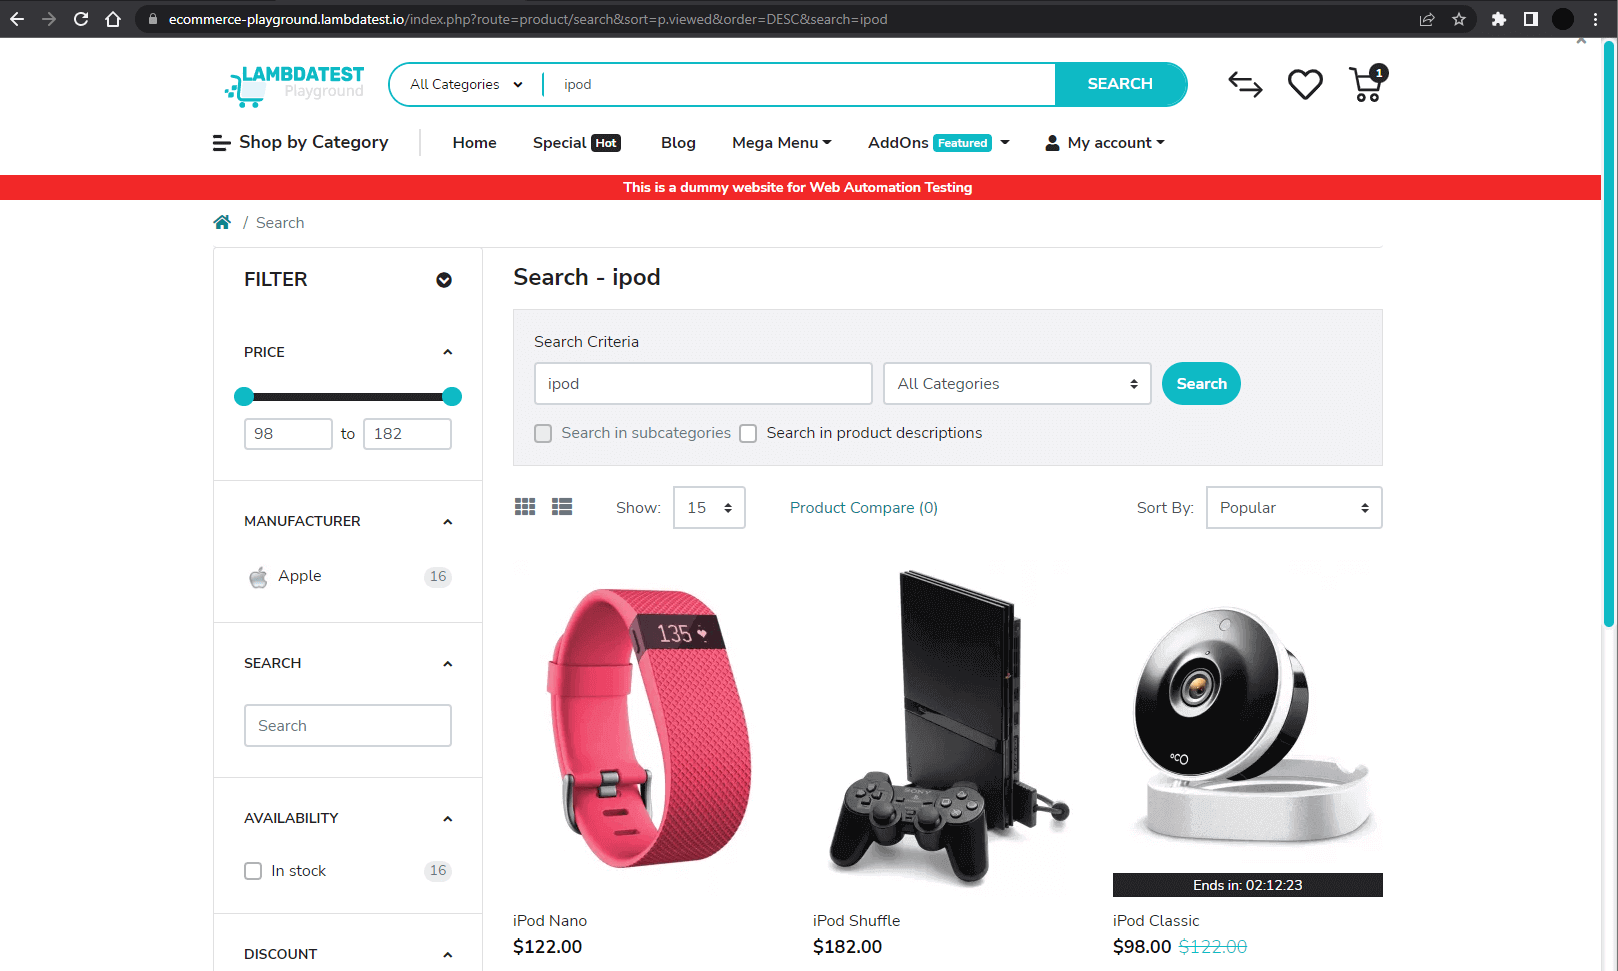
This will reorder the items for us, and all we need to do is select the first product returned to the list and add it to our cart.
|
1 2 3 4 5 |
// Wait for element await expect(page.locator('.product-action > button').first()).toBeVisible() // Click add to cart await page.locator('.product-action > button').first().click() |
Done! Nice, so now we have a new test from which we can create iterations. In total, I’ve created 6 tests. Let’s run them in parallel and see how they perform.
When running 6 tests, I started to see intermittent failures, despite adding waits and timeouts – this is where we start approaching the limits of a single machine for test execution and need to look towards a distributed solution.

If you’ve worked with automation in any form, I’m sure you’ve seen a similar diagram.
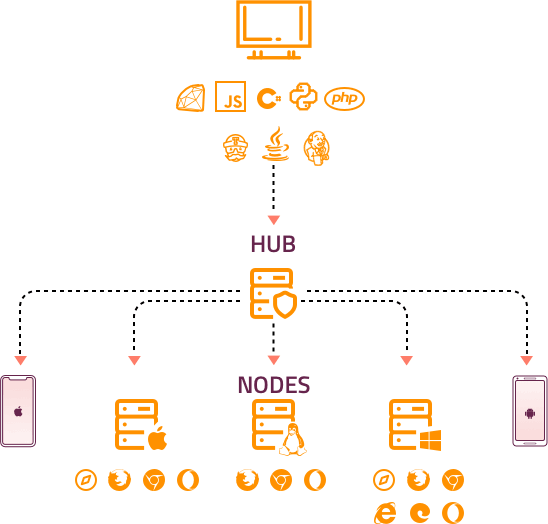
This is the basic premise of Selenium Grid – we send tests from our ‘client’ machine to our ‘hub’, and the ‘hub’ distributes the tests out to our ‘nodes.’ In this example if we had a suite of 9 tests, and each node had 3 Chrome instances available, we would see 3 tests executed on each node in parallel.
We will set Selenium Grid up on our local machine – it’s not following the intended architecture of Selenium Grid, as we won’t be creating separate VMs for our nodes. Still, it should give you an understanding of how it works and its benefits.
Setup:
- Download Java (you may need to set the environment variable path).
- Download Selenium Server (Grid).
- Download the latest stable Chromedriver version.
- Download the latest stable Geckodriver version.
- Set the PATH environment variable for both drivers (folder location).
Playwright test execution
Run the following command from your download location for Selenium Server (Grid). The version number may need to be changed if a newer version has been released.
|
1 |
java -jar selenium-server-4.3.0.jar standalone |
In the terminal, you should see the following:

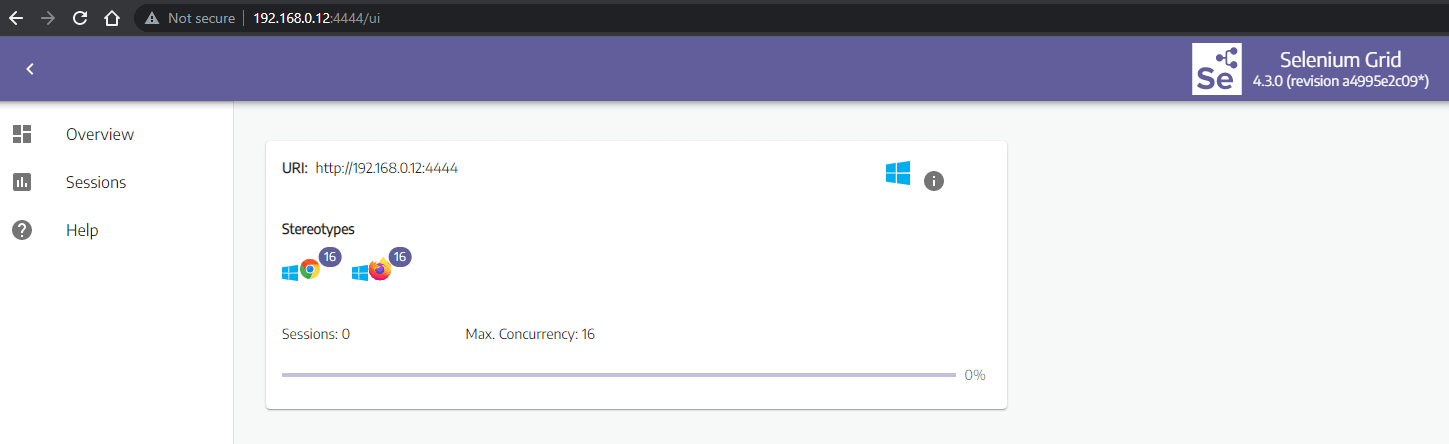
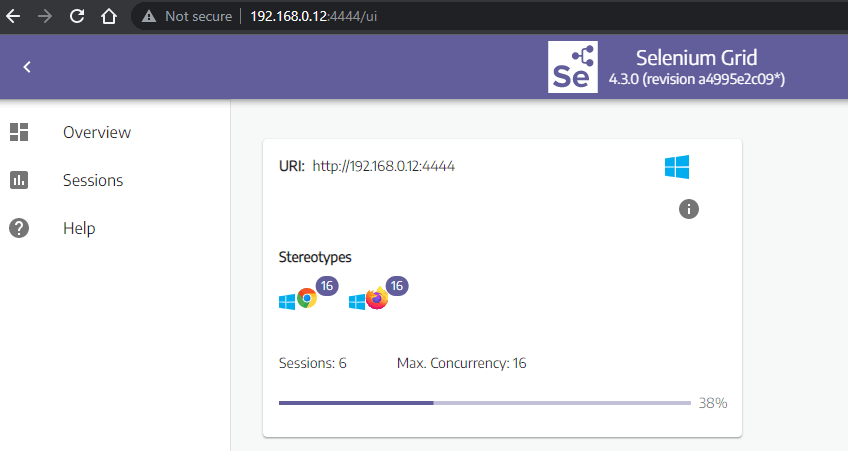
It has detected 16 available processors and 2 drivers, and as a result, has created 16 instances of Chrome and Firefox. The grid has been started at http://localhost:4444/. If we navigate that URL, we should see the following:
Now, we can send some tests to the grid. If we open a Git bash terminal and run the following command (replace the localhost value):
|
1 |
SELENIUM_REMOTE_URL=http://localhost:4444/wd/hub npx playwright test |
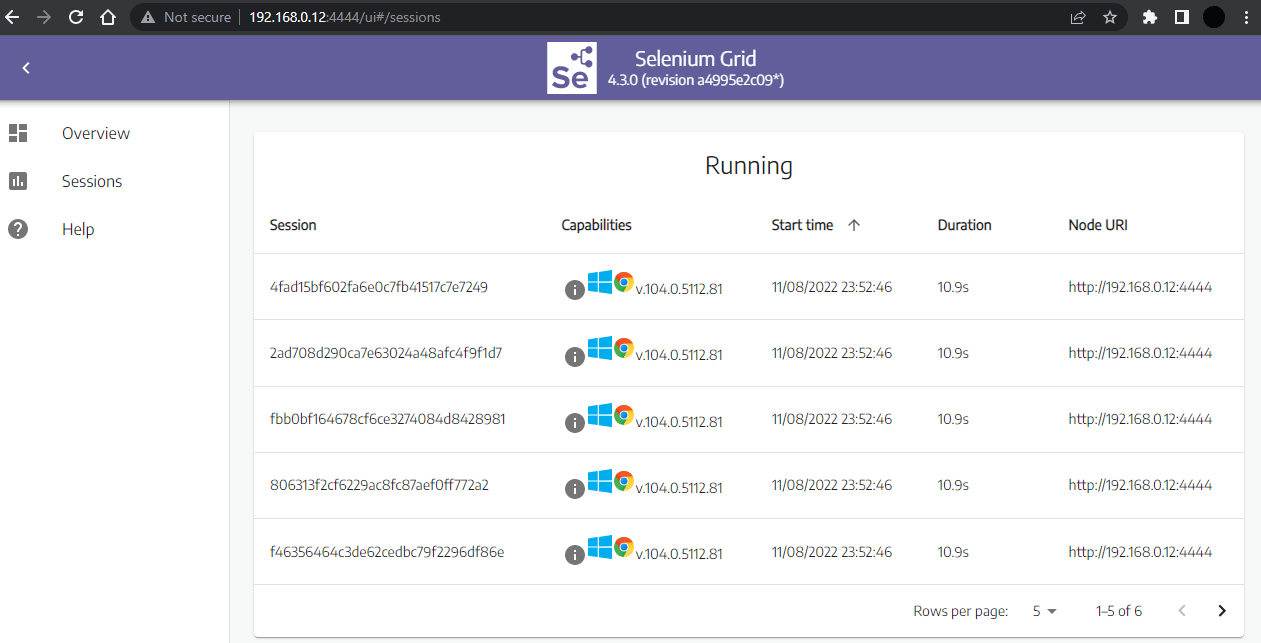
Playwright will execute its tests on the Selenium Grid remote URL, and we should be able to see 6 sessions actively running.

That’s basically all we need to know about how to run tests on Selenium Grid at a basic level – the more involved setups involve multiple VMs, and there are many useful Docker images/compose file templates that can be used to spin up the grid environment.
Once we start scaling out, we can run larger amounts of tests concurrently and at a faster speed – limited only by hardware costs and management.
Running your first Playwright test on cloud grid
Now to take our test suite and run it on a larger scale – more platforms and more browsers. We will be using the LambdaTest Cloud Grid for these examples, so you’ll need a few things configured before we begin.
Cloud testing platforms like LambdaTest help you perform cross browser testing at scale. It offers an online browser farm of 50+ browsers and browser versions of Chrome, Chromium, Microsoft Edge, Mozilla Firefox, and even Webkit to run your first Playwright script.
Subscribe to the LambdaTest YouTube Channel, stay updated with the latest playwright tutorial, and discover tutorials around topics like automated browser testing, Cypress E2E testing, mobile app testing, and more.
Prerequisites to run your first Playwright test on cloud
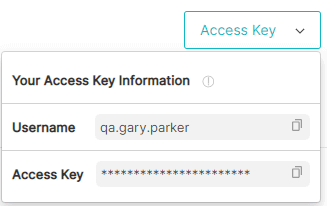
We will use a new configuration file that references LT_USERNAME AND LT_ACCESS_KEY environment variables.
|
1 2 |
'user': process.env.LT_USERNAME, 'accessKey': process.env.LT_ACCESS_KEY |
You can find this information under Dashboard, Automation, or User settings. Copy the values and set them as your local machines environment variables.
Playwright test configuration on cloud
In our playwright.config.js, we have now set a few new projects:
There is logic in the lambdatest-setup.js file, which runs our tests based on the following format: browserName:browserVersion:platform (separate by colons). You can edit and change these values or add new configurations if needed. You can also modify the viewport size and device emulation values.
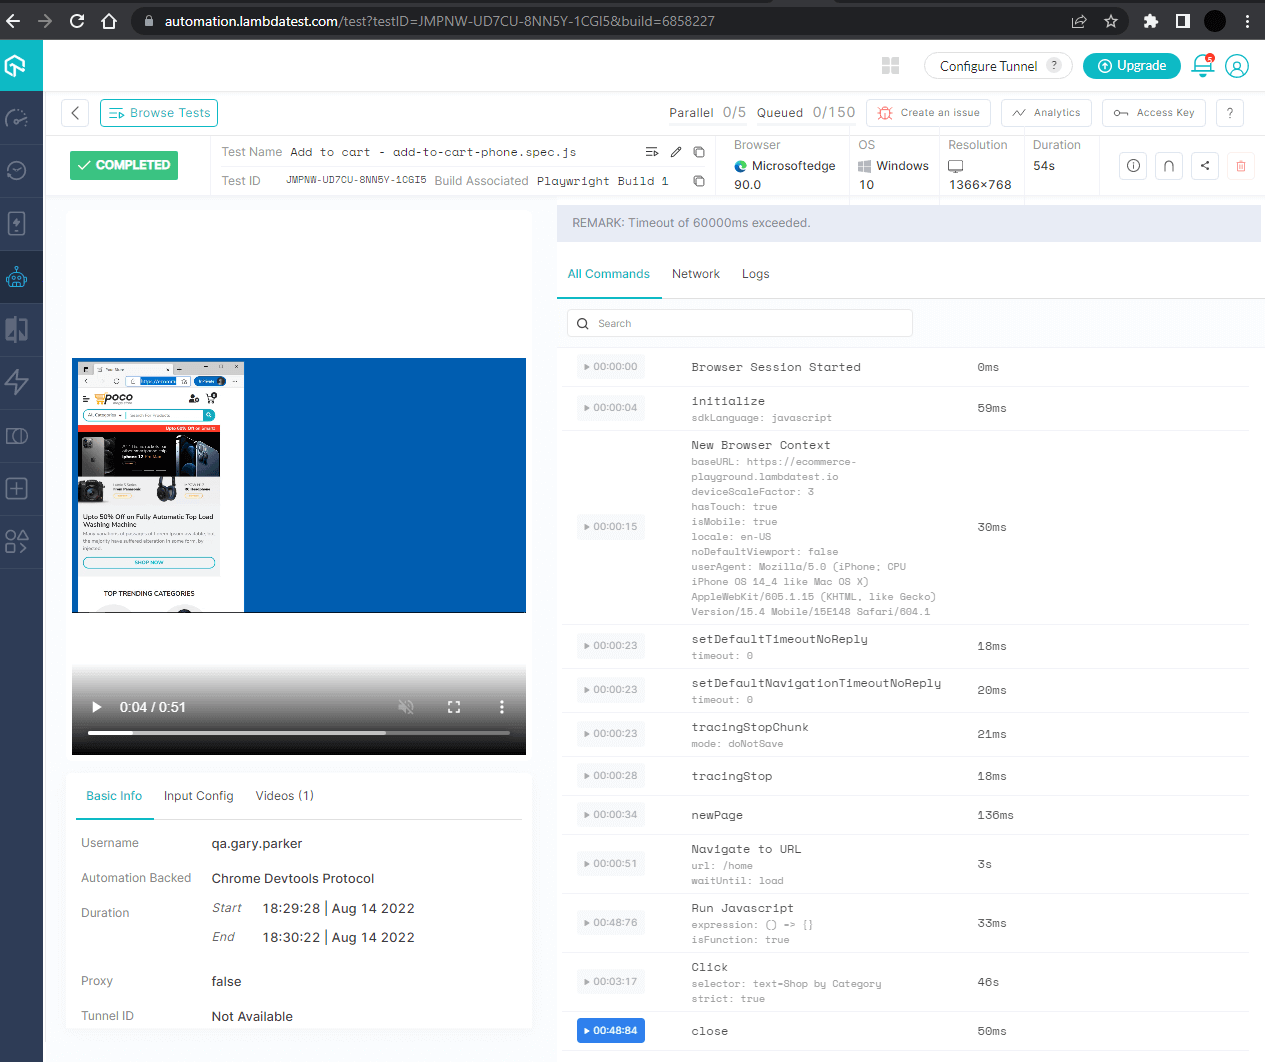
Playwright test execution on cloud
With the variables and project configurations in place, we are ready to run the tests. Run the npm run test, and you should see tests executing in the terminal.
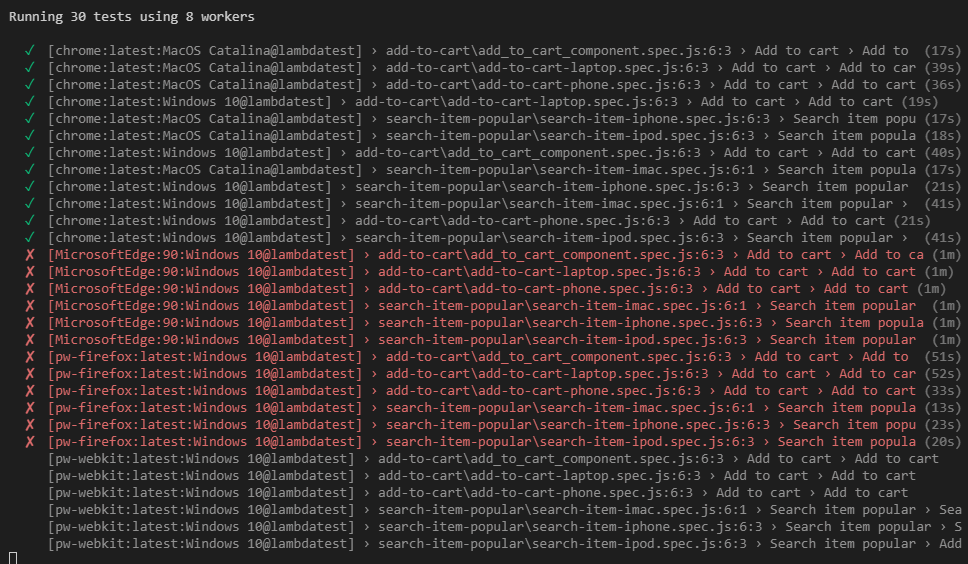
You should see 30 tests running this time, as our 6 tests are run against 5 different configurations. Some tests are passing across our chrome set up, which we would expect as this is what we tested against locally earlier on. But you’ll also notice a lot of red – as platforms we haven’t tested give unexpected results.
Discover the process of running tests on the LambdaTest cloud platform in this video tutorial.
This is good news – our tests have caught an issue with our website or our code. After looking into the test results and logs, one of the issues becomes very clear. We are testing against a mobile view, where the layout and elements have changed – for example, we no longer have the main menu bar, which has collapsed to a hamburger menu.
For the short term, we can change the viewport to match the others – so we still have desktop coverage against the Microsoft Edge platform. In the long term, we would need to rewrite the test logic to accommodate the mobile view or create a separate suite of tests for that platform.
The last issue we have is with WebKit – initially, we had it running on Windows, so I tried on macOS to see if there were compatibility issues, but the issue occurred on both. The tests could not hover over the products and click add to cart. This is potentially a genuine issue, and for this scenario, we would manually test the website on that platform and try to debug the issue.

Let’s look at our local setup and how it compares to the Cloud Grid.
Local Grid – 6 tests run on Chrome Windows – with the potential to run Firefox, Edge, and WebKit. Additional configuration is required to scale and increase platform coverage.
Cloud Grid – 30 tests run on Windows and Mac platforms across Chrome, Firefox, Edge, and WebKit. Not only do we have an incredible amount of test coverage out of the box, but the configuration was minimal, and the maintenance is zero – we just have to worry about building and increasing the test suite coverage.
Conclusion
It’s no longer good enough to run manual and automated tests on a single most popular configuration, i.e., Chrome with Windows or Safari with Mac. We need to be able to run a large number of tests, quickly and at scale, across a matrix of browsers, platforms, and resolutions.
With a Cloud Grid platform, a lot of the complexity is taken away from the user, so they can focus on what matters – writing robust and effective automated tests.
Frequently Asked Questions (FAQs)
What is Playwright for testing?
Playwright provides a single API for executing Web Tests and Automation. Playwright is an ever-green testing framework that allows you to test your website in any major browser on all platforms.
Is Playwright better than selenium?
Selenium has been around since the start of the web and is used by many large companies to test their applications. Playwright is relatively new but supports all major browsers and provides a simple, easy-to-use interface.


Author’s Profile
Gary Parker
Currently working as a Senior QA Architect, responsible for QA Architecture, tooling, frameworks and processes. Specializing in front-end web and mobile technologies. With almost 10 years of experience in the QA industry across many different domains, products, and environments. I enjoy writing technical blogs as a way to keep myself up-to-date with the industry and ensure a deeper understanding of the topics at hand.
Blogs: 2
Got Questions? Drop them on LambdaTest Community. Visit now