Selenium MSTest Tutorial: Setup Selenium WebDriver For MSTest Framework In C#
Himanshu Sheth
Posted On: March 14, 2021
9 Min


In the on-going ‘Selenium MSTest testing tutorial’ series, we earlier had a look at setting up the MSTest framework in Visual Studio. It was a getting started guide with a major focus on the installation of the Selenium MSTest framework and MSTest adapter for the project. In case you are starting up with the MSTest framework, we recommend that you check out the installation guide on MSTest Tutorial: Environment Setup For Selenium Testing.
In this Selenium MSTest testing tutorial, we take a look at setting up Selenium WebDriver with Visual Studio in C#. Before we install the Selenium WebDriver, we create a new project in C#.
Starting your journey with Selenium WebDriver? Check out this step-by-step guide to perform Automation testing using Selenium WebDriver Tutorial. If you’re looking to improve your Selenium interview skills, check out our curated list of Selenium interview questions and answers.
Overview
Using Selenium WebDriver with MSTest in C# helps you automate web testing inside a .NET environment. MSTest provides structure, reporting, and test management, while Selenium handles browser interactions.
How to Create C# Project for Selenium Automation?
Before setting up Selenium WebDriver, you first need to create a C# project using Visual Studio. This setup ensures a structured environment for writing and executing automated browser tests with MSTest.
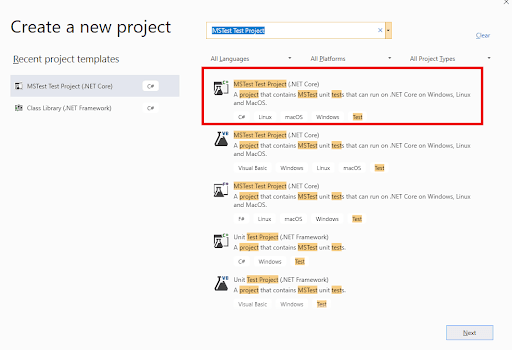
- Create a New Project: Open Visual Studio and create a new project by selecting MSTest Test Project (.NET Core) from the available templates.
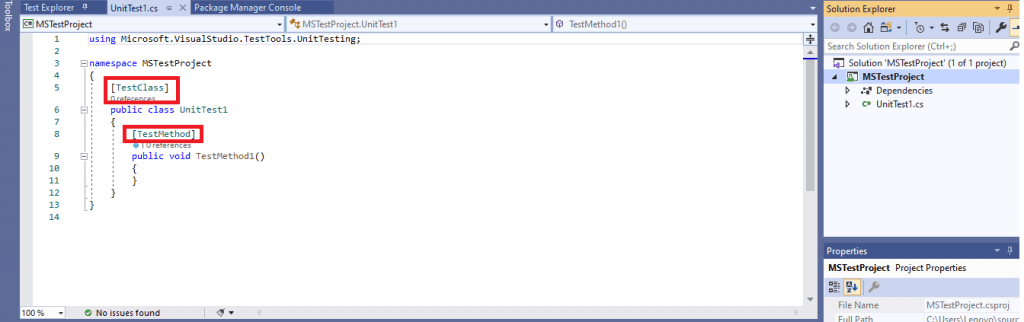
- Default MSTest Structure: The created project includes a default class with [TestClass] and [TestMethod] attributes, which define test classes and methods for execution.
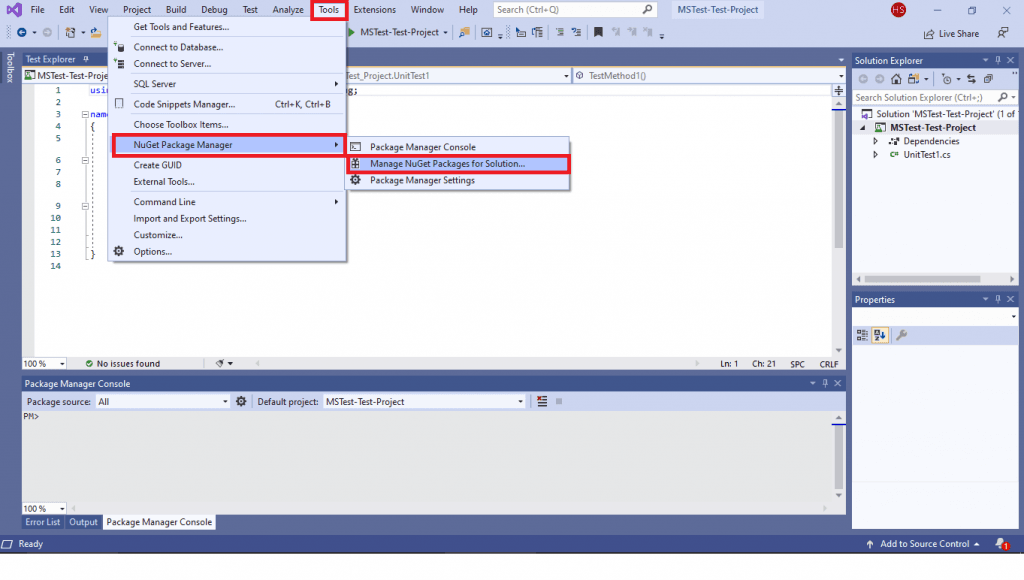
- Install Selenium WebDriver: Selenium WebDriver is required to run browser automation tests and can be installed using NuGet Package Manager in Visual Studio.
- Using Visual Studio IDE: Navigate to Tools → NuGet Package Manager → Manage NuGet Packages for Solution and search for “Selenium.” Select Selenium.WebDriver and click Install.
- Install ChromeDriver: For Chrome-based automation, install Selenium.WebDriver.ChromeDriver from NuGet to enable communication with the Chrome browser.
- Verify Installation: Add the following namespaces to confirm installation – using OpenQA.Selenium; and using OpenQA.Selenium.Chrome; – and ensure no compilation errors appear.
- Sample Test Class: The default UnitTest1 class contains a placeholder test method. You can replace it with your Selenium automation logic later.
- Using PM Console: Alternatively, install Selenium packages through the command line by running Install-Package Selenium.WebDriver in the Package Manager Console.
- Add Chrome Driver via Console: Use the command Install-Package Selenium.Chrome.WebDriver to install ChromeDriver if you’re using Chrome for automation testing.
- Verify Packages: Run Get-Package in the console to list installed dependencies and confirm that Selenium.WebDriver and Selenium.Chrome.WebDriver are properly configured.
How to Download Selenium WebDriver in Visual Studio?
Before executing your first Selenium script in MSTest, you need to set up Selenium WebDriver. It can be installed easily through NuGet, the official package manager for Microsoft platforms.
- Using Visual Studio IDE: Open Visual Studio and navigate to Tools → NuGet Package Manager → Manage NuGet Packages for Solution to begin installation.
- Search Selenium Package: In the search bar, type “Selenium” and select Selenium.WebDriver from the list of available packages.
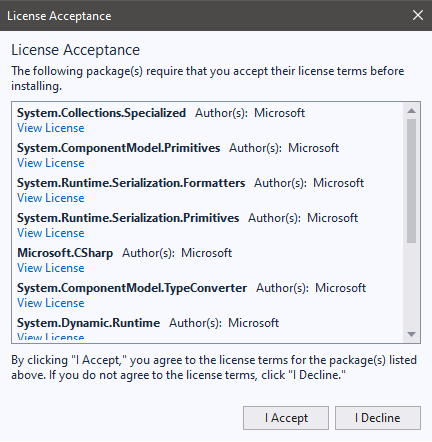
- Install Selenium WebDriver: Click the Install button and accept the license terms when prompted to complete the setup.
- Install ChromeDriver: For browser automation, search and install Selenium.WebDriver.ChromeDriver to enable Chrome testing within your project.
- Verify Installation: Add the following namespaces in your C# class – using OpenQA.Selenium; and using OpenQA.Selenium.Chrome; – to confirm that the libraries are available.
- Sample Test Structure: The default MSTest project contains a UnitTest1 class with [TestMethod] and [TestClass] attributes. You can add Selenium code here for testing.
- Using PM Console: If you prefer command-line installation, go to Tools → NuGet Package Manager → Package Manager Console in Visual Studio.
- Install via Command: Run the command Install-Package Selenium.WebDriver to download and install Selenium WebDriver from NuGet.
- Add ChromeDriver: Execute Install-Package Selenium.Chrome.WebDriver in the console to install the ChromeDriver package for Chrome-based testing.
- Verify Packages: To confirm successful installation, run Get-Package in the Package Manager Console and check for Selenium.WebDriver and Selenium.Chrome.WebDriver entries.
Creating a New Project in C#
Before installing Selenium WebDriver, we create a new project in C# by following the below-mentioned steps:
- 1. Open Visual Studio and create a new project of the type ‘MSTest Test Project (.Net Core).’
- As the created project is of type MSTest Test Project (.Net Core), the default C# class comes along with the attributes [TestMethod] and [TestClass] in it.
Steps to Download Selenium WebDriver
Before running your first script in MSTest, you need to download and set up Selenium WebDriver.
Selenium WebDriver on Visual Studio can be installed using NuGet, a free and open-source package manager that is specifically designed for the Microsoft Platform.
There are two options for installing Selenium WebDriver – using the Visual Studio IDE and using the NuGet Package Manager (PM) Commands.
Using Visual Studio IDE
For installing Selenium WebDriver using the VS IDE, please perform the following steps:
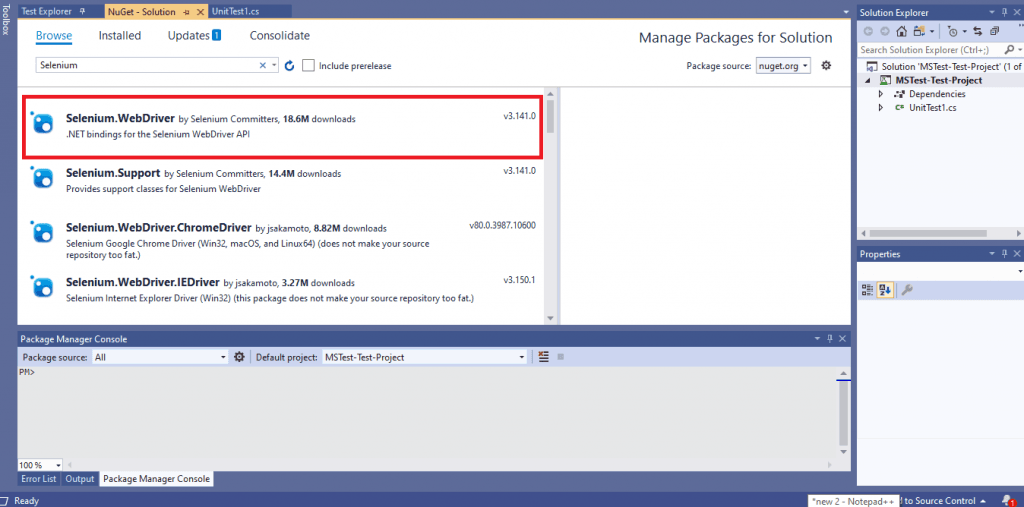
- Navigate to Tools -> NuGet Package Manager -> Manager NuGet Packages for Solution and search for ‘Selenium.’
- Select Selenium.WebDriver from the search list and click on the Install button.
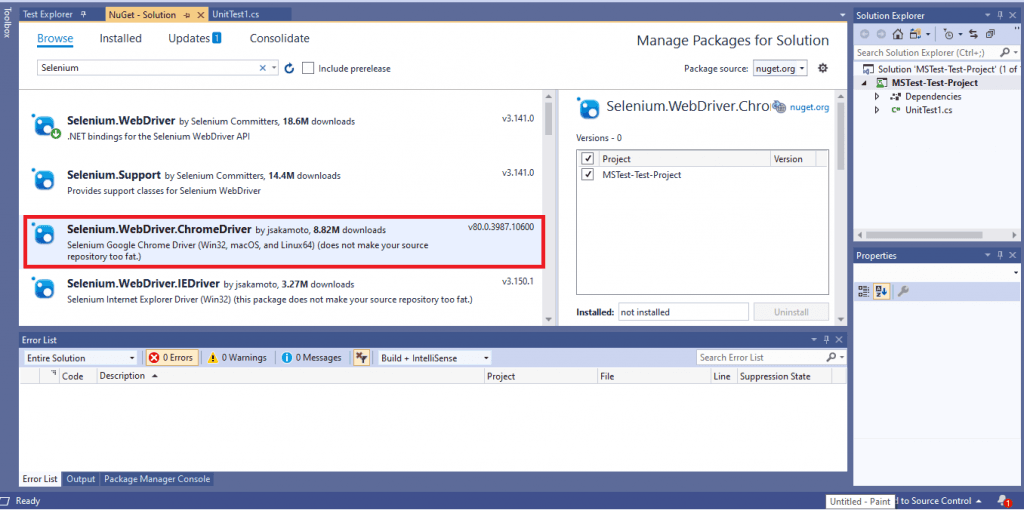
- For automated browser testing, we make use of the Chrome web browser. Hence, we install the Selenium Chrome Driver. Select Selenium.WebDriver.ChromeDriver from the search list and click on the Install button.
- Now that the Selenium WebDriver installation is complete, you can use the package in the source code. Including the following statements in the source code to verify whether the Selenium WebDriver is installed or not.
|
1 2 3 4 5 6 7 8 9 10 11 12 13 14 15 |
using Microsoft.VisualStudio.TestTools.UnitTesting; using OpenQA.Selenium; using OpenQA.Selenium.Chrome; namespace MSTest_Test_Project { [TestClass] public class UnitTest1 { [TestMethod] public void TestMethod1() { } } } |
Using Package Manager (PM) Commands
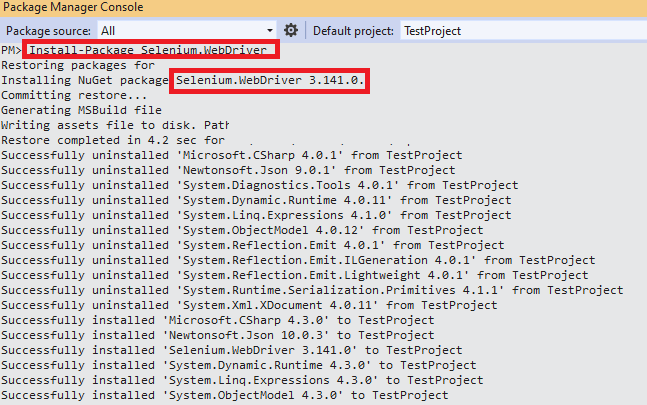
If you are more comfortable with the command-line terminal, Selenium WebDriver can also be installed by executing the relevant commands on the Package Manager (PM) console.
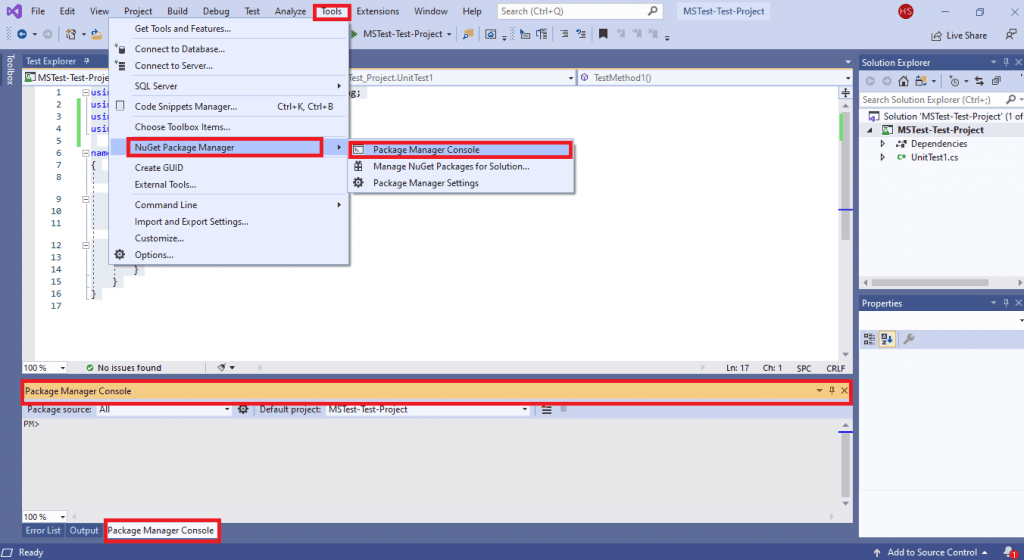
- In order to execute commands from the PM console, navigate to Tools -> NuGet Package Manager -> Package Manager Console.
- The following commands have to be executed on the Package Manager (PM) console:
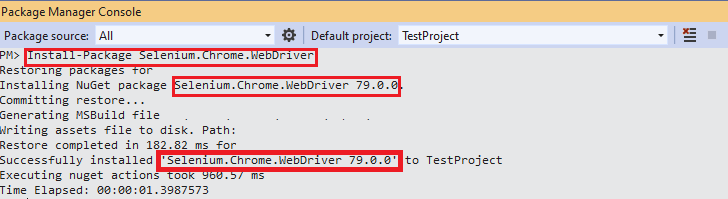
- As the Chrome browser is used for testing, we install the Selenium Chrome Driver as we did in the earlier case.
|
1 |
Install-Package Selenium.WebDriver |
|
1 |
Install-Package Selenium.Chrome.WebDriver |
Read: Most Complete MSTest Framework Tutorial Using .Net Core.
Shown below is the snapshot of the Package Manager Console:
To verify whether the necessary packages are installed, execute the Get-Package command on the PM console.
|
1 2 3 4 5 6 7 8 |
PM> Get-Package Id Versions -- -------- Selenium.WebDriver {3.141.0} Selenium.Chrome.WebDriver {79.0.0} ...... ...... ...... ...... |
This MSTest Tutorial for beginners and professionals will help you learn how to use MSTest framework with Selenium C# for performing Selenium automation testing.
Conclusion

With this Selenium MSTest setup example, we had a look at setting up Selenium WebDriver for automated testing with MSTest and C#. The steps mentioned in this Selenium C# tutorial are essential to get started with automation testing with Selenium and C#. With the completion of the Selenium MSTest framework & Selenium installation, you are all set to perform cross browser testing or automated browser testing with MSTest, Selenium, and C# ☺.
Frequently Asked Questions
What is SpecFlow Selenium?
SpecFlow is a BDD tool that helps automate acceptance tests, exploit the full power of .NET, and help improve your development process. It’s an interactive testing framework for .NET and C
Which is better: NUnit or MSTest?
MsTest is similar to NUnit which is another unit testing framework with a focus on simplicity. The difference between the two lies in how they execute tests. In MSTest, tests are executed in parallel whereas in NUnit the test runner will wait for all tests to finish before moving on to the next test. This causes a delay when executing more than one test. Hence, MSTest offers advantages in speed and robustness when compared to NUnit.
Author
Himanshu Sheth is the Director of Marketing (Technical Content) at LambdaTest, with over 8 years of hands-on experience in Selenium, Cypress, and other test automation frameworks. He has authored more than 130 technical blogs for LambdaTest, covering software testing, automation strategy, and CI/CD. At LambdaTest, he leads the technical content efforts across blogs, YouTube, and social media, while closely collaborating with contributors to enhance content quality and product feedback loops. He has done his graduation with a B.E. in Computer Engineering from Mumbai University. Before LambdaTest, Himanshu led engineering teams in embedded software domains at companies like Samsung Research, Motorola, and NXP Semiconductors. He is a core member of DZone and has been a speaker at several unconferences focused on technical writing and software quality.
Blogs: 131