What is Xcode: Features, Installation, and How to Use it

Xcode is an IDE developed by Apple for developing your applications for macOS, iOS, iPadOS, watchOS, tvOS, and visionOS with powerful, integrated tools.

OVERVIEW

Xcode, launched by Apple in 2003, is their main integrated development environment (IDE) for creating apps on Apple devices like Mac, iPhone, iPad, Apple Watch, and Apple TV.

The most recent stable release, version 15, was launched on September 18, 2023 and with its extensive capabilities, Xcode empowers developers to design, code, test, and optimize applications that cater to the unique characteristics of each platform, ensuring seamless performance and a superior user experience.

Xcode is available for free on the macOS platform, and it's an essential tool for anyone looking to develop applications for Apple devices. IOS app developers, macOS app developers, and other professionals in the Apple ecosystem widely use it.

Whether crafting apps for Mac computers, iPhones, iPads, Apple Watches, or Apple TV, Xcode provides the essential tools and resources needed to bring innovative ideas to fruition within the ever-evolving Apple ecosystem.

What is Xcode?

Xcode is a software package developed

Source

Xcode is a software package developed by Apple that serves as a one-stop-shop for developers creating applications for Apple devices such as Mac computers, iPhones, iPads, Apple Watches, and Apple TVs. It provides a wide range of tools and features that help developers design, write, test, and debug their apps efficiently.

When developing applications for Apple's ecosystem of devices, Xcode is the go-to integrated development environment (IDE). This powerful tool, created by Apple, provides developers with everything they need to design, build, and deploy software for macOS, iOS, watchOS, and tvOS. You can design your app's appearance, write the code that makes it work, and test it to ensure it runs smoothly.

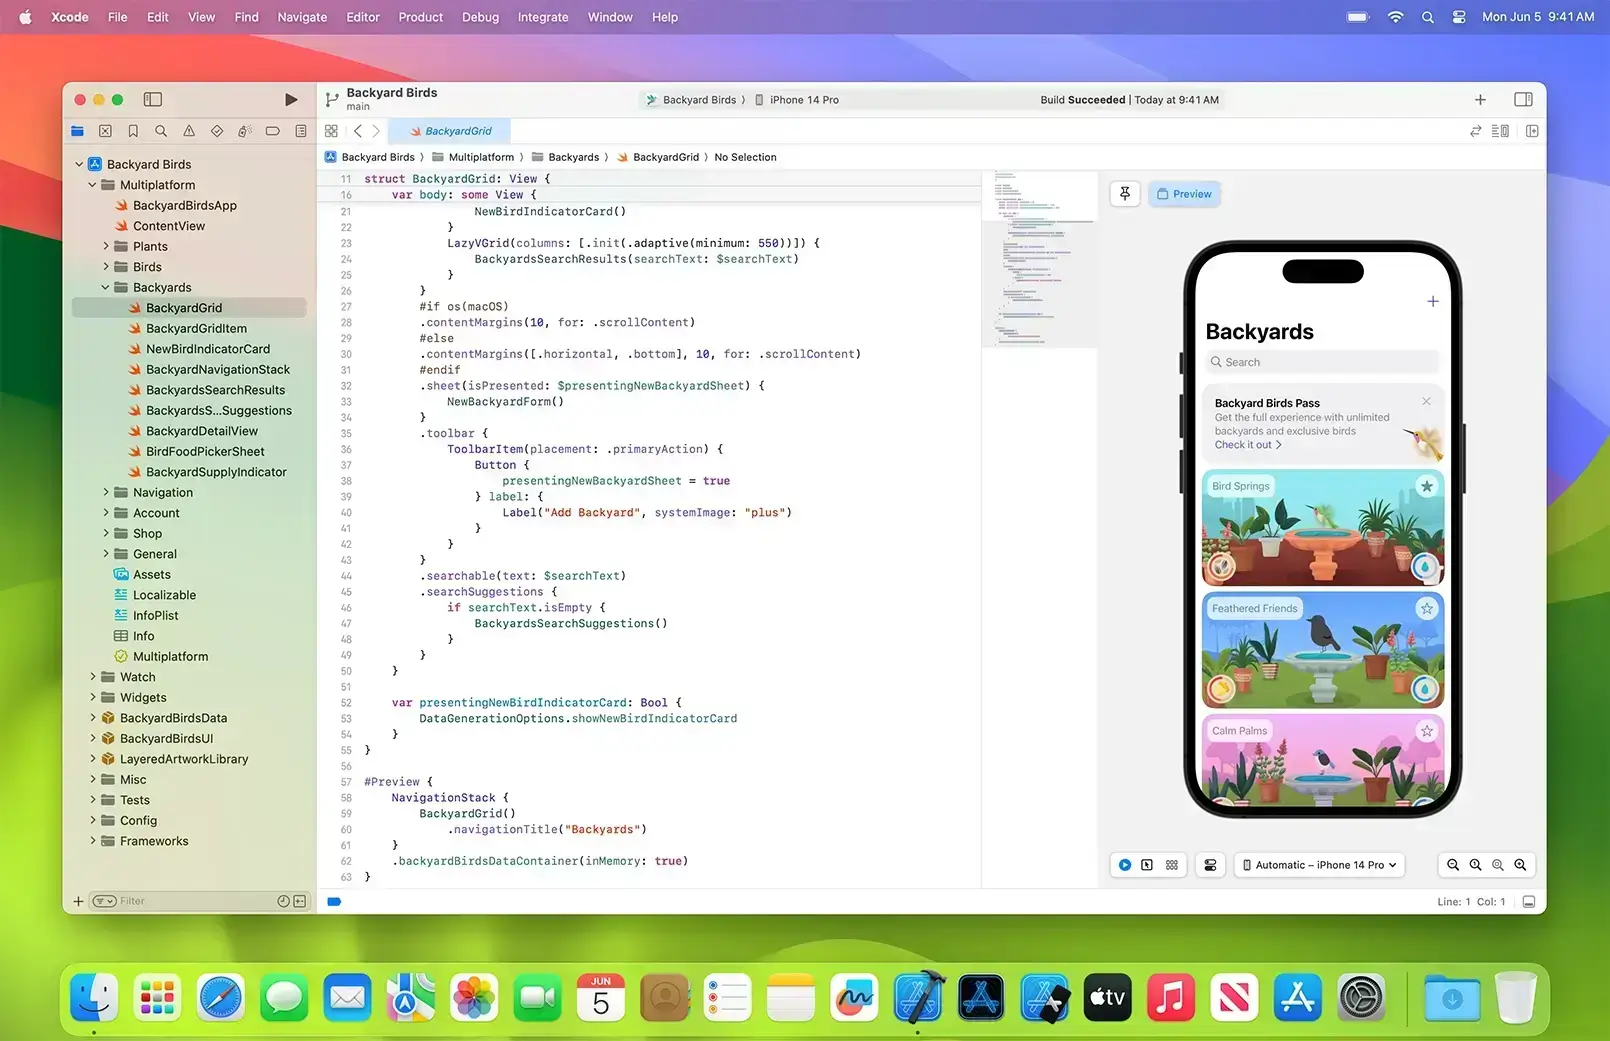
At its core, Xcode provides a comprehensive suite of tools and features that facilitate the entire software development process. It combines a sophisticated code editor with advanced features such as syntax highlighting, code completion, and code navigation with a versatile visual design tool, Interface Builder. This integration allows developers to craft their applications' functionality and user interface seamlessly.

Xcode streamlines the app distribution process by seamlessly integrating with Apple's ecosystem, enabling developers to manage deployment and updates effortlessly through the App Store. This connectivity extends the reach of apps to millions of users globally. Xcode goes beyond mere coding; it offers a suite of debugging tools and performance optimization instruments. These tools empower developers to identify and address issues efficiently, ensuring a responsive and error-free user experience. Real-time insights into app behavior facilitate fine-tuning for optimal performance.

What is Xcode used for?

Xcode is an integrated development environment (IDE) developed by Apple Inc. It is primarily used for creating software for Apple's various platforms, including macOS, iOS, watchOS, and tvOS. Here are its main uses:

  • Developing Applications: Xcode is the main tool for developing apps for iPhone, iPad, Mac, Apple Watch, and Apple TV. It supports programming languages like Swift and Objective-C.
  • User Interface Design: Xcode includes Interface Builder, a graphical tool that allows developers to design and layout the user interface of their apps without writing code, using a drag-and-drop interface.
  • Testing and Debugging: It provides simulators for different Apple devices, enabling developers to test their applications and ensure they work smoothly across various device types and screen sizes. Xcode also includes powerful debugging tools to help identify and fix issues.
  • Performance Analysis: Xcode offers tools like Instruments, which help developers analyze and optimize the performance of their applications.
  • Managing App Assets: Xcode's asset catalog allows developers to easily manage app assets like images, icons, and localization files.
  • App Distribution: Xcode is used to package and submit apps to the App Store, making it the final step in deploying an application to users.

Features of Xcode

Let's look closer at Xcode's unique capabilities, revealing the tools and services that enable developers within the Apple ecosystem. Xcode is the go-to app development tool for everything from coding and testing to collaboration and automation.

  • Code Editor: Within Xcode, there exists a robust code editor that simplifies the coding process for developers. It employs tools such as syntax highlighting, code auto-completion, and intuitive code navigation. These features collectively serve to streamline the coding experience, enhancing productivity and accuracy by ensuring that developers can easily spot errors, access relevant code snippets, and write code more efficiently. This intuitive code editor is a fundamental component of Xcode's suite of tools for software development.
  • Complete Integrated Development Environment (IDE): Xcode is an all-encompassing IDE that serves as a unified workspace for developers. It streamlines the entire app development process, from designing user interfaces to coding, testing, and debugging applications tailored for various Apple devices, including Mac, iPhone, iPad, Apple TV, and Apple Watch.
  • Programming Languages: Xcode comes equipped with Swift, Apple's modern and efficient programming language. Additionally, it supports C, C++, and Objective-C compilers, ensuring compatibility with legacy codebases and diverse development needs.
  • Simulator: Developers can test and prototype their apps in a simulated environment using Xcode's Simulator. This invaluable tool provides emulated environments for a wide range of Apple devices, such as iPhone, iPad, Apple Watch, and Apple TV, each with distinct settings, files, and operating system versions.
  • Note

    Note : Experience instant access to robust Android emulators and iOS simulators online. Accelerate your automated testing and streamline app debugging on our cloud-based Android emulator and iOS simulator. Try LambdaTest Now!

  • Instruments: Xcode incorporates Instruments, a tool for profiling and analyzing apps. Developers can use this tool to enhance app performance, identify memory-related issues, and gather data using various specialized tools.
  • Create ML: Xcode features Create ML, allowing developers to create and train custom machine learning models for their applications. This feature opens the door to implementing machine learning capabilities within apps.
  • Reality Composer: For augmented reality (AR) experiences and 3D compositions, Xcode offers Reality Composer. This tool empowers developers to construct immersive and interactive AR content seamlessly.
  • Build System: Xcode accommodates the porting of macOS apps to Apple Silicon architecture while maintaining compatibility with Intel-based Mac computers. Developers can customize project settings to optimize their code compilation process.
  • User Interface Design: Xcode simplifies user interface design with tools like SwiftUI, a declarative framework using Swift code to describe interfaces, and Interface Builder, which visually constructs UI views using a library of controls and modifiers.
  • Debugging: Xcode equips developers with robust debugging tools, allowing them to inspect running apps, isolate and resolve bugs, detect crashes, monitor system resource usage, visualize memory issues, and investigate view layout problems. Breakpoints, variable tracking, and source code analysis are integral to debugging.
  • Note

    Note : We have compiled all LT Debug Chrome Extension for debugging websites!

  • Xcode Cloud: Apple's upcoming service, Xcode Cloud, is set to revolutionize app development with cloud-based continuous integration and continuous delivery. While currently in beta testing, it promises scalability, collaboration tools, and automation features to streamline the development workflow further.

How to use Xcode?

Xcode, Apple's versatile Integrated Development Environment (IDE), is your gateway to crafting powerful software and apps for the diverse ecosystem of Apple devices. Whether you dream of creating innovative iOS applications, feature-rich macOS software, or sleek watchOS and tvOS experiences, Xcode provides the indispensable tools and resources to turn your vision into reality.

1. Installation

If you haven't already, begin by installing Xcode from the Mac App Store. This process may take some time as Xcode is an extensive application. Once installed, launch Xcode.

2. Creating a New Project

  • When you open Xcode, you'll see a welcome screen. Click on "Create a new Xcode project" to start a new project.
  • Xcode provides templates for different types of applications, such as "Single View App" for a basic app, "Tabbed App" for apps with tabbed navigation, and many others. Choose the one that best suits your project.

3. Project Configuration

  • Give your project a name and specify an organization identifier (usually in reverse domain format, e.g., com.yourcompany).
  • You can choose the programming language for your project, such as Swift or Objective-C.
  • Select the target platform (iOS, macOS, watchOS, or tvOS) and the minimum deployment target version.
  • Optionally, choose a source control system like Git to track changes.

4. User Interface Design

  • If your project involves a graphical user interface (UI), use Interface Builder to visually design your app's screens. You can drag and drop UI elements and arrange them to create the desired layout.
  • You can also create UI elements programmatically by writing code in the view controllers.

5. Writing Code

  • Open the appropriate source code files to start writing the logic of your application.
  • Use Xcode's code editor, which offers features like syntax highlighting, code completion, and inline documentation to assist you.
  • You'll write functions, methods, and classes to implement the functionality of your app.

6. Debugging

  • Debug your app using Xcode's integrated debugger. Set breakpoints in your code to pause execution at specific points and inspect variables.
  • Utilize the built-in simulators to test your app on various Apple device types and screen sizes.
  • Check the console for debugging information and error messages.

7. Testing

  • Write unit tests and UI tests to ensure the functionality and reliability of your application. Xcode provides automation testing frameworks for this purpose.
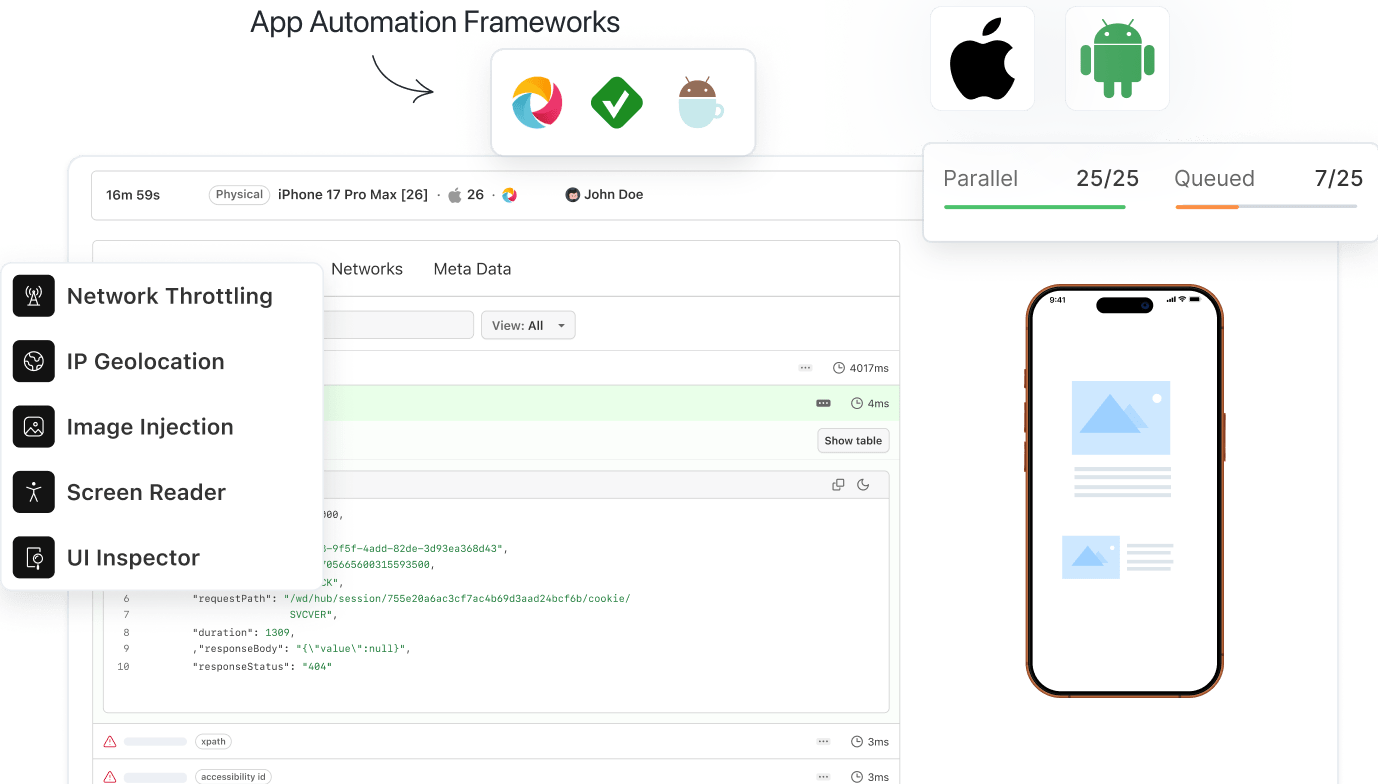
  • Utilize the real device cloud to test your app on various Apple devices without physical hardware. This allows you to check how your app behaves on various screen sizes and iOS versions without needing actual physical devices.
  • Leverage LambdaTest to enhance your testing reach beyond Xcode's simulators. With LambdaTest's extensive real device cloud, validate your app's compatibility across multiple Apple devices. Seamlessly test on different screen sizes and iOS versions, ensuring a consistent user experience without the need for physical hardware. LambdaTest bridges the gap between development and real-world performance.
Note

Note : Run real-time tests across multiple Apple devices on the cloud. Try LambdaTest Now!

8. Version Control

  • Integrate your project with a version control system like Git to track changes and collaborate with team members if necessary.
  • Xcode provides Git integration and a source control navigator to manage your code repository.

9. Optimization and Profiling

  • Use Xcode's profiling tools to analyze your app's performance and identify areas where optimization is needed.
  • Instruments, a profiling tool included with Xcode, helps you detect memory leaks, CPU usage, and other performance issues.

10. Deployment

  • When your app is ready for release, you can package it for distribution.
  • For iOS apps, you can submit them to the App Store. For macOS apps, you can distribute them through the Mac App Store or other channels.

11. Documentation and Resources

    Consult Apple's official documentation, online tutorials, and developer forums for guidance and solutions to common challenges throughout your development journey.

...

Advantages and disadvantages of using Xcode


AspectAdvantages of Using XcodeDisadvantages of Using Xcode
IntegrationAll-in-one development environment for Apple platforms.Exclusive to macOS. Cannot be used on Windows or Linux.
However, for Windows and Linux users seeking to utilize Xcode for Apple app development without the necessity of purchasing a Mac system, a promising solution lies with real device cloud services.
UI DesignVisual UI design with SwiftUI & Interface Builder.Sometimes buggy Interface Builder can be challenging to navigate.
Performance ToolsComes with Instruments for profiling & diagnosing.Can be slow or unresponsive, especially on older Mac hardware.
TestingiOS Simulator for testing on various devices & OS versions.UI test recording can be glitchy.
Safety DebuggingStatic analyzer, memory graph debugger, advanced debugging.Occasionally cryptic error messages.
Cross-platformTailored for Apple platforms (iOS, macOS, watchOS, tvOS).Not suited for cross-platform development.
Dependency ManagementIntegrated Swift Package Manager support.Dependency conflicts can arise with third-party tools.

How to download and install Xcode for Mac?

To download Xcode for macOS, you can follow these steps:

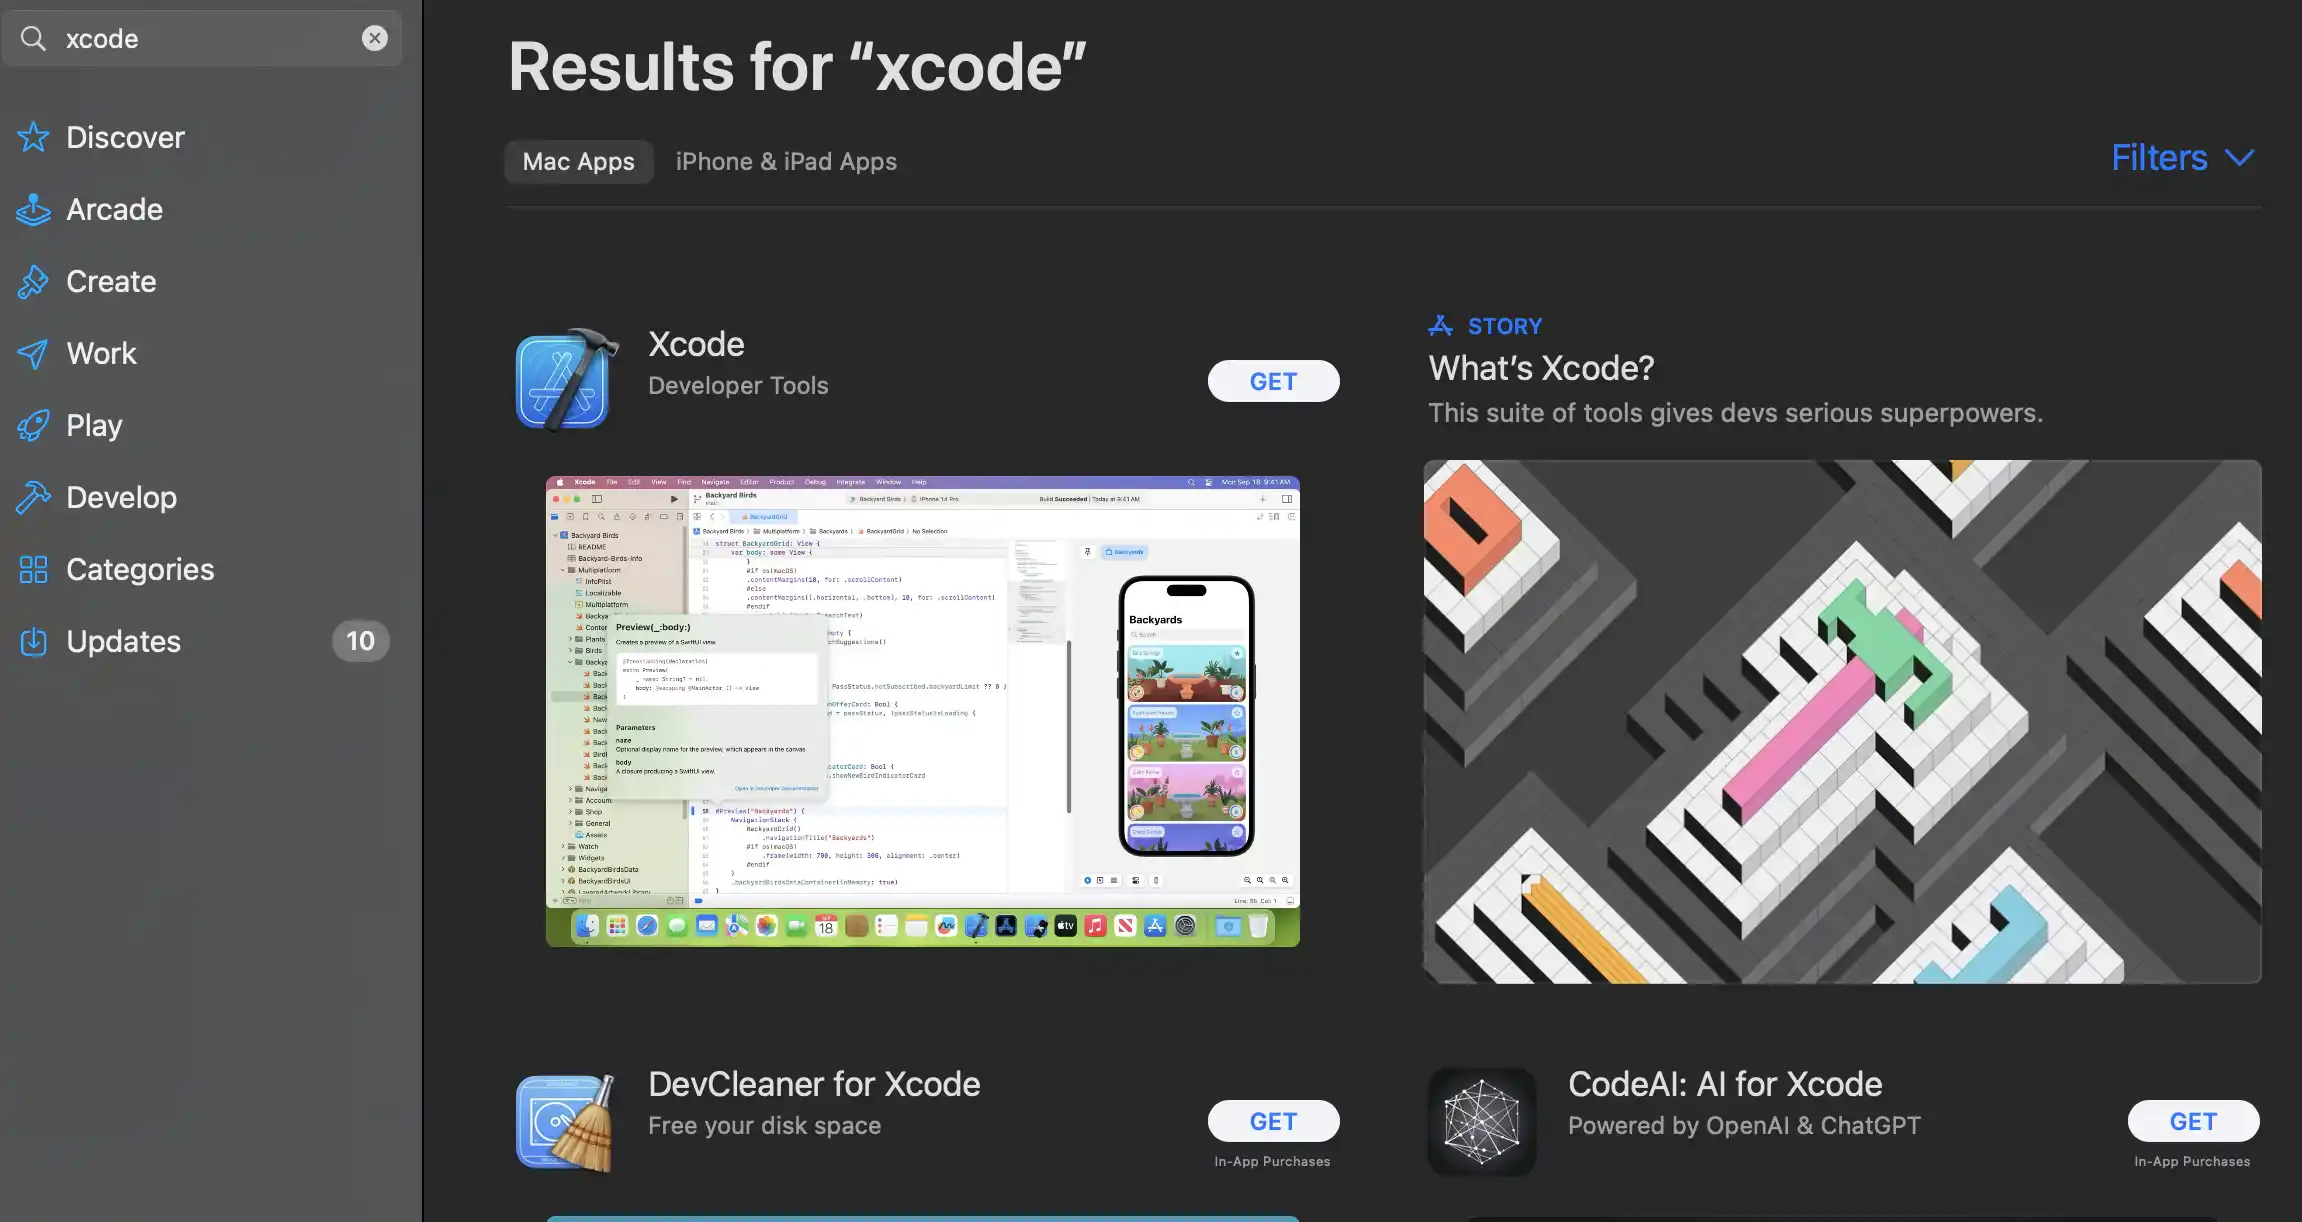
  • Open the Mac App Store: Go to the "App Store" application on your Mac. You can find it in your Applications folder or by searching for "App Store" in Spotlight (Cmd + Space, then type "App Store").
  • Search for Xcode: In the Mac App Store, use the search bar in the top-right corner to search for "Xcode."
  • search bar in the top-right corner
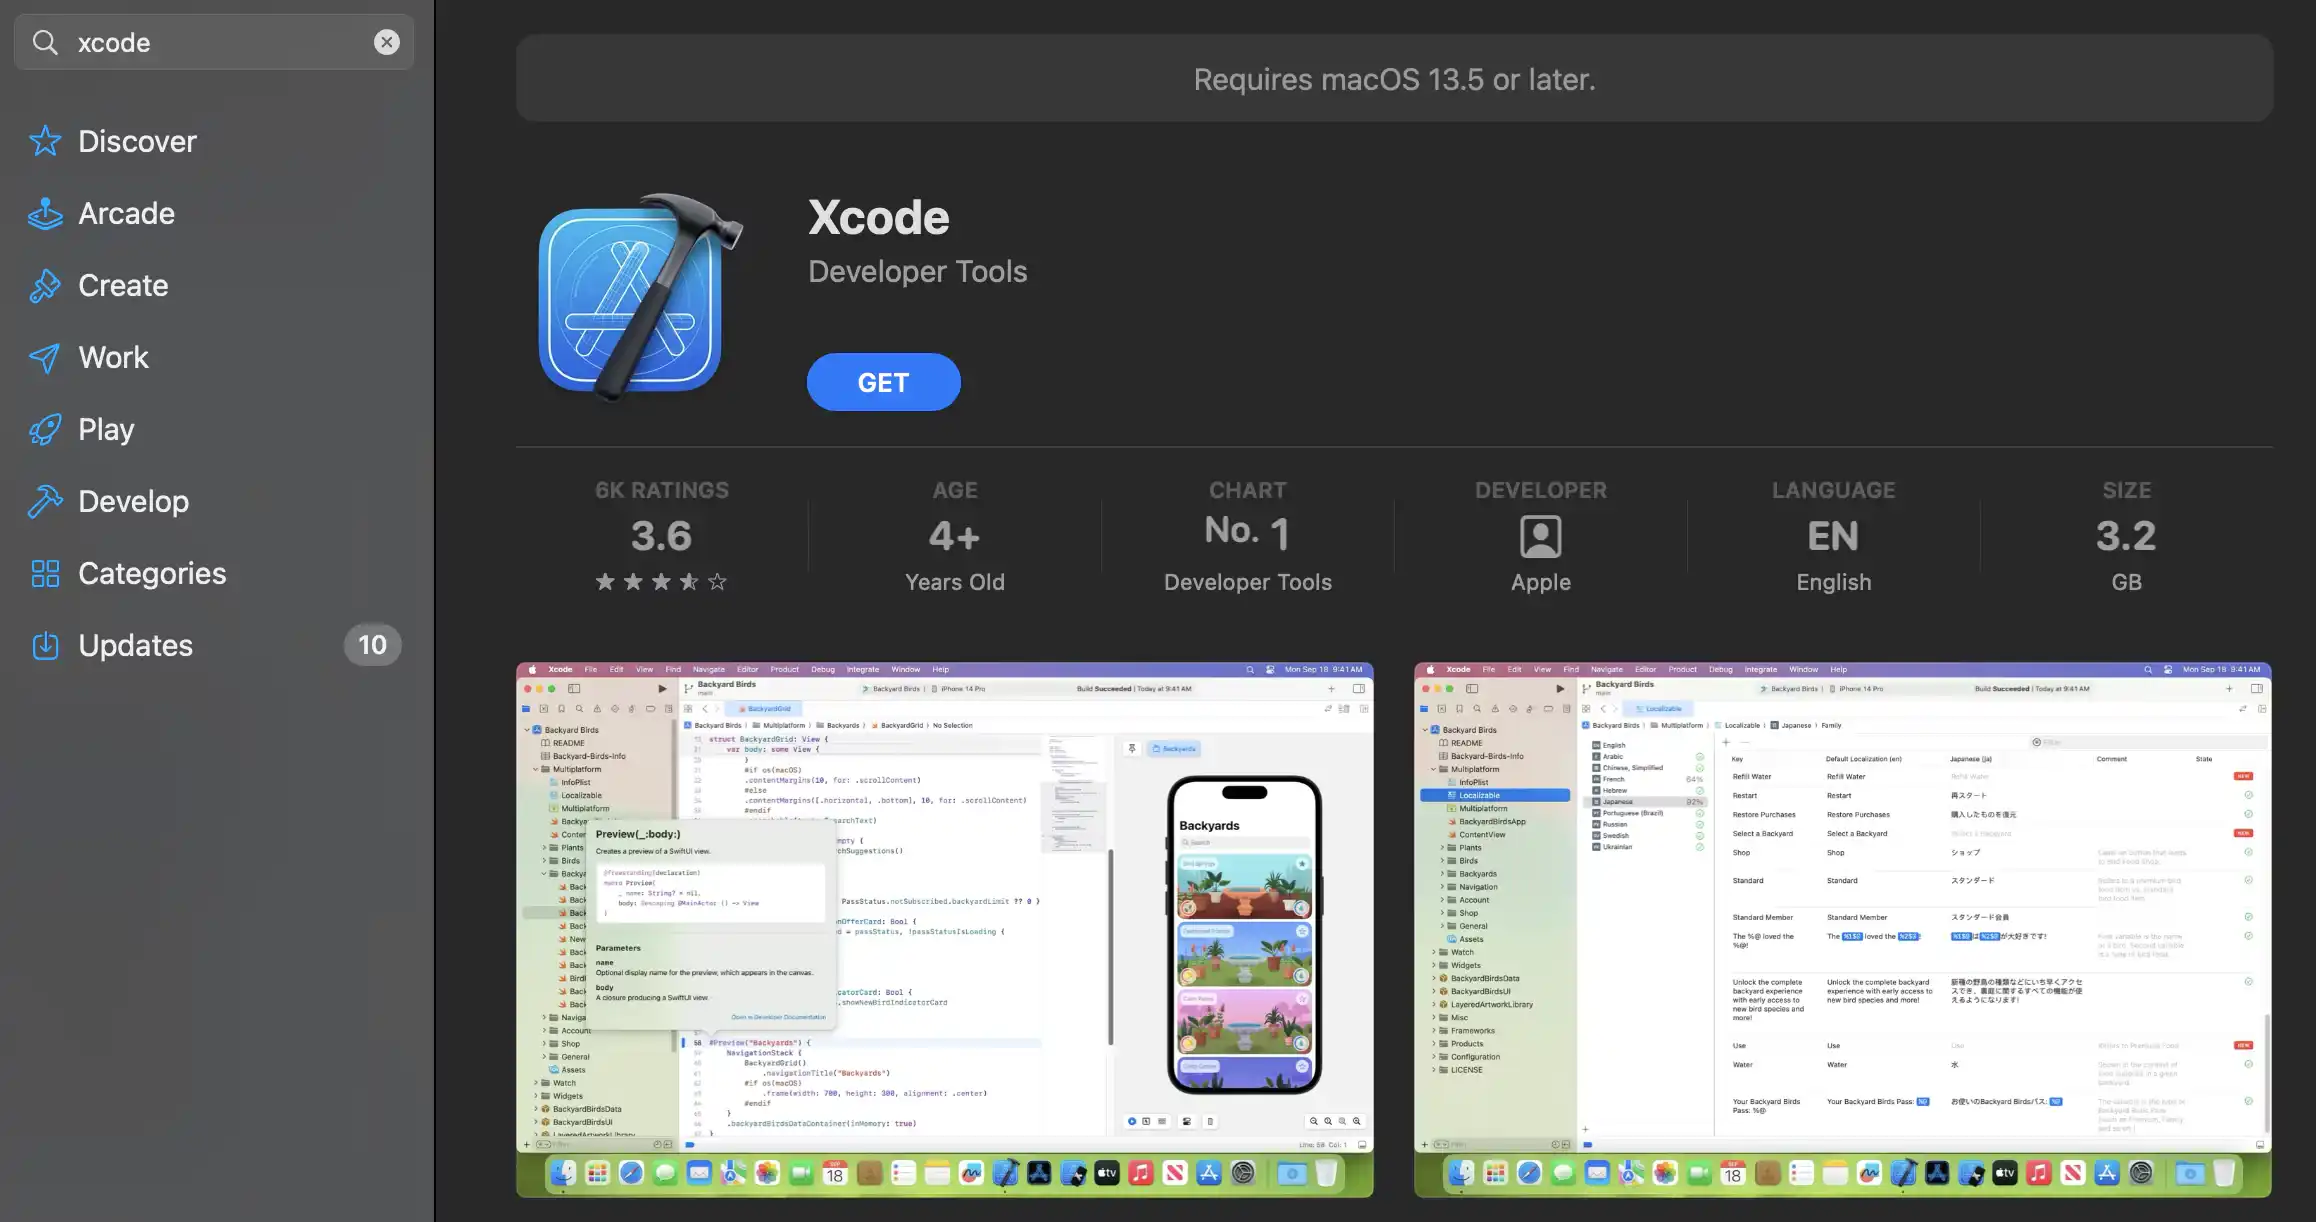
  • Locate Xcode: In the search results, you should see "Xcode" listed. It is typically the first result, but you can click on it to view more details.
  • Download Xcode: Click the "Get" or "Download" button next to Xcode. You may be prompted to sign in with your Apple ID or use your Touch ID/Face ID for verification. After confirming your download, the Xcode installer will start downloading.
  • Xcode installer will start downloading
  • Wait for the Download: Xcode is an extensive application so the download may take some time, depending on your internet connection speed. You can monitor the progress in the "Downloads" tab of the App Store.
  • Install Xcode: The application will appear in your "Applications" folder after the download. You can also find it in the "Launchpad."
  • First Launch: Open Xcode for the first time. You may be prompted to agree to the license agreement and enter your administrator password to install additional components and configure Xcode for development.
  • agree to the license agreement and enter
  • Optional Components: During installation, Xcode may ask if you want to install additional components, such as command-line tools and simulator runtimes. Depending on your development needs, you can choose to install these components.
How to download and install Xcode for Windows?

While Xcode is officially designed for macOS and is not directly available for Windows, many developers, especially those interested in iOS app development, often seek ways to run Xcode on Windows-based systems. Windows users can consider emulating or replicating the Xcode development environment on their Windows PCs, allowing them to begin their journey into Apple app development.

  • Use macOS on a Virtual Machine: You can run macOS on a virtual machine (VM) using virtualization software like VirtualBox, VMware, or Parallels Desktop on your Windows PC. Once you have a macOS VM, you can install Xcode within the VM. Please note that Apple may not officially support this approach and may not provide the same performance and stability as running Xcode on a genuine Mac.
  • Real Device Cloud Services: There are cloud-based services like real Device Cloud that provide remote access to macOS machines, so you can run macOS and Xcode on a remote machine from your Windows PC.
    • Real Device platform provides access to real mobile devices iPhone & Android (smartphones and tablets) for developing and testing applications remotely.
    • Eliminates the need for organizations to maintain a physical inventory of multiple devices.
    • Offers instant access to newly released devices and OS versions.
    • Supports automated testing frameworks and tools, enhancing testing efficiency and facilitates concurrent testing on multiple devices, speeding up the testing process.
    • Recommendation: For developers, especially those focusing on Apple apps, considering a real device cloud is crucial. LambdaTest's Real Device Cloud is a highly recommended platform, offering a comprehensive range of real Apple devices for testing, ensuring your apps deliver a seamless experience to all users across different devices and OS versions.
    LambdaTest's Real Device Cloud is a highly recommended platform
  • Cross-Platform Development Tools: Consider using cross-platform development tools and frameworks that allow you to build apps for multiple platforms, including iOS, from a Windows PC. Examples of such devices include:
    • Flutter: A UI toolkit by Google for building natively compiled mobile, web, and desktop applications from a single codebase.
    • React Native: Developed by Facebook, it lets you build mobile apps using JavaScript and React.
    • Appgyver: Offers a low-code platform for building mobile apps that can be deployed to iOS and Android.
    • Xamarin: Owned by Microsoft, Xamarin allows you to write apps in C# and run them on iOS and Android.
    • Use a Physical Mac: If iOS app development is a significant part of your work, consider investing in a physical Mac or Mac Mini. You can connect it to your Windows PC or use it exclusively for macOS development.

How to uninstall Xcode?

Uninstalling Xcode from your Mac is a straightforward process. Here are the steps to uninstall Xcode:

  • Quit Xcode: Before you begin, make sure that Xcode is not running. If it's open, go to the "Xcode" menu and select "Quit Xcode."
  • Move Xcode to Trash
    • Open the "Applications" folder on your Mac. You can do this by clicking on the "Finder" icon in the Dock and selecting "Applications" from the sidebar.
    • Find the "Xcode" application icon in the "Applications" folder.
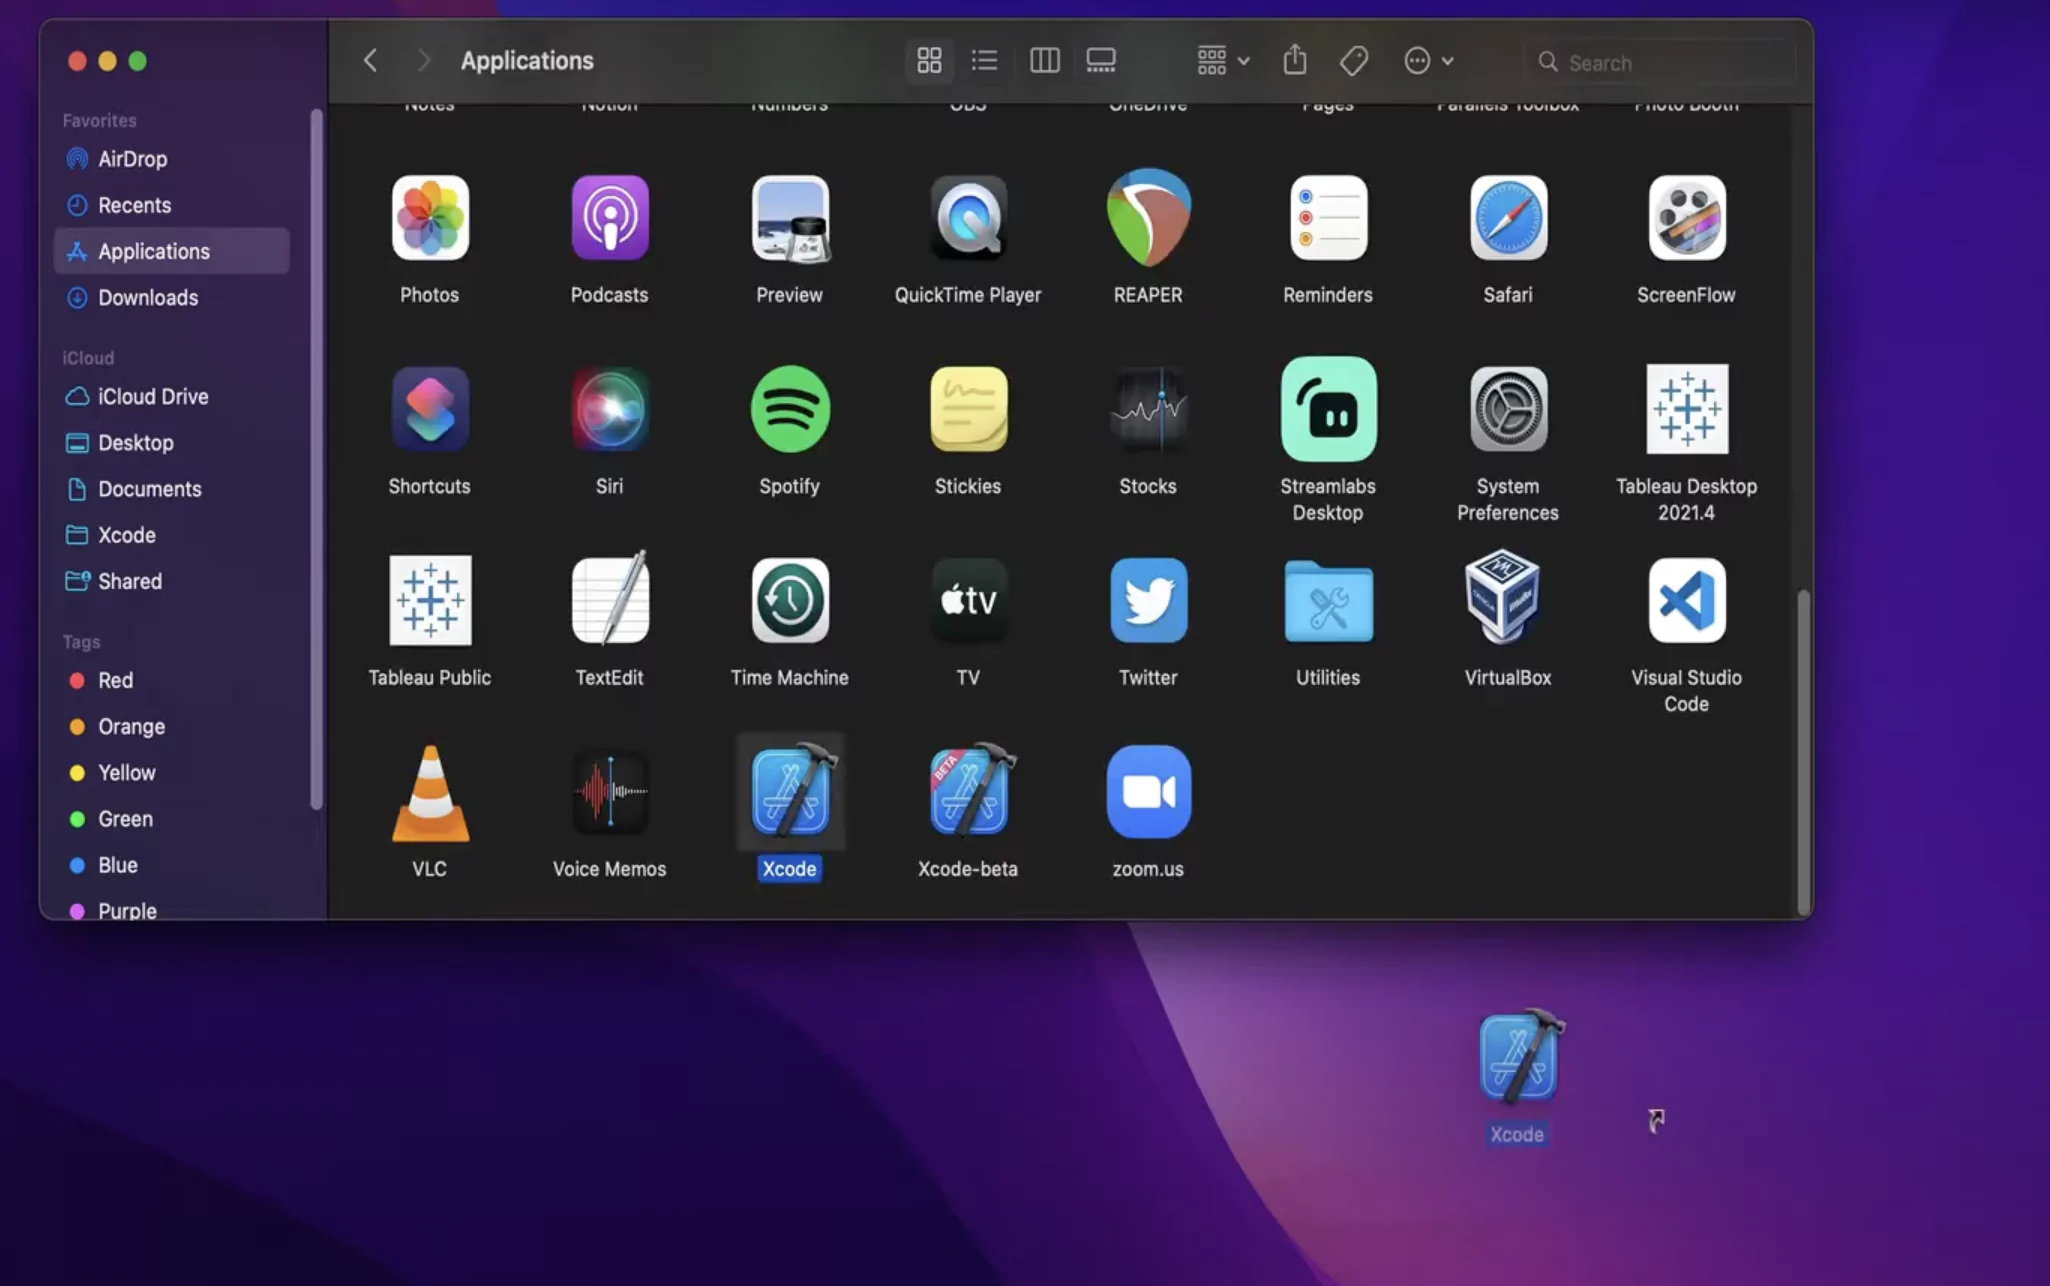
    • Drag the "Xcode" icon to the Trash (located in the Dock or the far right of the Dock). Alternatively, right-click the Xcode icon and select "Move to Trash."
    Drag the Xcode icon to the Trash
  • Remove Supporting Files
    • While Xcode itself is a large application, it may leave behind some supporting files and data that can take up significant disk space. To remove these files, open a Finder window and go to your home directory. You can do this by clicking on your username in the sidebar.
    • You'll find a folder in your home directory called "Library." Please note that on macOS versions starting with Catalina (10.15), Apple has default hidden the user's Library folder. You can access it by opening the "Go" menu in Finder and holding down the "Option" key to reveal the "Library" option.
    • Within the "Library" folder, locate and open the "Developer" folder.
    • Inside the "Developer" folder, you may find folders like "Xcode," "CoreSimulator," and others. Delete these folders to remove any remaining Xcode-related files.
    Delete these folders to remove any remaining Xcode
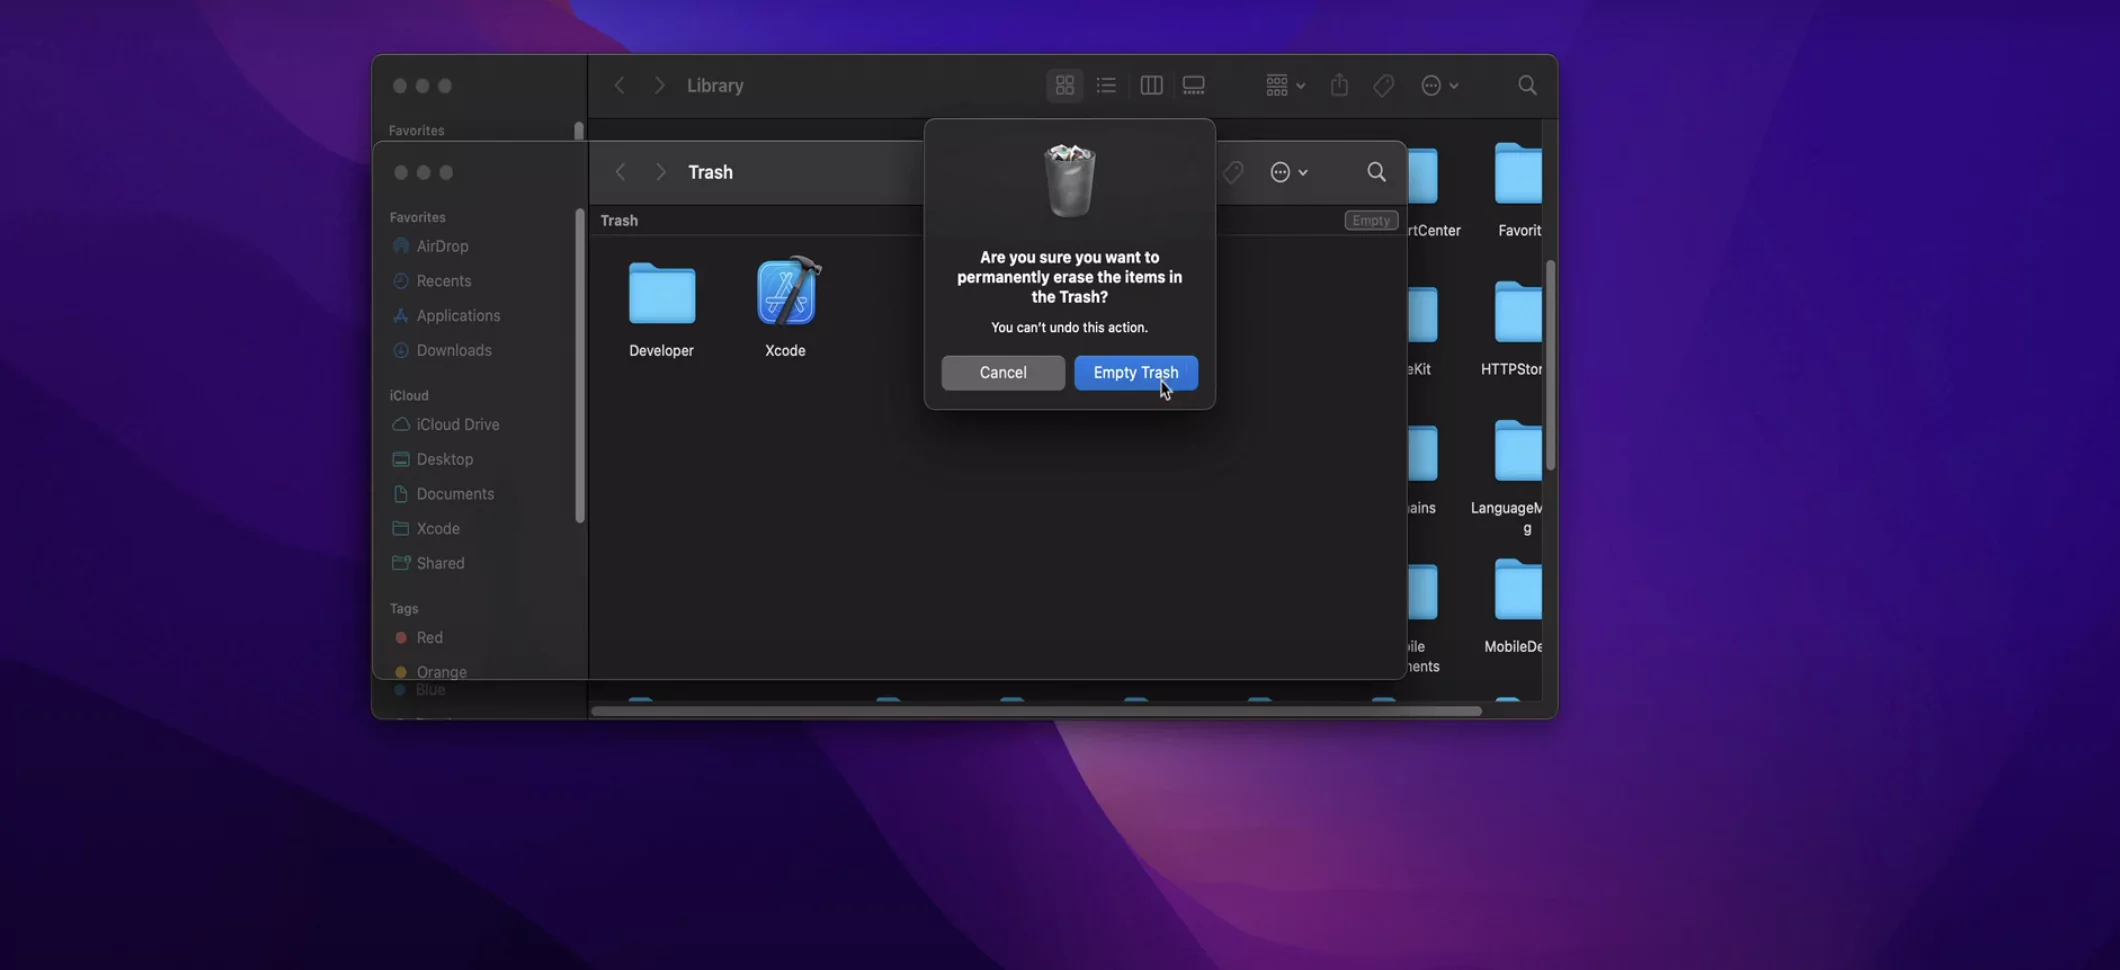
  • Empty the Trash
  • After moving Xcode and any associated files to the Trash, remember to empty the Trash to delete the files from your Mac permanently. Right-click on the Trash icon in the Dock and select "Empty Trash."

  • Optional
  • Restart your Mac to ensure that any lingering processes or cached files related to Xcode are entirely cleared.

    Xcode should now be completely uninstalled from your Mac. This process will free up disk space and remove all Xcode-related files and components. If you ever need to reinstall Xcode in the future, you can do so from the Mac App Store or by downloading it from Apple's official website.

How to reinstall Xcode?

Reinstalling Xcode on your Mac is a straightforward process. Whether you need to reinstall it because you've removed it, need to update to a newer version, or encounter issues with your existing installation, here are the steps to do so:

  • Remove the Existing Xcode Installation
  • If you currently have Xcode installed and want to reinstall it, you should remove the existing installation first. Follow these steps:

    • Open a Finder window.
    • Go to your "Applications" folder.
    • Locate the "Xcode" application icon and drag it to the Trash (located in the Dock or the far-right of the Dock).
    • Empty the Trash to delete Xcode and its associated files completely.
  • Download Xcode
  • You can download Xcode from the Mac App Store or from Apple's official website. Here's how to do it from the Mac App Store

    • Open the Mac App Store on your Mac.
    • Search for "Xcode" using the search bar in the top-right corner.
    • Find "Xcode" in the search results and click the "Download" button. You may need to sign in with your Apple ID or use Touch ID/Face ID for verification.
  • Install Xcode
    • Once the download is complete, the Xcode installer will launch automatically.
    • Follow the on-screen instructions to install Xcode. This includes agreeing to the license agreement and entering your administrator password when prompted.
    • The installation process may take some time, as Xcode is a large application.

How to update Xcode?

Updating Xcode on your Mac is essential to ensure that you have access to the latest features, improvements, and support for the latest Apple platforms and devices. Here's how to update Xcode:

  • Check for Updates
    • Open the "App Store" on your Mac. You can find it in your Applications folder or use Spotlight (Cmd + Space, then type "App Store").
    • In the "App Store," click on your Apple ID profile picture in the bottom-left corner to access your account details.
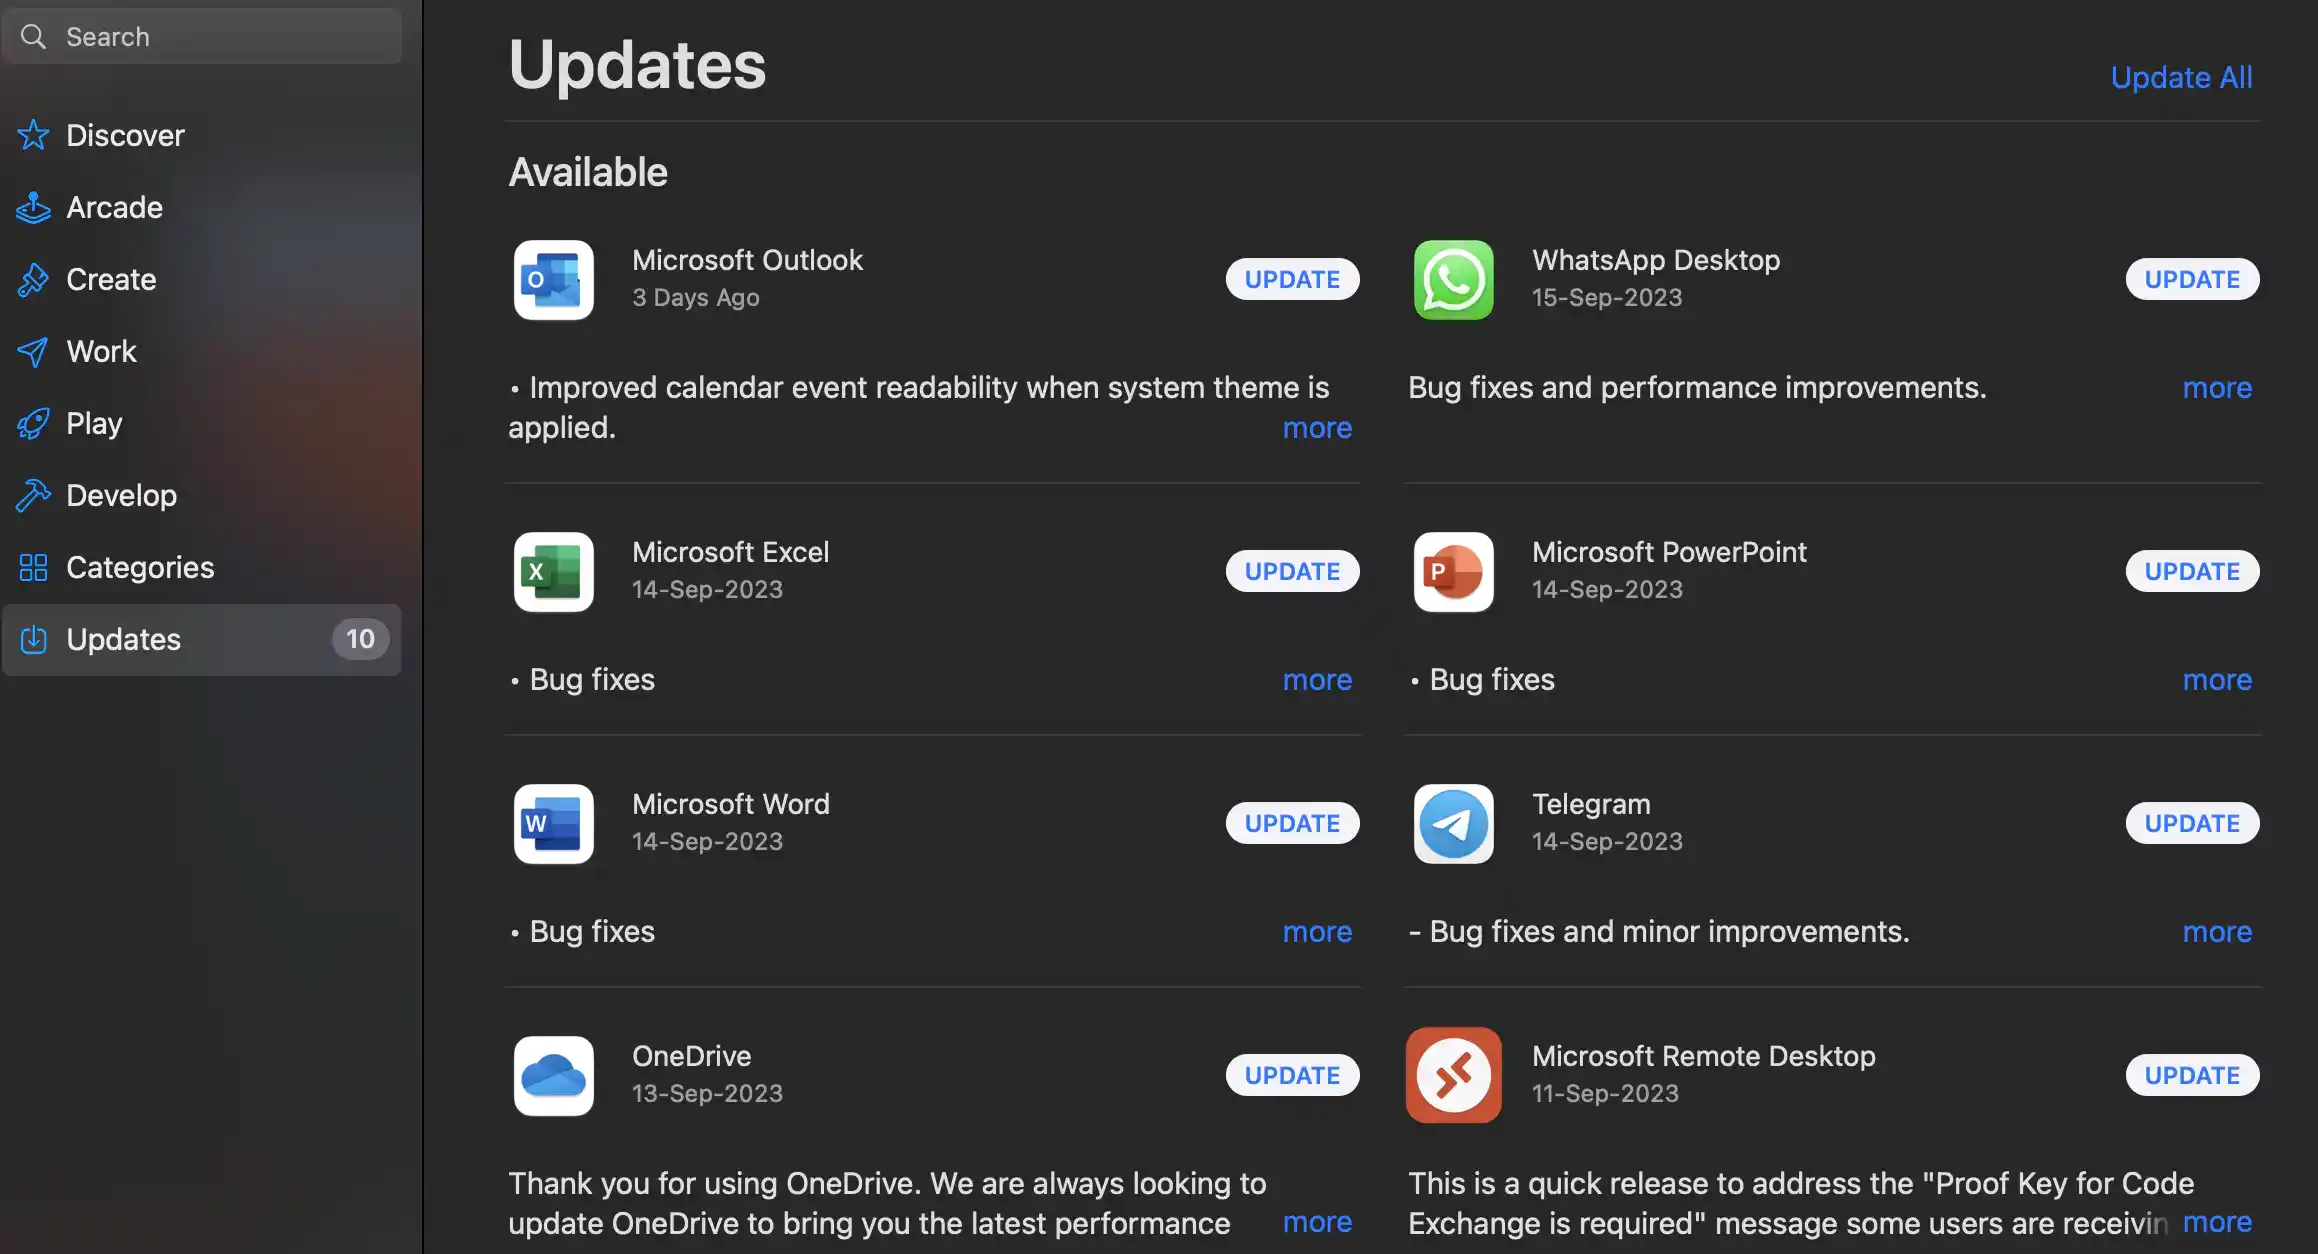
    • Scroll down to the "Updates" section. If an update is available for Xcode, it will appear in the list of updates.
    update is available for Xcode, it will appear in the list of updates
  • Update Xcode
    • If an Xcode update is available, you should see a button next to it labeled "Update." Click on this button to start the update process.
    • You may be prompted to enter your Apple ID password or use Touch ID/Face ID for authentication.
    • The App Store will download and install the latest version of Xcode on your Mac. This process may take some time, especially if it's a major update.
  • Complete Installation
    • Once the update is downloaded and installed, the new version of Xcode should be ready to use.
    • You can check the updated version number by launching Xcode and going to the "Xcode" menu - "About Xcode."
  • Verify Your Projects
  • After updating Xcode, it's a good practice to open and verify your existing Xcode projects to ensure they work correctly with the new version. Be aware that sometimes, compatibility changes might require adjustments to your projects.

  • Enjoy the New Features
  • Explore the updated Xcode to take advantage of any new features, improvements, and bug fixes that the update brings.

By keeping Xcode up to date, you can make the most of the latest tools and resources available for iOS, macOS, watchOS, and tvOS app development. Apple regularly releases updates to Xcode to enhance the development experience and support the evolving ecosystem of Apple devices and software.

Xcode supported languages

Xcode, Apple's integrated development environment (IDE), primarily supports two programming languages for app development: Swift and Objective-C. Here's an overview of each language:

1. Swift

  • Swift is a modern, powerful, and easy-to-learn programming language developed by Apple. It is designed to be safe, fast, and expressive.
  • Xcode provides robust support for Swift, including code highlighting, code completion, and debugging features.
  • Swift is the preferred language for developing applications for Apple's platforms, including iOS, macOS, watchOS, and tvOS. It has gained popularity for its conciseness and safety features.

2. Objective-C

  • Objective-C is an older programming language that has been a staple of Apple app development for many years. It is a superset of the C programming language and adds object-oriented features.
  • Xcode offers extensive support for Objective-C, including syntax highlighting, code completion, and debugging tools.
  • While Swift has become the language of choice for new Apple app development, Objective-C is still relevant and often used to maintain or extend legacy codebases.

In addition to Swift and Objective-C, Xcode supports other web technologies, such as HTML, CSS, and JavaScript, for building web-based components within iOS and macOS apps. For example, you can use the WebView component to embed web content in your applications.

Xcode also supports various scripting languages, such as Python and Ruby, which can be used for automating tasks, creating plugins, or extending the functionality of your applications.

While Swift and Objective-C are the primary languages for developing native iOS, macOS, watchOS, and tvOS applications within Xcode, developers can incorporate other languages and technologies for specific use cases, depending on their project requirements. However, these additional languages typically interact with the primary app logic written in Swift or Objective-C.

How to Install Xcode command line tools?

You can install Xcode Command Line Tools separately from the full Xcode IDE on your Mac. These tools are essential for various development tasks and are often used for compiling code, managing packages, and more. Here's how to install Xcode Command Line Tools:

Method 1: Using the Terminal

  • Check if Command Line Tools Are Installed
  • To check if Command Line Tools are already installed on your Mac, open the Terminal application (you can find it in the Utilities folder within the Applications folder). Then, type the following command and press Enter:


    xcode-select --version

    If Command Line Tools are installed, you will see a version number. You'll receive a message indicating they are only found if installed.

  • Install Command Line Tools
  • If you don't have Command Line Tools installed or need to update them, you can do so by running the following command in the Terminal:

    xcode-select --install

    After running this command, a dialog box will appear on your screen asking if you want to install the tools. Click the "Install" button to proceed.


    Agree to the License Terms
  • Agree to the License Terms
  • After clicking "Install," you will receive the Xcode license agreement. Read through the terms, and if you agree, click "Agree" to continue. The installation process will begin.


     The installation process will begin
  • Wait for Installation
  • Depending on your internet connection speed, the Command Line Tools installation process may take some time. It will automatically download and install the necessary components.

  • Completion
  • Once the installation is complete, you should see a message indicating that the Command Line Tools are installed.

  • Verify Installation
  • To verify that the Command Line Tools are properly installed, you can once again run the following command in the Terminal:


    xcode-select --version

    This time, you should see the version number of the installed Command Line Tools.

Method 2: Via Xcode

  • Open Xcode: If you have Xcode already installed, open it.
  • Access Preferences: In Xcode, navigate to the menu bar and select "Xcode" - "Preferences."
  • Downloads Tab: In the Preferences window, go to the "Downloads" tab.
  • Install Command Line Tools: Look for the "Command Line Tools" option in the list of available downloads. You'll see an "Install" button next to it if it's not already installed. Click on "Install" to initiate the installation process.

After successfully installing Xcode Command Line Tools using any of the above methods, you'll have access to a range of essential development tools, including compilers, version control systems, and various command-line utilities. You can verify the installation by running commands like gcc --version or git --version in the Terminal. If these commands return version information, it confirms that the tools were correctly installed and ready for your development projects.

How to use Xcode command line tools?

Xcode Command Line Tools provide a set of powerful utilities and development tools that can be accessed and used directly from the command line in Terminal. These tools are essential for various development tasks and can be especially handy when automating processes or integrating them into scripts. Here's how to use Xcode Command Line Tools effectively:

  • Open Terminal
  • To start using Xcode Command Line Tools, open the Terminal application on your Mac. You can find Terminal in the Utilities folder within the Applications folder, or you can use Spotlight (Cmd + Space, then type "Terminal") to search for it.

  • Check If Tools Are Installed
  • Before using any specific command, you can check if Xcode Command Line Tools are installed by running the following command:


    xcode-select -p

    This command will display the path to the currently selected developer directory. If it returns a valid path, it indicates that the tools are installed.

  • Update Tools (Optional)
  • If you need to update Xcode Command Line Tools to the latest version, you can do so with the following command:


    sudo softwareupdate --install -a

    This command will check for updates and install them.

  • Using Common Commands
  • Xcode Command Line Tools include a wide range of command-line utilities. Here are some common ones:

    • Compiler: You can use gcc or clang for compiling C, C++, and Objective-C code. For example:
    • gcc -o myprogram myprogram.c
    • Git: Xcode Command Line Tools include Git, a popular version control system. You can use Git commands for source code management. For example:
    • git clone https://github.com/yourusername/yourrepository.git
    • Make: If you're working with projects that use makefiles, you can use the make command to build and compile projects. For example:
    • make
    • Package Managers: If you use package managers like Homebrew or MacPorts, you can interact with them through the command line. For instance, with Homebrew:
    • brew install package-name
    • Shell Scripts: You can create shell scripts and use the tools to automate tasks or perform batch operations.
    • Text Editors: You can use command-line text editors like nano or vim to edit code or configuration files.
  • Access Help and Documentation
  • Most of the command-line tools included with Xcode Command Line Tools provide help and documentation. You can access this information by adding the --help or -h flag to a command. For example:


    gcc --help

    This will display detailed information about using the gcc compiler.

  • Scripting and Automation
  • Xcode Command Line Tools are often used in scripts and automation tasks. You can create shell scripts incorporating these tools to perform tasks automatically, such as building projects, running tests, or deploying code.

  • Stay Updated
  • Keep your Xcode Command Line Tools updated to ensure you have access to the latest features and bug fixes. You can do this through the Mac App Store or by running sudo softwareupdate --install -a periodically.

By leveraging Xcode Command Line Tools, you can streamline your development workflow, automate repetitive tasks, and efficiently manage your projects from the command line. These tools are a valuable addition to any developer's toolkit, whether you're working on software development, system administration, or other technical tasks.

...

2M+ Devs and QAs rely on LambdaTest

Deliver immersive digital experiences with Next-Generation Mobile Apps and Cross Browser Testing Cloud

What are Xcode previews?

Xcode Previews, also known as SwiftUI Previews, are a powerful feature introduced by Apple in Xcode for SwiftUI-based app development. SwiftUI is a modern framework for building user interfaces on Apple platforms, and Previews make it easier to design, develop, and test SwiftUI views in real-time. Here's what Xcode Previews are and how they work:

  • Real-Time Previews
    • Xcode Previews allow developers to see live previews of their SwiftUI views as they write code. This real-time preview is displayed right alongside the code editor in Xcode.
    • As you change your SwiftUI code, such as modifying the user interface or layout, the preview instantly updates to reflect those changes. This instant feedback makes it easier to iterate and experiment with your UI design.
    Note

    Note : Run real-time tests across 3000+ environments. Try LambdaTest Now!

  • Interactive Testing
    • Previews are interactive, which means you can interact with the user interface elements within the preview to test how your app behaves without running it on a simulator or device.
    • You can directly interact with buttons, sliders, and other UI components in the preview to see how they respond to user input.
  • Multiple Device Previews
    • Xcode lets you view your SwiftUI previews on different device types and screen sizes, such as iPhone, iPad, Mac, and Apple Watch.
    • You can easily switch between these device previews to ensure your app's user interface looks and functions correctly across various platforms.
  • Dark Mode and Localization Testing
    • Xcode Previews support testing your app's user interface in different appearance modes, such as light and dark. This is crucial for ensuring your app looks good in all conditions.
    • You can also preview your user interface in different languages and locales to test localization and internationalization.
    Note

    Note : Test your web pages and mobile apps from cities and local areas of 50+ countries. Get instant access to 3000+ desktop and mobile browsers, browser versions, operating systems, and hundreds of mobile devices with a click. Try LambdaTest Now!

  • Conditional Previews
  • Xcode allows you to create conditional previews based on different app states or data. This enables you to visualize how your UI responds to changes in data, such as loading states, error messages, or empty states.

  • Integration with Live Previews
  • Xcode Previews are tightly integrated with Xcode's Live Preview feature, which allows you to see how your SwiftUI views will look and behave in a live running app.

    You can switch between the Xcode Preview canvas and the Live Preview window to comprehensively view your app's UI.

  • Debugging and Inspecting
  • Xcode Previews provides debugging and inspection tools that allow you to identify and fix issues in your SwiftUI code directly from the preview canvas.

  • Reusable Components
  • SwiftUI Previews are not limited to previewing entire views; you can also preview individual SwiftUI components, making testing and reusing UI elements easier.

Xcode Previews significantly improve the development process for SwiftUI-based apps by providing instant feedback, simplifying UI design, and speeding up the testing and debugging of user interfaces. They are a valuable tool for SwiftUI developers to create high-quality, responsive, and platform-adaptive user interfaces for iOS, macOS, watchOS, and tvOS applications.

Enhancing Your Productivity in Xcode

Productivity is the cornerstone of efficient app development, and Xcode offers many tools and techniques to help developers streamline their workflows. Here's a guide on how to enhance your productivity in Xcode:

  • Master Keyboard Shortcuts: Xcode boasts an array of keyboard shortcuts to navigate, edit, and debug code swiftly. Please familiarize yourself with common shortcuts and incorporate them into your daily coding routine. This can significantly speed up your workflow.
  • Unit Testing: Implement unit testing for your code to catch bugs early and ensure the reliability of your applications. Xcode provides robust tools for writing and running unit tests.
  • Harness Autocomplete: Take advantage of Xcode's robust autocomplete feature. As you type, Xcode intelligently suggests code completions based on your context, saving you from tediously typing out lengthy code segments and ensuring accuracy in your coding.
  • Master Debugging Tools: Xcode has a suite of debugging tools to ferret out and resolve code issues. Delve into the world of breakpoints, watches, and visualization tools. Regularly utilizing these tools will empower you to identify and rectify bugs efficiently.

Conclusion

Xcode's all-in-one approach, from code editing to deployment, simplifies the development process and empowers developers to create innovative and high-quality applications for Apple devices. Xcode serves as the quintessential development environment for Apple's ecosystem, bridging the gap between creative ideas and functional applications. It equips developers with robust tools, resources, and seamless integrations, enabling them to embark on successful software development journeys for various Apple devices. Xcode is the conduit through which innovation and creativity are transformed into tangible user experiences within the Apple ecosystem.

Frequently asked questions

  • General ...
Can you use Xcode on Windows?
No, as of now, Xcode's installation is limited to Mac platforms exclusively, and it cannot be installed on either Windows or Linux operating systems.
Is Xcode an IDE?
Yes, Xcode is an integrated development environment (IDE) developed by Apple. It's used for app development on macOS, iOS, iPadOS, watchOS, and tvOS.
What are Xcode previews on iPhone?
Xcode previews on iPhone provide a live, interactive view of how your app's user interface will appear and behave on different devices and screen sizes, aiding in real-time design and testing.
What languages does Xcode support?
Xcode supports various programming languages, with Swift and Objective-C being the primary languages for macOS, iOS, iPadOS, watchOS, and tvOS app development. It also supports C/C++ and other languages for different use cases.
How to check the Xcode version?
To check your Xcode version, open Xcode and click on the 'Xcode' menu in the top-left corner of your screen. Then, select 'About Xcode.'' A window will appear displaying your Xcode version and build number.
How to open Xcode?
To open Xcode on macOS, click the Xcode icon in your Applications folder and double-click it.
How to reinstall Xcode?
To reinstall Xcode: 1. Uninstall the existing Xcode. 2. Download the latest version from the Mac App Store or Apple Developer website.3. Install the new Xcode version. 4. Launch Xcode from the Applications folder.
What is Xcode used for?
Xcode is primarily used for developing software applications for Apple platforms, including macOS, iOS, iPadOS, watchOS, and tvOS. It provides tools for coding, designing user interfaces, debugging, testing, and deploying apps.

Did you find this page helpful?

Helpful

NotHelpful

Try LambdaTest Now !!

Get 100 minutes of automation test minutes FREE!!

Next-Gen App & Browser Testing Cloud