A Step-By-Step Guide To Cypress API Testing
Enrique
Posted On: December 29, 2022
![]() 41797 Views
41797 Views
![]() 17 Min Read
17 Min Read
API (Application Programming Interface) is a set of definitions and protocols for building and integrating applications. It’s occasionally referred to as a contract between an information provider and an information user establishing the content required from the consumer and the content needed by the producer.
Cypress is a popular and user-friendly testing framework for end-to-end (E2E) testing of web applications. It is particularly popular among developers and testers familiar with JavaScript, as it does not require additional libraries, dependencies, or drivers to install. Cypress can be easily installed using the Node Package Manager (NPM) and does not require additional setup or configuration. This makes it a good choice for those looking to quickly and easily set up E2E testing for their applications.
Why Cypress for API testing? Can we have a test automation tool for everything? It could sound like a utopian dream for every company and testing team, but we can cover almost all possibilities with Cypress automation tool. It is a next-generation front-end testing framework; it constructs HTTP requests on behalf of the web applications as it is running. Although it might seem that Cypress is making these requests from the browser, it utilizes Node.js as the motor to create the HTTP requests to the API server.
In this blog on Cypress API Testing, you will learn how to use Cypress to write cleaner and more efficient code for API test automation.
So, let’s get started!
TABLE OF CONTENTS
Introduction to API Testing
API testing is a vital aspect of integration testing that assesses whether APIs meet expectations for functionality, reliability, performance, and security. It has gained increasing importance in software testing due to its speed and reliability compared to tests based on user interfaces (UI).
In addition, API testing allows the testers to find bugs earlier in the development process, usually before the UI is created. Finally, API testing allows requests that might not be allowed through the UI (Sometimes, the UI is not ready during API development).
Understanding the flow of our APIs is necessary before starting to test them, and we need to understand a few essential technical requirements of the APIs.
API Endpoints
An API endpoint is the entry point in a communication channel where two software mediators interact. The endpoint can be seen as how the APIs can access the resources they require from a server to fulfill their tasks. An API endpoint is a fancy word for a server or service URL. For example, https://api.linkedin.com/v2/simpleJobPostings is the endpoint for LinkedIn’s job posting API, or we can use https://api.lambdatest.com/automation/api/v1 endpoint for getting data from the LambdaTest platform.
Methods Supported
We need to understand the methods (POST, GET, PUT, DELETE, PATCH) supported by the API. Keep in mind those as we need to test them.
Input-Output Schema
It is essential to comprehend the type of input required and the response body content for the API (JSON, plain text, XML, or other).
Response Codes
The response or status code is the most crucial API output that must be verified. The API response status codes are included in five classes or types. The first digit of the response code represents the response class, while the last two digits do not have any classification or categorization roles. The standard defines five types:
- 1xx Informational response – the request was received, resuming the process.
- 2xx Successful – the request was received, comprehended, and accepted.
- 3xx Redirection – further action must be taken to complete the request.
- 4xx Client error – the request contains the wrong syntax or cannot be fulfilled.
- 5xx Server error – the server failed to fulfill a valid request.
You can read through our earlier blog that deep dives into the HTTP Status request to learn more about it.
Headers and Auth Requirements
API calls demand a variety of header fields. Headers include a wealth of information that can help track down issues when they occur.
Typically, headers contain information regarding the request, response body, and request authorization. In addition, authentication is essential to confirm the credentials of a connection attempt. Therefore, most commercial APIs require API Key-based Authentication for their services (LambdaTest API Documentation).
Are you interested in learning more about API testing? Check out the TestuConf 2022 Phase Angle of API.
Rest and GraphQL API Testing using Cypress
In REST, an API endpoint is requested using the HTTP protocol to serve the data that the client needs, and the server returns the response based on the requested query. REST is a set of architectural practices, not a protocol or a standard. Therefore, API developers can implement REST in a variety of ways.
GraphQL, as a query language, defines specifications of how a client application can ask for the required data from a remote server. As a result, the server application produces a response to the requested client query. The exciting thing to notice in GraphQL is that the client application can also query what it requires without relying on the server-side application to determine a query.
Now we can start using Cypress for API testing, as Cypress is a standalone frontend automation testing tool; it creates HTTP requests on behalf of the web applications as it is executing. Cypress might appear to make these requests from the browser; it uses Node.js as an engine to make the HTTP requests to the API server.
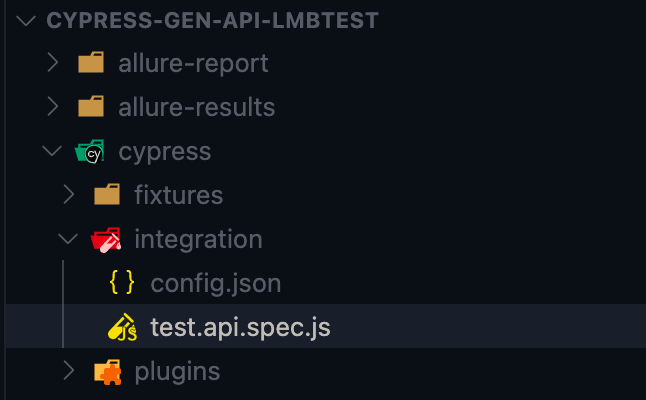
For Cypress UI automation, I’m currently using version 9.7.0; at this point, we don’t require any cool new experimental features for our Cypress API testing project. Regarding API testing Rest and GraphQL, we will use the Go REST website; let’s start with some basic test scripts to get familiar with automated Cypress API testing.
Let’s code our first test and get all the users from our API user’s endpoint; we will use an HTTP request with the syntax cy.request (options):
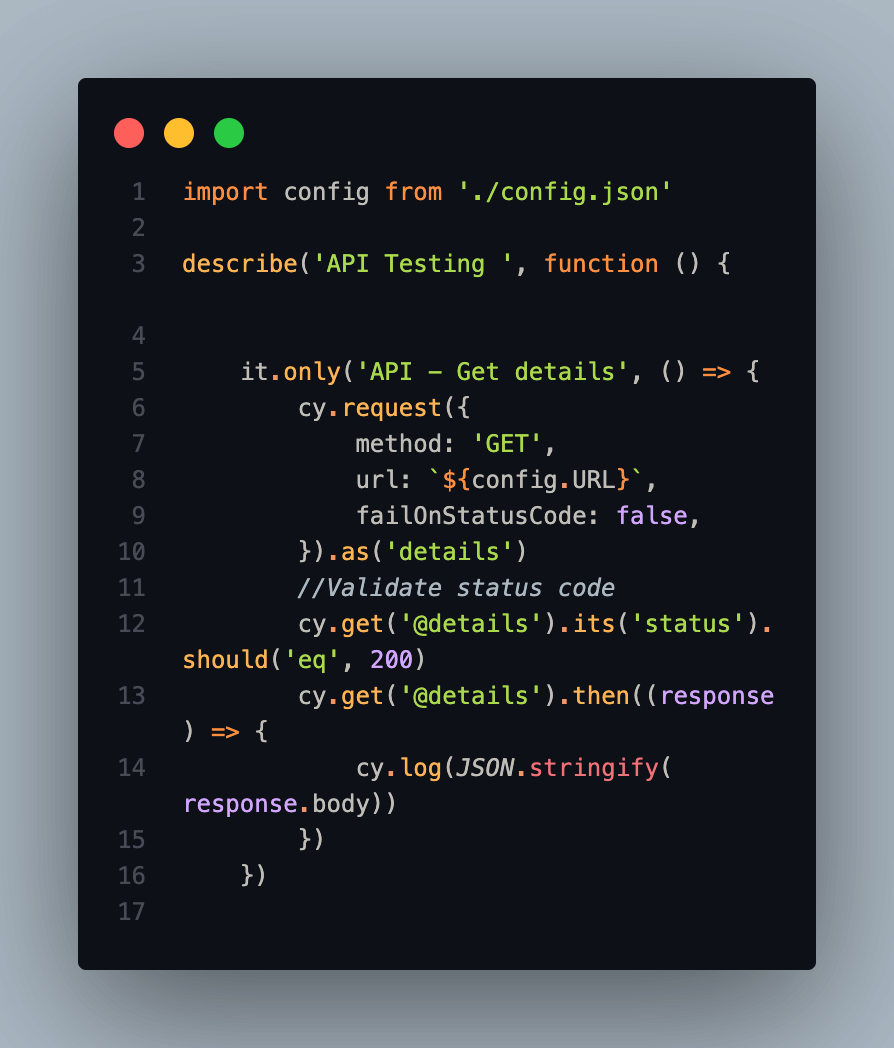
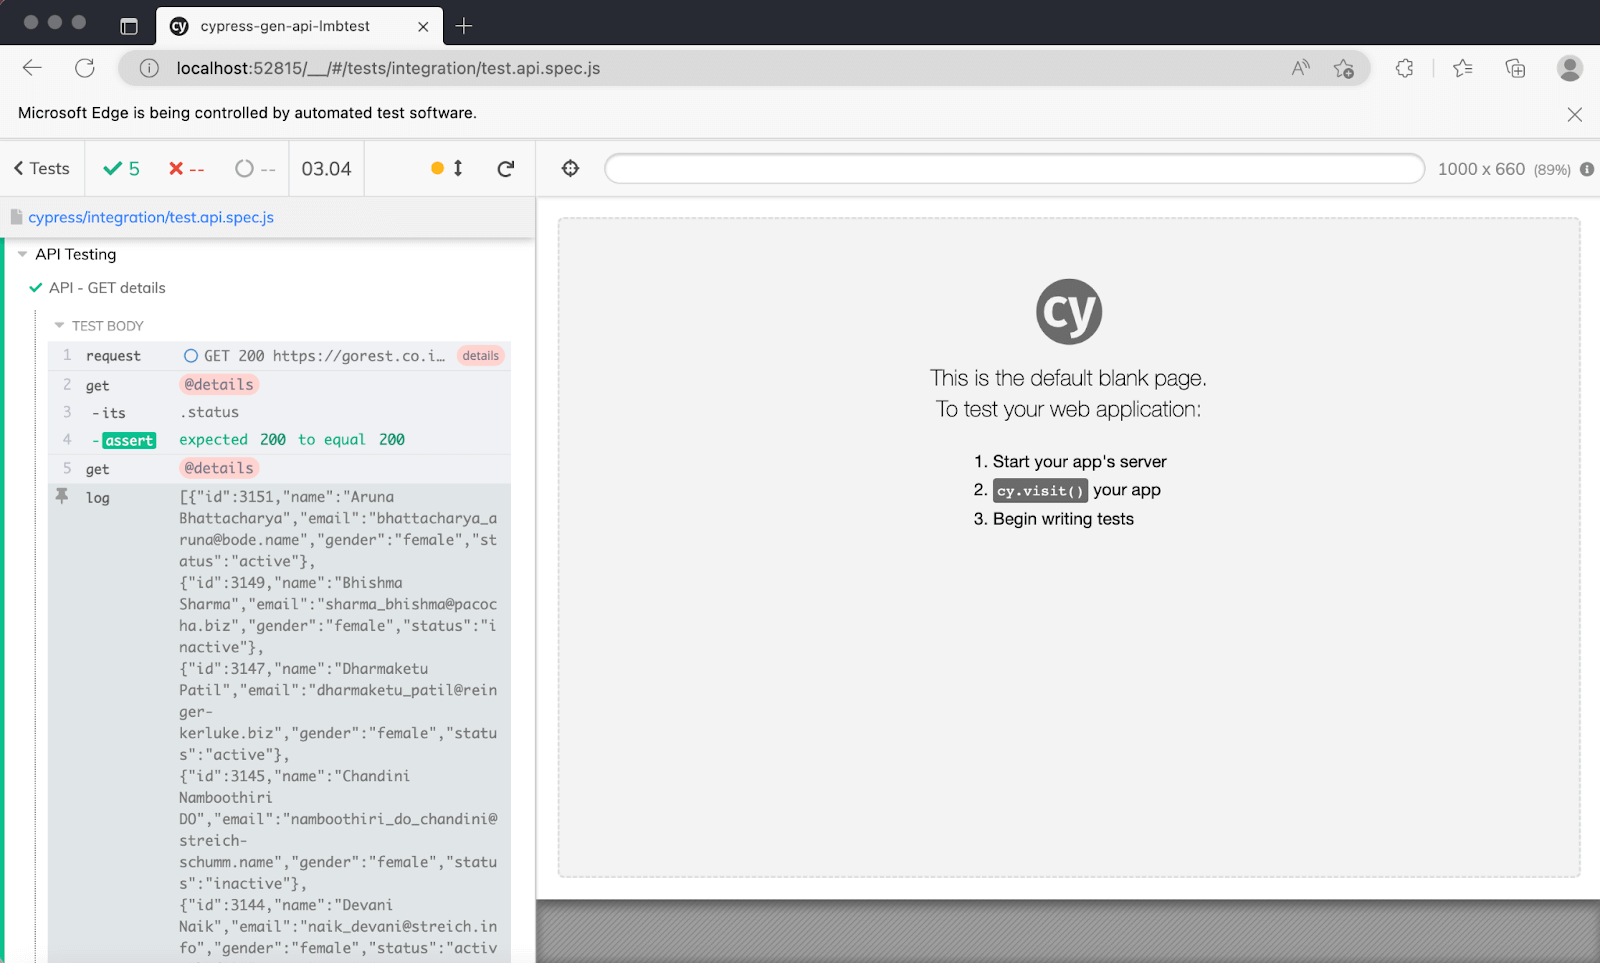
For the code above, we make a ‘GET‘ request to our users in the ‘gorest’ API route. We assert that the response returns a 200 status code and prints the body response for that request. Now let’s run it and see the Cypress Test Runner result:
Let’s understand the code above; we are using cy.request with some parameters, first is the method cy.request supports the following methods -> GET, POST, PUT, DELETE, PATCH, HEAD, OPTIONS, among others.
Then the URL to request, and finally, the failOnStatusCode equal to false, avoiding our tests failing with other status codes different to 2xx and 3xx. One crucial part is creating an alias for our request to use for the assertions to validate the status code and JSON body or other necessary validations.
Now, let’s create more requests using different methods with cy.request:
Cypress API Testing POST – Code
|
1 2 3 4 5 6 7 8 9 10 11 12 13 14 15 16 17 18 19 20 21 22 |
cy.request({ method: 'POST', url: `${config.URL}`, failOnStatusCode: false, 'auth': { 'bearer':`${config.Bearer_Rest}` }, body: {'name':'Test6 API6', 'gender':'male', 'email':'test_api6@test.com', 'status':'active'} }).as('details') //Validate status code cy.get('@details').its('status').should('eq', 201) cy.get('@details').then((response) => { let res = response.body att1 = res.id cy.log(att1) }) cy.get('@details').then((response) => { cy.log(JSON.stringify(response.body)) }) |
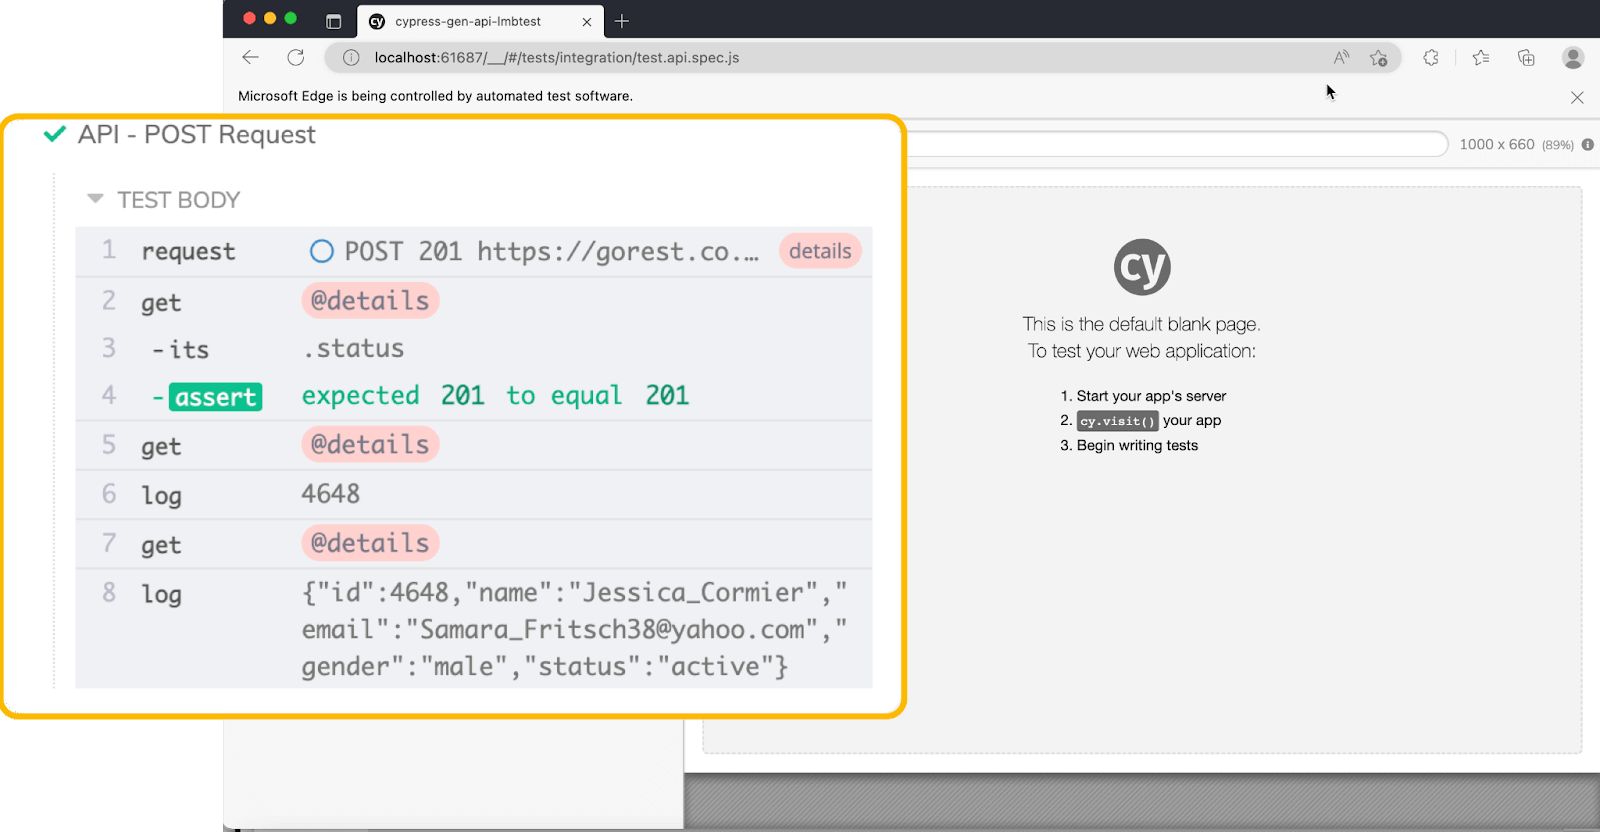
For the code above, we send a ‘POST’ request to create a new user in the ‘gorest’ API route. We assert that the response returns a 201 (Success and a New resource have been created) status code and saves the id for future purposes (UPDATE, DELETE, PATCH). Besides that, we added a few fields for Bearer Authentication and body request to send the data required for the new user.
Cypress API Testing Put and Delete – Code
|
1 2 3 4 5 6 7 8 9 10 11 12 13 14 15 16 17 18 19 20 21 22 23 24 25 26 27 28 29 30 31 32 33 |
cy.request({ method: 'PUT', url: `${config.URL}`+att1, failOnStatusCode: false, 'auth': { 'bearer': `${config.Bearer_Rest}` }, body: {'name':'Test API_Update', 'gender':'female', 'email':'test_update@test.com', 'status':'active'} }).as('details') //Validate status code cy.get('@details').its('status').should('eq', 200) cy.get('@details').then((response) => { cy.log(JSON.stringify(response.body)) }) cy.request({ method: 'DELETE', url: `${config.URL}`+att1, failOnStatusCode: false, 'auth': { 'bearer': `${config.Bearer_Rest}` }, }).as('details') //Validate response code cy.get('@details').its('status').should('eq', 204) cy.get('@details').then((response) => { cy.log(JSON.stringify(response.body)) }) |
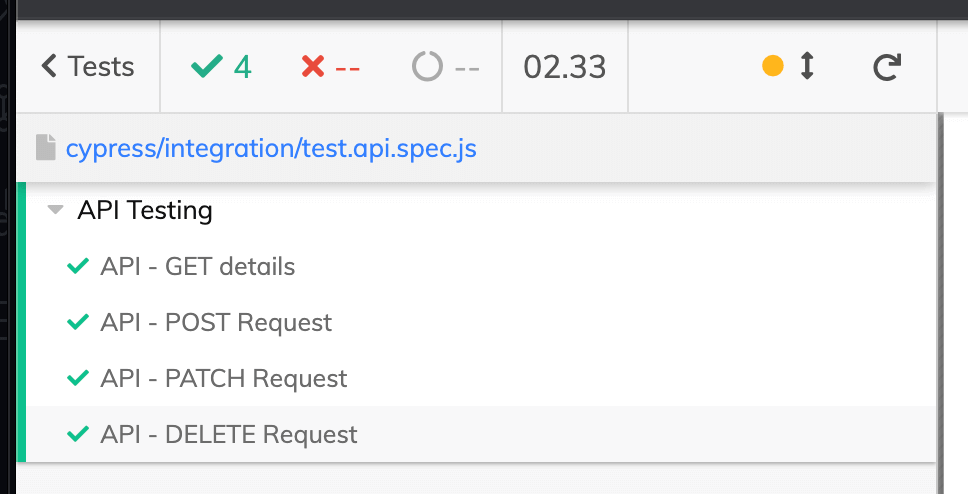
We can notice from the code above that the att1 global variable is part of the URL; as mentioned above, we need previous data to Update or Delete. Also, there is a new status code for our DELETE request; the response returns a 204 (there is no content to send in the response payload body.) Let’s see the execution results for those tests.
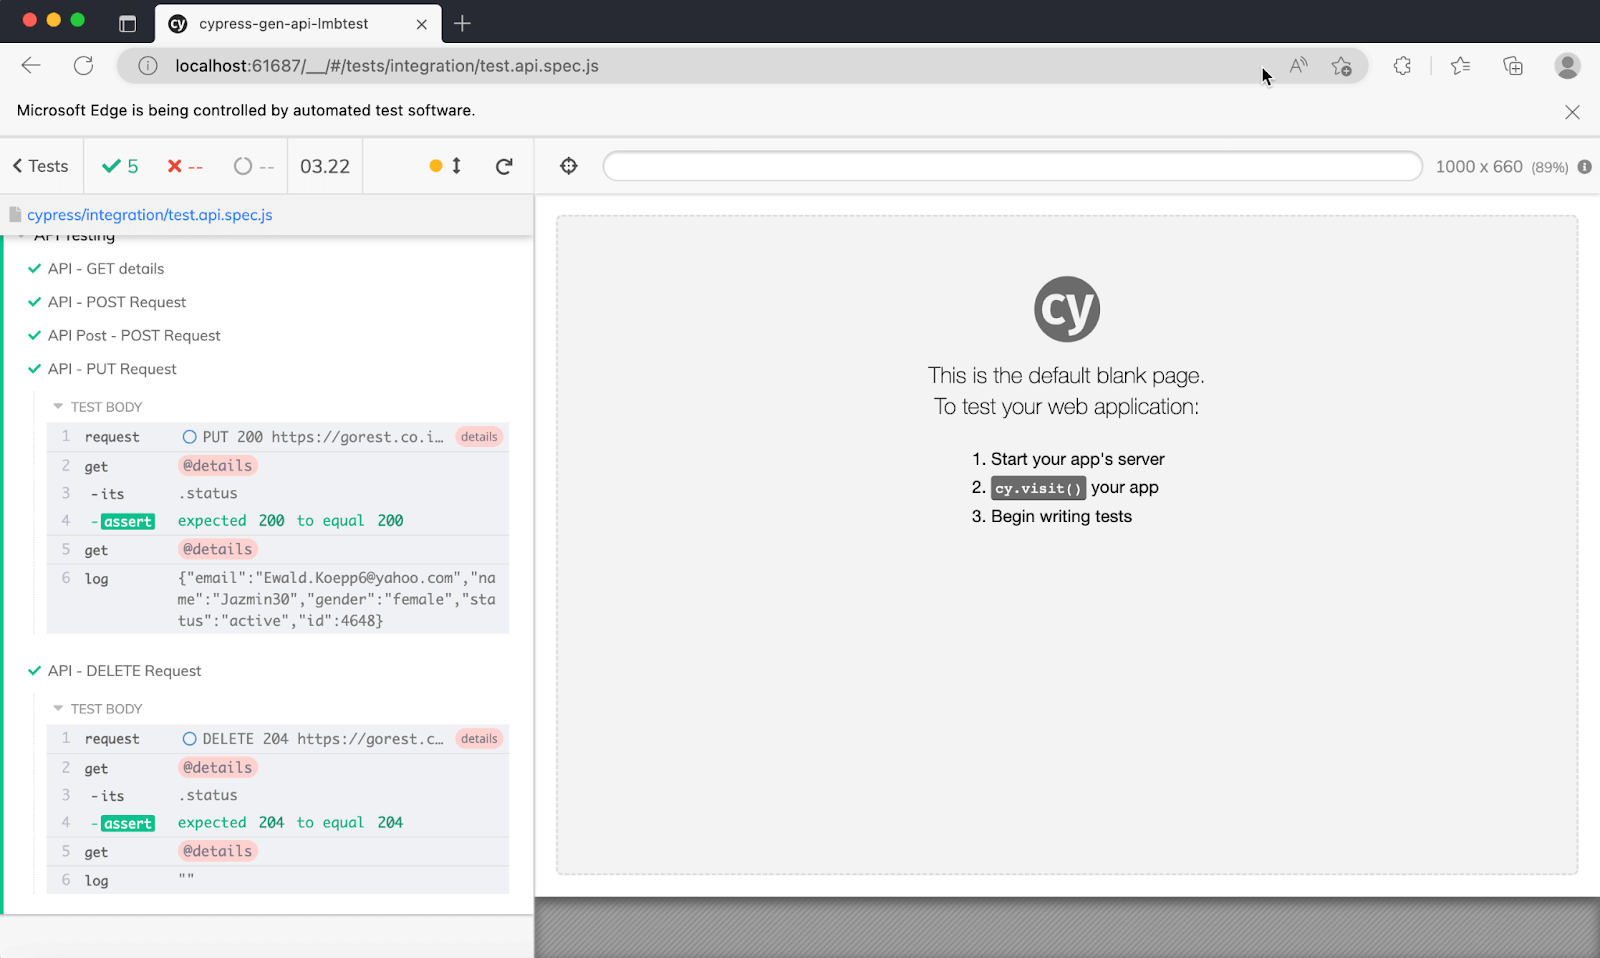
As QAs validate a status code 204, we should ask if this is the proper response; a successful response should be 200 (OK) if the response includes an entity describing the status or a 202 (Accepted). But, again, it is up to your current needs.
It’s time to explore the GraphQL part; unlike a REST API, GraphQL requests are all sent to a single endpoint. We can easily use Cypress to fetch all the uses in our GraphQL endpoint. It will look like this:
|
1 2 3 4 5 6 7 8 9 10 11 12 13 14 15 16 |
cy.request({ method: 'POST', url: `${config.URL4}`, failOnStatusCode: false, header: { 'Accept-Encoding': 'application/json', 'Content-Type' : 'application/json', 'bearer': `${config.Bearer_Graph}` }, body: { query: 'query{users {pageInfo {endCursor startCursor hasNextPage hasPreviousPage} totalCount nodes {id name email gender status}}}' } }).as('details') //Validate status code cy.get('@details').its('status').should('eq', 200) cy.get('@details').then((response) => { cy.log(JSON.stringify(response.body)) }) |
As we can notice from the code above, the body request is a query; that’s the essential part; GraphQL is a query language for APIs; if we understand our GraphQL schema, we can query and get the desired response.
Cypress plugin API
In this section of our Cypress API testing guide, we will discuss one API plugin, and probably, one of the most useful, related to APIs, cypress-plugin-api; the creator of this plugin mentions that if we merge Postman with Cypress, we obtain the cypress-plugin-api. First, we need to install it
|
1 |
'npm i cypress-plugin-api'. |
As we are using the 9.7.0 version, we need to add it to our /support/index.js file:
|
1 |
import 'cypress-plugin-api' |
We can now use the cy.api() command. It works precisely like cy.request() command, but in addition to calling the API, it will print our information about the API call in your Cypress runner, as you can see below:
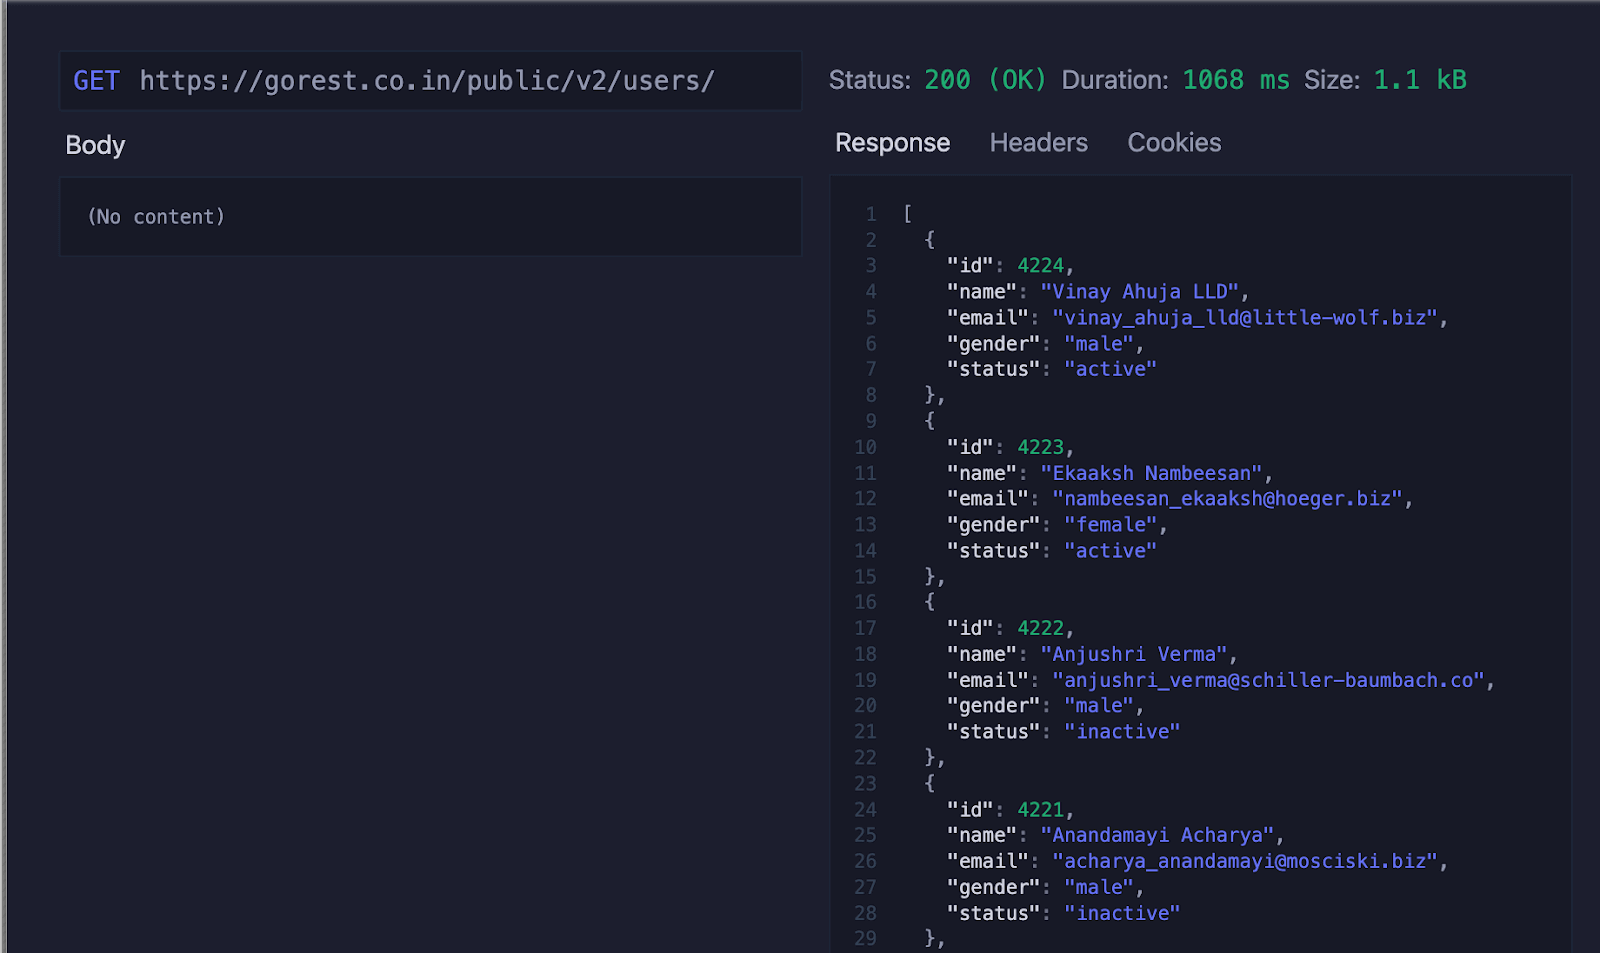
As we can see, the information printed looks useful, including response, headers, and cookies; besides that, we can see the body request and authentication.
Run End-to-End Cypress tests on the cloud grid. Try LambdaTest Now!
Code Walkthrough:
Let’s start defining our config.json file; here, we can include some data and URLs:
Then, we use ‘faker’ for our random data related to our POST and PUT methods; we can install it using the following:
|
1 |
npm install --save-dev @faker-js/faker |
After that, we use a global variable for our user-id field; it’s up to you if you want to use Cypress env variables or global variables, in my particular case, as this will be used for API. There is no need to use it outside this file; I prefer that variable.
|
1 2 3 4 5 6 7 8 9 10 11 12 13 14 |
it('API Post - POST Request', () => { cy.request({ method: 'POST', url: `${config.URL2}`, failOnStatusCode: false, 'auth': { 'bearer': `${config.Bearer_Rest}` }, body: {'user':att2, 'user_id': att1, 'email':faker.internet.email(), 'title':'This is a title', 'body': 'This is a message'} }).as('details') |
Regarding the API tests, we added one more test about Post using a user previously created; as we can notice, the API Post – POST Request‘. The structure is similar to our previous request, only changing the body. Testers must understand the API definition to send requests and adequately create Negative tests based on API schema.
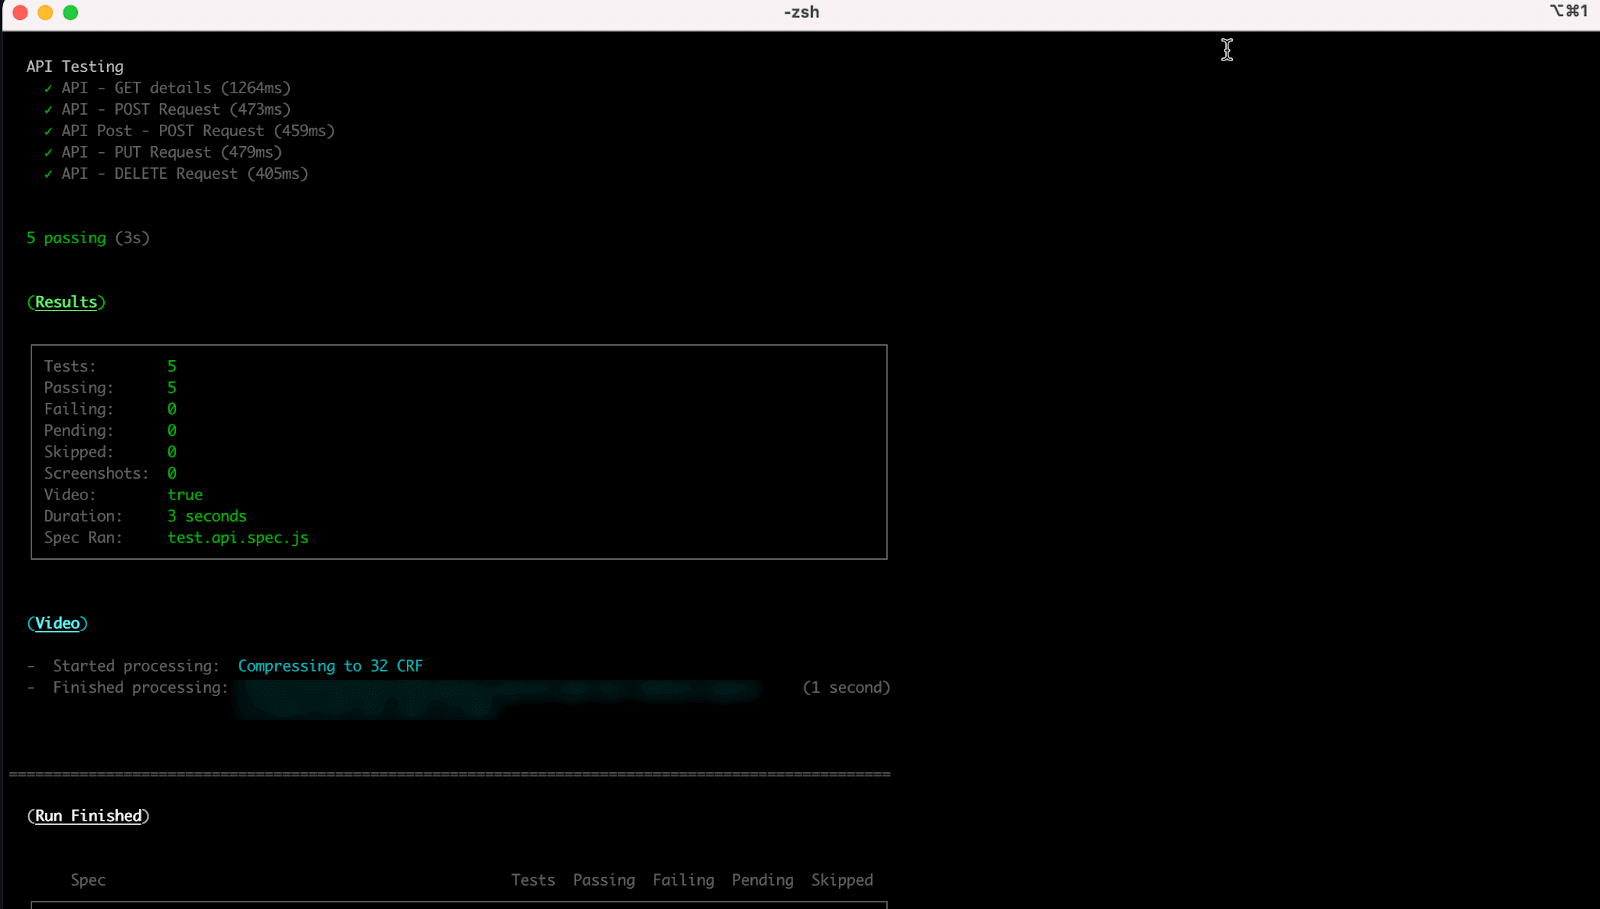
It’s time to run our tests; as we saw above, we can run using the UI Runner or terminal mode; let’s try both.
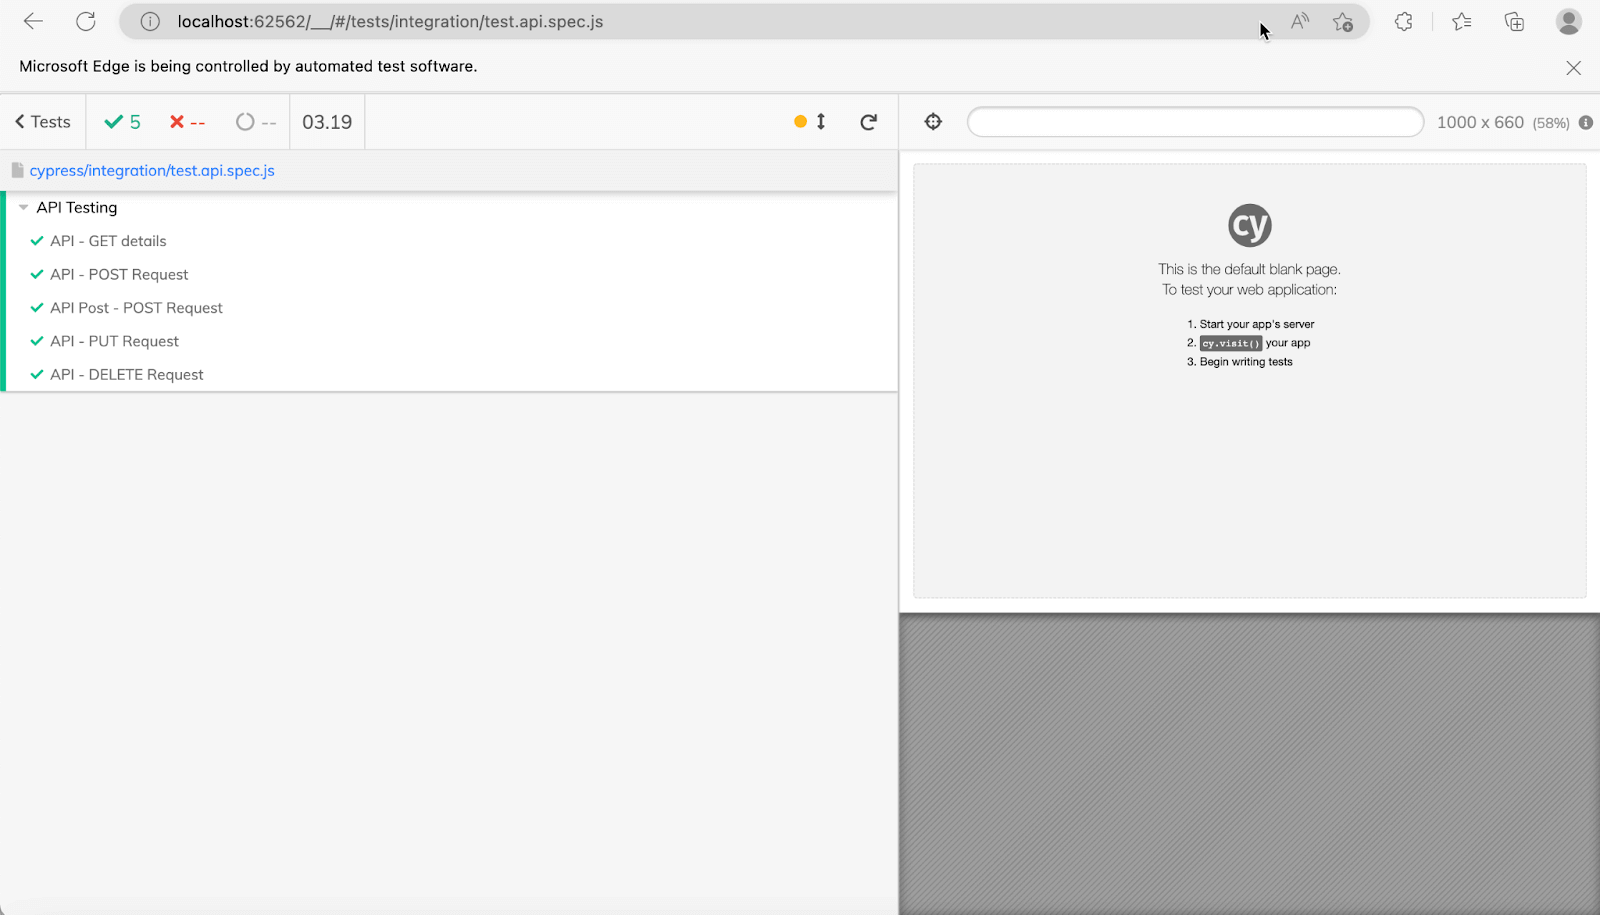
We are going to use the following command to run one specific test spec:
|
1 |
npx cypress run --spec cypress/integration/test.api.spec.js |
As we can see above, the specific test case is executed on the CLI using the “–spec” option.
Mochawesome is also available if we want to take a look:
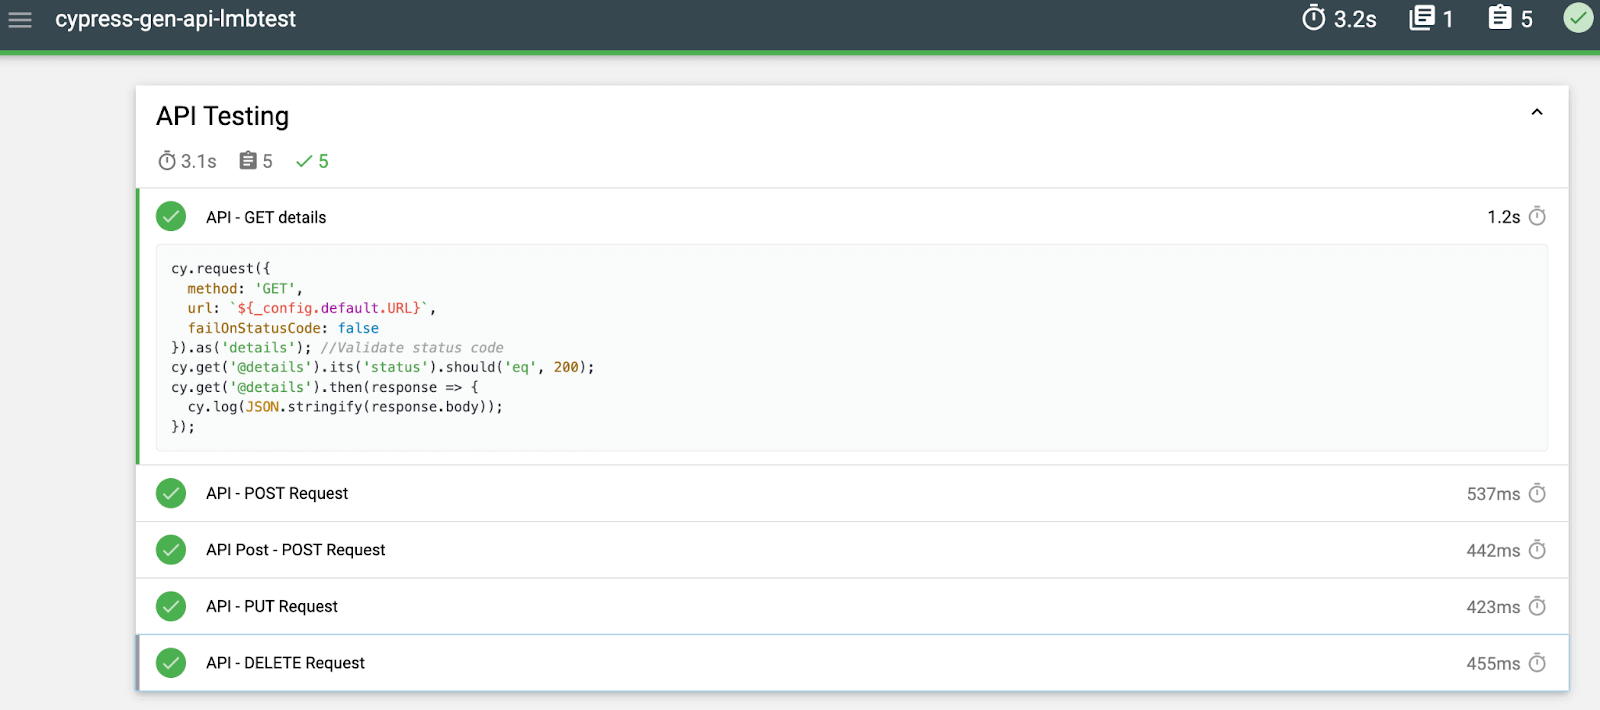
If you want to know more about Mochawesome, please visit the blog on generating Mocha Reports with Mochawesome. Also, please download the GitHub repo and provide some feedback.
Cleaner Methods for our Cypress API Testing
As we can see in our code, we are repeating our code multiple times, especially for the POSTs and PUT, GET and DELETE; what about using some methods to encapsulate our “cy.requests” calls:
|
1 2 3 4 5 6 7 8 9 10 11 12 13 |
export default class MainMethods { static GetDelMethod(url,method){ cy.request({ method: method, url: url, failOnStatusCode: false, 'auth': { 'bearer': `${config.Bearer_Rest}` }, }).as('details') } |
Now, let’s reuse the methods inside of our Test code:
|
1 2 3 4 5 6 7 8 9 |
it('API - GET details', () => { MainMethod.GetDelMethod(`${config.URL}`,'GET') //Validate status code cy.get('@details').its('status').should('eq', 200) cy.get('@details').then((response) => { cy.log(JSON.stringify(response.body)) }) }) |
|
1 2 3 4 5 6 7 8 9 10 11 12 13 14 15 16 17 18 19 20 |
it('API - POST Request', () => { const body = {'name':faker.internet.userName(), 'gender':'male', 'email':faker.internet.email(), 'status':'active'} //Method MainMethod.PostMethod(`${config.URL}`, JSON.parse(JSON.stringify(body))) //Validate status code cy.get('@details').its('status').should('eq', 201) cy.get('@details').then((response) => { let res = response.body att1 = res.id att2 = res.user cy.log(att1) }) cy.get('@details').then((response) => { cy.log(JSON.stringify(response.body)) }) }) |
|
1 2 3 4 5 6 7 |
it('API - DELETE Request', () => { MainMethod.GetDelMethod(`${config.URL}`+att1,'DELETE') cy.get('@details').its('status').should('eq', 204) cy.get('@details').then((response) => { cy.log(JSON.stringify(response.body)) }) }) |
What we tried above was a crude attempt to use the Builder pattern, as the focus here is that the instance is returned from every method (every computation) and is then used to build up the complex object. The builder pattern can help us to reuse and maintain different API test scenarios. You can learn more about it through this blog on Fluent Interface Design Pattern blog.
Using LambdaTest Rest API to validate data
In this section of our blog on Cypress API testing, we will use LambdaTest REST APIs for related APIs to validate the data already uploaded in our previous tests to LambdaTest.
LambdaTest Cypress cloud grid offers an online device farm with 3000+ real devices and browsers to help you get the job done. This can help improve the overall test coverage of an application by enabling tests to be run on different combinations of browsers and operating systems using the same test scripts.
With Cypress parallel testing, run multiple tests concurrently to expedite the testing process and enable Cypress test automation at scale. By leveraging cloud grids and parallel testing, it is possible to significantly improve the quality of a product by thoroughly testing it across a wide range of environments.
Subscribe to the LambdaTest YouTube channel for tutorials around Selenium testing, Playwright browser testing, Appium, and more.
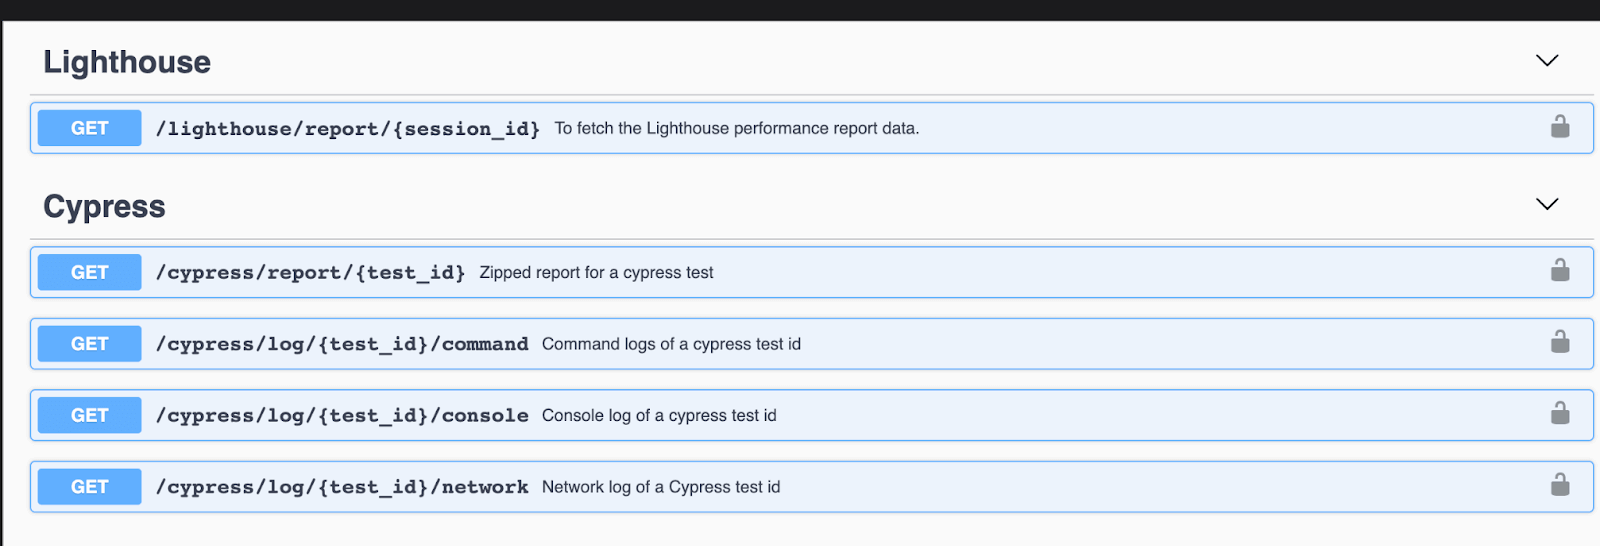
For this example, we will use the Cypress level GET request for execution on the LambdaTest platform. Let’s code one test and get the Cypress console logs from the LambdaTest API endpoint:
|
1 2 3 4 5 6 7 8 9 10 11 12 |
static GetDelMethodLam(url,method){ cy.request({ method: method, url: url, failOnStatusCode: false, 'headers' : { 'accept': 'application/octet-stream', 'content-type': 'application/x-gzip', 'Authorization': "Basic <code> }, }).as('details') |
Let’s dig into the code; we are reusing one of our Methods for ‘GET’ and ‘DELETE,’ just updating the headers part as we need that to authenticate into LambdaTest API.
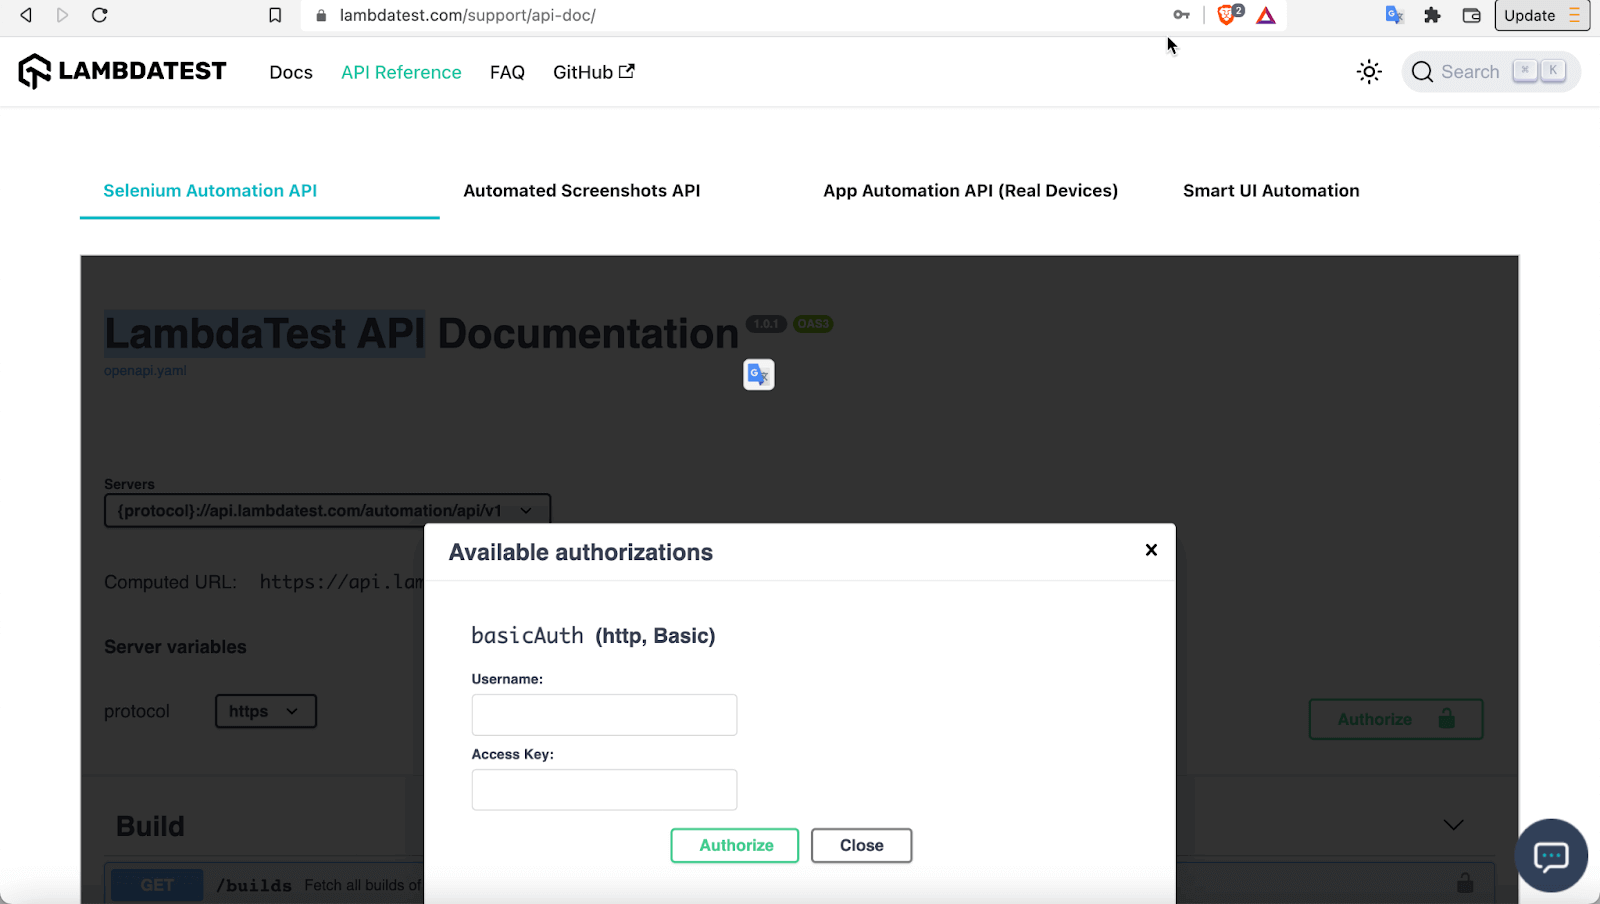
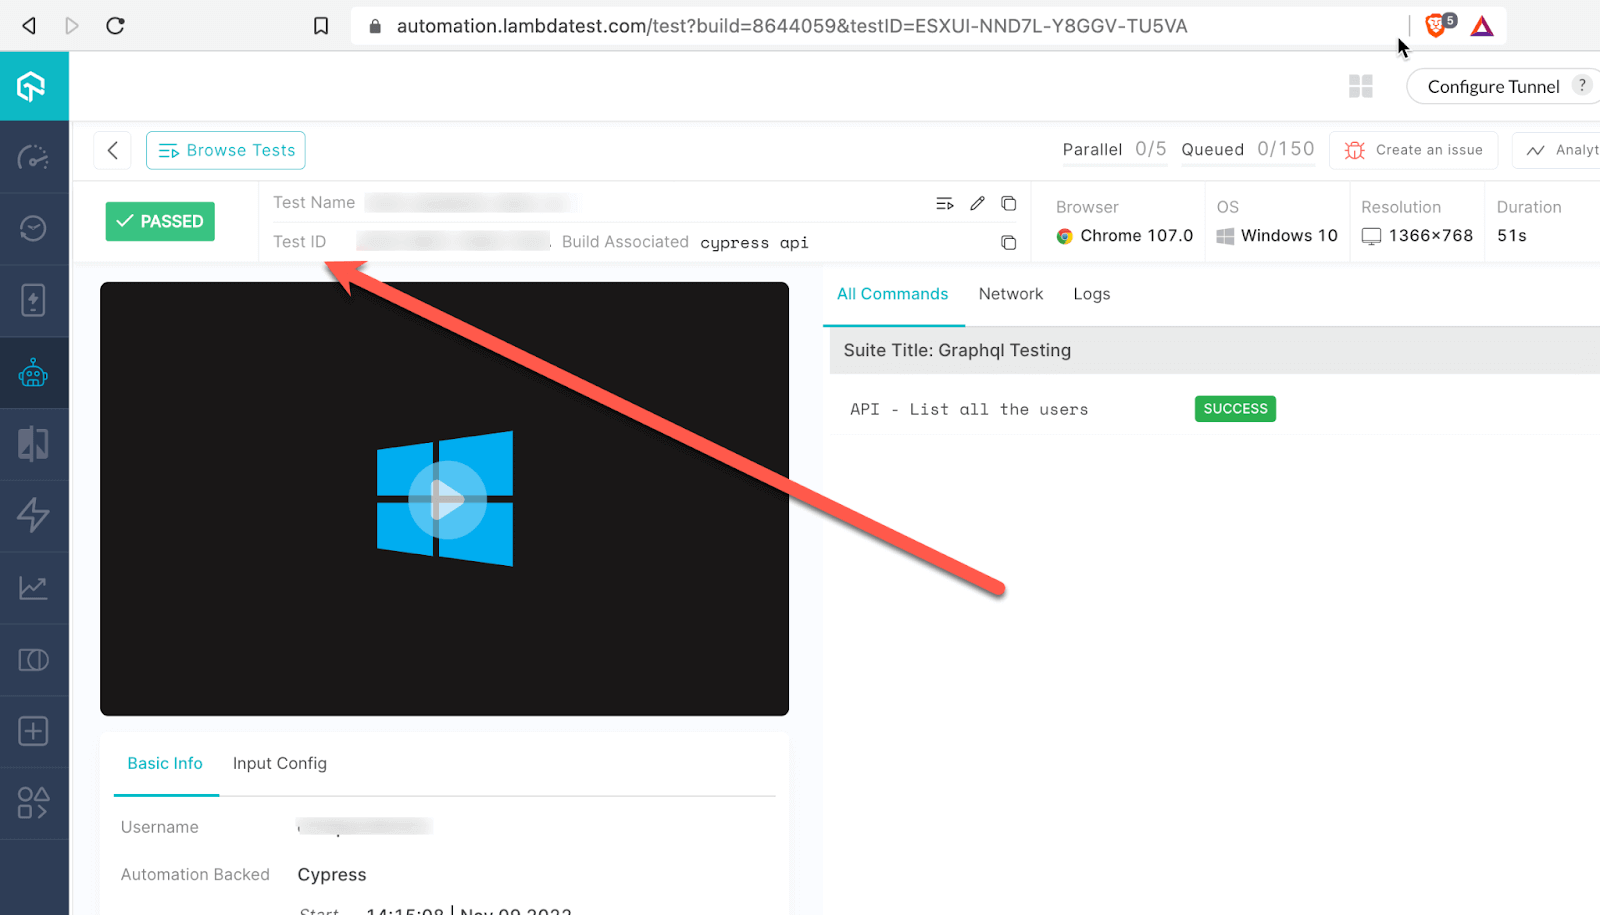
Once in our test, we use our config.json file for the URL endpoint and testID, passing the Method name and running it to see the data. It is essential to get the test_Id from our LambdaTest:
|
1 2 3 4 5 6 7 8 9 10 11 12 13 14 |
import config from './config.json' import MainMethod from '../builder/components/Mainmethods' describe('API Testing LambdaTest ', function () { it.only('API - GET details', () => { MainMethod.GetDelMethodLam(`${config.URLL}`+`${config.testId}`+'/console','GET') //Validate status code cy.get('@details').its('status').should('eq', 200) cy.get('@details').then((response) => { cy.log(JSON.stringify(response.body)) }) }) }) |
As we can see in the response, there are some logs for the past execution of Cypress UI testing.
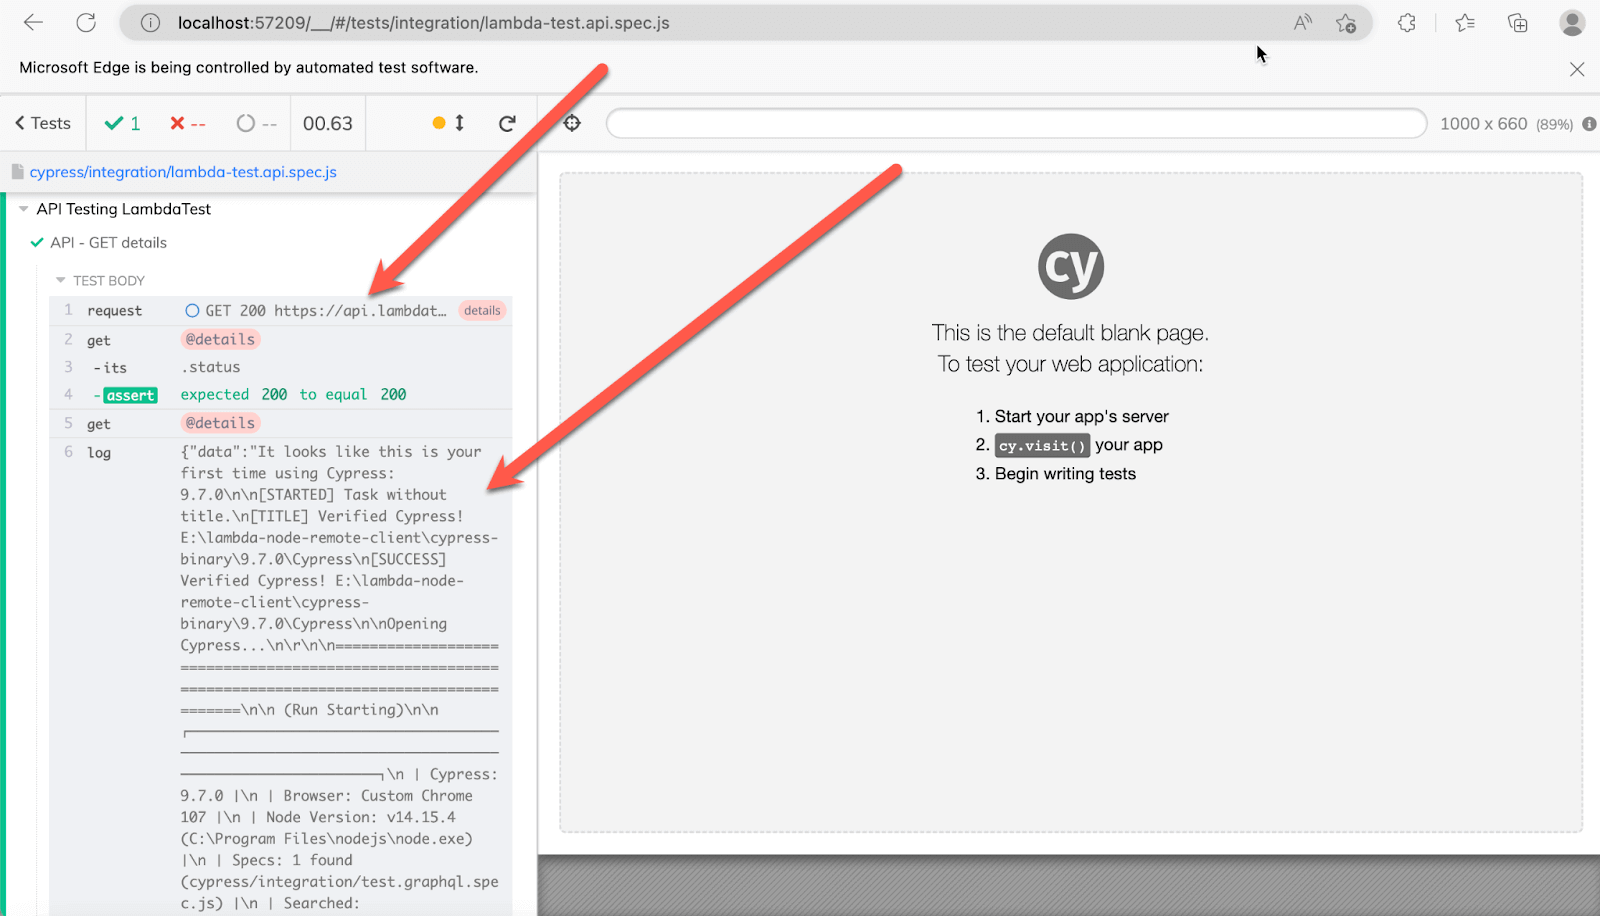
Another Test example using API for Network logs:
|
1 2 3 4 5 6 7 8 9 |
it('API - GET Network', () => { MainMethod.GetDelMethodLam(`${config.URLL}`+`${config.testId}`+'/network','GET') //Validate status code cy.get('@details').its('status').should('eq', 200) cy.get('@details').then((response) => { cy.log(JSON.stringify(response.body)) }) }) |
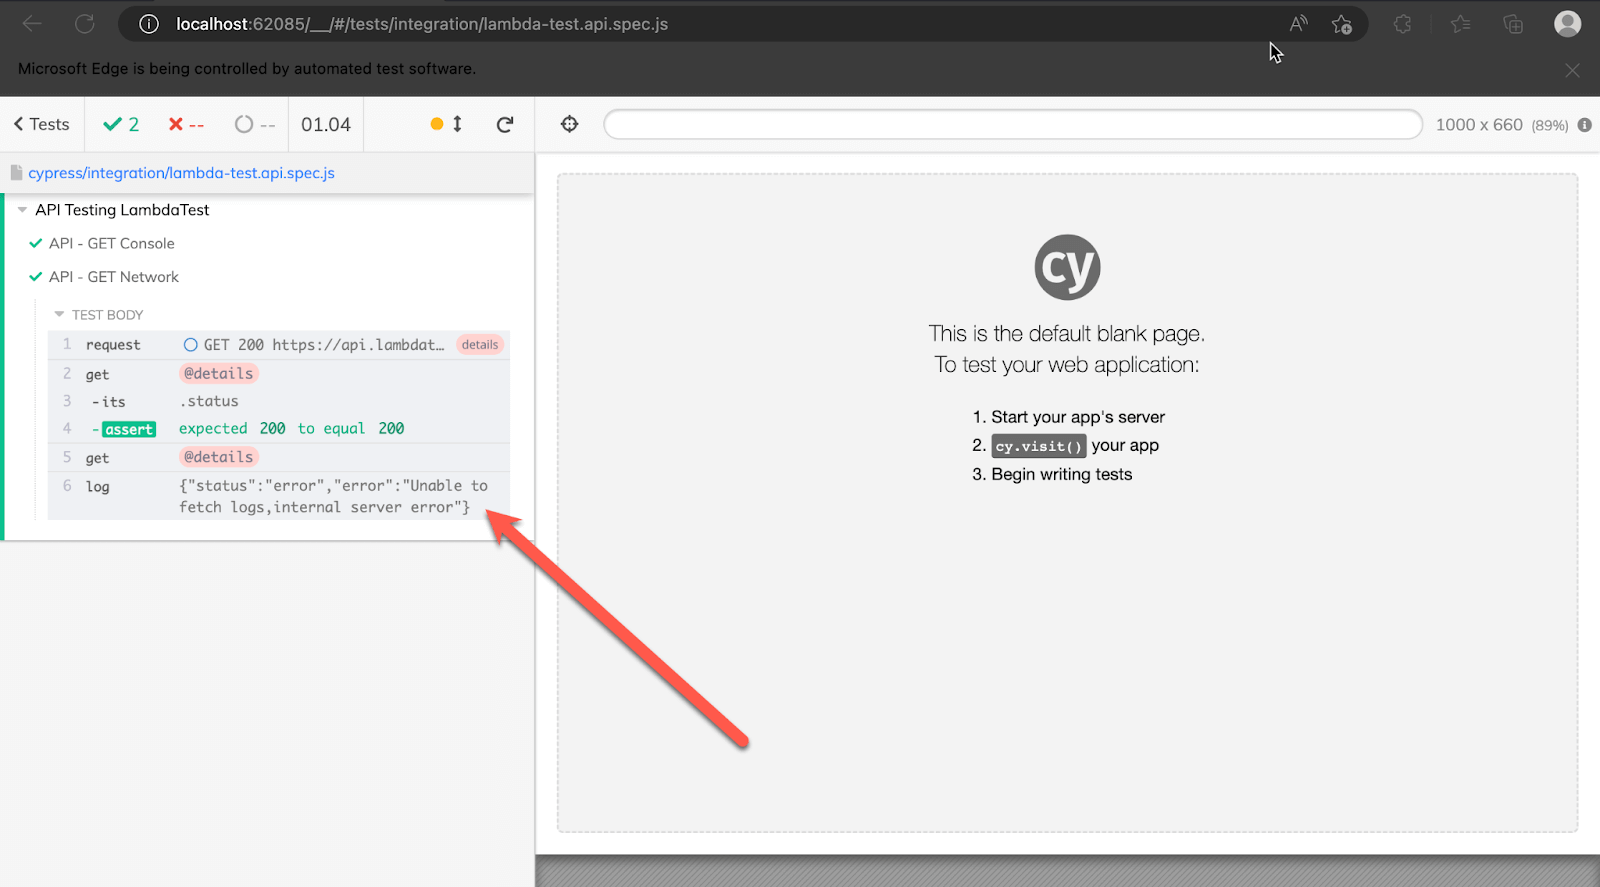
Last but not least, a PATCH method to change the build name:
|
1 2 3 4 5 6 7 8 9 10 11 12 13 |
static PatchMethodLam(url){ cy.request({ method: 'PATCH', url: url, failOnStatusCode: false, 'headers' : { 'accept': 'application/json', 'Authorization': "Basic <> }, body: { 'name': 'cypress - api mod2 cypress' } }).as('details') } |
Shown below is the test runner results:
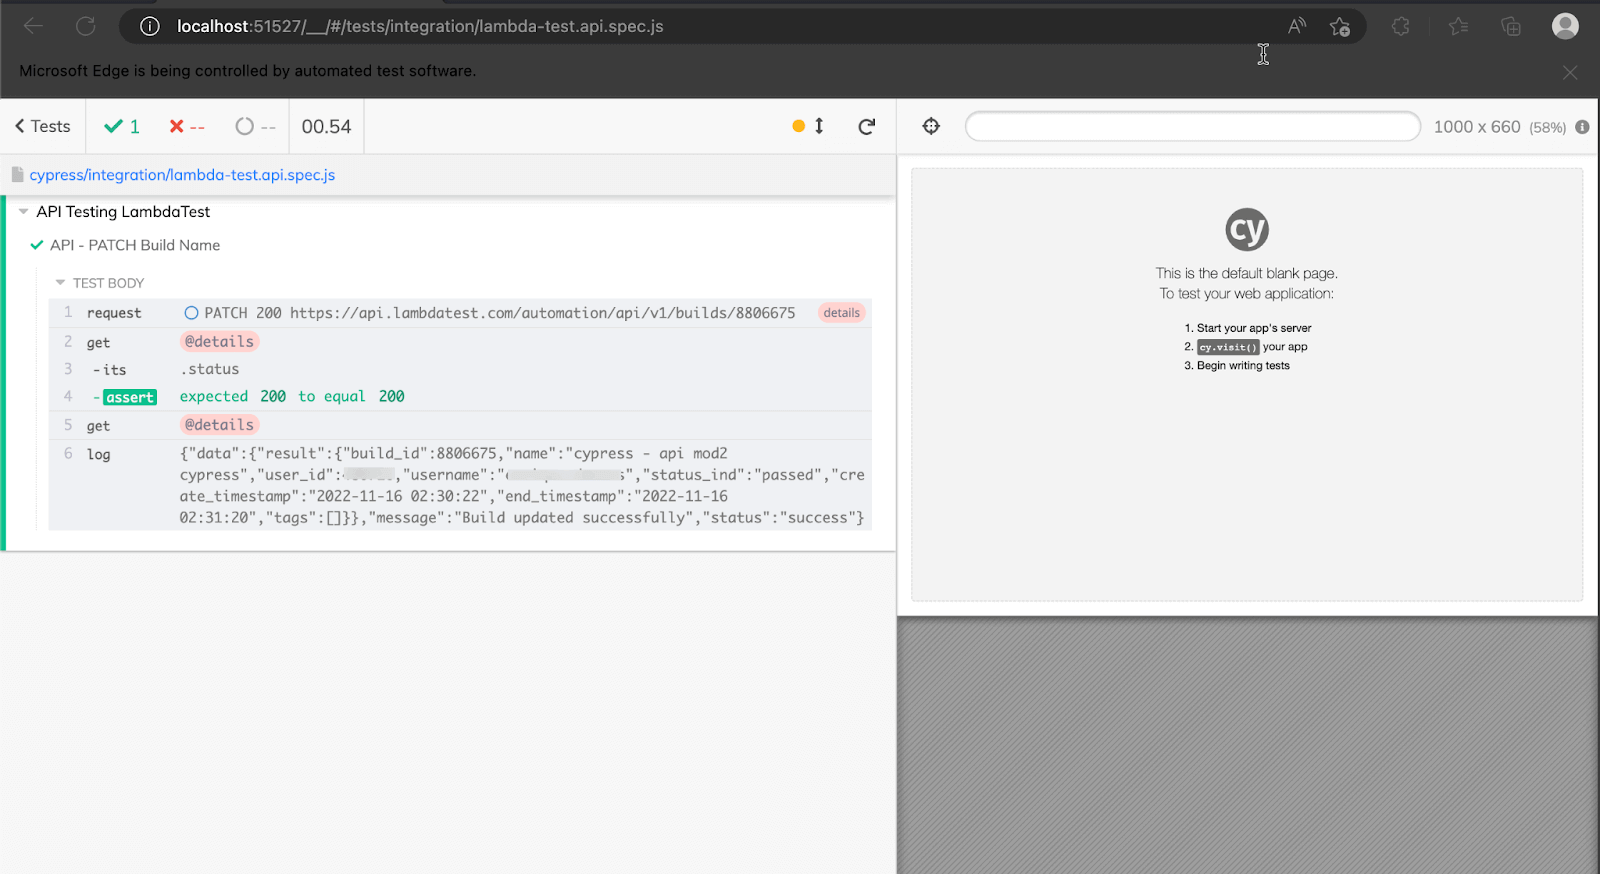
Hopefully, this will give you an idea of how to take advantage of the LambdaTest APIs and build your Cypress requests.
If you want to deepen your understanding of Cypress and become proficient in using it to test web applications, this course could be a good fit. It covers the fundamentals of Cypress and provides a solid foundation for building more advanced testing skills.
The Cypress 101 certification course is designed for developers and testers who already have a basic understanding of Cypress and want to advance their knowledge and Cypress e2e testing skills.
Wrapping Up
API testing is a process that involves three steps:
- Sending the request with the necessary input data
- Getting the response’s output data
- Validating the response against the expected outcome
These steps seem very easy and quick to follow for any tester and are, in fact, truly easy for low functionality levels, but tests get more and more complex as you start testing APIs on a deeper level.
It is strongly advised to consider Cypress API testing as a core requirement of your project development process and make it as extendable, reusable, and maintainable as possible. With this blog post on Cypress API Testing, we’ve covered a lot, but we’ve only scratched the surface of API Test Automation. The Cypress site has much more detailed documentation and examples of the power of Cypress.
If there are any questions or ideas about improving our Cypress API Testing, please let me know or reach me directly.
Happy Bug Hunting!
Frequently Asked Questions (FAQs)
Can Cypress be used for API testing?
Yes, Cypress can be used for API testing. Cypress is a JavaScript-based end-to-end testing framework designed to make testing web applications easier. It can be used to test the functionality of APIs by making HTTP requests to the API and verifying the response received.
To test an API using Cypress, you can use the cy.request() command to send an HTTP request to the API. You can specify the HTTP method (e.g., GET, POST, PUT, etc.), the URL of the API endpoint, and any data or headers that need to be included in the request. Once the request has been sent, you can use assertions to verify the response received from the API, such as checking the status code, response body, or any custom headers.
How do you write API test in Cypress?
To write API tests in Cypress, you can use the cy.request() command to send an HTTP request to the API and then use assertions to verify the response received.
How to execute API in Cypress?
To execute an API in Cypress, you can use the cy.request() command to send an HTTP request to the API. The cy.request() command takes three arguments: the HTTP method (e.g., GET, POST, PUT, etc.), the URL of the API endpoint, and the optional options object.
Got Questions? Drop them on LambdaTest Community. Visit now


