
How to Use Cypress for File Upload and Download
Kailash Pathak
Posted On: January 23, 2024
![]() 287509 Views
287509 Views
![]() 28 Min Read
28 Min Read
Testing file transfer functionalities in web applications is crucial for efficiently and accurately validating uploading and downloading features.
Uploading files typically involves interacting with a file input element on a web page, and in Cypress, you can automate this process by simulating user interaction and attaching a file using the attach() command.
On the other hand, downloading files is commonly achieved by sending an HTTP request to the server and receiving a file as part of the response. In Cypress, automating file downloads can be accomplished by intercepting the HTTP response and saving the file to a specified location on the user’s computer, a task facilitated by the writeFile() command.
In this tutorial on Cypress for file upload and download, we will delve into various use cases that cover the methods for uploading and downloading files, including scenarios involving single or multiple files using various Cypress methods like readFile() and more.
So, let’s get started!
TABLE OF CONTENTS
Why use Cypress for file upload and download?
In web applications, downloading and uploading files are essential for various activities, such as social media platforms, eCommerce sites, and document management systems. For instance, in an eCommerce application, users may need to upload images or product specifications when creating new listings. Additionally, the platform might offer a feature allowing customers to download invoices or purchase histories for their records.
Similarly, social media platforms enable users to share multimedia content like photos and videos. Users upload these files from their devices to the platform, where they are stored and made accessible to others who can download and view them.
If a web application lacks the capability for users to upload or download files, it restricts their ability to seamlessly transfer data between their devices and the application’s server. This limitation can lead to potential business losses and negatively impact user experience.
Without a web application’s file upload and download capabilities, users face limitations in seamlessly transferring data between their devices and the application’s server. This deficiency risks potential business losses and negatively impacts the overall user experience.
Efficient testing of file transfer functionalities in web applications is vital for accurately validating uploading and downloading features. Manual testing of these features can be time-consuming and prone to human error. To overcome this, leveraging Cypress to automate file upload and download testing proves valuable. This reduces manual effort and saves time, contributing to an overall improvement in the application’s quality.
Cypress offers a seamless solution for automating these tests, allowing developers to concentrate on more critical aspects of the application’s development. The tool provides native support for handling file uploads, facilitating easy interaction with file input elements, triggering file selection, and validating the upload process. This native support simplifies testing scenarios related to file uploads.
Moreover, Cypress enables the interception and stubbing of network requests, including those associated with file uploads and downloads. This functionality empowers developers to control the behavior of these requests during testing, facilitating the simulation of various scenarios and the testing of edge cases.
This robust automation tool not only streamlines the testing of file transfer functionalities but also ensures that these critical features operate efficiently within the web application. Whether you’re dealing with file uploads or downloads, Cypress provides the necessary tools to enhance the reliability and effectiveness of your automated testing scripts.
To gain a deeper understanding of Cypress, including its features, methods, and how to get started, watch the video tutorial below for a more detailed walkthrough.
How to use Cypress for file upload?
Using Cypress for file uploads is a frequent requirement in web applications, particularly those that empower users to submit files. This process involves choosing a file stored on your computer and moving it to a web application as part of a testing scenario. In other words, during a test, you simulate a user selecting a file from their local machine and uploading it to the web application being tested.
This is a common scenario when testing functionalities such as file uploads on a website. When using Cypress for file upload, we need to ensure we are testing with file formats that the application supports. Below is the list of formats that any application must support to allow users to upload and download files.
- Images: JPEG (.jpg, .jpeg), PNG (.png), GIF (.gif)
- Documents: PDF (.pdf), Microsoft Word (.doc, .docx), Microsoft Excel (.xls, .xlsx)
- Videos: MP4 (.mp4), WebM (.webm), AVI (.avi), MOV (.mov))
The above list indicates supported file types for different categories of content—images, documents, and videos—that developers might encounter when testing Cypress for file upload in web applications.
Making sure that the application can handle the different file formats mentioned above correctly is important. For instance, when testing image uploads, you must check if it accepts JPEG, PNG, or GIF formats. You must also test with PDFs, Word files, and Excel spreadsheets for document uploads to ensure everything works as expected.
There are multiple ways to use Cypress for file upload. Here are some common approaches:
- Using Cypress for file upload with the selectFile().
- Using Cypress for file upload with the cypress-file-upload plugin.
Using Cypress for file upload with the selectFile()
There are various ways of uploading files using the selectFile() command.
Uploading a single file using the selectFile()
Before explaining how to upload files using selectFile(), let’s learn about the command selectFile().
The selectFile() command in Cypress enables you to upload a single file or an array of files and simulate the selection of files with additional options. In Cypress file upload, the selectFile() command allows you to interact with file input elements (e.g., < input type=”file“ >)
Syntax
The selectFile() method takes multiple arguments, as shown below:
|
1 2 3 4 |
. selectFile(file) . selectFile(file, options) . selectFile( [filel, file2,....]) . selectFile( [filel, file2,....], options) |
While using Cypress for file upload, the selectFile() command mimics dragging files into the browser or selecting and uploading files to an HTML5 input element. The selectFile() command in Cypress for file upload triggers the file selection dialog in the browser.
You can provide file paths or an array of file paths to the command to simulate the selection of files. The selectFile() command in Cypress supports various file types for emulating file selection or upload actions in a browser or HTML5 input element. It can effectively handle common file types, facilitating a seamless testing experience.
- Text files (e.g., .txt, .csv)
- Image files (e.g., .jpg, .png, .gif)
- Document files (e.g., .doc, .docx, .pdf)
- Audio files (e.g., .mp3, .wav)
- Video files (e.g., .mp4, .avi)
If you are getting started with Cypress and want to install Cypress, you can go through this support document on getting started with Cypress testing that covers all the steps from setting up Cypress to performing your first test using Cypress in detail. You can consider installing the latest version. However, the version at the time of writing this blog is 12.11.0.
The correct methods for interacting with file input elements in Cypress for file upload are cy.selectFile(file), cy.fixture(), and ct.get().attachFile(). Below is the command that helps you upload a file in Cypress:
| COMMANDS | OPERATIONS |
| cy.get(‘input[type=file]’).selectFile(‘file.json’) | Upload JSON File |
| cy.get(‘input[type=file]’).selectFile(‘file.txt’) | Upload txt File |
| cy.get(‘input[type=file]’).selectFile(‘image1.jpg’)
cy.get(‘input[type=file]’).selectFile(‘image2.png’) |
Upload image file (jpg, png) |
| cy.get(‘input[type=file]’).selectFile(video.mp4′) | Upload video file |
| cy.get(‘input[type=file]’).selectFile(audio.mp3′) | Upload audio file |
Options
The options parameter is an optional object that allows you to customize the behavior of the cy.selectFile() during Cypress for file upload. In options, you can pass the following parameters.
| OPTIONS | PARAMETERS | OPERATIONS |
| action | select | Switch modes. Valid values are selected and drag-dropped. |
| force | FALSE | Forces the action, disables waiting for actionability. |
| log | TRUE | Displays the command in the Command log. |
| timeout | defaultCommandTimeout | Time to wait for .selectFile() to resolve before timing out. |
| waitForAnimations | waitForAnimations | Whether to wait for elements to finish animating before executing the command. |
Cypress provides a convenient method, selectFile(), to simplify Cypress for file uploads. This method streamlines the process of selecting and attaching files to input elements. Below, I will demonstrate a better understanding of selectFile().
Demonstration: Uploading a single file using the selectFile()
In Cypress, file uploads can be seamlessly handled using the cy.fixture() and ct.get().attachFile() methods. Let’s explore a practical example to understand how to implement file upload in a test scenario.
Test Scenario
|
Before diving into writing the test script, performing initial steps such as visiting the target site and identifying the web elements you will need to interact with and perform automation is crucial.
Element Identification:
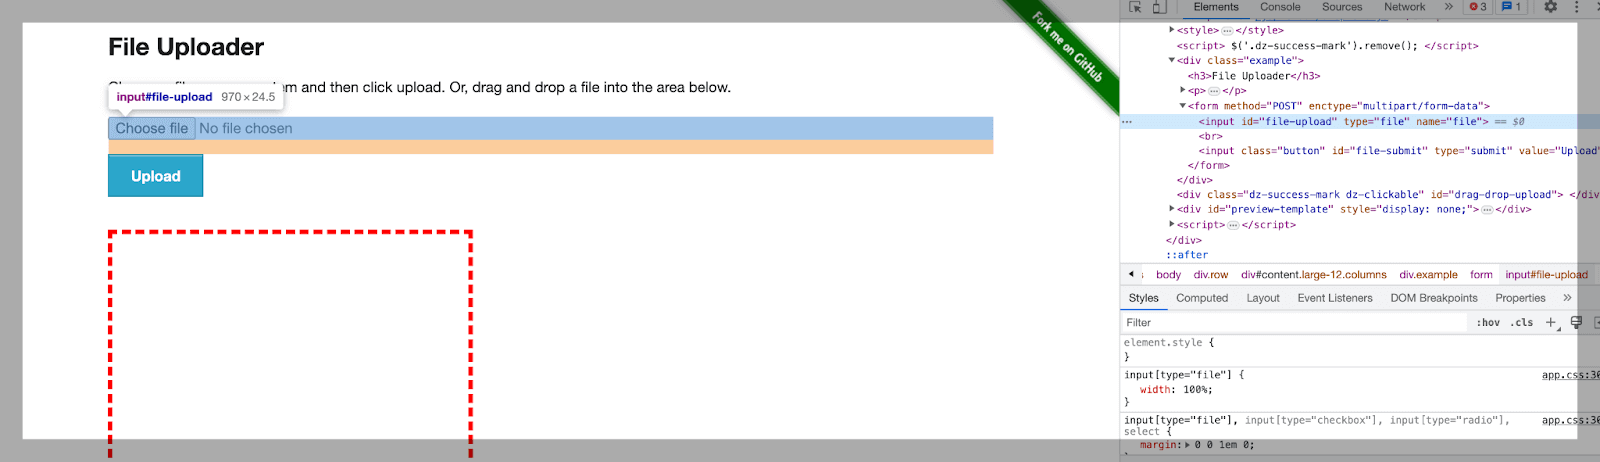
Use the cy.get() command and pass in the element’s ID. For example, the following code would locate an element with the ID file-upload.
|
1 |
cy.get("#file-upload") |
|
1 |
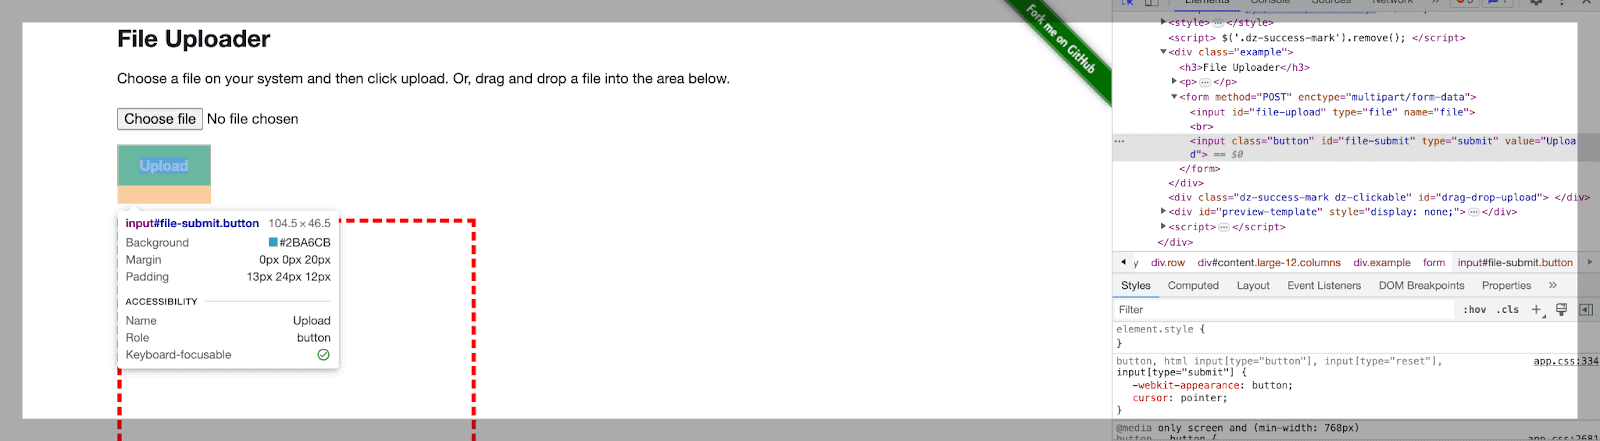
cy.get("#file-submit") |
You can use the cy.get() command and pass in the element’s ID. For example, the following code would locate an element with the ID file-submit.
|
1 |
cy.get("#uploaded-files") |
You can use the cy.get() command and pass in the element’s Id. For example, the following code would locate an element with the ID uploaded-files.

Now that we have all the locator elements needed to perform the file upload operation, we will see the code implementation in detail below.
To gain insights into locating web elements effectively for your automation testing, follow this guide on locators in Selenium. The guide offers a detailed walkthrough covering various types of locators to enhance your understanding of the process.
Code Implementation:
Below is the code for the above test scenario.
|
1 2 3 4 5 6 7 8 9 10 11 12 13 14 15 16 17 18 19 20 21 22 23 24 25 26 27 28 29 30 31 32 33 34 35 36 37 38 39 40 41 42 43 44 45 46 47 48 49 50 51 52 53 54 55 56 57 58 59 60 61 62 63 64 65 66 67 68 69 70 71 72 73 74 75 76 77 78 79 80 81 82 83 84 85 86 87 88 89 90 91 92 93 94 95 96 97 98 99 100 101 102 103 104 105 106 107 108 109 110 111 112 113 114 115 116 117 118 119 120 121 122 123 124 125 126 127 128 129 130 131 132 133 134 135 136 |
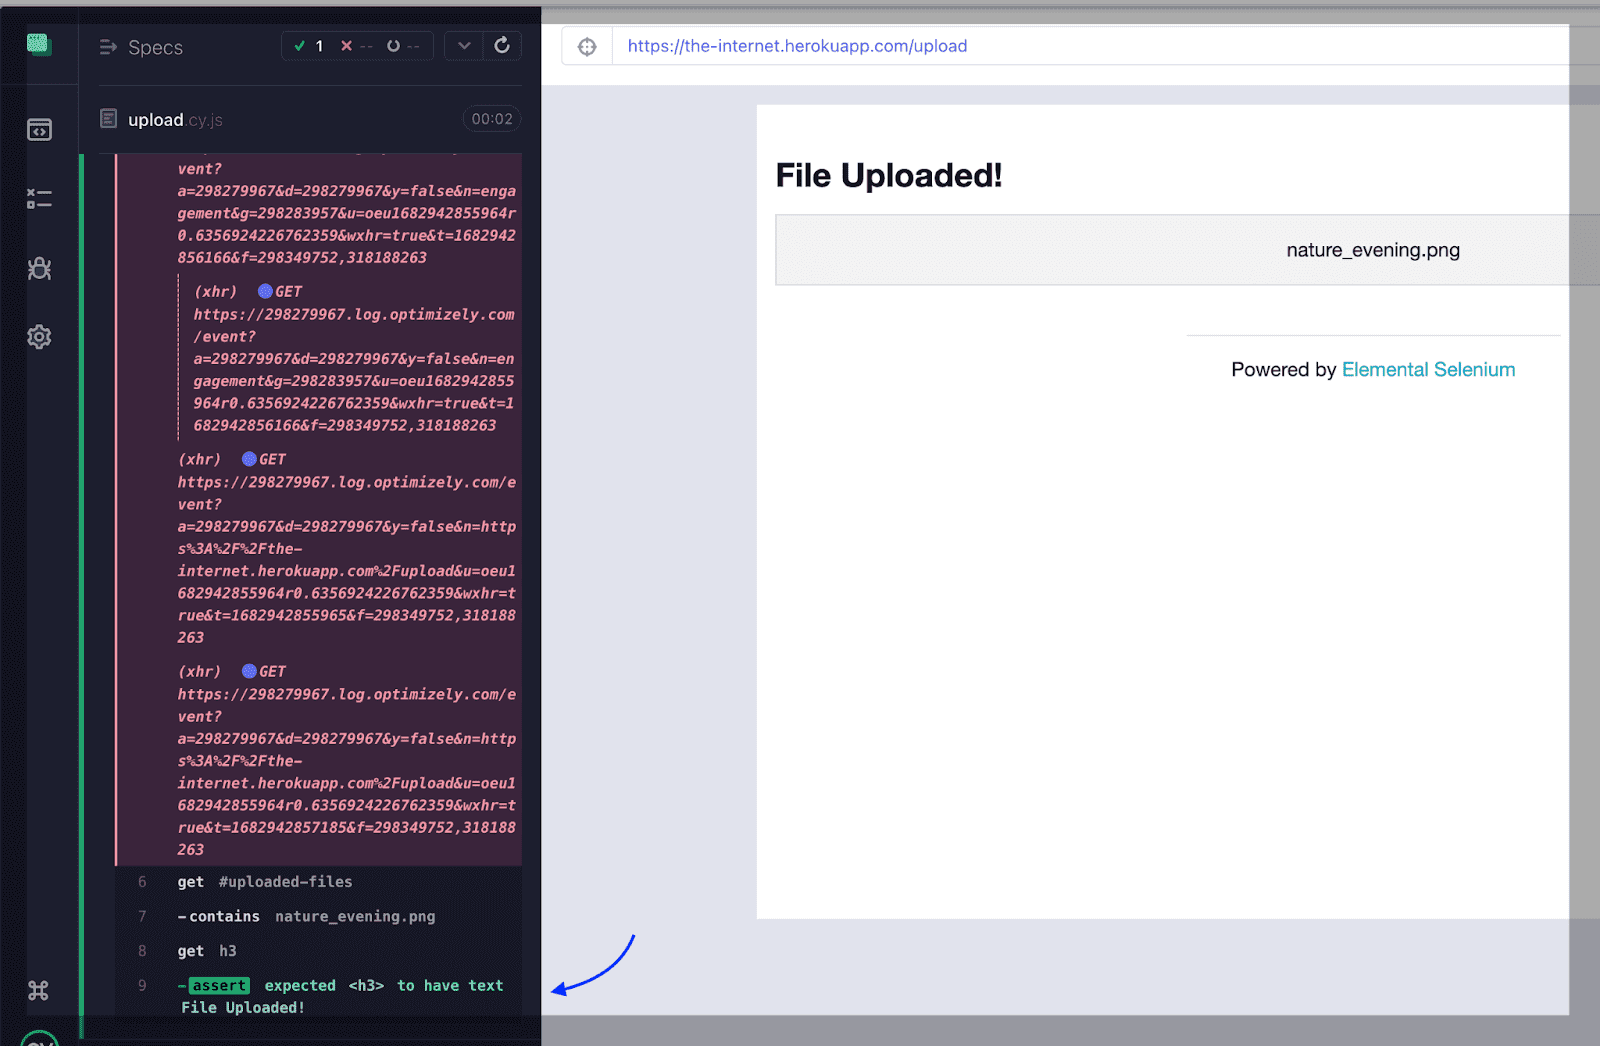
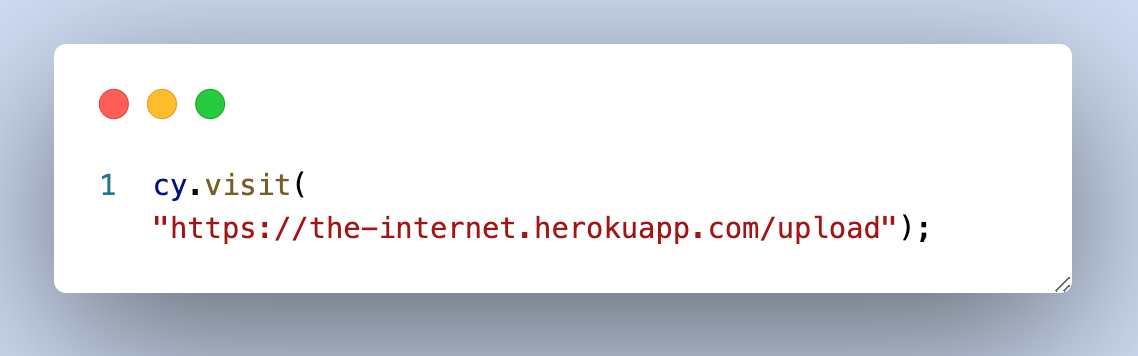
describe("Example to demonstrate how to upload the file in cypress", function () { it("Upload the file using .selectFile with select mode", () => { cy.visit("https://the-internet.herokuapp.com/upload"); cy.get("#file-upload").selectFile( "cypress/fixtures/images/nature_evening.png" ); cy.get("#file-submit").click(); cy.get("#uploaded-files").contains("nature_evening.png"); cy.get("h3", { timeout: 30000 }).should("have.text", "File Uploaded!"); }); it("Upload the file using .selectFile with with drag and drop mode", () => { cy.visit("https://the-internet.herokuapp.com/upload"); cy.get("#file-upload").selectFile( "cypress/fixtures/images/nature_night.png", { action: "drag-drop" } ); cy.get("#file-submit").click(); cy.get("#uploaded-files").contains("nature_night.png"); cy.get("h3", { timeout: 30000 }).should("have.text", "File Uploaded!"); }); it("Another example Upload the File Using SelectFile Command", () => { cy.visit("http://www.autopract.com/#/home/fashion"); cy.get("button[aria-label='Close'] ").click(); cy.get(".btn.btn-success").scrollIntoView(); cy.get('input[type="file"]').selectFile("cypress/fixtures/images/nature_night.png", {force: true}); }); it("Upload multiple file using selectFile", () => { cy.visit("https://postimages.org/"); cy.get("#uploadFile").selectFile(["cypress/fixtures/images/nature_evening.png","cypress/fixtures/images/nature_night.png"],{ action: "drag-drop" }); cy.origin('https://postimages.org/', () => { cy.get('.controls', { timeout: 20000 }).contains('Upload completed!'); cy.get(".imagetitle").eq(0).should("have.text", "nature_evening"); cy.get(".imagetitle").eq(1).should("have.text", "nature_night"); }); }) }) describe('Upload the file using the plugin cypress-file-upload', function () { it('File Upload using cypress-file-upload npm package', () => { cy.visit('https://the-internet.herokuapp.com/upload') const filePath = 'images/nature_evening.png' cy.get('input[type="file"]').attachFile(filePath) cy.get('#file-submit').click() cy.get('#uploaded-files').contains('nature_evening.png') cy.get("h3", { timeout: 30000 }).should("have.text", "File Uploaded!"); }) }) |

In the example above, we upload the image file using selectFile() with select mode. This command selects a file to upload to an input field. The command first selects the file input element using the cy.get() method with the input[type=file] selector.
Then, the selectFile() method is called on the selected element with the argument image.png. This will simulate selecting the file image.png in the file selection dialog when a user clicks on the file input field.
Code Walkthrough:
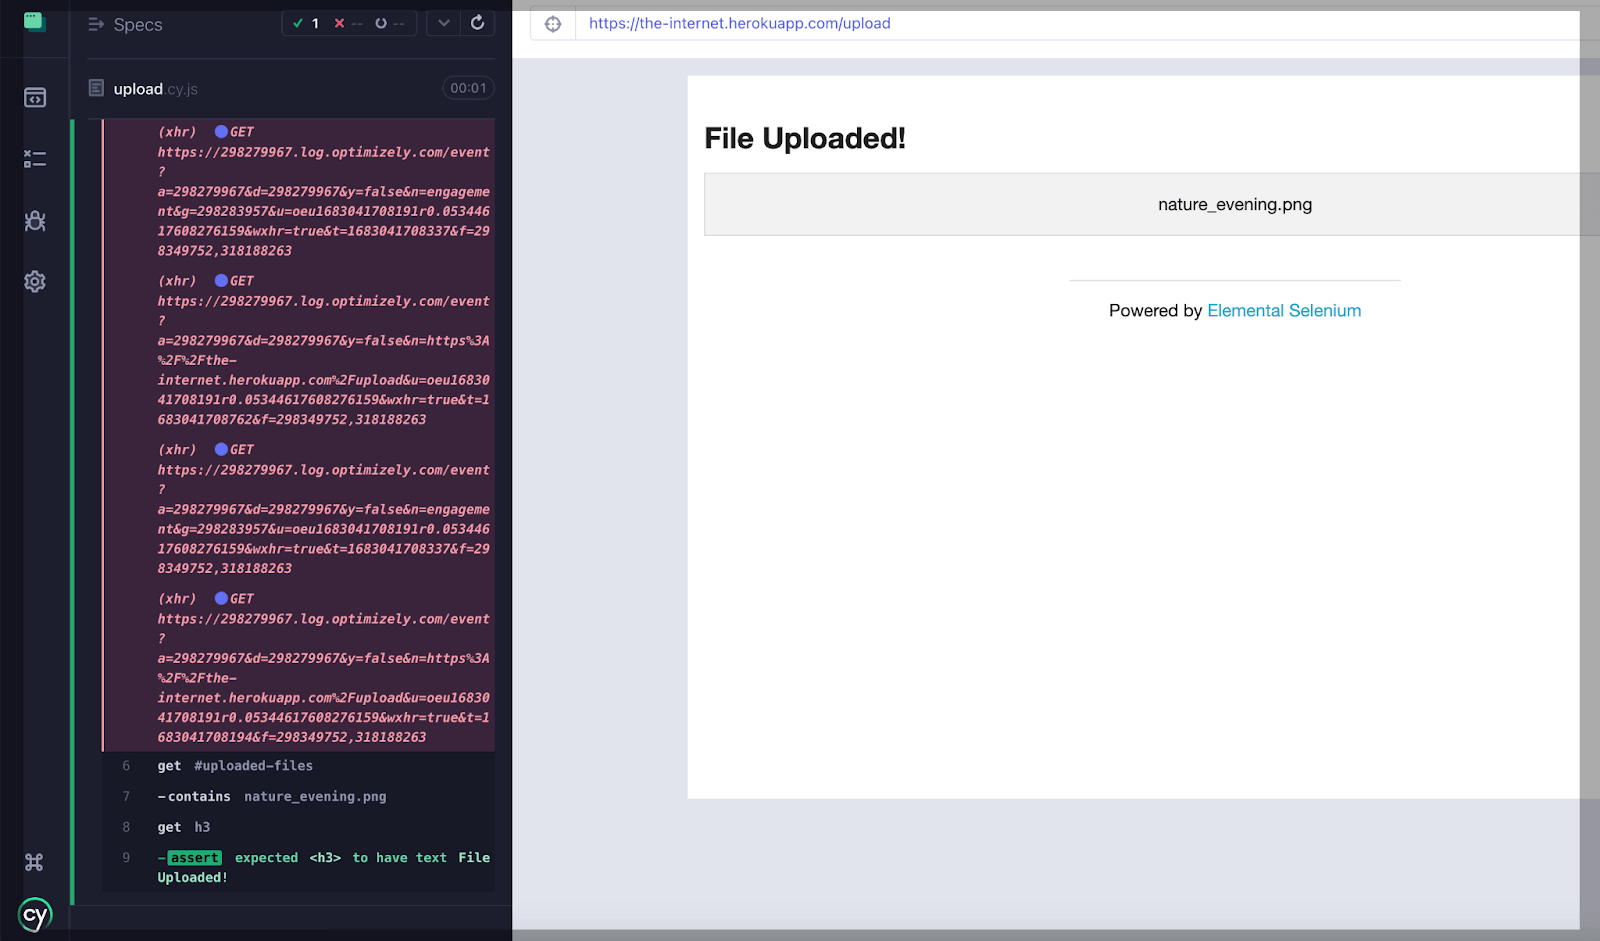
We have kept the .png file under the images folder. After uploading the image, click the Upload button and verify the message File Uploaded!

It navigates to the specified URL, which is the file upload page of a web application.

It selects a file for upload. The code targets the file input element with the ID file-upload and uses the .selectFile() command to specify the file path to be uploaded (“path/to/your/images/example.png”).

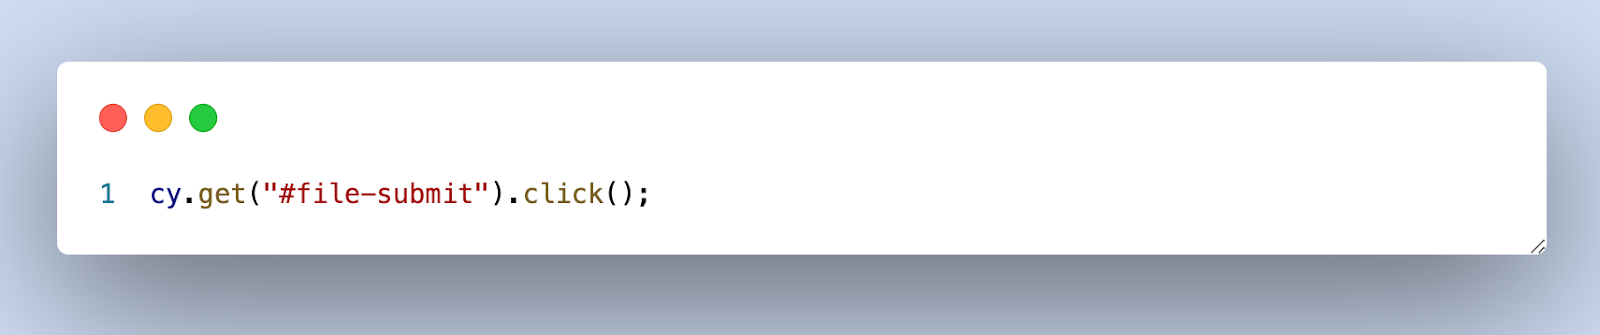
It initiates the Cypress file upload process. The code targets the element with the ID file-submit button to initiate file uploading.

It verifies that the uploaded file is displayed on the page. The code targets the element with the ID uploaded-files and checks if it contains the text “example.png.”

This line waits for an < h3 > element to appear on the page (with a maximum timeout of 30 seconds) and asserts that its text content is File Uploaded!. This assertion ensures that the file upload operation was successful.
Result:
Once you have successfully uploaded the image based on the test scenario, let’s explore more ways to use Cypress for file upload.
Uploading a single file using the drag-and-drop option
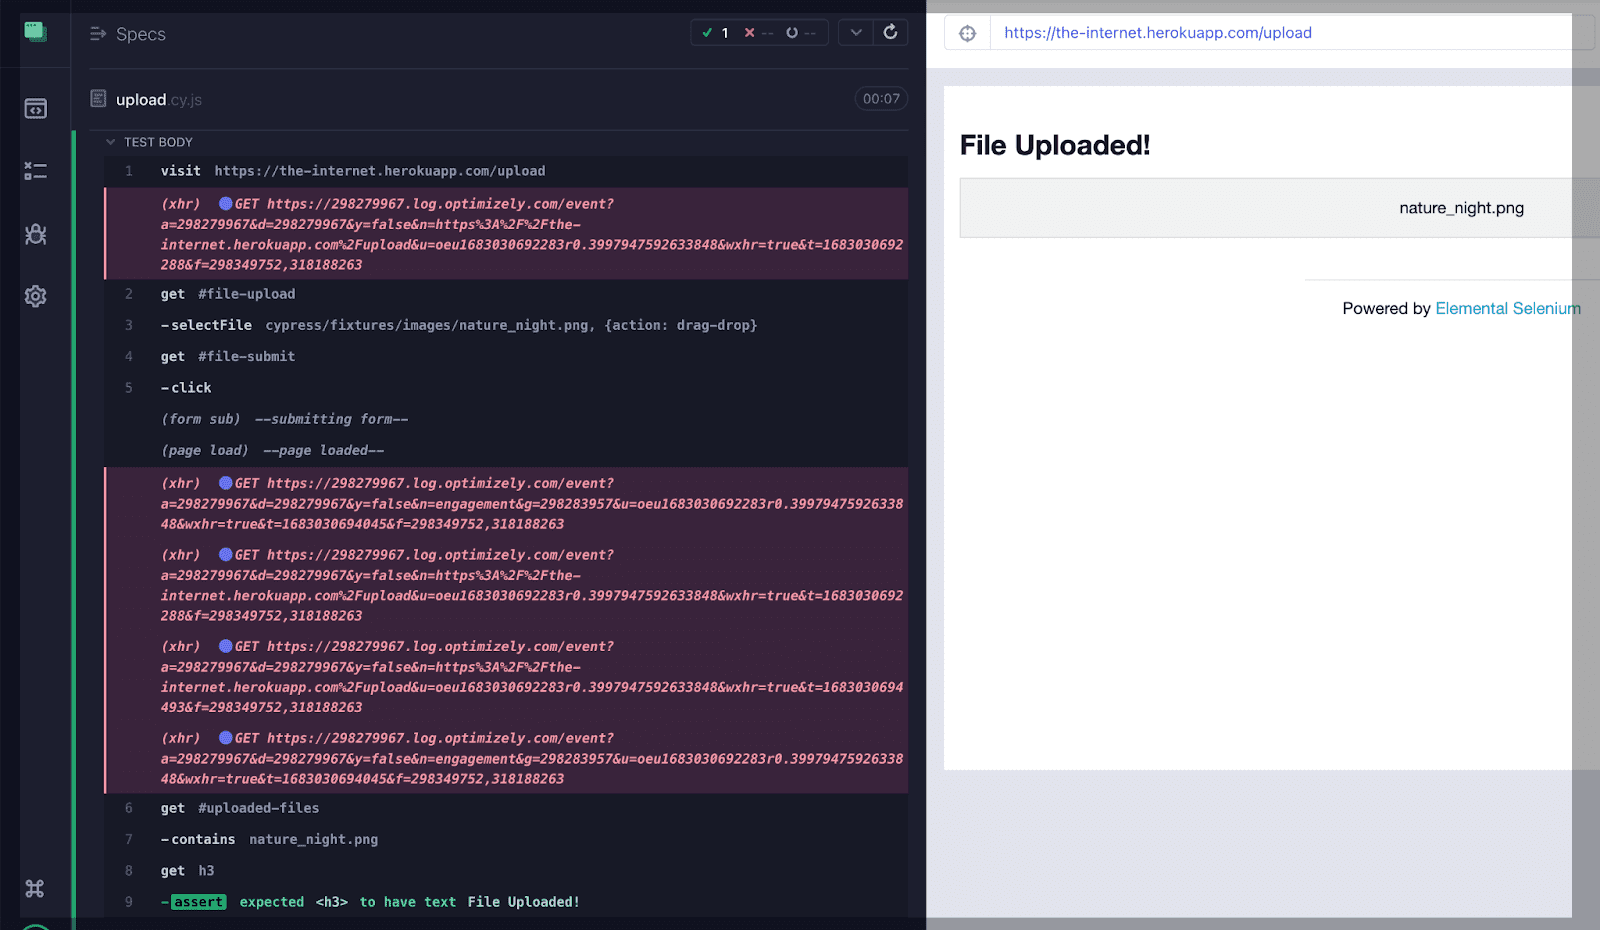
Performing file uploads for single files using Cypress can be achieved through a drag-and-drop action for selecting a file to upload into an input field. Initially, the command targets the file input element using the cy.get() method with the selector input[type=file]. Subsequently, the selectFile() method can handle the file selection process method invoked on the selected element, taking two arguments.
The first argument, image.png, represents the file’s name intended for upload. The second argument is an options object with the action property drag-drop. This configuration simulates dragging and dropping the file onto the input field, bypassing the conventional file selection dialog.
Demonstration: Uploading a single file using the drag-and-drop option
In this section on Cypress for file upload, let’s look at the demonstration for uploading files using the drag-and-drop option.
Test Scenario:
|
Code Implementation:
In the below example, the location of uploading the file is from the local system.
|
1 2 3 4 5 6 7 8 9 10 11 12 13 14 15 16 17 18 19 |
it("Upload the file using .selectFile with with drag and drop mode", () => { cy.visit("https://the-internet.herokuapp.com/upload"); cy.get("#file-upload").selectFile("path/to/your/image/fileexample.png", {action: "drag-drop"}); cy.get("#file-submit").click(); cy.get("#uploaded-files").contains("nature_night.png"); cy.get("h3", { timeout: 30000 }).should("have.text","File Uploaded!"); }); |
Code Walkthrough:
Before we jump to the result, let us understand what the code is trying to perform in a step-by-step process.
The cy.visit(“https://the-internet.herokuapp.com/upload ”) command is used to navigate to the specified URL, the web application’s file upload page.

It targets the file input element with the ID file-upload and uses the .selectFile() command to specify the file path to be uploaded (“path/to/your/image files/example.png”). The {action: “drag-drop”} option also indicates that the file should be selected using the drag-and-drop mode.

It clicks the Submit button with an element ID file-submit to initiate the file uploading process.

The cy.get(“#uploaded-files”).contains(“example.png”) verifies that the uploaded file is displayed on the page. It targets the element with the ID uploaded-files and checks if it contains the text example.png.

The cy.get(“h3”, { timeout: 30000 }).should(“have.text”,”File Uploaded!”) waits for an < h3 > element to appear on the page (with a maximum timeout of 30 seconds) and asserts that its text content is “File Uploaded!”.
This assertion ensures that the file upload operation was successful.

The maximum file size that can be uploaded using the cy.selectFile() command in Cypress depends on the underlying browser. We can give a timeout with a particular command to handle if a file takes a long time to upload.
Result:
 Note
NoteRun your Cypress test with various browsers and operating systems. Try LambdaTest Today!
Uploading multiple files using the selectFile()
This multiple file selection using selectFile() targets the file input element using the cy.get() method with the selector input[type=file]. Subsequently, the selectFile() method is invoked on the selected element with the argument [‘image1.png’, ‘image2.png’]. This action simulates the selection of multiple files within the file selection dialog that emerges when a user interacts with the file input field.
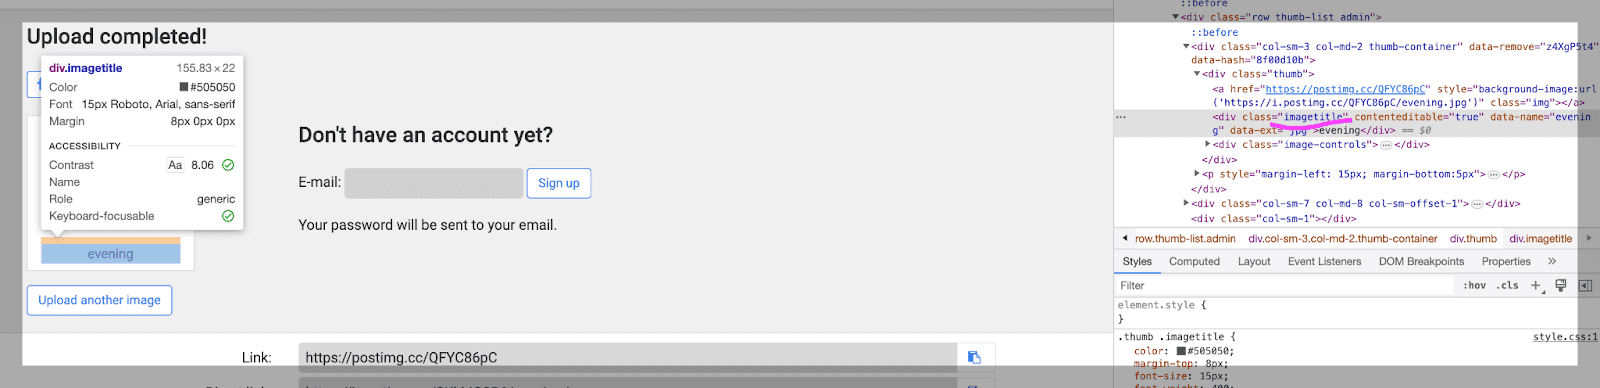
Element Identification:
Before demonstrating the process of multiple file uploads using Cypress, it’s essential to identify and locate the web element that facilitates Cypress for file upload. This involves pinpointing the specific element on the web page to which the file will be uploaded during testing.
|
1 |
cy.get("#uploadFile") |

|
1 |
cy.get(".imagetitle") |
|
1 |
cy.get('.controls') |

Now that we have captured the ID, the following test scenario will demonstrate Cypress for file upload with multiple selections.
Demonstration: Uploading multiple files using the selectFile()
In this demonstration, we will explore how Cypress simplifies file uploads by utilizing the selectFile() method with arrays. This feature allows for straightforward testing of scenarios involving multiple file selections, enhancing the efficiency of Cypress in handling diverse upload requirements.
Test Scenario:
|
Below is the code implementation for the above test scenario.
Code Implementation:
|
1 2 3 4 5 6 7 8 9 10 11 12 13 14 15 16 17 18 19 20 21 22 23 24 25 |
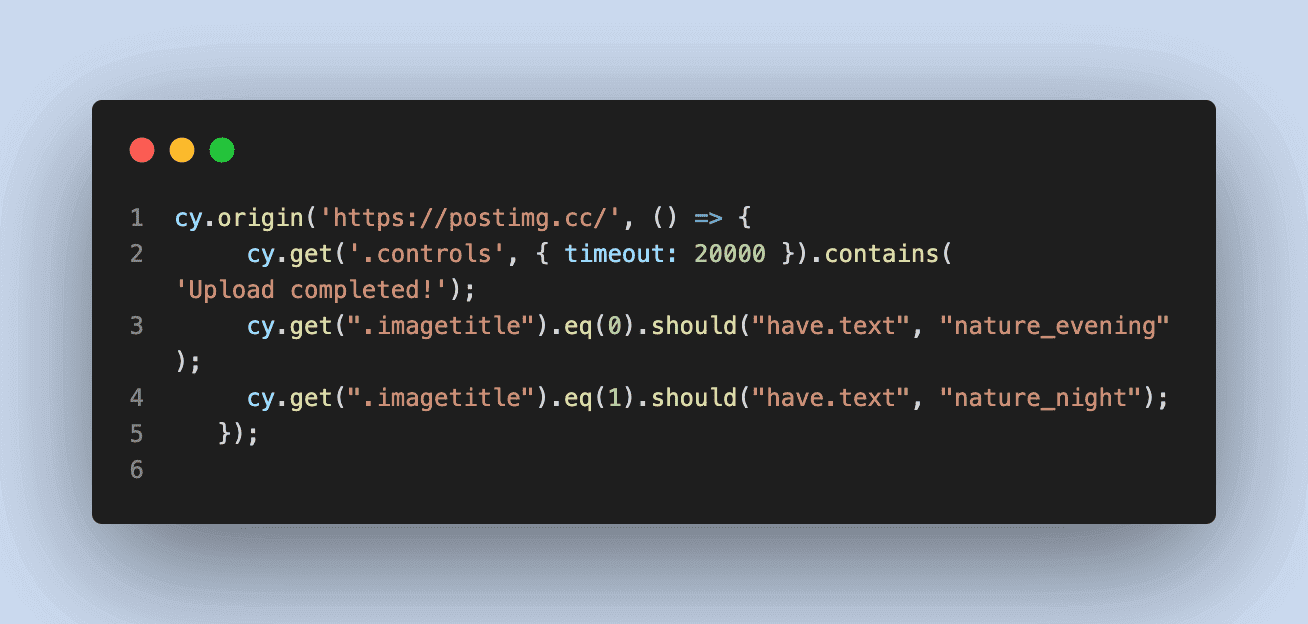
it("Upload multiple file using selectFile", () => { cy.visit("https://postimages.org/"); cy.get("#uploadFile").selectFile(["path/to/image/example.png","path/to/images/to/example.2.png"],{ action: "drag-drop" }); cy.origin('https://postimg.cc/', () => { cy.get('.controls', { timeout: 20000 }).contains('Upload completed!'); cy.get(".imagetitle").eq(0).should("have.text", "example"); cy.get(".imagetitle").eq(1).should("have.text", "example2"); }); }) |
In the given example, the test navigates to the post images website, utilizes the selectFile() method to choose two image files, and subsequently verifies the successful upload by confirming the presence of the file names in the UI. Additionally, the test uses the origin command to ensure accurate domain targeting for assertions and sets a 20-second timeout for the appearance of the control element.
Code Walkthrough:

It visits the https://postimages.org/ website.

It selects the file inputs with the ID – uploadFile.
The above command is used to navigate a URL starting with https://postimg.cc using the cy.origin() command. After uploading the image successfully, you can verify the message Upload completed!.
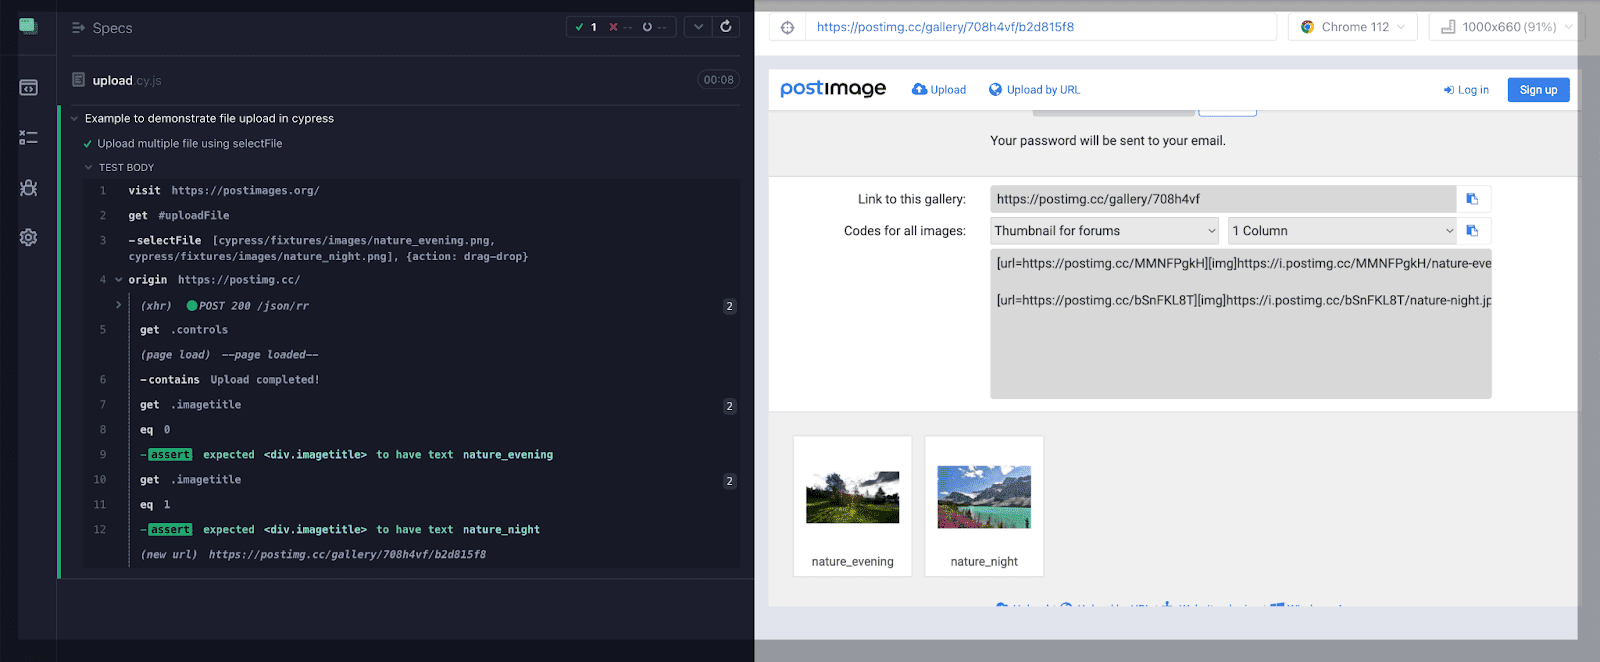
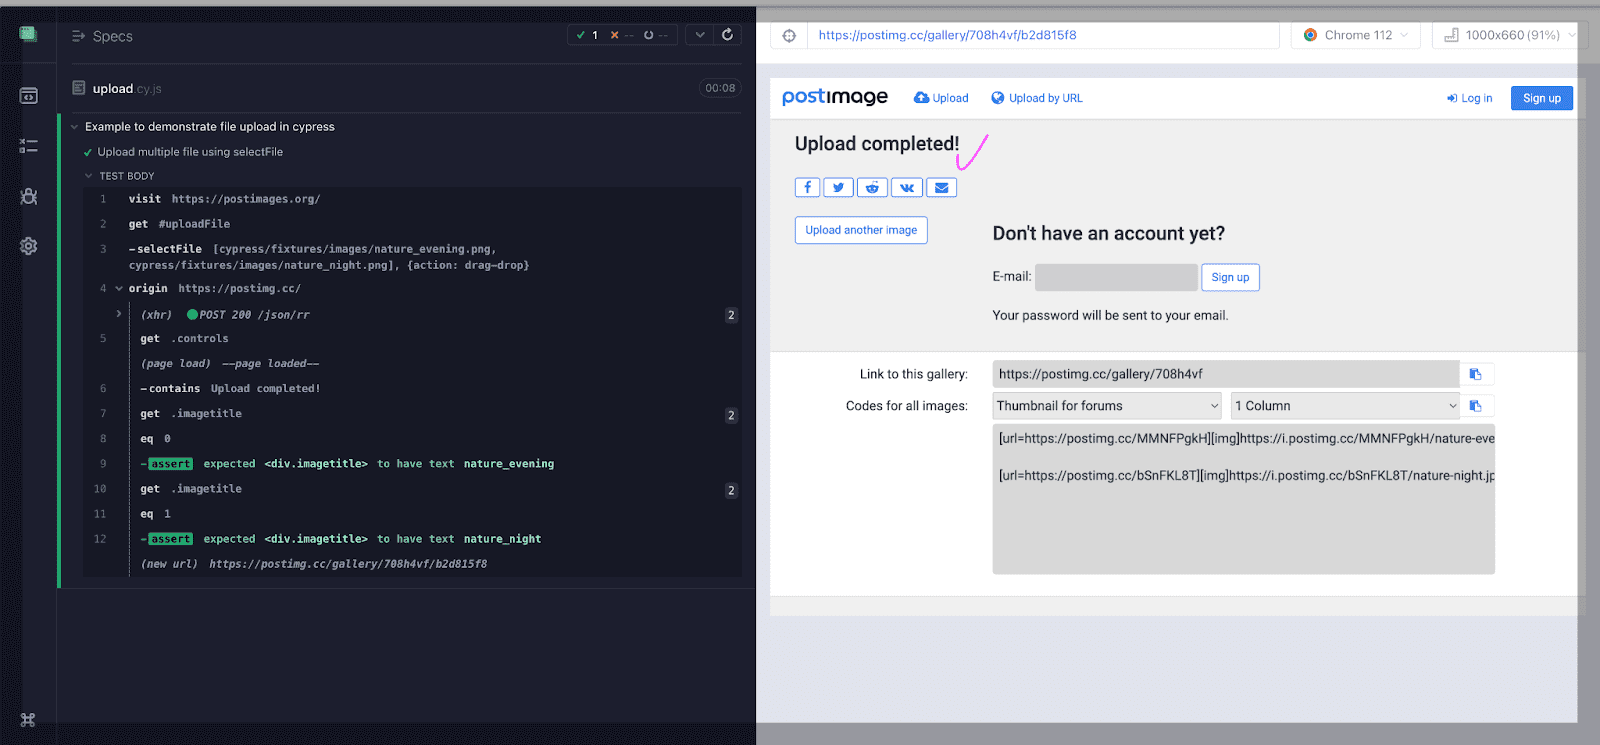
Result:
In the output, you can see images are uploaded successfully, and the message “Upload completed!” is verified.
Uploading files from a remote location
Uploading files from a remote location in Cypress involves leveraging the cy.request() command. This command initiates an HTTP request to the remote server and facilitates saving the file to a temporary directory on your local machine.
To comprehend remote location handling for Cypress for file uploads, let’s delve into a practical use case for better understanding.
Demonstration: Uploading files from a remote location
Cypress enables seamless testing of file uploads from remote locations, offering a robust solution for validating file handling in web applications. With Cypress, developers can easily simulate user interactions and validate the upload functionality, ensuring a comprehensive testing strategy for applications reliant on remote file uploads.
Let us see the demonstration of Cypress file upload from a remote location in a test scenario below.
Test Scenario:
|
Below is the code implementation for the above test scenario.
Code Implementation:
|
1 2 3 4 5 6 7 8 9 10 11 12 13 14 15 16 17 18 19 20 21 22 23 24 |
describe('File Upload from Remote Location Test', () => { it('uploads a file from a remote location', () => { // Download the file to a temporary directory on our machine cy.request({method: 'GET', url: 'https://the-internet.herokuapp.com/download/IM029.txt',encoding:'binary',}) .then(response => { cy.writeFile('./temp/IM029.txt', response.body, 'binary'); }); // Load the file into the test runner cy.fixture('IM029.txt','binary').then(fileContent => { // Visit the file upload page cy.visit('https://the-internet.herokuapp.com/upload'); // Get the file input element and attach the file to it cy.get('#file-upload').attachFile({ fileContent, fileName: 'IM029.txt', mimeType: 'text/plain', }); // Click the submit button cy.get('#file-submit').click(); // Verify that the file was uploaded successfully cy.get('#uploaded-files').should('contain', 'IM029.txt'); }); }); }); |
Before we see the results of the above code, let us understand the code in a step-by-step procedure.
Code Walkthrough:
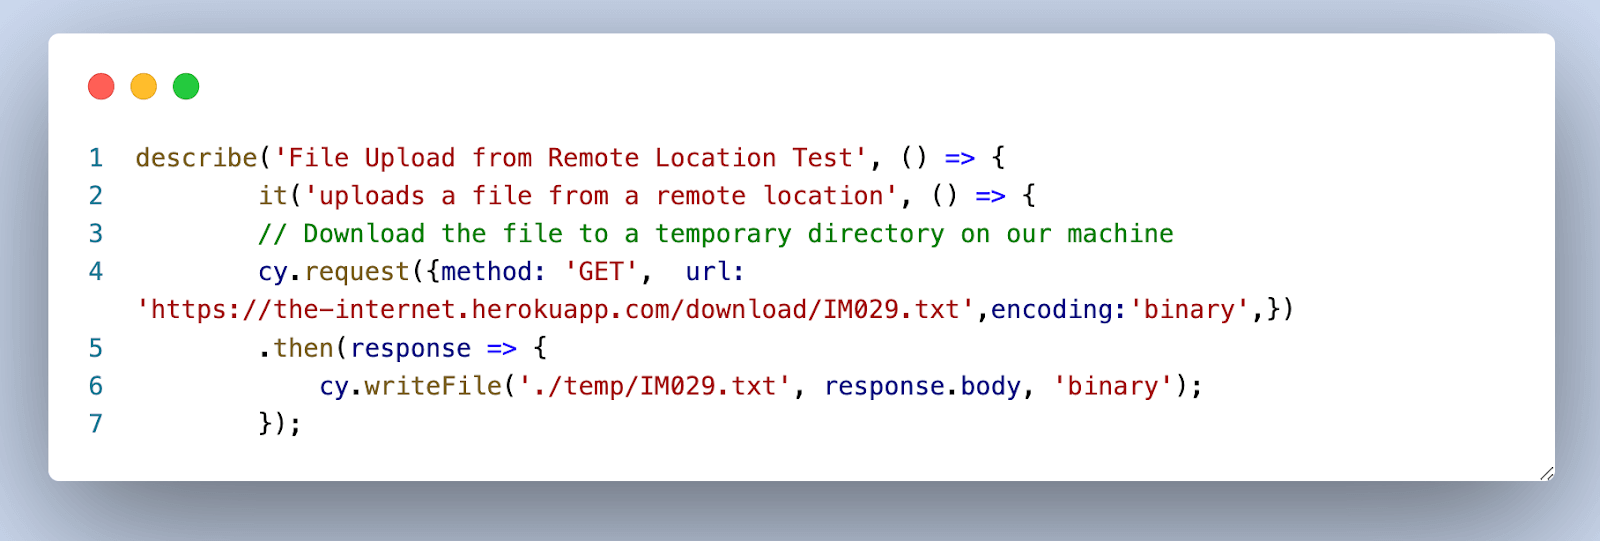
This block uses the cy.request() method to send a GET request to the specified URL (‘https://the-internet.herokuapp.com/download/IM029.txt‘).
The file is downloaded and saved to a temporary directory on the local machine (‘./temp/IM029.txt’) using cy.writeFile().
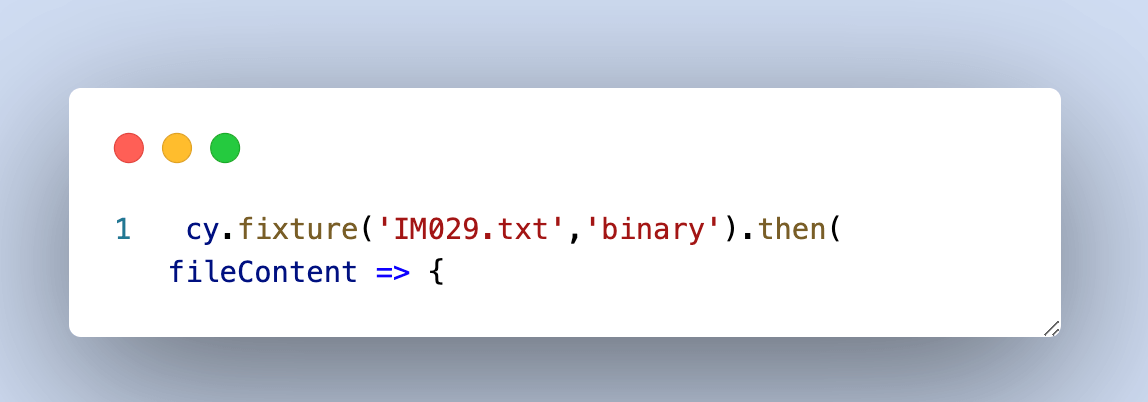
This block uses the cy.fixture() to load the file’s content (IM029.txt) as binary data into the test runner.
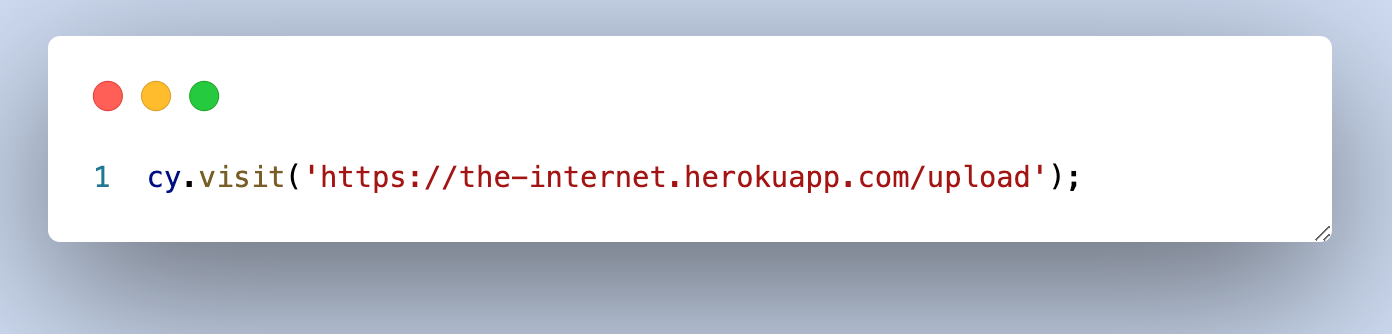
Then, navigate to the file upload page.
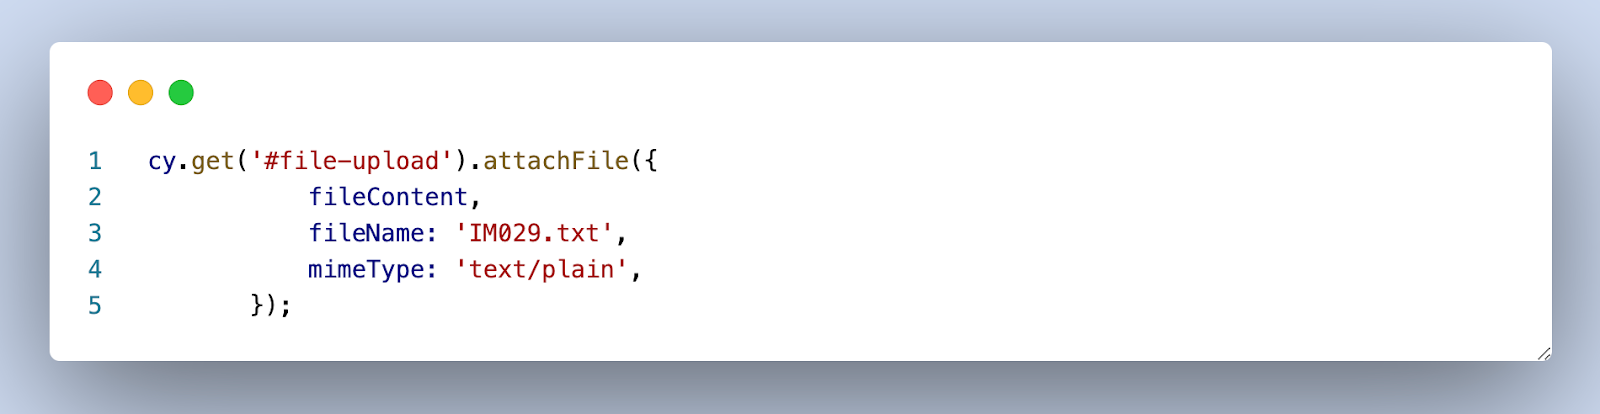
Find the file input element with the ID file-upload and attach the file to it using attachFile(). The file content, name, and MIME type are specified.
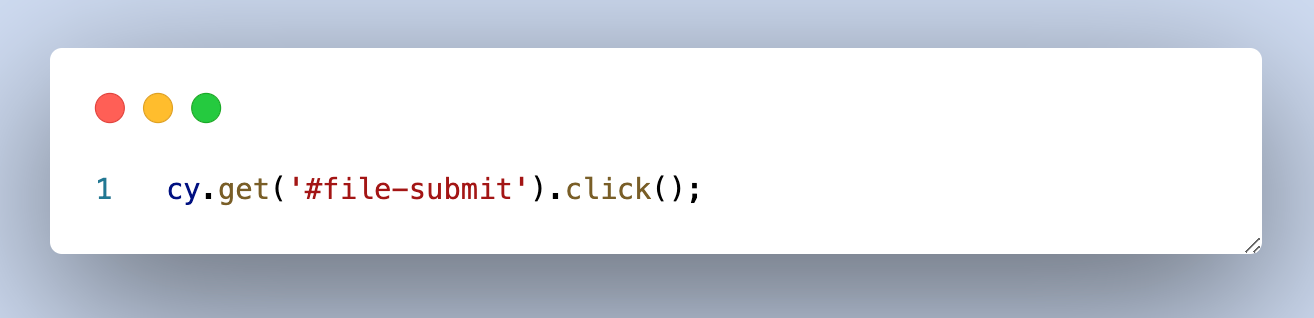
The code above clicks the Submit button on the file upload page with element ID file-submit to initiate the file uploading process.
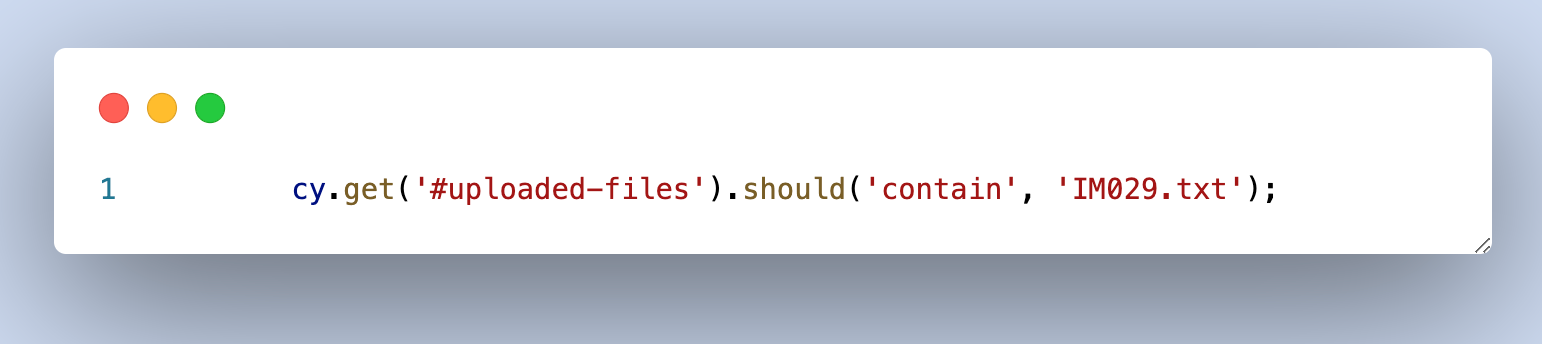
Finally, verify the uploaded file is displayed on the page by checking if the element with ID uploaded-files contains the text ‘IM029.txt’.
Uploading files with custom headers
When you need to upload files with custom headers in Cypress, you can use the cy.request() command to make a custom HTTP request. Here’s an example of uploading a file with custom headers using Cypress.
Let’s delve into the concept of custom headers in Cypress through the following use case:
Demonstration: Uploading files with custom headers
Cypress simplifies testing for file uploads with custom headers, allowing developers to validate this functionality easily.
Let us see the demonstration of Cypress for file upload with custom headers in a test scenario below.
Test Scenario:
|
Below is the code implementation for the above test scenario. IM029.txt is my local file name. You can use your filename when executing the test.
Code Implementation:
|
1 2 3 4 5 6 7 8 9 10 11 12 13 14 15 16 17 18 19 20 21 22 23 24 25 26 27 28 29 30 31 32 33 34 |
// Describe the test suite describe("File Upload from Remote Location Test", () => { // Define a test case within the suite it("uploads a file from a remote location", () => { // Step 1: Download the file to a temporary directory on our machine cy.request({ method: "GET", url: "https://the-internet.herokuapp.com/download/upload_file.txt", encoding: "binary", }).then((response) => { // Save the downloaded file to a temporary directory cy.writeFile("./temp/IM029.txt", response.body, "binary"); }); // Step 2: Load the file into the test runner using the Cypress fixture cy.fixture("IM029.txt", "binary").then((fileContent) => { // Step 3: Visit the file upload page cy.visit("https://the-internet.herokuapp.com/upload"); // Step 4: Attach the file to the file input element with custom headers cy.get("#file-upload").attachFile({ fileContent, fileName: "IM029.txt", mimeType: "text/plain", }); // Step 5: Click the submit button cy.get("#file-submit").click(); // Step 6: Verify that the file was uploaded successfully cy.get("#uploaded-files").should("contain", "IM029.txt"); }); }); }); |
Before we proceed to the results, let’s break down the functionality of the provided code step by step below.
Code Walkthrough:
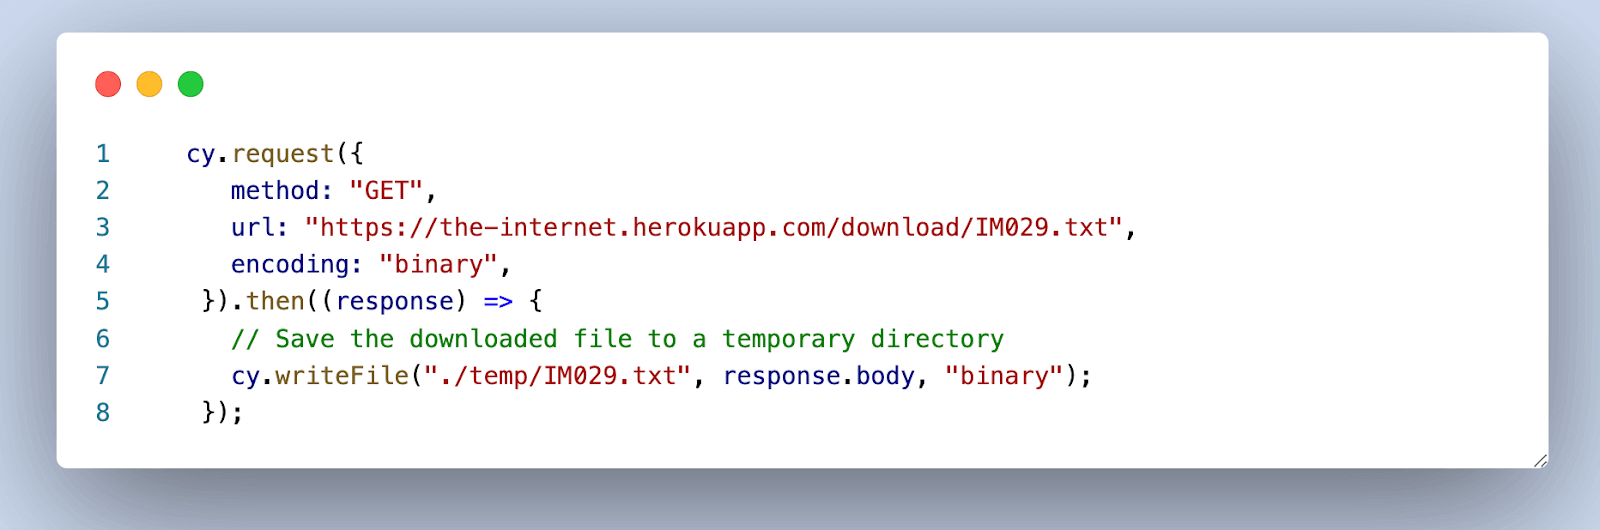
It uses cy.request() to make a GET request to download the file from a specified URL https://the-internet.herokuapp.com/download/IM029.txt. The file content is then saved to a temporary directory on the machine using cy.writeFile().
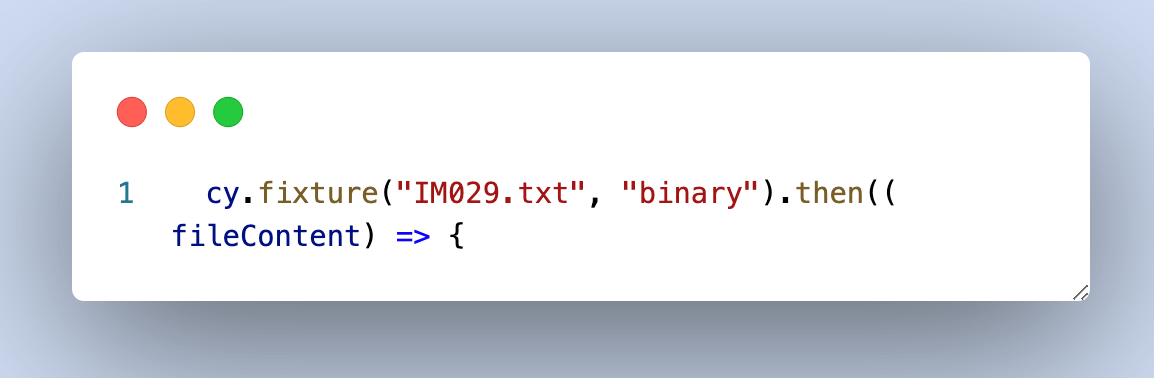
Use cy.fixture() to load the file content into the Cypress test runner. This allows the test to use the file content as a local file.
The above code visits the file upload page at https://the-internet.herokuapp.com/upload.

Use cy.get() to select the file input element with the ID file-upload and attach the file using attachFile(). This step includes specifying the file content, name, and mime type.
It clicks the Submit button with the ID file-submit to initiate the file uploading process.

It verifies that the uploaded files section (#uploaded-files) contains the expected filename IM029.txt. This step ensures that the file was successfully uploaded.
In the section below, let us see another way to use Cypress for file upload.
Using Cypress for file upload with the cypress-file-upload plugin
Another approach to using Cypress for file uploads is utilizing the cypress-file-upload plugin. This third-party extension for the Cypress testing framework enables the simulation of file uploads within Cypress tests.
With Cypress for file upload, you can employ the attachFile() command, offering flexibility through various options such as file content, file name, and MIME type. This capability simplifies testing scenarios involving diverse file types and sizes, ensuring a comprehensive evaluation of your Cypress for file upload functionality.
Some of the key features of the cypress-file-upload plugin include:
- Support for multiple file selection and upload
- Automatic handling of file input visibility and focus
- Support for drag-and-drop file upload
- Customizable upload options, such as file name and MIME type
- Integration with other Cypress plugins and framework
Based on our previous learning, assuming you have already installed the necessary Cypress dependencies and libraries. In this approach, to use Cypress for file uploads, you must install a specific plugin. Follow the steps to install the plugin and upload the file in Cypress.
Run the below command:
|
1 |
npm install --save-dev cypress-file-upload |
Output:

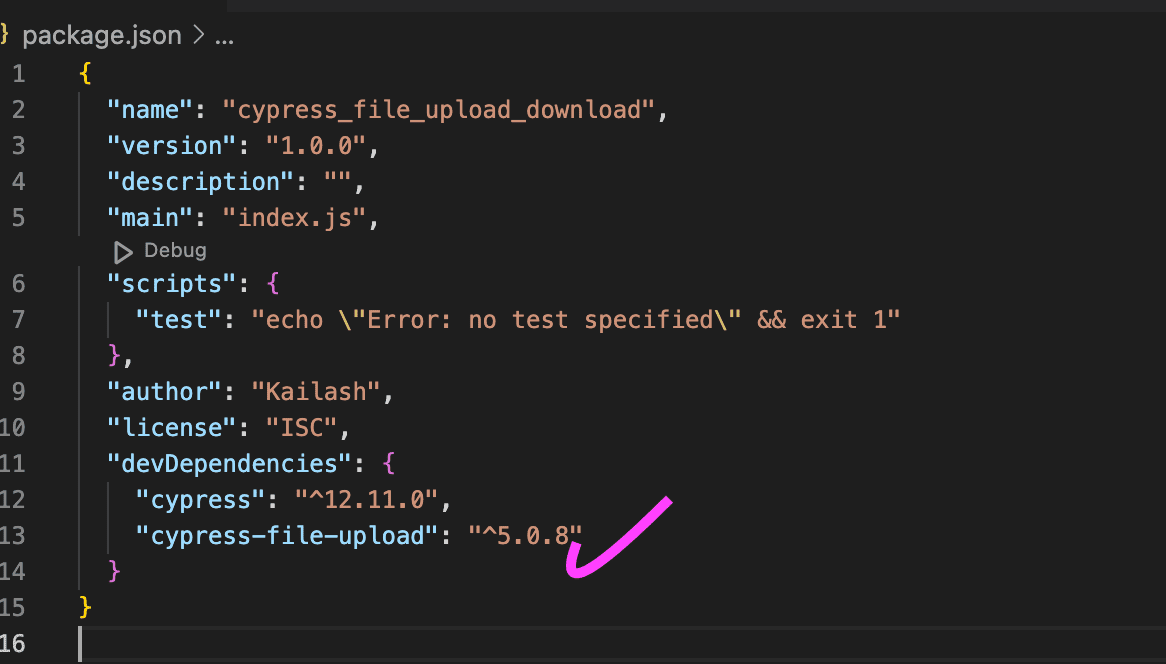
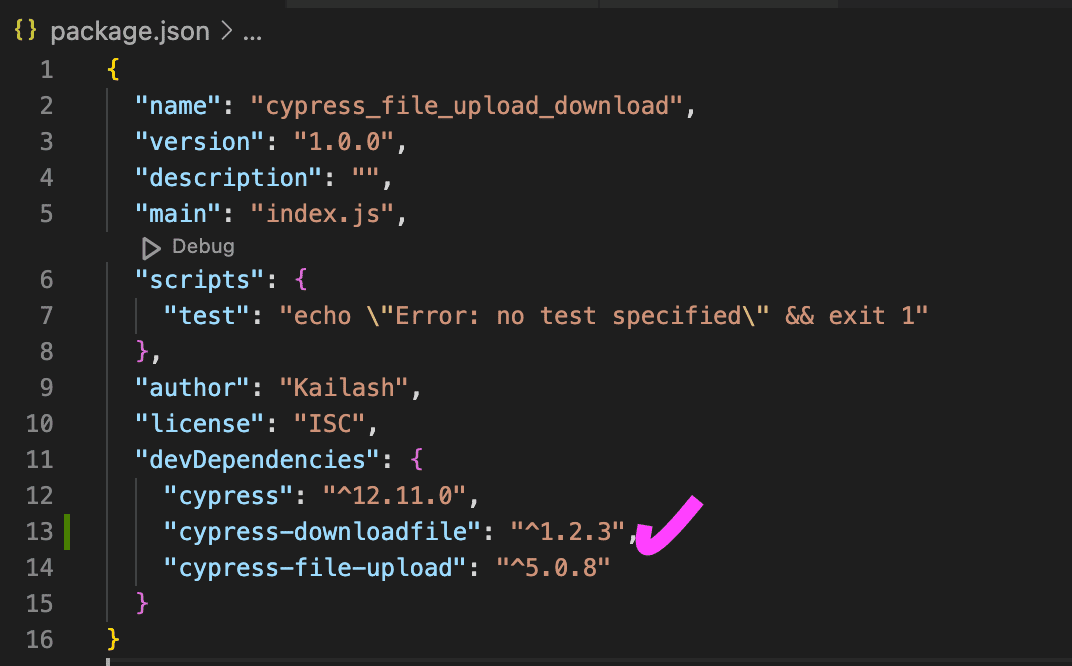
The package will become visible once the above command has been executed correctly. In the screenshot below, you can observe that the cypress-file-upload plugin has updated the version in the JSON file. Since I already had the older version, the command has successfully updated it.
Add the following line to commands.js located in the cypress/ support directory:
|
1 |
import 'cypress-file-upload'; |
Now that you have been successfully done installing the cypress-file-upload plugin, let us look into the working demonstration of the plugin with a test scenario.
Demonstration: Using Cypress for file upload with the cypress-file-upload plugin
In this section on Cypress for file upload, we will learn how this plugin streamlines the process in Cypress tests, making it more straightforward and user-friendly. Let us understand using the cypress-file-upload plugin with a test scenario.
Test Scenario:
|
Code Implementation:
Let’s take an example with the site to upload the file using the plugin.
|
1 2 3 4 5 6 7 |
it('File Upload using cypress-file-upload npm package', () => { cy.visit('https://the-internet.herokuapp.com/upload') const filePath = 'images/nature_evening.png' cy.get('input[type="file"]').attachFile(filePath) cy.get('#file-submit').click() cy.get('#uploaded-files').contains('nature_evening.png') }) |
Code Walkthrough
This is a Cypress test that automates file upload functionality using the cypress-file-upload npm package. Here’s what the test does:

Visit the upload page of the-internet.herokuapp.com website.

It defines a filePath variable containing the file path to be uploaded.
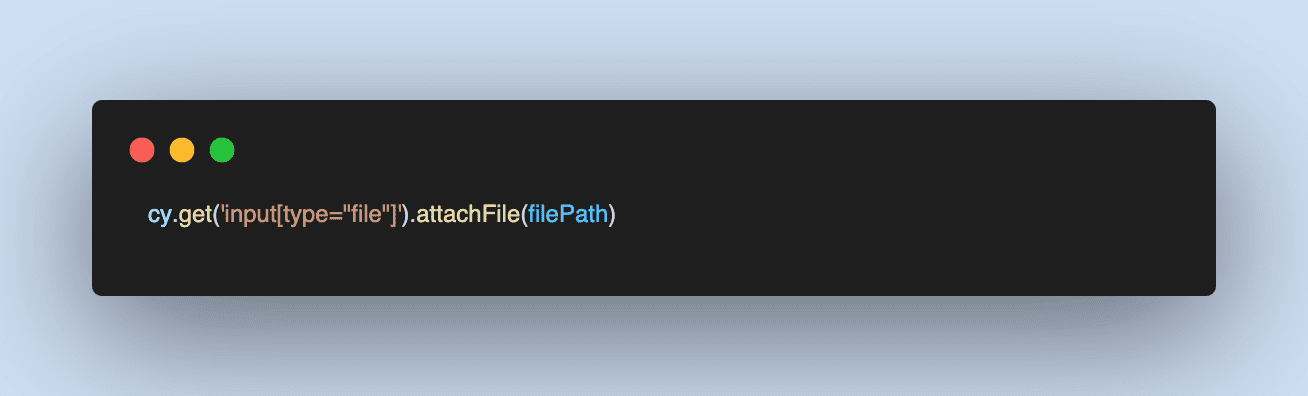
This command attaches the file to it using the attachFile() command provided by the cypress-file-upload plugin.
It clicks on the Upload button using the element ID file-submit to initiate the file upload process.
It verifies that the file has been uploaded successfully by checking if the file name is displayed on the page, using cy.get(‘#uploaded-files’).contains(‘nature_evening.png’).
Result:
How to use Cypress for file download?
Cypress does not natively support file downloads. You cannot download a file from your web application without Cypress commands.
You can use Cypress for file download using the below methods:
- Using Cypress for file download with the readFile().
- Using Cypress for file download with the cypress-downloadfile plugin.
Let us learn each of the methods mentioned above in detail below.
Using Cypress for file download with the readFile()
We can utilize readFile() to verify the content of a file downloaded to a specific folder, such as /cypress/downloads/.
Syntax:
|
1 |
cy.readFile('cypress/downloads/uploadData.txt') |
Below is an example of reading the downloaded file from a particular path.
|
1 2 3 |
it("Upload the file using .selectFile with select mode", () => { cy.readFile('cypress/downloads/uploadData.txt').should('contain', 'download file functionality in cypress') }); |
Below is the code walkthrough for the above code.
Code Walkthrough:
Using the cy.readFile() command, you can read the contents of a file named uploadData.txt in the cypress/downloads directory.

Result: (Pass Scenario)
The test case passes when Cypress’s string download file functionality matches.

Result: (Fail Scenario)
When the expected string does not match, the test case fails. For instance, the download file functionality in the Cypress test could be a minor tweak to the string.
|
1 2 3 |
it("Download the file in cypress", () => { cy.readFile('cypress/downloads/uploadData.txt').should('contain', 'download file functionality in cypress test') }); |

Now let us see the other way to use Cypress for file download in the below section.
Using the cypress-downloadfile plugin
This plugin enables you to simulate file downloads in your Cypress tests and verify the downloaded files. Using the cypress-downloadfile plugin, you can automate and validate file download functionality in your Cypress tests, ensuring the accurate downloading of expected files.
Before using this plugin, you must install the cypress-downloadfile plugin, which provides a convenient way to manage file downloads and perform essential assertions and validations.
Run the below command to download the plugin.
|
1 |
npm i --save-dev cypress-downloadfile |
Output:

In package.json, the package cypress-downloadfile is installed.
Add the following code to the file cypress/support/commands.js.
|
1 |
require('cypress-downloadfile/lib/downloadFileCommand') |
Add the following code to the file cypress.config.js.
|
1 2 3 4 5 6 7 8 9 10 |
const { defineConfig } = require("cypress"); const {downloadFile} = require('cypress-downloadfile/lib/addPlugin'); module.exports = defineConfig({ e2e: { setupNodeEvents(on, config) { on('task', {downloadFile}); // implement node event listeners here }, }, }); |
Let us understand how to use the cypress-downloadfile plugin.
Demonstration: Using the cypress-downloadfile plugin
The cypress-downloadfile plugin simplifies file download testing in Cypress. This approach is a straightforward process of simulating and validating file downloads, enhancing your ability to ensure robust download functionality in Cypress tests.
Let us learn more about using the cypress-downloadfile plugin using the test scenario below.
Test Scenario:
|
Below is the code implementation for the above test scenario.
Code Implementation:
|
1 2 3 4 5 |
it('File Download using cypress-downloadfile npm package', () => { cy.downloadFile('https://www.learningcontainer.com/wp-content/uploads/2020/04/sample-text-file.txt', 'cypress/fixtures/download_folder', 'data.txt') cy.readFile('cypress/fixtures/download_folder/data.txt').should('contain', 'Lorem ipsum dolor sit amet') }) |
Before we see the result of the cypress-downloadfile plugin, let us understand the code step-by-step.
Code Walkthrough:
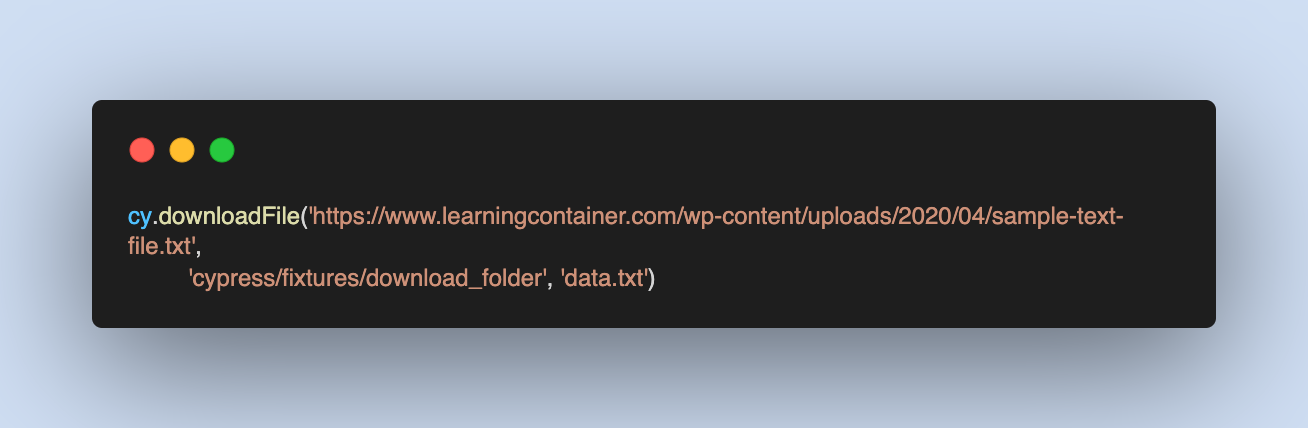
The cy.downloadFile() is used to download a file from the URL https://www.learningcontainer.com/wp-content/uploads/2020/04/sample-text-file.txt. The file is saved to the directory cypress/fixtures/download_folder with the name data.txt.
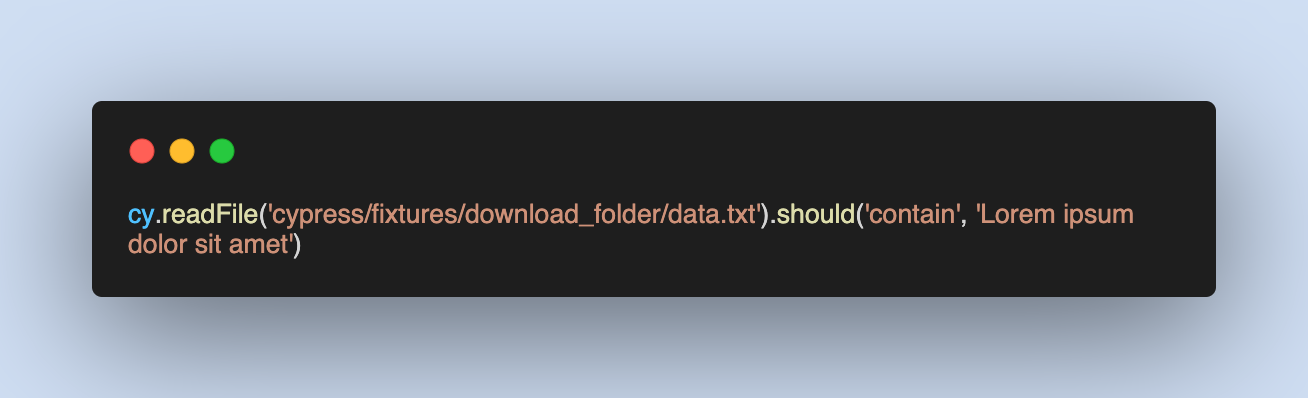
The cy.readFile() is used to read the contents of the downloaded file at cypress/fixtures/download_folder/data.txt.
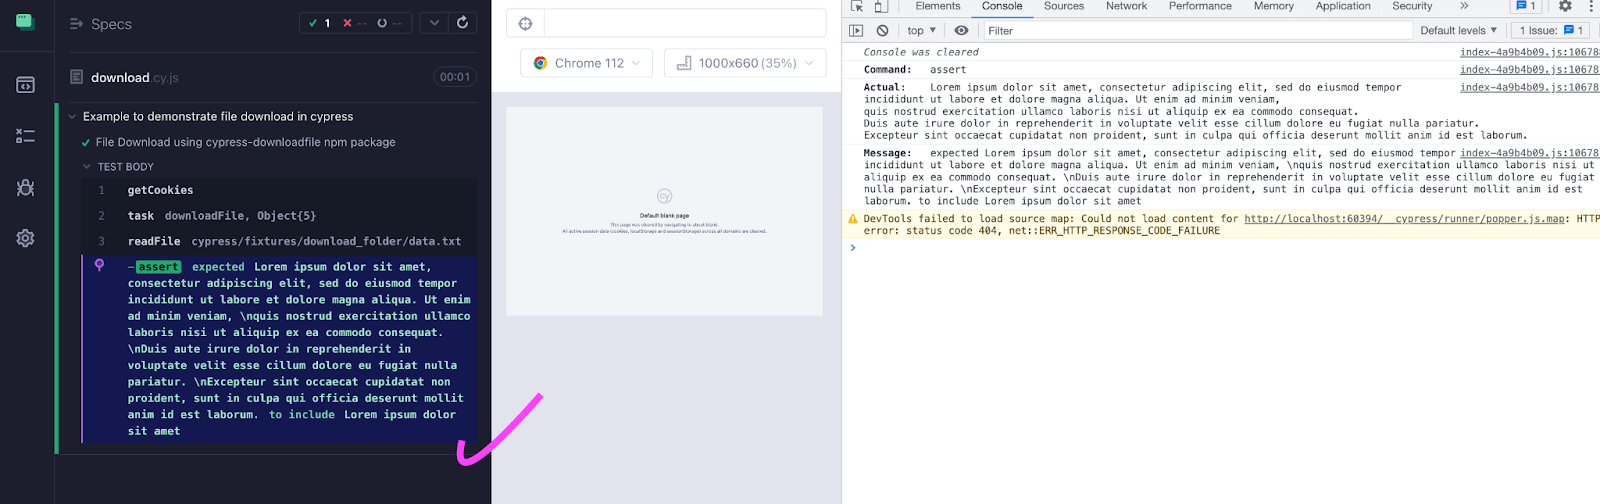
Finally, the should() assertion method in Cypress is used to verify that the contents of the file contain the string “Lorem ipsum dolor sit amet.”
Result:
With this, we have learned to use Cypress for file upload and download with single and multiple files using multiple ways. Further, we will use Cypress for file upload and download over cloud platforms like LambdaTest, which offers ease and efficiency by providing a scalable and diverse testing environment.
LambdaTest is an AI-powered test orchestration and execution platform that lets you run manual and automated tests at scale with over 3000+ real devices, browsers, and OS combinations. This platform facilitates smooth Cypress UI automation across many real browsers and operating systems.
This approach simplifies cross browser testing and cross-platform testing, ensuring the reliability and robustness of your Cypress tests on various configurations without the need for complex local setups.
Watch this complete video tutorial to get detailed insights on how you can perform Cypress testing over the cloud.
Watch this complete video tutorial to get detailed insights on how you can perform Cypress testing over the cloud.
Subscribe to the LambdaTest YouTube Channel to get the latest updates on tutorials around Selenium testing, Cypress testing, Cypress e2e testing, and more.
Conclusion
Downloading and uploading files are commonly used features in many applications. Automating these tasks using the Cypress automation tool can improve the reliability and robustness of your tests. By automating these features, you can simulate user interactions and validate the expected behavior of these functionalities.
By incorporating these automated tests into Cypress for file upload and download, you can catch potential issues and ensure that your application’s download and upload functionalities work as intended. It provides an additional layer of confidence in the functionality and stability of your application.
Frequently Asked Questions (FAQs)
How to upload an XLSX file in Cypress?
To upload an XLSX file using Cypress, follow these steps:
- Prepare the XLSX file
- Write the Test Script
- Run the Test
Ensure that the XLSX file is placed in the Cypress/fixtures folder or adjust the path accordingly in the test script. Also, note that the mimeType in the attachFile command corresponds to the XLSX file format. That’s it! You can now upload XLSX files using Cypress and perform necessary assertions or validations.
How do I download a Cypress zip file?
You can use the Cypress download file plugin to download a Cypress zip file, ensuring efficient handling of file downloads in your tests.
How to read file content in Cypress?
Reading file content in Cypress is simplified with the cy.readFile() command, allowing easy validation of file content in your tests.
How do I delete a downloaded file in Cypress?
Deleting a downloaded file in Cypress can be accomplished using standard file system commands or plugins like Cypress file utilities, which provide convenient file management capabilities.


Author’s Profile
Kailash Pathak
Currently working as Sr. Quality Lead Manager in a US-based MNC company. Where I am responsible for setting up the overall QA Automation strategy and ensuring that we deliver a high-quality product to our end users. Apart from my role, I have involved myself in educating the community about Software Testing and Test Automation. I am a Blogger and YOUTUBER. I have written a couple of blogs which can find out on my site https://qaautomationlabs.com/
Blogs: 9
Got Questions? Drop them on LambdaTest Community. Visit now


