Running Tests In Cypress With GitHub Actions [Complete Guide]
Anshita Bhasin
Posted On: December 28, 2022
![]() 39458 Views
39458 Views
![]() 22 Min Read
22 Min Read
This article is a part of our Content Hub. For more in-depth resources, check out our content hub on Cypress Tutorial and Cypress Tips And Tricks.
In today’s tech world, where speed is the key to modern software development, we should aim to get quick feedback on the impact of any change, and that is where CI/CD comes in place.
Setting up CI/CD is crucial for automated test cases because it gives more consistent results, agility, and efficient assessment of minor changes. With the shorter release and fast development cycles, we need to check that automated tests are passing on every code change, which can be easily done by configuring the CI/CD pipeline.
Let’s try to understand the impact of CI/CD with an example here:
You want to execute the automation suite whenever anyone pushes the code in the Git repository. So, how will you do that?
- With no CI/CD set up for your project
To run the automation suite, you have to pull the latest code and then run it locally on your machine, which is a tedious and lengthy process.
- With CI/CD implemented
You will set up your project’s CI/CD pipeline. So, your automation test suite would run whenever anyone pushes a code or creates a pull request automatically. It will take the latest code from the Git repository and run the test.
Setting up CI/CD helps to save time. Over the past few years, DevOps has become an important part of the software life cycle, leading to the growth of various DevOps tools and practices.
There are many CI/CD tools available in the market used by automation testers, but these days most people are using GitHub for version control and collaboration. So, GitHub Actions is becoming the favorite choice for automation testers/developers for CI/CD.
GitHub Actions is offered by GitHub as a SaaS offering. With GitHub Actions, you can achieve scheduling, parallelization, run your tests on Docker Containers, and can do many more.
In this blog on Cypress with GitHub Actions, we will learn how to set up CI/CD pipeline for Cypress test cases using GitHub Actions.
TABLE OF CONTENTS
- What is GitHub Actions?
- How to setup GitHub Actions in your Git repository?
- How to run Cypress tests using GitHub Actions?
- How to run the Cypress Test Case on a cloud platform using GitHub Actions?
- How to run Cypress tests for the specific browser using GitHub Actions?
- How to run Cypress tests in Docker Container GitHub Actions?
- How to get the Cypress test run results using GitHub Actions Artifacts?
- Frequently Asked Questions (FAQs)
What is Cypress?
Cypress is an open-source framework, which is built on Node.js and comes packaged as an npm module. It uses JavaScript for writing the test cases. As it runs tests directly inside the browser, it is fast compared to the other automation testing tools (or frameworks).
Cypress automation tool has received huge acceptance from QA and Developers and is constantly gaining popularity due to its features like easy installation, easy debugging, real-time reloads, and ease of use.
Below are some of the features, which make it unique from other web automation tools in the market:
- Easy Installation.
- Easy Debugging.
- In-built support for Retries, Screenshots, and Videos (No Extra code needs to be written).
- Automatic Reload (Cypress reloads your test case whenever you make any changes to your script).
- Can easily run your tests on different viewports ( iPad, iPhone, Samsung).
- Flake Resistant (Cypress waits for commands and assertions before moving on to the next step which avoids flakiness in a test).
What is GitHub Actions?
GitHub Actions is a Continuous Integration (build, test, merge) and Continuous Delivery (automatically released to the repository) (CI/CD) platform. It automates and executes the software development workflows right from GitHub.
With GitHub Actions, you can build, test, and publish across multiple platforms, operating systems, and languages all within the same workflow and then see the status checks displayed within the pull request.
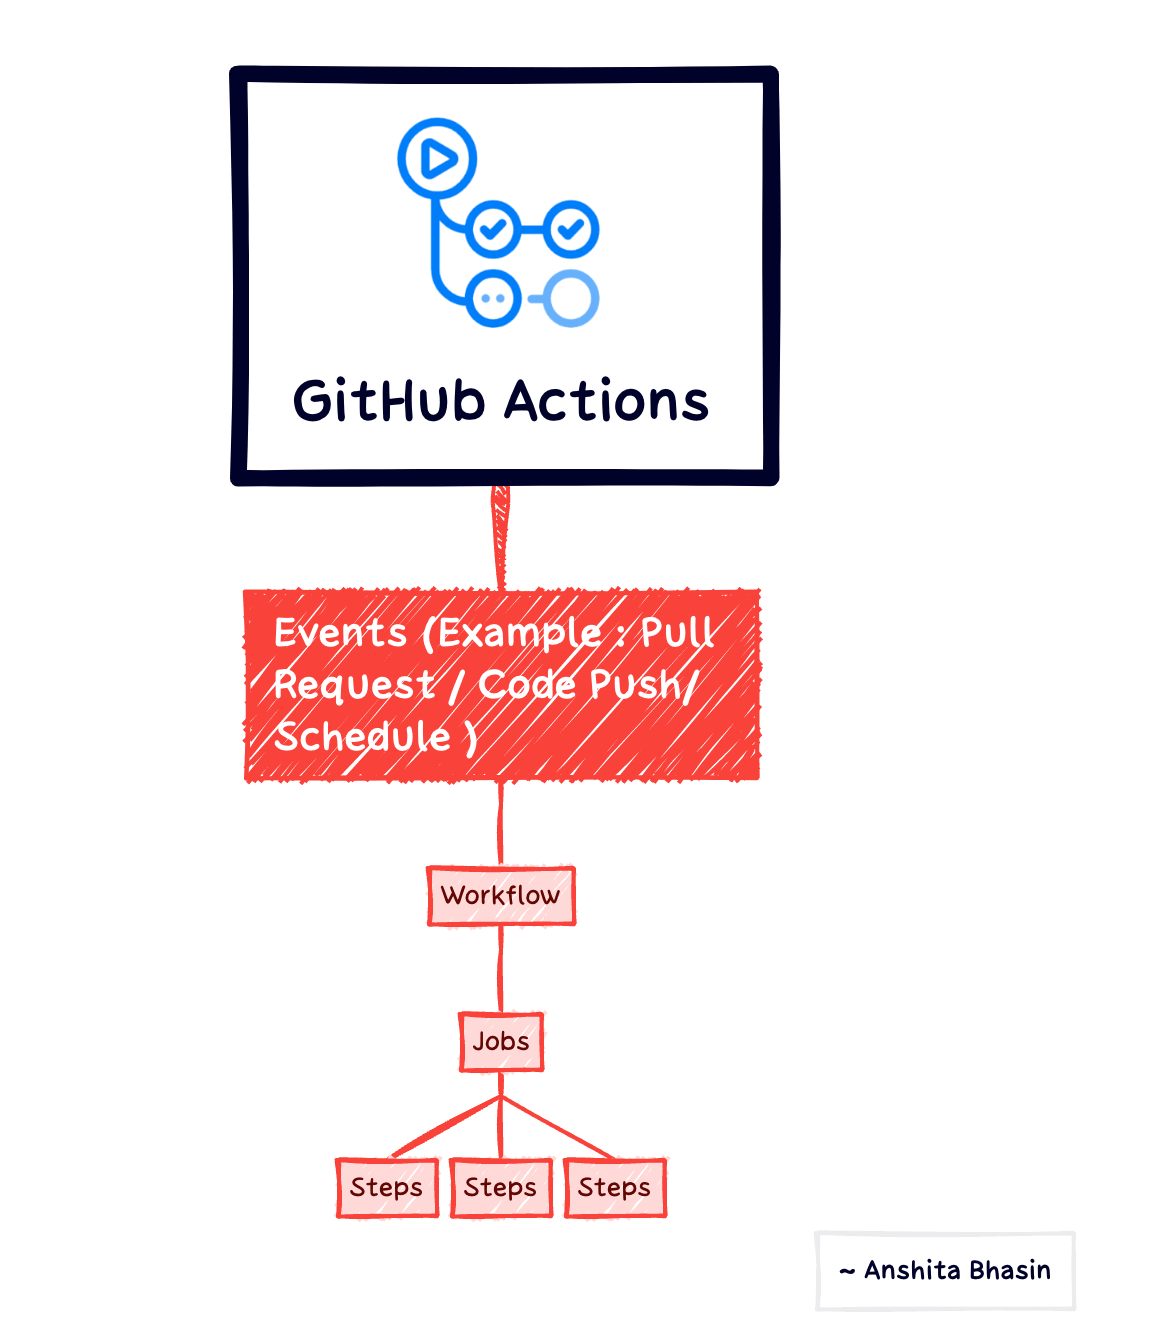
All GitHub Actions are handled via workflows, which are .yml files placed under the .github/workflows directory in a repository that defines automated processes. It brings automation directly into the software development lifecycle via event-driven triggers such as creating a pull request or pushing a code into a remote branch.
With GitHub Action, the pain of keeping your plugins updated is gone (which is the issue for other CI/CD tools like Jenkins), You don’t have to go to a separate tab for running CI/CD and pushing your code. It is all done in GitHub.
Some of the features of GitHub Actions are:
- Ease of setup. There is no installation required as it is on the cloud.
- Support of multiple languages and frameworks.
- Provides actions to every GitHub event.
- It can be shared via GitHub Marketplace.
- No explicit plugin is required for caching. You can write your own caching mechanism if you require caching.
- Asynchronous CI/CD is achieved using GitHub Actions.
At present, GitHub Actions is free to use for public repositories, and for private, it has a pay-as-you-go mechanism.
How to setup GitHub Actions in your Git repository?
GitHub Actions lets you run workflows when a certain triggering event occurs such as a code push, or pull request. A GitHub repository can have multiple workflows. For example, we can create 1 workflow to run our test case whenever there is a code push and one workflow to test the pull requests.
As part of this Cypress with GitHub Actions tutorial, we will learn how to set up the GitHub Action pipeline whenever there is a code push to the remote branch.
Reference code can be found here: 
Below are the steps to set up GitHub Actions in the Git repository:
- Login to your GitHub account.
- Create a workflow: Click on Add file > Create new file.
- Enter .github/workflows/main.yml ( It has to be in the same sequence). main.yml is the file name, you can name it as per your choice.
- Create a workflow file.


Follow the below sample code to create a GitHub Actions workflow (.yml file)
- name => It is the name of the workflow file. It appears in the “Actions” tab of the GitHub Repository with the same name.
- on=> On is the trigger condition, it specifies the trigger for the workflow. We have to add the events (push, pull_request, etc.) as subsections. In the above example, the workflow would be triggered whenever anyone pushes a change to the repository.
- jobs=> Groups all the jobs/tasks that are defined inside the job section in the yml file. We can define the name of jobs just in the next line.
- runs-on: ubuntu-latest => It configures the job to run on the latest version of Ubuntu. The job will execute on a fresh virtual machine hosted by GitHub. You can configure any value of the OS where you would like to execute the GitHub Actions workflow on.
- Steps=> It groups together all the steps that are defined in the yml file. There can be multiple steps in a .yml file. It is placed at the same level as the on section.
- Uses=>Syntax to use the GitHub Actions in the .yml file. You can pass the GitHub Actions to run the test case/ to checkout the code.
Now if you add this simple workflow to your repo, and push your code on the main branch, you can check that a workflow has been added under the Actions tab.

If you click on the workflow run, you’ll see some details such as the commit, the status, the time duration, as well as the jobs that have run.
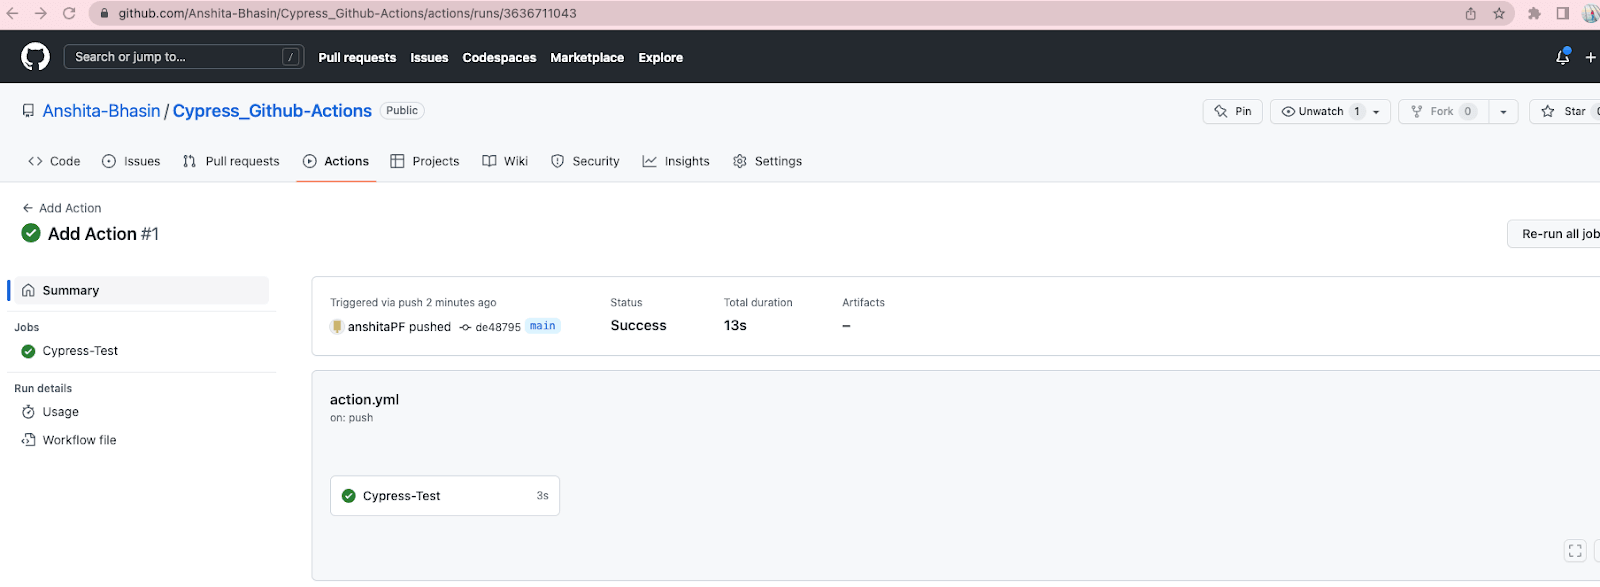
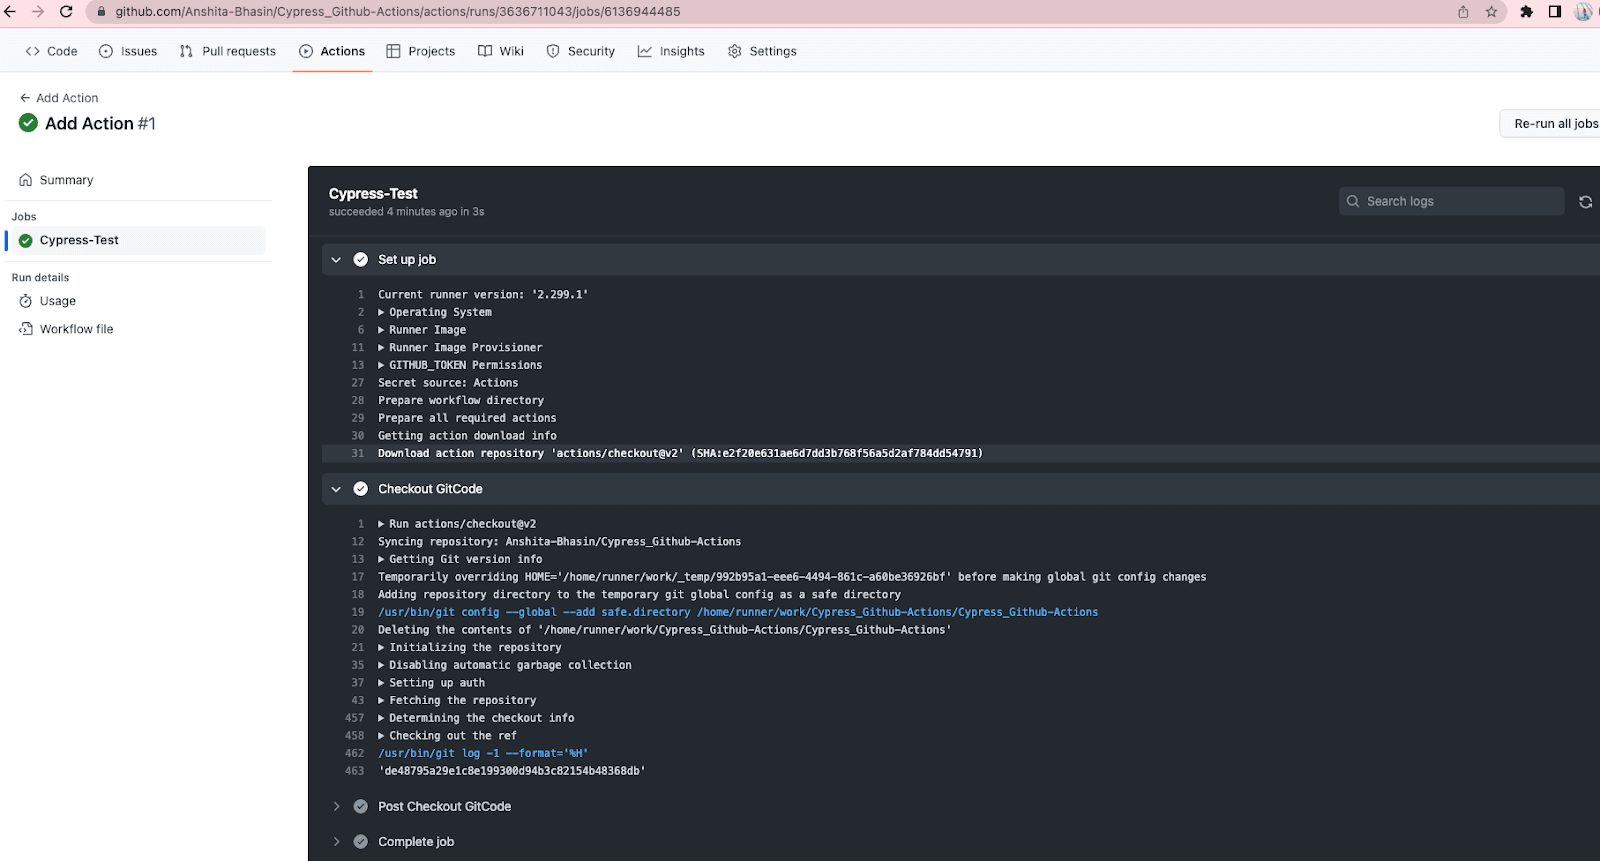
As per the above screenshot, we have only 1 job, i.e., Cypress-Test. We can also view the logs about setting up the job and completing it just by clicking Cypress-Test.
If you want to explore more on the workflow syntax. You can check here.
Run End-to-End Cypress tests on the cloud grid with GitHub Actions. Try LambdaTest Now!
How to run Cypress tests using GitHub Actions?
Cypress is a test automation tool for web applications, and GitHub Actions is a service that allows developers to automate various tasks, such as building, testing, and deploying code. Using Cypress with GitHub Actions allows us to automate the testing of a web application as part of the continuous integration and continuous deployment process. This can help ensure that the application is working properly and save time and effort for the development team.
To use Cypress with GitHub Actions, you would need to create a workflow file that defines the steps for running your Cypress tests. This file would be stored in your GitHub repository and would be executed by GitHub Actions whenever a specified event, such as pushing code to the repository, occurs.
We will see step by step, how to run the tests using Cypress with GitHub Actions.
Pre-Requisites:
- GitHub Repository with working Cypress code
- Knowledge of Cypress
Test Scenario:
- Open URL. https://ecommerce-playground.lambdatest.io/index.php?route=account/login
- Log in to the application.
- Search the product.
- Verify the searched product.
Below is the Cypress end-to-end test code where the user opens the browser, searches for a product, and verifies it in the end.
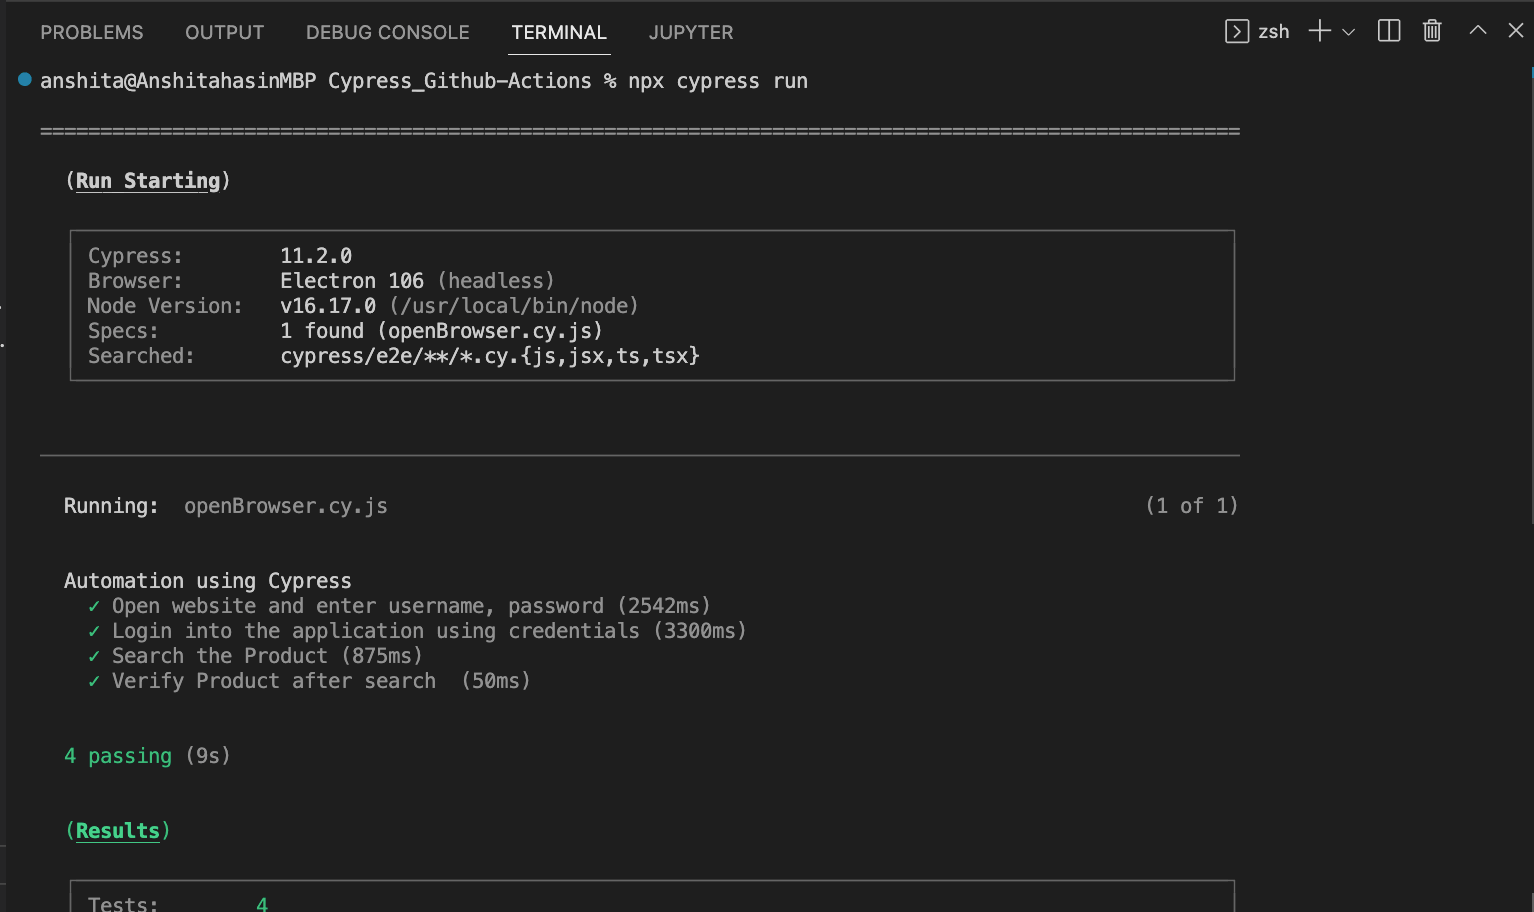
In order to run the above code locally through the terminal, we would run the command “npx cypress run”.
It will run the Cypress test automation and show you the test result in the terminal just like shown below:
Let’s learn how to run the above tests using Cypress with GitHub Actions. If you have followed setting up GitHub Actions in the above section of this blog on Cypress with GitHub Actions, by now you would know how to create a workflow .yml file.
Follow the below code to run the tests using Cypress with Github Actions:
In order to run it using Cypress with GitHub Actions workflow, we will use the Cypress official GitHub Actions (cypress-io/github-action@v4) (ref : Line11)
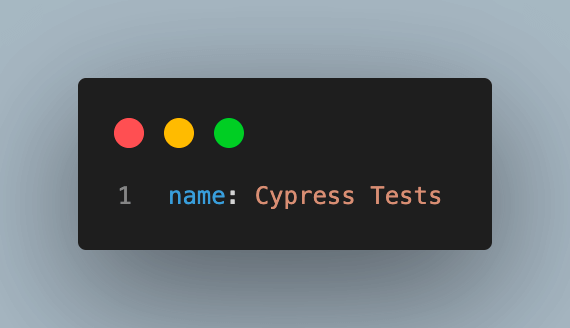
- We have provided the name of the workflow as “Cypress Test”.
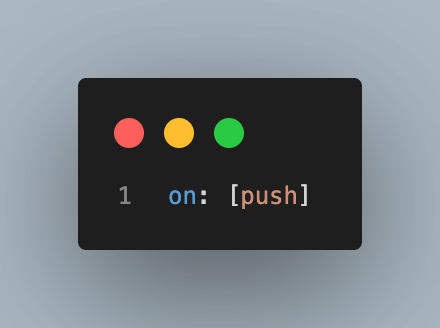
- We provided the trigger condition, In the above case, it would be pushed. So, whenever there would be code push to the remote branch, this workflow would be executed.
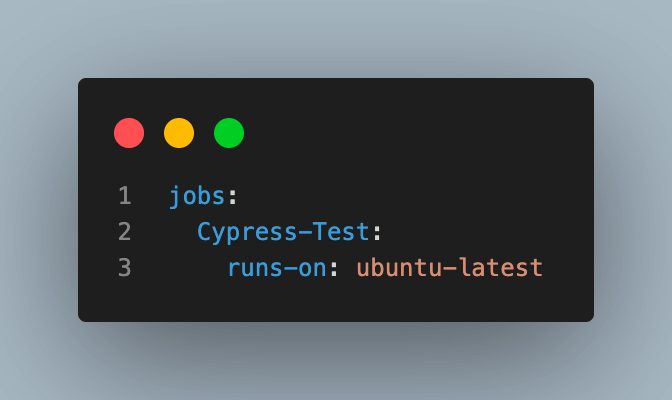
- Jobs’ name is passed as “Cypress Test” under which we are providing the OS info to run it on the latest ubuntu OS.
- There are 2 steps added as part of the shared workflow .yml file.
- The first step, would checkout the code from the GitHub repository using GitHub Actions “actions/checkout@v2”.
- The second step would run the Cypress tests. Cypress has official GitHub Actions for running the Cypress tests, which is “cypress-io/github-action@v4”. This action provides npm installation, custom caching, and additional configuration options and simplifies the setup of advanced workflows using Cypress with GitHub Actions platform.
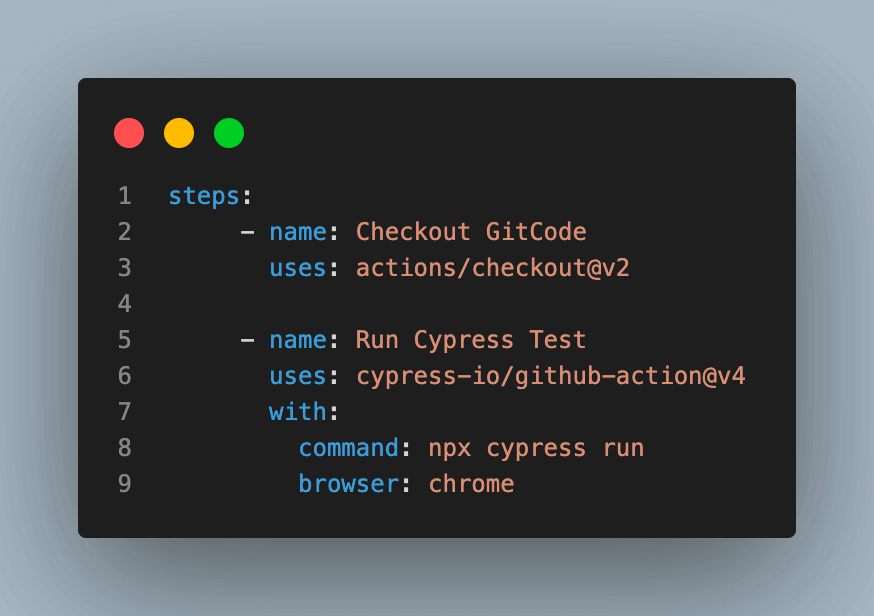
The above workflow would be called whenever there will be code push in your remote GitHub repository.
Once, the workflow is run. You can view the workflow run status from the Actions tab in your GitHub Project just as shown in the below screenshot.
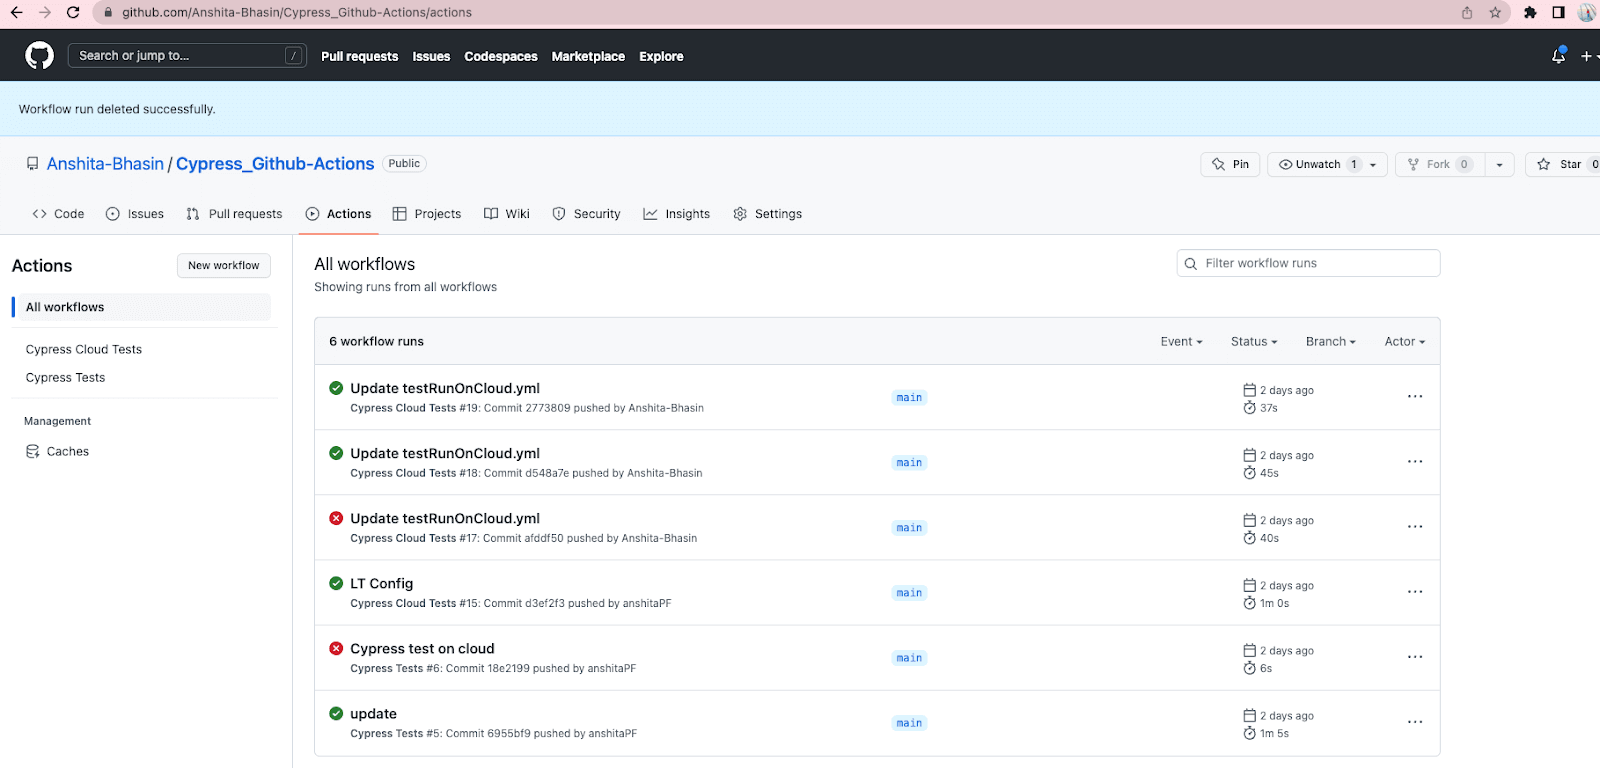
You can also check the step-by-step summary of each GitHub Actions just by clicking the file name and it will take you to the summary screen.
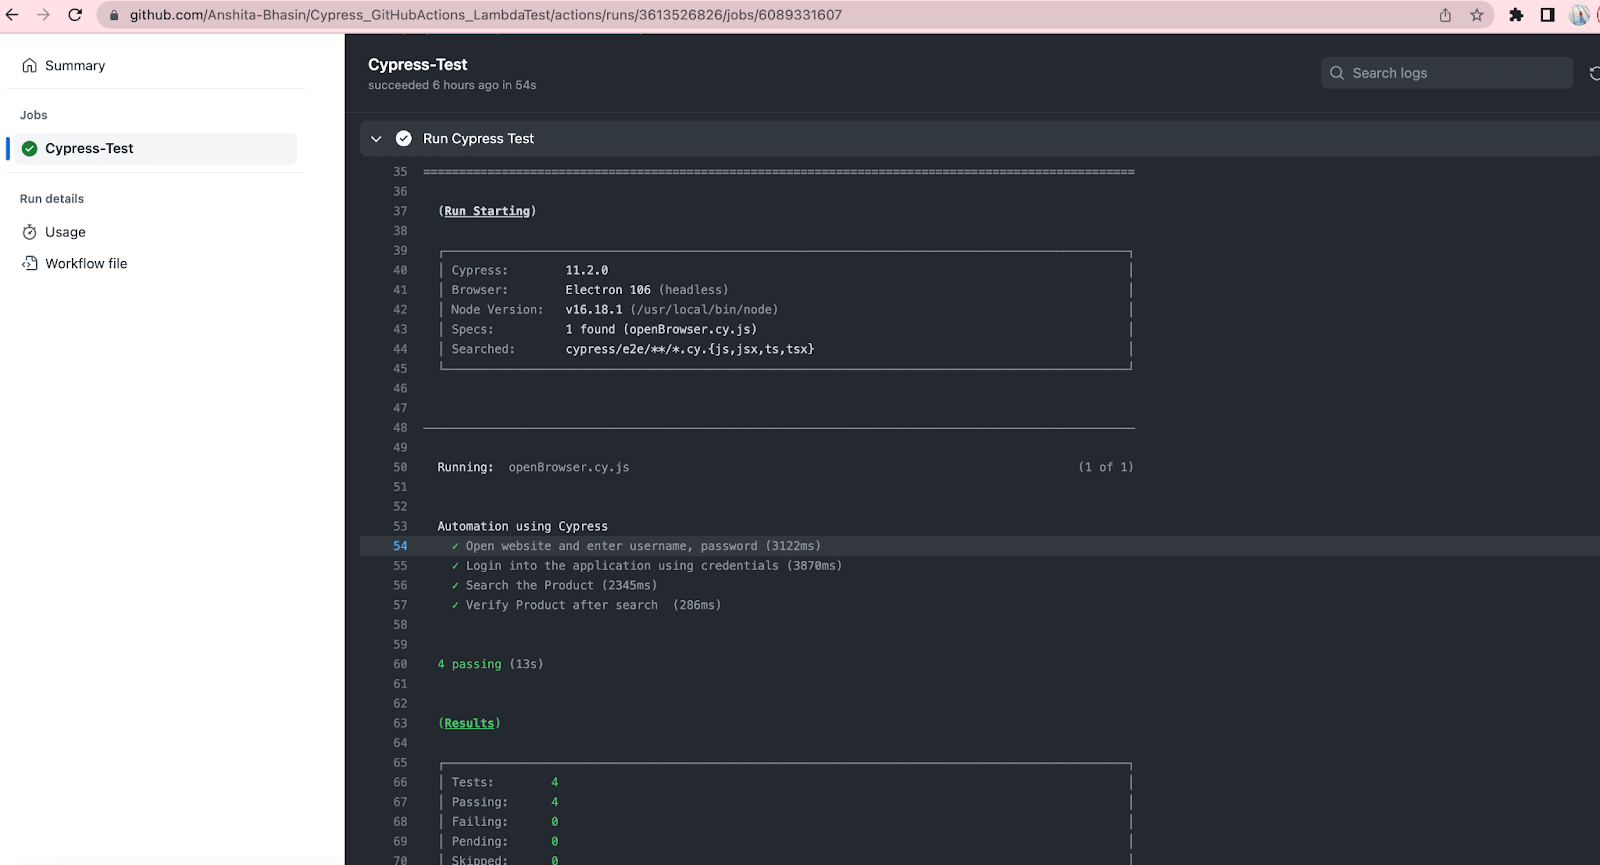
cypress-io/github-action@v4.x.x . . is the Cypress official GitHub Action. By default, it:
- Install npm dependencies.
- Build the project (npm run build).
- Start the project web server (npm start).
- Run the Cypress tests within our GitHub repository within Electron.
In the section on ‘How to run Cypress tests in Docker Container GitHub Actions,’ we’ll dive deeper into the benefits of using Docker alongside Cypress for efficient and reproducible test execution. Learn how to set up your environment for seamless Cypress docker integration.
How to run the Cypress Test Case on a cloud platform using GitHub Actions?
There are multiple approaches to perform Cypress testing on a cloud testing platform like LambdaTest using GitHub Actions.
Continuous quality cloud testing platforms such as LambdaTest lets you perform manual and automation testing of your websites and mobile applications on an online device farm of 3000+ real browsers, devices, and platform combinations. It provides developers with the ability to run their automated tests using different automation testing frameworks including Selenium, Cypress, Playwright and more.
Subscribe to the LambdaTest YouTube channel for tutorials around Selenium testing, Playwright browser testing, Appium, and more.
One of the ways is using the command as part of Cypress with GitHub Actions.
Below is the Cypress end-to-end testing code, which I would run in the LambdaTest cloud platform.
To run the Cypress UI tests on the LambdaTest Platform, we need to do the configuration using 3 steps.
Step 1: Install LambdaTest CLI.
Install LambdaTest CLI using npm, use the below command:
npm install lambdatest-cypress-cli

Step 2: Set up the config.
Once the LambdaTest CLI is installed, now we need to set up the configuration using the below command:
lambdatest-cypress init

After running the command, there will be a file created in your project named “lambdatest-config.json”. We need to set up the configuration in order to run our test case on different browsers on LambdaTest.
- auth: We need to set up the LambdaTest credentials, which will be used in lambdatest-config.json to run my test case on the cloud platform.
- browsers: Need to specify the browser and OS version on which we want our test case to run.
- run_setting: Need to set up the config in run_settings.
Set up the config name, which would differ based on different Cypress Versions, and set up the spec file.
For Cypress version 10 and above, you can follow the below code to set up lambdatest-config.json.
Step 3: Execute Test Case
Once the config is done, now you can execute the Cypress test case on the LambdaTest cloud Platform. You just need to run the below command to run it on LambdaTest.
lambdatest-cypress run
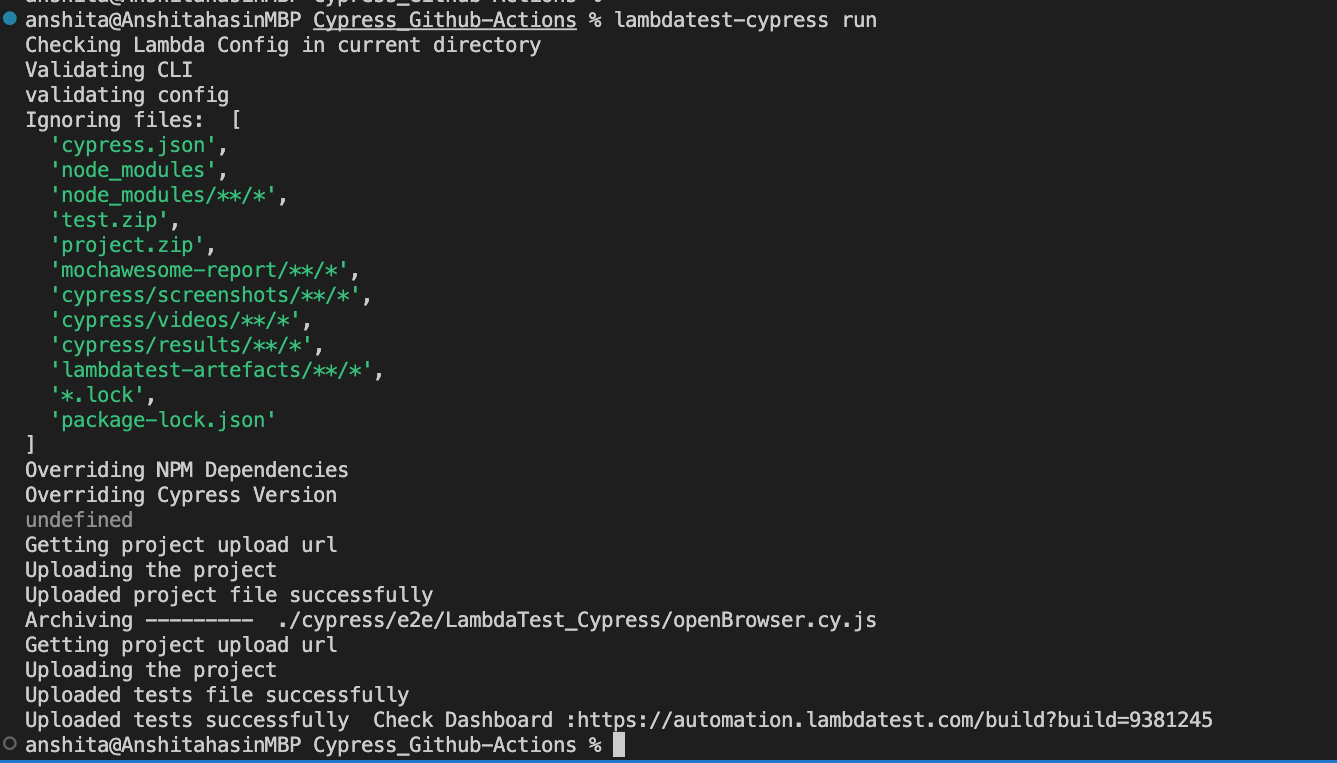
After the command is run and test cases are executed successfully, you can view the Cypress test run on LambdaTest cloud platform (Just like shown in the screenshot below):
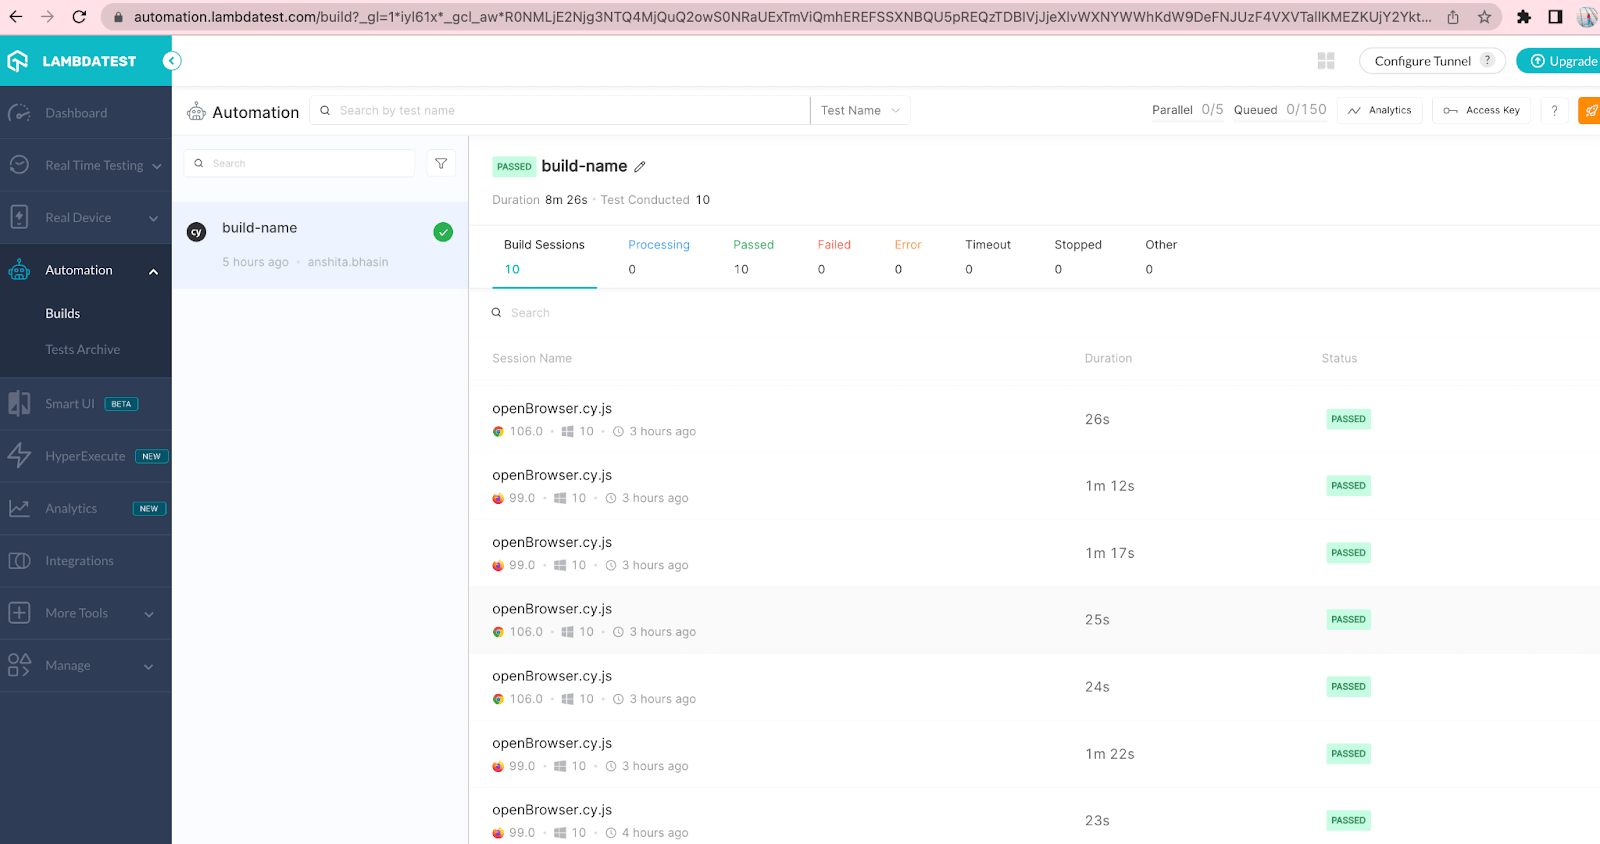
You can also view the logs by navigating to the logs section.
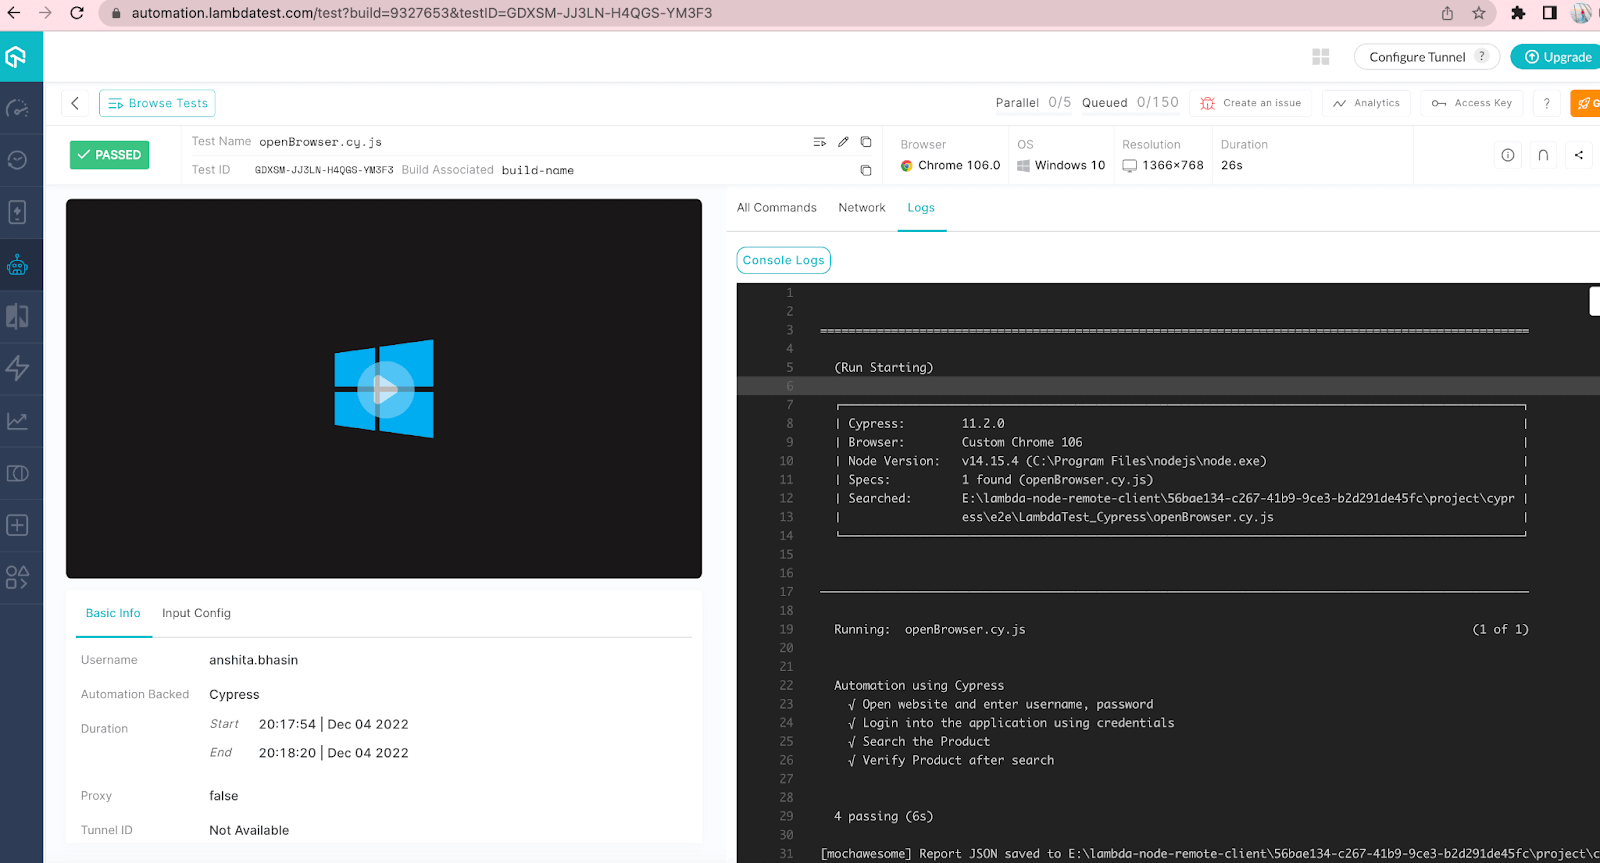
Until now, we learnt how to run Cypress automation tests on the LambdaTest cloud platform using the IDE terminal. Let’s see how to run the above flow using Cypress with GitHub Actions.
In order to run it using Cypress with GitHub Actions workflow, we will use the Cypress official GitHub Actions (cypress-io/github-action@v4), which either works on the script passed in the package.json or directly picks the cypress commands passed in the .yml file.
So, we will create a script in package.json. In order to run the Cypress test on the LambdaTest cloud platform, we need to run the command “lambdatest-cypress run”.
The same command, we will create as a script in package.json just as shown below:
|
1 2 3 4 5 6 7 8 9 10 11 12 13 14 15 16 17 18 19 20 |
{ "name": "cypress_github-actions-example", "version": "1.0.0", "description": "test automation using cypress", "main": "index.js", "scripts": { "test": "lambdatest-cypress run" }, "repository": { "type": "git", "url": "https://github.com/Anshita-Bhasin/Cypress_Github-Actions.git" }, "author": "Anshita Bhasin", "license": "ISC", "devDependencies": { "cypress": "^11.2.0" }, "dependencies": { "lambdatest-cypress-cli": "^3.0.7" }} |
To test if the above script is working fine, Go to the terminal and execute the command “< npm run scriptname >”
For the above code, the command would be npm run test. If you see the tests result just as shown below, that means your script is absolutely working fine.
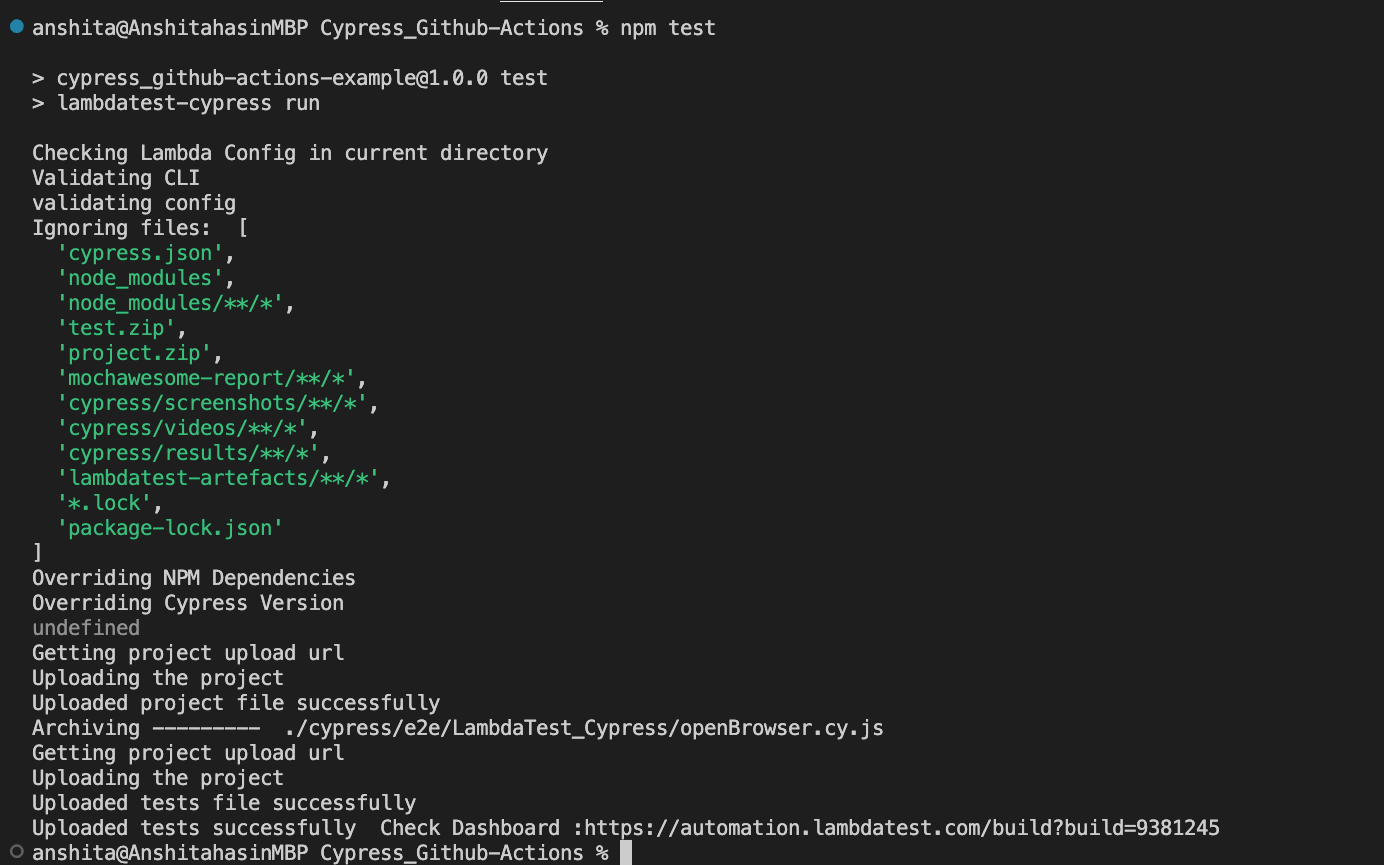
To run the same using GitHub Actions.
- Go to the workflow .yml file. (We covered above, how to create a .yml workflow file)
- Pass the script name as a command :
Command basically runs the Cypress command to execute the Cypress tests. It will check in package.json if there is a command with the name “test” and then it will run, else it will throw an error.
After creating the workflow, you can check the Actions tab in your GitHub Repository. It will show the summary of the workflow run.
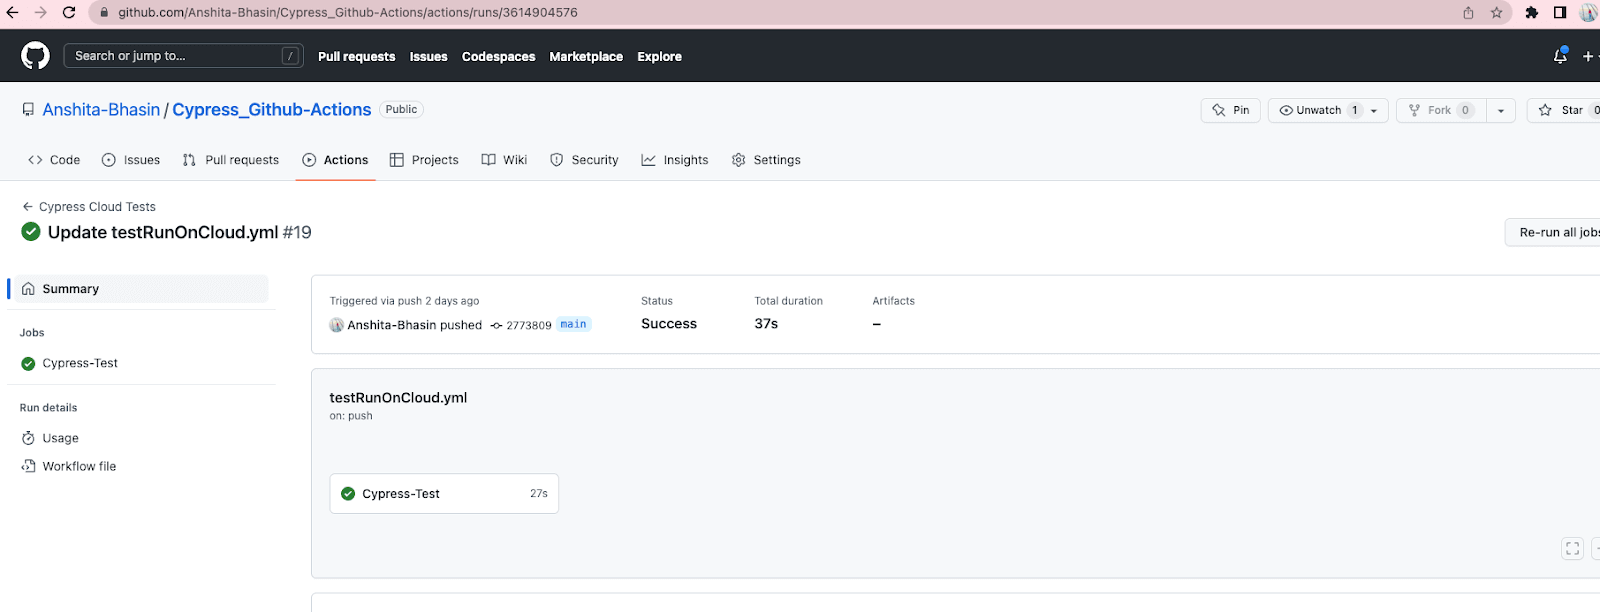
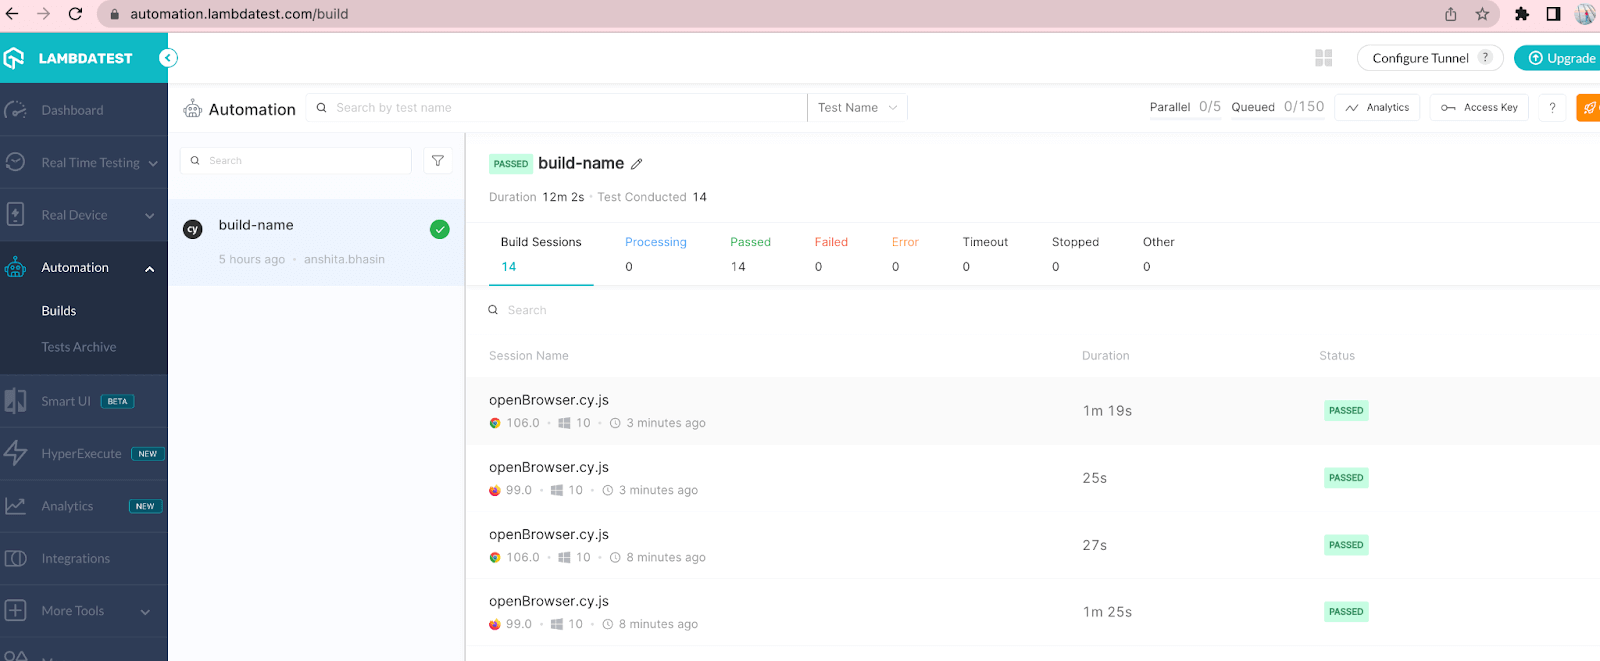
Now, navigate to the LambdaTest cloud platform to ensure whether tests are executed or not. You should be able to see the latest build on LambdaTest.
How to run Cypress tests for the specific browser using GitHub Actions?
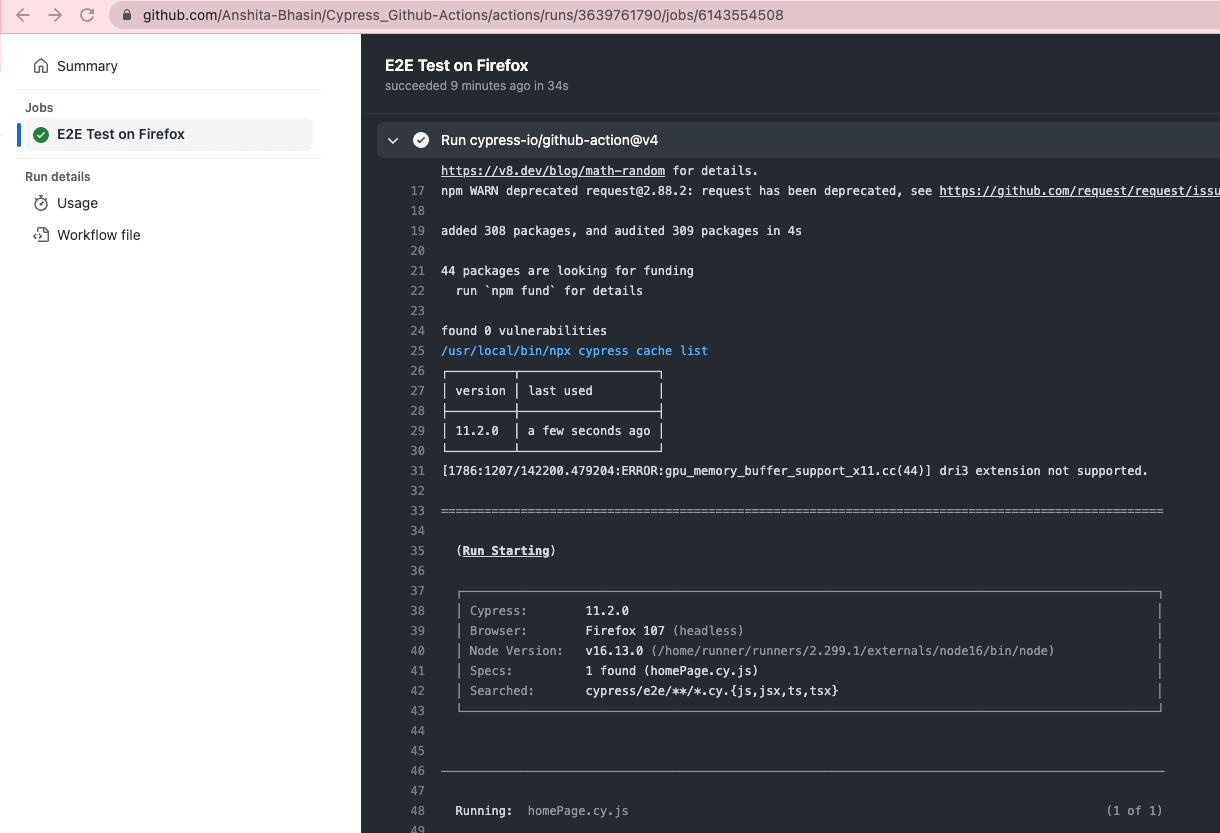
You can also run tests on different browsers using Cypress with GitHub Actions. Just provide the Cypress-supported browser name on which you want to run your test case. As part of the code below, I have passed Firefox. So, the test case would run on the Firefox browser but you can pass Chrome, Electron, or any other browser which Cypress supports.
Once the above workflow is executed, you can go to the Actions tab and view the logs where you should be able to see the browser name. It should be the same as passed in the workflow file. Below is the sample screenshot of the workflow logs:
How to run Cypress tests in Docker Container GitHub Actions?
You can also run the Cypress tests in your Docker Container using GitHub Actions. There is already a docker image available online with chrome version 78 and Firefox version 70 pre-installed. You can pass the container image using an argument container. After executing the test cases, it also stops the container.
Below is the sample code to run the Cypress test in the docker container using GitHub Actions:
How to get the Cypress test run results using GitHub Actions Artifacts?
You can get the Cypress test result as an artifact after your workflow is executed. You can store the generated videos or screenshots as CI artifacts. Let’s take an example – you want videos of your test run after every run but you want screenshots only when your test fails. So, this can be done by passing conditions in the workflow. We will use GitHub Actions actions/upload-artifact@v2 for storing the artifacts and then will pass the condition to show the artifacts.
Below is the sample code.
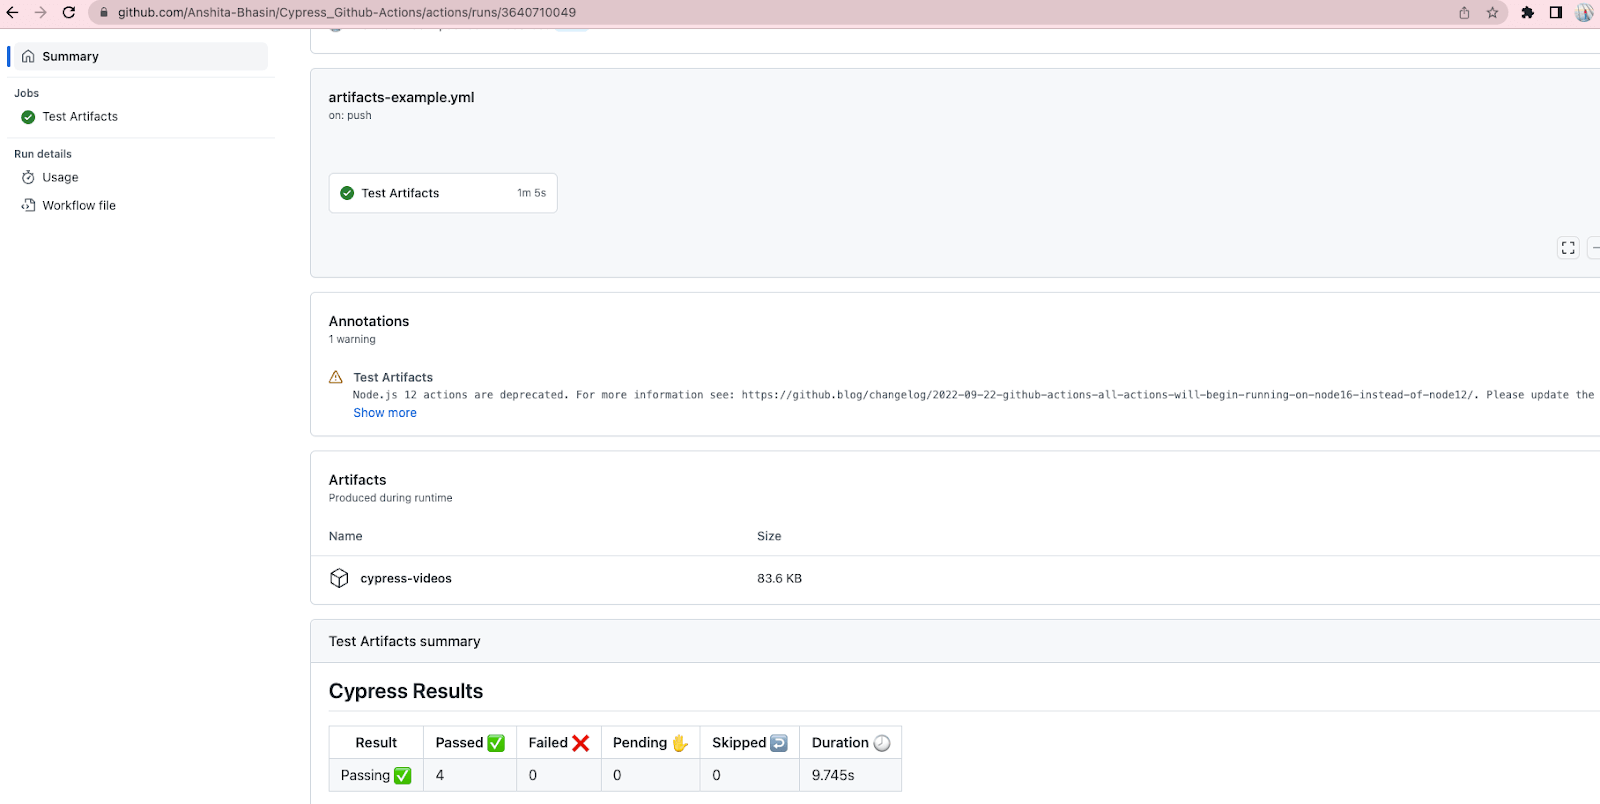
After your workflow is executed, you can check the artifacts from the summary of the workflow.
Click on the Actions tab. Select the action for the desired workflow run. Click the workflow and it will navigate to the summary page.
Conclusion
Cypress is compatible with different CI tools available in the market but one of the leading ones is GitHub Actions. Cypress even has its official GitHub Action(cypress-io/github-action@v4.x.x) which installs the npm dependency and runs the Cypress test. Running your Cypress test case on CI/CD platform gives you leverage to schedule it and run it on different trigger events which save a lot of time.
As part of this blog on Cypress with GitHub Actions, we covered the scenarios where we executed the Cypress test cases using GitHub Actions and also covered running it on a cloud platform.
Stay tuned for the topics on the Cypress Docker Tutorial. We delve into topics like seamless integration with Docker, optimizing container resources, and maximizing testing efficiency.
Frequently Asked Questions (FAQs)
How do I use Cypress actions in GitHub?
If you want to use Cypress Actions in a GitHub repository, you will need to push your tests to the repository and set up a continuous integration (CI) system to run your tests automatically. You can use a service like Travis CI or GitHub Actions to run your tests on every commit or pull request.
Can Cypress Run in headless mode?
Yes, Cypress can run in headless mode, which means that the tests are run in a terminal or command prompt without opening a graphical user interface (GUI). This can be useful for running tests on a server or in a continuous integration (CI) environment where a GUI is not available.
Can you use C# with Cypress?
Cypress is a JavaScript testing framework that is used to write and run automated tests for web applications. It does not directly support the use of C# or any other programming language.
However, it is possible to use C# to write automated tests for a web application that can be run using a tool like Selenium, which is a browser automation library that can be used to drive a web browser from a C# program.
What is GitHub Actions used for?
GitHub is a flexible platform for software development that offers collaborative version control and tools like GitHub Actions for automating build, test, and deployment procedures.
What is the difference between Jenkins and GitHub Actions?
Jenkins uses stages to conduct steps, whereas GitHub Actions groups commands or steps into jobs. Both support container-based builds and permit the community to share and reuse stages.
What is the difference between GitHub Actions and Docker?
GitHub Actions is a popular CI/CD platform for automating build, test, and deployment pipelines. Docker provides official actions that simplify image building, annotation, and pushing within GitHub Actions workflows.
What is the difference between pull and push GitHub Actions?
While the “pull_request” event is triggered by a pull request, the “push” event is triggered by code pushes. Actions involving pull requests from forked repositories call for the “pull_request” event.
What is the difference between GitLab and GitHub Actions?
Both GitLab CI/CD and GitHub Actions support running workflows at specific intervals. GitLab CI/CD utilizes pipeline schedules configured via the UI, while GitHub Actions allows triggering workflows on scheduled intervals using the “on” key.
Got Questions? Drop them on LambdaTest Community. Visit now


