
What Is Python End Parameter: A Detailed Guide
Paulo Oliveira
Posted On: October 12, 2023
![]() 259713 Views
259713 Views
![]() 35 Min Read
35 Min Read
In the world of test automation, two constant challenges stand out: making output well-organized and easy to understand. Developers and testers often strive to present logs, reports, and debug information straightforwardly and efficiently.
As technology advances and software systems become more complex, efficient and precise testing methodologies have become essential. Test automation is a crucial process. It is like a careful checklist to ensure that the software works well. To provide this, one frequently ignored but handy tool for automation engineers is the Python end parameter.
Python end parameter is a solution to deal with the complex nature of output formatting. Automation engineers use the end parameter to gain precise control over aspects like line endings, string concatenation, and formatting choices.
This blog will dive deeper into the Python end parameter, moving beyond the basics. We will use real-world examples and practical scenarios to illustrate its importance in the test automation field. By the end of this blog, you will be able to enhance the precision and effectiveness of your test automation scripts.
TABLE OF CONTENTS
- What is the Python end parameter?
- Understanding the Python print() function and Python end parameter
- Illustrating the default behavior of the Python end parameter
- Advanced techniques used with Python end parameter
- Parallel testing with Python end parameter
- Best practices for Python end parameter
- Conclusion
- FAQs
What is the Python end parameter?
The Python end parameter, a lesser-known feature of the Python print() function, controls each output’s concluding character or string. This parameter is set to a line break by default, represented by the newline character \n.
However, understanding how to manipulate the end parameter allows automation engineers to gain excellent control over the formatting of their output. This capability proves particularly valuable in test automation, where managing and presenting output in an organized and easily understandable manner is essential.
Overview of test automation and its benefits
Test automation is a foundational element in software development, offering developers and Quality Assurance Engineers (QAEs) the tools to thoroughly evaluate their software solutions’ reliability and efficacy. Its significance extends to accelerating the Software Development Life Cycle (SDLC). It brings a wide range of benefits, such as improving efficiency, boosting reliability, and enhancing the overall quality of the product.
Let us look into some of the benefits of test automation in the Python end parameter.
- Enhanced Efficiency: It reduces human effort and minimizes the time required to execute tests consistently.
- Augmented Accuracy: Minimizes the risk of human errors, ensuring more accurate detection of software defects and issues.
- Regression Testing: Automation ensures that recent changes or modifications do not disrupt previously working features.
- Scalability: It allows for testing complex software with many test cases, ensuring a comprehensive assessment.
- Rapid Feedback: It enables developers to identify and fix issues early in the development cycle.
Before getting started into advanced topics like the Python end parameter, ensure you have a solid knowledge of Python basics.
Understanding and leveraging the Python end parameter becomes crucial to further capitalize on the benefits of test automation. By skillfully manipulating line endings and customizing output formats, automation engineers can optimize the creation of well-structured logs, reports, and debugging information. This capability empowers teams to simplify their analysis, troubleshooting, and communication of test results.
Using the Python end parameter, we aim to provide automation engineers with the insights and skills to enhance their testing procedures, ultimately promoting more effective and efficient software development practices.
 Note
NoteEnhance efficiency and precision in Python-based test automation with LambdaTest. Try LambdaTest Today!
In the following sections, we will explore the Python end parameter in-depth, revealing its practical uses in addressing typical formatting issues encountered in test automation.
Understanding the Python print() function and Python end parameter
In this section, we will learn more about the workings of the Python print() function, its end parameter, and its purpose with an illustration for better understanding.
Python print() function: Managing output
Understanding the basics of the versatile print() function is essential. In Python, the print() function is a fundamental tool for showing text or values on the console, where program output is displayed. This built-in function handles various input types, from plain strings to complex variables or expressions, and presents them as readable text.
To understand this, see the example below using the print() statement.
|
1 2 3 4 5 6 7 8 9 10 11 12 |
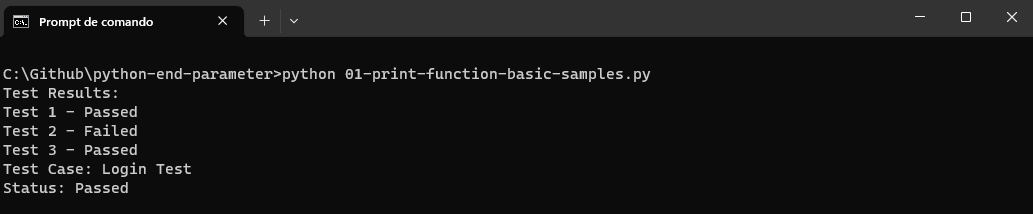
# Basic Sample - Printing directly in the print() function print("Test Results:") print("Test 1 - Passed") print("Test 2 - Failed") print("Test 3 - Passed") # Basic Sample - Printing data stored in variables test_case_name = "Login Test" test_case_status = "Passed" print("Test Case:", test_case_name) print("Status:", test_case_status) |
In these examples, the print() function displays test case information.
Step 1: In the first instance, the text to be printed is directly specified within the print() function.
Step 2: In the second example, the test case name and its status are extracted from a variable that holds text. These variables are then utilized within the print() function.
Running this code, you will get:
Python end parameter and its purpose
As we delve into the Python end parameter, we discover a hidden feature within the print() function. This mysterious end parameter lets us control what comes at the end of our printed output. By default, it adds a newline character \n, which makes the following result appear on a new line, following the usual formatting.
How does the Python end parameter affect the output of the print() function?
The Python end parameter acts as a prompt, significantly influencing the behavior of the print() function. By modifying the value assigned to the Python end parameter, we can redefine the default behavior, which typically entails appending a newline character.
This customization of the Python end parameter allows us to specify any character or string we desire, effectively determining the concluding element of our printed output. Consequently, this newfound control over formatting and arrangement permits us to fashion our printed output to align with our preferences and requirements.
Illustrating the default behavior of the Python end parameter
To provide a concrete demonstration of the default behavior exhibited by the Python end parameter, let us delve into a straightforward example. Consider the following lines of code:
|
1 2 |
print("Hello") print("World") |
Upon executing this code snippet, we witness the following output:

This output is attributed to the default behavior of the end parameter, which appends a newline character \n after each print() statement. Consequently, the two strings are displayed on separate lines, adhering to the conventional formatting conventions.
It happens because of the default behavior of the Python end parameter, which adds a newline character \n at the end of each print() statement. As a result, the two strings are shown on separate lines, following the usual formatting rules.
In the following sections, we’ll explore how the Python end parameter is practically used, including its role in combining strings and formatting output in test automation scripts.
Exploring the Python end parameter functionality

Let’s explore the Python end parameter in the Python print() function. This minor feature can significantly impact how we format our output. We will look into three default behaviors of the Python end parameter functionality:
- Changing the default behavior of the Python end parameter
- Concatenating output using the Python end parameter
- Controlling spacing with the Python end parameter
In the following section, we will discover the Python end parameter behaviors and capabilities and how it can improve our output formatting skills with some examples.
Whether you’re new to Python or an experienced developer, understanding the Python end parameter can be a valuable asset.
Changing the default behavior of the Python end parameter
Customizing the Python end parameter to achieve different line endings according to our requirements.
Whether you want to print on the same line without a newline character or prefer to separate output with a specific character, the Python end parameter gives you the power to achieve various line endings. This level of control is especially beneficial in scenarios where neatly formatted logs, reports, or data presentations are essential.
For instance, let’s consider the following code snippet:
|
1 2 |
print("Hello", end='!') print("World") |
In this example, we have modified the end parameter to (‘ ! ‘ ). On execution of the code snippet, the output will be:

As you can see, the print() statement doesn’t conclude with the usual newline character \n. Instead, it adds the exclamation mark (‘ ! ‘), exactly as instructed by the end parameter. Its customization allows us to manage line endings and craft distinct output styles.
In the following examples, we’ll explore how to use the Python end parameter to achieve different line endings and enhance the presentation of your output.
Consider the following examples:
Example 1: Various line endings, characters
In this example, we have used various characters as line endings for each print() statement.
To achieve this, we modify the Python end parameter in each print() statement, specifying the desired line ending for each output line.
|
1 2 3 |
print("Line 1", end='***') print("Line 2", end='---') print("Line 3") |
Output

The output demonstrates that we have yet to use the typical newline character. Instead, we have introduced custom line endings for each print() statement to achieve this unique output.
Let’s proceed with our examples to see how more can be customized using the Python end parameter.
Example 2: Comma-separated list of numbers
In this example, we will be customizing the Python end parameter to create a formatted list of numbers, separating them with colons and spaces, using a space character (‘ ‘) for the first print() statement and a comma followed by a space (‘ , ‘) for subsequent print() statements.
|
1 2 3 |
print("Number:", end=' ') for i in range(1, 6): print(i, end=', ') |
Output

This approach results in a comma-separated list of numbers with a space following each colon.
Concatenating output using the Python end parameter
The Python end parameter in the print() function can also be used for string concatenation, allowing us to create custom output formats. By adjusting the Python end parameter, we control how different print() statements are joined together.
Let’s look at the following code snippet:
In the code below, we have used the Python end parameter to concatenate strings and create a formatted output.
|
1 2 3 4 5 6 7 8 |
name = "Login" duration = "25 seconds" print("Test Case Name:", end=' ') print(name, end=', ') print("Test Case Duration:", end=' ') print(duration) |
Before we look into the outcome of the code, let us understand the code in the following steps:
Step 1: In the first print() statement, we use a space character (‘ ‘) as the Python end parameter. It adds a space after the content of the first print() statement.
Step 2: For the second print() statement, we use a comma and a space (‘, ‘) as the Python end parameter. It concatenates the name and adds a comma with a space before the next print() statement.
Output

This approach allows us to create a well-structured output format with concatenated strings.
The Python end parameter in test automation can help concatenate relevant information and create meaningful output. Let us learn more about this with some examples.
Example 1: Logging Test Steps
In this example, We are trying to print test steps and test status using the Python end parameter
|
1 2 3 4 5 6 7 8 |
test_step = "Click on 'Login' button" status = "Passed" print("Step:", end=' ') print(test_step, end=', ') print("Status:", end=' ') print(status) |
Let us understand what the code is trying to perform here in the following steps:
Step 1: You define test_step and status variables to store information about a test step and its status.
Step 2: The print() function is used multiple times to display this information.
Step 3: For the Step: and Status: labels, the Python end parameter is set to a space character (‘ ‘), so they don’t end with a newline character and stay on the same line.
Step 4: The test_step variable content is printed, followed by a comma and space to separate it from the next part.
Step 5: Finally, the status variable content is printed, which completes the output in the desired format.
Output

It displays the test step and its status in a clear and structured format on a single line. This enables us to generate detailed and informative logs during test execution.
Example 2: Reporting Test Results
In this example, we will display the information about a test case, its result, and an error message in a structured format on a single line, using specific labels and separators.
|
1 2 3 4 5 6 7 8 9 10 11 |
test_case = "Login Test" result = "Failed" error_message = "Invalid credentials" print("Test Case:", end=' ') print(test_case, end=', ') print("Result:", end=' ') print(result, end='. ') print("Error:", end=' ') print(error_message) |
Before we jump to the outcome of this code, Let us understand what the code is trying to perform here in the following steps:
Step 1: You define three variables: test_case, result, and error_message to store information about a test case, its result, and an associated error message.
Step 2: The print() function is used multiple times to display this information.
Step 3: The Python end parameter is set to a space (‘ ‘) for the Test Case and Result labels so they don’t end with a newline character and stay on the same line.
Step 4: The test_case variable content is printed, followed by a comma and space to separate it from the next part.
Step 5: The Result label is printed without a newline due to the ‘end’ parameter with a space (‘ ‘).
Step 6: The result variable content is printed, followed by a period and space to separate it from the next part.
Step 7: The Error label is printed without a newline due to the ‘end’ parameter with a space (‘ ‘).
Step 8: The error_message variable content is printed.
Output

It can be valuable for generating comprehensive test reports and identifying issues in the automation process.
NoteImprove your test reports and automation efficiency with LambdaTest. Try LambdaTest Today!
Controlling spacing with Python end parameter
The Python end parameter can control the spacing between different outputs besides line endings and string concatenation. By customizing the Python end parameter, we can adjust the spacing to enhance the readability and formatting of the output. Let us understand this with the example below.
Example:
In this example, we have added multiple spaces after the labels by manipulating the Python end parameter.
|
1 2 3 4 5 6 7 8 |
name = "Login" duration = "25 seconds" print("Test Case Name:", end=' ') print(name) print("Test Case Duration:", end=' ') print(duration) |
Before executing this code snippet, let us understand the working of this code in the following steps:
Step 1: You define two variables, name and duration, to store information about a test case’s name and duration.
Step 2: The print() function is used multiple times to display this information.
Step 3: For the Test Case Name and Duration labels, the end parameter is set to multiple spaces (‘ ‘) to align the output neatly.
Step 4: The name variable content is printed following the Test Case Name label.
Step 5: Similarly, the Test Case Duration label is printed, and the duration variable content is displayed next to it.

It displays the test case name and duration with specific labels and alignment for a structured and well-formatted output.
Controlling spacing using the Python end parameter in test automation scenarios can contribute to more readable and well-structured output. Some examples include:
- Displaying test case information with consistent spacing for improved readability
- Aligning test step descriptions and their corresponding results to create a well-organized log
- Formatting test data output to ensure clear differentiation between input values and expected results
By utilizing the Python end parameter to control spacing, test automation scripts can generate output that is easier to interpret and analyze, facilitating efficient debugging and reporting processes.
Understanding the potential of the Python end parameter provides test automation engineers with versatile tools for changing line endings, concatenating strings, and managing spacing. These capabilities make test automation logs, reports, and other outputs more readable, organized, and understandable, aligning them with specific formatting preferences.
Advanced techniques used with Python end parameter
Let’s dive into the versatile techniques you can use with Python end parameter to enhance your output formatting.
Combining Python end parameter with other print() statements
The Python print() function offers more than just the Python end parameter. Test automation professionals can unlock advanced functionality and control over their output by understanding how end can be combined with other parameters, such as sep and file.
One interesting parameter to explore is sep, which determines the separator between multiple items passed to print().
By default, sep is set to a space character but can be customized to meet specific requirements.
Consider the following example that combines end, sep, and file parameters:
Example:
Change the log_test_result() function to save test results in a log file (test.log) instead of displaying them on the console. Improve log entry readability using a pipe character (‘ | ‘) as the separator via the sep parameter.
|
1 2 3 4 5 6 7 8 9 |
def log_test_result(test_case, result): with open("test.log", "a") as file: print("Test case:", test_case, "Result:", result, sep=' | ', end='\n', file=file) # Usage Example test_case = "Login Test" result = "Passed" log_test_result(test_case, result) |
Before we jump to the outcome, let us understand the code instructions one by one using the following steps:
Step 1: You define a function called log_test_result that takes two parameters: test_case and result. This function is intended to log test results into a file named test.log.
Step 2: Inside the function, you use a with a statement to open the test.log file in append mode (‘a’). This mode ensures that the file is created if it doesn’t exist or appends data to it if it does.
Step 3: Within the with block, you use the print() function to write text to the file. The text includes the Test case, the value of test_case, the Result, the result value, and the separators specified by the sep parameter (‘ | ‘).
Step 4: After writing the text, the end parameter is set to \n to add a newline character, ensuring each log entry appears on a new line in the file.
Step 5: Finally, you provide an example of how to use the log_test_result function. You define a test_case variable with the value Login Test and a result variable with the value Passed.
Step 6: Then, you call the log_test_result function with these values, which logs this test case and results to the test.log file.
The test.log generated file will show the below content:

The code logs test case results to the test.log file in a structured format, making it easy to record and review test outcomes. Combining end, sep, and file parameters opens up possibilities for advanced print() usage in test automation.
Here are a few practical examples of the Python end parameter in test automation.
- Generating HTML Reports
By redirecting the output to an HTML file using the file parameter and customizing end, sep, and HTML tags, it’s possible to create visually appealing and interactive HTML reports that contain clickable links, tables, and other elements. - Logging Timestamps
Test automation scripts can log timestamps for each test step or event by incorporating the end parameter and date and time functions. This information can be valuable for debugging and analysis. - Creating Custom Output Formats
By combining end, sep, and file parameters with conditional statements and formatting techniques, test automation engineers can generate custom output formats customized to specific needs, such as XML, JSON, or CSV. It allows for seamless integration with other tools and systems.
Using Python end parameter with custom functions
The power of the Python end parameter is not limited to the built-in print() function. It can also be integrated into user-defined functions, providing greater control over the output.
Let’s explore an example of how end can be used in a custom function for test automation.
Example: Utilizing the Python end parameter within the custom function.
|
1 2 3 4 5 6 7 8 |
def log_test_step(step_number, description, result): print(f"Step {step_number}: {description}", end=' | ') print(f"Result: {result}") # Usage Example test_step = 3 step_description = "Click the Login button" step_result = "Passed" log_test_step(test_step, step_description, step_result) |
Before we jump to the outcome of this code, let’s first understand the purpose of this sequence of instructions.
Step 1: This code defines a function called log_test_step, which takes three parameters: step_number (an integer representing the test step), description (a string describing the step), and result (a string indicating the outcome).
Step 2: Inside log_test_step prints a formatted message including these parameters using f-strings, with a pipe symbol (‘ | ‘) as a separator.
Step 3: Outside the function, an example demonstrates how to use it by setting values for test_step, step_description, and step_result and then calling log_test_step to print a summary of the test step to the console.
Output

This output displays the step number, description, and result of the test step in a formatted manner. The pipe symbol (‘ | ’) separates the description and the outcome.
Examples of integrating the Python end parameter in custom functions for automation
Integrating the Python end parameter into custom functions can significantly enhance the flexibility and functionality of test automation scripts.
Here are some extra instances of integrating the Python end parameter.
Customized Logging Levels
Different logging levels, such as debug, info, or error, can be implemented by incorporating the end parameter in a custom logging function. It allows for selective output based on the desired level of detail, providing more granular control over the logging process.
Verbose Output Control
With the Python end parameter, custom functions can offer an option to toggle verbose output. It allows users to control the amount of information displayed during test execution, balancing detailed feedback and concise output.
Formatting Output for Different Platforms
Custom functions can adapt the output format based on the target platform using the Python end parameter. Whether it’s console, web, or mobile, the flexibility offered by the end allows for seamless formatting adjustments to ensure compatibility and consistency across various environments.
By integrating the Python end parameter with other print() parameters and custom functions, test automation engineers can leverage advanced techniques to optimize their output, customize it to specific requirements, and enhance the overall effectiveness of their automation efforts.
Parallel testing with Python end parameter
Diving into the world of parallel Python automation testing. We unlock the potential to expedite our testing efforts by harnessing the power of concurrency.
By executing multiple test cases concurrently, we can significantly reduce the overall testing time and enhance the efficiency of our test suite.
This section will demonstrate a test scenario that uses the Python end parameter to log actions inside a Python Selenium automation test. The main idea here is to automate a simple Python Selenium test, and within the automation steps, we will log each user interaction using the Python end parameter. So, we can see the power of the Python end parameter to one kind of use case: logging.
The demonstration will be done on a cloud-based grid-like LambdaTest.LambdaTest is an AI-powered test orchestration and execution platform that enables you to conduct both manual and automated tests on a large scale, encompassing over 3000 real devices, browsers, and operating system combinations. When conducting Python automation testing with LambdaTest, you can execute your automated tests concurrently across various browser and operating system combinations. This approach helps in minimizing the total test execution time.
To perform Selenium Python testing on the LambdaTest Selenium grid, you must use capabilities to set up and configure the specific environment in which your test will be executed.
In this pytest tutorial, we will address and resolve challenges related to this process by demonstrating how to utilize the capabilities effectively for testing purposes in a headless mode. We will also address and resolve challenges associated with configuring test environments.
Effectively demonstrating the utilization of capabilities for testing purposes in two distinct environments:
- Using Chrome on Windows 11.
- Using Firefox on macOS Ventura.
Test Scenario
|
For steps 2-4, we will use the Python end parameter to log the user actions inside the test case.
Before starting to write the code and run the test over LambdaTest, let’s take care of a few things, such as setting up the environment, installing Python, adding capabilities to test scripts, and more.
Setting up the environment
Before we start with parallel testing, it’s essential to set up a strong foundation by correctly configuring our testing environment. To ensure a smooth coding experience, follow the steps given below. These steps are essential for maximizing our testing capabilities and productivity.
Let’s explore the necessary actions we need to take before starting on parallel testing.
Step 1: Download and Install Python.
If you still need to install it, install it from the official Python website.
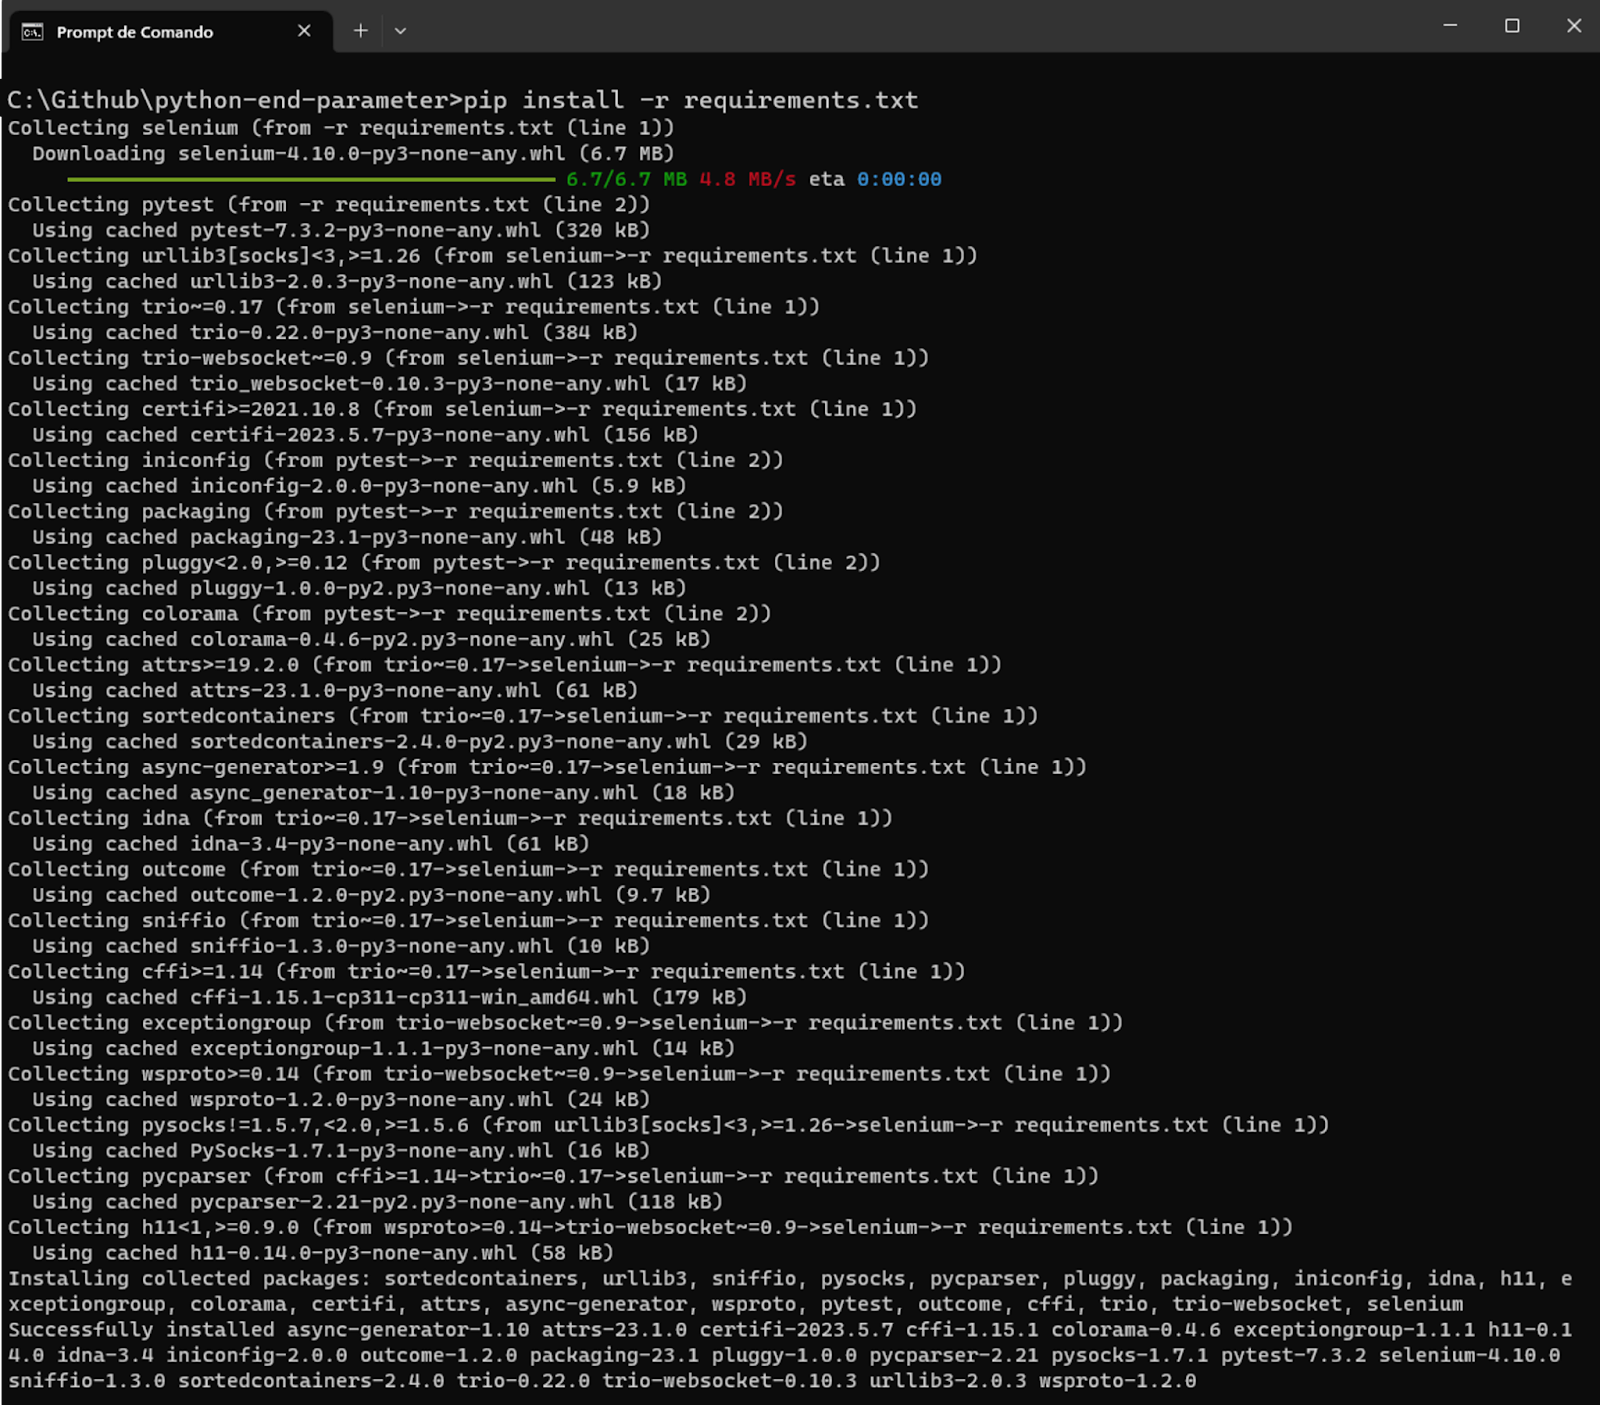
Step 2: Install Selenium and pytest libraries.
Once Python is installed, use the Python package manager, pip, to install Selenium and pytest by running the following command:
|
1 |
Pip install -r requirements.txt |
Step 3: Download and Install Visual Studio Code.
In this case, we will be using VS Code as our IDE, and you are free to use any preferred IDE of your choice.
Step 4: Configure pytest in Visual Studio Code.
To set up pytest as the test runner in Visual Studio Code, just do the following easy steps:
1. Create a Project Folder: Make a folder for your project, like naming it python-headless-browser.
2. Open the Project Folder in VS Code: Open this new project folder in Visual Studio Code.
3. Access the Command Palette: You can reach the command palette by going to “View” in the menu and choosing “Command Palette.” Or simply press Ctrl+Shift+P (Cmd+Shift+P on macOS).
4. Configure Tests: In the command palette, type Configure Tests and select it from the options.
5. Choose pytest as the Test Runner: When asked, pick pytest as your preferred test runner.
6. Select the Root Directory: Go for the root directory option. It sets up a pytest for your entire project.
By following these simple steps, you will have pytest all set up as your test runner in Visual Studio Code, making it easier to manage your tests right inside the editor.
If you’re using the pytest framework for running Python-based automation, check out our blog on pytest tutorial. Run your test suites in parallel across multiple browsers and operating systems for complete test coverage.
Subscribe to the LambdaTest YouTube channel for more videos on Parallel testing and Selenium testing and to enhance your testing experience!
With your IDE and framework ready, it’s time to configure the LambdaTest settings and specify the necessary capabilities to incorporate into our test script.
To do so, you need to follow the steps given below.
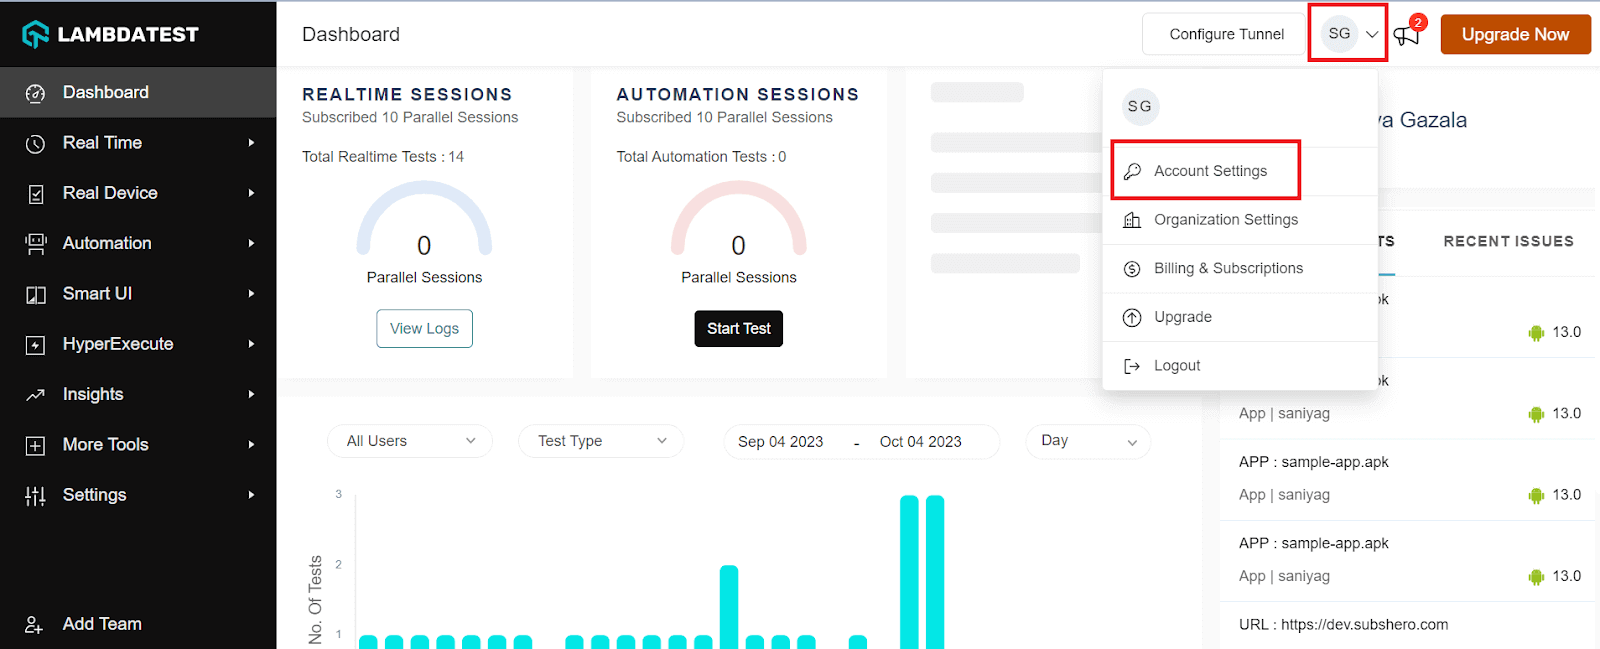
Step 1: Create a LambdaTest account.
Step 2: Get your Username and Access Key by going to your Profile avatar from the LambdaTest dashboard and selecting Account Settings from the list of options.
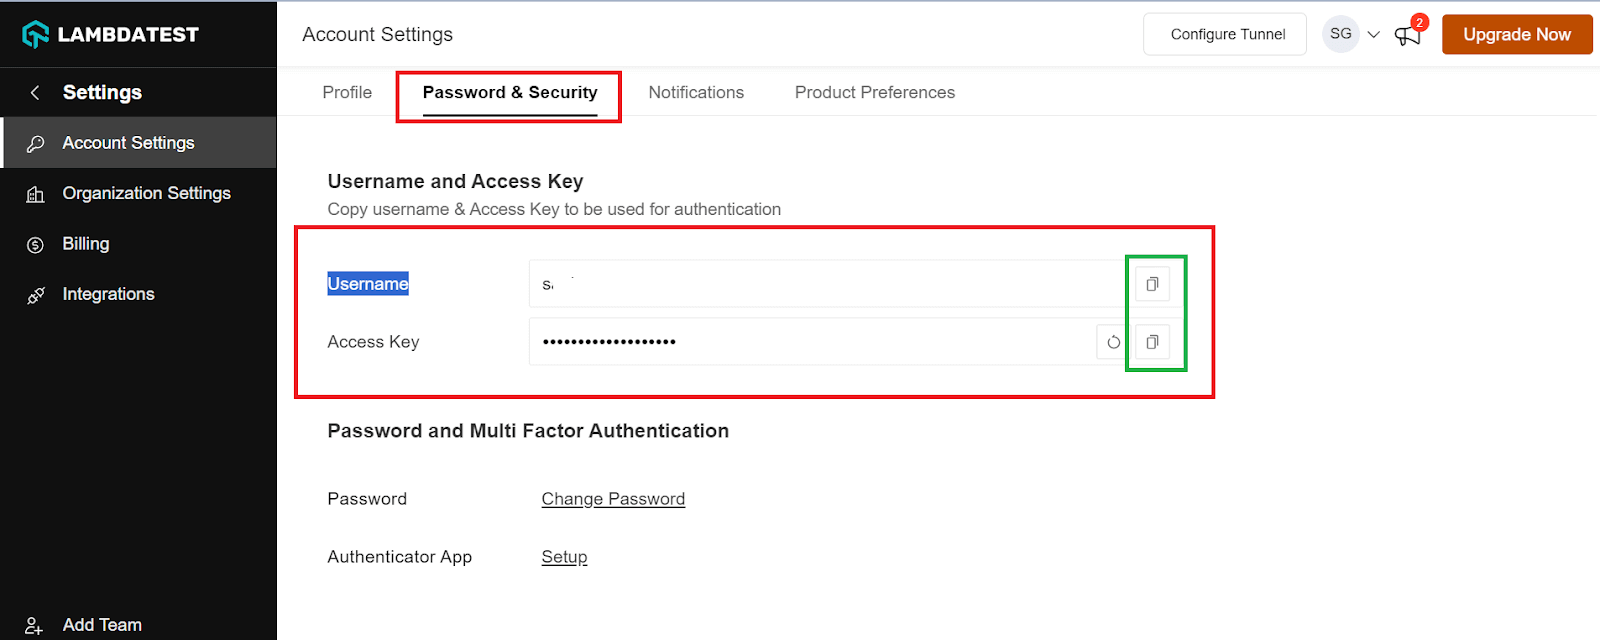
Step 3: Copy your Username and Access Key from the Password and Security tab.
Step 4: Generate Capabilities, which contain details like your desired browser and its various operating systems. Generate your LambdaTest Capabilities Generator as per your requirement.
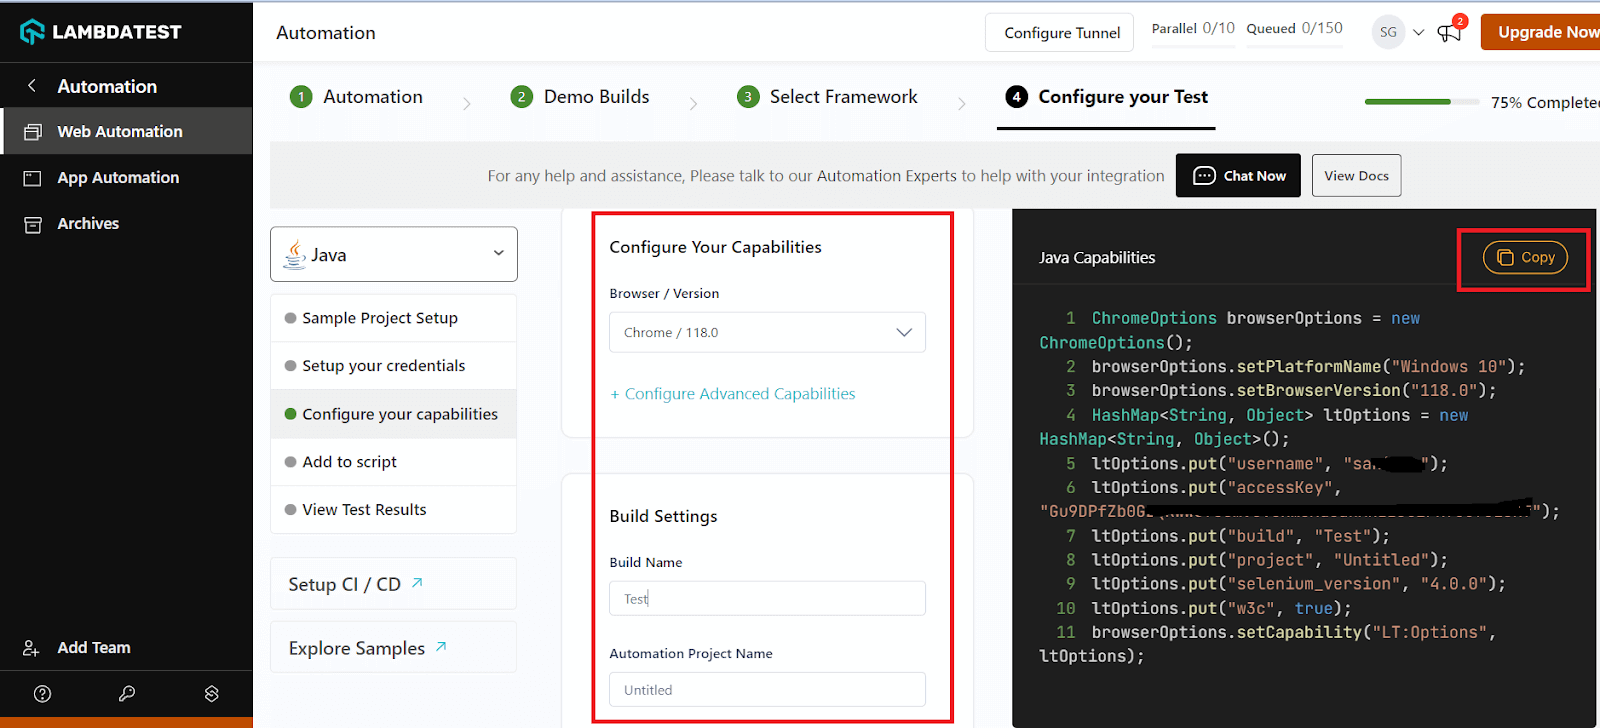
Step 5: Now that you have both the Username, Access key, and capabilities copied, all you need to do is paste it on your test script.
In the following section, we will implement parallel testing on the LambdaTest cloud platform.
Implementation of parallel testing on the cloud
With LambdaTest’s parallel testing feature, you can perform simultaneous tests across various browsers and devices, ensuring comprehensive coverage in less time.
|
1 2 3 4 5 6 7 8 9 10 11 12 13 14 15 16 17 18 19 20 21 22 23 24 25 26 27 28 29 30 31 32 33 34 35 36 37 38 39 40 41 42 43 44 45 46 47 48 49 50 51 52 53 54 55 56 57 58 59 60 61 62 63 64 65 66 67 68 69 70 71 72 73 74 75 76 77 78 79 80 81 82 |
from selenium import webdriver from selenium.webdriver.common.by import By import pytest import os from datetime import datetime @pytest.fixture(params=["chrome-Windows11", "firefox-macOSVentura"],scope="class") def driver(request): username = os.getenv("LT_USERNAME") accessToken = os.getenv("LT_ACCESS_KEY") gridUrl = "hub.lambdatest.com/wd/hub" if request.param == "chrome-Windows11": web_driver = webdriver.ChromeOptions() platform = "Windows 11" name = "Chrome" if request.param == "firefox-macOSVentura": web_driver = webdriver.FirefoxOptions() platform = "MacOS Ventura" name = "Firefox" lt_options = { "user": username, "accessKey": accessToken, "build": "monkey patching build", "name": "monkey patching test", "platformName": platform, "w3c": True, "browserName": name, "browserVersion": "latest", "selenium_version": "4.8.0", } options = web_driver options.set_capability('LT:Options', lt_options) url = "https://"+username+":"+accessToken+"@"+gridUrl driver = webdriver.Remote( command_executor=url, options=options ) yield driver driver.quit def log_test_execution(platform, browser, step, element, action, details): with open("cloudgrid.log", "a") as file: print("Timestamp", datetime.now(), "Platform", platform, "Browser", browser, "Step #", step, "Element", element, "Action", action, "Details", details, sep=' | ', end=';\n', file=file) def test_simple_demo_form(driver): # Load a webpage driver.get("https://www.lambdatest.com/selenium-playground/simple-form-demo") platform_name = driver.capabilities['platformName'] browser_name = driver.capabilities['browserName'] # Find an input element by its ID and enter text input_element = driver.find_element(By.ID, "user-message") input_element.send_keys("This is an end parameter text!") log_test_execution(platform_name, browser_name, "1", "user-message", "send_keys", "This is an end parameter text!") # Find an element by its ID and click on it element = driver.find_element(By.ID, "showInput") element.click() log_test_execution(platform_name, browser_name, "2", "showInput", "click", "") # Find an element by its ID and extract its text element = driver.find_element(By.ID, "message") assert element.text == "This is an end parameter text!" log_test_execution(platform_name, browser_name, "3", "message", ".text", "This is an end parameter text!") |

Code-Walkthrough
In this code example, we will explore the process of performing parallel Python Selenium automation testing using the Python end parameter. This technique allows us to run multiple test cases concurrently, improving efficiency and reducing overall testing time.
Let’s dive into the code and understand its various components.
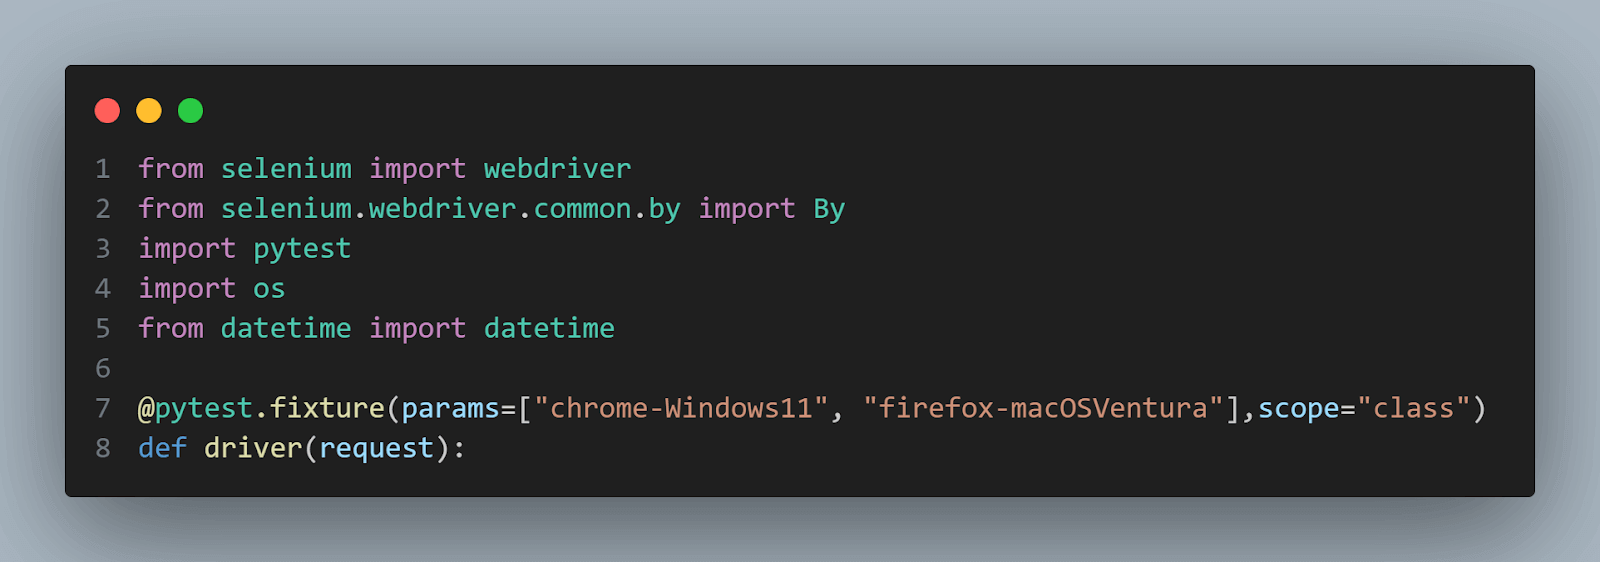
Imports and Test Fixture Setup:
- The code begins importing the necessary modules and defining the pytest fixture called driver using the pytest.fixture decorator.
- This fixture is responsible for initializing the Selenium WebDriver for each test case. It takes a parameter request, which represents the test request context.

Environment Setup:
- Inside the fixture, we will fetch the environment variables “LT_USERNAME” and “LT_ACCESS_KEY,” containing your LambdaTest credentials.
- It sets the LambdaTest Selenium Grid URL as “hub.lambdatest.com/wd/hub.” into gridUrl variable.
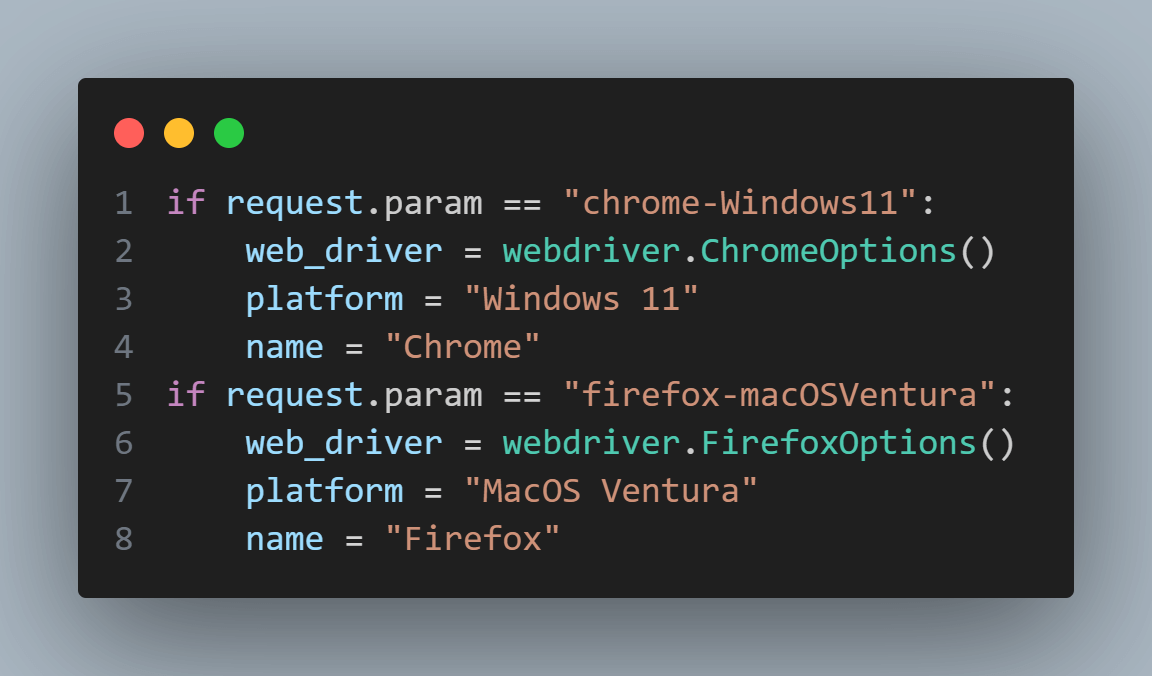
Browser Configuration:
- Based on the requested browser parameter (e.g., “chrome-Windows11″ or “firefox-macOSVentura“), it configures the webdriver options, platform, and browser name accordingly.
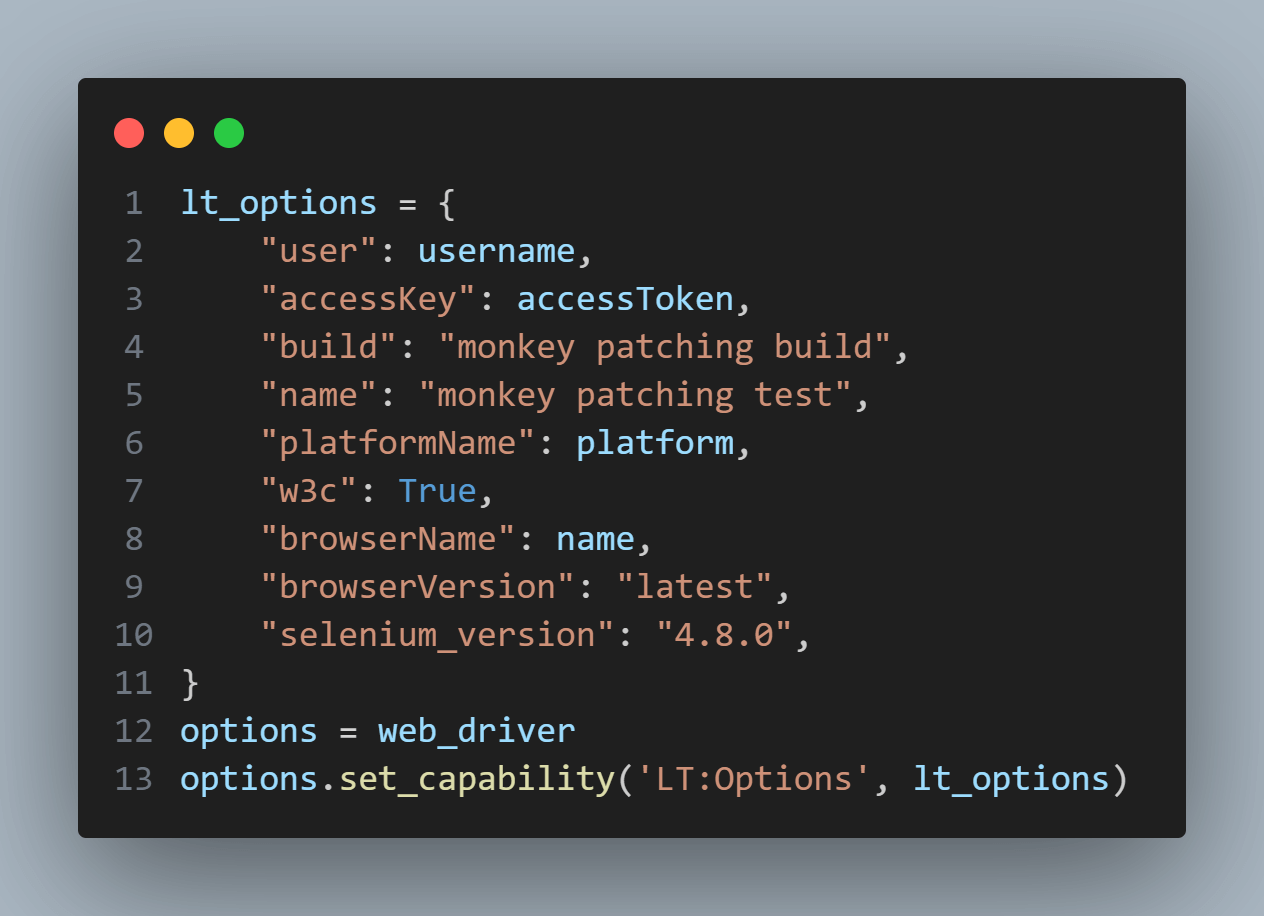
- LambdaTest-specific options such as username, accessKey, build, and name are set in lt_options.
- The webdriver options are assigned to the options variable.
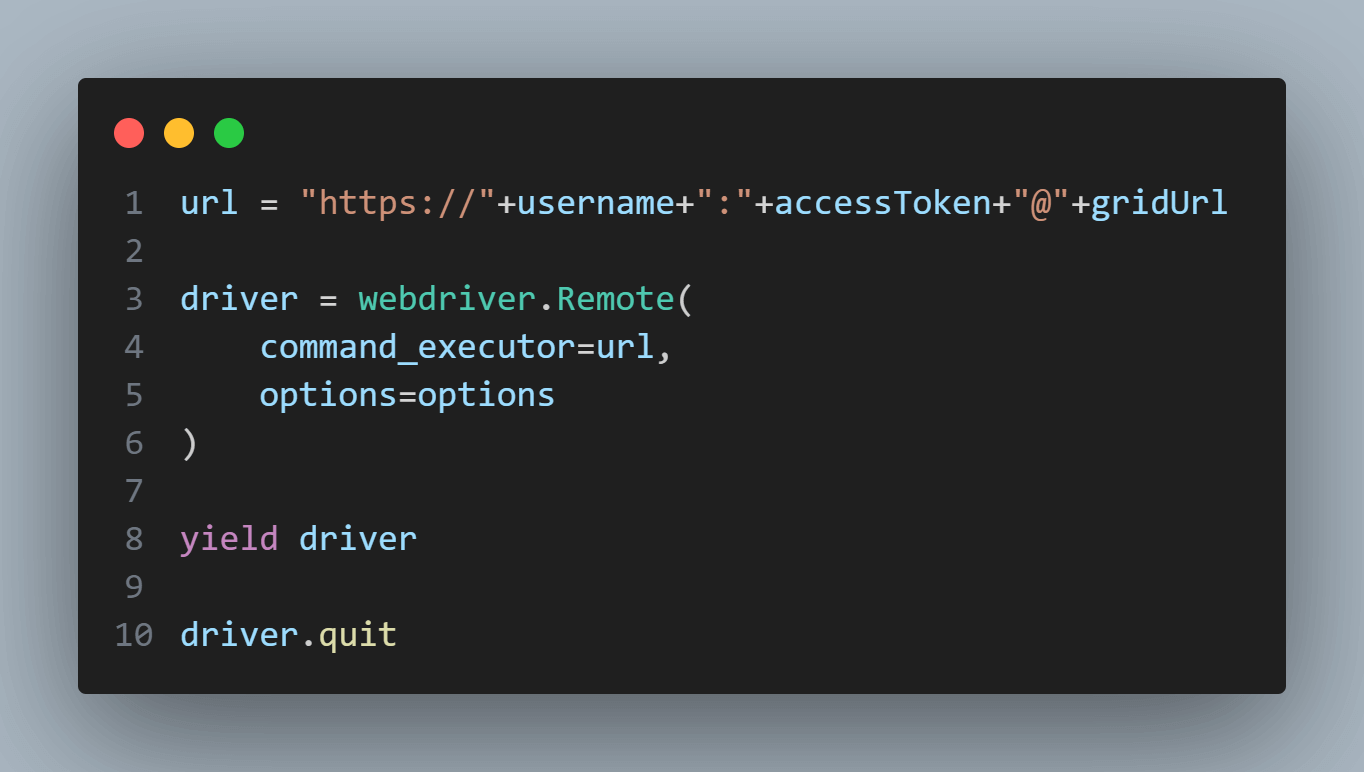
- The URL for accessing the LambdaTest grid is constructed using the credentials and grid URL.
WebDriver Initialization:
- It initializes a WebDriver instance using webdriver.Remote with the constructed URL and options.
- The WebDriver is yielded to the test case and cleaned up after test execution using the driver. quit() method.
Logging Function:
We define a helper function called log_test_execution. This function logs test execution details to a file named cloudgrid.log. It takes various parameters such as the platform, browser, step number, element, action performed, and additional details.
It will be explained in more information at the end of this section.
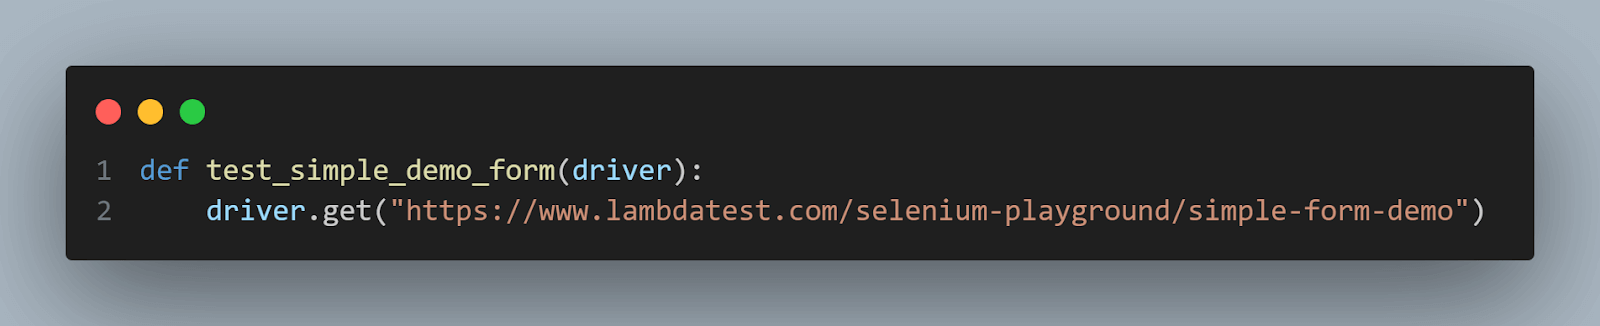
Test Function – test_simple_demo_form:
- This function is a sample test case.
- It navigates to the LambdaTest Selenium Playground’s simple form demo page.
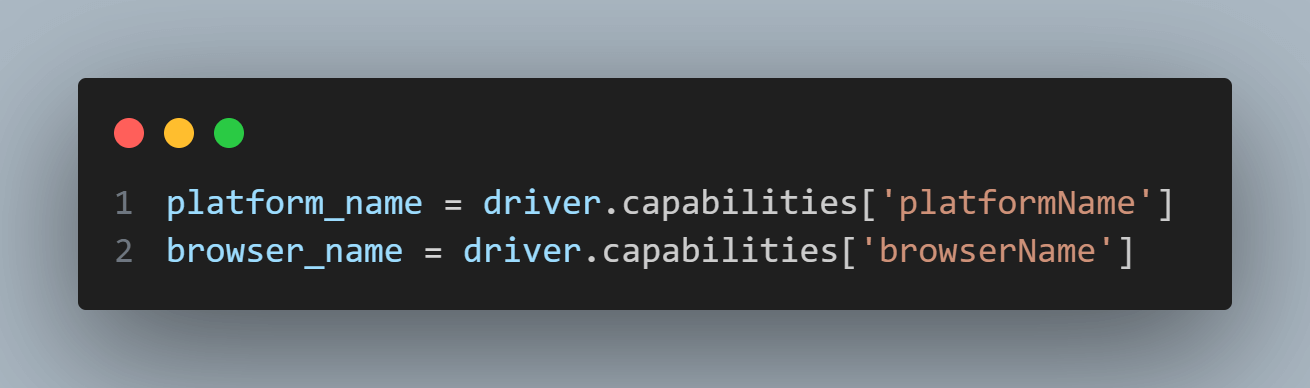
- Extracts platform and browser names from the webdriver’s capabilities.

Locating the Input Element:
- The code finds an HTML input element with the ID user-message on the web page using the driver.find_element().
Simulating User Input:
- The send_keys() method emulates user input by typing “This is an end parameter text!” into the located input field.
Logging Test Execution Details:
- After sending the keys, the log_test_execution function is called to log execution details. This includes recording the platform, browser, step number, element, action, and action details for later analysis and reporting.
- The parameters sent to the log_test_execution function are:
- platform : get from the webdriver capabilities
- browser : get from the webdriver capabilities
- step : 1, to represent that this is the first step of the test
- element : “user-message”, that is the ID of the element
- action : “send_keys” that is the action done in the element
- details : “This is an end parameter text!” that is what is typed in the field
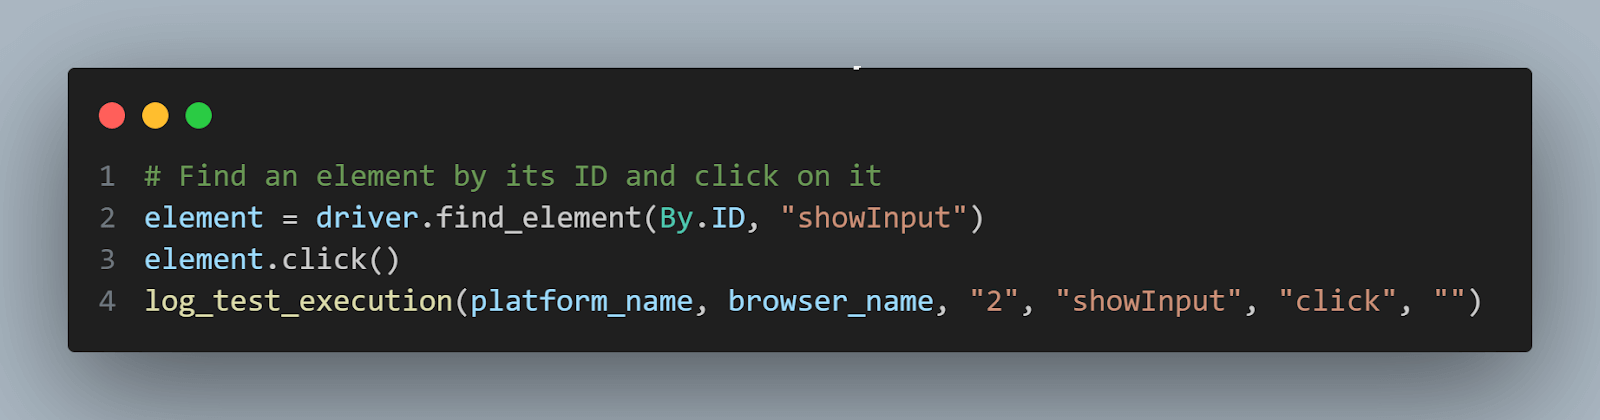
- We proceed to locate an element identified by the ID “showInput” and initiate a click action using the element.click() method. As always, we log these test execution details for documentation.
- The parameters sent to the log_test_execution function are:
- platform : get from the webdriver capabilities
- browser : get from the webdriver capabilities
- step : 2, to represent that this is the second step of the test
- element : “showInput” that is the ID of the element
- action : “click” that is the action done in the element
- details : “” because the click method does not need any detail, so, we don’t need to log any details
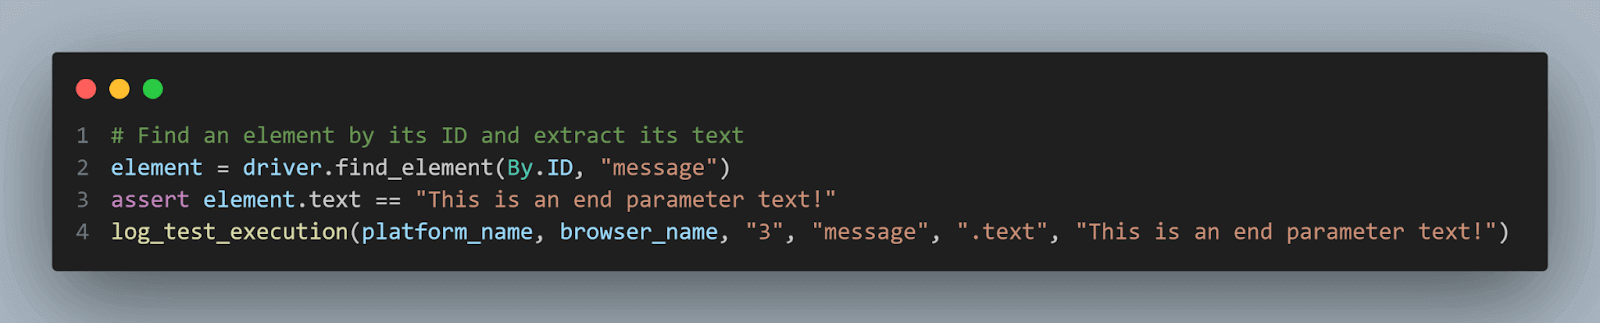
- To conclude, we find an element labeled message using its ID, and we check if the text displayed matches what we expect. If the check fails, the test is considered unsuccessful. Throughout this process, we continue to log the test execution details for documentation.
- The parameters sent to the log_test_execution function now are:
- platform : get from the webdriver capabilities
- browser : get from the webdriver capabilities
- step : 3, to represent that this is the third step of the test
- element : “message”, that is the ID of the element
- action : “.text ” that is the action done in the element (get the text value of the element)
- details: “This is an end parameter text!” that is what is expected to have in the element text value

In summary, this test case illustrates how we interact with web elements, carry out actions, and verify expected outcomes using Selenium. Additionally, it highlights the use of the Python end parameter function to streamline the logging of test execution details.
This code is the foundation for parallel Python Selenium automation testing, enabling simultaneous execution of multiple test cases and harnessing the benefits of parallel processing.
You can run the entire code using the below command:
|
1 |
pytest 12-cloud-grid-sample.py |
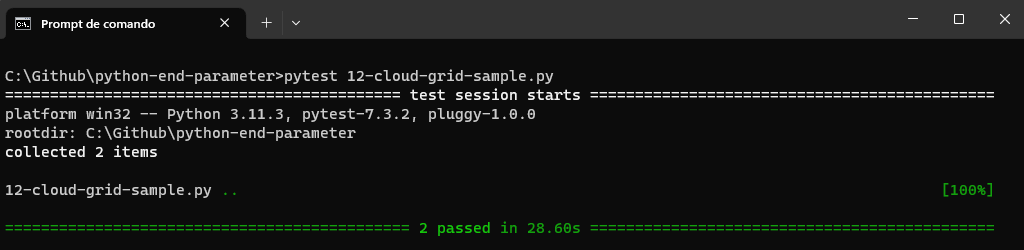
The cloudgrid.log generated file will show the below content:

Detailing the log_test_execution function
Inside the log_test_execution function, the details are formatted and appended to the log file using the print function combining end, sep, and file parameters.

The log_test_execution function has received some parameters:
- platform : Represents the platform name associated with the test execution. It is used to log the platform information
- browser : Represents the browser name associated with the test execution. It is used to log the browser information
- step : Represents the step number or identifier for the action being logged. It provides a reference to the specific action in the test execution flow. It helps the log reader understand the flow considering the step order
- element : Represents the element involved in the action being logged. It could be an element ID, class name, or any other identifier that helps identify the element in the test execution
- action : Represents the action performed on the element. It provides information about the specific action being logged, such as click, send_keys, or any other relevant action
- details : Represents additional details or information related to the action being logged. It could include the value sent in the action or any other relevant information.
Let us see the entire explanation of code flow in a step-by-step process.
Step 1: Opening the Log File
- The code uses the open function to open a file named cloudgrid.log in append mode.
- It’s crucial to note that the file is opened within a context manager (using the with statement). This ensures that the file is handled correctly and automatically closed after use.
Step 2: Writing Log Details
- To write log details, the code utilizes the print() function. This function is responsible for formatting and adding log entries to the file.
- The datetime.now() function obtains the current timestamp, representing when the log entry is created. This timestamp is recorded as a Timestamp.
Step 3: Log Formatting
- The remaining parameters (platform, browser, step, element, action, details) are logged in a well-structured format.
- The sep parameter, set as ” | “, determines the separator between log elements. In this case, it separates the elements with a vertical bar followed by a space.
- The end parameter, set as ;\n, specifies what comes after each log entry. Here, it appends a semicolon and moves to the next line after writing the log entry.
Step 4: Specifying the File Object
- The file=file part designates the file object to which the log entry is written.
- Because we’ve opened the file within the context manager, the file object references the cloudgrid.log file.
To summarize, this code efficiently manages log entries by opening the file within a context manager, formatting log details with separators and line endings, and then writing them to the designated log file. This approach ensures clean and organized log entries for later analysis.
Best practices for Python end parameter
When adding the Python end parameter into test automation scripts, it’s crucial to follow effective approaches to ensure optimal usage. Consider the following recommendations:
- Consistency is Key
- Intentional Separators
- Reusability Matters
- Balance Customization and Readability
Maintaining a consistent approach throughout the script when working with the end parameter fosters better readability and ensures a predictable output format across various sections of the script.
When concatenating strings or formatting output using the end parameter, selecting separators that clearly indicate the intended structure of the output is essential. This contributes to improved comprehensibility of logs, reports, and other output formats.
Design print() statements with the end parameter in a reusable manner. Avoid hard-coding values or specific formats that may limit the script’s flexibility. Instead, employ variables or functions to handle formatting, enabling effortless modifications and adaptability.
While the end parameter offers customization options, it’s vital to balance between custom formatting and readability. Excessive use of special characters or unconventional formatting should be avoided to prevent convoluted output that hinders interpretation and analysis.
Logging test results using Python end parameter
In test automation, logging plays a crucial role in capturing and tracking test results. The Python end parameter can be harnessed to create structured and informative logs that facilitate analysis and debugging.
To demonstrate this use case, let’s consider a more sophisticated example:
|
1 2 3 4 5 6 7 8 9 10 11 12 |
def log_test_result(test_case, result, timestamp): print("[LOG]", end=' ') print(f"Test Case: {test_case}", end=' | ') print(f"Result: {result}", end=' | ') print(f"Timestamp: {timestamp}") # Usage Example test_case = "Login Test" result = "Passed" timestamp = "2023-06-18 10:23:45" log_test_result(test_case, result, timestamp) |
Before looking into the outcome of the code, let’s understand the instructions step-by-step.
Step 1: The code defines a function named log_test_result that accepts three parameters:
- test_case : A string representing the name of a test case.
- result : A string indicating the test result (e.g., “Passed” or “Failed”).
- timestamp : A string containing the timestamp when the test was executed.
Step 2: Inside the log_test_result function:
- It starts by printing “[LOG]” to indicate this is a log entry.
- Then, it prints the test case name, result, and timestamp, each separated by a pipe symbol (‘ | ’). This information is included using f-strings for formatting.
- The end=’ ‘ argument in the print statements specifies that a space should be used to separate the printed items. This keeps the output visually organized.
Step 3: After defining the function, there’s an example of how to use it. There are three variables are created:
- test_case is assigned the value Login Test, representing the name of a test case.
- result is set to Passed, indicating that the test has passed successfully.
- timestamp is set to 2023-06-18 10:23:45, specifying the timestamp when the test was executed.
The log_test_result function is then called with these variables as arguments to log the test result.
Output:

To summarize, this code defines a function to log test results and demonstrates its usage with an example. The function accepts test case details, result, and a timestamp, then formats and prints a log entry for the test result.
Formatting output for test reports with Python end parameter
Test reports provide a complete overview of test execution outcomes. The Python end parameter can be leveraged to format the output, making it easier to read and interpret.
Consider the following more sophisticated example, where we demonstrate formatting output for a test report:
|
1 2 3 4 5 6 7 8 9 10 11 12 13 14 15 16 17 18 19 |
def generate_test_report(test_results): print("Test Report") print("-----------") for result in test_results: print("Test Case:", end='\t') print(f"{result['test_case']}", end='\t\t') print("Status:", end=' ') print(f"{result['status']}") # Usage Example test_results = [ {"test_case": "Login Test", "status": "Passed"}, {"test_case": "Logout Test", "status": "Failed"}, {"test_case": "Search Test", "status": "Passed"}, ] generate_test_report(test_results) |
Before we look into the outcome of this code, let’s understand what the code is trying to perform in a step-by-step manner.
Step 1: The code defines a function named generate_test_report that takes a single parameter, test_results, which is expected to be a list of dictionaries containing test case results.
Step 2: Within the generate_test_report function, It prints the test report and a line of dashes to serve as a header. This creates a clear visual separation for the test report.
Step 3: The code utilizes a for loop to iterate through the test_results list, where each item is a dictionary representing a test case result. In the loop, it retrieves each result dictionary.
Step 4: Inside the loop,
- It prints the test case followed by a tab character to indicate the start of a new test case entry.
- Then, it prints the test case name from the result dictionary.
- It prints the Status followed by a space to indicate the status of the test case.
- Finally, it prints the status (e.g., “Passed” or “Failed”) from the result dictionary.
Step 5: After defining the generate_test_report function, there’s an example of how to use it. test_results is a list of dictionaries, each containing a test case name and its status (“Passed” or “Failed”).
Output:
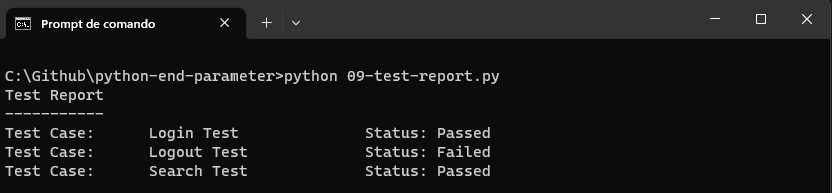
In this example, the generate_test_report() function is designed to receive a list of test results as input. By strategically using the Python end parameter and incorporating tabs, we craft the output with uniform spacing and alignment. Each test case name is neatly presented alongside its associated status, resulting in an aesthetically pleasing and easily comprehensible test report.
These advanced examples showcase the adaptability of the Python end parameter in logging test outcomes and structuring test reports. By employing customized formatting techniques, automation scripts can yield more refined and complete output, enriching the analysis and reporting capabilities of the automation process.
Conclusion
In this blog, we have discovered how the end parameter in Python plays a crucial role in controlling output formatting, especially in test automation. It’s a practical tool that allows us to customize how test results, logs, and other information are displayed. By using the Python end parameter effectively, we can improve the clarity and organization of our test automation code.
By default, the Python end parameter uses a newline character \n to move to the next line after printing. However, we can adjust it to fit our specific needs. This is just one example of the many powerful tools available to enhance the effectiveness of our test automation scripts.
In conclusion, the Python end parameter allows us to personalize the output of our test automation code, making it more readable and organized. By understanding its importance and experimenting with it, we can significantly enhance the presentation of our test results. Embrace the opportunity to explore the end parameter further, unlocking Python’s full potential in test automation.
Frequently Asked Questions (FAQs)
What are some practical applications of the Python end parameter?
The end parameter is particularly useful when formatting logs, reports, or data presentations. It helps control spacing, concatenate strings, and customize the appearance of printed output in various Python applications, including test automation.
Can the Python end parameter add different endings to specific lines within a single print() statement?
No, the end parameter applies to the entire print() statement. If you need different endings for specific lines, you would need to use separate print() statements for each line.
Does the Python end parameter impact the input values within a print() statement?
No, the end parameter only determines what character or string is added at the end of the printed output. It doesn’t affect the content of the print() statement itself.


Author’s Profile
Paulo Oliveira
Paulo is a Quality Assurance Engineer with more than 15 years of experience in Software Testing. He loves to automate tests for all kind of applications (both backend and frontend) in order to improve the team’s workflow, product quality, and customer satisfaction. Even though his main roles were hands-on testing applications, he also worked as QA Lead, planning and coordinating activities, as well as coaching and contributing to team member’s development. Sharing knowledge and mentoring people to achieve their goals make his eyes shine.
Blogs: 15
Got Questions? Drop them on LambdaTest Community. Visit now


