Getting Started with SpecFlow Actions [SpecFlow Automation Tutorial]
Andreea Draniceanu
Posted On: October 14, 2022
![]() 273578 Views
273578 Views
![]() 16 Min Read
16 Min Read
With the rise of Agile, teams have been trying to minimize the gap between the stakeholders and the development team.
Behavior Driven Development, or BDD, is a great way to bring together technical and non-technical folks by focusing more on the behavior of the apps, and a good understanding of the requirements, from a behavioral perspective.
BDD is centered on explicitly defining a feature’s desired behavior from the beginning. Specification by example is a method for identifying behaviors that use concrete examples rather than abstract, general language to describe the intended behavior. They act as the product’s requirements/acceptance criteria (before development) and test cases (after development).
In this SpecFlow automation tutorial, I’ll demonstrate how a BDD web test can be written using SpecFlow and Selenium C# and how to run it on the cloud Selenium Grid with SpecFlow Actions. I am using Visual Studio 2022, but you can use an older version to follow along. If you are preparing for an interview you can learn more through SpecFlow interview questions.
TABLE OF CONTENTS
What is BDD testing?
BDD is built on TDD (Test-driven development), which makes it an approach where tests are written first.
Since BDD is a collaborative approach, the product owner (stockholder), developers, project managers, QAs, and user acceptance testers come together to discuss which test scenarios should be passed to consider this software/application successful. They create a set of test scenarios in this way.
Since all of these test scripts are written in plain English, they also serve as documentation for the project. SpecFlow is a framework for defining these scenarios in a more structured way and tying them to tests that run against the code.
These two approaches—in isolation and together—can help you write better code and provide higher-quality software faster.
Cucumber and the Gherkin language
Cucumber is one of the most important tools that support BDD. It provides a means to write tests everyone can understand regardless of their technical skills.
Cucumber reads plain language executable specs and verifies that the program performs what it is supposed to. The specifications provide several scenarios. For example:
|
1 2 3 4 |
Scenario: We only work on weekdays Given today is Sunday When I get up Then I don’t have to work |
Each scenario consists of a series of actions that the Cucumber must perform. Cucumber checks whether the program matches the specification and produces a report stating if each scenario was successful or unsuccessful.
The Cucumber files use the extension .feature, and the scenarios must follow syntax rules called Gherkin. The lines in Gherkin should start with keywords.
The most important keywords in Gherkin are:
- Feature: provides a high-level description of the feature being tested and groups related scenarios.
- Scenario: a practical example of a business rule. It includes a series of steps.
- Given: a keyword that marks a step that gives an initial context of the system – the preconditions of the scenario.
- When: used for steps that describe an action.
- Then: marks a step that describes the expected result of the scenario.
- And / But: are used when multiple Given, When, or Then steps need to be used.
Introduction to SpecFlow Actions
SpecFlow is a BDD automation framework for .NET that uses the Gherkin language. It is provided as a Visual Studio extension. While writing this SpecFlow automation tutorial, the latest SpecFlow version is 3.9, released in November 2021.
SpecFlow uses the official Gherkin parser, with support for over 70 languages – which means that you can write your Given/When/Then scenarios in languages other than English, too. Then, using bindings, these tests are connected to the application code, enabling you to run the tests using the testing framework of your choice (such as NUnit, in our case).

To use SpecFlow, you need to install the Visual Studio extension. That can be easily done from the Visual Studio → Extension menu → Manage extensions, and search for SpecFlow.
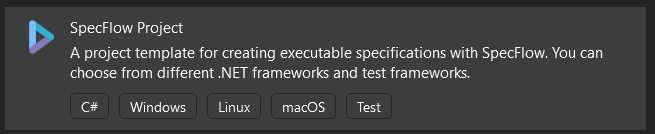
Then, to create a new SpecFlow project, from the New Project wizard, select the SpecFlow Project type:
Choose a target framework and your preferred test automation framework and complete the wizard. In this SpecFlow automation tutorial, we’ll be using NUnit from here on, and I’ll explain along the way the NUnit methods.
Subscribe to the LambdaTest YouTube Channel to see our latest tutorials about Selenium automation, Appium automation, Playwright automation, and more.
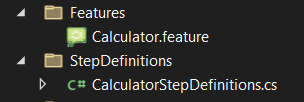
By default, the project will have a Features folder containing a file with the .feature extension and a StepDefinitions folder, which includes the implementations of the features:
What are SpecFlow Actions?
SpecFlow Actions is a solution provided by SpecFlow that enables us to integrate our SpecFlow tests with Selenium. It manages the browser’s lifetime and offers simple configuration options and Selenium helper methods.
The aim is to address typical issues testers run into when automating websites, applications, or APIs, such as working with multiple browsers or always being up-to-date with the latest browser version.
In the upcoming sections of this SpecFlow automation tutorial, I will walk you through the steps you need to integrate SpecFlow Actions with continuous testing clouds like LambdaTest to run tests in parallel on an online browser farm of 3000+ real browsers, devices, and OS.
Run C# Automation Testing Online. Try LambdaTest Now!
Demonstration: SpecFlow Actions on Cloud Grid
Before starting with SpecFlow automation, follow the steps above to install the SpecFlow extension and create a new SpecFlow project.
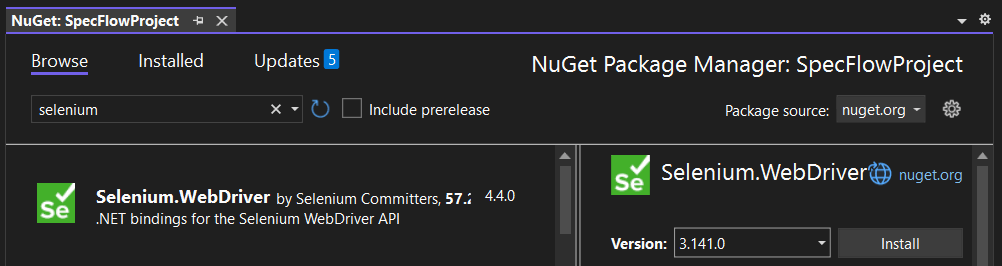
Next, you’ll need to install the following NuGet packages:
- Selenium.WebDriver: At the time of writing this SpecFlow automation tutorial, SpecFlow.Actions for LambdaTest worked with version 3.141.0 of Selenium.WebDriver, so this is the version I have installed, too.
- SpecFlow.Actions.LambdaTest: I’ll use the latest version (0.1.332) for this SpecFlow automation tutorial.
There are more ways to install a NuGet package. You can do it from the NuGet Package Manager of the project:
- Right-click on the project name and select Manage NuGet Package), and here, in the Browse tab, search for the desired package:
- To run the tests on the cloud, create in the project folder a new .json file called specflow.actions, and add the Selenium settings you want to use:
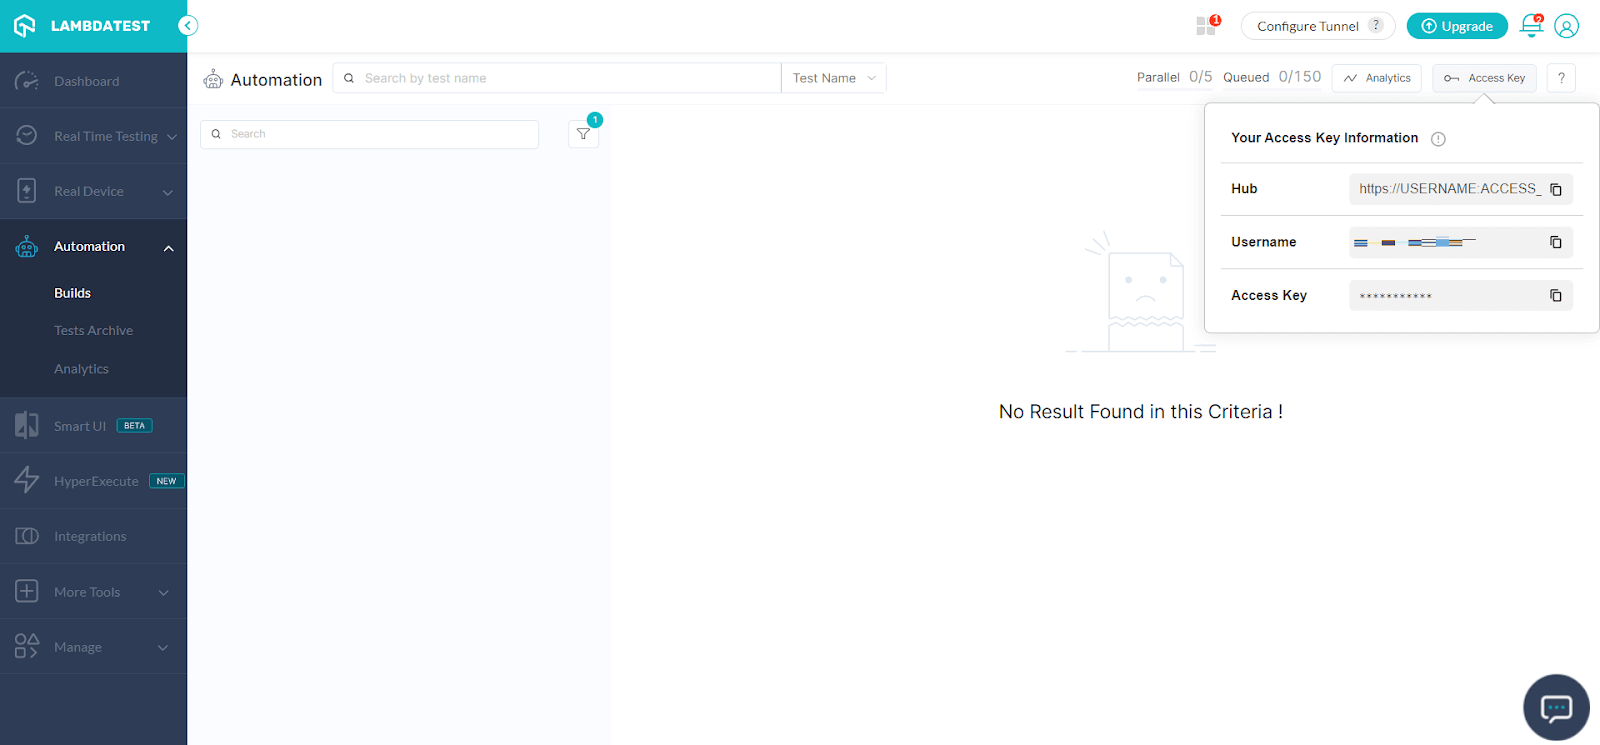
- You can get your LambdaTest username and access key from the LambdaTest Automation tab by clicking on Access Key:
- Then, add one .json file for each environment where you want to run your tests. For example, I’ll test Firefox on Windows 10 and Chrome on Windows 11.
Or you can use the NuGet Package Manager Console (Tools → NuGet Package Manager → Package Manager Console, and run the command:
|
1 |
dotnet add <PROJECT> package [options] <PACKAGE_NAME> |
For example:
|
1 |
dotnet add package Selenium.WebDriver --version 3.141.0 |
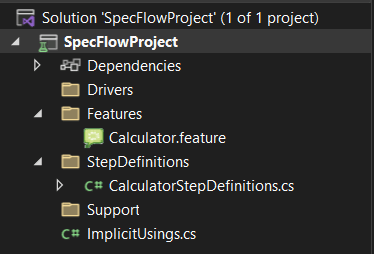
Now the project should look like this:
|
1 2 3 4 5 6 7 8 9 |
{ "selenium": { "defaultTimeout": 60, "pollingInterval": 5, "lambdatest": { "url": "https://${LT_USERNAME}:${LT_ACCESS_KEY}@hub.lambdatest.com/wd/hub" } } } |
I can use a specific browser version by providing the exact version number, instructing SpecFlow Actions to use the latest version, or telling it to go back to a certain number of versions.
Let me illustrate that. Here is the specflow.actions.windows10.firefox.json file, where I am using the latest version of Firefox:
And the specflow.actions.windows11.chrome.json file, where I am using the 4th latest version of Chrome:
Most of the browser capabilities are optional, but they are helpful when you need specific configurations or want to personalize the results, for example with the build and project names.
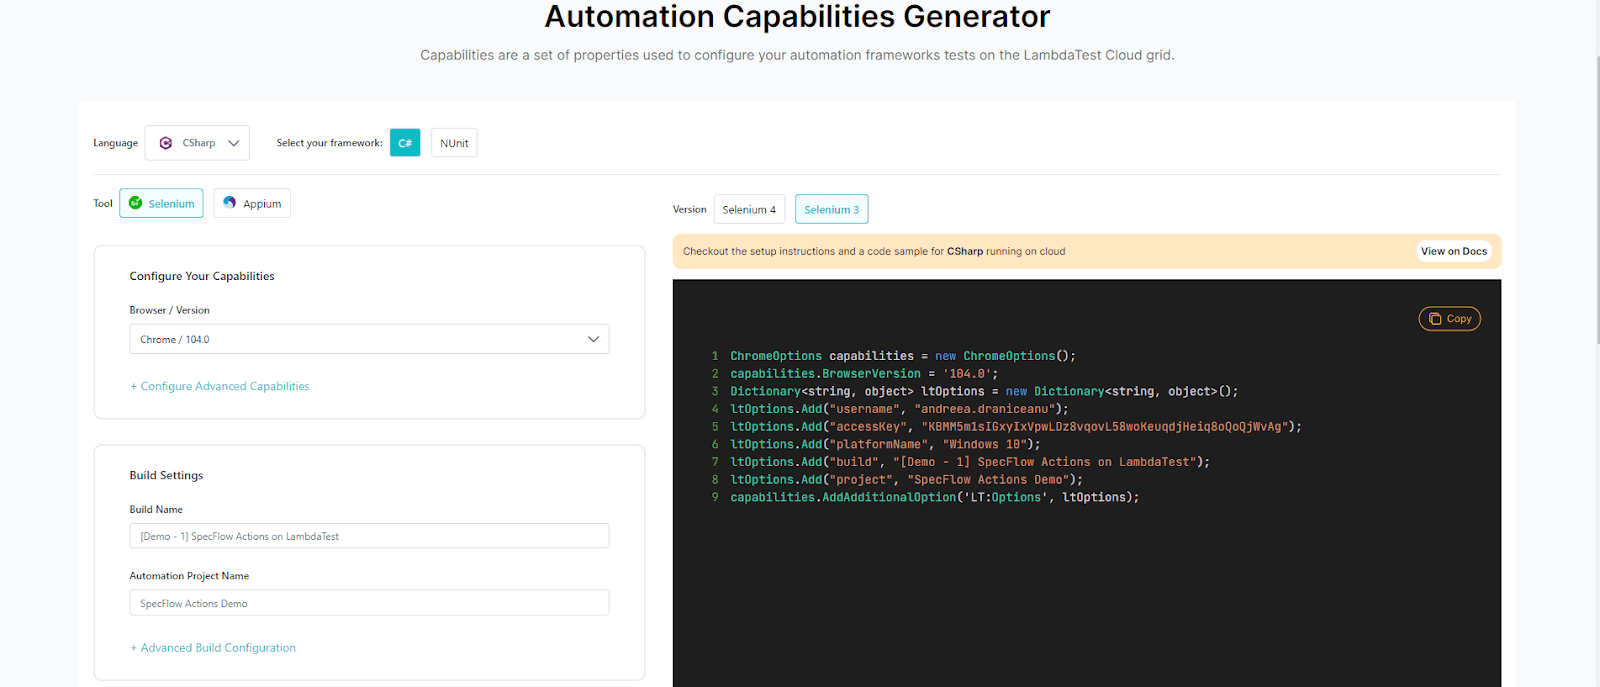
You can use the same capabilities you would obtain using the LambdaTest Automation Capabilities Generator, but in JSON format:
Test Scenario
I’ll use a fairly simple scenario to demonstrate how to write a BDD test scenario using SpecFlow.Actions with Selenium in C#. The test will be:
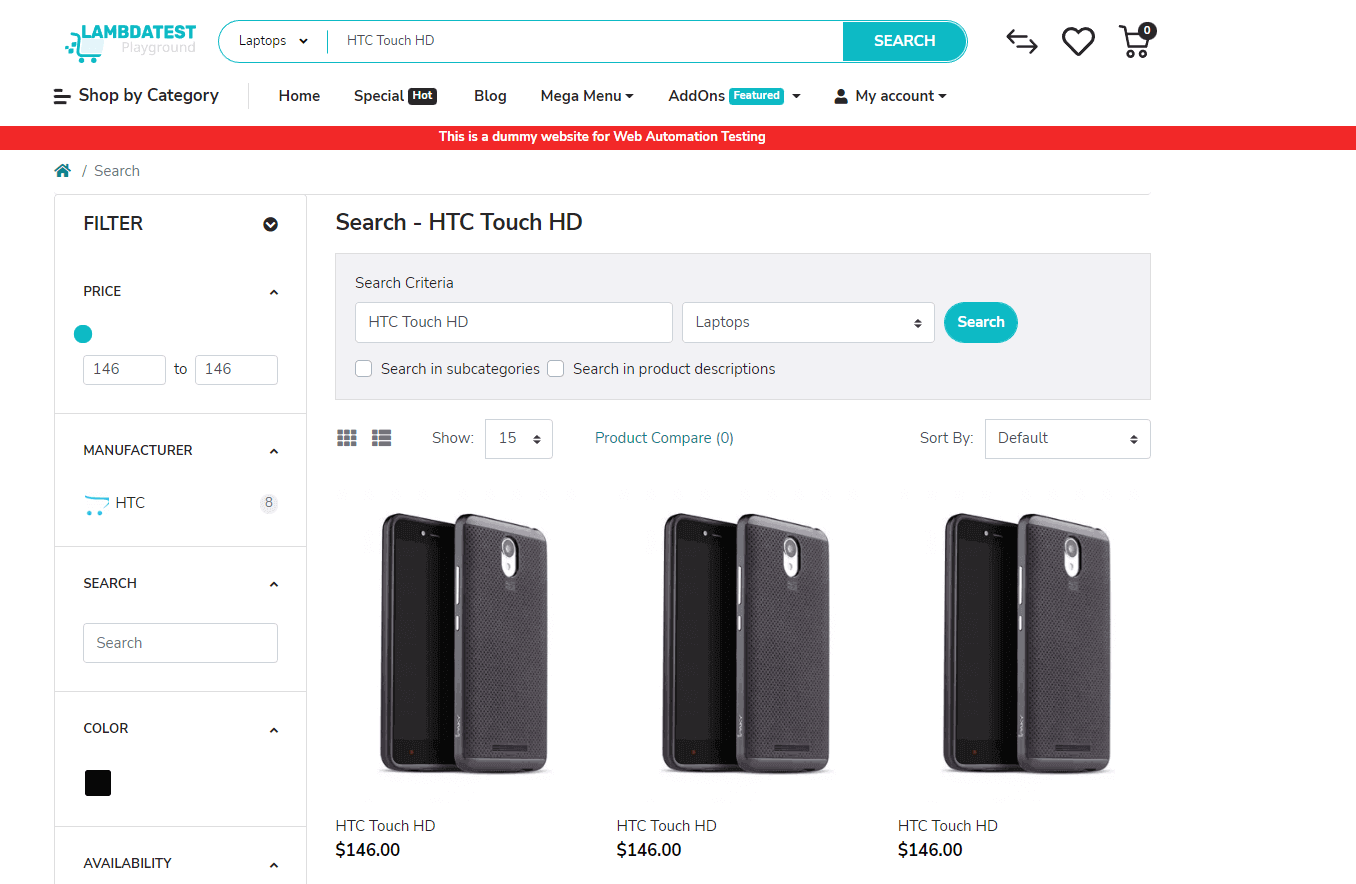
- Navigate to the page https://ecommerce-playground.lambdatest.io/.
- Select a category and perform a search.
- Validate that the correct number of results is returned.
Code Implementation
The .feature file contains the test scenarios written using the Gherkin language. I am testing two scenarios – see how easy they are to read:
The class containing the implementation (I named it SearchItemsStepDefinitions.cs) of the steps should look like this:
Code Walkthrough
Let’s begin with the feature file. Each feature file should, ideally, test only one feature of the application. This is defined by the “Feature” keyword, which should be the file’s first line. In my case, I am testing website’s search functionality, so the name I gave to the feature is “Search products”:
|
1 |
Feature: Search products |
Next, before my test scenario, I added a tag. These tags are used to identify and group related scenarios or scenarios that will be run together at some point.
|
1 |
@searchItems |
One scenario can have multiple tags, for example:
|
1 |
@SmokeTests @RegressionTests @FunctionalityTests |
Next comes the actual test scenario:
|
1 2 3 4 5 |
@searchItems Scenario: Search for iPod Nano Given I select the Software category When I search for iPod Nano Then I should get 4 results for iPod Nano |
It’s written in plain English and uses the Gherkin keywords:
- Scenario: this is the title of the test. It should be concise but also detailed enough to understand what it’s testing.
- Given: the keyword used for preconditions of the tests. This is the test step that will need to run before the actual test begins.
- When: the keyword used before the test steps.
- Then: This keyword marks the expected result of the test.
The beauty here is that the entire test is extremely easy to read by anybody, not just technical people or automation testers. And also, anybody can write this type of scenario without understanding the inner workings of a test automation framework.
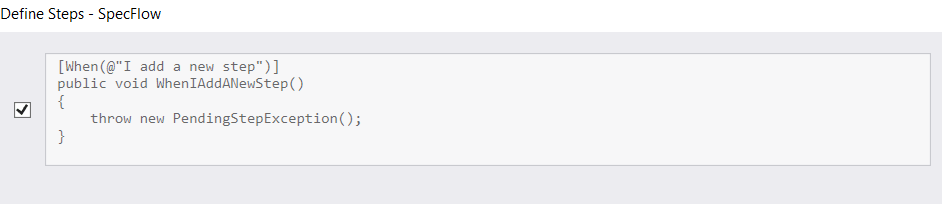
And thanks to the SpecFlow extension, for any new Gherkin steps written, you can generate the code steps, by right-clicking on the steps and selecting Define steps. You’ll get something like this:
Then you’ll have to write the implementation for the steps. This brings us to the Steps Definition class. The first part contains the packages used in the class:
|
1 2 3 4 |
using NUnit.Framework; using OpenQA.Selenium; using SpecFlow.Actions.Selenium; using TechTalk.SpecFlow; |
We are using Selenium, SpecFlow, SpecFlow Actions, and NUnit, which I use for the test’s assertions.
Then, using NUnit’s Parallelizable attribute, I define that 4 tests from the same assembly can run in parallel (so all the tests from the example, since we have 2 tests and 2 browser configurations). To learn more about parallel execution with SpecFlow, NUnit, and Selenium, please go through the following video:
|
1 2 |
[assembly: Parallelizable(ParallelScope.Fixtures)] [assembly: LevelOfParallelism(4)] |
Now comes the actual implementation. The [Binding] attribute marks the class as a step implementation class.
The first thing you need to do is create a constructor, and instantiate an IBrowserInteractions variable (this is the SpecFlow Actions equivalent of Selenium’s IWebDriver):
|
1 2 3 4 5 |
private readonly IBrowserInteractions _browserInteractions; public AddItemsToCartStepDefinitions(IBrowserInteractions browserInteractions) { _browserInteractions = browserInteractions; } |
Next, use the [BeforeScenario] hook, which marks the following method to run before each scenario. I prefer using this type of hook instead of writing an explicit Gherkin step for starting the app because, while this step is mandatory before any other steps, I don’t find that it reflects a part of the user behavior:
|
1 2 3 4 5 |
[BeforeScenario] public void SetUp() { _browserInteractions.GoToUrl("https://ecommerce-playground.lambdatest.io/"); } |
The following methods will be the test steps. For each method to be bound to the correct feature step, it needs to have a matching attribute (Given / When / Then), followed by a regular expression that matches the Gherkin step. For example, the
|
1 |
[Given(@"I select the (.*) category")] |
Regular expression matches both
|
1 |
Given I select the Software category |
and
|
1 |
Given I select the Tablets category |
The (.*) pattern means that my expression will match any value. Then the method needs to have a parameter of the relevant type – string in this case, and int and string in the last step.
|
1 |
I should get (.*) results for (.*) |
The actual implementation is fairly similar to a Selenium implementation, except this time we are using the methods provided by SpecFlow Actions. To identify elements, you need to use WaitAndReturnElement (for a single element) and WaitAndReturnElements (for a list of elements), and then to interact with them, you can use Click() and SendKeys() – the same way you would if you would use Selenium WebDriver.
For this particular SpecFlow automation tutorial, I used the XPath locator for the web elements on the page because the web elements do not have unique IDs. XPath is one of the most used locators in Selenium WebDriver for navigating across a page’s HTML structure. Any element on a web page can be located using the HTML DOM framework for both HTML and XML documents.
The basic fundamental format of an XPath is:
|
1 |
//tagname[@attribute=’value’] |
Where:
- //: indicates the active node;
- tagname: indicates the node’s tag (for example, a for hyperlinks, button for buttons, etc.);
- The @ character marks the node’s attribute;
- Attribute: the name of the node’s attribute;
- Value: the chosen attribute’s value.
To get the elements’ XPath, you can use the Developer Tools provided by the browser (right-click on the element and select Inspect) and build it based on its attributes.
You can even select Copy → XPath, although this might not always return the best XPath or even a unique one. You can also use Chrome extensions that help identify the best locator for web elements, I use and recommend SelectorsHub:
You can use the Console to see how many elements are returned for a specific XPath:
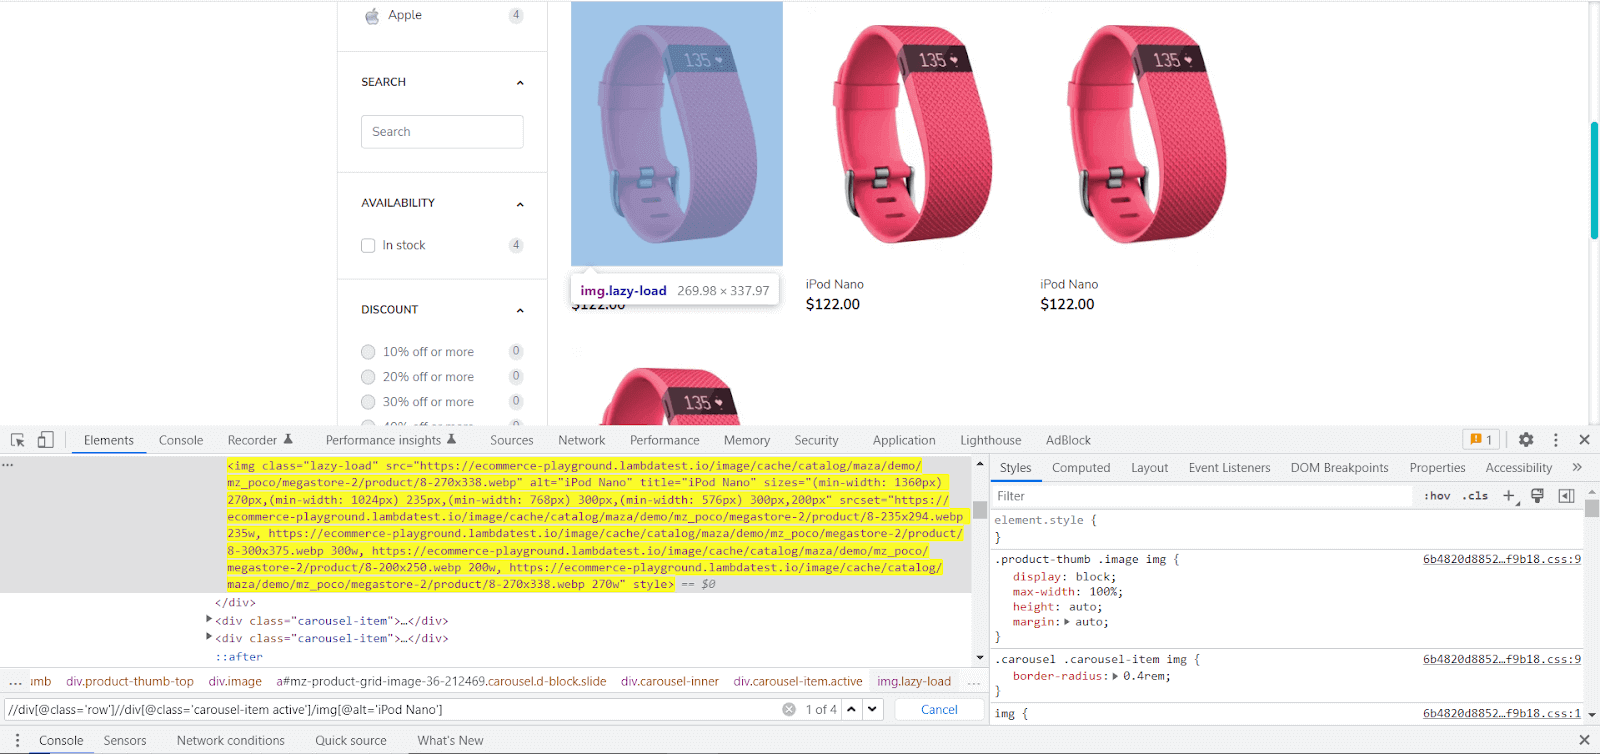
You can use the Console to see how many elements are returned for a specific XPath:


So what you need to do is:
- Click on the category button to expand the menu, and then click on the given category (which will be passed as a parameter):
- Type in the search keyword (also passed a parameter) and click the Search button:
- Validate that the number of actual results matches the expected number:
|
1 2 3 4 5 6 |
[Given(@"I select the (.*) category")] public void GivenISelectTheCategory(string category) { _browserInteractions.WaitAndReturnElement(By.XPath("(//div[@class='dropdown search-category']/button[@type='button'])[1]")).Click(); _browserInteractions.WaitAndReturnElement(By.XPath($"(//a[text()='{category}'])[1]")).Click(); } |
|
1 2 3 4 5 6 |
[When(@"I search for (.*)")] public void WhenISearchForProduct(string product) { _browserInteractions.WaitAndReturnElement(By.XPath("(//input[@name='search'])[1]")).SendKeys(product); _browserInteractions.WaitAndReturnElement(By.XPath("(//button[normalize-space()='Search'])[1]")).Click(); } |
|
1 2 3 4 5 6 |
[Then(@"I should get (.*) results")] public void ThenIShouldGetResults(int itemsCount) { int actualCount = _browserInteractions.WaitAndReturnElements(By.XPath("//div[@class='carousel-item active']")).Count(); Assert.AreEqual(itemsCount, actualCount); } |
Here, you can use the Assert class from NUnit to compare two values. If the values are equal, the test will pass; if not, the test will fail.
And that’s all! Now let’s put our tests to work!
Accelerate C# Automated Scripts with Parallel testing. Try LambdaTest Now!
Execution
You will be able to see the tests in Test Explorer (Test → Test Explorer), just like in any other Visual Studio Project:
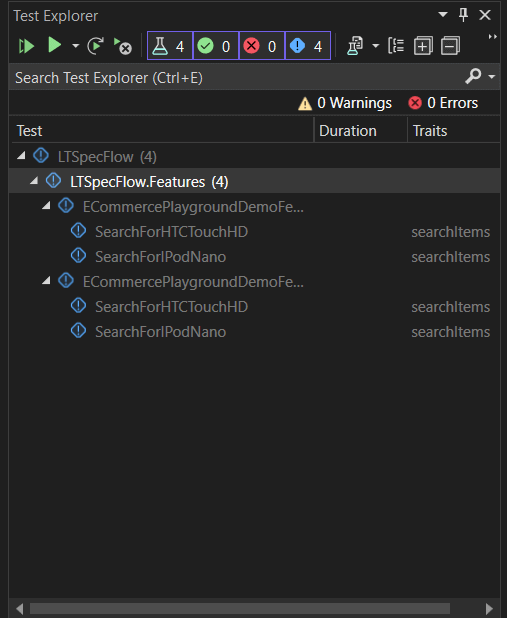
The number of tests will match the number of scenarios defined in the feature file(s) times the number of browser configurations. In this SpecFlow automation tutorial, I have 2 scenarios and 2 browser configurations, so I’ll see 4 tests in the explorer window. The Traits column is populated with the tags I used for the scenarios.
Now, if you press Run All, you’ll see that the tests start executing, and if you define the parallelization, they will run in parallel. No browser window will open since we’re running the tests on the cloud. Still, you can see the tests running on the LambdaTest Dashboard:

Once they finish running, you can see them in your LambdaTest account, in Automation → Builds:
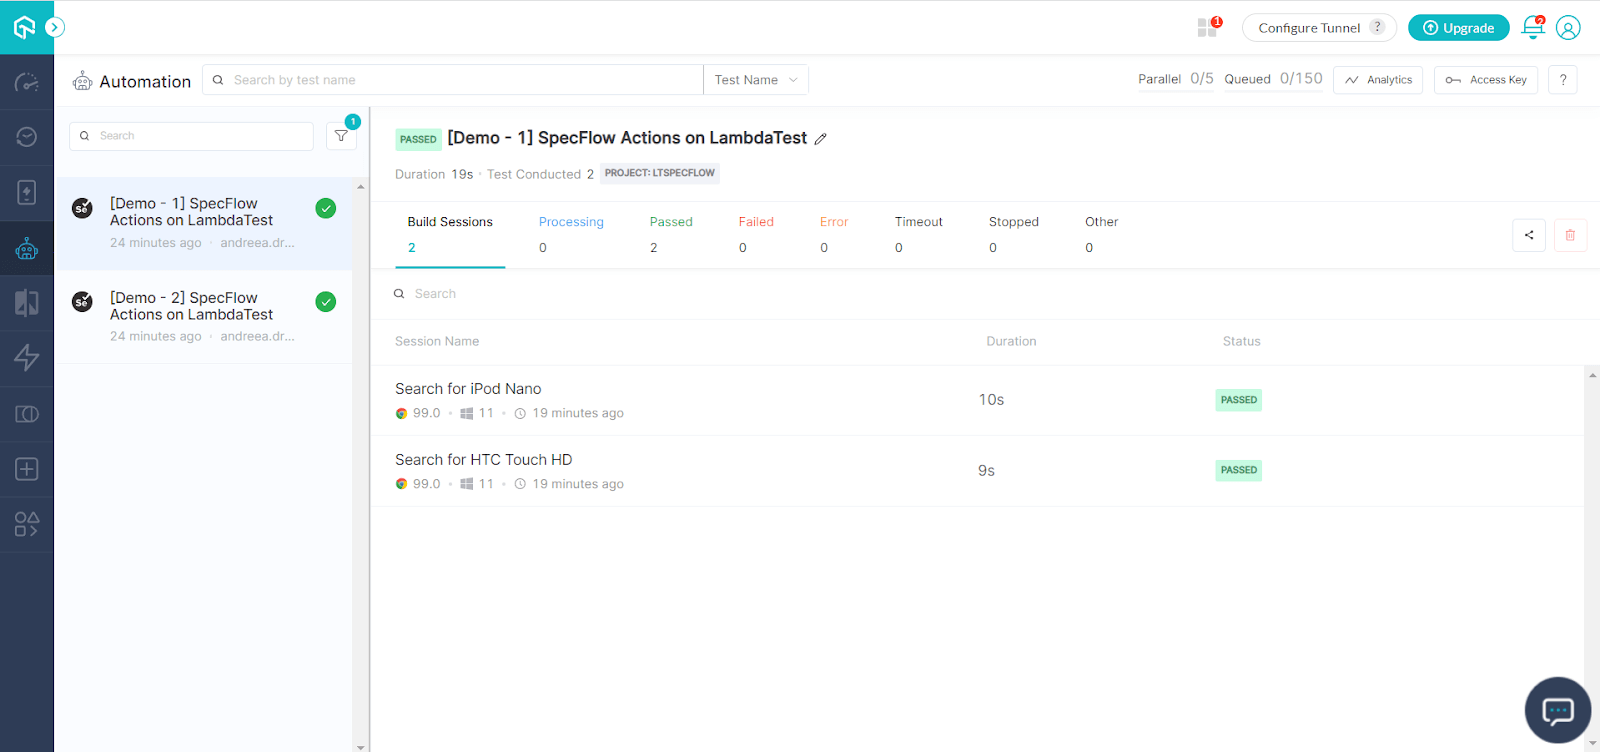
To see the details, you can click on each test, where you will find a video recording of the test run, the configuration details, the time it took for the test to run, its result, and the step details with each of their results. You can also click on each step to see the recording at that exact time:

Are you a tester looking to hone your skills? Prove your worth by earning the Selenium C# 101 certification by LambdaTest.
Wrapping Up
In this Selenium C# tutorial, we have seen why SpecFlow is an excellent framework for writing behavior-driven scenarios because the tests can be written in simple English and understood by anyone on the team.
And on top of this, using SpecFlow Actions can power up your test automation even further since it enables you to run the tests on various browser versions and operating systems and run them in parallel on the Selenium IDE cloud. With LambdaTest, you can enhance your SpecFlow testing by running SpecFlow tests on the cloud, allowing for greater scalability and collaboration among distributed teams.
Frequently Asked Questions (FAQs)
Is SpecFlow a BDD tool?
SpecFlow is a framework for Behavior-Driven Development (BDD). BDD is an approach to agile software development that focuses on communication between developers and customers and is based on the idea of collaboration rather than working in isolation. SpecFlow helps automate the testing of features using Gherkin, the language that forms the foundation of BDD.
What is the difference between SpecFlow and selenium?
SpecFlow is a BDD-style testing framework that uses natural language to specify your tests. Selenium is a browser automation framework used in combination with a programming language like C#.
What is the difference between cucumber and SpecFlow?
SpecFlow is a BDD tool for building executable specifications of your software, typically for automated testing. Cucumber is an integration testing tool that allows you to write human-readable acceptance criteria for your application.


Author’s Profile
Andreea Draniceanu
I’m a software QA engineer based in Romania. I’ve been in the software industry for over 10 years. My current focus is UI test automation with C#, but I love exploring all QA-related areas and sharing my knowledge.
Blogs: 13
Got Questions? Drop them on LambdaTest Community. Visit now