
Mastering Web Automation With Python Selenium On Chrome
Jainish Patel
Posted On: February 12, 2024
![]() 216002 Views
216002 Views
![]() 28 Min Read
28 Min Read
Python is the third most preferred programming language, according to StackOverflow Survey 2023. It is easy to learn, versatile, and has a large developer community. Python’s open-source nature, high-level syntax, and interpretive capabilities make it an ideal choice.
With frameworks like Flask and Django for backend development and libraries like Selenium for automation testing, Python offers comprehensive options. As software becomes more complex, manual testing is time-consuming. Python’s support for testing frameworks such as Unittest, pytest, Robot, Behave, and Lettuce makes it a popular choice for automation testing.
This article will review critical areas to help you run Python Selenium on Chrome for web automation. Firstly, we will start with an installation and setup process for Python and Selenium. Next, we will discuss handling various input types and interacting with warnings, alerts, and pop-ups. At the end of the article, you will be able to create tests for automation testing. If you are preparing for an interview you can learn more through Selenium interview questions.
TABLE OF CONTENTS
- Python Selenium ChromeDriver Setup
- Opening a Website in Chrome Browser with the help of Python Selenium Script
- Creating Python Selenium Test Cases
- Advanced Python Selenium Techniques in Chrome
- Chrome Options and Preferences
- How to Integrate Selenium with Python Testing Libraries
- Challenges of Testing on the Local Grid
- Frequently Asked Questions
Python Selenium ChromeDriver Setup
Selenium is a library that controls web browsers and automates tasks/tests. It provides a way to simulate user interaction with a web page, including filling out forms, clicking buttons/links, navigating through pages/windows, and taking screenshots of the window.
Selenium WebDriver uses different WebDrivers, like ChromeDriver for Chrome, gecko driver for Firefox, and many others. It gives Selenium WebDriver the ability to control the browser.
Installation and setup process of ChromeDriver for different operating systems
There are multiple steps to be taken to install the driver correctly. Let’s look at each step one by one.
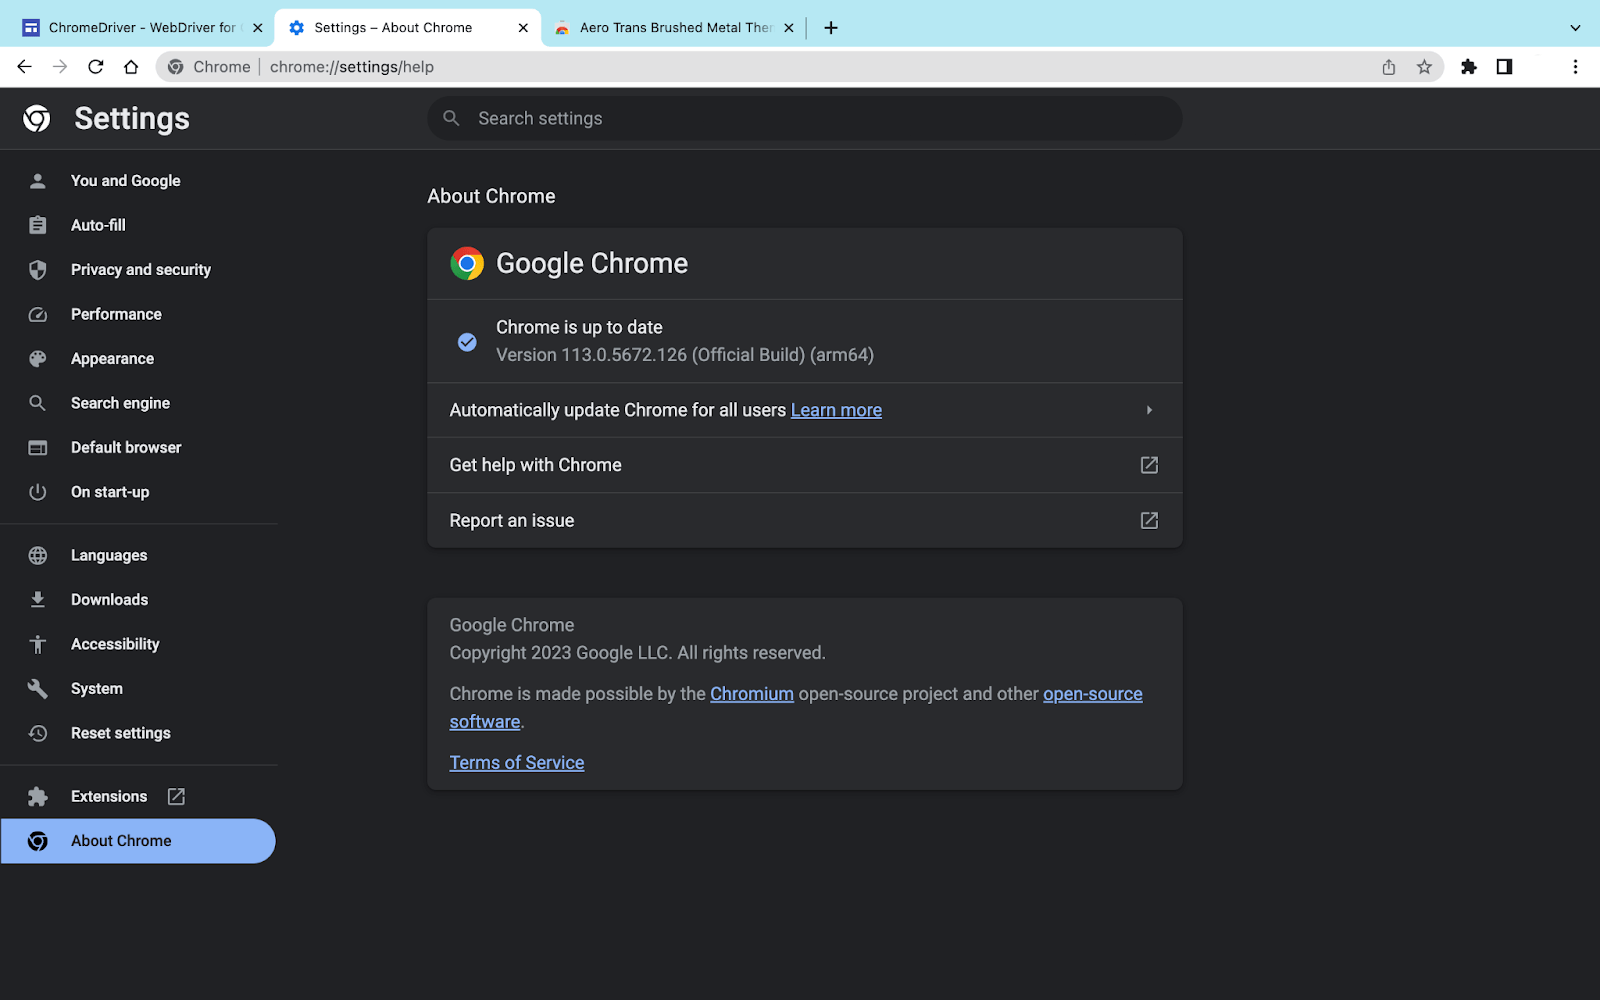
- Check the version of Chrome installed on your device. To check the version, go to the top right corner, select the 3 dots icon -> settings, and then select About Chrome from the left panel.
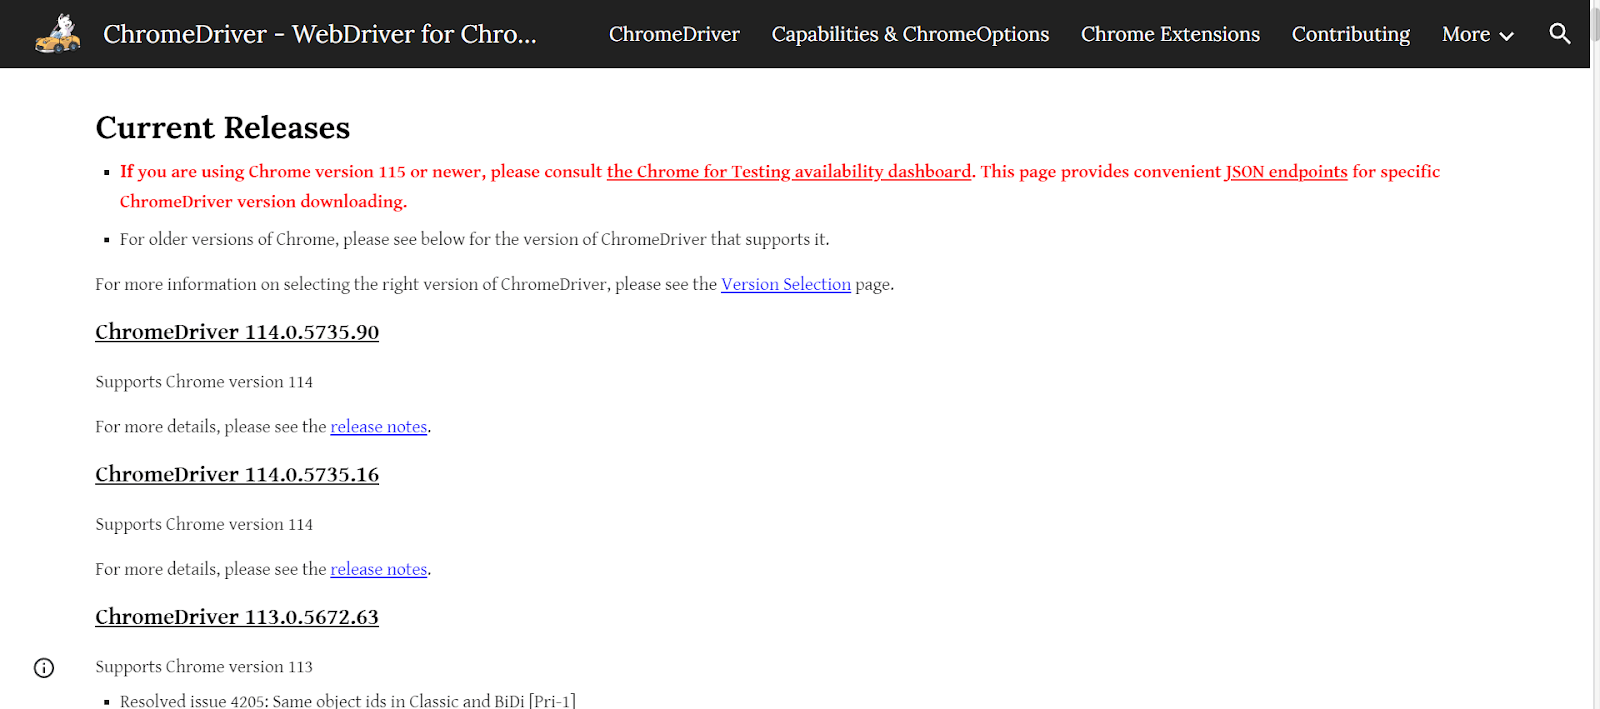
- Follow this ChromeDriver link to download it on your system.
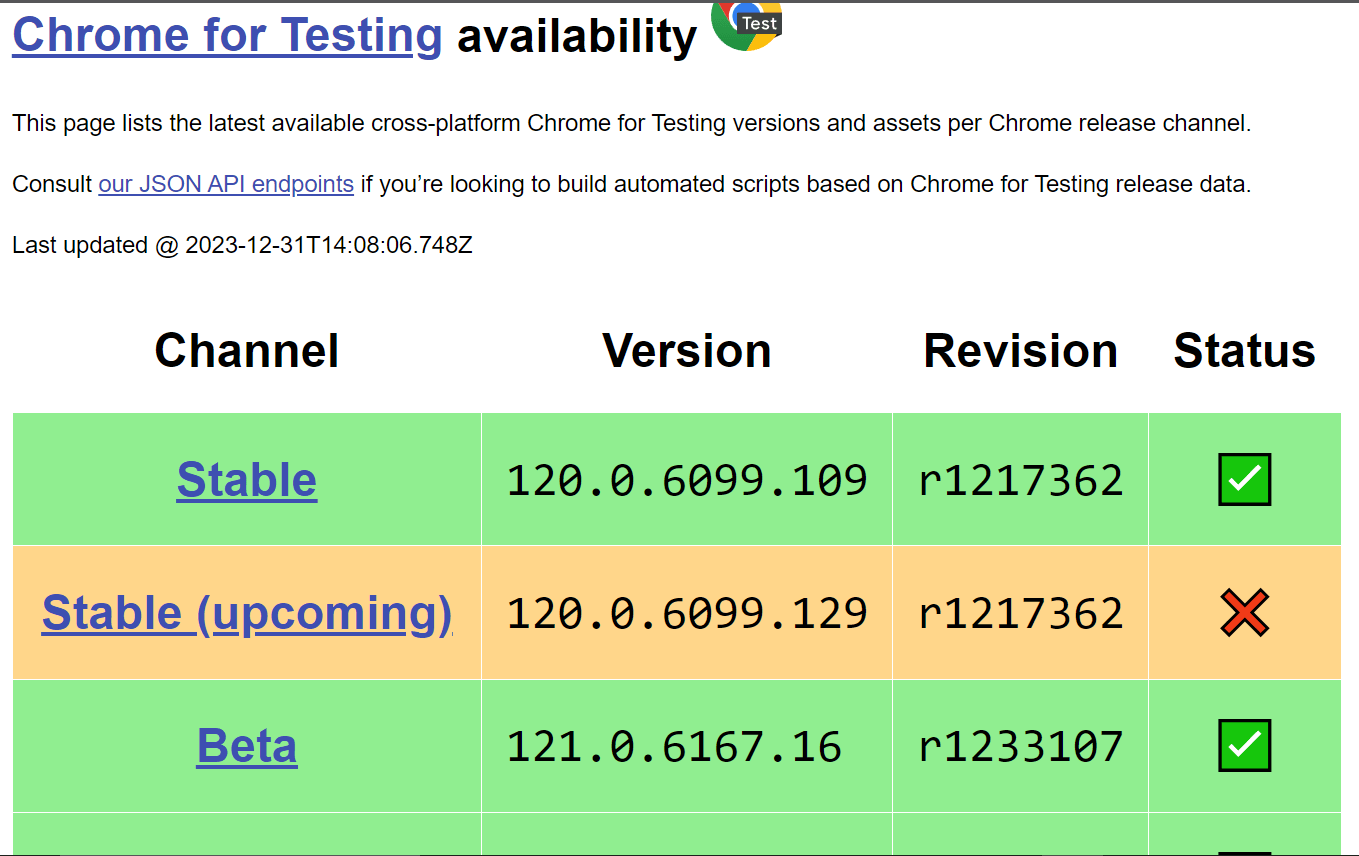
- If the version of your chrome browser is 115 or more, head towards the Chrome for testing availability dashboard.
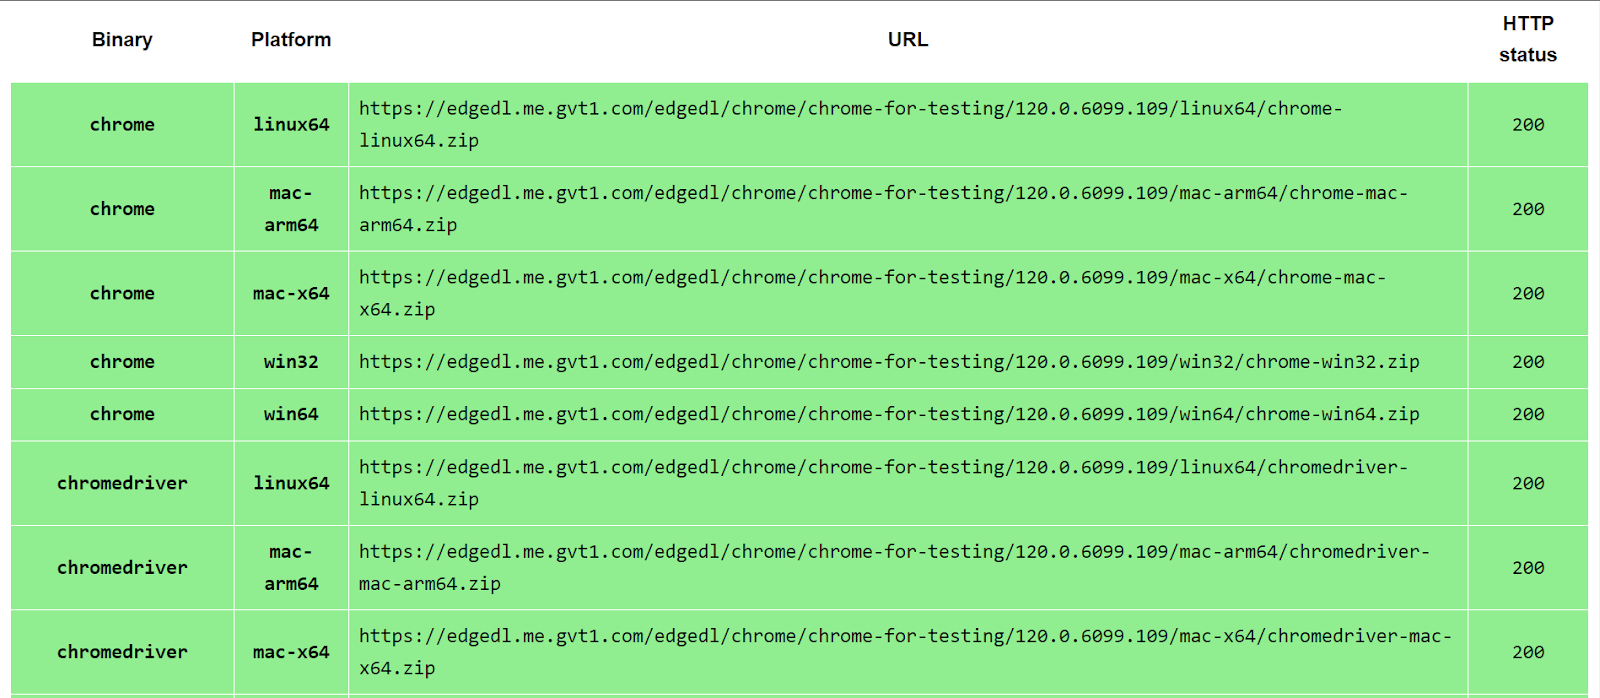
- Click on the stable channel and look for the OS configuration of your system.
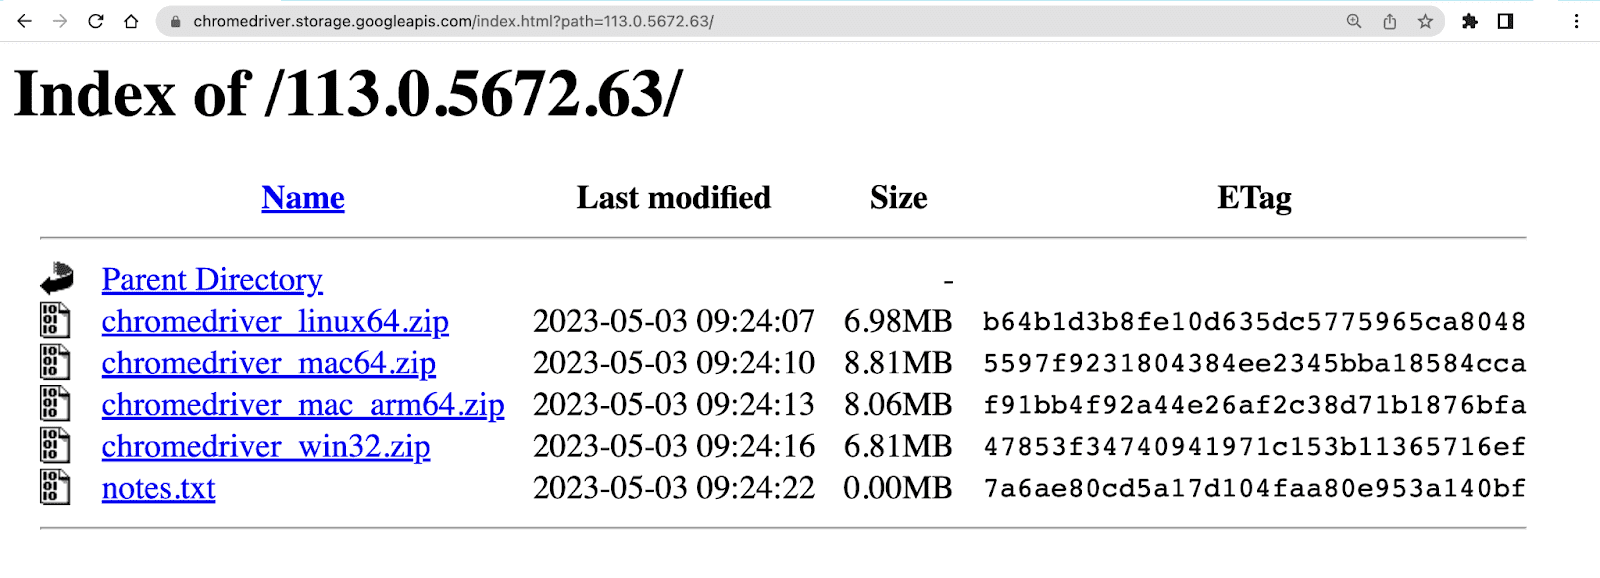
- Copy the URL and open it in a new tab, ChromeDriver will be downloaded in zip format. Extract it in the desired location.
- If the version of your Chrome browser is less than 115, select the ChromeDriver according to the version of the Chrome browser. After that, we have to choose the operating system on which we desire to run it.
- Once the download is complete, extract the chromedriver.exe by unzipping the folder.
Till this point, the process is the same for all operating systems. Now we will see the setup process for each OS.
Windows Operating System
- Copy the path for the file chromedriver.exe so I store the driver in “D:\chromedriver.exe”.
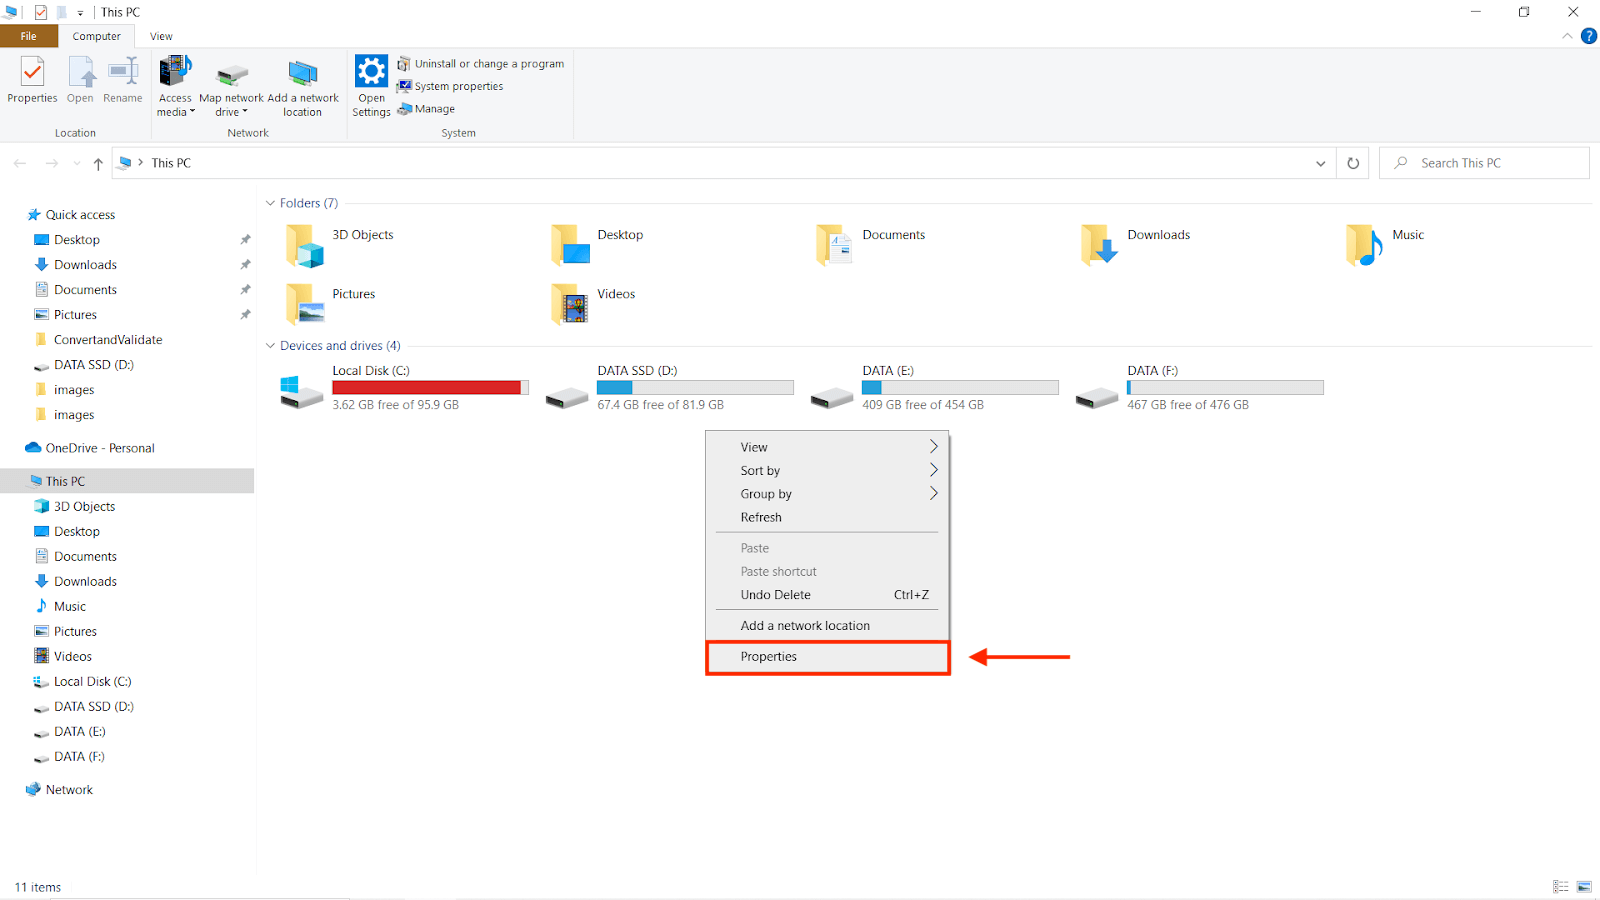
- Right-click on My Computer and click on Properties options.
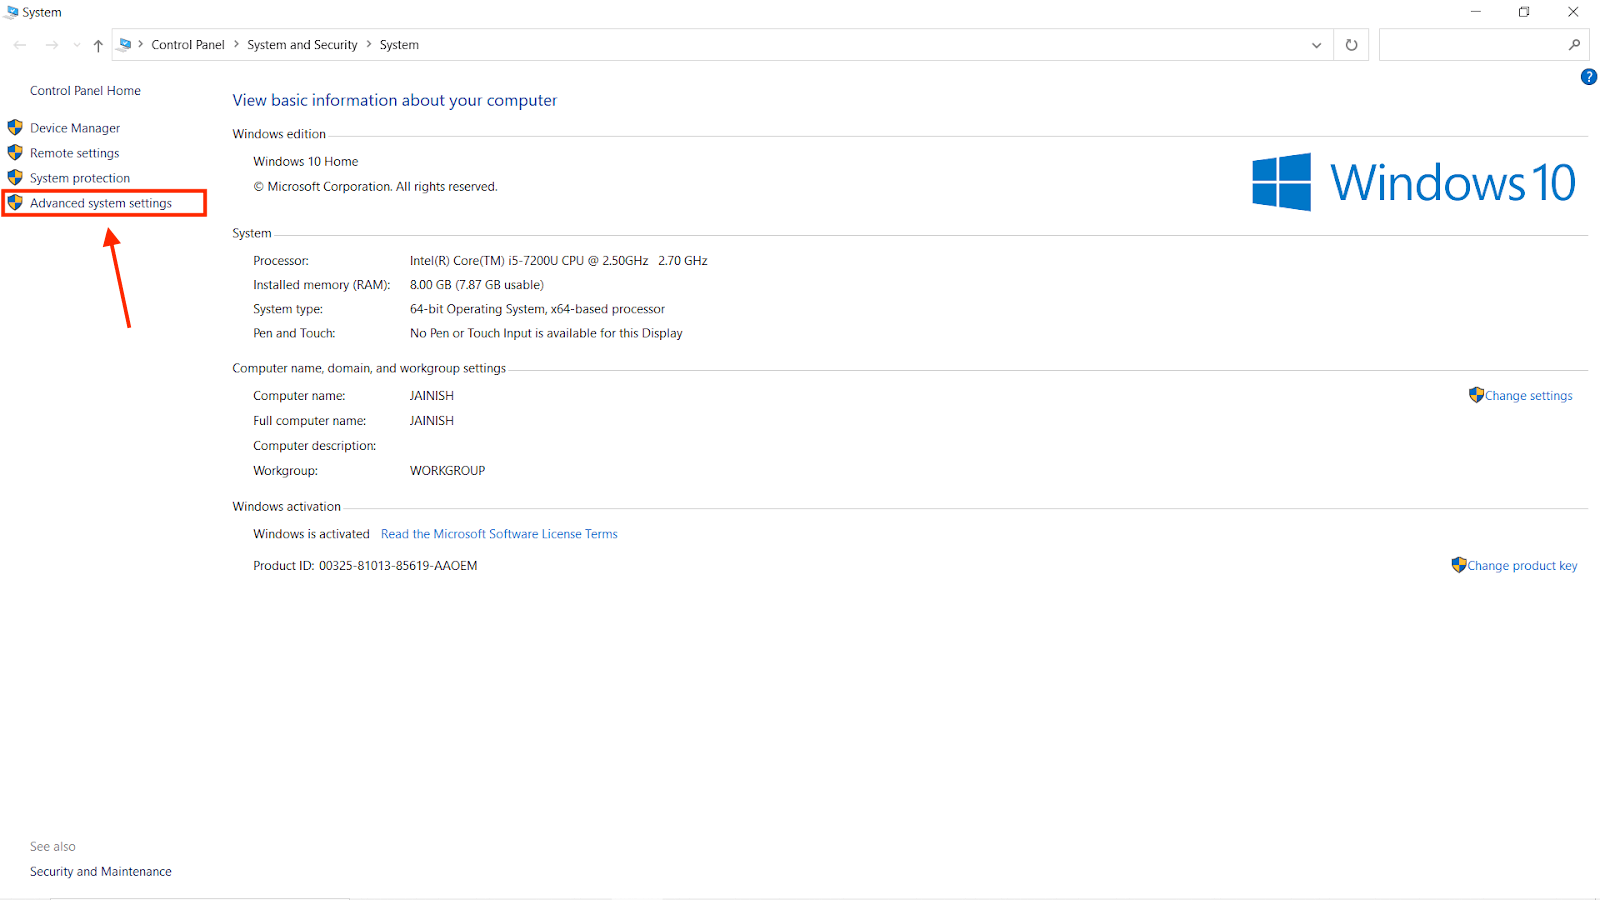
- You will be redirected to a new window that will look similar to the image below; after that, select the Advanced System Settings option.
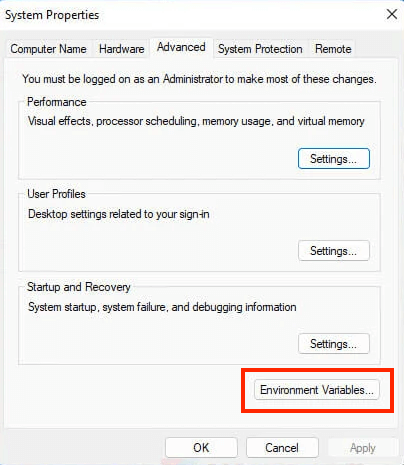
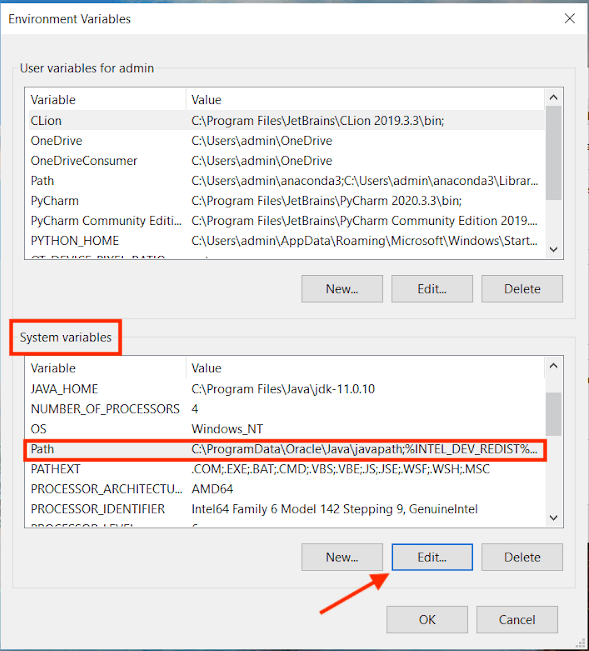
- From the system properties options, select the Environment Variables button.
- Now, from the system variables, select the path and press the Edit button.
- Paste the copied path of the file and save the changes by pressing the OK button.

macOS Operating System
- Open the Finder and use ⌘+shift+G
- Go to the following path “/usr/local/bin”
- Add the “chromedriver.exe” file here
Linux Operating System
If you have already followed the steps to download ChromeDriver, skip steps 1, 2, and 3.
- Go to your temp folder:
- Download the latest Linux-based Chromedriver:
- Extract Chromedriver from its archive:
- Move Chromedriver to the applications folder:
|
1 |
cd /tmp/ |
|
1 |
wget https://chromedriver.storage.googleapis.com/2.37/chromedriver_linux64.zip |
|
1 |
unzip chromedriver_linux64.zip |
|
1 |
sudo mv chromedriver /usr/bin/chromedriver |
If you want to explore the way to set the environment variable for the driver using a terminal, follow the documentation by Selenium.
How to Check if the Installation is Successful
Windows OS:
Open the command prompt and run the following command:
|
1 |
chromedriver |
If the driver is installed correctly, it will open the chromedriver.exe program window.
macOS or Linux-based OS:
Run the following command in the terminal; if installed correctly, it will output the version of the driver.
|
1 |
chromedriver --version or chromedriver -version or chromedriver -v |
Installation of ChromeDriver using webdriver-manager
In the year 2022, Selenium introduces Selenium Manager. It is a CLI (Command-Line Interface) program that was created in Rust programming language to support cross-platform execution. When no browser driver is found on the PATH or a third-party driver manager is not utilized, Selenium Manager is transparently triggered by the Selenium bindings. In Python, a module known as webdriver-manager is used to manage WebDriver binaries for multiple programming languages and browsers. It makes it easier to download and maintain the correct WebDriver executables that are needed for browser automation and to manage WebDriver binaries for browsers like Chrome, Firefox, and Edge, utilize this library.
You must first install the package before you can use webdriver-manager in your Python project. The Python package installer pip can be used to accomplish this by using the following command:
|
1 |
pip install webdriver-manager |
Once the module is installed you can use the webdriver-manager to initialize the ChromeDriver as shown in the below code:
|
1 2 3 4 5 6 |
from selenium import webdriver from selenium.webdriver.chrome.service import Service as ChromeService from webdriver_manager.chrome import ChromeDriverManager driver = webdriver.Chrome(service=ChromeService(ChromeDriverManager().install())) driver.close() |
You can also streamline your web automation tasks with Python Selenium on Chrome using AI-driven testing assistant like KaneAI.
KaneAI is an end-to-end AI test assistant that simplifies test creation, debugging, and evolution using natural language. Effortlessly create, debug, and evolve your tests using natural language, making test automation faster and more efficient.
Opening a Website in Chrome Browser with the help of Python Selenium Script
For this guide, we will use VS Code.
Before moving forward, the following steps need to be done to run the Python scripts with ease.
Creating a virtual environment
It is not a mandatory step; However, if you want to use different versions of Python on your system for different projects, a virtual environment is a way to do it.
Let’s discuss how to create an environment using different methods.
Using GUI:
From VS Code, you can create local environments using virtual environments(venv) or Anaconda(conda) by opening the Command Palette (Windows: Ctrl+Shift+P or macOS: ⇧+⌘+P), start typing the Python: Create Environment command to search and then select the command.

If you select Venv another menu will open to select the version of Python.
After that, the environment folder will be created in your workspace, and a notification will display the creation progress in the bottom right corner.
Using Terminal:
If you choose to create a virtual environment using this method, use the following command (where .venv is the name of the environment folder):
|
1 2 3 4 5 6 7 |
# Windows # You can also use `py -3 -m venv .venv` python -m venv .venv # macOS/Linux # You may need to run `sudo apt-get install python3-venv` first on Debian-based OSs python3 -m venv .venv |
Once the virtual environment (.venv) is created successfully, create a new Python file with the desired name.
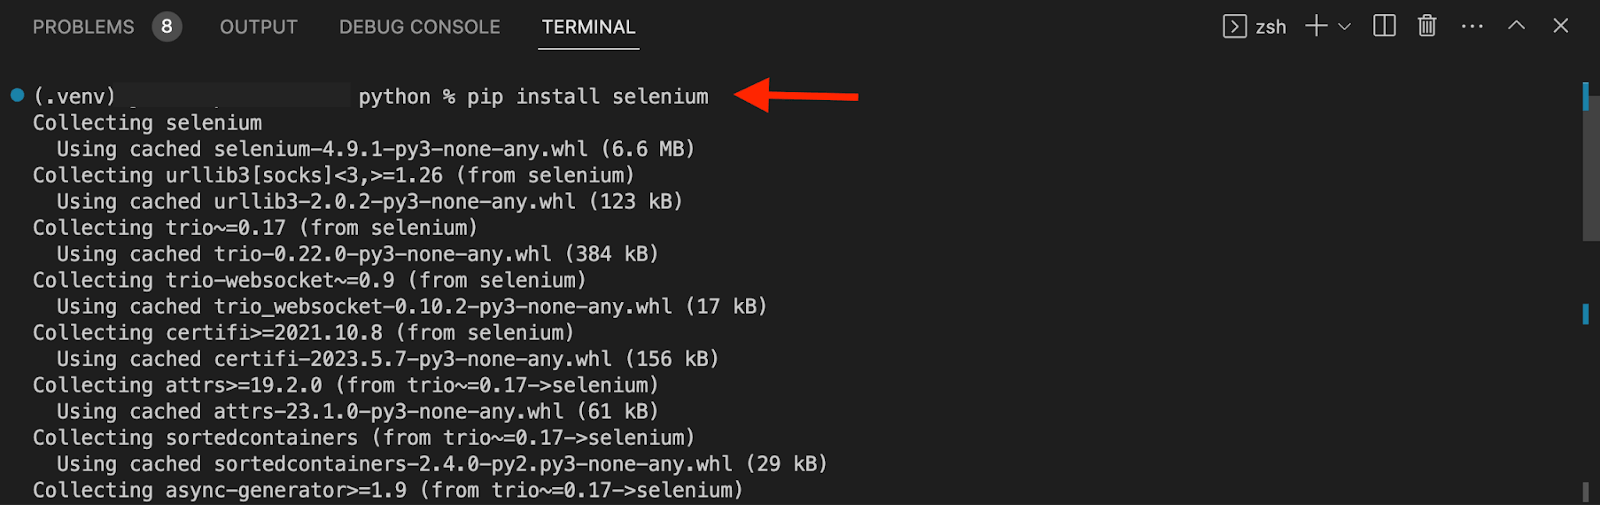
Open a VS Code Terminal and run the following command to install Selenium. The version of Selenium used in this article is 4.9.1 . To know more about Selenium v4.
|
1 |
pip install selenium |
The required setup is completed. Let’s start with the rollercoaster ride of learning Python Selenium using Chrome.
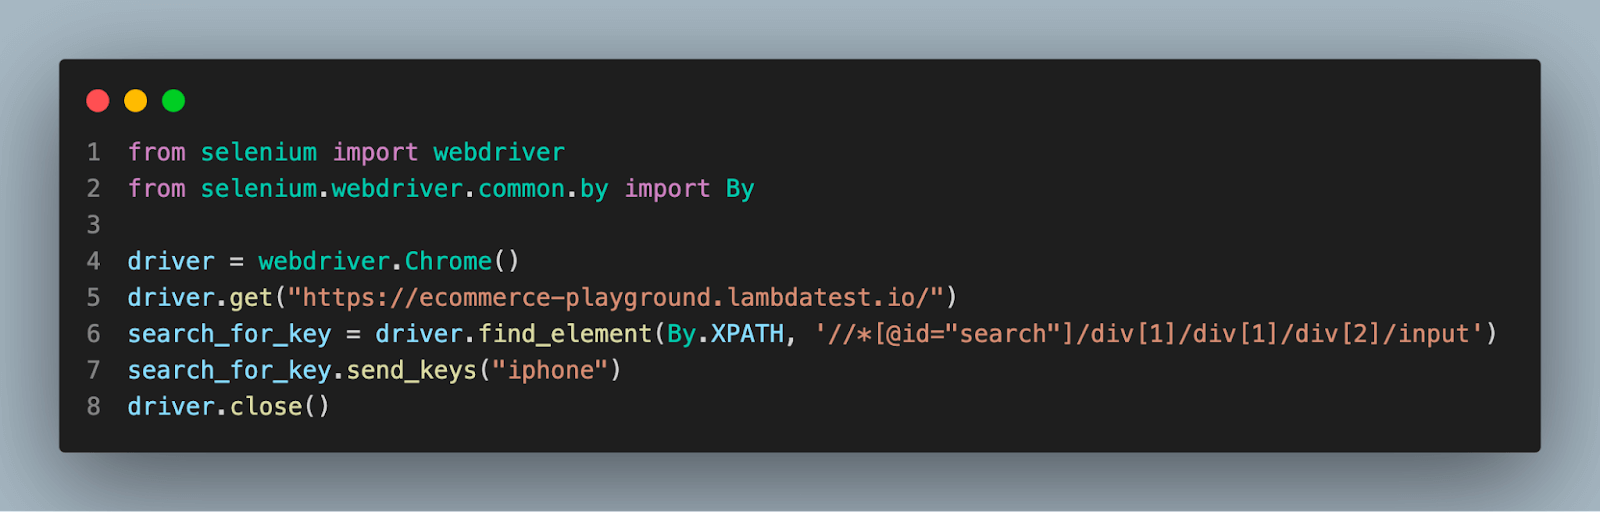
Running Python Selenium using ChromeDriver
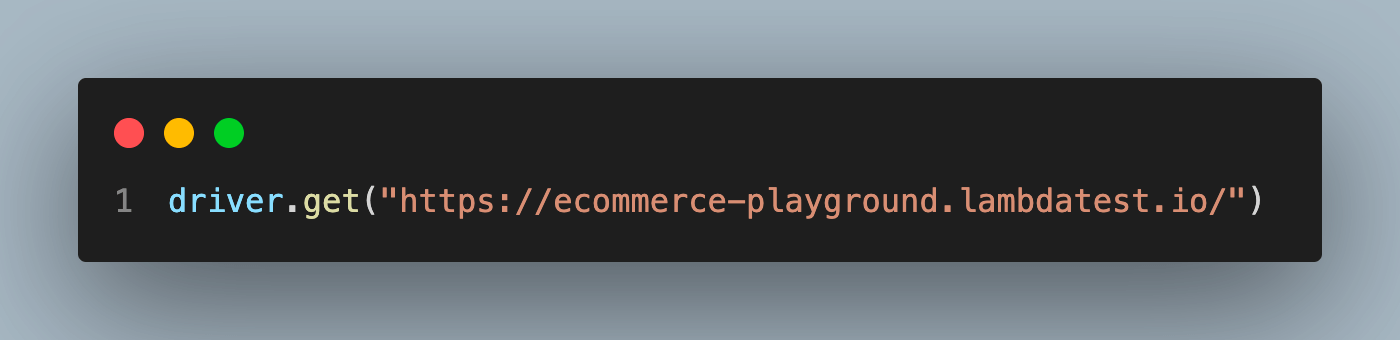
To open a website on Chrome Browser, run the block of code:
|
1 2 3 4 5 |
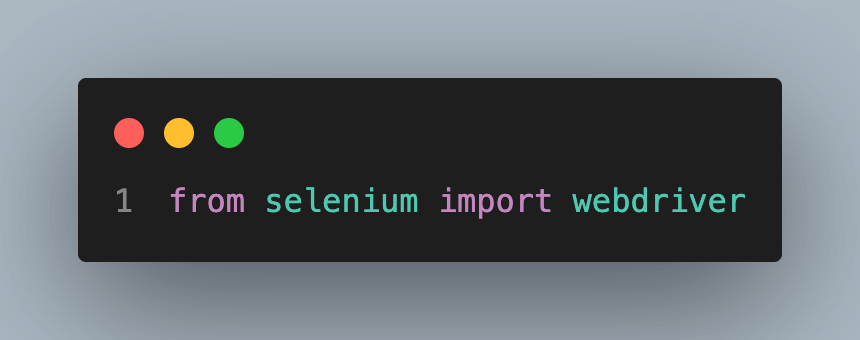
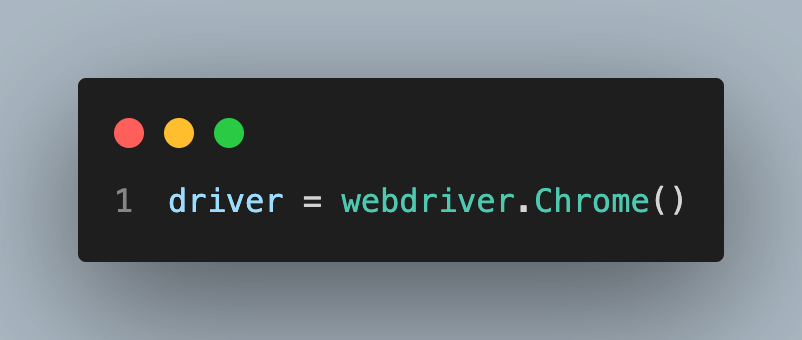
from selenium import webdriver driver = webdriver.Chrome() driver.get("https://ecommerce-playground.lambdatest.io/") driver.close() |
The import statement is used to get webdriver from the selenium package.
It is used to initialize a new instance of the Chrome WebDriver.
get(): This is a method provided by the WebDriver object, which is used to navigate to a specific URL. It instructs the web browser to open the specified URL.
close(): This method closes the current browser window or tab.
Creating Python Selenium Test Cases
In this section, we will see how to control various actions such as navigating to web pages, clicking buttons, and filling out forms which are very commonly used by most websites. For this, we will use LambdaTest E-commerce to run our Selenium scripts.
find_element method
To perform various actions, we need to locate the element. A key Selenium feature that enables you to locate web items on a page is the find_element method. This approach allows you to search for elements using various criteria, including an ID, name, class name, CSS selector, or XPath. During test execution, you can quickly recognize and interact with the desired elements by setting the proper locator strategy.
Selenium WebDriver offers a range of methods to locate elements on a webpage, providing flexibility and versatility for web automation tasks. These methods enable developers to pinpoint specific elements based on various attributes. Some of the commonly used methods include finding elements by ID, NAME, or XPATH. Additionally, elements can be located by their LINK_TEXT or PARTIAL_LINK_TEXT. Other options include finding elements by their TAG_NAME, by CLASS_NAME, or by using CSS_SELECTOR. By leveraging these various methods, developers can effectively locate and interact with elements on webpages using Selenium with Python. The below table shows the syntax to use different methods.
| Old API | New API |
|---|---|
| find_element_by_id(‘id’) | find_element(By.ID, ‘id’) |
| find_element_by_name(‘name’) | find_element(By.NAME, ‘name’) |
| find_element_by_xpath(‘xpath’) | find_element(By.XPATH, ‘xpath’) |
| find_element_by_link_text(‘link_text’) | find_element(By.LINK_TEXT, ‘link_text’) |
| find_element_by_partial_link_text(‘partial_link_text’) | find_element(By.PARTIAL_LINK_TEXT, ‘partial_link_text’) |
| find_element_by_tag_name(‘tag_name’) | find_element(By.TAG_NAME, ‘tag_name’) |
| find_element_by_class_name(‘class_name’) | find_element(By.CLASS_NAME, ‘class_name’) |
| find_element_by_css_selector(‘css_selector’) | find_element(By.CSS_SELECTOR, ‘css_selector’) |
To use By following import statement needs to be imported:
|
1 |
from selenium.webdriver.common.by import By |
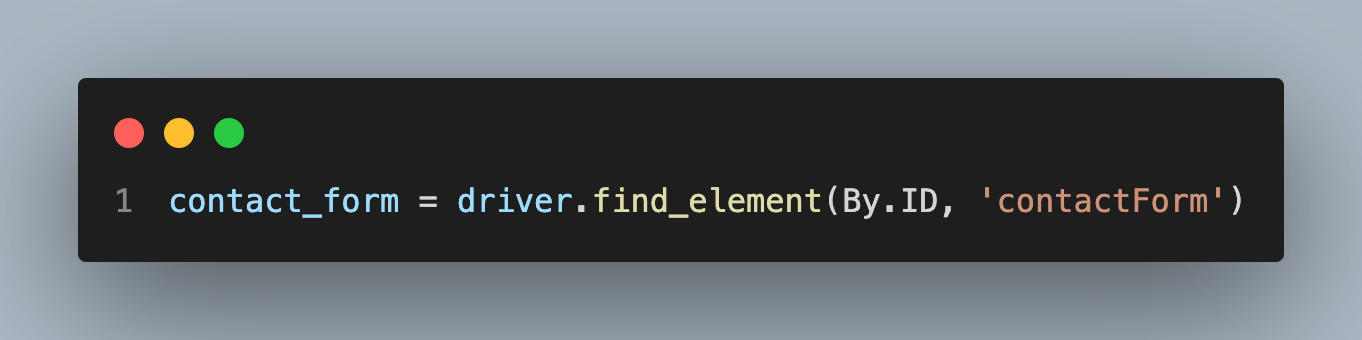
Find element by ID:
To get a form from the below HTML snippet:
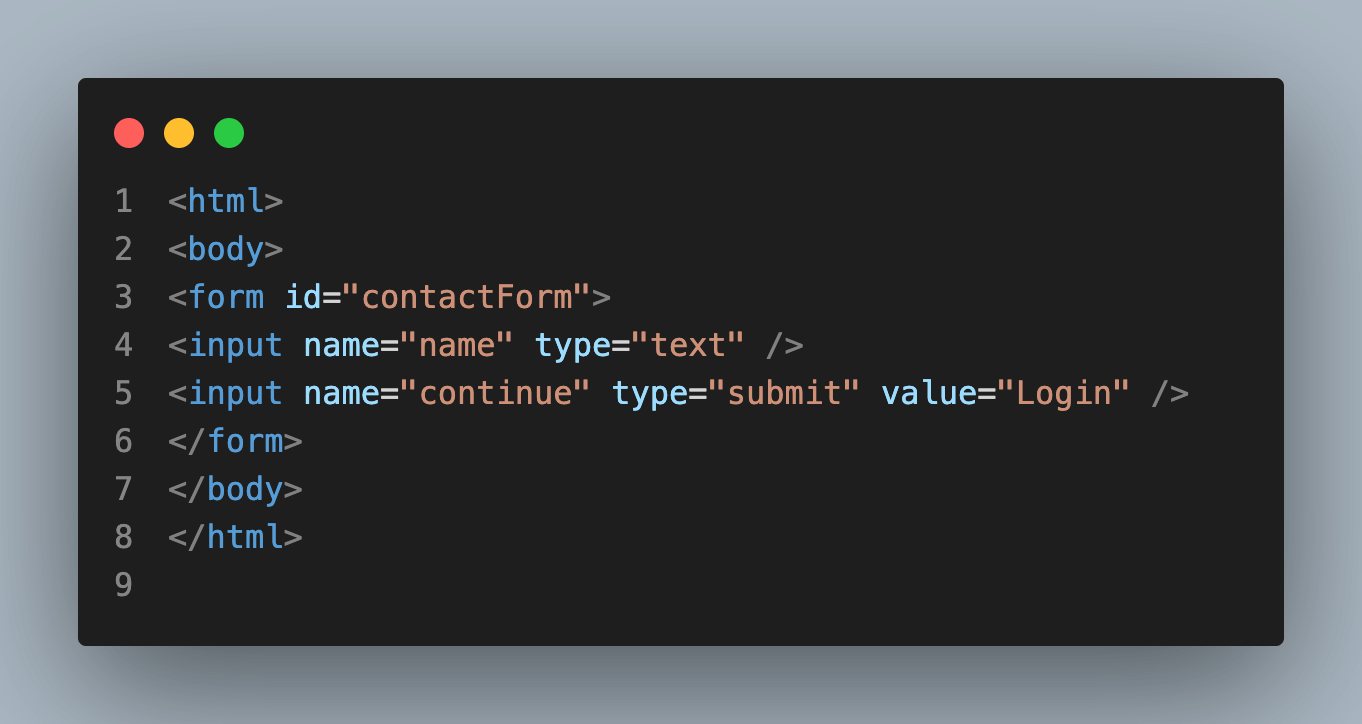
Follow the find_element method will be used:
|
1 |
contact_form = driver.find_element(By.ID, 'contactForm') |
Other methods will work similarly to the ID method.
Adding value to the input field
In automation, interacting with input fields is a regular task. Right-click anywhere on the webpage and choose inspect element to view the element’s details. Hover over the element you want to access. After utilizing the find_element function to identify the input element, you may imitate keyboard input by using the send_keys() method. You can simulate user input by filling the input field with the desired data by giving the desired text or value as an argument.
The below code shows how to use the method:
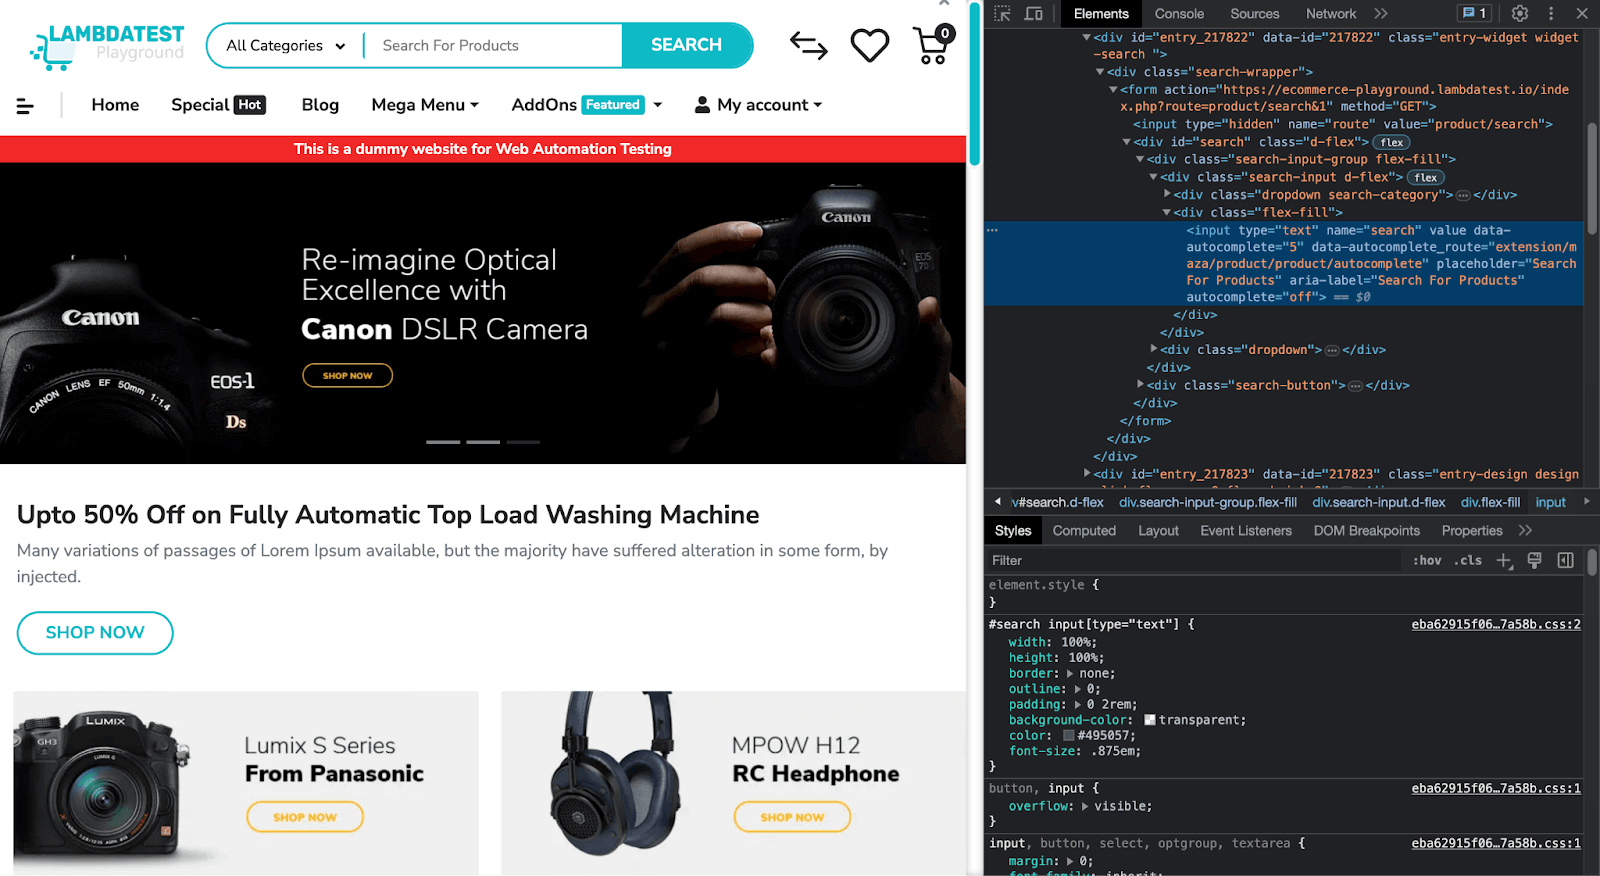
The below code is using element’s XPath to access it:
|
1 2 3 |
search_for_key = driver.find_element(By.XPATH, '//*[@id="search"]/div[1]/div[1]/div[2]/input') # Below code will add iPhone in the input field. search_for_key.send_keys("iphone") |
Triggering Button
Buttons play an important role in web applications, from submitting a form to adding some functionalities, and testing their functionality is vital. For this task, we will use the Xpath to locate the element. To get the path of the element, right-click on the element and select copy from the available options; select copy Xpath(relative path of the element).

The code to store the element in a variable by XPath will look as below:
|
1 |
search_btn = driver.find_element(By.XPATH,'//*[@id="search"]/div[2]/button') |

click() method will click the button.
|
1 |
search_btn.click() |
Controlling Dropdown
Select elements or dropdown menus are frequently found in web forms. Consider a situation where you need to control the dropdown menu. As shown below, we need to select Digital Music.
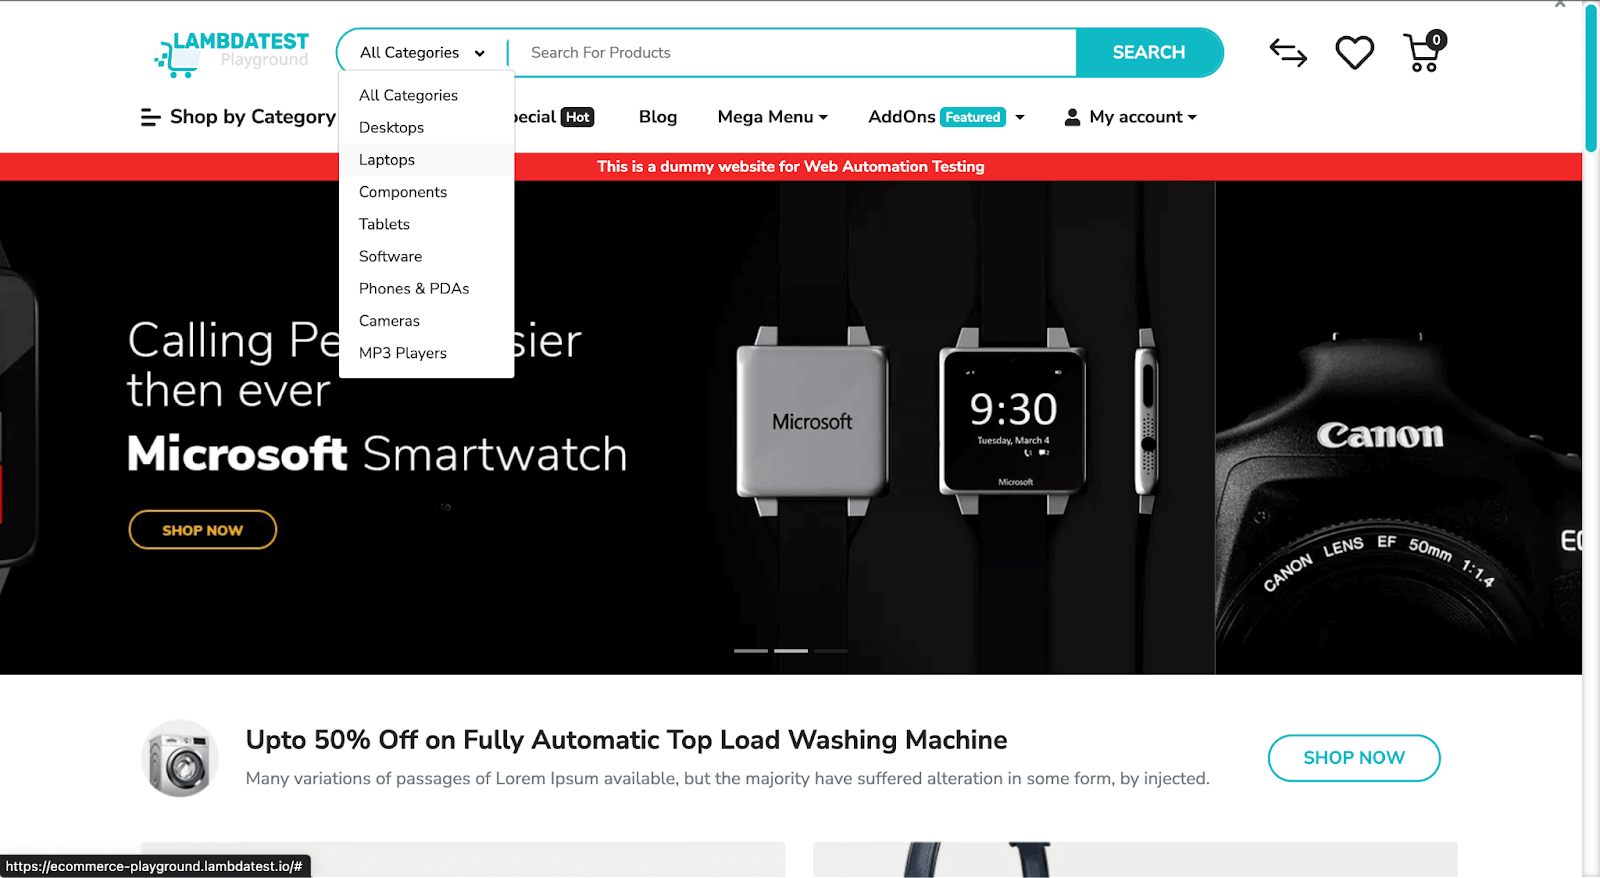
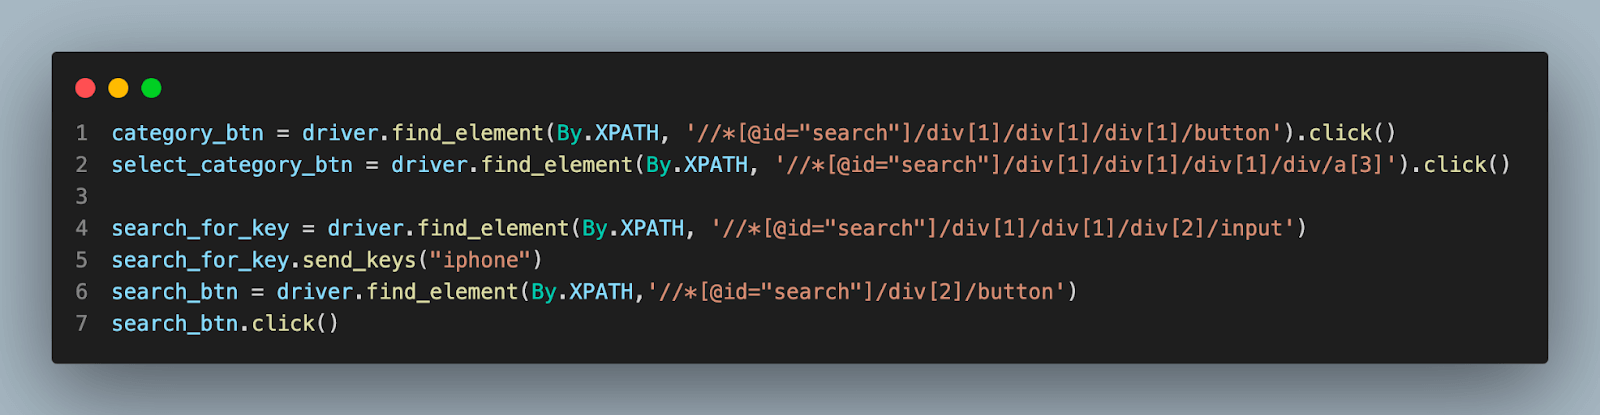
To use Dropdown get the XPath of the option you want to select. In the below code, a[3] is assigned to Laptops.
|
1 2 |
category_btn = driver.find_element(By.XPATH, '//*[@id="search"]/div[1]/div[1]/div[1]/button').click() select_category_btn = driver.find_element(By.XPATH, '//*[@id="search"]/div[1]/div[1]/div[1]/div/a[3]').click() |
After selecting the category below, the piece of code will add the text to the search field.
|
1 2 |
search_for_key = driver.find_element(By.XPATH, '//*[@id="search"]/div[1]/div[1]/div[2]/input') search_for_key.send_keys("iphone") |
The below code will press the search button to trigger the search.
|
1 2 |
search_btn = driver.find_element(By.XPATH,'//*[@id="search"]/div[2]/button') search_btn.click() |
To know more about other methods, follow a detailed article for handling Dropdowns.
Clearing Edit Box or Text Input
Another important action in Selenium test cases is clearing the text input or edit box’s contents. To clear the content/text of an edit box or text input, you can use the clear() method provided by the WebElement class.
Here’s an example:
|
1 2 |
search_for_key = driver.find_element(By.XPATH, '//*[@id="search"]/div[1]/div[1]/div[2]/input') search_for_key.clear() |

Advanced Python Selenium Techniques in Chrome
Selenium offers advanced techniques that let you manage many actions encountered while performing web testing and complex automation activities. This section will cover advanced Python Selenium techniques in Chrome, including drag-and-drop, moving through history and location, switching between windows and frames, handling popups and alarms, adding cookies, adding waits, and taking screenshots.
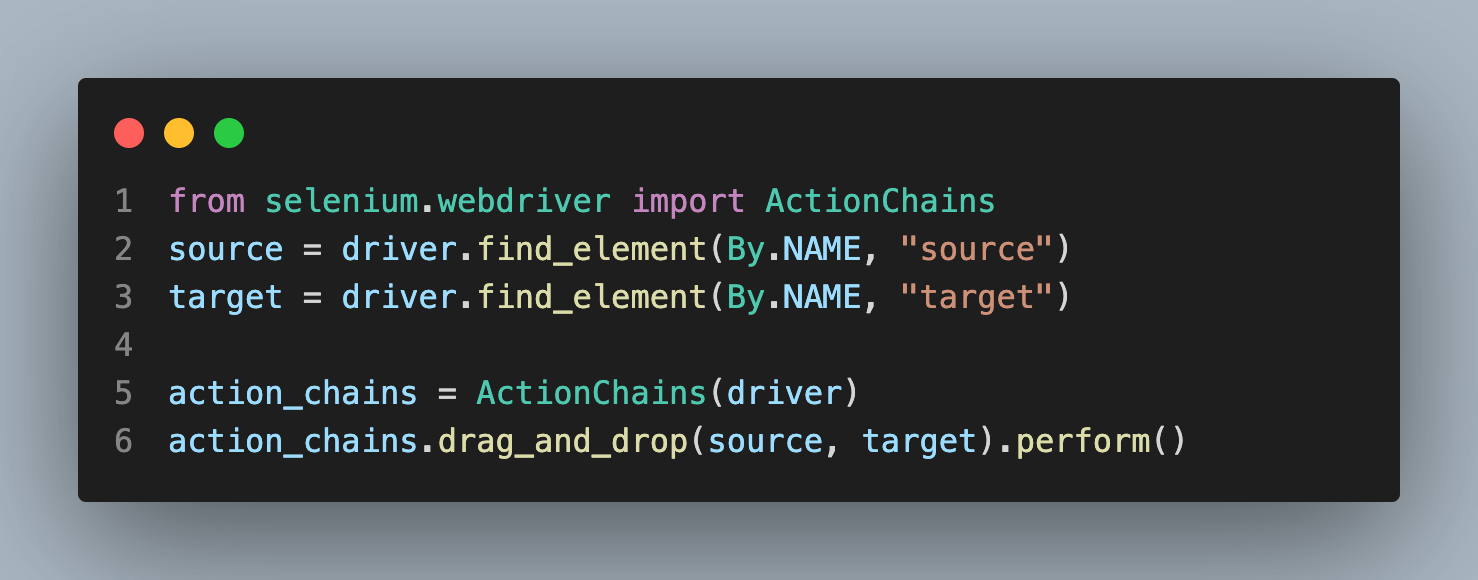
Drag and Drop
This functionality is commonly found in modern web apps. Selenium also provides this functionality to simulate drag-and-drop actions on web elements. By locating the source and the target element using the find_element method, you can use the drag_and_drop or drag_and_drop_by_offset methods to perform drag-and-drop operations, imitating user interactions and validating the expected behavior of the application.
|
1 2 3 4 5 6 7 8 9 |
# Get the element by its name source = driver.find_element(By.NAME, "source") target = driver.find_element(By.NAME, "target") # initialize the ActionChains action_chains = ActionChains(driver) # drag_and_drop method is a part of ActionChains action_chains.drag_and_drop(source, target).perform() |
For more detailed information on this topic, please refer to our comprehensive blog post on Drag and Drop.
Switching between windows and frames
Most websites nowadays have various iframes and windows which are used to implement various features WebDriver also provides support moving between named windows using the “switch_to.window” method:
|
1 2 3 4 5 |
# To change the window driver.switch_to.window("windowName") # To change the frame driver.switch_to.frame("frameName") |

Scroll a web application
Most websites have scroll to make it more interactive and engaging. The selenium scroll-down code is shown below. It calls the method execute_script() with the javascript to scroll to the end of the web page.
|
1 2 3 4 5 6 7 8 9 10 11 |
from selenium import webdriver from selenium import webdriver import time driver = webdriver.Chrome() driver.get("https://ecommerce-playground.lambdatest.io/") # scroll the website or webpage to the complete body height driver.execute_script("window.scrollTo(0, document.body.scrollHeight)") time.sleep(3) driver.close() |
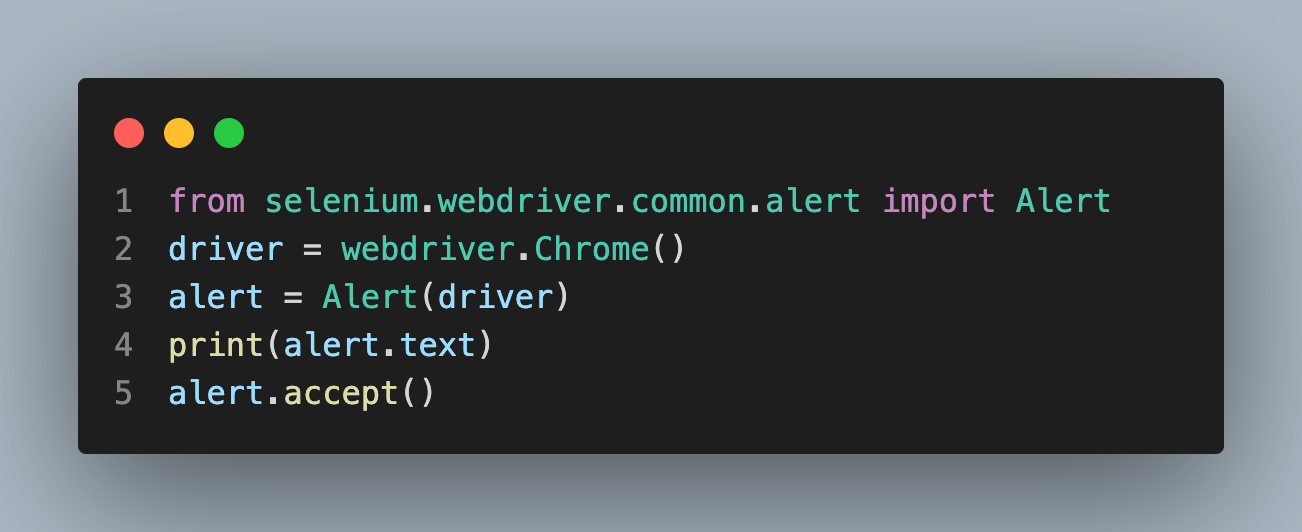
Popups and Alerts
Handling popups and alerts is paramount when automating web testing. Popups and alerts can appear during various scenarios, such as confirmation messages, error alerts, warnings, or authentication dialogs.
|
1 2 3 4 5 6 7 8 9 |
# import Alert from selenium.webdriver.common.alert import Alert driver = webdriver.Chrome() # create an alert object alert = Alert(driver) # To print the alert text print(alert.text) # accept the alert alert.accept() |
To delve deeper into this topic, we recommend referring to our comprehensive blog post covering Alert and Popup.
Navigating through history and location
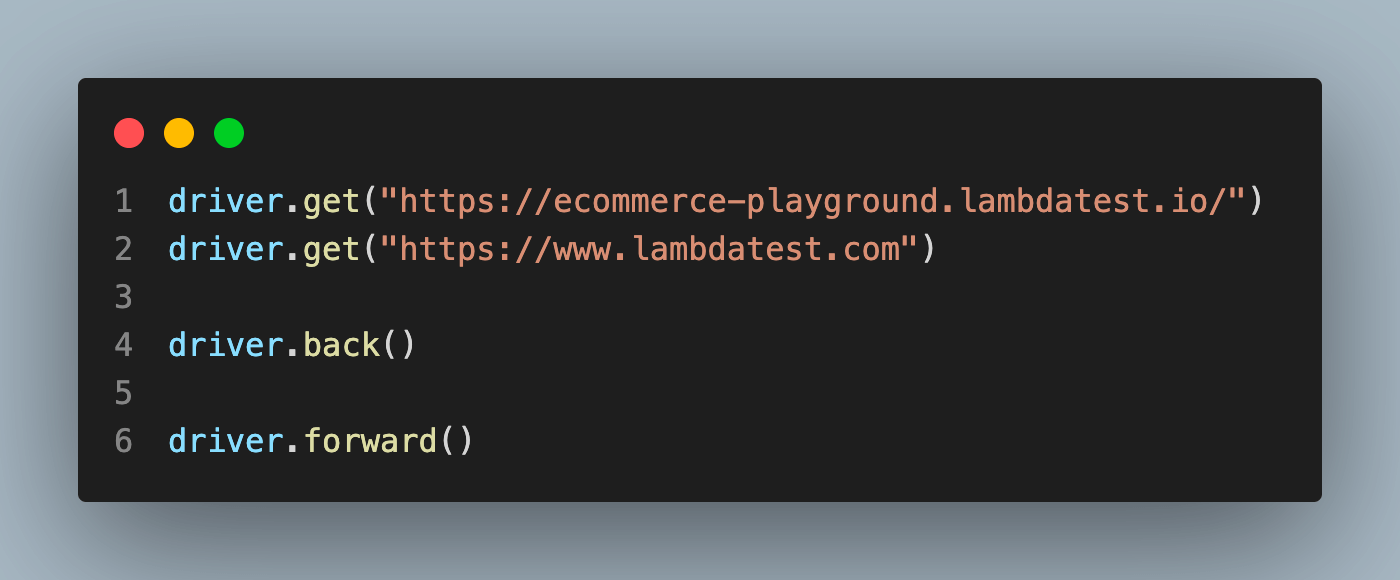
Selenium enables you to control the browser’s location and navigate its history. To simulate user navigation behaviors, you can use Selenium WebDriver class methods like back(), forward(), and refresh(). You can test the behavior of web applications using these techniques to navigate to other pages, go back to the previous page, go forward to the next page, or refresh the current page.
The below code will showcase the usage of the methods:
|
1 2 3 4 5 6 7 |
# Get the website URL driver.get("https://ecommerce-playground.lambdatest.io/") driver.get("https://www.lambdatest.com") # Step backward in the browser history driver.back() # Step forward in the browser history driver.forward() |
Adding Cookies
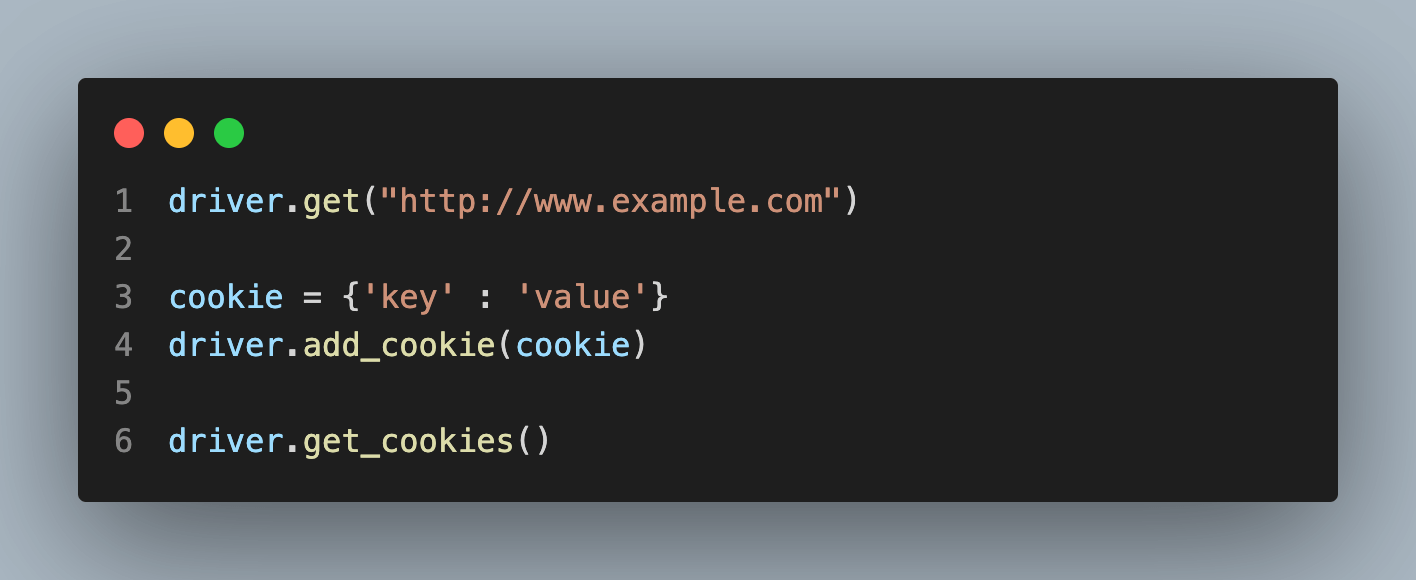
A cookie is a piece of data from a website stored within a web browser that the website can retrieve later. Web applications utilize cookies heavily to store session data and user preferences.
For adding cookies while running tests, Selenium offers several options. You can define the cookie’s name, value, domain, path, and other parameters using the add_cookie method, whereas the get_cookies() method is used to get the values of cookies. You may mimic personalized or logged-in user sessions by adding cookies, allowing for thorough testing of application operation. The cookies will be stored for a particular domain.
|
1 2 3 4 5 6 7 8 9 |
# Set a valid Domain driver.get("http://www.example.com") # Now set the cookie. It is valid for the entire domain cookie = {'key' : 'value'} driver.add_cookie(cookie) # get the value stored cookie driver.get_cookies() |
To learn more about this topic, we advise you to read our in-depth blog post about Handling Cookies.
Adding Waits
One must incorporate waits in order to time test execution with the loading and rendering of the web page. You can tell Selenium to wait until a specific condition is met before moving on to the next phase by using explicit or implicit waits. This increases test stability and dependability by ensuring that the test case waits for particular items to be visible, clickable, or present.
There are two types of waits explicit and implicit.
Explicit waits: This piece of code that you declare to wait until a specific event takes place before continuing on the website. The extreme case of this is time.sleep(), which sets the condition to an exact time period to wait.
|
1 2 3 4 5 6 7 8 9 10 11 12 |
from selenium import webdriver from selenium.webdriver.common.by import By from selenium.webdriver.support.ui import WebDriverWait from selenium.webdriver.support import expected_conditions as EC driver = webdriver.Chrome() try: # wait 5 seconds before looking for element element = WebDriverWait(driver, 5).until(EC.presence_of_element_located((By.ID, "elementName"))) finally: # else quit driver.quit() |

Implicit waits: It tells WebDriver to poll the DOM for a certain amount of time when trying to find any element (or elements) not immediately available. The default setting is 0.
|
1 |
driver.implicitly_wait(10) # seconds |

We suggest reading our in-depth blog post on Types of waits to learn it in depth.
Taking Screenshots
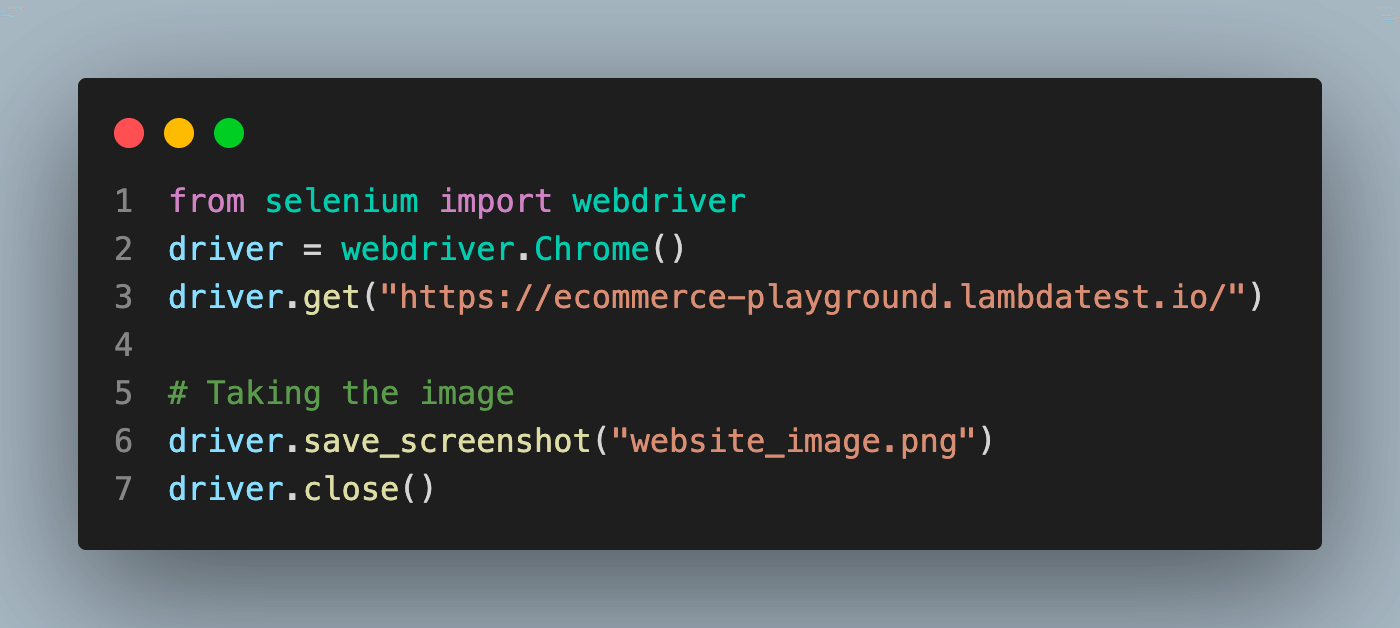
It is practical to take screenshots while a test execution for documentation, debugging, and reporting purposes. Selenium offers tools for taking screenshots of a web page whenever you want. You can save the screenshot to a particular location by employing the save_screenshot method. By taking screenshots, you may visually check the condition of the website and collect proof of test execution for subsequent investigation.
The below code will take a screenshot and open the code is implemented with it open a new window to show the preview of the screenshot.
|
1 2 3 4 5 6 7 |
from selenium import webdriver driver = webdriver.Chrome() driver.get("https://ecommerce-playground.lambdatest.io/") # Taking the image driver.save_screenshot("website_image.png") driver.close() |
Output Image:

To delve deeper into this topic, we recommend you to explore our extensive blog post covering the topic of Python Selenium Screenshots.
Chrome Options and Preferences
ChromeOptions class has been introduced in the latest/updated version of Selenium. It is helpful to make changes in the Chrome browser, whereas, DesiredCapabilities is an old concept (its usage in Java is deprecated.) to configure or make changes in the browser. Save this answer.
In Selenium 3, capabilities were defined in a session by using Desired Capabilities classes. As of Selenium 4, you must use the browser options classes. A browser options instance is required for remote driver sessions as it determines which browser will be used.
Page Load Strategy
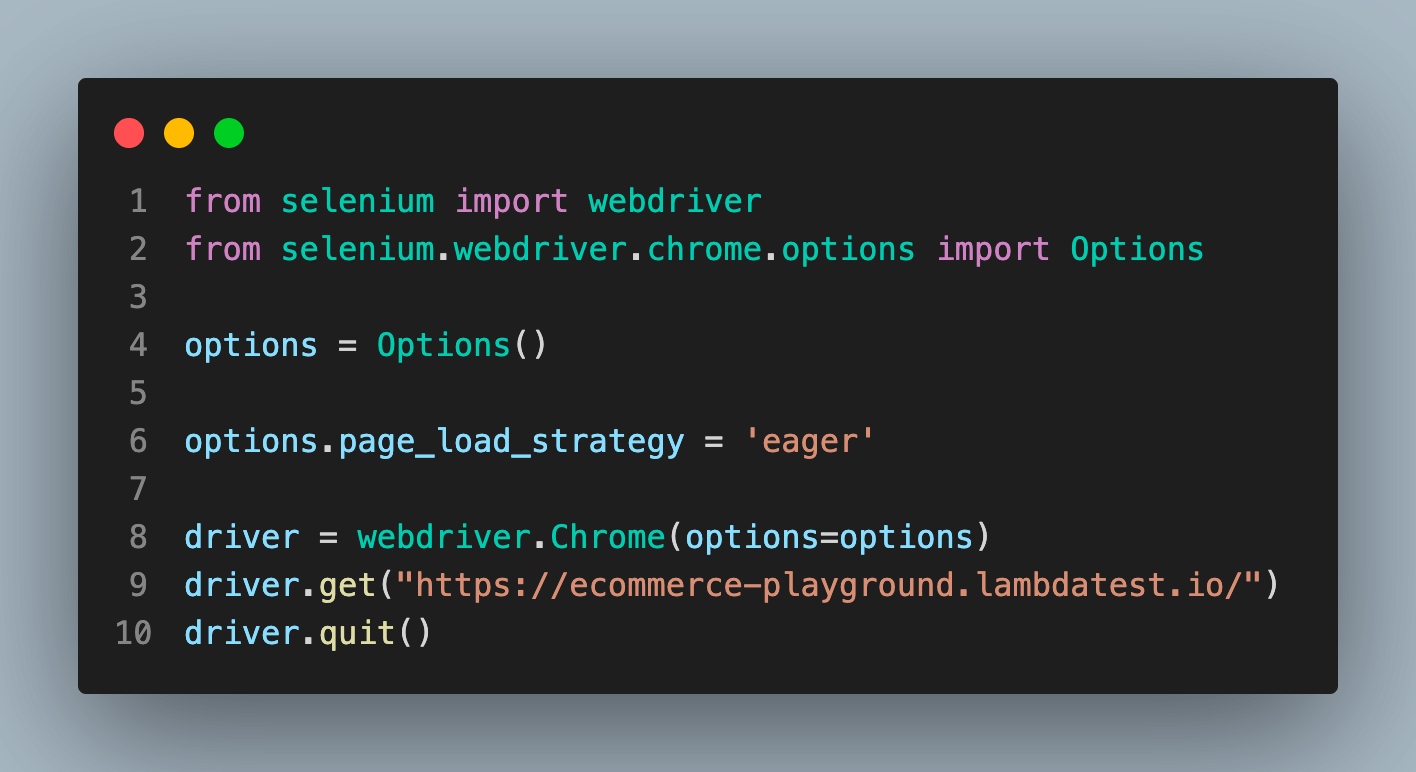
The page load strategy specifies how long the browser should wait before the page loads before continuing. Different page load techniques, including regular, eager, and none, are offered by Selenium. You can manage how Selenium interacts with the page while running the test by defining the preferred page load strategy in Chrome Options. By selecting the proper page load strategy, you may increase test stability by ensuring that your tests wait until all required items have loaded completely.
Types of loading:
- normal: Used by default, waits for all resources to download
- eager: DOM access is ready, but other resources like images may still be loading
- none: Any Does not block WebDriver at all
The below code will showcase how to incorporate eager technique to load the website.
|
1 2 3 4 5 6 7 8 9 10 11 |
from selenium import webdriver from selenium.webdriver.chrome.options import Options # initialize options to use it options = Options() options.page_load_strategy = 'eager' # adding options to local chrome driver driver = webdriver.Chrome(options=options) driver.get("https://ecommerce-playground.lambdatest.io/") driver.quit() |
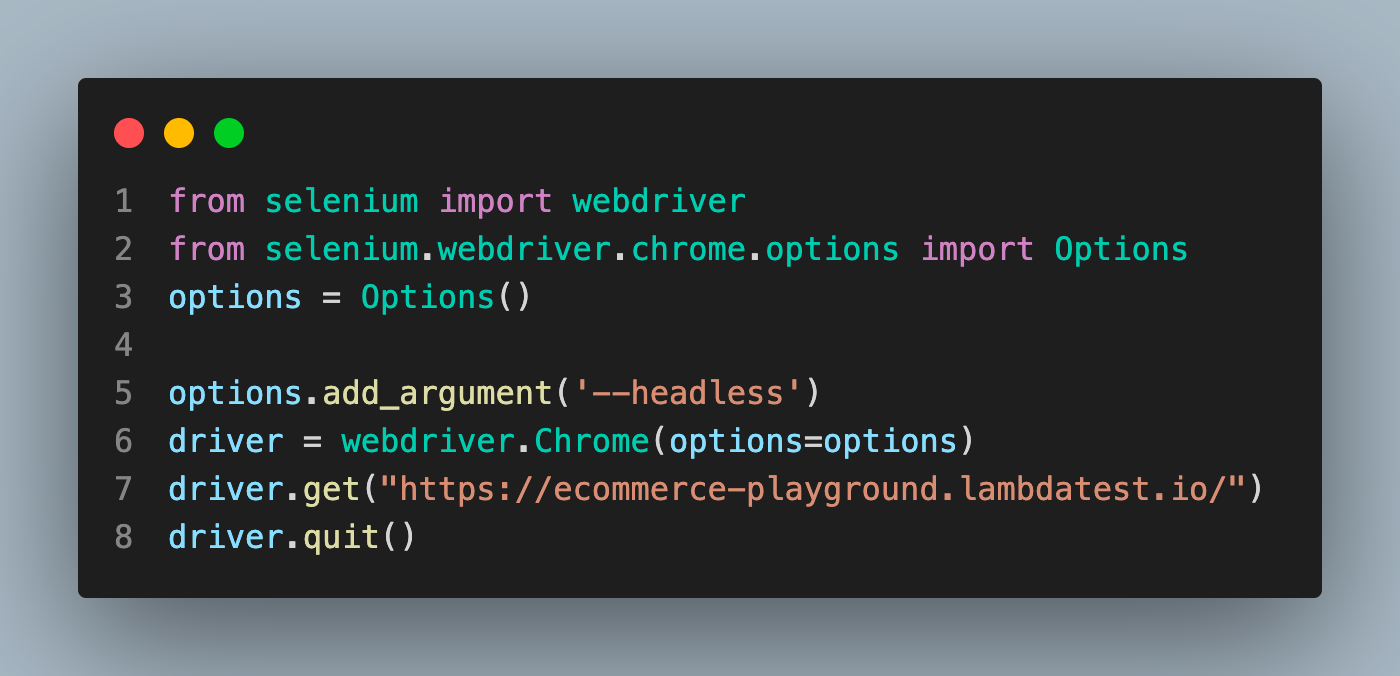
Headless Mode
You can use Chrome’s headless mode to run it without displaying the graphical user interface(GUI). It is helpful for reducing test execution time or conduct tests in a server environment. You can automate the web without a visible browser window by turning on the headless mode in Chrome Options. When performing tests on distant servers or in a continuous integration (CI) environment, headless mode is especially useful.
|
1 2 3 4 5 6 7 8 |
from selenium import webdriver from selenium.webdriver.chrome.options import Options options = Options() # add_argument parameter tells Chrome browser that it should be run without UI (Headless) options.add_argument('--headless') driver = webdriver.Chrome(options=options) driver.get("https://ecommerce-playground.lambdatest.io/") driver.quit() |
Proxy Setting
Proxy settings are essential for scenarios where you need to route network traffic through a proxy server. With Selenium, you may modify proxy settings by using Chrome Options. By specifying the proxy server’s address and port, you can route your browser’s requests through the proxy server during test execution. Applications that depend on certain network settings can be tested using this, and it can also be used to simulate various geographic locations.
With the help of a proxy within tests, we can verify if the website user interface matches the location.
|
1 2 3 4 5 6 7 8 9 10 11 12 |
from selenium import webdriver from selenium.webdriver.chrome.options import Options options = Options() # proxyserver py = "128.21.0.0:8080" # proxy parameter to options options.add_argument('--proxy-server=%s' % py) # options to Chrome() driver = webdriver.Chrome(options=options) driver.implicitly_wait(0.6) driver.get("https://ecommerce-playground.lambdatest.io") driver.quit() |

Tips and tricks to improve the Chrome browsing experience for web automation
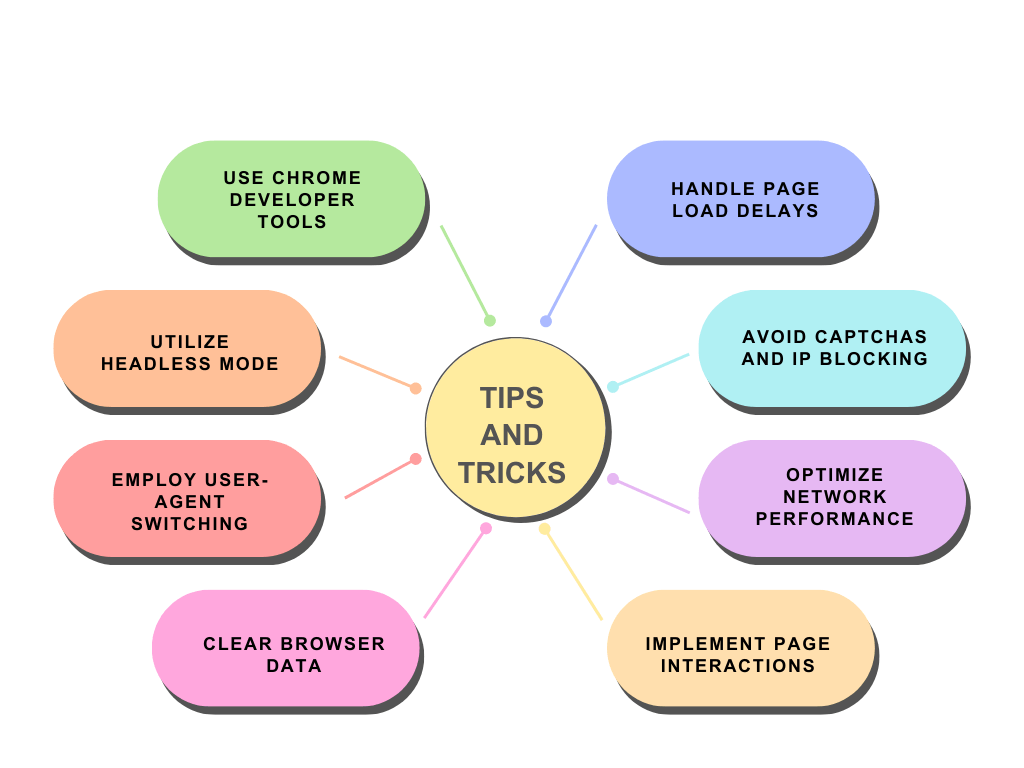
Here are some tips and tricks to enhance the Chrome browsing experience for web automation:
- Use Chrome Developer Tools: This tool helps to debug and inspect any website. To access it right-click on a web page and select Inspect or by pressing Ctrl+Shift+I or ⌥ Option + ⌘ Cmd + I. The Developer Tools allow you to analyze network traffic, manipulate the DOM, and test JavaScript code.
- Employ User-Agent Switching: The User-Agent header identifies the operating system and browser being used. Depending on the user agent, some websites may act differently or restrict access to a particular functionality. You can change the user agent to imitate various devices or browsers to get around this.
- Utilize Headless Mode: Chrome offers a headless mode, which allows you to run Chrome without a GUI(graphical user interface). It can be advantageous for automation since it reduces the usage of resources and allows you to execute tasks in the background.
- Handle Page Load Delays: Asynchronous loading of web pages is common, and automation scripts must handle delays effectively. The “Network API,” the powerful API offered by Chrome’s Developer Tools, enables you to keep monitoring network traffic and wait for particular requests to finish before moving further. This might assist in coordinating your automation duties with the manner in which the website loads.
- Clear Browser Data: To prevent interruption from past sessions when automating activities frequently, it’s crucial to delete browser data including cookies, cache, and local storage. By using the Chrome settings or programming tools for browser automation, you can manually delete this data.
- Optimize Network Performance: One should take advantage of Chrome’s network-related features to enhance the execution of automation scripts. Using Chrome’s DevTools or automation libraries, you can, for instance, disable images and pointless resources, simulate slow network conditions, or deny particular requests.
- Avoid Captchas and IP Blocking: To prevent automation, several websites use security measures like Captchas or IP blocking. You can utilize machine learning techniques or third-party captcha-solving services to bypass captchas. Using proxy servers or VPNs, you can rotate IP addresses for IP blocking.
- Use Page Object Model (POM): By portraying web pages as objects, the Page Object Model design pattern aids in the organization and maintenance of automation code. Your automation scripts’ capacity to be reused, read, and maintained is enhanced. Your code will become more modular and easier to maintain if POM is implemented.
- Implement Page Interactions: Interacting with site elements like buttons, forms, dropdown menus, etc. is common in automation. To find and interact with these items, Chrome automation frameworks like Puppeteer and Selenium WebDriver offer APIs. Your automation capabilities will be improved by effectively understanding and utilizing these APIs.
- Stay Up-to-date: Regular upgrades and new features are introduced as Chrome continues to develop. Keep up with the most recent Chrome upgrades, which may include adjustments to the browser’s functionality, security improvements, and automation-related capabilities. This will enable you to take advantage of new functionality and modify your automation techniques as necessary.
How to Integrate Selenium with Python Testing Libraries
Popular Python testing tools like Unittest and Pytest may be simply combined with Selenium to increase the functionality of your test automation system. In this guide, we will explore how to integrate Selenium with these testing libraries, providing a structured and efficient approach to writing and executing tests.
Unittest
The base of the Python Unittest library is a third-party package called PyUnit. Based on the well-known JUnit framework, Steve Purcell came up with the idea for PyUnit. It later developed into a recognized Python module starting with version 2.5.
For a long time, Python’s standard library has included the unittest module. Therefore, installing it using something like pip install unittest is typically not necessary. It works without installation if you simply run import unittest in your Python code.
To get a better understanding and working of the unittest module we are going to run the following code:
|
1 2 3 4 5 6 7 8 9 10 11 12 13 14 15 16 17 18 19 20 21 22 23 24 25 26 |
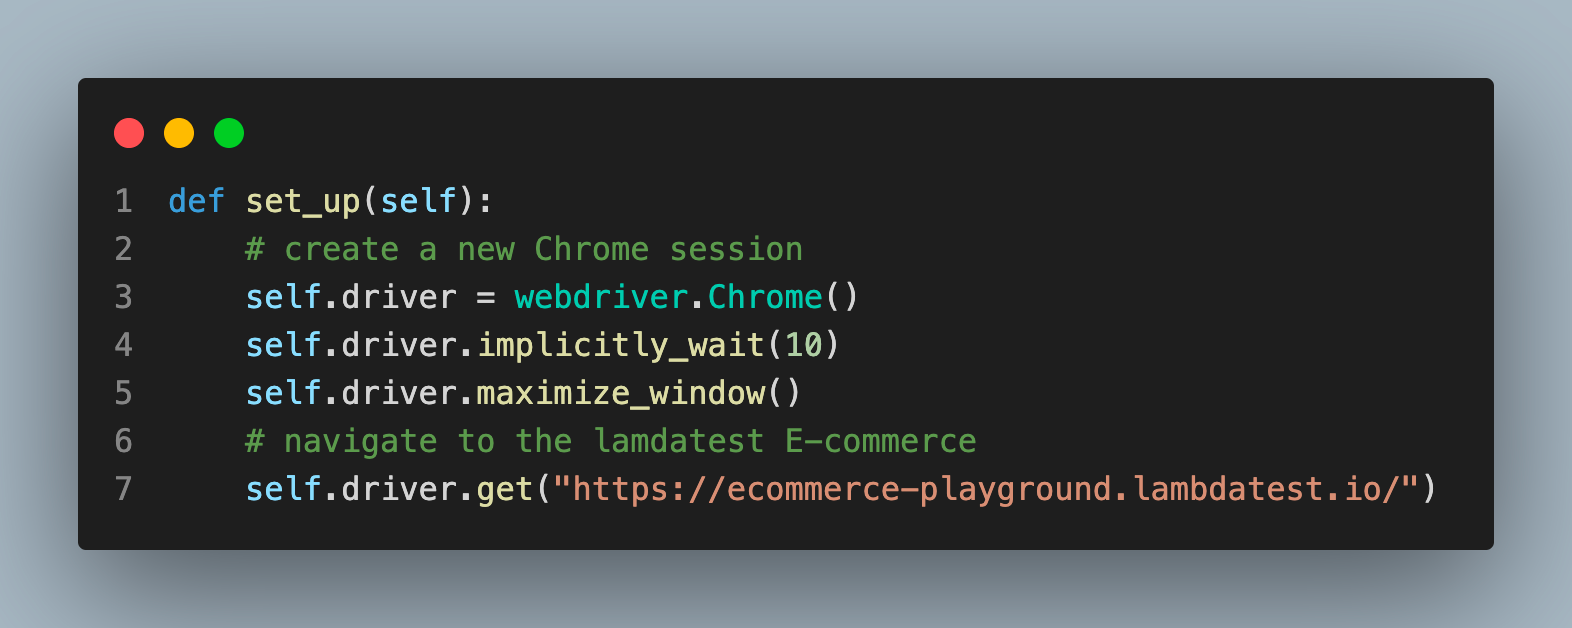
import unittest from selenium import webdriver from selenium.webdriver.common.by import By class SearchText(unittest.TestCase): def set_up(self): # create a new Chrome session self.driver = webdriver.Chrome() self.driver.implicitly_wait(10) self.driver.maximize_window() # navigate to the lamdatest E-commerce self.driver.get("https://ecommerce-playground.lambdatest.io/") def test_search_by_text_keyword(self): # get the search bar search_for_key = self.driver.find_element(By.XPATH, '//*[@id="search"]/div[1]/div[1]/div[2]/input') search_for_key.send_keys("iphone") # enter a search keyword and submit search_btn = self.driver.find_element(By.XPATH,'//*[@id="search"]/div[2]/button') search_btn.click() def tear_down(self): # close the browser window self.driver.quit() if __name__ == '__main__': unittest.main() |
The above code will run from top to bottom. Firstly, the set_up() method will initialize the driver and opens the mentioned URL. Then test_search_by_text_keyword() method will be executed where the search box will be selected and added value “iphone” and press the search button to search for the item. The test will be ended by closing the browser via tear_down() method.
To use the unittest module and write a simple test by inheriting the TestCase class, you’ll need to import the unittest module and define a class that inherits the TestCase class.
The test case’s entry point is a set_up() method. It can be used to perform a predetermined set of operations before running a single test or every test included in the class.
Similar to the set_up() method, test methods get implemented in the TestCase class.
Pytest
The PyPy project gave rise to the Python testing framework Pytest. It can be used to create a variety of software tests, including functional, end-to-end, unit, and integration tests.
You must run the following command on the terminal (or command prompt), which makes use of the Python package management (pip), to install pytest:
|
1 |
pip install pytest |
Once the pytest module is installed successfully. We can run our test using pytest by the following code and name the file appropriately with the .py extension:
|
1 2 3 4 5 6 7 8 9 10 11 12 13 14 15 |
# Import necessary modules import pytest from selenium import webdriver from selenium.webdriver.common.by import By # In order for pytest to recognise the test, the test name must begin with test_<name> (for example, test_lambdatest_todo_app). def test_case(): driver = webdriver.Chrome() driver.maximize_window() driver.get("https://ecommerce-playground.lambdatest.io/") search_for_key = driver.find_element(By.XPATH, '//*[@id="search"]/div[1]/div[1]/div[2]/input') search_for_key.send_keys("iphone") search_btn = driver.find_element(By.XPATH,'//*[@id="search"]/div[2]/button') search_btn.click() driver.close() |
To run the Python pytest file use the following command:
|
1 |
pytest <filename>.py |
Once the test is completed you get information regarding it in the terminal:
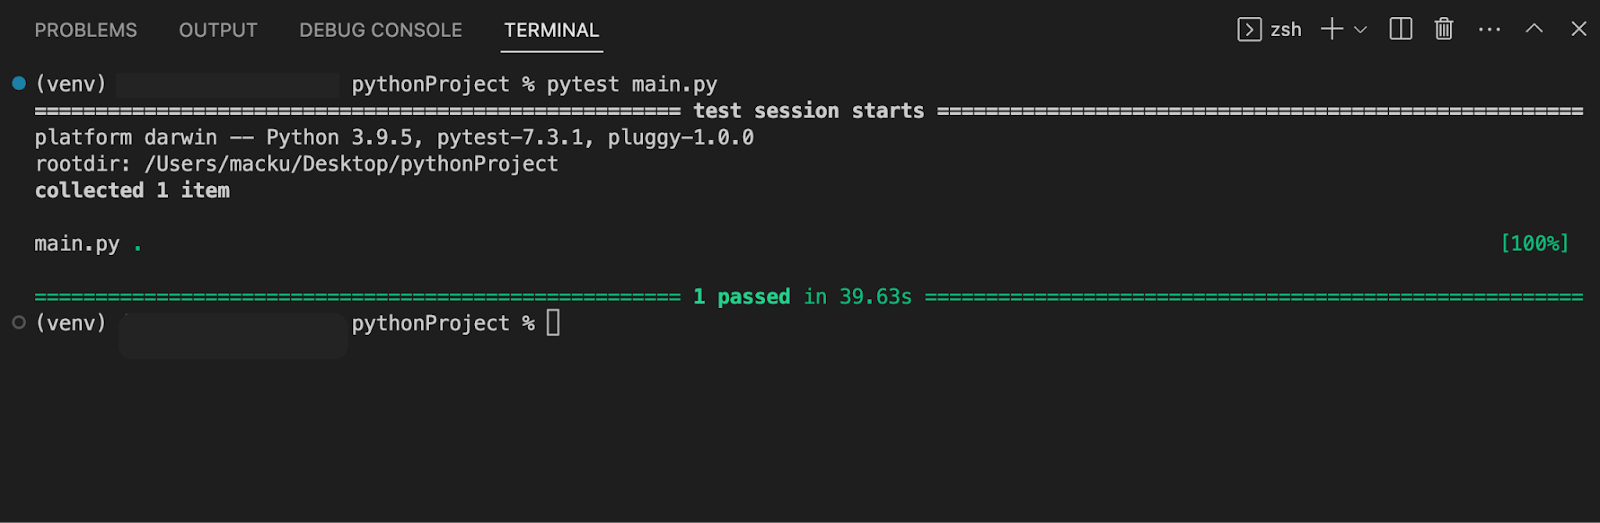
Check out our detailed blog on Pytest to gain deeper understanding.
Challenges of Testing on the Local Grid
Testing on a local grid might provide a variety of difficulties. The lack of readily available physical devices and browsers is one of the major problems. A local grid makes it challenging to test across a variety of device and browser configurations, which could have a negative effect on test coverage as a whole. It also needs a lot of resources, including infrastructure setup, software, and hardware, to maintain and manage. It can take time and money to scale the grid to handle rising test demand.
In order to address these issues, cloud-based testing grids are required. Cloud-based testing grids provide a large inventory of actual devices and browsers, making them scalable and adaptable solutions. Testers have access to a variety of setups and can run parallel tests, which speeds up test execution and improves test coverage. Because the testing environment is hosted on the infrastructure of the cloud provider, the cloud-based method eliminates the requirement for managing and maintaining local infrastructure.
To improve automated testing, a platform like LambdaTest provides cloud-based testing grids. Testers may easily perform Selenium tests in Python on a variety of Chrome browser versions across various operating systems by using LambdaTest. The platform enables testers to build and run automation scripts quickly by providing a seamless interface with well-known test frameworks like Pytest and Unittest.
Running Testcase on a cloud-based testing grid
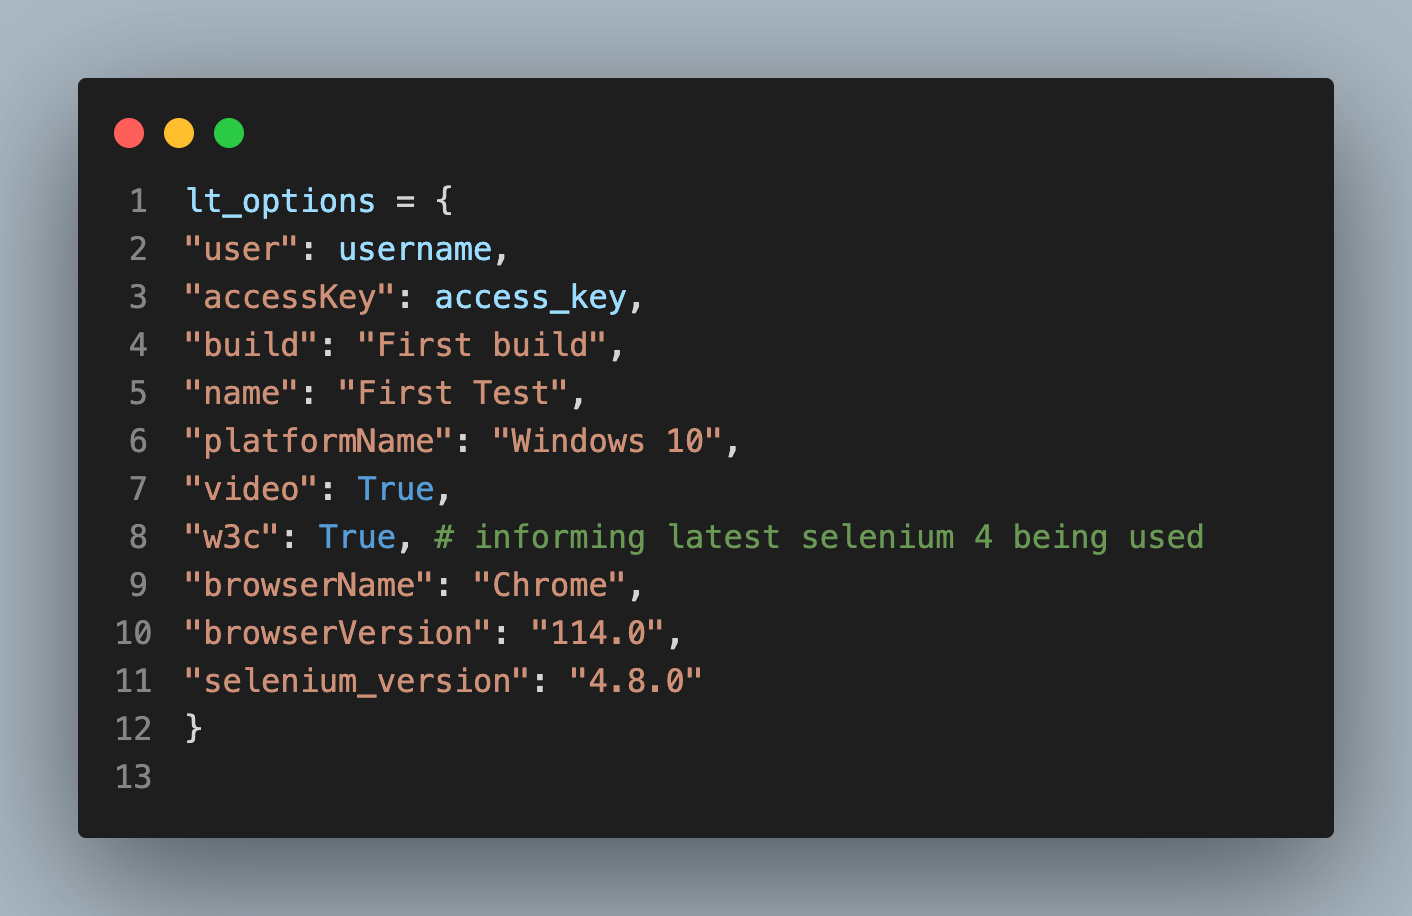
In this section, we are going to run a test on LambdaTest using Pytest as the testing framework. We are going to run our test on WINDOWS 10 operating system with Chrome version 114.0.
Before Running a Python test on LambdaTest, follow a few simple steps:
- Create an account on Lambdatest and complete all the required processes.
- Go to the dashboard by clicking the dashboard button on the top right corner or Follow this LambdaTest Dashboard.
- Get your credentials from the profile icon located in the top right corner, and then select the profile option it will redirect to the profile screen. Select Password & Security here; you can find your Username and Access Key and save it for future use. Or use this Profile link.
|
1 2 3 4 5 6 7 8 9 10 11 12 13 14 15 16 17 18 19 20 21 22 23 24 25 26 27 28 29 30 31 32 33 34 35 36 37 38 39 40 41 42 |
# Import required modules import pytest from selenium import webdriver from selenium.webdriver.chrome.options import Options as ChromeOptions from selenium.webdriver.common.by import By # username and access_key is important to run your test on LambdaTest username = "" access_key = "" # Capabilities define the OS, Browser name, and other necessary details lt_options = { "user": username, "accessKey": access_key, "build": "First build", "name": "First Test", "platformName": "Windows 10", "video": True, "w3c": True, # informing latest Selenium 4 being used "browserName": "Chrome", "browserVersion": "114.0", "selenium_version": "4.9.0" } def test_app(): # To run the test on the platform remote_url = "http://{}:{}@hub.lambdatest.com/wd/hub".format(username, access_key) browser_options = ChromeOptions() # adding the capability to the chrome browser_options.set_capability('LT:Options', lt_options) # initializing remote server driver = webdriver.Remote(command_executor=remote_url, options=browser_options) driver.get("https://ecommerce-playground.lambdatest.io/") search_for_key = driver.find_element(By.XPATH, '//*[@id="search"]/div[1]/div[1]/div[2]/input') search_for_key.send_keys("iphone") search_btn = driver.find_element(By.XPATH,'//*[@id="search"]/div[2]/button') search_btn.click() driver.close() if __name__ == '__main__': test_app() |
Understanding the code step by step:
Add your credentials here as it will help the lambdaTest to run tests on your account:
Get your desired capabilities that can be generated from the capabilities generator.
Congratulations on achieving a milestone.
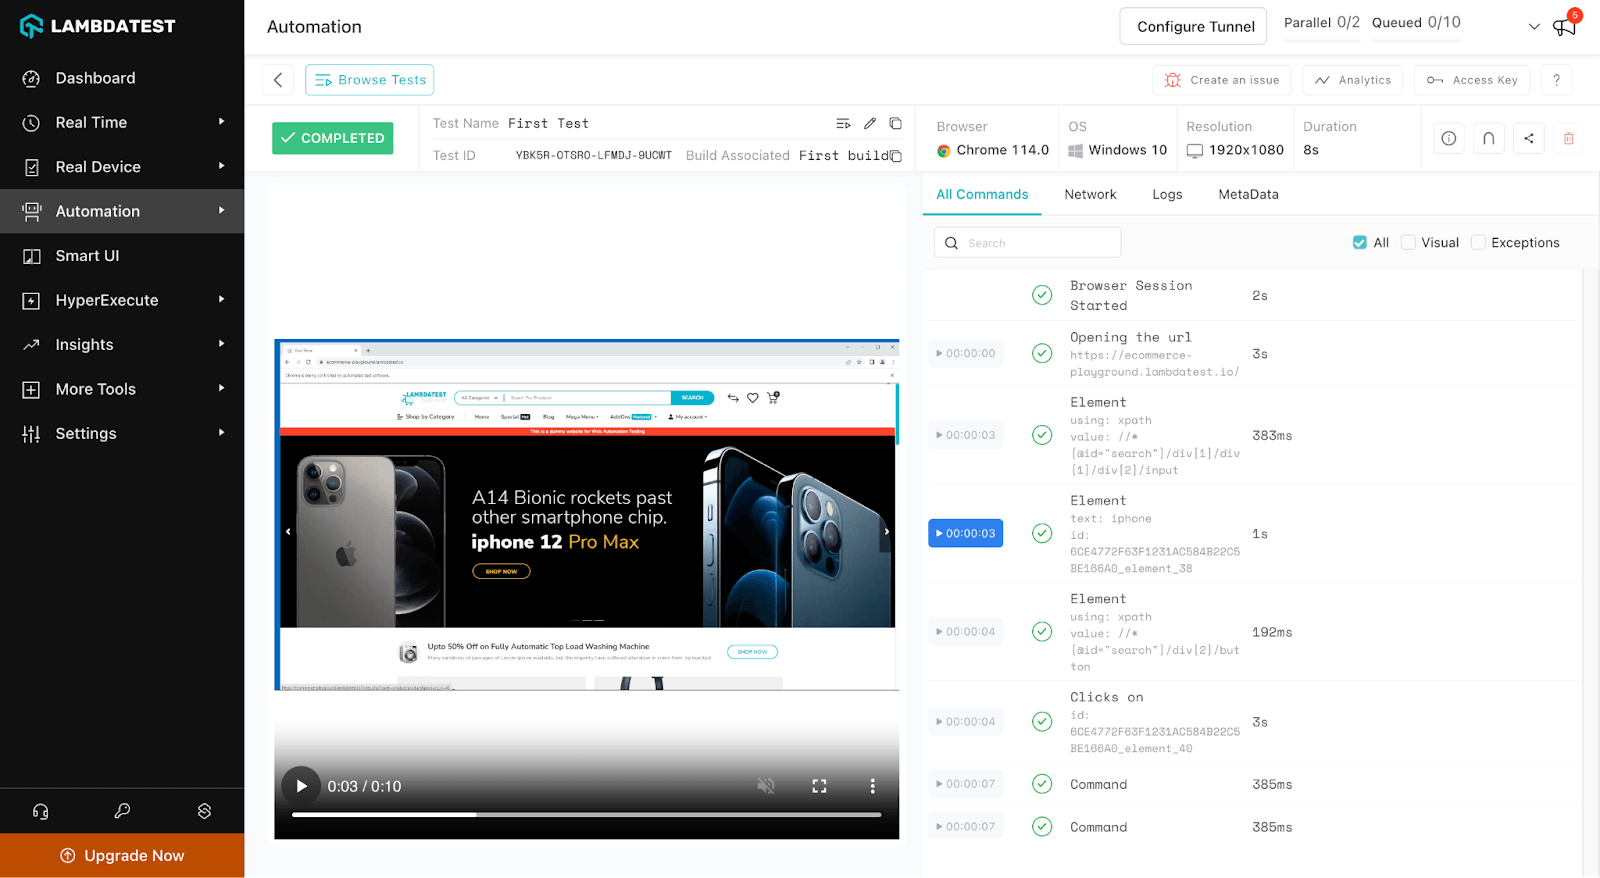
Find details of your test case under Automation>Builds click on the First test to get details of the implementation.
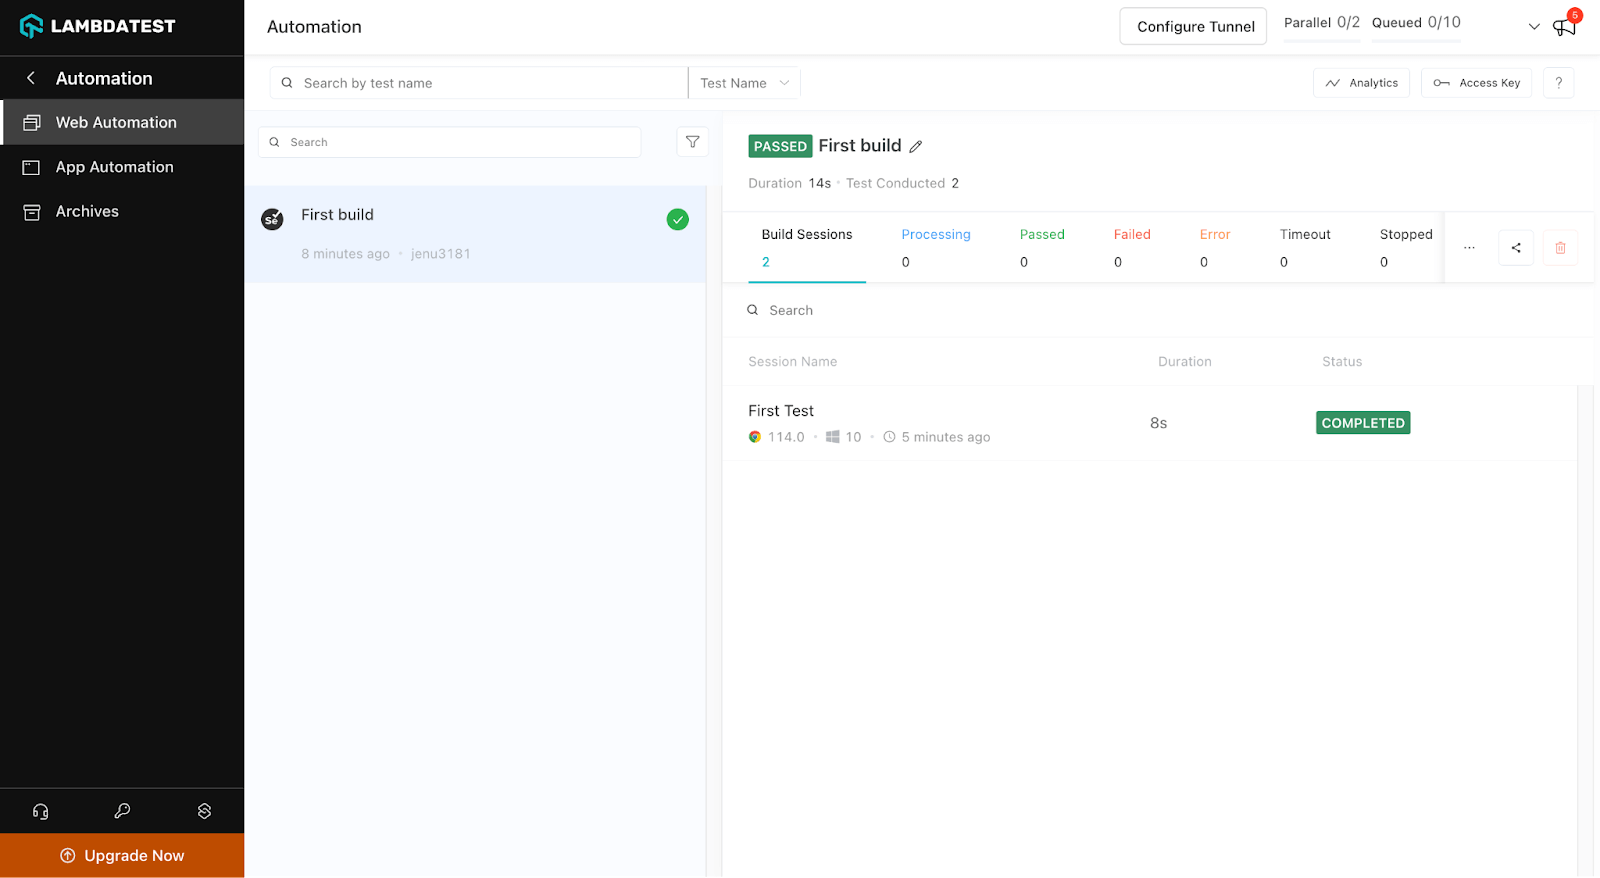
Explore various available test details to get a better idea of the platform.
Conclusion
In a nutshell, Python Selenium with Chrome provides a reliable and adaptable approach to performing testing and automating web-based tasks. In this blog, we’ve covered a variety of Python Selenium with Chrome, starting with how to install and configure ChromeDriver on various operating systems. We gained advanced skills, including drag-and-drop, dealing with pop-ups and warnings, and navigating through history and location. We also learned how to open websites, interact with items on web pages, and execute other basic tasks.
We also go in-depth on some of the extra functionality and personalization choices offered by ChromeOptions, like proxy settings, headless mode, and page load strategies. Additionally, we covered Tips and Tricks to improve Chrome browsing for web automation.
We explored the integration of Selenium with well-known Python testing frameworks like Unittest and Pytest to broaden the scope of testing. As a result, developers can use these frameworks’ robust functionality and reporting skills in conjunction with Selenium.
You may streamline your web automation responsibilities, increase testing productivity, and ensure the quality of your online applications by becoming proficient with Python Selenium with Chrome. You now have a good base to build upon as you continue your exploration and use Python Selenium to its best potential in your projects. Happy automating!
To dive deep into Selenium with Python, follow Python Tutorial with Selenium.
Frequently Asked Questions (FAQs)
What are the significant changes from Selenium 3 to Selenium 4?
Compared to Selenium 3, Selenium 4 brings substantial modifications and enhancements. A new architecture dubbed Selenium Grid 4, stronger support for contemporary web technologies, including the W3C WebDriver Protocol, improved documentation, new APIs for interacting with web elements, and increased debugging abilities are just a few of the essential enhancements.
What is the difference between ChromeOptions and Desired Capabilities?
Both ChromeOptions and Desired Capabilities are used in Selenium for customizing the behavior of the Chrome browser.
- browser options such as window size, user agent, and proxy settings. It provides a more convenient and readable way to configure Chrome-specific options.
- Desired Capabilities, on the other hand, is a generic concept in Selenium that applies to all browsers. It allows you to set a range of capabilities for browser automation, including browser name, version, platform, and other specific settings. Desired Capabilities can be used to customize the behavior of any browser supported by Selenium, not just Chrome.
What are the Python Selenium Chrome best practices?
For efficient automation, it’s crucial that you stick to recommended practices while utilizing ChromeDriver with Python Selenium. For better speed, use headless mode, use explicit waits rather than static sleep, and keep Chrome and ChromeDriver up to date. For maintainable code, specify window size, avoid pointless interactions, and apply the page object pattern. Utilize effective locators like IDs or CSS_SELECTORS, gently handle exceptions, and properly close the browser and driver. Effectively manage sessions and cookies. By following these tips you can improve the dependability, performance, and maintainability of your Python Selenium Chrome automation scripts.


Author’s Profile
Jainish Patel
Jainish Patel is a tech enthusiast specializing in web development. With a primary focus on React.js, React.native, and core front-end languages, He is well-equipped to tackle the ever-evolving world of web technologies. Building sleek and interactive Mobile and web applications is one of his strengths. Moreover, he is passionate about crafting seamless user experiences and transforming ideas into reality through programming.
Blogs: 7
Got Questions? Drop them on LambdaTest Community. Visit now


