
Pytest Django Tutorial: Testing Your Django Apps With Selenium Pytest
Idowu (Paul) Omisola
Posted On: April 5, 2023
![]() 34448 Views
34448 Views
![]() 28 Min Read
28 Min Read
Django reduces the development complexities of large-scale websites. But when developing a website with Django, UI automation testing is as essential as unit testing. Even if your team operates a CI/CD pipeline, you want to ensure you catch bugs earlier and deliver a tested build to the production environment. Although Django’s built-in test client provides a dummy browser for functional testing, it has many limitations.
Selenium overcomes these limitations and comes to mind when testing the template structure, user-DOM interaction, and JavaScript responsiveness. However, for fast, scalable, and measurable Django automation UI testing, a combination of pytest and Selenium gives an excellent result.
As for pytest, it has many valuable built-in features and plugins, making it an ideal testing tool for heavy-duty web frameworks. Thankfully, Django supports pytest and Selenium.
This pytest Django tutorial will teach you how to test your locally hosted Django website on a cloud grid using Selenium and Python. You’ll also see how you can repeat this test in a live version of your Django website.
Watch this in-depth pytest tutorial that will help you master the pytest framework and assist you in writing efficient and effective automation tests.
TABLE OF CONTENTS
- Benefits of using pytest for Django automated testing
- What are pytest fixtures?
- Setting up pytest Django Project
- Testing a Django application with pytest
- Demo: Testing the Django application with pytest
- Testing hosted version of the Django application with pytest and Selenium
- Rounding Up: Simplify pytest Django UI automation testing with Selenium
- Frequently Asked Questions (FAQs)
Benefits of using pytest for Django automated testing
Pytest has some features that make it an ideal Django testing tool. While you might also use the unittest module for Python automation testing, pytest makes your test easy to read and supports parameterized testing.
Below are more benefits of using this framework for pytest Django automation testing:
- Parameterization
Pytest allows you to parameterize your test, simplifying the test class or function and eliminating code chunks.
- Fixtures
Pytest’s fixtures are some of its most valuable features. They help you to manage the test data and separate test code from dependencies. For example, pytest fixtures can be handy for interacting with the database and creating users in a Django app.
- Support for third-party and built-in plugins
Its support for many third-party and built-in plugins makes it a versatile tool for automation and Python unit testing. Some examples of plugins that work seamlessly with pytest include coverage.py and pytest-BDD for code coverage and behavior-driven tests, respectively.
- Support for other testing libraries
Pytest works seamlessly with other testing libraries, including unittest for unit testing and Selenium for UI automated testing.
- Easy Assertions
Unlike unittest, which uses several assertion types, pytest validates expected results using only the assert keyword.
- Django testing support
With the help of the pytest-django library, pytest provides full support for Django UI automation testing and unit testing.
- Detail-oriented
Pytest provides detailed test information, including the test timeframe and the number of test runs.
Run Python Test Scripts across 3000+ browsers & devices. Try LambdaTest Now!
What are pytest fixtures?
We’ll store the admin registration information for our test using pytest fixtures in this pytest Django tutorial.
So what are pytest fixtures?
Pytest fixtures are custom functions that allow you to separate test data and dependencies from the test suite. Fixtures are reusable, making the test code less complex. While they might present limitations in some use cases, they’re customizable and can work in different capacities.
You can also Subscribe to the LambdaTest YouTube Channel and stay updated with the latest tutorials around automated browser testing, Selenium testing, Cypress E2E testing, CI/CD, and more.
You can convert a function into a pytest fixture by adding a fixture decorator (@pytest.fixture), which accepts an optional scope keyword argument. Pytest fixtures even pair seamlessly with Selenium for automated testing.
For example, consider testing a website if it has a particular string in its title. You can separate the test string from the function that gets the website’s title using the pytest fixture, as shown below.
|
1 2 3 4 5 6 7 8 9 10 11 12 13 14 15 16 17 |
from selenium import webdriver import pytest @pytest.fixture def webPageTitle(): driver = webdriver.Chrome() driver.get("https://www.lambdatest.com/automation-demos") return driver.title @pytest.fixture def titleString(): return "Selenium" def test_string_in_webPage_title(webPageTitle, titleString): assert titleString in webPageTitle |
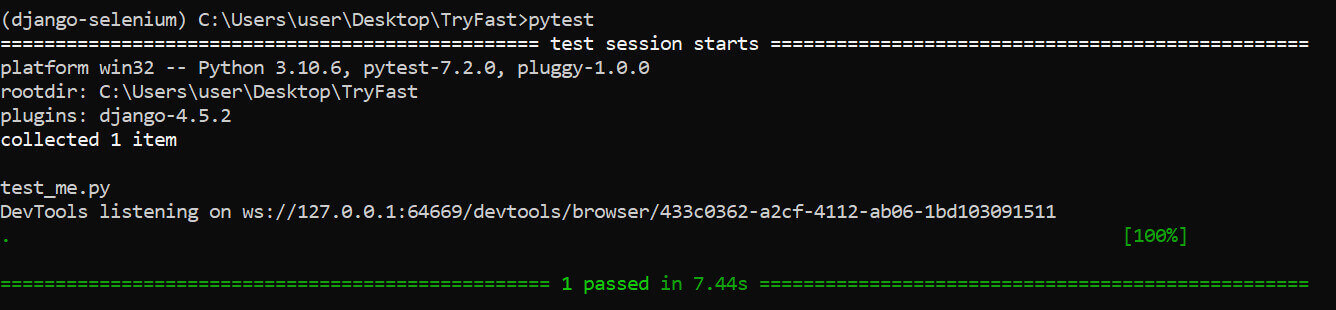
Running the above test using the pytest command runs as shown.
Holding Test Fixtures: What is the conftest.py file?
The conftest.py file connects your fixtures automatically with your test suite without explicitly importing them. So while fixtures are optional and may not be applicable in all test types, pytest looks for them inside conftest.py.
By default, pytest only recognizes fixtures written within the same module. But the conftest.py file allows you to use them across your test directory.
When you write fixtures in the conftest.py file, you don’t need to import them explicitly in your test. Pytest automatically recognizes all functions (with the fixture decorator) inside conftest.py as fixtures.
While pytest maps fixtures in conftest.py automatically, you can’t call them directly in your test modules. You use another pytest fixture to handle the main one indirectly to use it in your test class or function.
For instance, we can rearrange the previous example above by isolating the fixtures from the test function. This also allows us to isolate test dependencies.
To achieve this, create a new test folder. Make a new conftest.py and a test.py file inside that folder. Then separate the test concerns as shown.
As seen in the example above, you don’t need to import the fixture explicitly into test.py to use them.
Open your terminal to your test folder and run the following command:
|
1 |
pytest test.py |
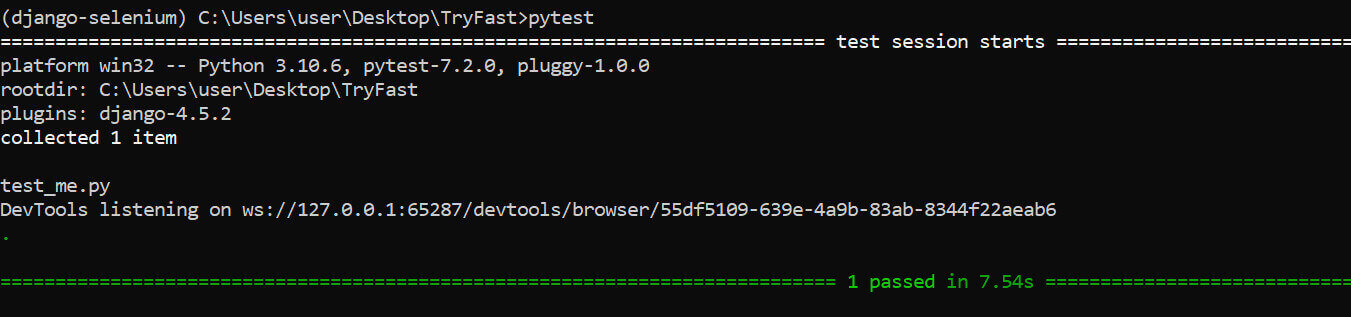
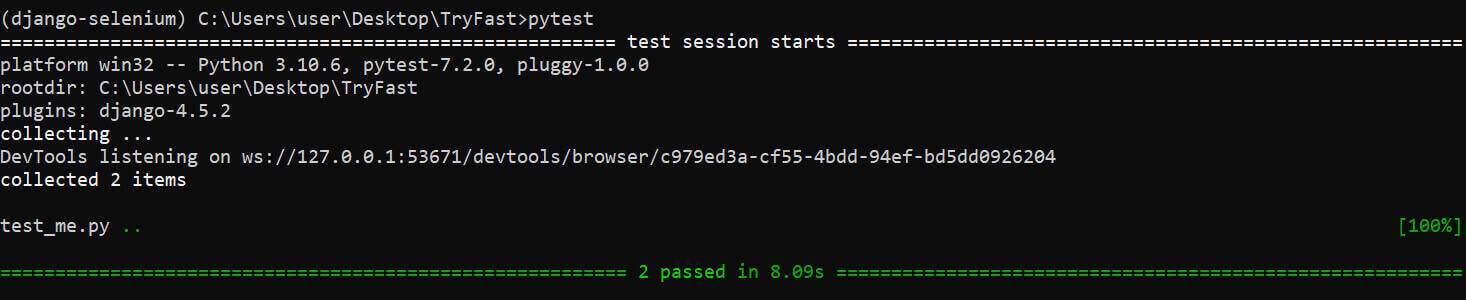
The test runs successfully, as shown below.
Parameterized Fixtures
Fixtures are also parameterizable, allowing you to execute several tests in one test function. Let’s take a quick look at its usage in the following example.
In this section of the pytest Django tutorial, you will visit two websites and check if the action is successful by asserting that a particular string is present in each web title.
You could write the test for each website as a boilerplate, as shown:
|
1 2 3 4 5 6 7 8 9 10 11 12 13 14 |
from selenium import webdriver driver = webdriver.Chrome() first_website = "https://www.lambdatest.com/automation-demos" second_website = "https://www.lambdatest.com" def test_first_web_page(): driver.get("https://www.lambdatest.com/automation-demos") assert "Selenium" in driver.title, "Selenium should be in the title" def test_second_web_page(): driver.get("https://www.lambdatest.com") assert "LambdaTest" in driver.title, "LambdaTest should be in the title" |
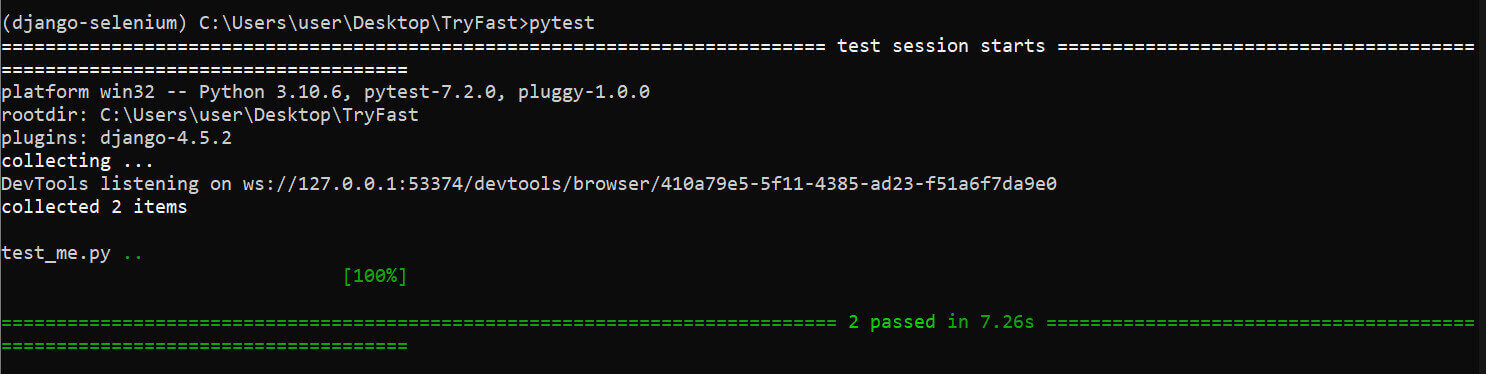
The two tests pass, as shown below.
But we can eliminate this boilerplate by passing the websites as parameters in our test function. Hence, a single test function validates the result instead of the separate units.
When parameterized, the code becomes the following.
|
1 2 3 4 5 6 7 8 9 10 11 12 13 |
import pytest from selenium import webdriver driver = webdriver.Chrome() first_website = "https://www.lambdatest.com/automation-demos" second_website = "https://www.lambdatest.com" @pytest.mark.parametrize("allWebsites", [first_website, second_website]) def test_all_customer_outputs(allWebsites): driver.get(allWebsites) assert "Selenium" and "LambdaTest" in driver.title, "Selenium and LambdaTest must be in titles" |
The test visits each website in the list and validates the input data, as shown.
However, while a parameterized fixture shortens the code, its limitation is that you might not have the flexibility of customizing the error message for each expected output, as done in the previous chunked code above.
Setting up pytest Django Project
If you don’t already have a running pytest Django project, you can set it up using the brief explanation below if you’ve not done so already. This pytest Django tutorial runs on Python 3.10.6. But earlier versions also work perfectly. So we also assume you have Python running on your machine.
To start, create a project directory and make a new Python virtual environment in that folder. For this stage, you can use the virtualenvwrapper or Python’s built-in virtualenv package, depending on what works best for you. Ignore this step if you’re already working in a virtual machine or your project uses a containerized environment.
Next, install Django in your virtual environment.
We also used the markdown package for the website demo used in this pytest Django tutorial. So while it’s not a requirement, you might want to install it.
Create a requirements.txt file in your project root folder and list the packages as shown.
While django-markdown-deux is optional, it provides a markdown template for the pytest Django project. So I’ve added it since it’s a requirement for the Django project used in this pytest Django tutorial to work as expected.
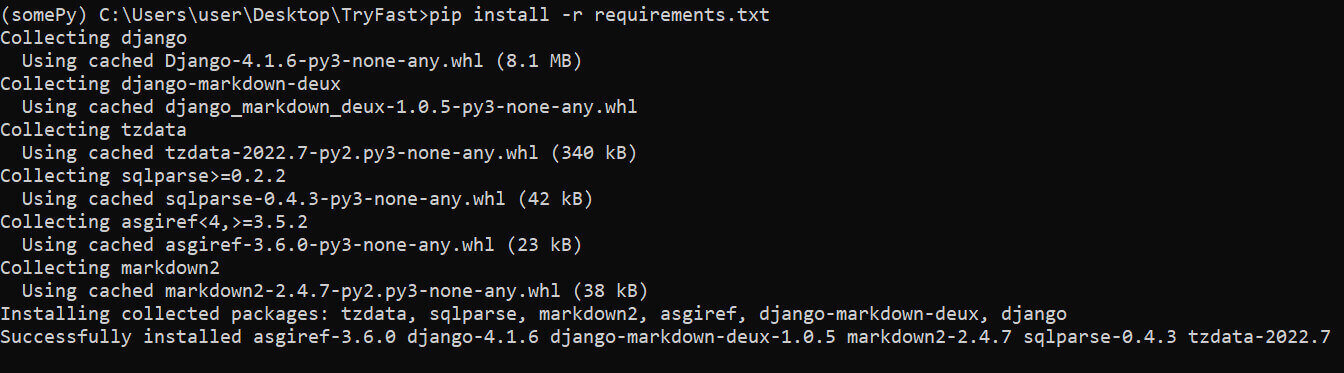
Run the installation of the requirements using pip:
|
1 |
pip install -r requirements.txt |
The installation runs as shown below.
Why use Django for large-scale websites?
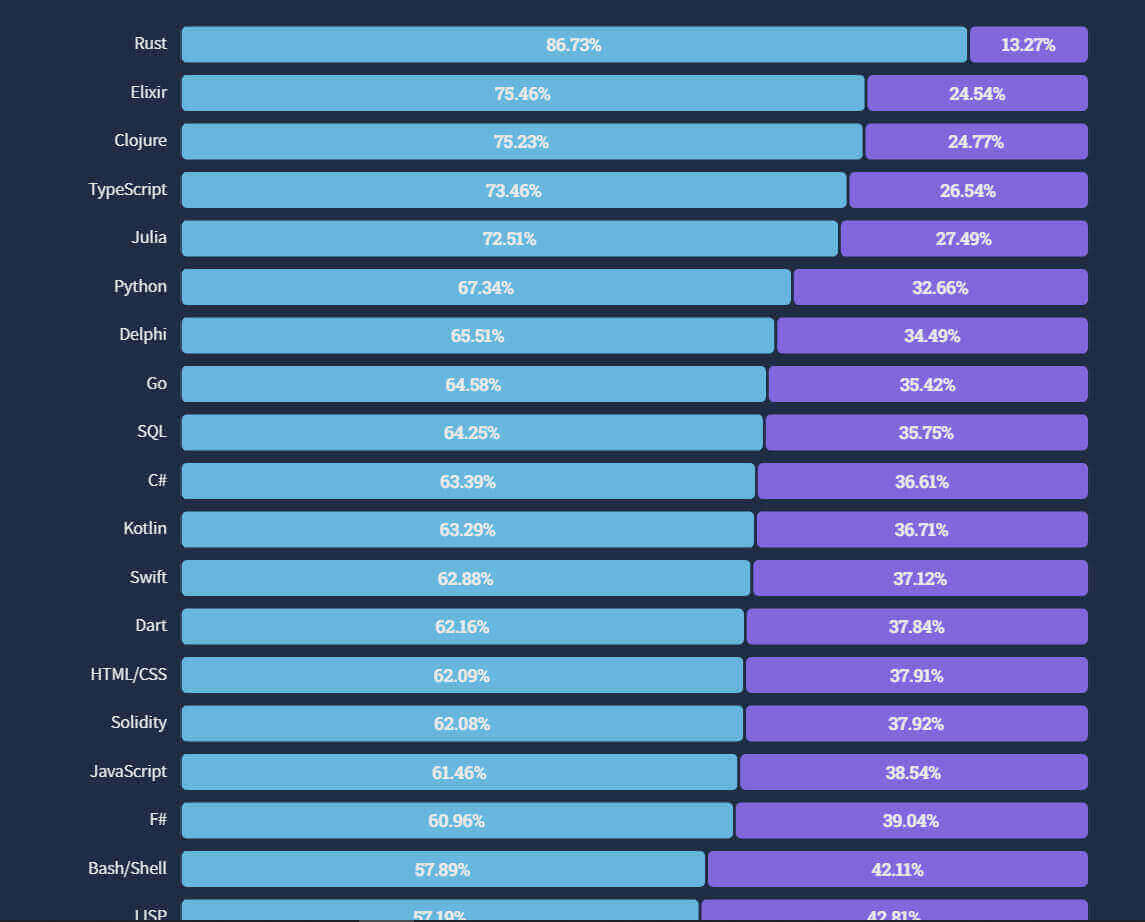
The 2022 Stack Overflow Developer Survey shows that Python is one of the easiest programming languages. Since Django is a Python web framework, it allows you to develop a complex website by leveraging Python’s simplicity.
Some alternatives to Django include Flask, Pyramid, web2.py, CherryPy, Tornado, and FastAPI, among others. But Django’s structure smoothens the development pipeline, helping the development team to achieve a viable product on time.
Besides testing support, here are some reasons Django is suitable for developing large-scale websites:
- Scalability
Django offers a robust and horizontally scalable architecture that allows you to add more layers to your website. Its URL pattern gives it rigidity for accommodating multiple requests at a time.
- Top-notch security features
Django offers built-in security against cross-site scripting (XSS), clickjacking using the X-Frame-Option middleware, cross-site request forgery (CSRF), and SQL injection using query sets.
- Built-in admin interface
Building an admin interface consumes development time. Django eliminates this, as it comes with a built-in, well-styled admin engine that’s easy to use for content creators and less programming-savvy individuals.
- Object-relational mapping (ORM) support
Django’s ORM support allows it to link several models seamlessly in relational databases.
- Seamless database setup
Using Django’s settings.py file
- Easy SMTP integration
You can configure an SMTP protocol easily inside the settings.py. It also supports third-party, real-time SMTP monitoring tools like Sentry.
These features reduce development time, making Django a suitable Python framework for developing complex websites.
Testing a Django application with pytest
The next step is to configure your pytest Django project. This involves creating an initiation file that points your tests to your Django project settings file. But let’s install more dependencies before moving ahead.
Installation of Test Dependencies
Since this pytest Django tutorial demonstrates how to use Selenium and pytest for UI automation testing with Python in Django, we’ll install pytest, pytest-django, and Selenium.
To install these test packages, append the list of dependencies in your requirements.txt file as shown.
|
1 2 3 4 5 |
django django-markdown-deux pytest pytest-django selenium |
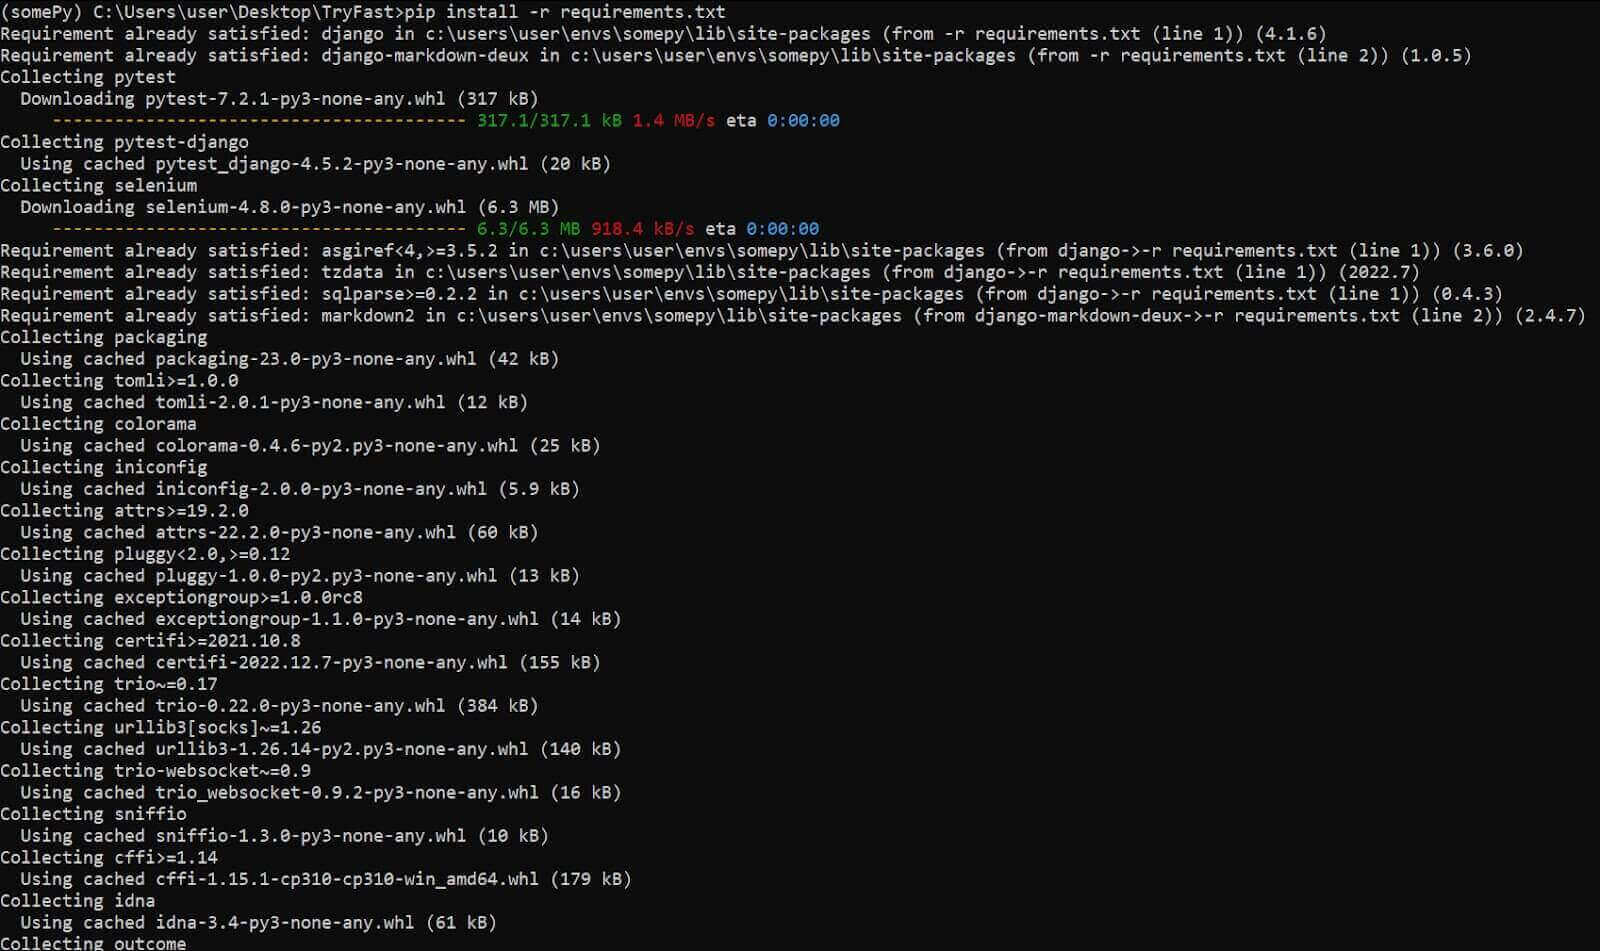
Now, run the installation again.
|
1 |
pip install -r requirements.txt |
The installation runs as shown. Note how it skips the dependencies we installed previously.
What is pytest-django?
The pytest-django module is a pytest plugin that facilitates Django testing with pytest. It also lets you configure your pytest Django project to work inside the pytest.ini file.
Generally, pytest-django is the plugin that allows pytest to identify your Django project. Additionally, it lets you use pyest’s marker helpers, fixtures, and other pytest plugins with Django without hassle.
Configuration of pytest.ini
Next, create a pytest.ini file in your project root. This is an initialization file that connects your Django project with pytest. You can configure your test behavior using this file, including default database usage.
Below is the simple configuration used in this pytest Django tutorial.
DJANGO_SETTINGS_MODULE points our test to the pytest Django project settings file. This is a feature of the pytest-django plugin that allows pytest to inherit the configurations of your Django project.
We use filterwarnings to ignore deprecation warnings since we want to see a clean log of our test runs. We also like the test execution to be as fast as possible. So we declare –reuse-db in the addopts configuration to allow our test to re-use the previous database instead of creating a new one for each test instance.
Creation of Django Test Directory
A dedicated test folder will enable you to separate your test suite from your pytest Django project. Doing this can be handy when the test codebase is large.
Go to your Django project root directory and create a new test folder. You can create other folders within this directory to handle your test files.
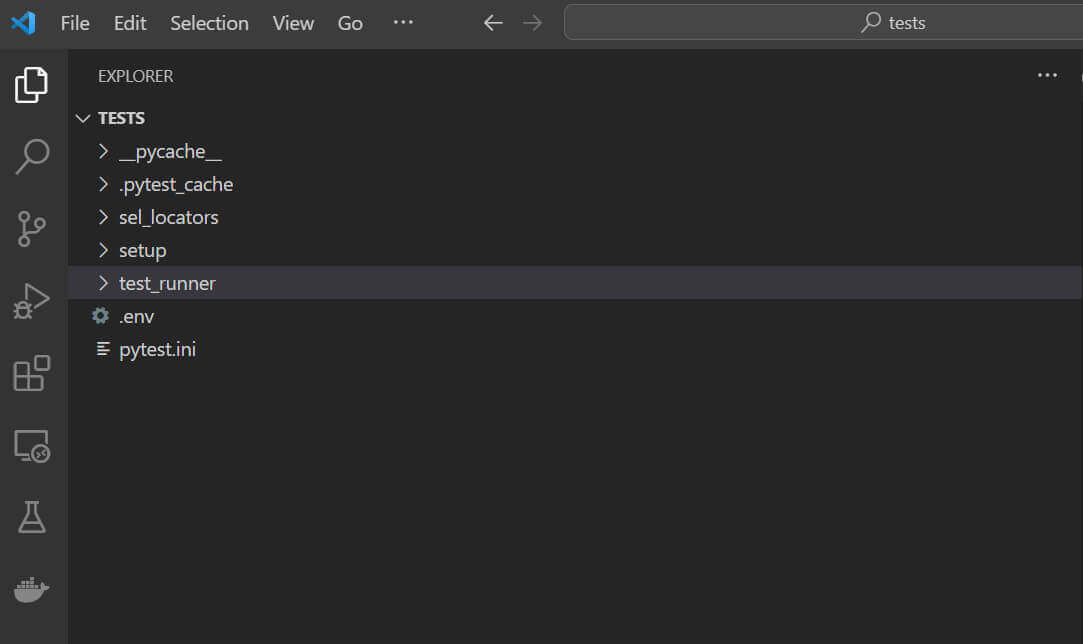
Project Structure
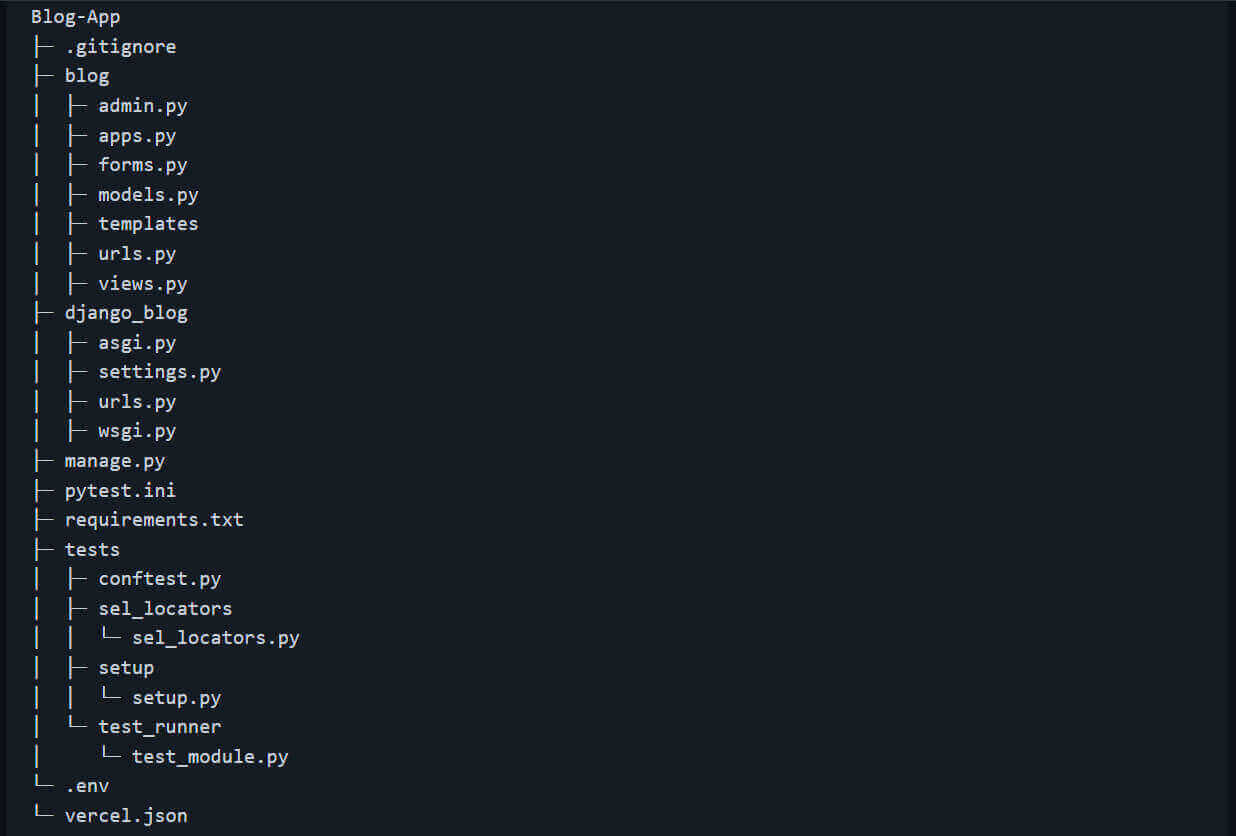
Below is how the project structure looks in VS Code:

Let’s take a closer look at the tests folder to see what each directory and file does.
Test Directory Structure
The Django test directory structure typically includes a “tests” module within each Django app directory, where app-specific tests can be organized and stored. Additionally, the project directory may also contain a top-level “tests” directory for project-wide tests that don’t belong to a specific app.
sel_selectors directory:
The sel_selectors folder contains the module that handles all DOM selectors for Selenium (sel_selectors.py). This module holds the selector class used to perform web actions in the test runner file (test_runner/test_module.py).
setup folder:
The setup directory has the file containing general test requirements and driver configuration for the Django test (setup.py). The setup.py file provides the Settings class for accessing the grid, opening the browser instance, closing the browser, and quitting the test suite.
test_runner folder:
This folder contains the main Python file (test_module.py) that runs the test suite and feeds pytest with relevant test information.
Demo: Testing the Django application with pytest
Let’s briefly explain our Django test goal before we begin.
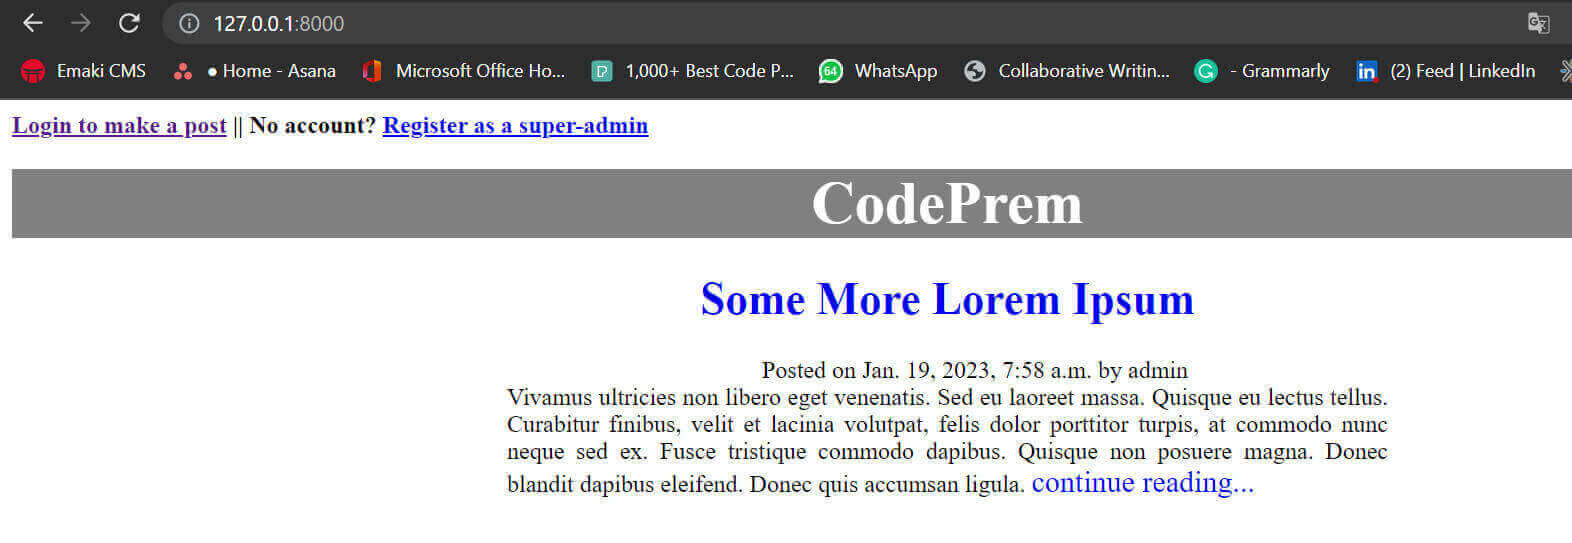
Our project is a simple blog with an admin backend where a superuser can publish posts. So our test goal is to create the superuser for each test instance, visit the login page and log into the admin panel. Then fill in the form fields.
Below is a screenshot of the login page for our locally hosted Django website.
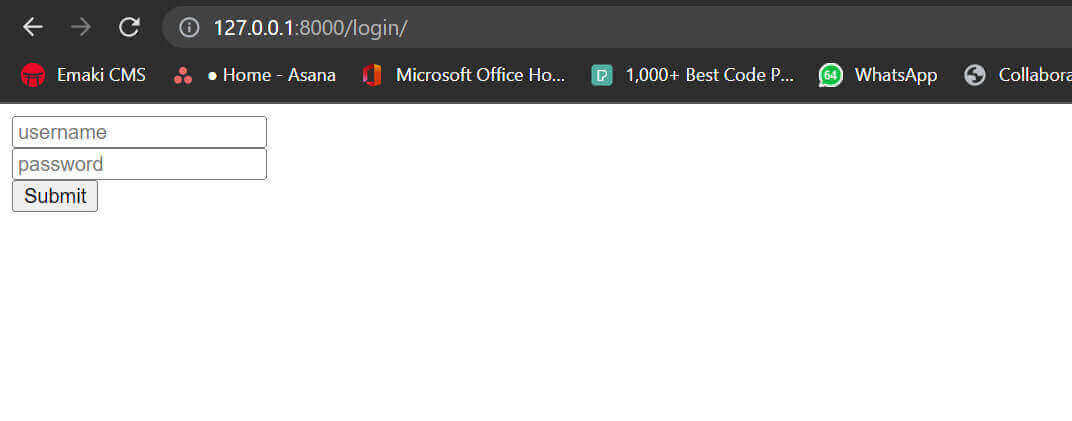
Then finally, we publish a post by ticking the Published checkbox and clicking the Submit button.
The admin page of the locally hosted Django website looks like this:
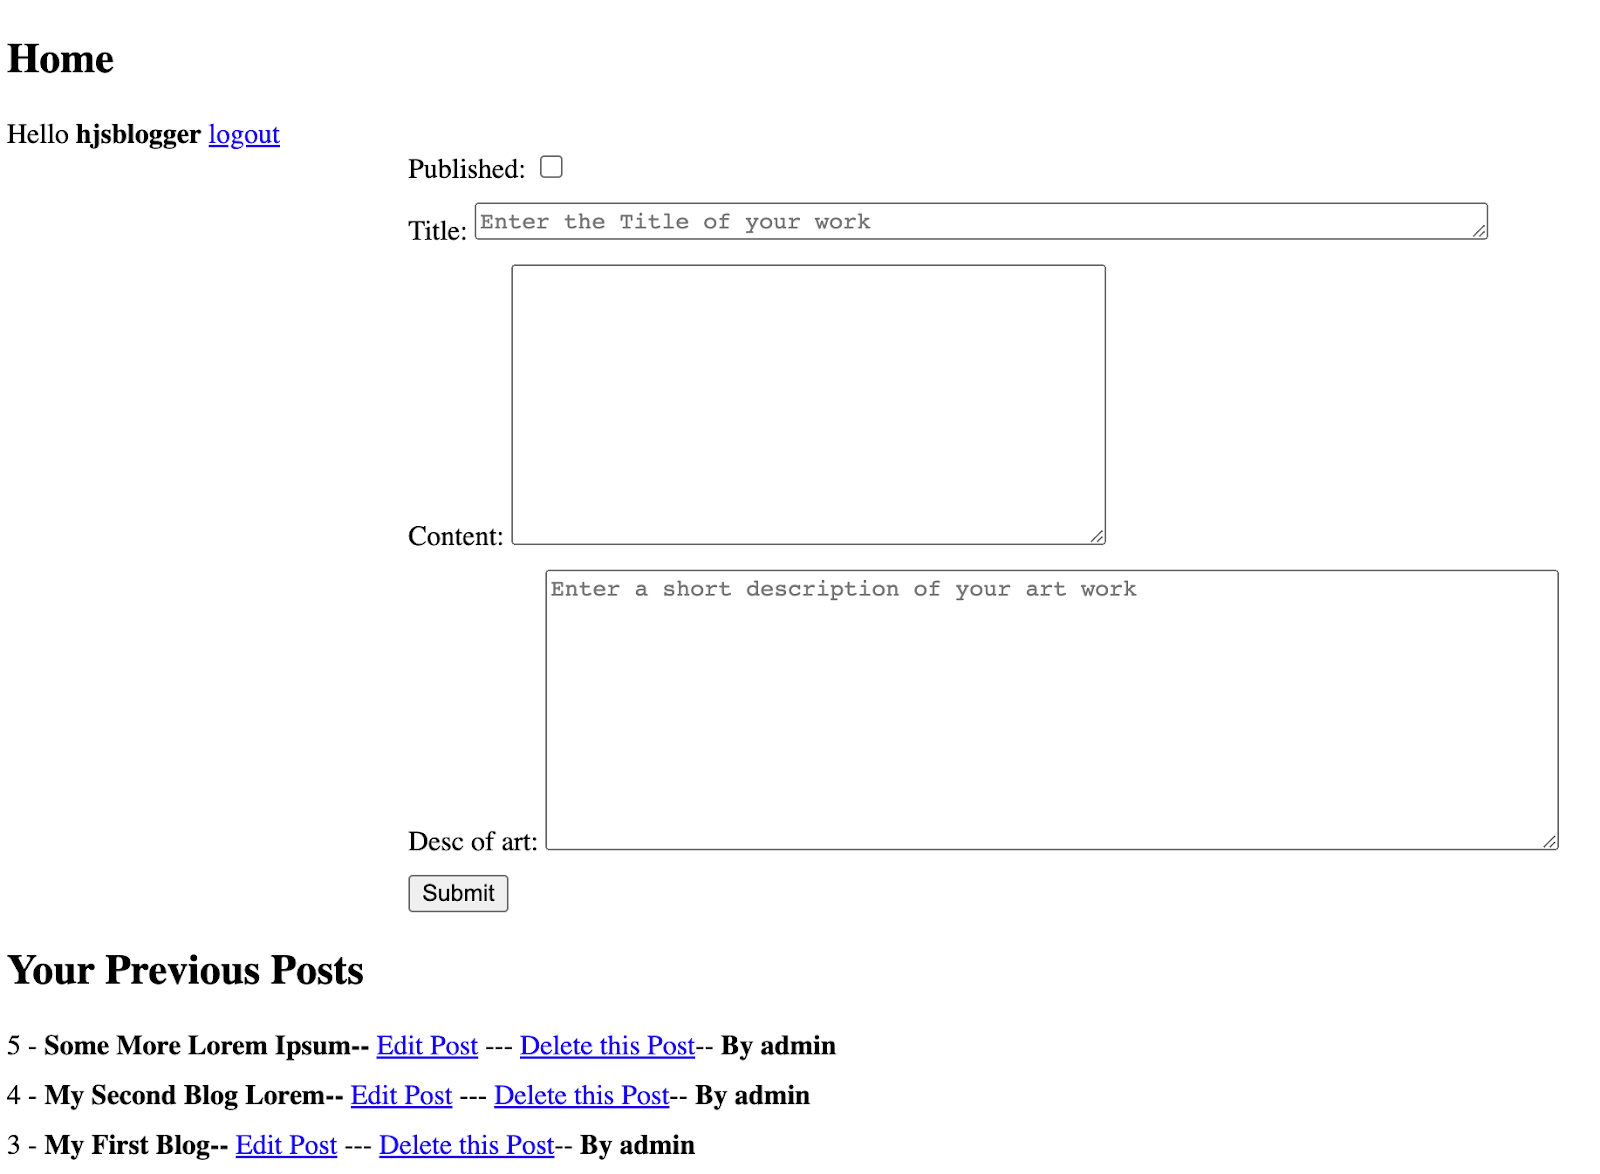
We expect to visit the homepage after publishing a post. So we create an action for that action as well. See the homepage below.
This section of the pytest Django tutorial will demonstrate the test using the locally hosted pytest Django project. We will do the same when finally hosted—you’ll see this later in the section of this pytest Django tutorial.
Test Scenario:
Below are our test steps:
- Log on to the login page.
- Fill out the username and password fields with the superuser’s credentials.
- Click the login button to enter the post editor engine.
- Fill out the post fields.
- Tick the Published checkbox.
- Click Submit to publish the post and visit the homepage.
Set up your Grid Tunnel to allow local testing
To run the locally hosted Django website, you need a tunnel to establish a connection with a Selenium cloud grid, like LambdaTest. So the tunnel serves as a temporary server for each test instance.
LambdaTest is a digital experience testing platform that enables you to perform Python web automation across 3000+ real browsers and platform combinations. It supports different Python-based testing frameworks like pytest for Selenium Python testing.
Visit our support documentation to get started with Selenium Python testing.
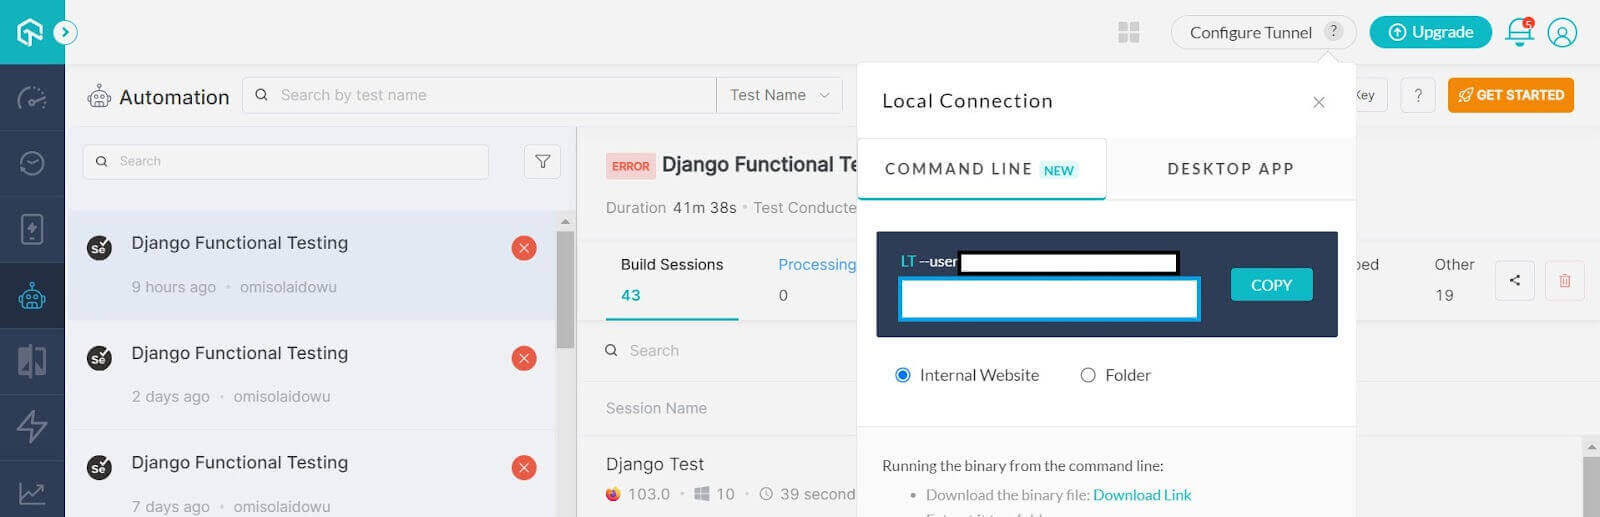
To set up a tunnel on the LambdaTest cloud grid:
- Download a compatible version of the tunnel from LambdaTest. Extract the file once downloaded.
- Go to the build section of your dashboard.
- Click Configure Tunnel at the right.
- Copy the tunnel connection string.
- Open your command line to the extracted tunnel file destination.
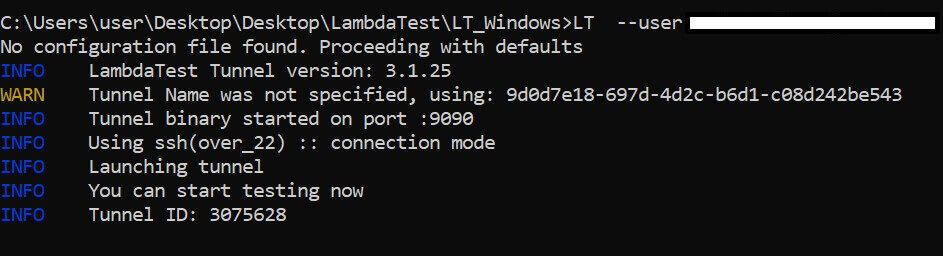
- Paste the copied string in the command line and press enter to start your tunnel.
- The tunnel runs as shown below.
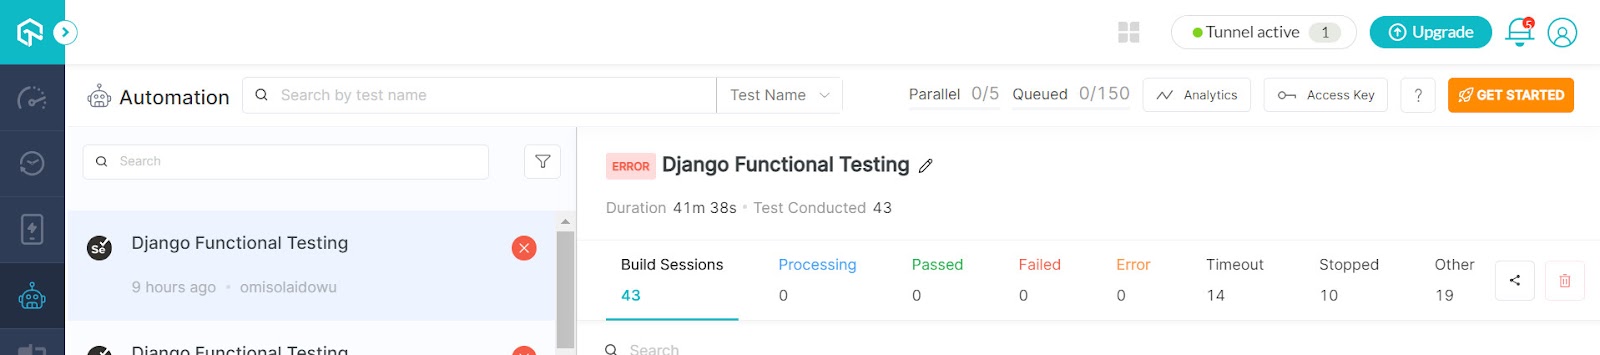
- When you refresh your builds dashboard, Tunnel active replaces Configure Tunnel at the top right.
Add a conftest.py file
As mentioned, the conftest.py file holds test fixtures, which are perfect for handling test data, states, and dependencies.
In this pytest Django tutorial, we handle the superuser creation function for our test using the pytest fixture. We place it inside conftest.py since we want to separate it from the bulk Django test suite.
To add the conftest.py file to your Django test suite, create a new file in your test folder and name it conftest.py.
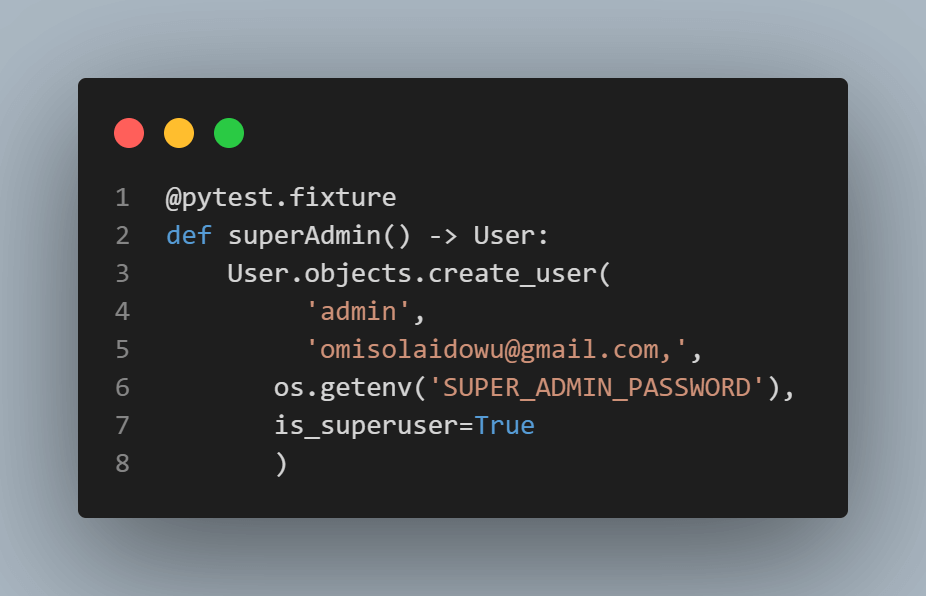
Below is our superuser creation fixture.
The above code creates a superuser for logging into the Django app. This fixture runs only once. So we don’t need to bother about duplicate user keys.
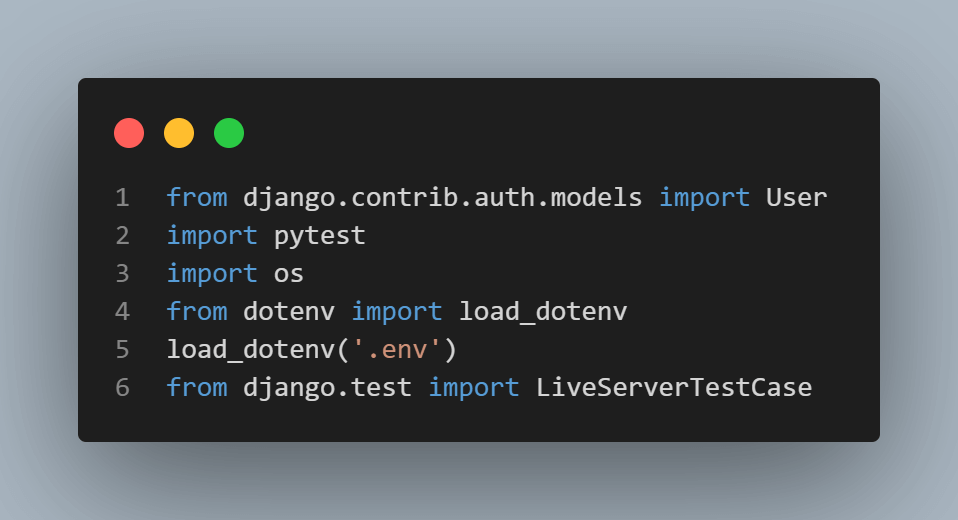
Creating a superuser for our test is easy since Django has a built-in User model. We import the User model from Django to create a superuser in the superAdmin function, which returns a User instance. Using the @pytest.fixture decorator, pytest sees this function as a fixture.
We also import the LiverServerTestCase class from Django. This provides a live server for running the UI test. When inherited, we can mimic a live test using the liver_server_url attribute.
However, superAdmin is a base fixture. Django knows to create a superuser from the given parameters because we set is_superuser to True.
As we mentioned, you can’t call a fixture directly in a test without passing it to a handler (typically, another fixture).
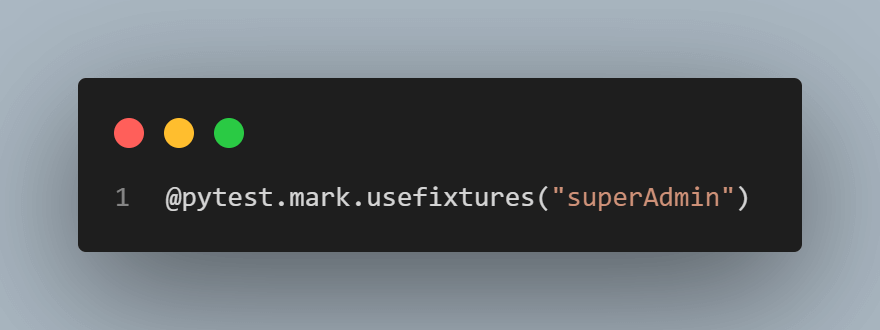
While you can call a fixture inside another directly without issues, it’s different when dealing with a class, as we need to pass the @pytest.mark.usefixtures decorator over it.
The @pytest.mark.usefixtures decorator allows you to specify the fixture to use in a class method. In this case, the admin class can feed its methods with the superAdmin function fixture, as listed in the usefixture decorator.
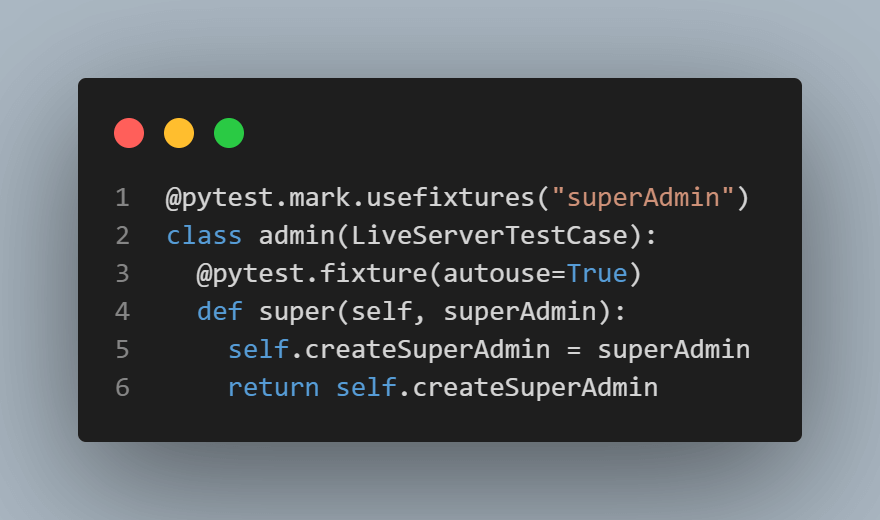
Although the test runner class (test_module.py) might inherit LiverServerTestCase directly, the admin class inherits it instead since the test runner class will still inherit the admin class.
Thus, while the test runner class inherits the admin attributes, it also does so LiverServerTestCase and can use the liver_server_url attribute from that class to open the web URL.
The super method has to be a fixture since only a pytest fixture can call another one directly before it’s usable in a test class or function. This class method returns an admin attribute (self.createSuperAdmin) using the superAdmin Pytest fixture.
Hence, calling self.createSuperAdmin in our test runner class creates a superuser with the specified email address and username for every test execution.
Setting up the Django test
The test setup follows the typical setup and tear-down functions for expanding the browser window and closing it, respectively.
However, you need to grab your grid username and access key if you’re using a cloud grid, as you need to provide these inside your desired capabilities.
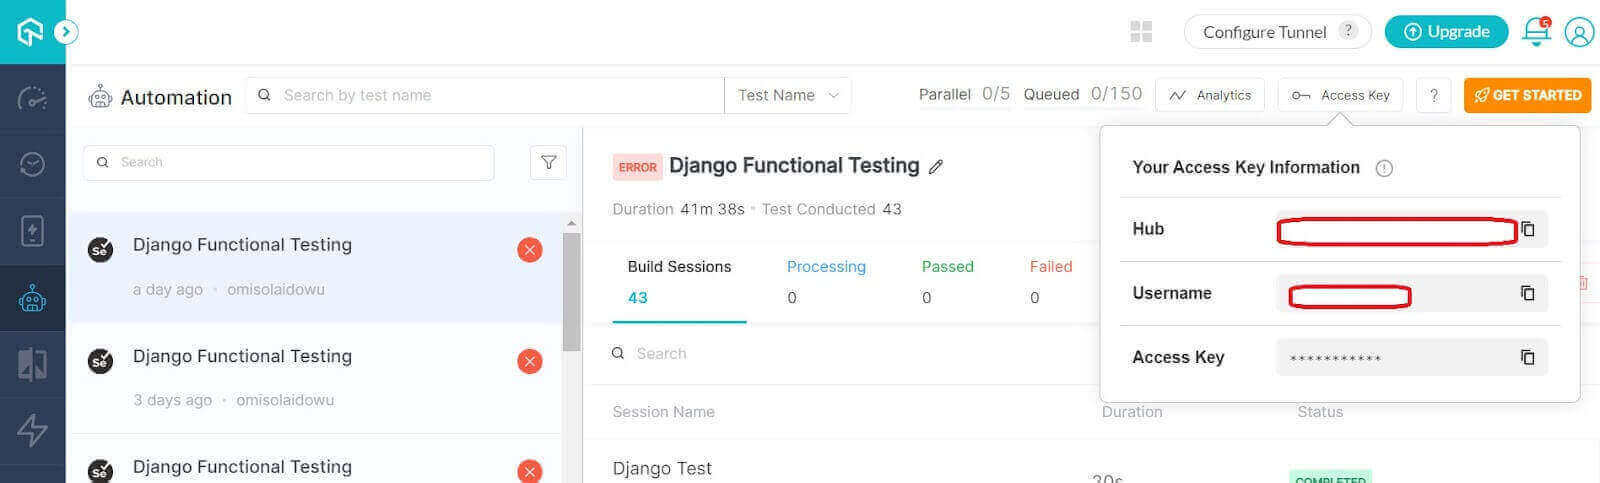
If you’re using the LambdaTest cloud grid, follow these steps to get your username and access key.
- Log into your LambdaTest Dashboard and go to the Builds directory.
- Click the Access Key at the top right.
- Copy the Username and Access Key fields and paste them into your environment variable (.env) file as shown.
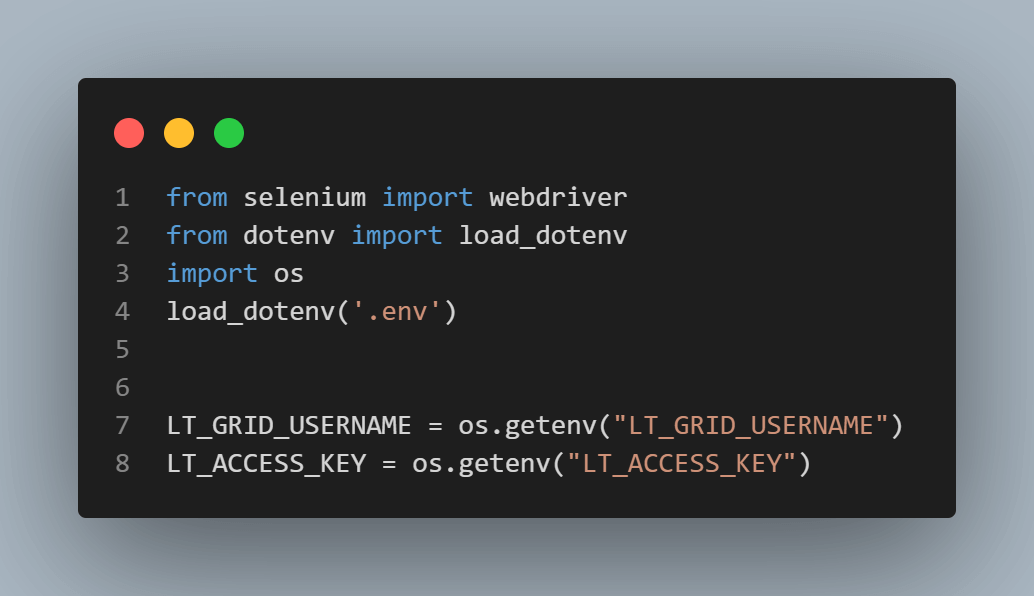
Now let’s go ahead with the Django UI automation test setup.

We start the setup by importing the Selenium WebDriver. Next is the extraction of our grid username and access key from the .env file using the os.getenv function.
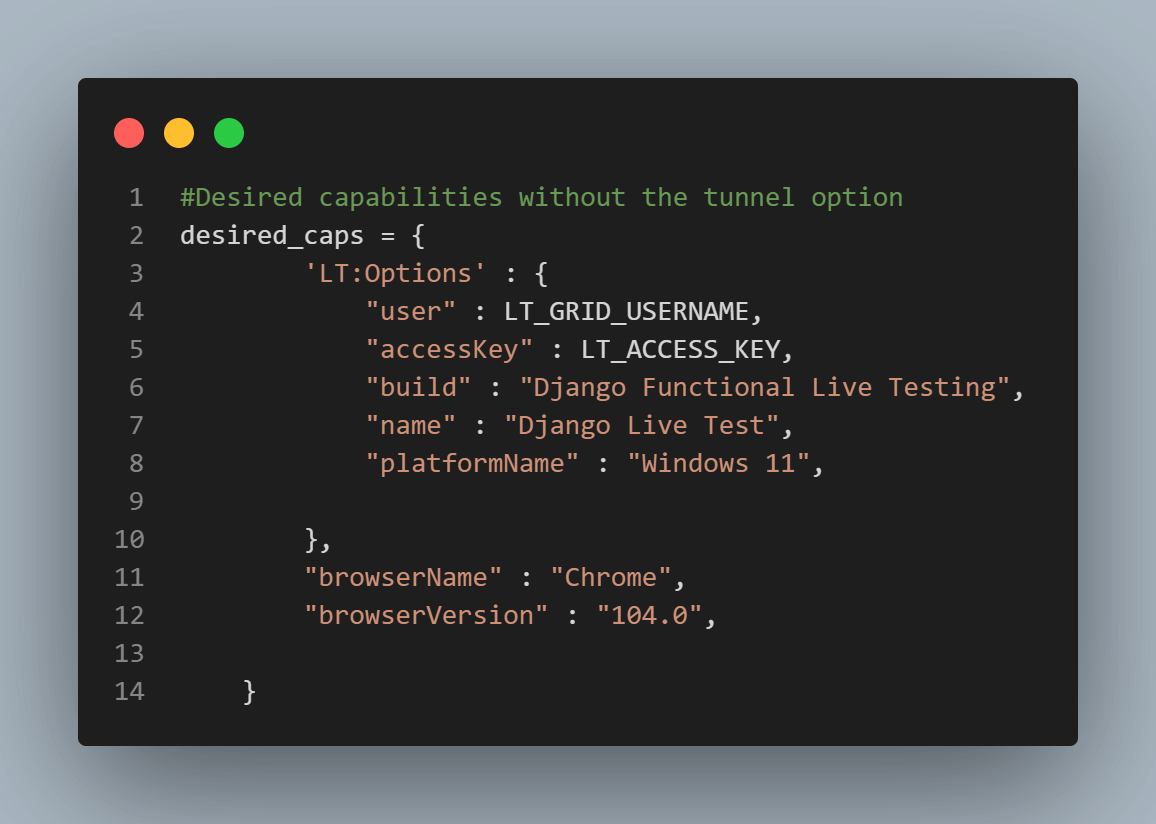
Specifying these variables inside the desired capabilities, as shown below, allows us to access the cloud grid browser and platform instance. And since the test uses a tunnel, we also add a tunnel option to desired_caps and set it to True, so the Selenium cloud grid knows we’re testing from a local machine.
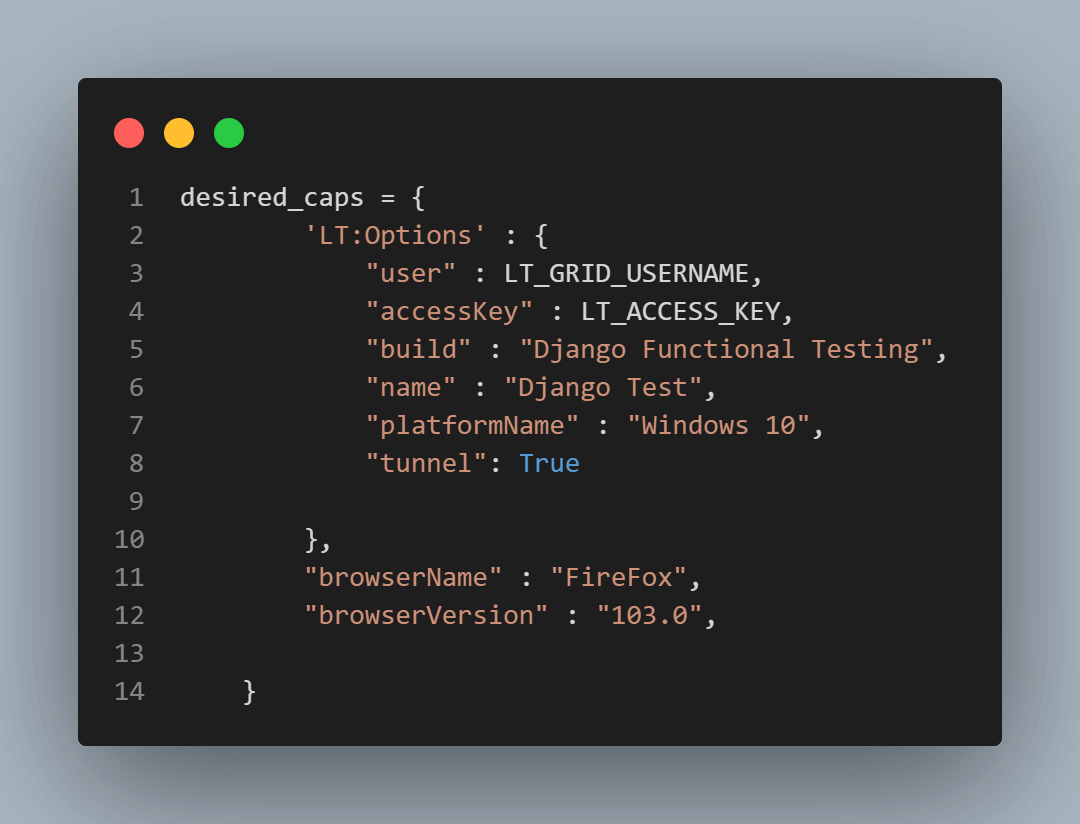
Note: Since setting tunnel to True is only applicable when testing a locally hosted website, remove or set it to False when switching to a live test.
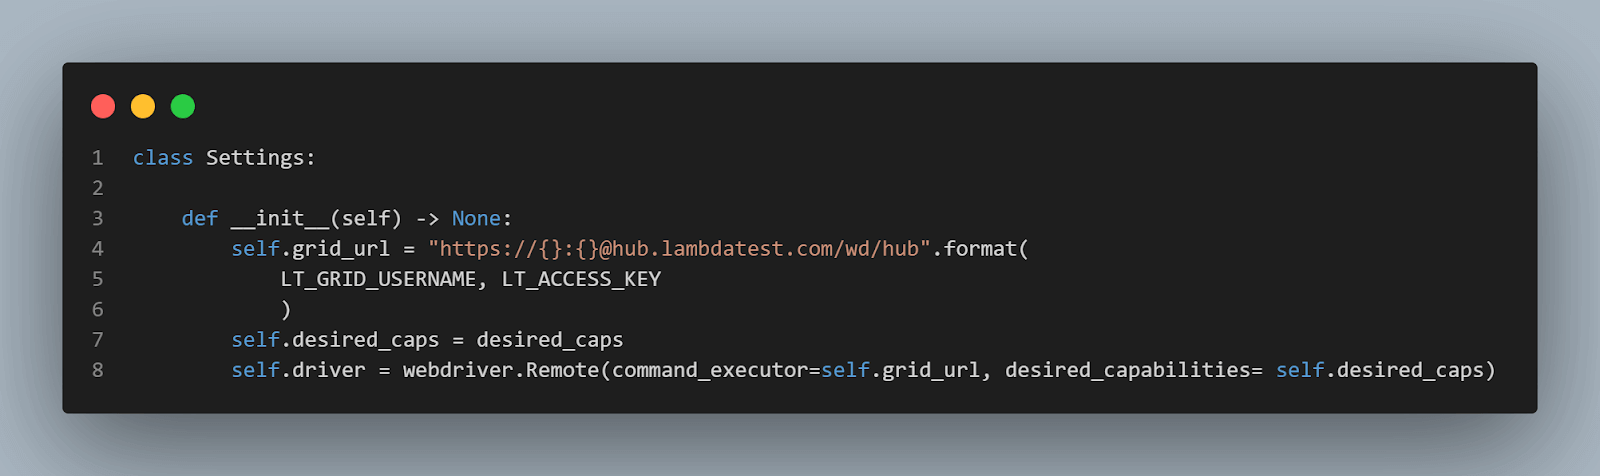
The grid URL also requires the username and access key for full access to the cloud grid. We declare this as an attribute of the Settings class. We further use this to configure the Selenium web driver (passed as self.driver), as shown below.
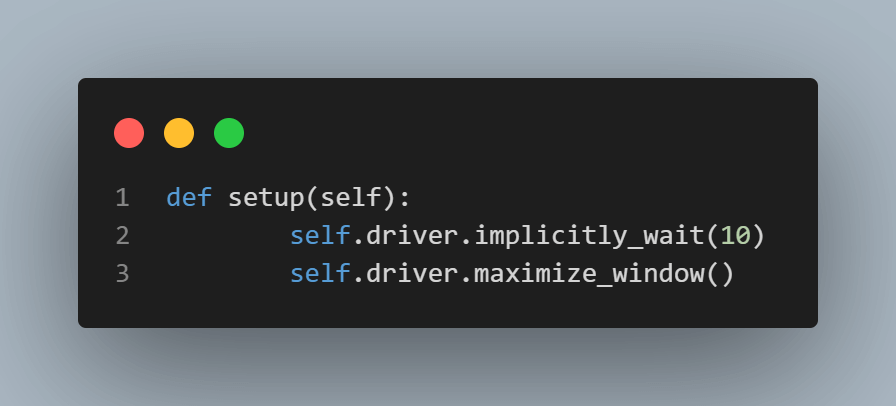
Next up are the setup and tearDown functions. The setup delays the browser for 10 seconds for the DOM to load resources. It then maximizes the browser window for web access.
The tearDown function checks if the test has a running driver and quits it if the condition is True.
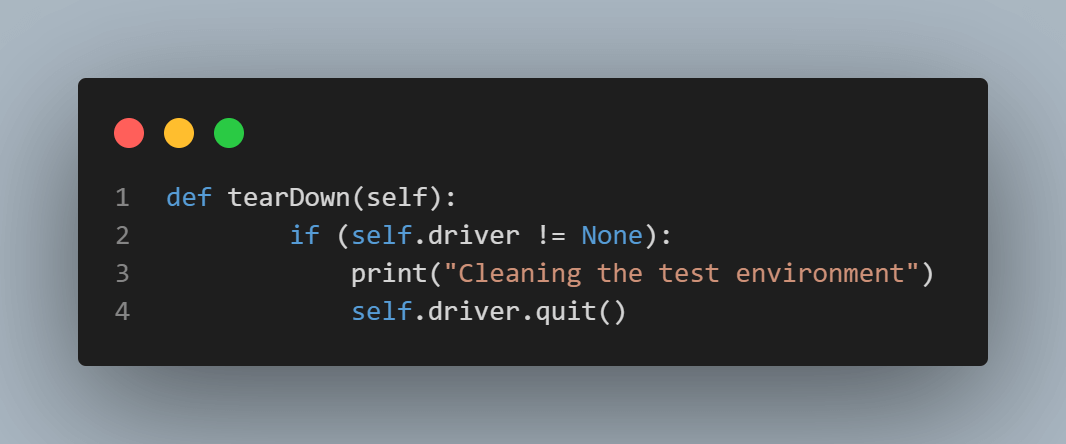
However, the tearDown function must execute after the test runs all required scenarios. Otherwise, calling tearDown before any test scenario will close the browser and quit the Django test before completion.
Create the Selenium Selector Class
Getting the selectors from the DOM is easy since the project is probably still on your local machine. Even if you’ve deployed to production, inspecting the DOM via the browser exposes the web elements.
Inspecting the web elements
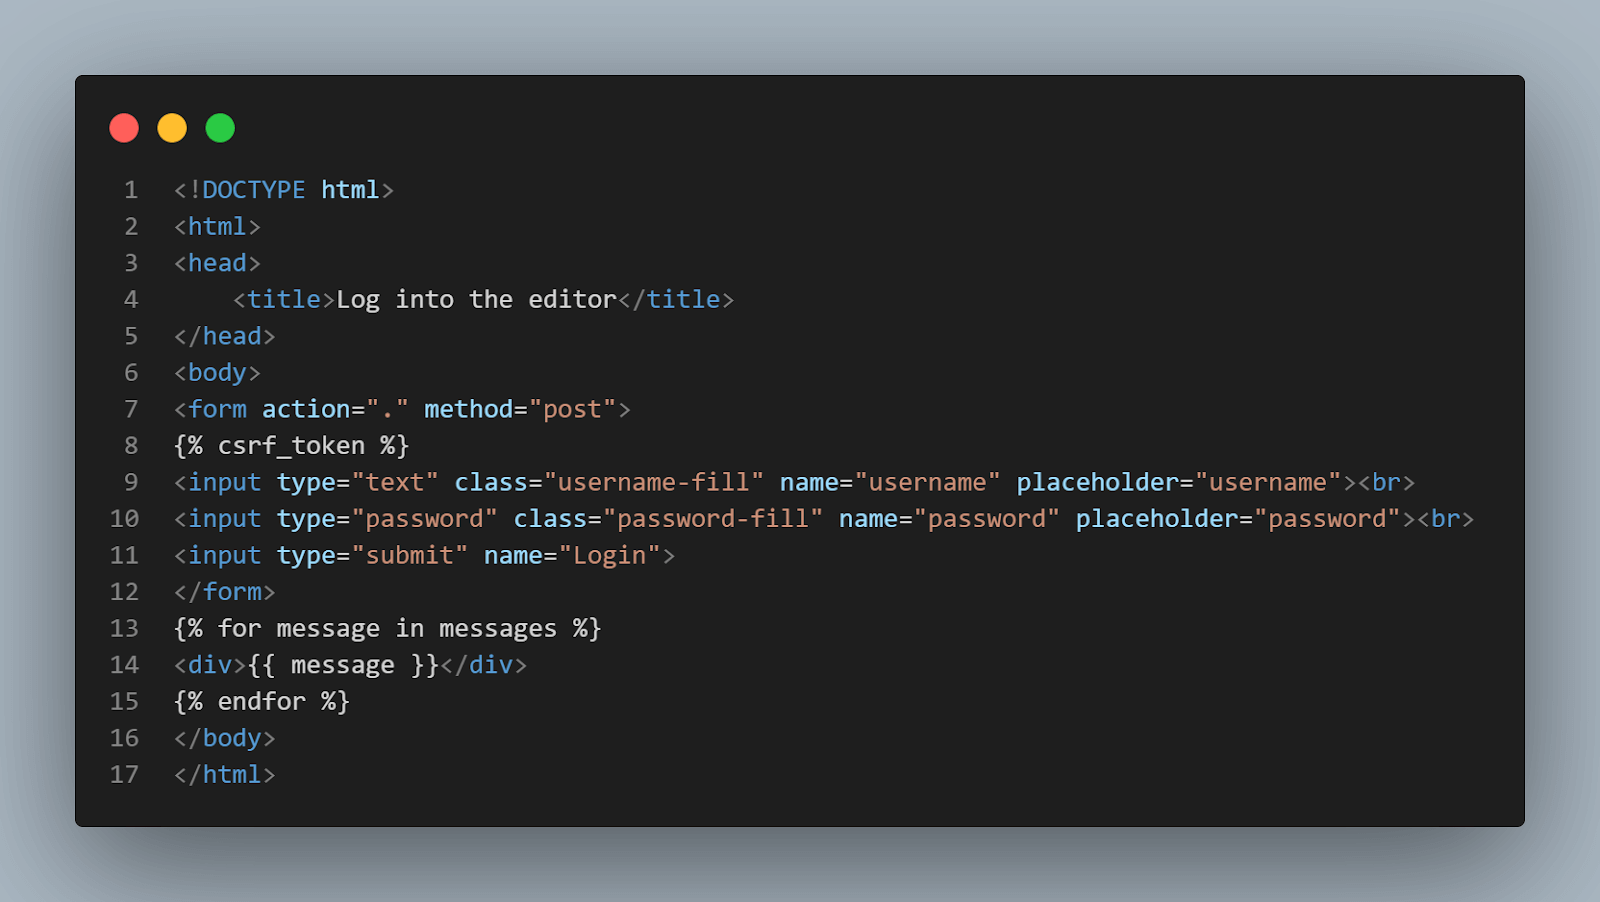
The project is still locally hosted in this case. We need Selenium to interact with two templates; templates/engine.html and templates/login.html.
Let’s view the login template to assess its DOM structure.
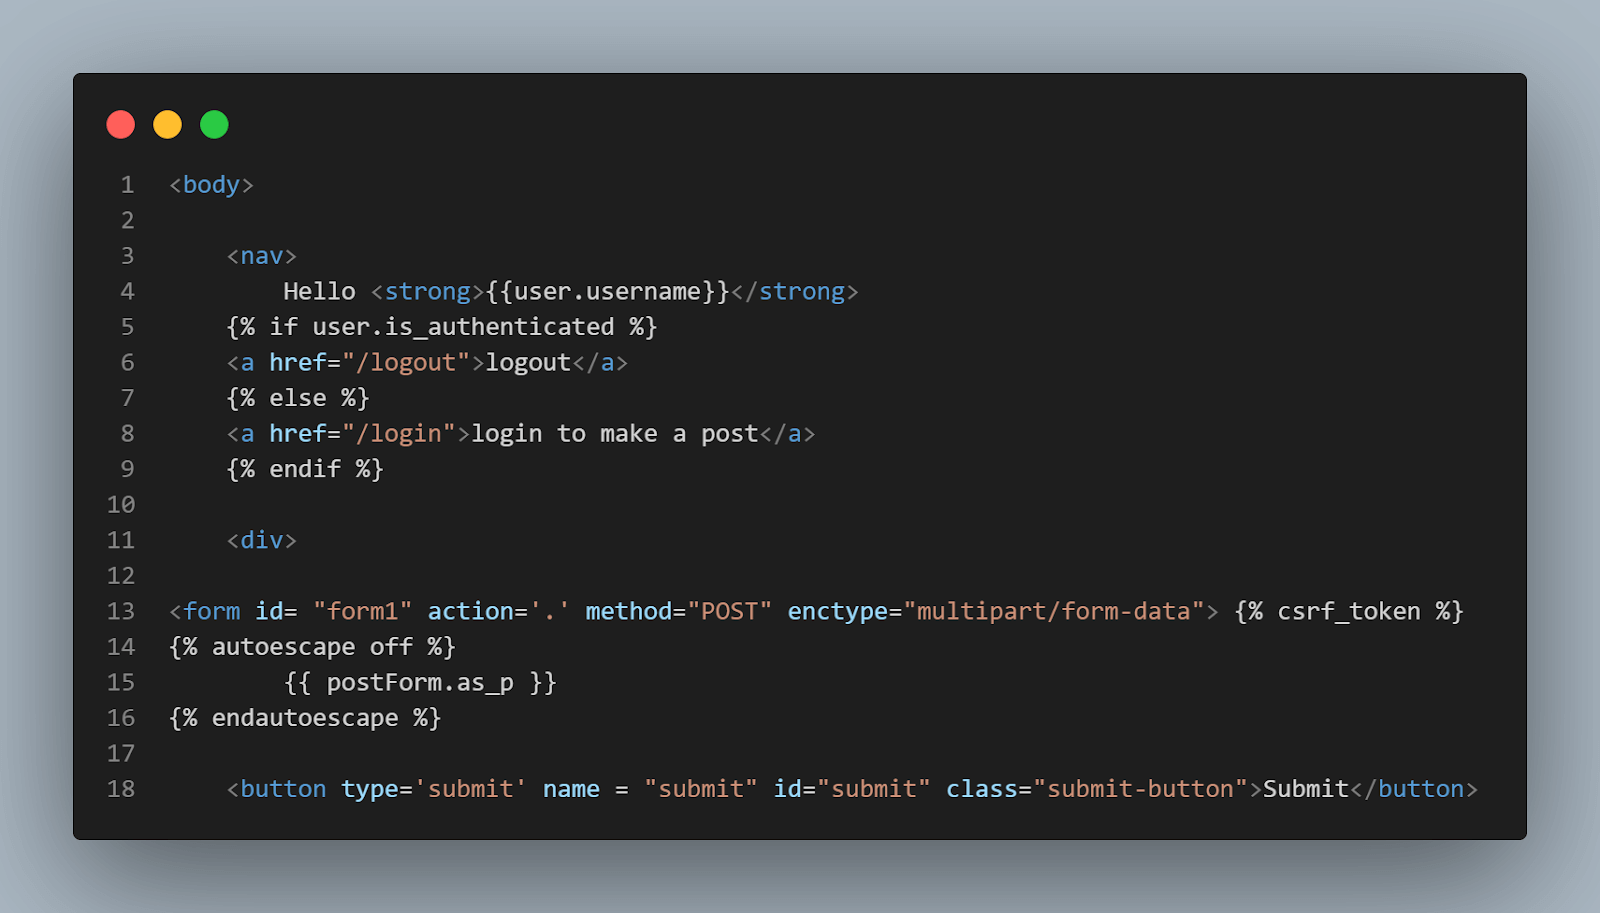
The engine template inherits its elements from the Django forms attribute. This is because we only want to call the form in the HTML template. Let’s see the forms.py file used in this pytest Django project for clarity.
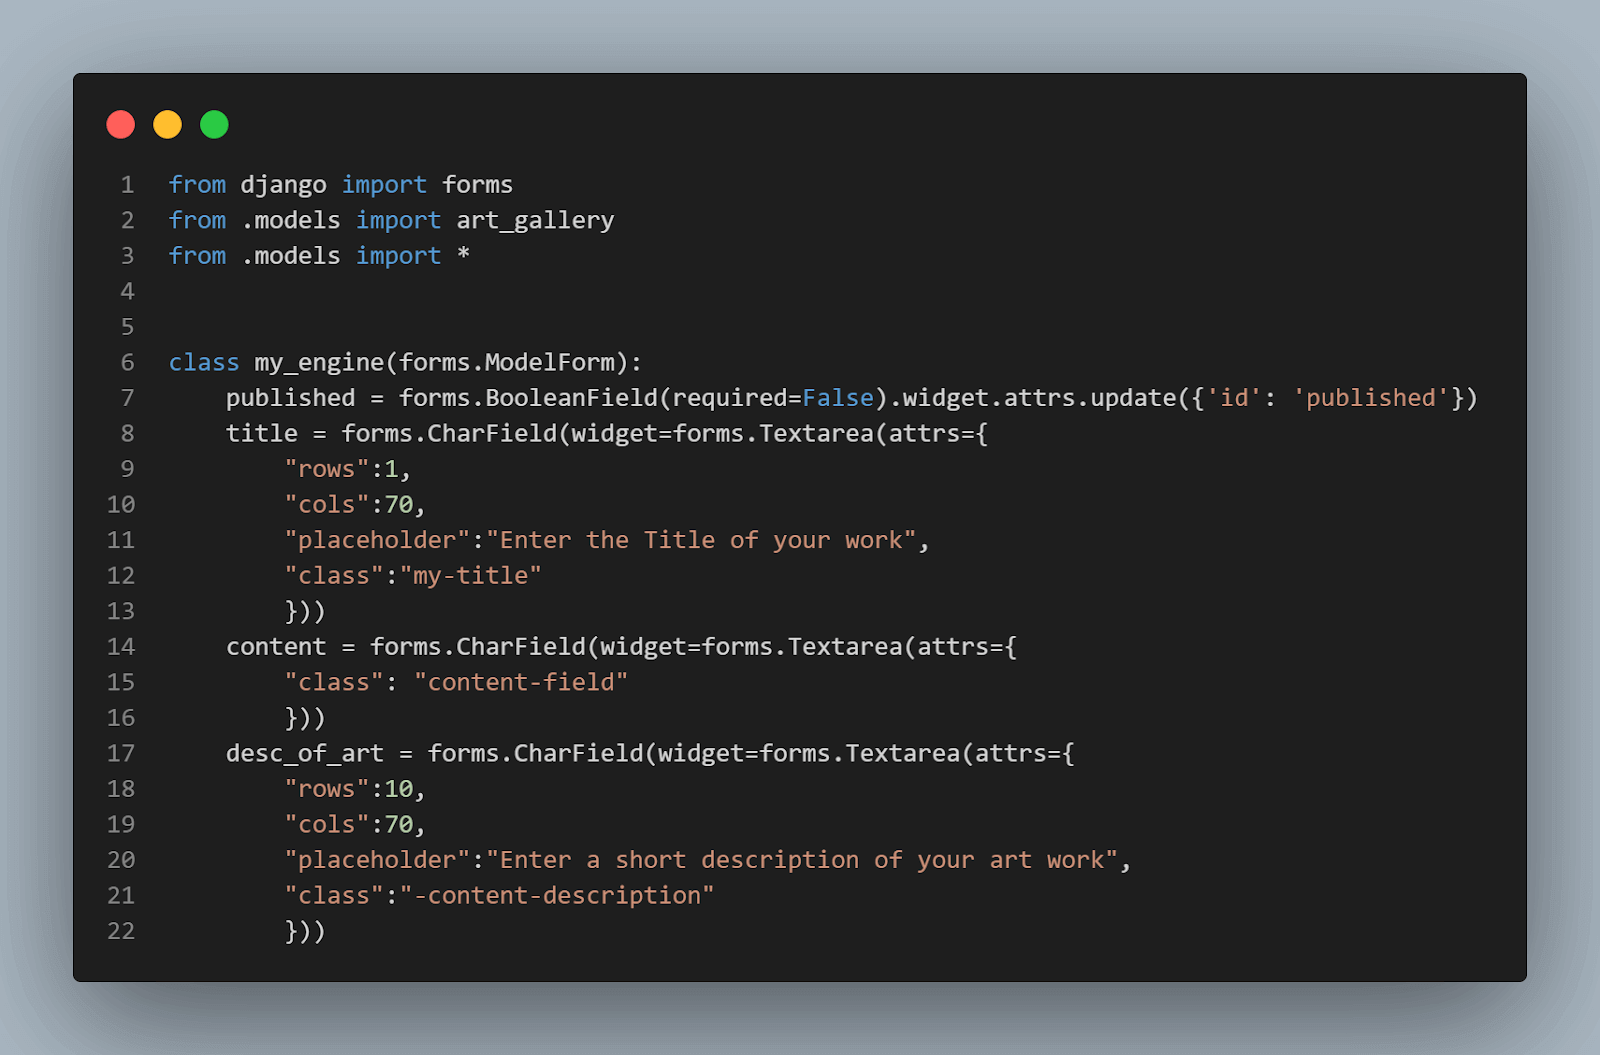
The submit element is missing from the above form. You can find that in the original engine template.
Below is the original engine template. Look closely, and you’ll see that the Submit button has an id and a class of submit and submit-button, respectively.
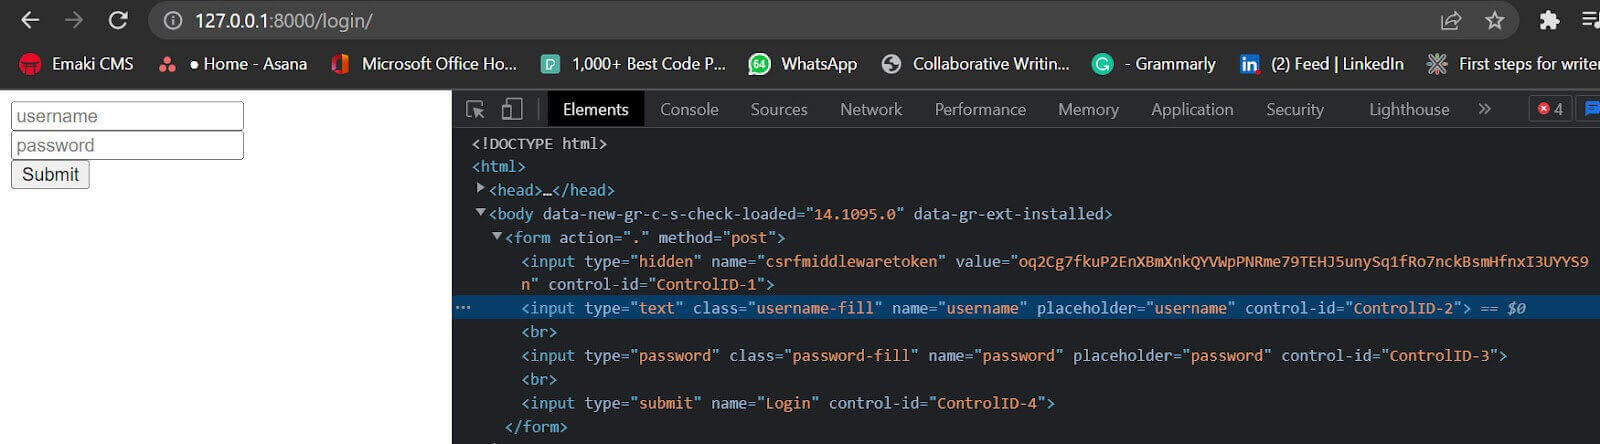
Alternatively, you can inspect the website to pick the Selenium locators for each DOM element involved in the test.
For instance, to get the class selectors for the login form, visit the login URL and open the DOM structure using the browser’s inspect tool. Here’s what you get:
Now let’s create the selector module for our Django UI test
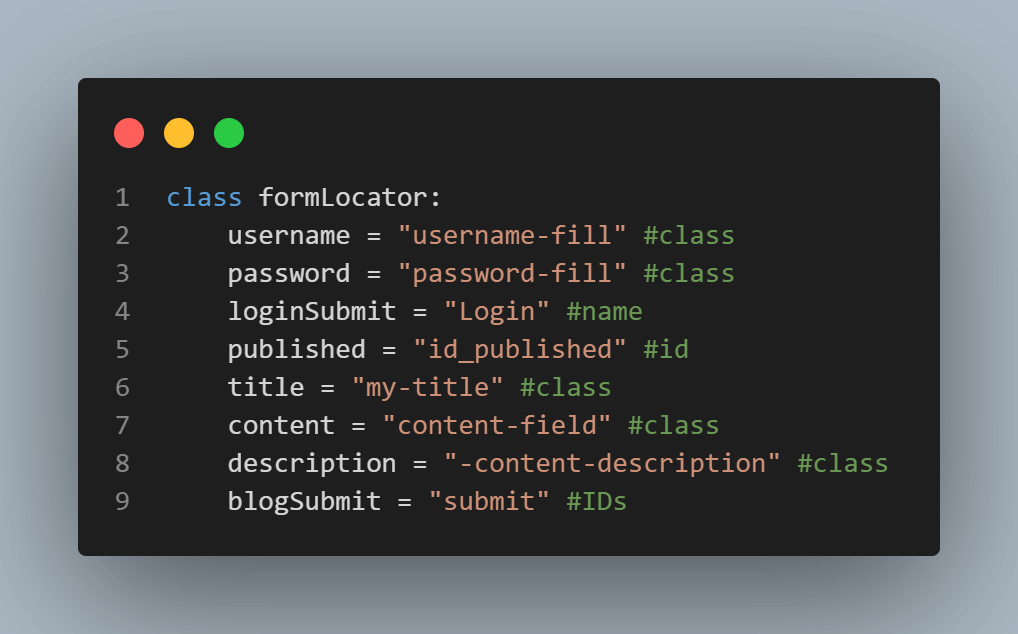
The formLocator class contains the DOM selectors for the target web page. Thus, each is an attribute of the formLocator class.
Looking closely, every other selector in the formLocator class besides the submit buttons, username, and password fields inherit its identifier from the Django form shown previously.
Below is an extract of the formLocator class.
We also create a Webactions class to act on these selectors. The dataclass decorator adds a driver initiator to the webActions object. We’ve previously imported dataclass from Python’s built-in dataclasses package.
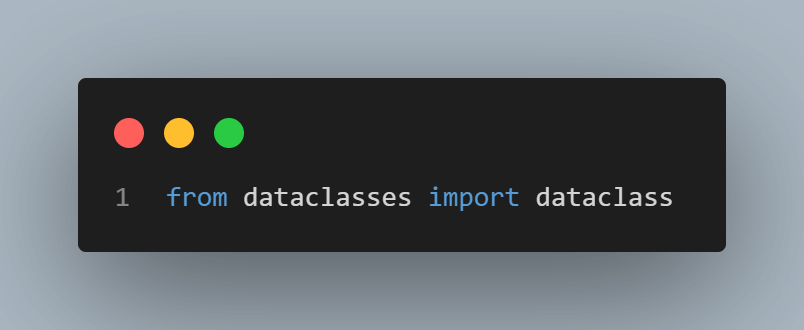
Thus, webAction instantiates with the Selenium WebDriver, which comes from the setup module (you’ll see the usage in the test runner (test_module.py).

This is similar to using the __init__ method like so:
|
1 2 |
def __init__(self, driver): self.driver = driver |
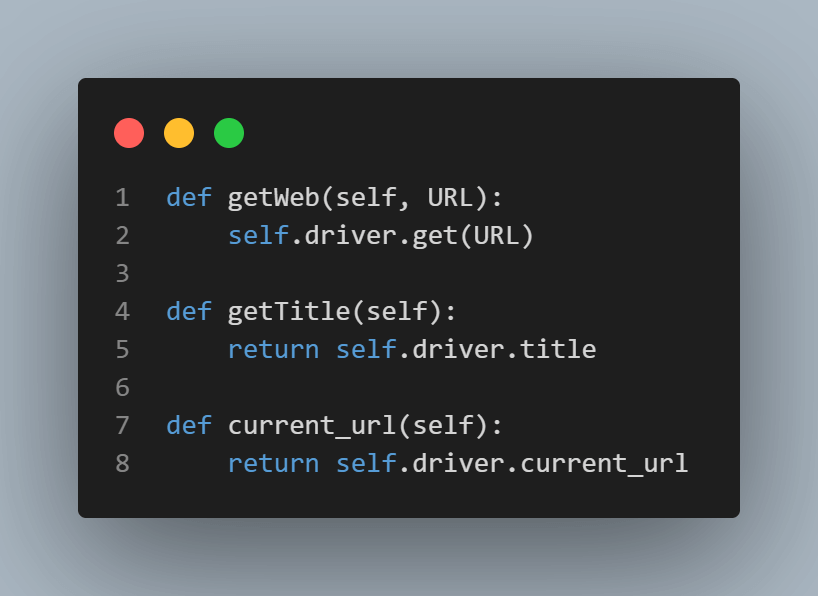
The getWeb, getTitle, and current_url methods of Webactions class fetch the website’s URL, the current page title, and the current page URL, respectively. While you can achieve this directly using driver.get, this approach allows you to customize and abstract your test.
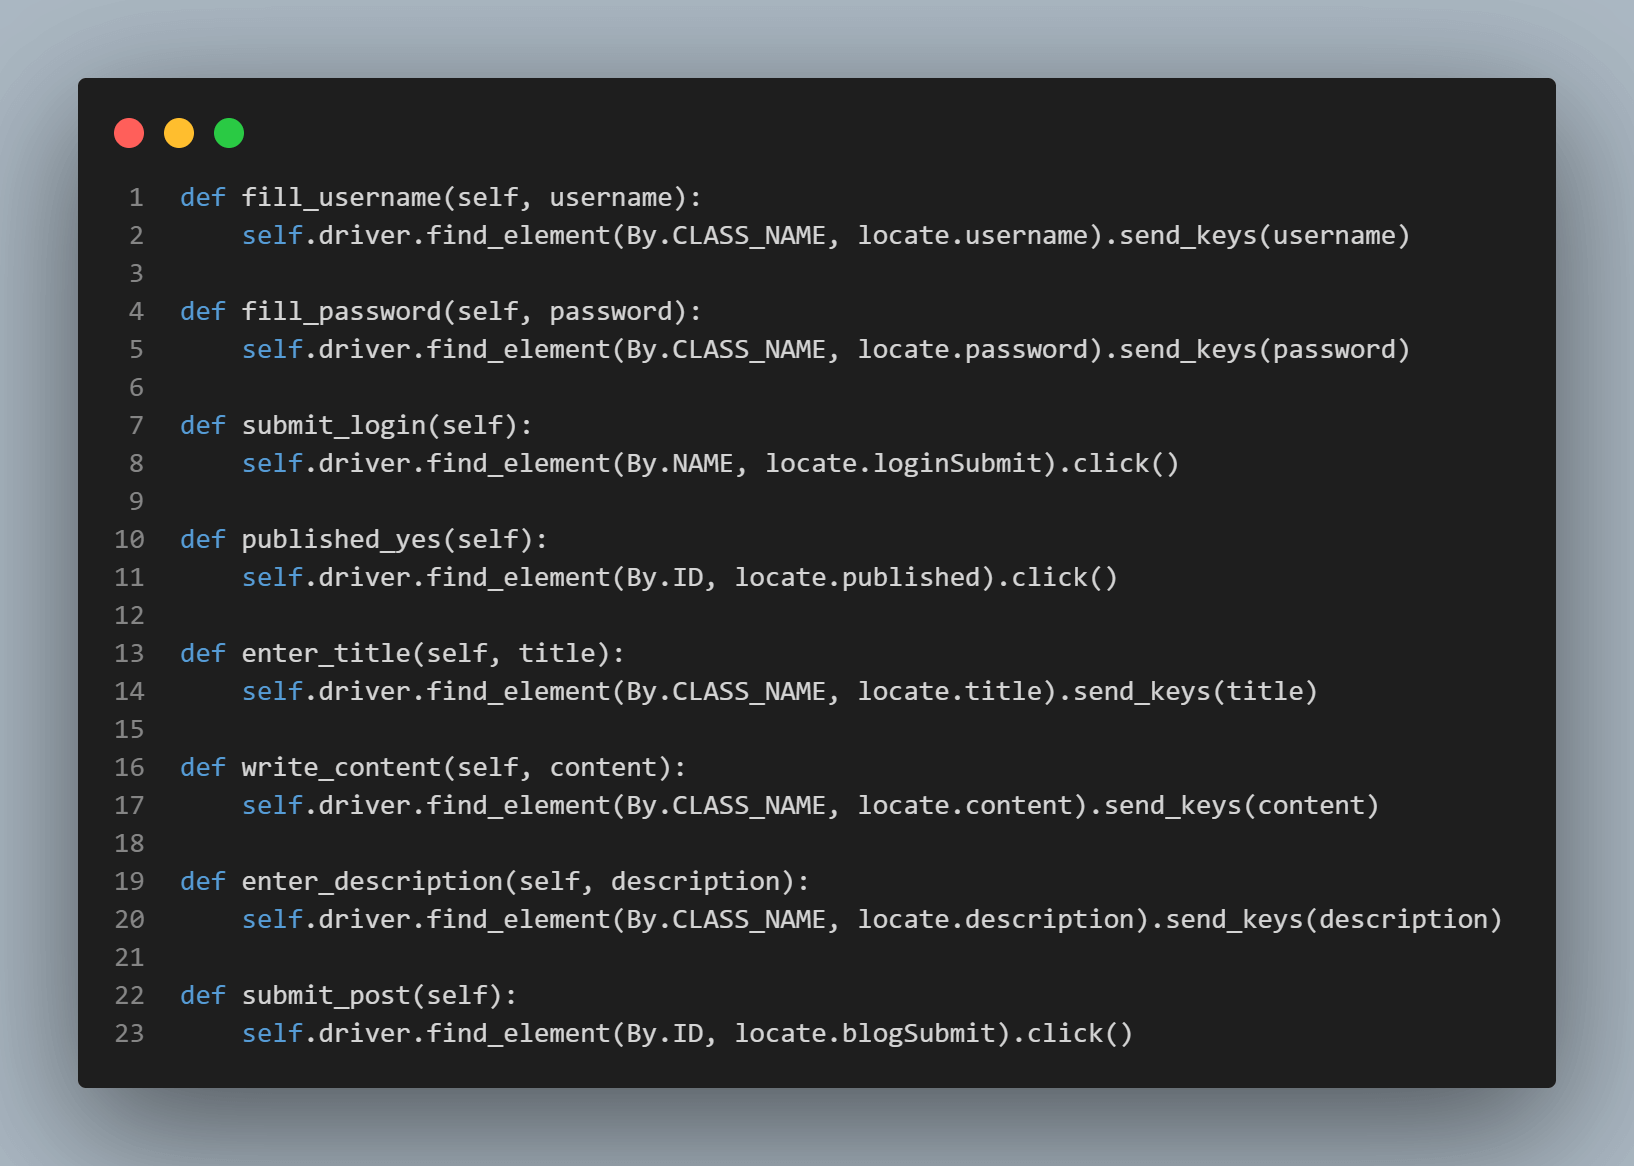
The other methods in the Webactions class interact with the DOM selectors using the Selenium By class (we’ve imported this previously). However, those requiring form filling take an argument each.
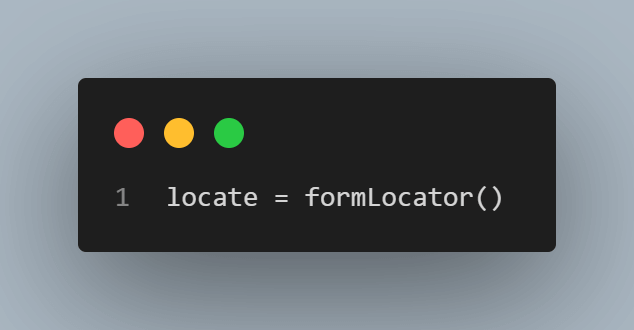
For instance, a method whose selector uses an ID identifier locates its element using By ID. Each class method accesses the selectors by calling them from the formLocator class instance (locate.selector_name). We instantiate this class in the code as shown.
Below are the web actions that interact with the DOM.
Create the Test Execution File
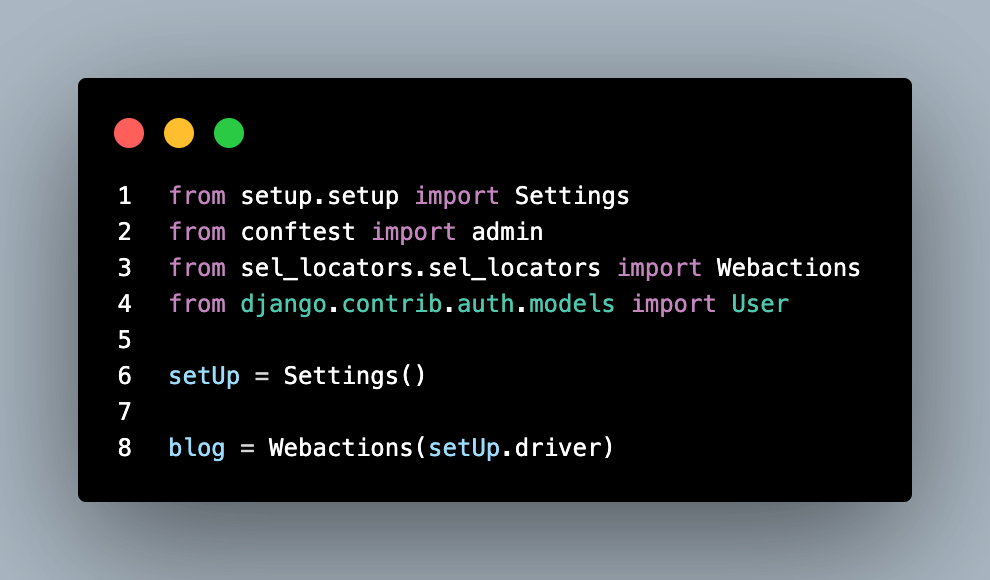
We start the above test execution by importing the Settings class from the setup file, which we instantiate as setUp. The Webaction instance also uses the driver attribute from the setUp object to initiate a blog instance. Our test uses the User model from Django (imported from django.contrib.auth.models) to assert the number of superusers in the database. We also import the admin class from conftest.py.
As shown previously, the admin class contains the fixture handler, which also inherits the LiverServerTestCase to pull a live server for local testing. So this allows the test runner class (TestUserLoginFormSuccess) to inherit the admin and LiveServerTestCase classes.
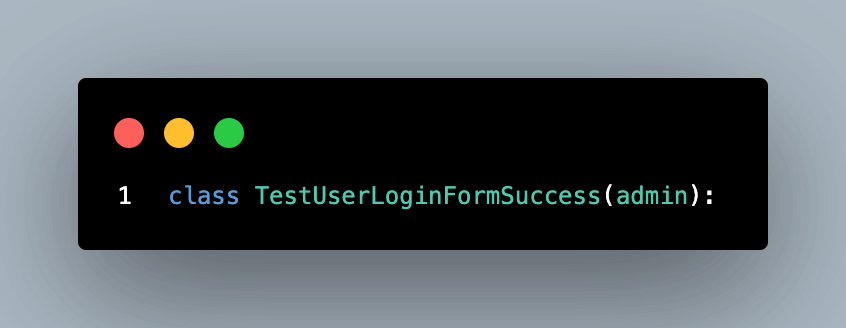
TestUserLoginForm has only one method (test_should_post_blog) running the test steps. Pytest automatically looks for this test method in the test_module.py file to execute the Django test suite.
That method starts by calling setUp.setup to maximize the browser window and initiate the Selenium WebDriver.

While you may not need to create a superuser in all Django test cases, only the superuser can access the editing engine in this case. So pytest needs the superuser credentials to log into the editor engine.
But pytest runs an instance of the Django test. Thus, it can’t use the superuser credentials you create using the python manage.py createsuperuser command. We need to create a dedicated superuser for our test—so it can access the admin panel and create a blog post.
So for the superuser creation, we call the createSuperAdmin action. This comes from the super fixture of the admin class inherited by the test runner class (TestUserLoginFormSuccess).
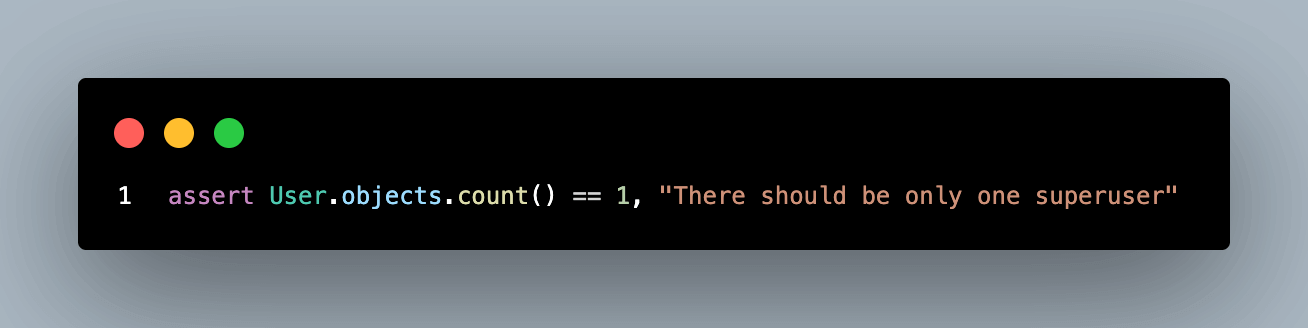
Once the superuser is created, the test leverages Django’s built-in User model to check if the superuser count in the database is more than one using pytest’s assert.
Selenium runs through the test method in the test class to execute each test step. These steps come from the webAction class—instantiated as a blog. Hence, each test step comes from this instance as blog.test_step.
Now, let’s go through each test step in the test_should_post_blog method.
Step 1 – Log on to the login page using the live_server_url attribute from Django’s LiveServerTestCase (inherited from the admin class). We also use pytest assert to check if a value exists in the page title.
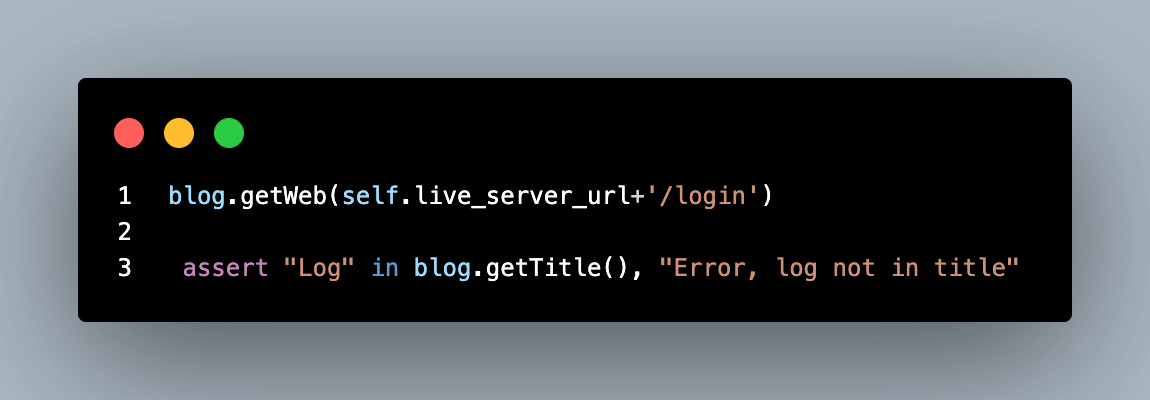
The live_server_url provides a default localhost port for testing in Django. When concatenated with another route in the app, it results in a complete web directory.
For instance, [live_server_url+”/login”] might result in [http://localhost:54776/login]. The port number may vary, though. Checking one of our builds on the cloud grid shows that Django’s live_server_url runs on port 62409 for that instance.

As mentioned, this might change in another build. You don’t need to bother about how Django handles it.
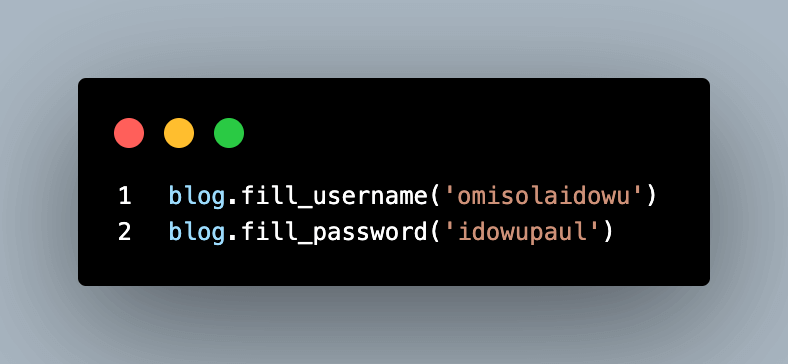
Step 2 – Fill in the username and password field with the superuser’s credentials. These credentials must match the ones used to create a superuser in this Django test. Otherwise, the test fails while trying to assert a value match on the following page.
The test runs the following steps to fill out the login form with the superuser’s username and password.
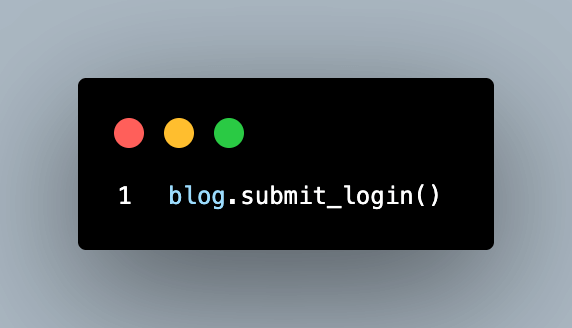
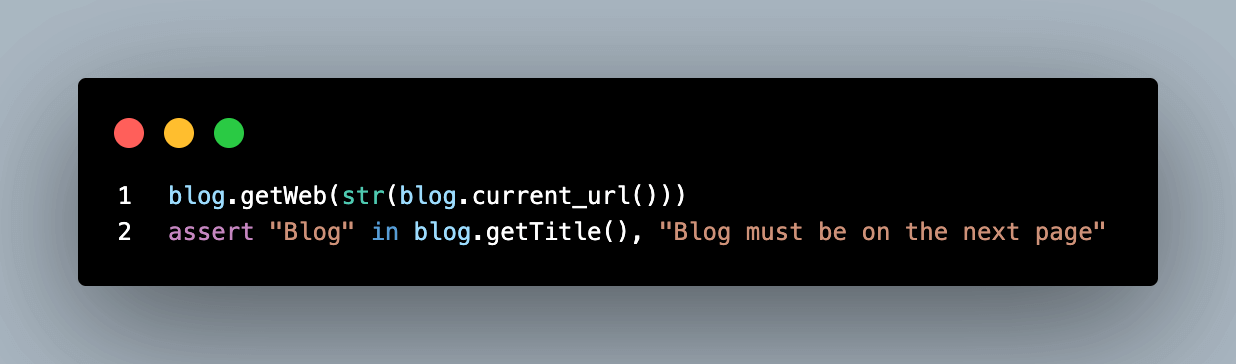
Step 3 – Click the Login button to enter the post editor engine.
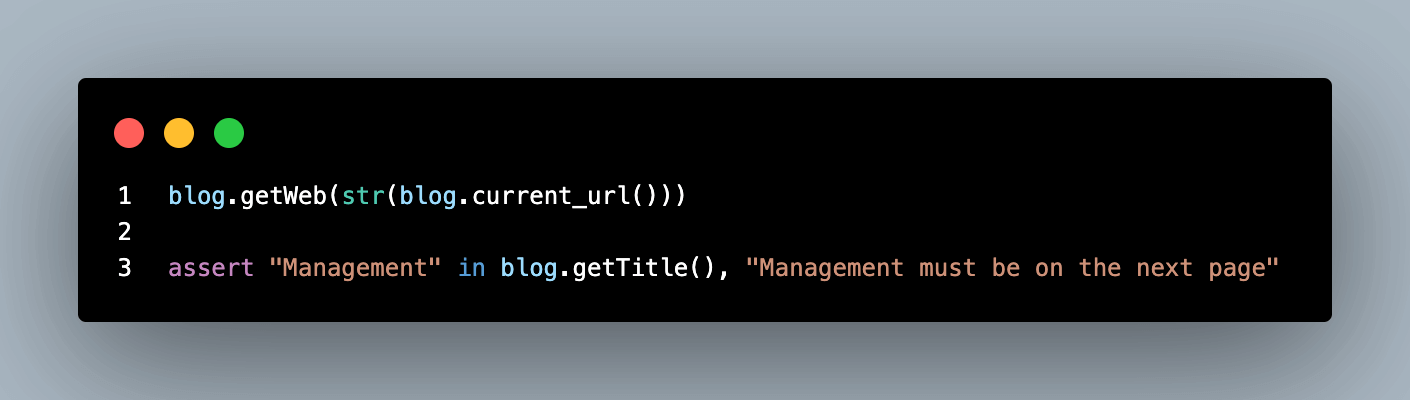
Once logged in, we expect to access the admin page, where the user can publish posts. You need to get the current URL to achieve this. To check if the test successfully navigates that page, we also assert that a value exists in its title.
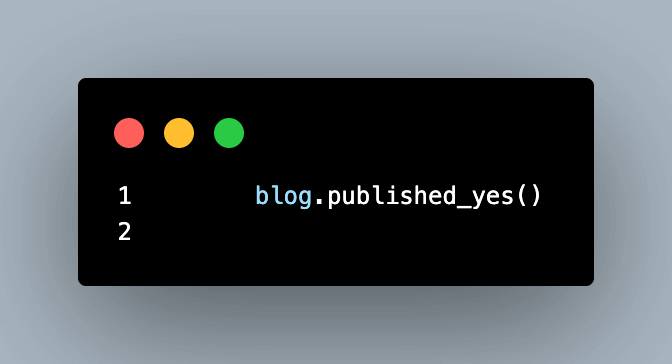
Step 4 – Tick the Published checkbox.
Step 5 – Fill out the post and title fields.
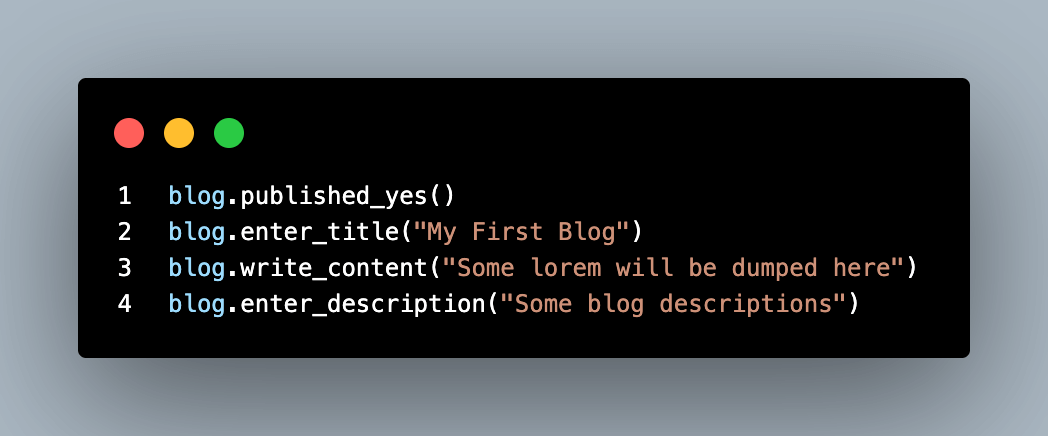
Step 6 – Click Submit to publish the post and visit the homepage.

The final stage in the test is to check successful URL navigation by asserting that a value exists in the homepage title.
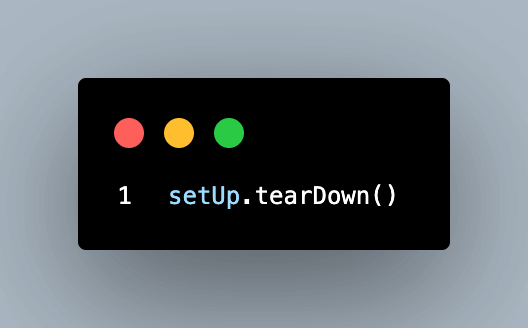
Finally, we close the browser instance and end the test using the tearDown method of the Settings class.
Execution of the locally hosted Django website
To run the test, open the command line to your pytest Django project’s root folder and run the following command.
|
1 |
pytest |
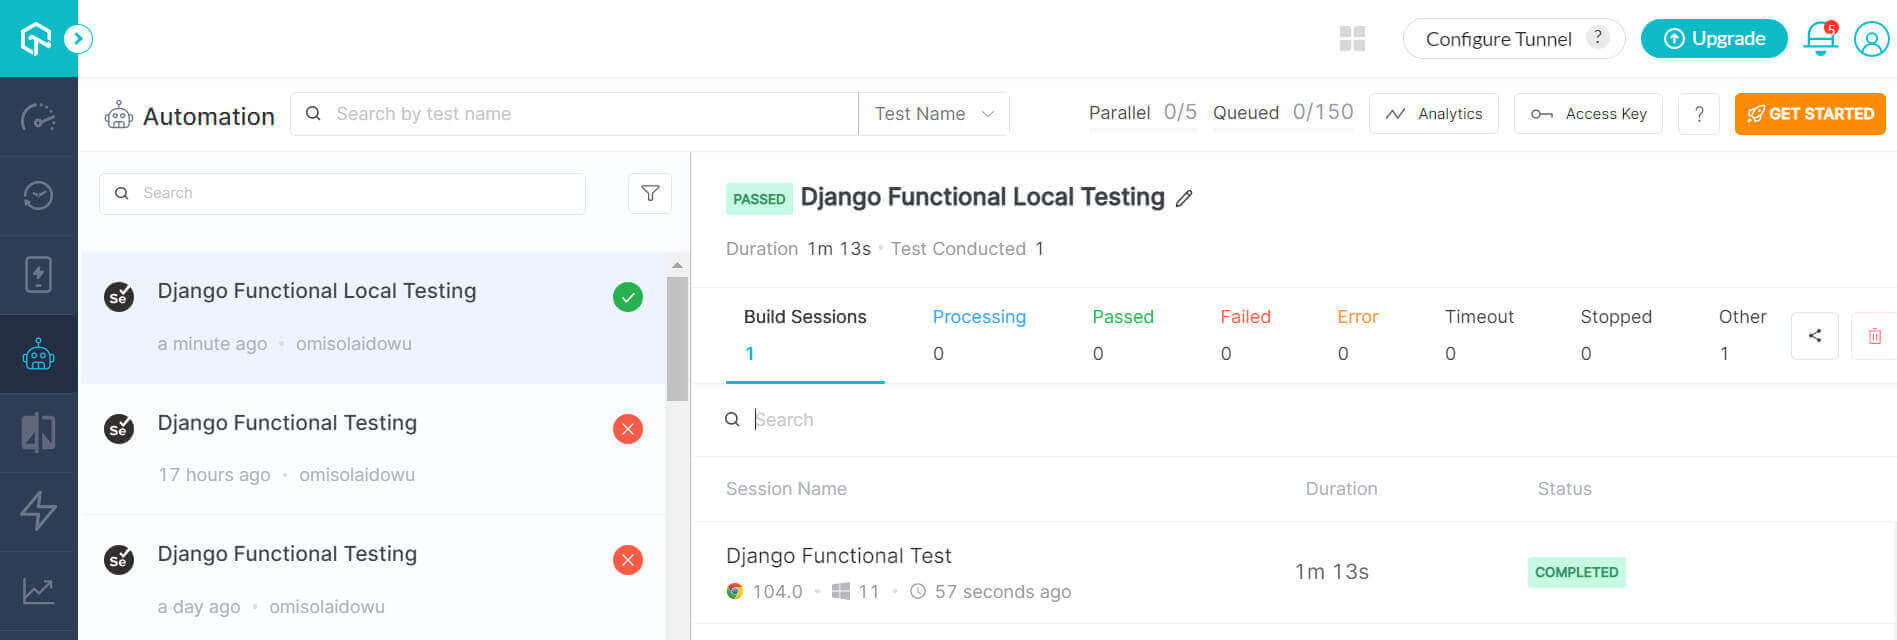
The test runs successfully on the cloud grid as shown below.
Testing hosted version of the Django application with pytest and Selenium
While we’ve tested our Django website locally, you only require a few tweaks to make it reusable on a live website. The live demo version of the project is available at https://django-app-selenium-pytest-test.vercel.app.
So you can access the login page at https://django-app-selenium-pytest-test.vercel.app/login.
Our previous test only assessed the login and post-publishing functionalities. While you don’t have permission to create a superuser for the live version, you can create one at https://django-app-selenium-pytest-test.vercel.app/register.
Then execute the test using the registered credentials.
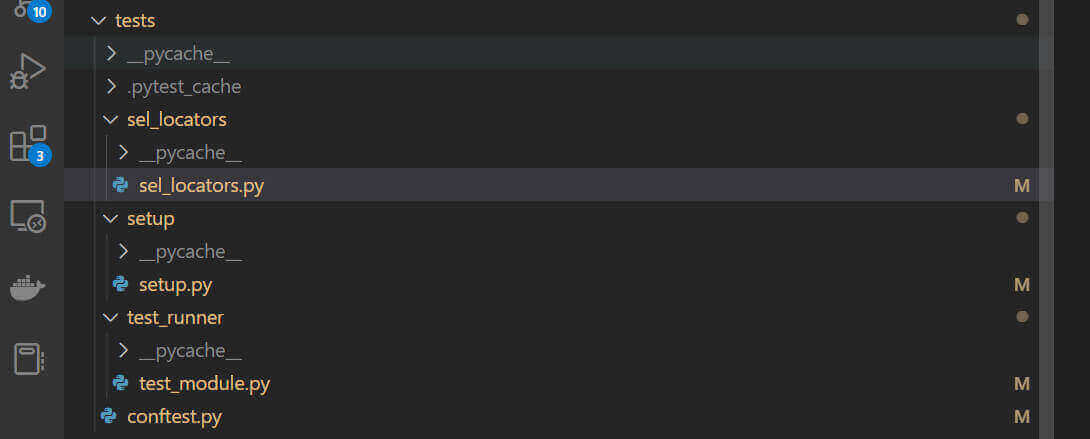
To repeat the test on the live version, you can separate the test folder from the pytest Django project and run the test independently.
When extracted from the local Django project, the test folder looks like this:
While other files in the test directory remain the same, you’ll make some changes to test_runner/test_module.py and setup/setup.py.
Remove the tunnel option from desired_caps in the setup file. Otherwise, the grid sees your build as coming from the local machine and fails the test.
Below is how the new setup.py code looks.
The desired_caps dictionary in this one doesn’t have a tunnel option.
You might not need a conftest.py file for the live test, as we only used that to create a superuser in our case. You also need to remove LiveServerTestCase and the admin inheritance from the test runner class (TestUserLoginFormSuccess) since the website is now live.
Thus, the new test_module.py file looks like this:
Live Test Execution
To run the live test, open your command prompt to the tests folder and run the following command.
|
1 |
pytest |
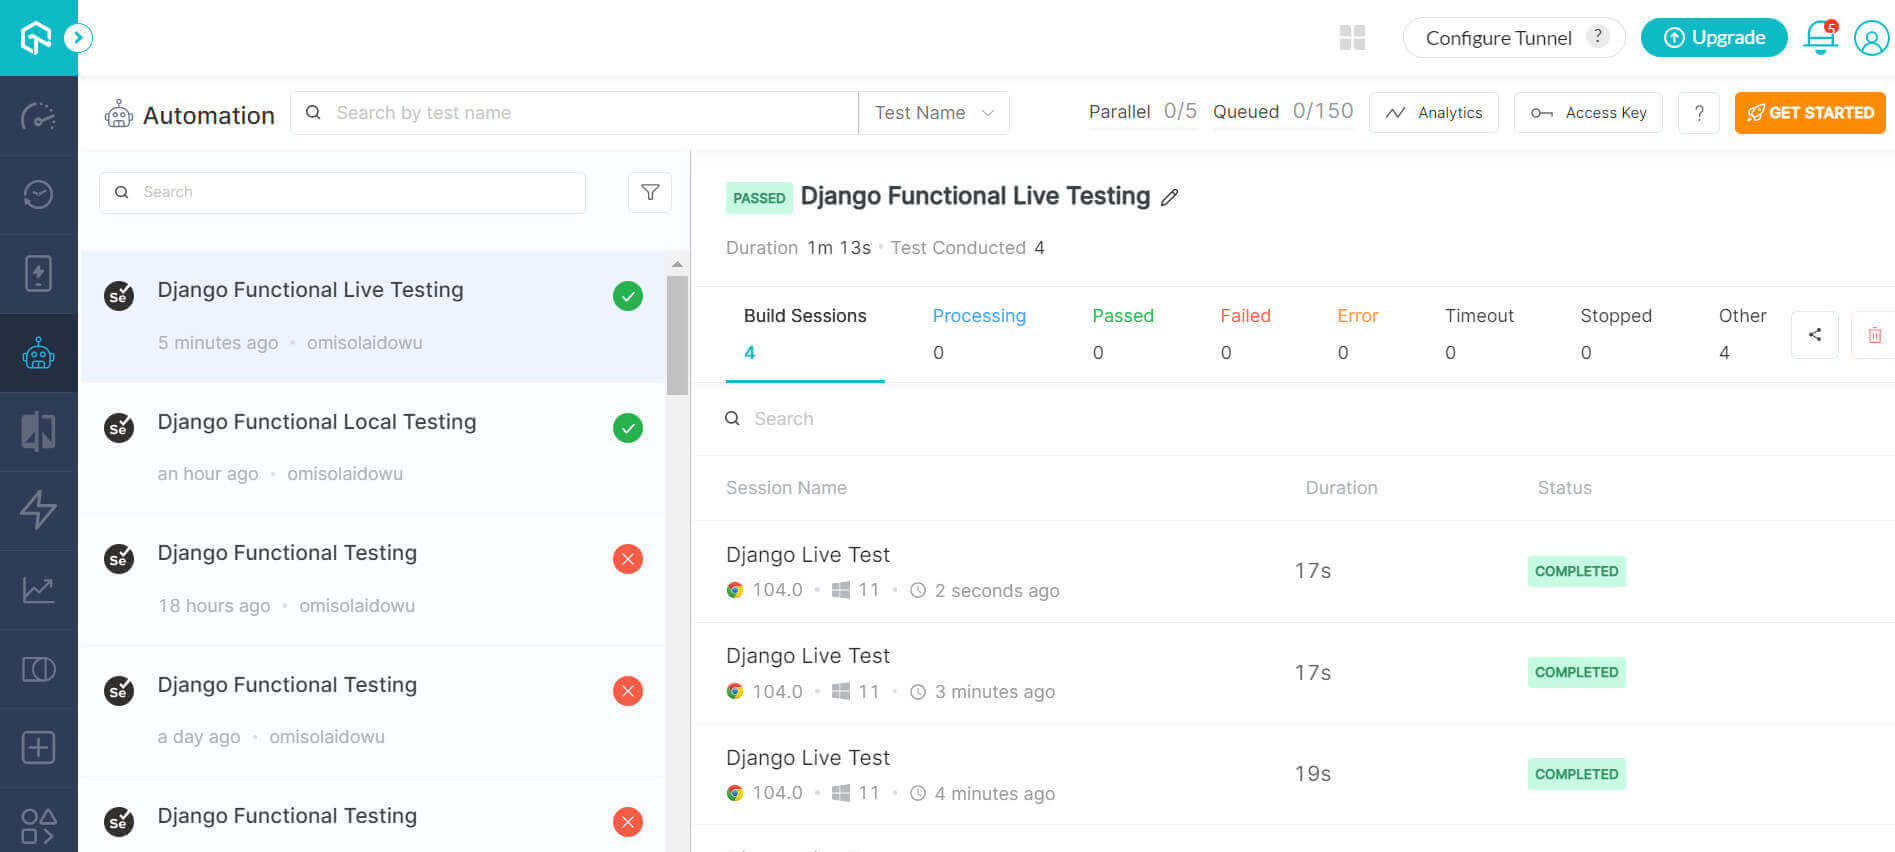
The test runs on the cloud grid, as shown below.
If you’re looking to become an expert in automation testing and boost your Python skills, enrolling in a Selenium Python 101 certification program is an excellent first step. By doing this, you’ll lay a strong foundation for using Selenium Python in testing, paving the way for a successful career in this field.
Rounding Up: Simplify pytest Django UI automation testing with Selenium
In this Selenium pytest tutorial, we looked into performing local testing of your website UI, which helps you assess its functionalities and discover bugs before deploying it to production.
However, UI automation testing can be challenging without the appropriate tools to execute it. For versatile web frameworks like Django, pytest does the job excellently, as it fuses perfectly with Selenium and offers many built-in tools out of the box. Additionally, you can focus on writing your test script while pytest gives detailed information about your test execution.
In addition to linking every test file without complexity, you’ve also seen the power of pytest in connecting your test suite to your Django project settings. Overall, automation UI testing of a locally hosted and live Django website on a Selenium cloud grid is easy with a few configurations.
Frequently Asked Questions (FAQs)
Can I use pytest with Django?
Yes, you can use pytest with Django. In fact, pytest is a popular testing framework for Python, and many developers prefer using it over Django’s built-in testing framework.
To use pytest with Django, you’ll need to install the pytest-django package, which provides many useful fixtures and plugins for testing Django applications.
Does Django use pytest or unittest?
Django includes its testing framework called unittest (also known as django.test), which provides a set of tools and classes for writing and running tests. unittest is similar to Python’s built-in unittest module but with some added features specifically designed for testing Django applications.
That being said, Django does not use pytest by default, but it can be used as an alternative testing framework instead of unittest. Many developers prefer using pytest over unittest because it offers a more concise and flexible syntax, powerful fixtures and plugins, and better test discovery mechanisms.


Author’s Profile
Idowu (Paul) Omisola
Idowu is a self-taught programmer, coding YouTuber, and technical writer with a penchant for teaching. He started his coding career in 2018 but combined it with technical writing a year later and has never looked back. He has worked for a couple of websites over the years, and you'll find some of his coding guides on popular websites like MUO. He loves discussing software structure and coding topics in Python, JavaScript, Golang, and TypeScript. And when it comes to software testing, he's a fan of Playwright and Selenium.
Blogs: 6
Got Questions? Drop them on LambdaTest Community. Visit now


