Scale Your Automation Testing with AI
 Run end-to-end parallel tests & reduce test execution time by 5x
- Generate tests scripts using natural language with KaneAI
- Accelerate your testing process with Autoheal, SmartWait & RCA

- Automation
- Home
- /
- Learning Hub
- /
- Playwright JavaScript: A Beginners Guide
Playwright JavaScript: A Beginners Guide
This comprehensive Playwright JavaScript tutorial is perfect for beginners who are looking to learn how to automate web testing and control web browsers with Playwright.
Last Modified on: November 28, 2025
- Share:
OVERVIEW
When planning a test automation strategy, it's important to not only consider the specific needs and requirements of the project but also explore the capabilities of the available tools in the market. Playwright is indeed one of the most emerging tools in recent years for test automation.
Playwright is an open-source automation testing framework developed by Microsoft. Its unique features and capabilities have gained popularity, making it a promising option for automation testing. Playwright provides a set of APIs that allow developers and testers to write test scripts to automate web applications across different browsers, such as Chromium, Firefox, and WebKit. It supports multiple programming languages like Java, JavaScript, TypeScript, Python, and C#.
Playwright JavaScript is an excellent combination for web automation. It is a modern and powerful automation library that allows you to control web browsers like Chrome, Firefox, Safari, etc. It also offers rich features, such as taking screenshots, recording videos, emulating mobile devices, and intercepting network requests.
JavaScript, on the other hand, is a popular programming language widely used for web development, and it is well-suited for writing automation tests with Playwright. JavaScript has a rich set of libraries and tools, which makes it easy to write complex automation scripts that can interact with elements in web applications.
According to statistics from W3Techs, as of April 2023, JavaScript is used as the client-side programming language on 95% of websites, indicating its widespread adoption for web development.
In this Playwright JavaScript tutorial, you will learn in detail about the Playwright. You will see the capabilities it offers and how to set up tests to run locally and on the cloud grid.
So, let’s get started!
What is Playwright?
Playwright is an open-source automation library for web browsers developed by Microsoft and primarily used for automating interactions with web browsers like Chromium, Firefox, and WebKit-based browsers. It provides high-level APIs for browser automation, making it easy to perform actions such as clicking buttons, filling out forms, and navigating between pages.
It also supports advanced features like intercepting network requests, emulating mobile devices, and taking screenshots. Playwright is an end-to-end testing framework slowly gaining popularity in the market.
You can also subscribe to our LambdaTest YouTube Channel to get the latest updates on tutorials around Selenium automation testing, Cypress testing, and more.
Why Playwright framework?
At the time of writing this Playwright JavaScript tutorial, the current trend of Playwright on GitHub shows the growing popularity of the Playwright framework (50.4k Star, 2.5k Fork, 99+ Releases).
In the NPM trends, it's clear that Playwright is gaining popularity in the market.

Benefits of using Playwright
There are several reasons why Playwright is a good choice for browser automation:
- Cross-browser support
- Speed and reliability
- Comprehensive API
- Community support
- Trace Viewer
- CodeGen
Playwright supports multiple browsers, including Chromium, Firefox, and Safari, making it easier for developers to test their web applications across different platforms and devices.
This means you can write and run a single automation script across multiple browsers without worrying about browser-specific differences.
Playwright is designed to be fast and reliable, using a powerful architecture that separates the automation code from the browser process, making it more stable and less prone to crashes. Playwright's API is designed to be intuitive and easy to use, making it ideal for beginners and experienced developers.
Playwright has a comprehensive API that covers all aspects of browser automation. It provides methods for interacting with web pages, handling cookies and sessions, and navigating through pages.
The Playwright's growing community of developers contributes to its development, shares its knowledge, and supports other developers. This means you can get help and advice from other developers when encountering problems.
Playwright Trace Viewer is a powerful tool that helps you diagnose and debug issues in your Playwright automation scripts. It provides a visual representation of the actions taken by the Playwright during test execution, along with detailed timing and performance information.
Code generation with Playwright can be helpful for developers new to Playwright or who need to quickly generate automation code snippets based on their interactions with a web page. It can accelerate the process of creating automation scripts and improve the efficiency of web testing and scraping tasks.
Why Playwright JavaScript?
JavaScript is a high-level, interpreted programming language used for web development, server-side programming, and other applications. It is a versatile language used for various purposes, including web development, server-side programming, mobile app development, game development, and more. It is often used in conjunction with popular frameworks and libraries such as React, Angular, and Vue.js to create complex web applications.
It is also a popular language for QA automation because it provides a flexible and powerful toolset for testing web applications. With JavaScript, developers can write automated tests for web applications that run in the browser, such as end-to-end tests, integration tests, and unit tests.
There are several reasons why Playwright JavaScript is an excellent choice for browser automation:
- Familiarity
- Debugging
- Cross-platform support
- Automation
- Robustness
- Asynchronous programming
- Expressive syntax
- Test framework integration
Many developers are already familiar with JavaScript, making it easy to start with Playwright. This also means developers can leverage existing JavaScript libraries and tools when writing automated tests.
Debugging automated tests can be challenging, but using Playwright JavaScript makes it easier to debug tests in the browser's developer tools. This allows developers/testers to see what is happening in the browser during the test, making diagnosing and fixing issues easier
Playwright supports multiple operating systems, including Windows, macOS, and Linux. JavaScript is a cross-platform language, so developers/testers can use it to write tests that can be run across the platform and cross browser.
JavaScript is a flexible language that can be used to write different automated tests, including unit tests, integration tests, and end-to-end tests. Playwright provides a high-level API that can be used to write tests for different types of applications, such as single-page applications and progressive web applications.
Playwright provides a reliable and robust testing framework that allows you to write end-to-end tests for web applications. It provides a robust set of APIs that can handle complex browser interactions, such as handling popups, iframes, and network requests.
JavaScript's asynchronous programming model is well-suited for browser automation, where multiple actions often happen simultaneously. Playwright uses promises to handle asynchronous actions, which makes it easy to write code that is both readable and efficient.
JavaScript has a clear and concise syntax, making it easy to write both readable and expressive code. This is important for automated tests, where code needs to be easy to understand and maintain.
Playwright is designed to be integrated with popular JavaScript testing frameworks such as Jest and Mocha, commonly used for JavaScript unit testing. This allows you to seamlessly incorporate Playwright scripts into your existing testing workflows, making it easier to write end-to-end tests or perform regression testing for web applications.
Playwright Architecture
To understand the Playwright architecture, the best way is to compare Playwright with Selenium.
In Selenium architecture, HTTP requests are used to interact with the web application. Once a request is sent to the web server, the server will process the request and send a response back to the Selenium WebDriver.
The HTTP connection is typically terminated after receiving the response, which means the connection between the Selenium WebDriver and the web server is closed. This is because HTTP is a stateless protocol, which means that each request and response is independent of any previous requests or responses.
For example, if the test involves clicking a button on a web page, Selenium WebDriver will send an HTTP request to the webserver to simulate the button click. Once the web server processes the request and sends back the response, the HTTP connection will be terminated.

In Playwright architecture, like Selenium, HTTP requests interact with the web application. But Playwright also supports WebSockets, allowing real-time, bidirectional communication between the web application and the automation script.

Unlike HTTP, WebSockets are not stateless, and the connection remains open after the initial handshake between the client (Playwright) and the Server (web application). This means that the WebSocket connection is not terminated after getting a response and can continue to send and receive messages in real time. It will remain open until either the client or server terminates the connection.
Features of Playwright
Playwright is a powerful automation tool for web applications that provides developers and QA engineers with a wide range of features. Here are some of the key features of Playwright:
- Cross-language
- Cross-browser/platform
- Auto-wait
- Intercepting network requests
- Device Emulation
- Screenshot and Video Capture
- Assertion
- Codegen
- Playwright Inspector
- Test frames
- Shadow DOM
- Multiple Tabs and Cross-origin
- Reporting
Playwright is a cross-language automation testing tool for web applications. It supports automation in several programming languages, such as JavaScript, TypeScript, Python, Java, and C#. This cross-language support allows developers and QA engineers to use their preferred programming language and tools to write tests.
Playwright supports all modern rendering engines, including Chromium, WebKit, and Firefox. It is a cross-platform automation tool for web applications. It supports automation on Windows, macOS, and Linux operating systems, making running tests on different environments easy.
One of its key features is the auto-wait functionality, which allows Playwright to automatically wait for elements to be ready before performing actions on them. Auto-wait is enabled by default in Playwright and can be customized using the setDefaultTimeout method of the Playwright class. This method sets the default timeout for waiting for an element to appear or become visible.
Playwright allows for intercepting and modifying network requests and responses, enabling powerful testing scenarios such as mocking API responses or capturing network traffic for analysis.
Playwright allows you to emulate different devices, such as mobile phones, tablets, and desktops, making it easy to test the responsiveness of web pages across different devices.
Playwright provides APIs for capturing screenshots and recording videos of web pages, allowing you to validate the state of web pages during automation tests visually.
Playwright is compatible with various testing frameworks that provide built-in assertion libraries, such as Jest, Mocha, and Jasmine. These frameworks allow you to write and execute tests that include assertions on various conditions, such as element existence, text content, visibility, and more. You can learn more about it through this Playwright Assertions tutorial.
Codegen is used in Playwright to generate code for various programming languages such as JavaScript, Python, and C#. Codegen is useful when working with Playwright because it can generate code that follows best practices and reduces the amount of manual coding required.
Playwright Inspector is a feature of the Playwright automation library that allows you to debug and troubleshoot your Playwright scripts. It provides an interactive graphical user interface (GUI) that lets you inspect the state of the browser and the page, interact with page elements, and debug your scripts.
Playwright provides built-in methods to interact with frames in a web page during automation testing. You can use the frame method of the Page object to access and manipulate frames.
Playwright CSS and Text Engines penetrate the Shadow DOM by default. This makes it easy to find shadow elements and allows you to interact with them similarly to regular DOM elements.
You can automate Tabs and Cross-origin in Playwright by creating scenarios with different contexts for different users and running them against your server, all in one test.
Playwright provides built-in reporters that you can use to generate reports for your tests. Playwright reporters help you to visualize and understand the results of your tests in a better way. Here are the reporters available in Playwright: ‘list’, ’dot’, ’line’, ’junit’, and ‘HTML’.

Setting up Playwright JavaScript
In this section of this Playwright JavaScript tutorial, we will look at how to install and configure Playwright and what benefits they offer in terms of installation and setup.
There are two ways of installing the Playwright:
Using the init command
Step 1: Set up the project.
To get started with Playwright, you'll need to create a new JavaScript project. You can do this by running the following commands in your terminal.
mkdir playwrights_with_JavaScript
cd playwrights_with_JavaScript
npm init -y
This will create a new directory called "playwrights_with_JavaScript" and initialize a new npm project inside it.

Step 2: Install Playwright.
You'll need to install Playwright as a dependency of your project. You can do this by running the following command in your terminal.
npm init playwright@latestAfter installation, the latest version of Playwright is added as a development dependency to your project.

After installation, we can see that Playwright (version 1.31.2) is installed.
{
"name": "playwrights_with_javascript",
"version": "1.0.0",
"description": "",
"main": "index.js",
"scripts": {
"test": "echo "Error: no test specified" && exit 1"
},
"keywords": [],
"author": "",
"license": "ISC",
"devDependencies": {
"playwright": "^1.31.2"
}
}
Using the VS Code extension
Step 1: Create a folder, e.g., playwright_javascripts_1.31.
Step 2: Open the folder in VS Code.
Step 3: Search Playwright extension in VS Code and install it.

Step 4: Now Search “Playwright” and Click on Test: Install Playwright

Step 5: Finally, click the OK button.

Once you click on the “OK” button, installation of Playwright starts and can be seen in the below screenshot after the final installation.

Types of Testing using Playwright
You can use Playwright for various types of testing using, including UI Testing, API Testing, Visual Testing, Accessibility Testing, and Component Testing. Each type of testing is explained in detail below with examples.
UI Testing with Playwright JavaScript
With Playwright, you can simulate user interactions such as clicking, filling out forms, and navigating between pages to test the functionality of your web application.
Let’s take an example of UI automation for the site:
https://ecommerce-playground.lambdatest.io/.
Use Case:
const { test, expect } = require("@playwright/test");
test("Search the text 'Palm Treo Pro  ", async ({ page }) => {
await page.goto('https://ecommerce-playground.lambdatest.io/');
await page.locator("span.title", {hasText: 'Mega Menu' }).hover()
await page.locator("a[title=Desktop]").click();
await page.locator("div.carousel-item.active > img[title='Palm Treo Pro']").click()
await page.locator("#container button[title='Add to Cart']").click();
await page.locator("a.btn.btn-primary.btn-block",{hasText: 'View Cart'}).click()
await expect(page.locator("td.text-left", {hasText: 'Palm Treo Pro'})).toBeVisible()
await expect(page.locator("div[class$='flex-nowrap'] > input")).toHaveValue("1")
});
In the above code, we have used several Playwright locators. Let's discuss these locators.
The Menu option “Mega Menu” can be located under the span with the text “Mega Menu”.

We can locate the Computer type “Desktop” by locator title.

The locator to click on “Palm Treo Pro” can be achieved by button class ‘.container button’ by adding the product title.

The locator for clicking on “Add to Cart” can be located by button class with the title of the button.

The “View Cart” can be located by the class of the button with the text “View Cart”.

The product quantity can be located by class .flex-nowrap.

Running the Test Case
In Playwright, now we can run the test case in UI mode.
Playwright launched UI mode in version 1.32. In the Playwright UI mode, you can interact with the webpage by clicking on elements and filling in forms. You can also see the generated Playwright code in the right-hand panel.
Run the below command to execute the test case.
npx playwright test --uiIt will open the below screen.

Run the test case by clicking on the Play (>) icon.

Test case execution can be seen in the below screenshot. The screenshot shows that all commands are executing line by line on the left side.
At the bottom of the Source tab, we can see the complete code, executed line by line.

API Testing with Playwright JavaScript
Playwright API testing with JavaScript refers to the process of using the Playwright Node.js library to write automated tests for web applications.
This kind of testing is particularly beneficial for checking API answers, validating data input and output, and confirming the application's functionality. The response status code, headers, and body can all be verified using several built-in assertions that are also provided.
Here are some key features of API testing with Playwright JavaScript:
- HTTP request interception: Playwright provides the ability to intercept HTTP requests and responses, enabling you to simulate various network scenarios and test your API's behavior in different situations.
- Intercepting requests: Playwright allows you to intercept HTTP requests made by your application and respond with custom data or mock responses.
- Mocking responses: You can use Playwright to create mock responses for specific API requests. This can help you test your application's behavior under different scenarios.
- Stubbing responses: With Playwright, you can stub responses for specific API requests. This can help you test how your application behaves when certain API requests return unexpected or erroneous data.
- Setting headers and cookies: Playwright allows you to set HTTP headers and cookies for API requests, which can be useful for testing authentication and authorization functionality.
API Test Example
For API testing demo purposes, let’s take an example of the site https://reqres.in/. In the below API testing example, we cover CRUD operation using the REST API
GET Request
The GET method is used to retrieve specific data and pass parameters to read code from the API response. In the example below, we are getting specific user data using the GET method and userId.
test("GET API Request with -- Valid 200 Response ", async ({ request }) => {
const response = await request.get("${baseurl}/users/2");
expect(response.status()).toBe(200);
});
POST Request
A POST API request is a type of API request that is used to send data to a server. It is often used to create or update resources on the server. In a POST request, the client sends a payload (or request body) to the server, which contains the data that needs to be processed or stored.
Below is the example of a POST request where we create the data, then verify the status should be 201.
 test("POST API Request with -- Valid 201 Response ", async ({ request }) => {
const response = await request.post("${baseurl}/users/2', {
data: {
id: 123,
},
});
const responseBody = JSON.parse(await response.text());
expect(responseBody.id).toBe(123);
expect(response.status()).toBe(201);
});
PUT Request
A PUT API request is a type of HTTP request used in RESTful web services for updating or replacing an existing resource on the server. In a PUT request, the client sends a payload (or request body) to the server, which contains the updated representation of the resource.
Below is the example of a PUT request where we are updating the id and then verifying the status should be 200.
test("PUT API Request with -- Valid 201 Response ", async ({ request }) => {
const response = await request.put("${baseurl}/users/2", {
data: {
id: 245,
},
});
const responseBody = JSON.parse(await response.text());
expect(responseBody.id).toBe(245);
expect(response.status()).toBe(200);
});
DELETE Request
A DELETE API request is a type of HTTP request used in RESTful web services for deleting a resource on the server. In a DELETE request, the client sends a request to the server to delete a resource identified by a specific URI (Uniform Resource Identifier).
Below is the example where we delete the particular id, then verifying status should be 204.
test("DELETE API Request with -- Valid 201 Response ", async ({
request,
}) => {
const response = await request.delete("${baseurl}/users/2", {});
expect(response.status()).toBe(204);
});
Output
In the below screenshot you can see the output of all four methods.

Visual Testing with Playwright JavaScript
Playwright can perform visual testing, which means comparing the expected visual appearance of a web page with the actual appearance after changes have been made.
To perform Playwright visual testing, you can use the ‘expect’, which allows you to take screenshots of web pages and compare them against reference images. Here's an example of how to perform visual testing using Playwright:
- First, we navigate to the web page you want to test, for example. https://ecommerce-playground.lambdatest.io/index.php?route=account/login
- Then we login into the site with valid credentials.
- Playwright test will capture a screenshot of the current page and save it as a baseline screenshot (also known as a golden image) when you run a test. In later testing, fresh screenshots will be compared with the baseline using pixel-by-pixel matching. To take a screenshot, use the screenshot() function. The page.screenshot() method is used to capture the image.
For example, suppose you've already created a golden image (reference screenshot), and you want to compare it to the screenshot you just took with Playwright. You can use a snippet of code similar to the one below:
expect(await page.screenshot()).toMatchSnapshot('golden.png')To save a screenshot, Playwright will utilize the page object and call the screenshot function. Then, it will compare these two screenshots for visual differences using the pixelmatch library. To fine-tune the pixel matching in your screenshots, use the threshold option.
For a complete example, please see the snippet below:
test("Login and Edit account detail  ", async ({ page }) => {
await page.goto('https://ecommerce-playground.lambdatest.io/index.php?route=account/login');
await page.fill('input[name="email"]', 'lambdatestnew@yopmail.com');
await page.fill('input[name="password"]', 'Lambda123');
await page.click('[value="Login"]')
const screenshot = await page.screenshot({ path: 'example });
expect(screenshot).toMatchSnapshot('example.png', { threshold: 0.2 });


});
')
Output
You can enhance the power of your Playwright visual regression testing suite by executing your tests on cloud. SmartUI clouds like LambdaTest provide a visual testing feature that allows you to capture screenshots of web pages or specific elements on those pages and then compare them against expected screenshots or baseline images. This enables you to detect any visual differences or discrepancies in the layout, design, or appearance of your web application across different configurations.
With LambdaTest, you can perform Playwright automated testing at scale using our cloud-based digital experience testing platform, significantly reducing the time required to run your Playwright JavaScript tests.
LambdaTest provides access to a comprehensive online browser farm of over 50 different browser versions, including Chrome, Chromium, Microsoft Edge, Mozilla Firefox, and WebKit, allowing you to execute your Playwright JavaScript tests. This provides maximum coverage and compatibility, enabling you to test your applications on various browser environments.
Accessibility Testing with Playwright JavaScript
Accessibility testing is an important part of software development as it ensures that your product can be used by people with disabilities. Playwright can be used for web accessibility testing to ensure that web applications are usable and accessible to people with disabilities. WCAG (Web Content Accessibility Guidelines) is a set of standards developed by the World Wide Web Consortium (W3C) to ensure that web content is accessible to all users, including those with disabilities.
By incorporating Playwright into your accessibility testing process, you can automate the testing of WCAG guidelines and ensure that your web application is accessible to all users, including those with disabilities.
Below are the steps for doing accessibility testing for the site https://ecommerce-playground.lambdatest.io/
Step 1: You need to install Playwright and axe-core. You can install them using npm @axe-core/playwright and its dependencies.
axe-core is an open-source accessibility testing engine developed by Deque Systems. It provides automated accessibility testing capabilities that can be integrated into web applications or testing frameworks.
Step 2: Run the following command.
npm install @axe-core/playwright
Step 3: Create the Playwright Script.
const { test, expect } = require("@playwright/test");
const AxeBuilder = require('@axe-core/playwright').default;
test('Accessibility testing : Scanning the entire page ', async ({ page }) => {
await page.goto('https://ecommerce-playground.lambdatest.io/');
const accessibilityScanResults = await new AxeBuilder({ page }).analyze();
expect(accessibilityScanResults.violations).toEqual([]);
});
Code Walkthrough
First we import the package @axe-core/playwright. After providing the url we can use Method AxeBuilder.analyze() to run the accessibility scan against the page. Finally, in the last step verify that there are no violations in the returned scan results.
Output
In the below screenshot, you can see that there are more than 1000 accessibility violations when we scan a complete page.


Component Testing with Playwright JavaScript
Component testing with Playwright is a testing approach that involves testing individual components or pieces of a web application using Playwright, an open-source tool for automating web browsers.
Set up React application for Playwright Component Testing
React allows developers to build reusable UI components and manage the state of those components efficiently, making it highly suitable for building interactive and dynamic web applications.
React component testing involves writing automated tests to verify the correctness and expected behavior of React components in isolation, without the need for manual testing. This helps to catch bugs and ensure that components are functioning.
It is a free library that helps programmers create user interfaces quickly. It was developed by Facebook in about 2011 and is hugely popular. It currently receives millions of downloads and is maintained by a large community. The latest version of React is 18, and it's used by millions of users.

Testing React components with Playwright involves setting up a testing environment and writing test cases to ensure the components behave as expected. Here are the steps to get started:
Let’s set up the React component.
Step 1: Run the below command in the terminal.
npx create-react-app react-app

Step 2: Run the below command to launch React app in the root directory.
cd react-app
npm start
Step 3: After running the above command, React app starts with port http://localhost:3000/.

You can see in your Visual Studio Code, the project has been created successfully. What it looks like is attached below.

Step 3: Now run the below command.
npm init playwright@latest -- --ctOnce the above command is executed, the below options are displayed to install.
Step 4: Select ‘JavaScript’.


Once the React framework is installed successfully, you will see the below screen.

Step 4: Once the above command is executed successfully, Playwright is installed.

Testing React Component using Playwright
Let’s create two files: App.js and App.spec.js under the src folder.

<app> is the root component of the app. Let’s add below code under App.js, where it is defined:
import logo from './logo.svg';
import './App.css';


function App() {
return (
<div className="App">
<header className="App-header">
<img src={logo} className="App-logo" alt="logo" />
<p>
Edit <code>src/App.js</code> and save to reload.
</p>
<a
className="App-link"
href="https://reactjs.org"
target="_blank"
rel="noopener noreferrer"
>
Learn React
</a>
</header>
</div>

);
}
export default App;
Next step is to write out the test cases that we want to test and then check if the component works as expected. Add the below code under App.spec.js.
import { test, expect } from '@playwright/experimental-ct-react';
import App from './App';


test.use({ viewport: { width: 500, height: 500 } });


test('Verify the text in React Page ', async ({ mount }) => {
const component = await mount(<App />);
await expect(component).toContainText('Learn React');
await expect(component).toContainText('save to reload');
});
In the above code block, we are writing a test case that renders the App component and then checks to see if there is any text like 'Learn React’ and ‘save to reload’ on the screen
Now run the test case using the command:
npm run test-ctAfter running the above command run the below command:
npx playwright show-report

Running Playwright JavaScript Test Cases on the Local Grid
We have taken the below examples for demo purposes.
Example 1:
|
// @ts-check
const { test, expect, chromium } = require("@playwright/test");
test.describe("Open the Site and Serach the data ", () => {
test("Search the text 'Palm Treo Pro  ", async ({ page }) => {
await page.goto('https://ecommerce-playground.lambdatest.io/');
await page.locator("span.title", {hasText: 'Mega Menu' }).hover()
await page.locator("a[title=Desktop]").click();
await page.locator("div.carousel-item.active > img[title='Palm Treo Pro']").click()
await page.locator("#container button[title='Add to Cart']").click();
await page.locator("a.btn.btn-primary.btn-block",{hasText: 'View Cart'}).click()
await expect(page.locator("td.text-left", {hasText: 'Palm Treo Pro'})).toBeVisible()
await expect(page.locator("div[class$='flex-nowrap'] > input")).toHaveValue("1")
});
})
First Method to Run Test Case
To run Playwright JavaScript test cases on the command line, you can use the following Playwright test command:
npx playwright testHere we are executing the test cases in two browsers. For running the test cases in parallel in two browsers, we have to do the below setting in playwright.config.js.
 /* Configure projects for major browsers */
projects: [
{
name: 'chromium',
use: { ...devices['Desktop Chrome'] },
},
{
name: 'firefox',
use: { ...devices['Desktop Firefox'] },
},
],
When you run npx playwright test, it will execute all the test files (by default, files ending with .spec.js) located in the ./tests directory of your project.

Run the following command:
npx playwright show-reportIn the below screenshot, you can see all test steps are passed in both browsers when we run the test case in the local terminal.

Second Method to Run Test Case
Another way to run the Playwright JavaScript test cases is using the below command.
npx playwright test –uiThe npx playwright test --ui command is a way to run end-to-end tests using Playwright's Test Runner with a graphical user interface (GUI). This command launches a test runner UI that allows you to run and debug your tests interactively.
For example, to run tests in UI mode for a file called example.test.js, you can run the following command:
npx playwright test --ui example.test.jsLet’s execute the test cases uiTest.spec.js in the local environment by running the following command:
npx playwright test --ui uiTest.spec.js
Example 2:
We have another example for the same site https://ecommerce-playground.lambdatest.io/ where we are opening the site and verifying user redirect to correct URL on clicking of the link
Test 1
|
Test 2
|
test.describe("Verify the links in Landing Page ", () => {
test.beforeEach(async ({ page }) => {
await page.goto("https://ecommerce-playground.lambdatest.io/");
});
test("Open the Site and Click on  Home link and verify user re-direct to correct url", async ({page }) => {
await page.locator('span:has-text("Home")').click();
await expect(page).toHaveURL(
"https://ecommerce-playground.lambdatest.io/index.php?route=common/home"
);
});
test("Open the Site and click on Blog Link and verify user re-direct to correct url", async ({ page }) => {
await page.locator("#widget-navbar-217834 >> text=Blog").click();
await expect(page).toHaveURL(
"https://ecommerce-playground.lambdatest.io/index.php?route=extension/maza/blog/home"
);
});
});
We can execute the above code in the UI using the below command in two browsers - Firefox and Chrome.
npx playwright test uiTest.spec.js
Another way to execute the test cases is using the below command, which opens the runner, and from that runner we can run the particular test case.
npx playwright test –ui
Let’s execute the spec file ‘uiTest.spec.js’.


Running Playwright JavaScript Test Cases on the Cloud Grid
Running your Playwright JavaScript test on the cloud refers to executing your Playwright test scripts on virtual machines or containers hosted on remote servers provided by cloud computing platforms.
Several cloud-based digital experience testing platforms allow you to run your Playwright JavaScript tests on various browsers and operating systems. These services offer pre-configured virtual machines and provide a web interface to run and manage your tests. LambdaTest offers a cloud-based infrastructure that allows you to run your tests on a wide range of browsers and operating system configuration.
To run your Playwright JavaScript tests on LambdaTest, you need to create a LambdaTest account, configure your test environment by selecting the browser and operating system configurations you want to test against and upload your test scripts to the LambdaTest platform.
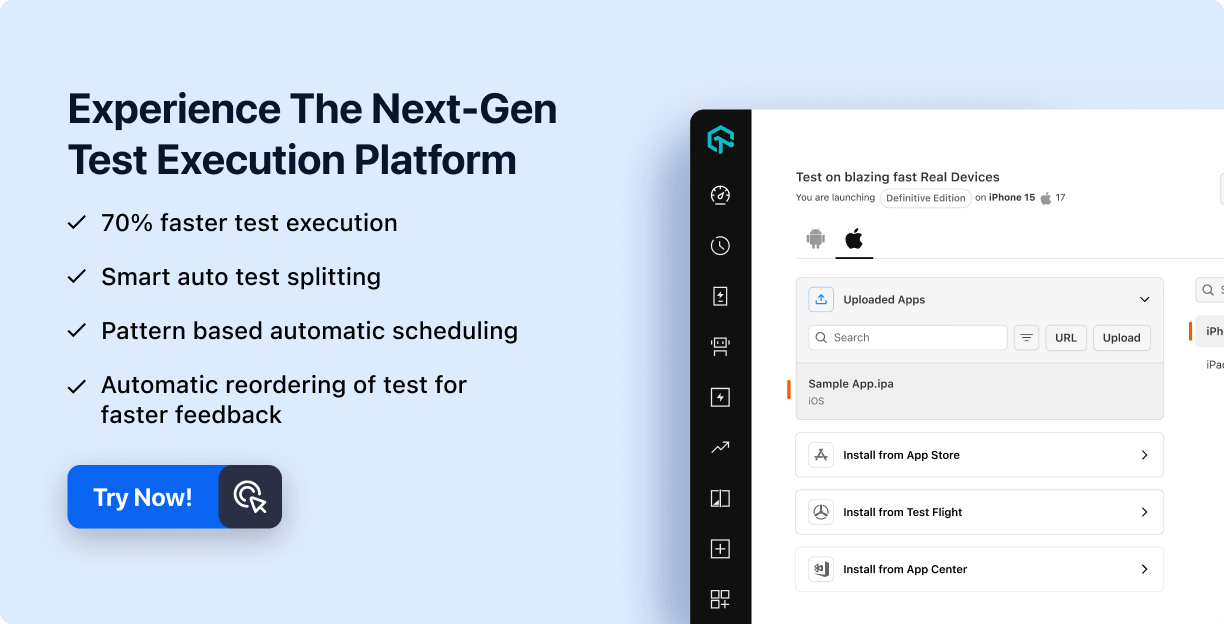
Note: Run Playwright Test Scripts across 50+ browsers & devices. Try LambdaTest Now!
There are several benefits of running your Playwright JavaScript tests on the cloud, which include;
- Scalability
- Flexibility
- Cost-effectiveness
- Parallel testing
- Increased test coverage
With cloud-based infrastructure, you can easily scale your testing environment up or down depending on your testing needs.
The cloud provides access to a wide range of browser and operating system configurations, allowing you to test your web application on various platforms.
Running your Playwright JavaScript tests on the cloud can be more cost-effective than maintaining your own hardware and software infrastructure.
Cloud-based testing platforms allow you to run your Playwright JavaScript tests in parallel, which can significantly reduce the time it takes to complete your test suite.
With access to a wide range of browser and operating system configurations, you can easily increase your test coverage and identify issues that may not be apparent on a single platform.
Configuring Playwright Tests on the Cloud Grid
You need to configure your browsers to point to the existing session before launching and configuring your capabilities. In this case, we have set up the platform, build, name, user, and access key attached below.
In the below code, you can see we have configured two browsers (Chrome and MS Edge) with different platforms.
const capabilities = [
{
browserName: "Chrome", // Browsers allowed: 'Chrome', 'MicrosoftEdge', 'pw-chromium', 'pw-firefox' and 'pw-webkit'
browserVersion: "latest",
"LT:Options": {
platform: "Windows 11",
build: "Playwright Sample Build",
name: "Playwright Sample Test on Windows 11 - Chrome",
user: "username",
accessKey: "accesskey",
network: true,
video: true,
console: true,
},
},
{
browserName: "MicrosoftEdge",
browserVersion: "latest",
"LT:Options": {
platform: "Windows 11",
build: "Playwright Sample Build",
name: "Playwright Sample Test on Windows 8 - MicrosoftEdge",
user: "username",
accessKey: "accesskey",
network: true,
video: true,
console: true,
},
},
{
browserName: "Chrome",
browserVersion: "latest",
"LT:Options": {
platform: "MacOS Big sur",
build: "Playwright Sample Build",
name: "Playwright Sample Test on MacOS Big sur - Chrome",
user: "username",
accessKey: "accesskey",
network: true,
video: true,
console: true,
},
},
];
And then, on my test, launching the browser to connect to the endpoint:
const browser = await chromium.connect(wss://cdp.lambdatest.com/playwright?capabilities=${encodeURIComponent(JSON.stringify(capabilities))})
const page = await browser.newPage()
await page.goto('https://ecommerce-playground.lambdatest.io/');
Below is the final code to execute the test cases in the cloud.
Code Walkthrough
- Open the site https://ecommerce-playground.lambdatest.io/
- Click on “Mega Menu”.
- Click on Desktop text from the owned menu.
- Click on a particular product.
- Add to the card.
- Verify the product is added to the card with quantity “1”.
const { chromium } = require("playwright");
const { expect } = require("@playwright/test");
const parallelTests = async (capability) => {
console.log("Initialising test:: ", capability["LT:Options"]["name"]);
const browser = await chromium.connect({
wsEndpoint: 'wss://cdp.lambdatest.com/playwright?capabilities=${encodeURIComponent(
JSON.stringify(capability)
)}',
});
const page = await browser.newPage();
await page.goto("https://ecommerce-playground.lambdatest.io/");
await page.locator("span.title", { hasText: "Mega Menu" }).hover();
await page.locator("a[title=Desktop]").click();
await page
.locator("div.carousel-item.active > img[title='Palm Treo Pro']")
.click();
await page.locator("#container button[title='Add to Cart']").click();
await page
.locator("a.btn.btn-primary.btn-block", { hasText: "View Cart" })
.click();
await expect(
page.locator("td.text-left", { hasText: "Palm Treo Pro" })
).toBeVisible();
await expect(page.locator("div[class$='flex-nowrap'] > input")).toHaveValue(
"1"
);
await browser.close();
};
// Capabilities array for with the respective configuration for the parallel tests
const capabilities = [
{
browserName: "Chrome", // Browsers allowed: 'Chrome', 'MicrosoftEdge', 'pw-chromium', 'pw-firefox' and 'pw-webkit'
browserVersion: "latest",
"LT:Options": {
platform: "Windows 11",
build: "Playwright Sample Build",
name: "Playwright Sample Test on Windows 11 - Chrome",
user: "Username",
accessKey: "accessKey",
network: true,
video: true,
console: true,
},
},
{
browserName: "MicrosoftEdge",
browserVersion: "latest",
"LT:Options": {
platform: "Windows 11",
build: "Playwright Sample Build",
name: "Playwright Sample Test on Windows 8 - MicrosoftEdge",
user: "Username",
accessKey: "accessKey",
network: true,
video: true,
console: true,
},
},
{
browserName: "Chrome",
browserVersion: "latest",
"LT:Options": {
platform: "MacOS Big sur",
build: "Playwright Sample Build",
name: "Playwright Sample Test on MacOS Big sur - Chrome",
user: "Username",
accessKey: "accessKey",
network: true,
video: true,
console: true,
},
},
];
capabilities.forEach(async (capability) => {
await parallelTests(capability);
});
To run the test case, you have to run the below command:
node UiTest_RunIn-parallel.js
Viewing your Playwright JavaScript Test Results
When Playwright JavaScript tests are executed on the LambdaTest platform, the results are displayed in the LambdaTest Automation Dashboard.
The Playwright build is displayed on the left in the LambdaTest Automation Dashboard snapshot below, and the corresponding build sessions are displayed on the right.
In the below screenshot, you can see the test case start executing on different platforms.


Finally, you can see the test case is executed.

Ready to showcase your Playwright automation testing skills? Become a certified Playwright 101 expert with LambdaTest's program designed for developers seeking proficiency in using Playwright for end-to-end testing of modern web applications.
Wrapping up
In conclusion, automation testing using Playwright JavaScript can significantly improve the efficiency and effectiveness of software testing. Playwright is a powerful and user-friendly automation tool that enables you to automate web browsers with ease. The combination of Playwright JavaScript allows you to create automated tests that can be run repeatedly and consistently, saving you time and effort.
On This Page
- Overview
- What is Playwright?
- Why Playwright framework?
- Benefits of using Playwright
- Why Playwright JavaScript?
- Playwright Architecture
- Features of Playwright
- Setting up Playwright JavaScript
- Type of Testing using Playwright
- Running Playwright JavaScript Test Cases on the Local Grid
- Running Playwright JavaScript Test Cases on the Cloud Grid
- Frequently Asked Questions (FAQs)
Frequently Asked Questions (FAQs)

Did you find this page helpful?
![]()
![]()
More Related Hubs

Start your journey with LambdaTest
Get 100 minutes of automation test minutes FREE!!