
Python ConfigParser Tutorial – Comprehensive Guide To Working With Configuration Files With Python
Jolivé Hodehou
Posted On: June 13, 2023
![]() 125972 Views
125972 Views
![]() 18 Min Read
18 Min Read
As a QA Engineer, one of the common tasks is software testing that relies on various configuration settings. These settings can include URLs, database connection strings, authentication credentials, and more. These configuration settings can be stored in various file formats, such as .ini, .csv, .json, etc., and can be read using different libraries in Python.
The challenge is that these configuration settings can change over time, and it can be tedious and error-prone to hard-code these values directly into the code. For example, if the URL of the service changes, all instances of that URL would need to be updated in the codebase.
Furthermore, if there are multiple environments (such as development, testing, and production), these configuration settings may differ between them. For instance, a development database may use a different connection string than a production database. These differences can lead to bugs and errors that are difficult to detect and resolve.
Python is one of the most popular programming languages in the world, especially in the automation field. According to the statistics, 824,793 are Python customers. Due to its simple and easy-to-learn syntax, it has become the go-to language for many developers. This popularity has led to the development of a vast array of modules and libraries that make Python an excellent choice for automation tasks.

One such module is the Python ConfigParser module, which allows developers to read, modify, and write configuration files in a standardized way. The Python ConfigParser module supports various configuration file formats, including INI-style files, which are commonly used in many applications.
By using Python ConfigParser, developers can store configuration settings separately in configuration files, making it easy to manage settings for different environments. This separation makes the code modular, maintainable, and easier to change. Additionally, Python ConfigParser provides a simple and consistent API for working with configuration files, making it easy to read and modify configuration settings from within the code.
In this Selenium Python testing tutorial, let’s explore the usage of Python ConfigParser to read and write configuration parameters from/into an INI file and a practical example where we automate a website login feature. Throughout the tutorial, let us leverage the unit testing framework and the Selenium library and demonstrate the power of Python ConfigParser in managing login credentials in a separate configuration file. Additionally, it showcases the flexibility of Python ConfigParser in handling multiple browsers and its usefulness in cloud testing scenarios.
With this approach, we can easily update our configuration settings without changing our code, making it more modular and maintainable.
TABLE OF CONTENTS
What is Python ConfigParser?
ConfigParser is a Python standard library module that allows parsing configuration files in INI format. INI stands for initialization, a simple and common file format used to store configuration data, such as application settings, database credentials, or API keys.
Here’s an example of how an INI-style configuration file looks.
|
1 2 3 4 5 6 7 8 9 10 11 12 |
[Release1] url = http://api.release1.com port = 8080 timeout = 10 debug = false [Release2] url = http://api.release2.com port = 8081 timeout = 20 debug = true |
In this example, there are two sections: [Release1] and [Release2]. Each section defines the configuration settings for a specific release. The [Release1] section contains a URL, port, timeout, and debug flag for Release 1, while the [Release2] section contains the same configuration settings for Release 2 with different values.
Using separate values for each release allows for easier management of configurations for different environments. For instance, if we need to change the URL or port for one of the releases, we can modify the corresponding section in the configuration file without affecting the other releases.
The Python ConfigParser module provides a way to read and write configuration files using a hierarchical structure of sections and options. A name in square brackets identifies sections, and options are defined as key-value pairs within each section.
The module provides a convenient and robust interface for parsing configuration files, handling errors and exceptions, and interpolating values from other sections or environment variables.
Let’s cover the basics of working with configuration files using the Python ConfigParser.
 Note
NoteAutomate website testing using Python across 3000+ environments.
Installing ConfigParser
ConfigParser is a built-in module in Python, so there is no need to install it separately. However, we will need to import it before we can use it in our code with the below command.
|
1 |
import configparser |
Creating a Configuration File
To create a new configuration file, we can use the ConfigParser() constructor to create a new instance of the ConfigParser class. We can then use the write() method to write the configuration to a file.
|
1 2 3 4 5 6 7 8 9 10 11 12 |
import configparser config = configparser.ConfigParser() config['Section 1'] = {'key1': 'value1', 'key2': 'value2'} config['Section 2'] = {} config['Section 2']['key3'] = 'value3' config['Section 2']['key4'] = 'value4' with open(test_config.ini, 'w') as configfile: config.write(configfile) |
This will create a new configuration file called test_config.ini in the current directory with the following content:
|
1 2 3 4 5 6 7 8 |
[Section 1] key1 = value1 key2 = value2 [Section 2] key3 = value3 key4 = value4 |
Reading a Configuration File
To read a configuration file, we can use the read() method of the Python ConfigParser object. This method takes the filename of the configuration file as its argument.
|
1 2 3 4 5 6 7 8 9 10 11 12 13 14 15 16 17 |
import configparser config = configparser.ConfigParser() config.read(test_config.ini') print(config.sections()) # Output: ['Section 1', 'Section 2'] print(config['Section 1']['key1']) # Output: 'value1' print(config['Section 2']['key3']) # Output: 'value3' |
This will update the key1 value in Section 1 of the test_config.ini file.
Deleting a Section or Key
To delete a section or key in a configuration file, we can use the remove_section() and remove_option() methods, respectively.
|
1 2 3 4 5 6 7 8 9 10 11 12 13 |
import configparser config = configparser.ConfigParser() config.read(test_config.ini') config.remove_section('Section 2') config.remove_option('Section 1', 'key1') with open(test_config.ini', 'w') as configfile: config.write(configfile) |
This will remove Section 2 and the key1 from Section 1 of the test_config.ini file.
Advantages of using ConfigParser
While we have established the key benefits that ConfigParser offers to developers, we can summarize them for your configuration management needs:
- Simple to use: Python ConfigParser is a user-friendly module that makes it easy to handle configurations in a test automation project.
- Supports multiple configuration file formats: It supports multiple configuration file formats like .ini, .conf, and .cfg files.
- Allows the use of sections and keys: Python ConfigParser allows the use of sections and keys to organize configuration data, making it easy to read and update the configuration files.
- Flexible: ConfigParser is flexible and allows developers to choose the data types for values in configuration files.
- Supports interpolation: It supports interpolation, which is the ability to use values from one section in another section.
- Python standard library: Python ConfigParser is readily available and does not require additional installation or setup.
- Cross-platform: ConfigParser is cross-platform and can be used on any operating system that supports Python. This makes it a versatile tool for automation tasks that need to run in different environments.
- Dynamic configuration support: Python ConfigParser allows us to define different key-value pairs and sections for different releases of the application. This makes it easy to manage and deploy different configurations across different environments, such as development, testing, and production.
Write your first tests using Python ConfigParser
Using ConfigParser is one way to write tests for configuration files. It is a module that allows you to read and write configuration files using a simple syntax. Let’s get started with writing tests.
Step 1: Check if Python is installed
To begin, ensure the below to get Python installed on your machine.
- Open a terminal.
- Type the following command and press enter:
- If Python is not installed or the version displayed is not the desired version, proceed to install it.
python --version
This command checks if Python is already installed. If it is, the installed Python version will be displayed.
![]()
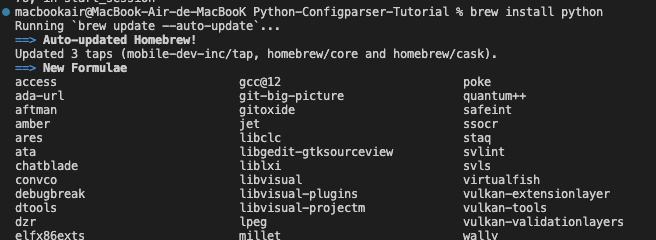
Step 2: Install Python (if necessary)
To install Python on macOS using Homebrew, follow the below steps.
- Type
brew install pythonon the terminal. - Once the installation is completed, verify the installation again using the command
python --version. This time, the installed Python version should be displayed.
Step 3: Install Selenium
Follow the below pointers to install Selenium using pip:
- Open a terminal on your macOS.
- Type the following command and press Enter.
- If you are using Python 3, use pip3 instead of pip:
pip install selenium
pip3 install selenium
This command installs the Selenium package and its dependencies.

Getting started with ConfigParser
In this section of the Python ConfigParser blog, we will look at the following test case for a login feature:
Use Case 1: Storing URL and Login Credentials
Let’s explore how to leverage ConfigParser to store URL and login credentials securely.
|
This is what the structure of our project should look like.

- config folder: Contains the test_config.ini file, which stores the configuration settings.
- pages folder: Contains the login_page.py file, which contains the Page Object Model (POM) for the login page.
- tests folder: Contains the test files.
- utils folder: Contains the config_reader.py file, which contains a function to read the configuration settings from the test_config.ini file.
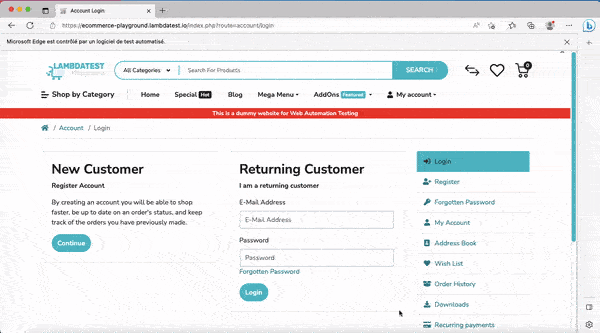
File: test_config.ini
The test_config.ini file stores the URL and login credentials for the website.
|
1 2 3 4 5 |
[WEBSITE] url = https://ecommerce-playground.lambdatest.io/index.php?route=account/login [LOGIN] email = test@test.lambdatest.com password = lambdatest_password |
File: config_reader.py
The config_reader.py file contains a function to read the configuration settings from the test_config.ini file.
|
1 2 3 4 5 6 |
import configparser def read_config(section, key): config = configparser.ConfigParser() config.read('config/test_config.ini') return config[section][key] |
This function takes two arguments: section and key, which correspond to the section and key in the test_config.ini file. It returns the value of the specified key in its specified section.
File: login_page.py
The login_page.py file contains the Page Object Model (POM) for the login page.
|
1 2 3 4 5 6 7 8 9 10 11 12 13 14 15 16 17 18 19 20 21 22 23 24 25 26 27 28 29 30 31 |
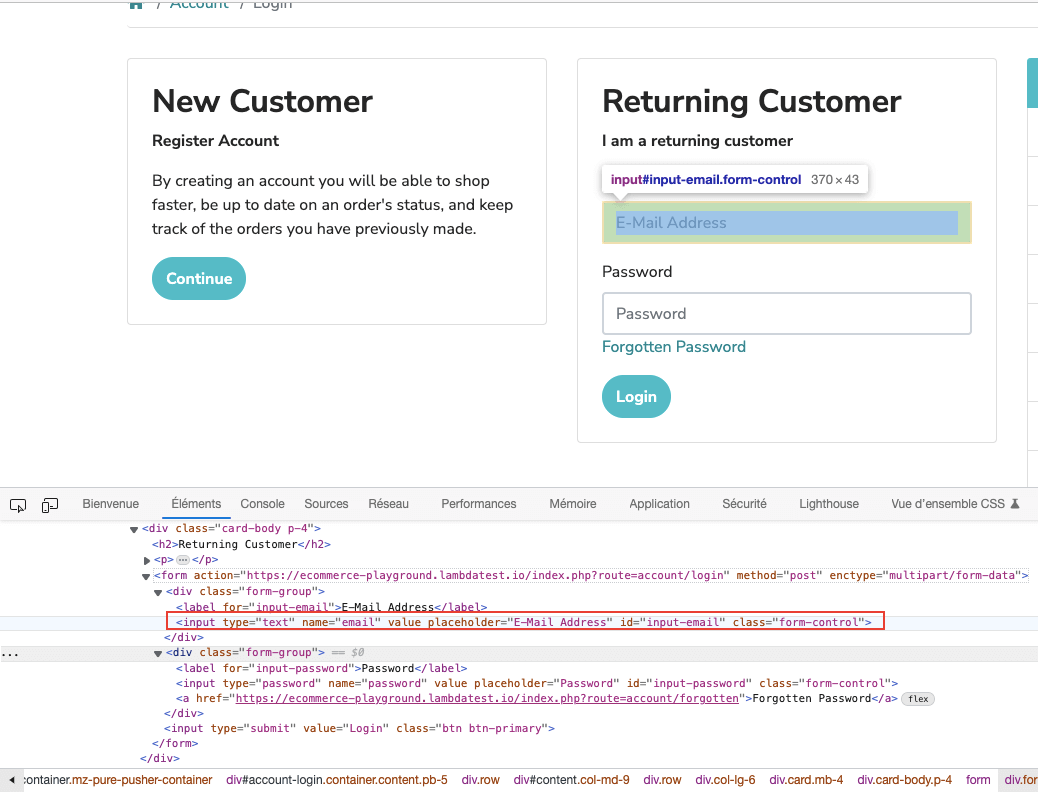
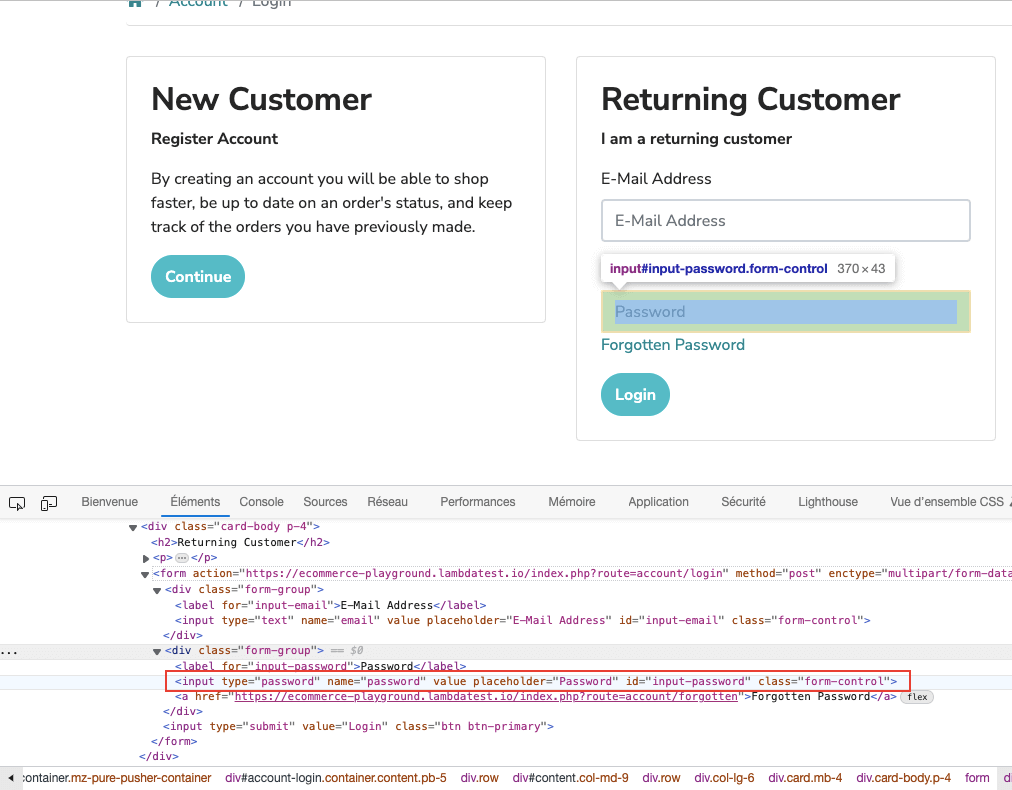
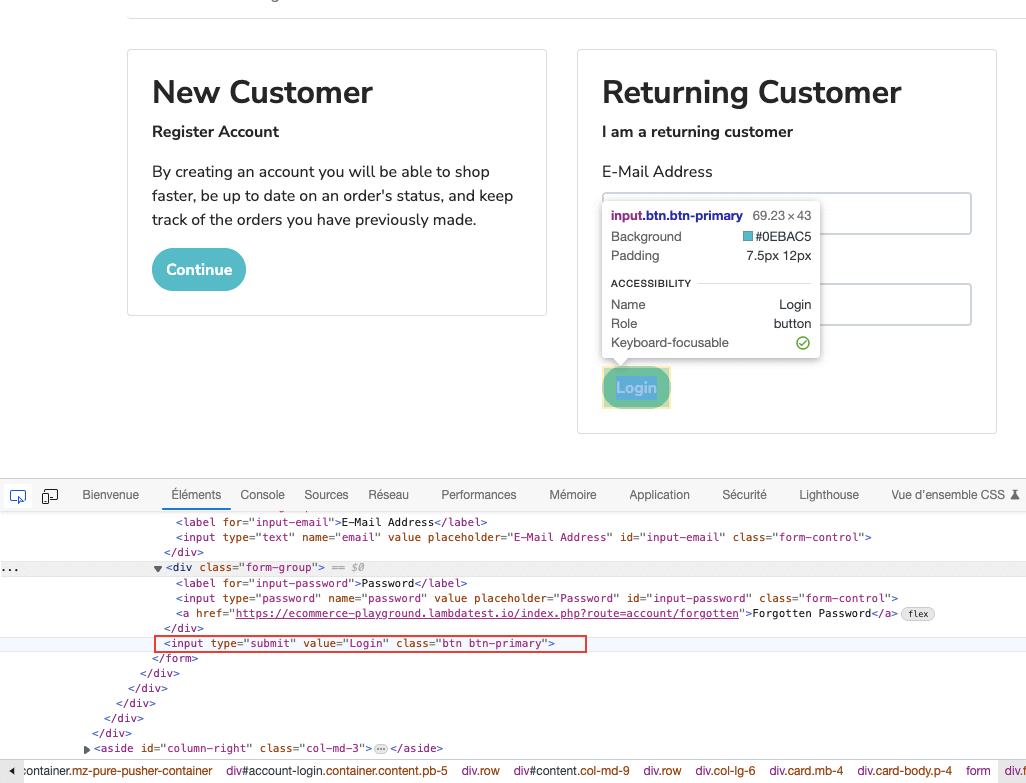
from selenium.webdriver.common.by import By from selenium.webdriver.support.ui import WebDriverWait from selenium.webdriver.support import expected_conditions as EC from utils.config_reader import read_config class LoginPage: def __init__(self, driver): self.driver = driver self.wait = WebDriverWait(self.driver, 10) @property def email(self): return self.wait.until(EC.presence_of_element_located((By.ID, 'input-email'))) @property def password(self): return self.wait.until(EC.presence_of_element_located((By.ID, 'input-password'))) @property def submit_button(self): return self.wait.until(EC.element_to_be_clickable((By.XPATH, "//input[@value='Login']"))) def login(self): self.email.send_keys(read_config('LOGIN', 'email')) self.password.send_keys(read_config('LOGIN', 'password')) self.submit_button.click() |

This class defines the elements and actions for the login page. The class contains methods to interact with the page elements, such as the E-Mail input field, Password input field, and Submit button, as shown in Fig. 1, Fig. 2, and Fig. 3, respectively.
It uses the Selenium WebDriverWait class to wait for the page elements to be present and clickable before interacting with them.
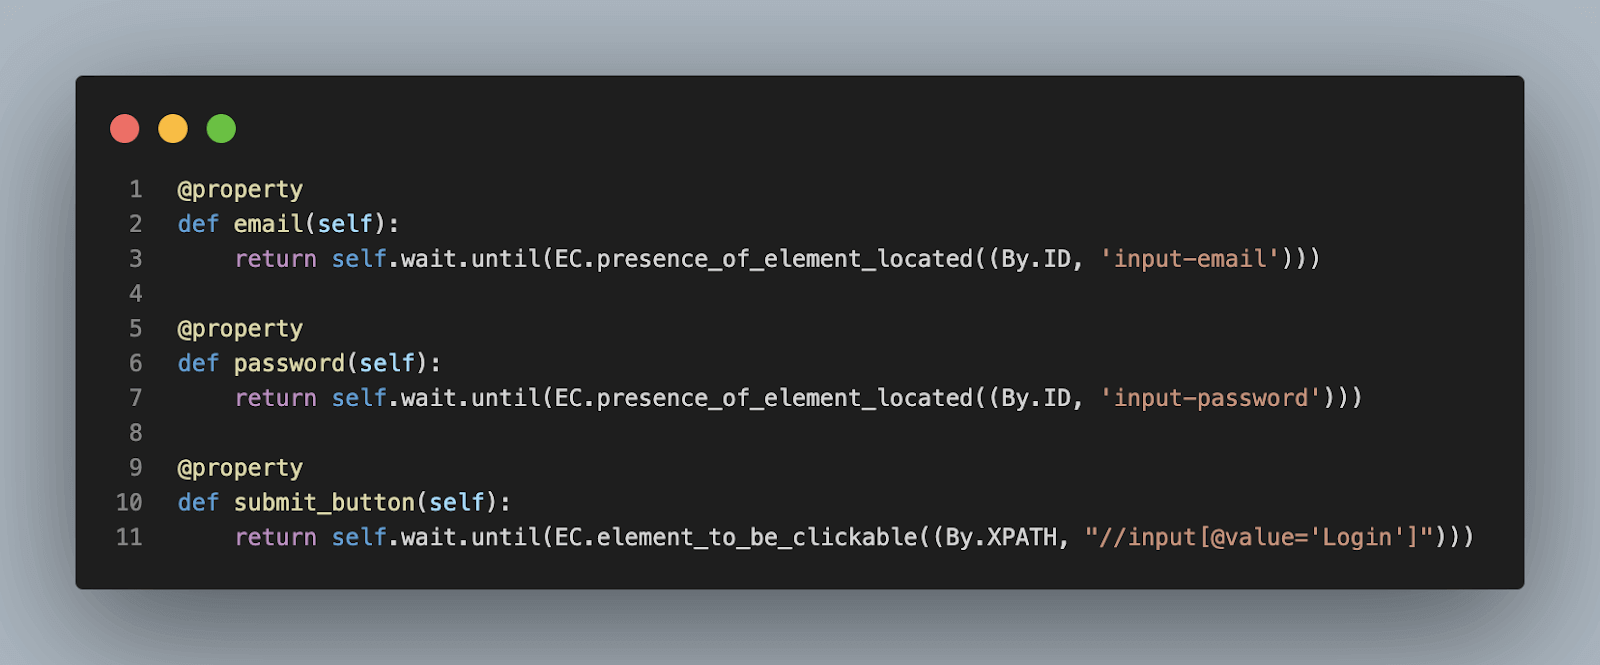
The @property decorator is used to define methods that behave like properties. In this case, the properties email, password, and submit_button are defined using the @property decorator. These properties are then used in the login() method to interact with the page elements.
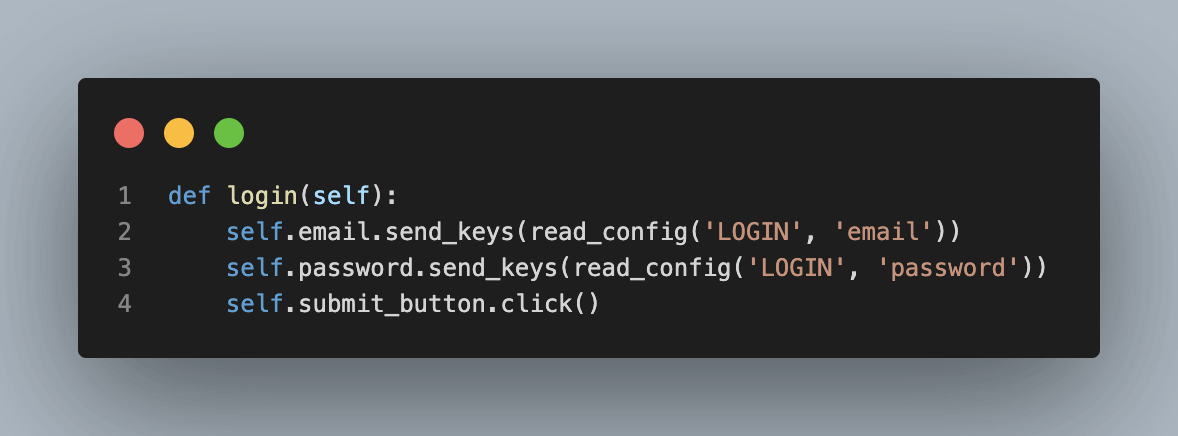
The login() method uses the read_config() function from the config_reader module to read the login credentials from the test_config.ini file. It then sends the email and password values to the respective input fields using the send_keys() method and clicks the submit button using the click() method.
File: test_login.py
The test_login.py file contains the test that tests the login feature using Python unittest and Selenium.
|
1 2 3 4 5 6 7 8 9 10 11 12 13 14 15 16 17 18 19 20 21 22 23 24 25 26 |
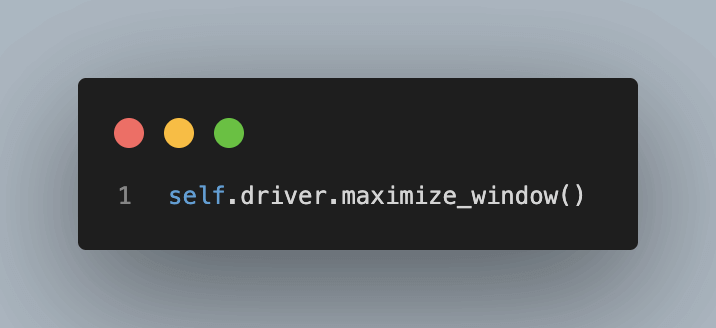
import unittest from selenium import webdriver from pages.login_page import LoginPage from utils.config_reader import read_config import time class TestLogin(unittest.TestCase): def setUp(self): self.driver = webdriver.Firefox() self.driver.get(read_config('WEBSITE', 'url')) self.driver.maximize_window() def tearDown(self): self.driver.quit() def test_login(self): login_page = LoginPage(self.driver) login_page.login() time.sleep(5) if __name__ == '__main__': unittest.main() |
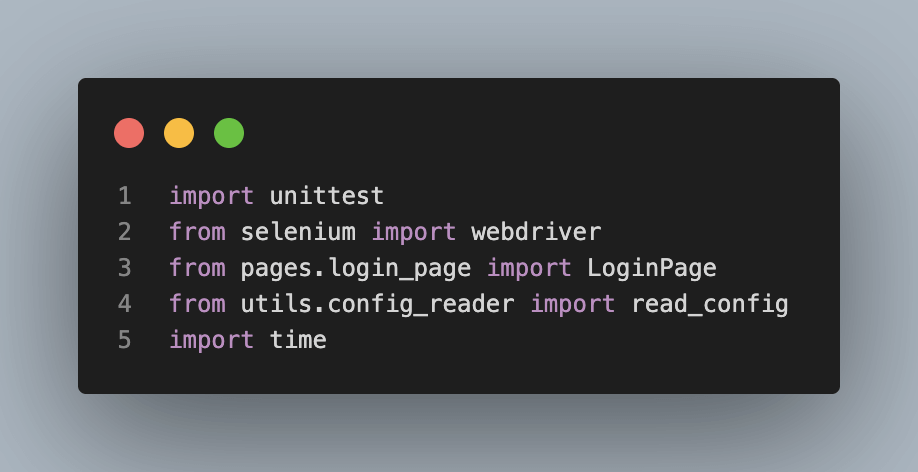
Here, we import the necessary modules, including the unittest module for creating tests, the Selenium WebDriver module for controlling the browser, the LoginPage class from the login_page file, and the read_config function from the config_reader file in utils for reading configuration data.
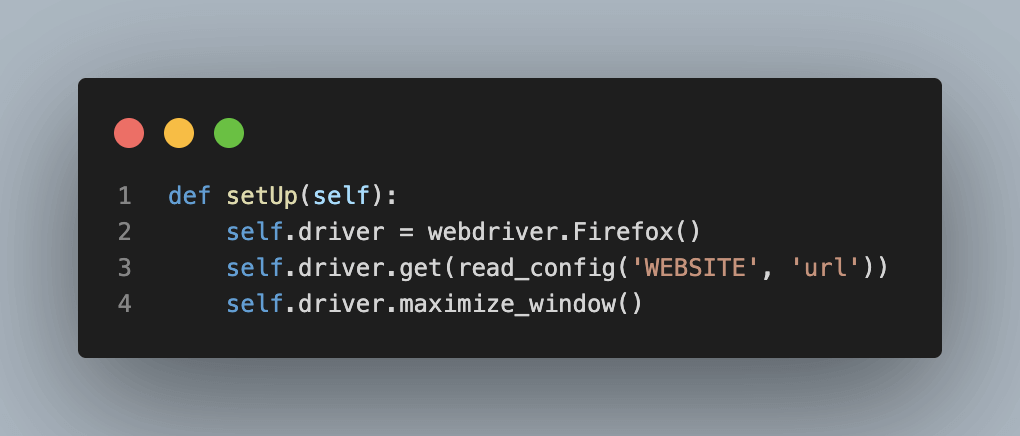
This class defines a test that uses setUp() to initialize the Firefox driver, open the website URL and maximize the window. tearDown() is used to close the driver after the test has run.
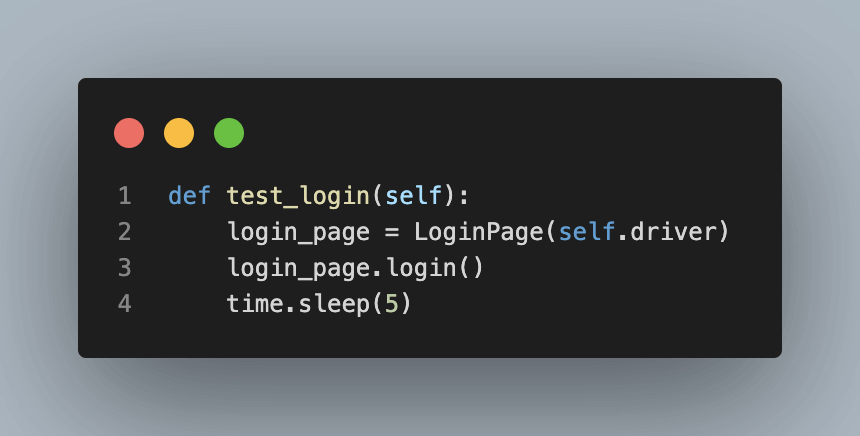
The test_login() method instantiates the LoginPage class and logs in using the login() method.
Now we can run our test using the command in our terminal.
python3 -m unittest
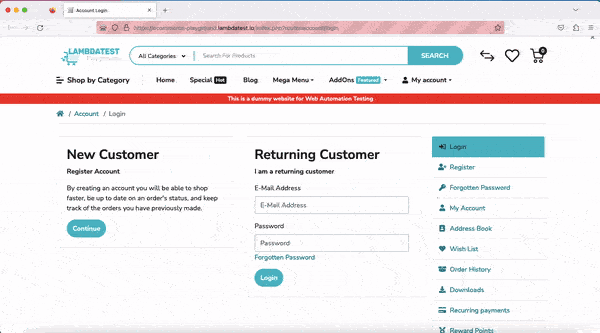
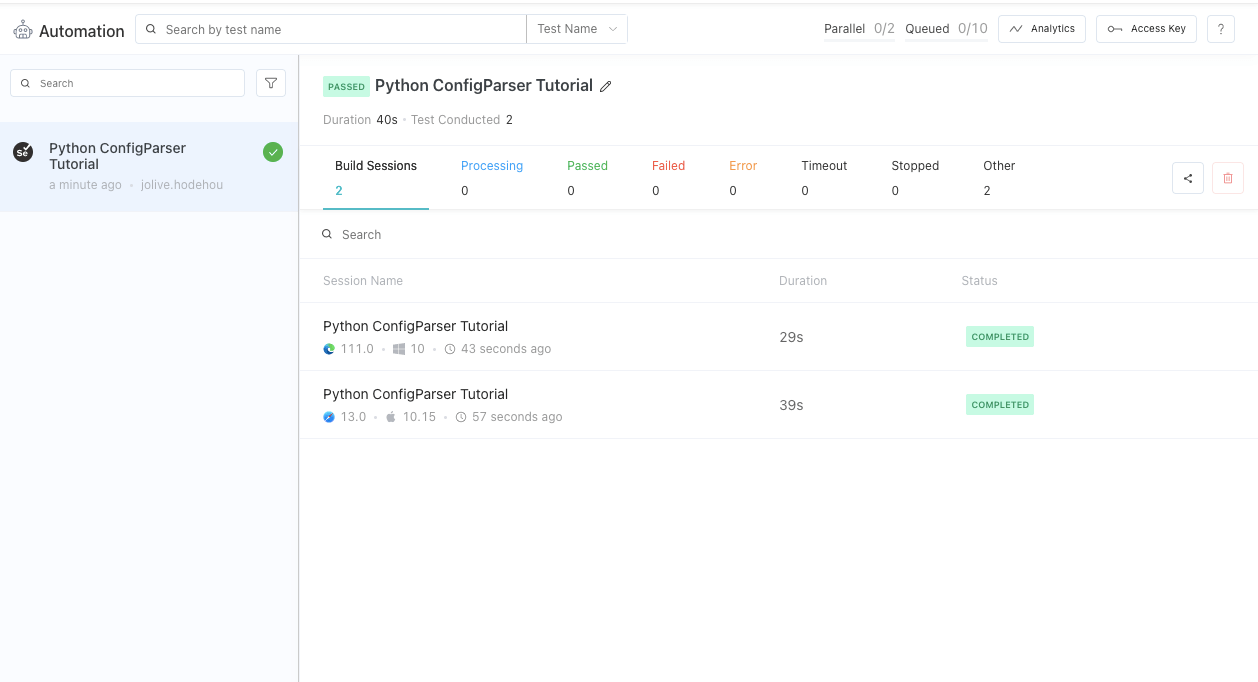
Test Overview
Once the tests are executed, the login instantiates the LoginPage class and logs in. Have a quick glimpse.
Use Case 2: Managing testing on different environments
QA Engineer, working on a web application with different environments for development, staging, and production, has different URLs and API keys. To perform the application testing, we need to execute tests on all three environments.
|
1 2 3 4 5 6 7 8 9 10 11 12 13 |
[DEV] url = https://dev.lambdatest.com api_key = abcdef123456 [STAGING] url = https://staging.lambdatest.com api_key = abcdef123456 [PROD] url = https://lambdatest.com api_key = abcdef123456 |
We use the environment name as a section header and list the key-value pairs specific to each environment under it. When we need to run tests in a specific environment, we can load the appropriate section and use the values in our test scripts.
For example, in our use case 1, if we wanted to use the URL of our website in the staging environment, we would modify our setUp method as follows.
|
1 2 3 4 5 |
class TestLogin(unittest.TestCase): def setUp(self): self.driver = webdriver.Firefox() self.driver.get(read_config(STAGING, 'url')) self.driver.maximize_window() |
We can modify it depending on the environment in which we want to run our tests. We can also modify the setUp method to run the test in several environments using a loop.
|
1 2 3 4 5 6 7 8 9 |
class TestLogin(unittest.TestCase): def setUp(self): self.driver = webdriver.Firefox() self.driver.maximize_window() environments = ['TEST', 'STAGING', 'PROD'] for env in environments: self.driver.get(read_config(env, 'url')) |
In this modified setUp method, first initialize the driver and maximize the window.
Then, we define a list of environments in which we want to run the test.
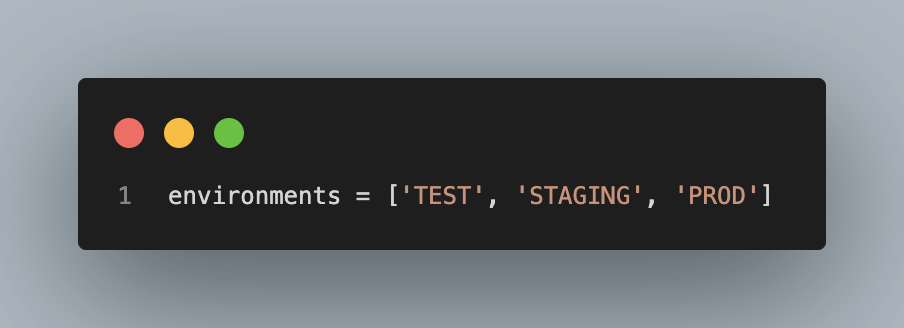
We loop over each environment and call the read_config function with the current environment and the key URL to get the corresponding URL value from the Python config file. Finally, we call self.driver.get with the URL value to navigate to the corresponding page in the current environment.
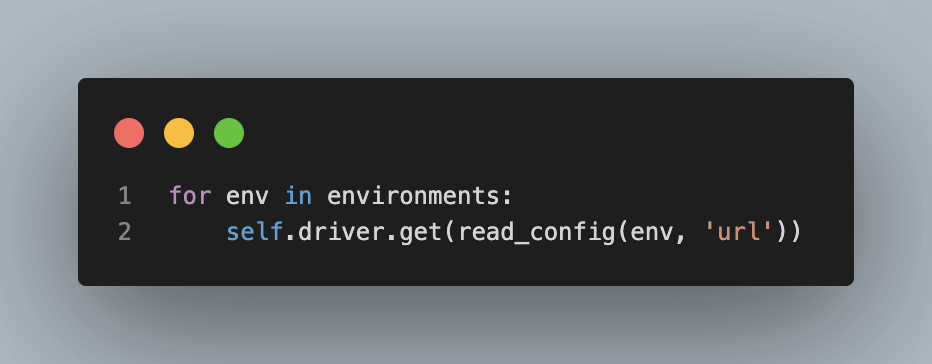
This way, the test will run in each of the specified environments, and the URL value will be read from the corresponding Python config file for each environment.
Use Case 3: Browser Management through Configuration
Let’s try to get more out of the Python ConfigParser library by using it for an even more interesting use case. We will add a new configuration that will allow us to switch our tests from one browser to another or to run them in the main browsers without having to change them each time.
To add a new configuration to change the browser, we can modify the test_config.ini file to include a new section for BROWSER with a key-value pair for the browser to be used:
|
1 2 3 4 5 6 7 8 9 10 11 |
[WEBSITE] url = https://ecommerce-playground.lambdatest.io/index.php?route=account/login [LOGIN] email = test@test.lambdatest.com password = lambdatest_password [BROWSER] name = Edge |
We can then modify the setUp() method in test_login.py to read the browser name from the test_config.ini file:
|
1 2 3 4 5 6 7 8 9 10 11 12 |
def setUp(self): browser_name = read_config('BROWSER', 'name') if browser_name.lower() == 'chrome': self.driver = webdriver.Chrome() elif browser_name.lower() == 'firefox': self.driver = webdriver.Firefox() elif browser_name.lower() == 'edge': self.driver = webdriver.Edge() else: raise ValueError('Invalid browser name') self.driver.get(read_config('WEBSITE', 'url')) self.driver.maximize_window() |
This modification allows us to specify which browser to use in the test_config.ini file and then use that value to initialize the appropriate driver in the setUp() method.
With these modifications, we can run our tests in different browsers by simply changing the value of the name key in the BROWSER section of the test_config.ini file.
Note that we can also use this approach to run the tests in multiple browsers by reading a list of browser names from the test_config.ini file and then initializing the corresponding drivers in a loop.
Test Overview
Here is a GIF that showcases how tests are executed in multiple browsers by reading a list of browser names from the test_config.ini file.
Use Case 4: Parallel Testing on LambdaTest
Digital experience platforms like LambdaTest facilitate automated Selenium testing using Python on an online browser farm of 3000+ real browsers and OS combinations, enabling developers and QA teams to carry out Python web automation at scale. The platform supports various Python testing frameworks such as pytest, Robot, and Behave, providing flexibility to the users.
You can also Subscribe to the LambdaTest YouTube Channel and stay updated with the latest tutorials around automated browser testing, Selenium testing, Cypress E2E testing, CI/CD, and more.
Visit our support documentation to get started with Selenium Python testing.
To run tests on LambdaTest, we need to add the LambdaTest credentials to our configuration file. We can add a new section for LAMBDATEST with keys for the username and access_key. You can find the same from the LambdaTest Automation Dashboard.

We also need to add the browser & OS combinations we want to run our parallel tests to our configuration file. To do this, we add a BROWSER_OS_LIST section.
|
1 2 3 |
[BROWSER_OS_LIST] safari_latest_mac = {"browserName": "safari", "browser_Version": "latest", "platformName": "macOS Catalina"} edge_latest_win10 = {"browserName": "MicrosoftEdge", "browser_Version": "latest", "platformName": "Windows 10"} |
Let’s also modify our config_reader.py file by adding a new function that can take a section as an argument and return all the key-value pairs in that section as a dictionary.
|
1 2 3 4 |
def read_config_section(section): config = configparser.ConfigParser() config.read('config/test_config.ini') return config[section] |
Now we need to modify our test_login.py file to be able to run our test in the browser and OS combinations defined in our configuration file.
Here is what the code should look like now:
Code Walkthrough
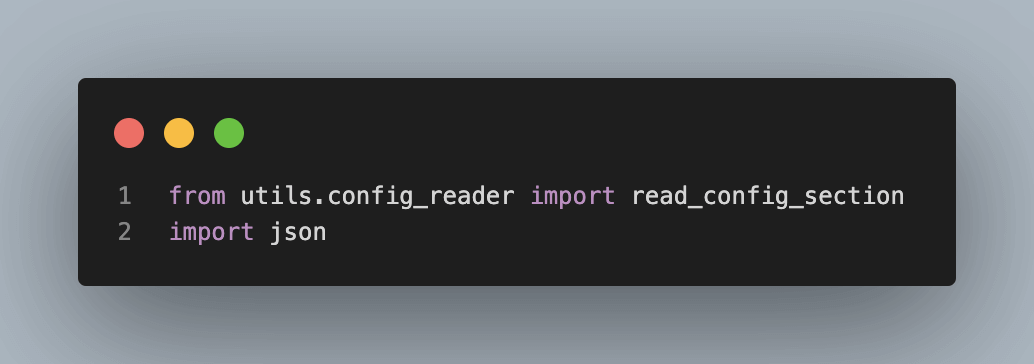
Step 1: We imported the read_config_section function that we had defined in the config_reader module and then imported JSON, a built-in Python library for working with JSON data.
Step 2: In the setUp method, we initialize the test environment. We start by reading the configuration section named ‘BROWSER_OS_LIST’ using the read_config_section function. This section contains a dictionary of operating systems and browsers.
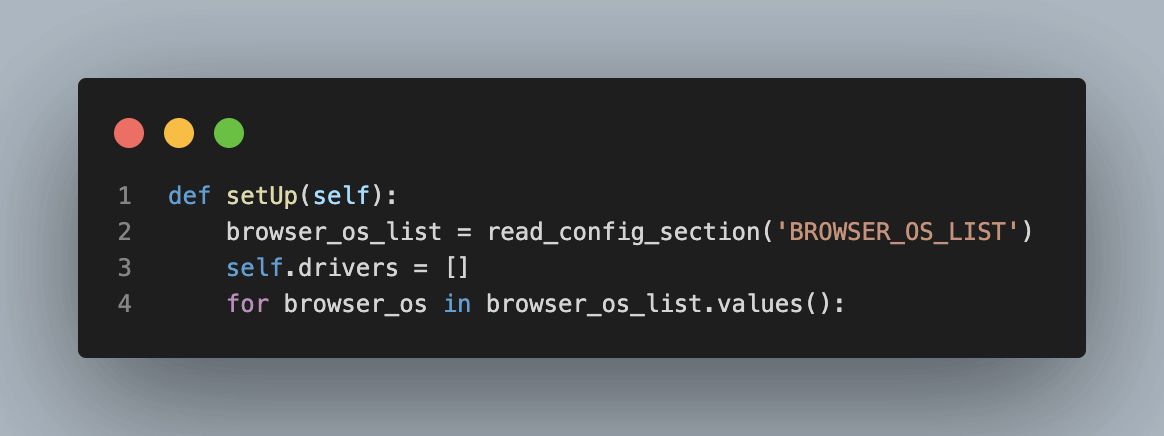
We then initialize an empty list called self.drivers to store the WebDriver instances for each browser. Next, we iterate through each value (browser operating system) in the browser_os_list dictionary.
|
1 2 3 4 5 6 7 8 9 10 11 |
lt_options = { "user": read_config('LAMBDATEST', 'username'), "accessKey": read_config('LAMBDATEST', 'access_key'), "build": "Python Configparser Tutorial", "name": "Python Configparser Tutorial", "platformName": json.loads(browser_os)["platformName"], "w3c": True, "browserName": json.loads(browser_os)["browserName"], "browserVersion": json.loads(browser_os)["browser_Version"], "selenium_version": "4.8.0" } |
Inside the loop, we create a dictionary called lt_options. This dictionary contains the configuration options required for running tests on the LambdaTest platform. The values for “user” and “accessKey” are read from the configuration using the read_config function.
Other values such as “platformName”, “browserName”, and “browserVersion” are extracted from the browser_os variable, which is expected to be a JSON string.
Step 3:
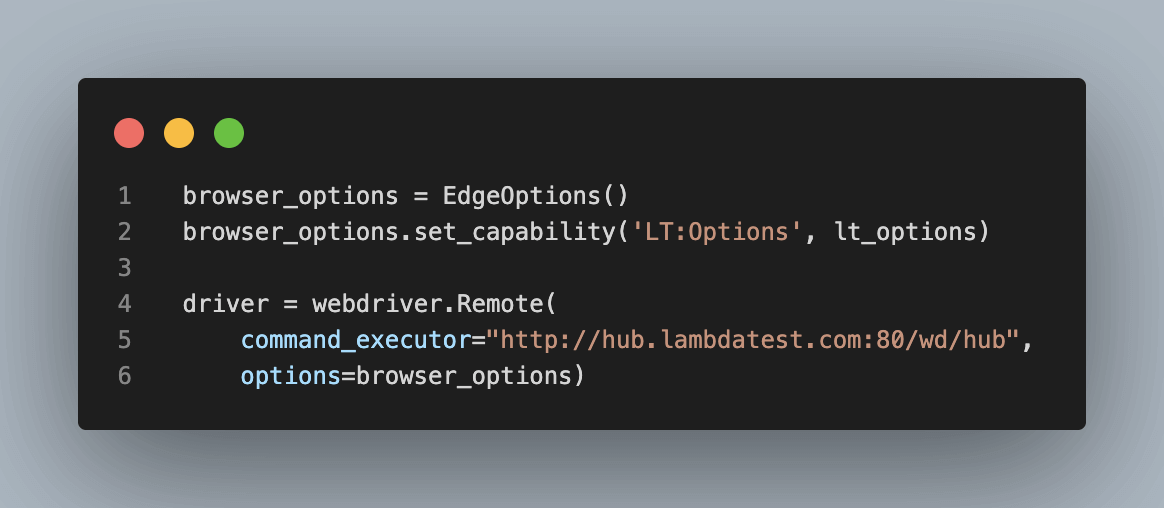
We create an instance of EdgeOptions and assign it to the browser_options variable. We then set the capability named ‘LT:Options’ with the lt_options dictionary.
Next, we create a webdriver.Remote instance, which represents a remote WebDriver. The command_executor parameter specifies the URL of the Selenium hub provided by LambdaTest, and the options parameter is set to the browser_options we created earlier.
Step 4:
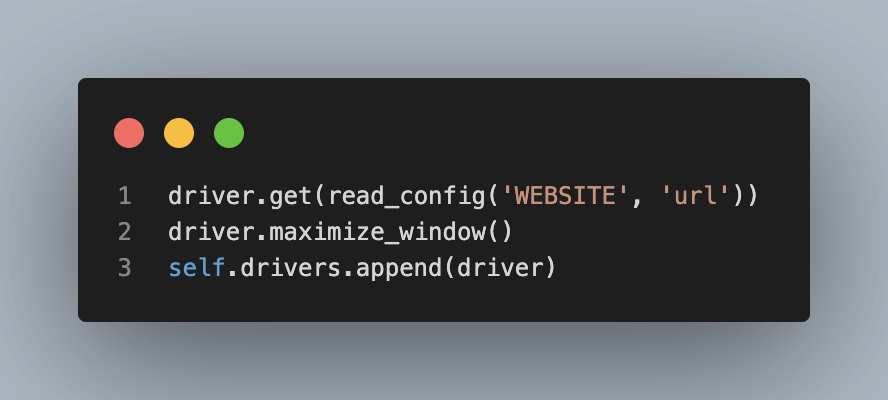
We use the get method of the driver instance to navigate to the URL of the website under test. The URL is retrieved from the configuration using the read_config function.
Then, we maximize the browser window using the maximize_window method of the driver. Finally, we add the driver instance to the self.drivers list.
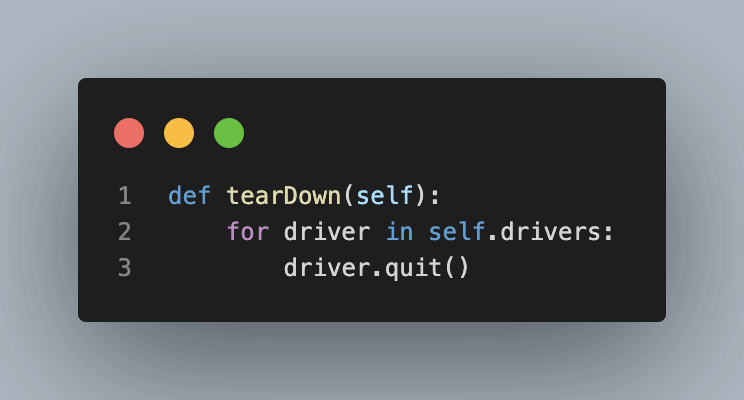
Step 5:
In the tearDown() method, we have added a loop that goes through the list of WebDriver instances and calls the quit() method for each of them to close the browser window and free up system resources.
Step 6:
Finally, in our test case, we have added another for loop, which is used to iterate on the self.drivers list for each instance of webdriver, an instance of the LoginPage class is created.
|
1 2 3 4 5 |
def test_login(self): for driver in self.drivers: login_page = LoginPage(driver) login_page.login() time.sleep(10) |
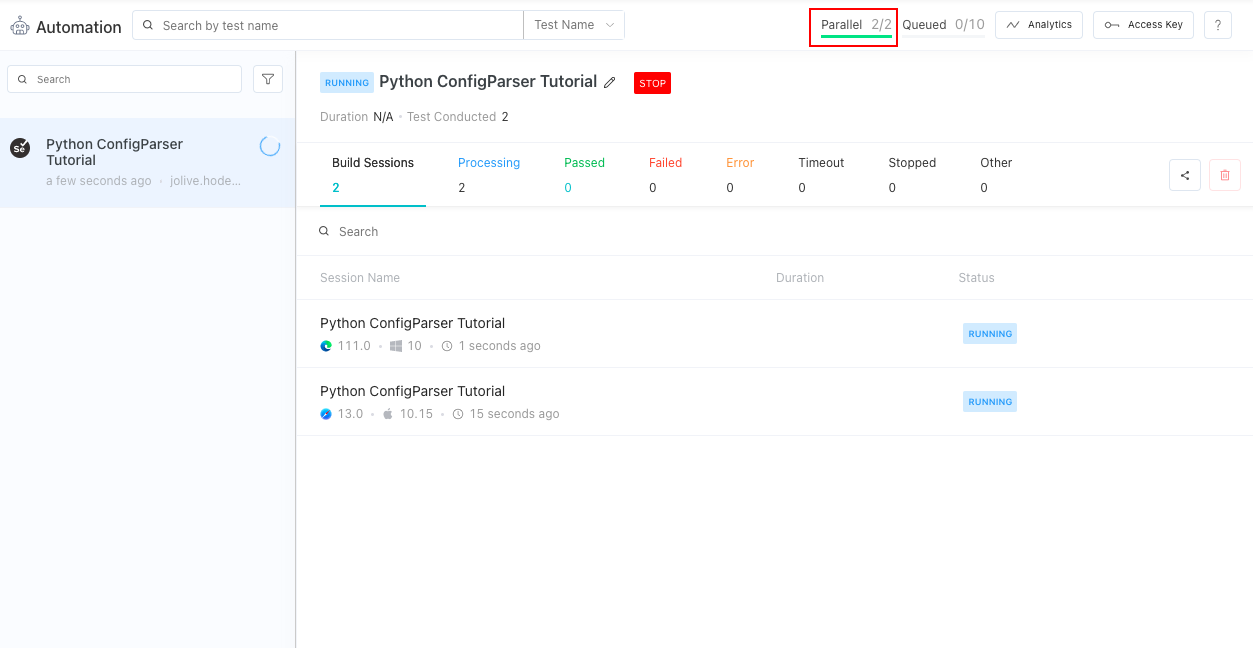
Test Overview
Attached are the screenshots where a test case loop is added to iterate on the self-driver list.
Are you eager to master Python automation testing? Embarking on a Selenium Python 101 certification program is an excellent choice to jumpstart your journey towards becoming an automation testing expert while enhancing your Python skills. By enrolling in this program, you’ll lay a strong foundation for effectively harnessing Selenium Python in your testing endeavors.
This certification program not only equips you with essential knowledge but also paves the path toward a prosperous career in the dynamic field of automation testing. Get ready to establish a solid groundwork and unlock endless possibilities in the world of Selenium Python.
Conclusion
In conclusion, the Python ConfigParser module is a powerful tool that allows developers to read and write configuration files easily. It provides a simple and intuitive interface for parsing and accessing the configuration values and supports various file formats, such as .ini and .cfg.
With Python ConfigParser, developers can easily customize their applications and make them more flexible and adaptable to various scenarios. By following best practices like separating the configuration data from the application code and encrypting sensitive information, developers can ensure the security and robustness of their applications.
Overall, Python ConfigParser is a valuable tool for any developer and is a great way to streamline the process of managing application configurations. Using Python ConfigParser to read configuration settings from an external file can make automation testing more efficient, flexible, and secure.
Frequently Asked Questions (FAQs)
What is the best way to write Python config file?
Writing a separate file with Python code is the simplest way to create configuration files. You could choose to name it databaseconfig.py. Then, to prevent unintentionally uploading it, you might add the line *config.py to your. gitignore file.
How to use config YAML file in Python?
The yaml.dump() method, which takes a Python object and a file reference as inputs, can be used to write data to the YAML file.


Author’s Profile
Jolivé Hodehou
Jolivé Hodehou is a QA Engineer and Technical Writer. He enjoys contributing to the delivery of valuable products by building a strategic vision of quality and by being involved in the different aspects of the tester's role.
Blogs: 7
Got Questions? Drop them on LambdaTest Community. Visit now


