
How to Take Screenshots in Python Using Selenium
Paulo Oliveira
Posted On: October 18, 2023
![]() 177166 Views
177166 Views
![]() 40 Min Read
40 Min Read
In the world of technology, ensuring flawless software functionality and identifying problems is essential. As the graphical user interface (GUI) becomes more complex, the need for consistent performance across various devices increases. It is important to find an efficient method for monitoring, evaluating, and enhancing software operations. Moreover, it’s important to understand how specific errors impact what users see on their screens.
To address these challenges, one effective approach is to utilize visual evidence, specifically screenshots, as valuable tools in software testing and development. These screenshots serve as invaluable assets for identifying problems and confirming the impact of errors on the user interface. This visual evidence is essential for maintaining a consistent user interface, pinpointing issues, and speeding up the correction process.
It also bridges automated operations and manual verification, enabling development teams to assess software responses and identify inconsistencies visually. It also helps development teams make data-driven decisions, monitor project development, identify areas for improvement, and optimize the user interface through A/B tests.
In this blog, you will learn to capture screenshots in Python and explore various techniques that can be applied in automation testing. You will also learn the best practices and tools used for Python screenshots.
By the time you finish reading, you’ll have a solid knowledge of using Python for taking screenshots in automated testing. This will enhance your software development and testing process.
TABLE OF CONTENTS
- What do you mean by visual captures?
- Basic Python setup
- Benefits of screenshot testing with Python
- Integrating Python screenshots into test automation
- Capturing Python screenshots using Selenium
- Potential challenges and solutions while taking Python screenshots
- Python screenshots API for cross-browser testing
- Bonus: Alternative tools for Python screenshots
- Demonstration: Python screenshots using Selenium
- Best practices while taking Python screenshots
- Conclusion
- Frequently Asked Questions (FAQs)
What do you mean by visual captures?
Visual captures are often referred to as screenshots; they serve as visual markers for on-screen activities, whether you’re creating step-by-step guides or documenting your software experiences. However, their significance becomes particularly evident in specific domains, with software testing and its automated aspects being a prime example.
Let’s say you have just launched a modern website boasting fast transitions, a user-friendly layout, and an excellent user experience. However, you start receiving feedback about its inconsistent appearance across different devices. This is where screenshots step in as an unrecognized hero. They provide immediate visual cues that are crucial for spotting any overlooked irregularities.
For instance, screenshots can be used to compare images and detect differences between different versions of an application, making them a necessary tool for ensuring consistent user experiences.
In software testing, screenshots are similar to ‘visual documentation’. They confirm that the software’s appearance matches its intended design, ensuring graphical elements are displayed correctly and free from any imperfections. In the context of test automation, their importance becomes even more noticeable.
Automated tests frequently run outside regular working hours, making screenshots valuable visual representations. Instead of diving into extensive logs or trying to decode cryptic error codes, quality assurance professionals can refer to screenshots to gain clear insight into emerging issues.
As we continue, we’ll discover how Python’s versatility simplifies capturing and organizing screenshots, making it an effective tool for visual insights. Let’s start setting up Python in the following section of this blog on Python screenshots.
Basic Python setup
Before we begin working with Python screenshots, let’s explore the standard steps for setting up the Python environment :
- Installing Python
- Verify installation
- Code editor
- Python set up
Download and install the latest version of Python from the official website.
If you already have Python installed in your system, you can check it using the following command.
|
1 |
python --version |
To work with Python screenshots and related libraries, it’s essential to use a compatible Python version. Python 3.6 or its subsequent releases are preferable. In this case, we will use Python 3.6, which offers consistent performance and adaptability with the latest tools and libraries. To determine your current Python version, input the following command line in your terminal
|
1 |
python3 --version |

You can use any basic text editor for writing Python code, we’ll use Visual Studio Code in this case as our code editor.
If Python isn’t already set up on your machine, navigate to Python’s official portal, search for the version adapted to your operating system, and proceed with the guided setup. During this phase, ensure you opt to “Include Python in PATH” for effortless accessibility via the terminal or command interface.
After setting Python in your system, you are ready to write Python code. If you are already aware of Python basics and want to upgrade to Python advanced, check out this complete Python tutorial for valuable, in-depth insights to enhance your Python knowledge.
Benefits of screenshot testing with Python
Screenshot testing is essential in the modern development environment, and Python makes this process more efficient and flexible. Below are some key benefits of incorporating Python screenshot testing:
- Easy to implement
- Versatility
- Integration with test automation
- Identifying UI issues
- Time and cost efficiency
- Facilitates better communication
- A/B testing and data-driven decisions
- Debugging made easy
Python is known for its clean, readable syntax, making it easier for beginners and seasoned programmers to implement Python screenshot testing. Various libraries and frameworks, such as PIL and Selenium, offer straightforward methods to capture and manipulate Python screenshots.
Python offers multiple libraries that can provide different needs, from capturing the entire screen specific windows, or even a small region. This makes it highly versatile for different types of testing, from unit testing to end-to-end testing.
Python screenshot testing can be easily integrated into existing test automation frameworks like pytest or unittest. This allows for seamless visual verification and functional testing, making your test suite more comprehensive.
Python screenshots provide a visual history of the application’s UI, making identifying inconsistencies or defects easier. This is particularly useful for web applications, where responsiveness and layout are crucial for user experience.
Automated Python screenshot tests save time and human resources. These tests can be run during off-hours and quickly cover much ground, making them cost-effective and efficient.
Having a visual representation makes it easier to communicate issues across the team. Python screenshots can be embedded into test reports and shared with designers, developers, and business stakeholders, fostering better understanding and quicker decision-making.
Python screenshots can also be valuable assets for data-driven decisions. They can be used in A/B testing to determine which of the two versions performs better regarding user engagement, layout effectiveness, and other key performance indicators.
When a test fails, capturing the Python screenshot can provide valuable debugging information. It offers developers a visual context that complements error messages and logs, expediting debugging.
In summary, Python screenshot testing is a ‘nice-to-have’ and a ‘must-have’ in your testing process. Its user-friendly nature, adaptability, and seamless integration make it the top choice for teams committed to building robust and flawless applications.
 Note
NoteUpgrade your testing with Python and screenshot testing. Try LambdaTest Today!
Integrating Python screenshots into test automation
Capturing screens isn’t just about recording or documentation; it becomes incredibly valuable when added to automated tests. Let’s delve into how taking images can improve testing and reporting.
The importance of visual verification
This plays an important role in our digital experiences. It ensures that what we see on the screen matches our expectations and requirements. In the following section below, we will learn the significance of visual verification in software testing, user experience, and more.
- The role of visual analysis in testing
- Real-world scenarios highlighting visual checks
- Spotting visual changes through Python screenshots
- Python Libraries for Image Differencing
- ImageChops: A component of the Pillow suite, ImageChops provides functionalities for mathematical image evaluations, emphasizing inconsistency.
- OpenCV: This extensive computer vision toolkit has functions like absdiff() that outline picture differences.
- @allure
- pytest
- –capture: This part of the command is employed to determine how pytest captures and presents the output, which includes standard output (stdout) and standard error (stderr) during test runs. It plays a crucial role in controlling the behavior of output capture and display.
- –tee-sys: it is one of the modes used in pytest and command. Using –tee-sys, you capture and display the output and duplicate it to the terminal (sys. stdout and sys. stderr). This means you can see the output in the test report and the terminal while running your tests.
- Import statement
- Defining function
- URL
- save_screenshot()
- get_screenshot_as_file()
- screenshot_data variable.
- quit()
- Import statement
- Defining function
- URL
- Locators
- specific_element.screenshots()
- quit()
- Automating visual testing: Regularly ensure that code changes have not broken any visual elements across platforms.
- Quality assurance: Before releasing new features, take Python screenshots to ensure everything renders correctly.
- Regression testing: Capture Python screenshots before and after code changes for a visual history, aiding in quickly identifying issues.
- Competitive analysis: Take snapshots of competitor web pages to compare user experience and visual elements.
- Efficiency: Eliminate the need for manual screenshot capturing, thus saving time.
- Broad coverage: Test across multiple browsers and operating systems in a single API call.
- Easy integration: The API can be easily integrated into your CI/CD pipeline for automated testing during every build.
- Flexibility: Choose from various configurations such as screen resolutions, defer time, etc.
- Collaboration: Enable email notifications to keep your team in the loop whenever a screenshot test is executed.
- Once Python is installed, use the Python package manager, pip, to install Selenium and pytest by running the following command:
- Requirements.txt contains the dependencies we want to install.
- After running, you can see the below output:
- The script begins by importing the necessary modules.
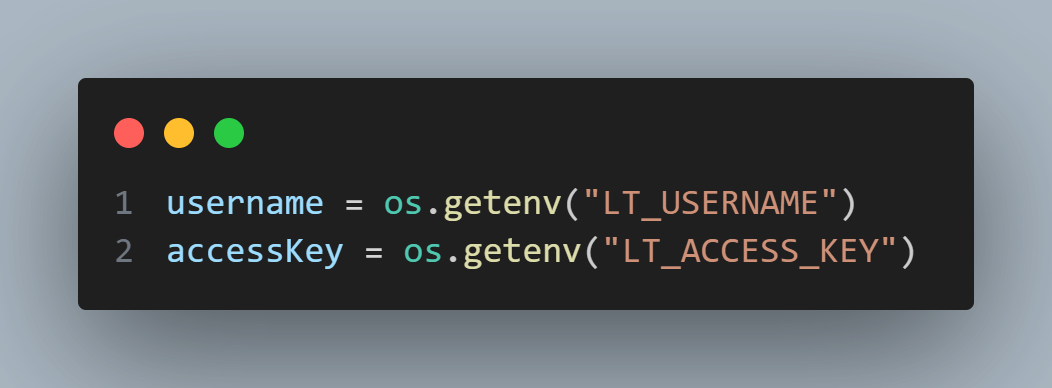
- The script fetches your LambdaTest username and access key from environment variables.
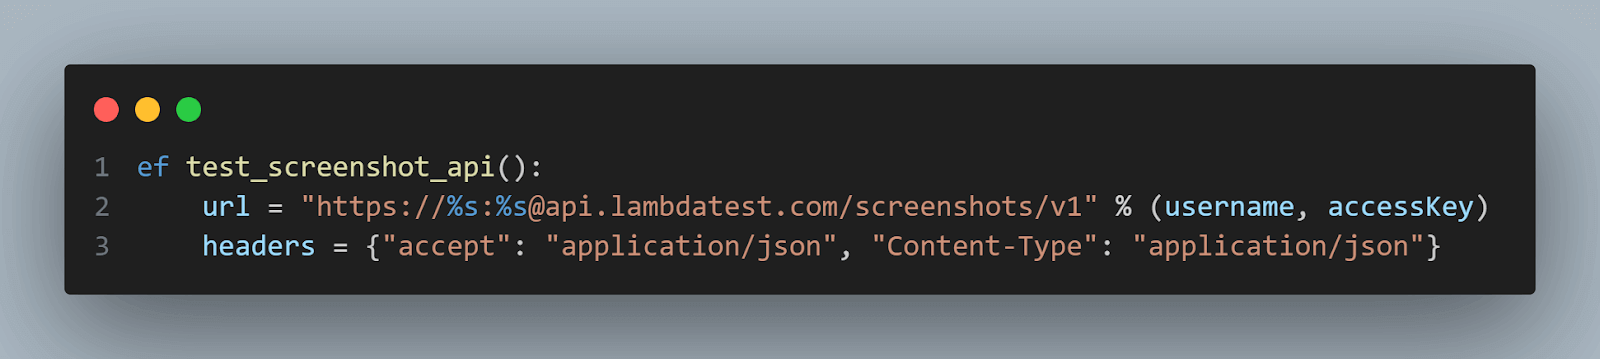
- The test_screenshot_api function performs an API request to LambdaTest to initiate a Python screenshot test. The function starts formatting a URL with the username and access key for authentication. Headers specify that the API should return JSON data.
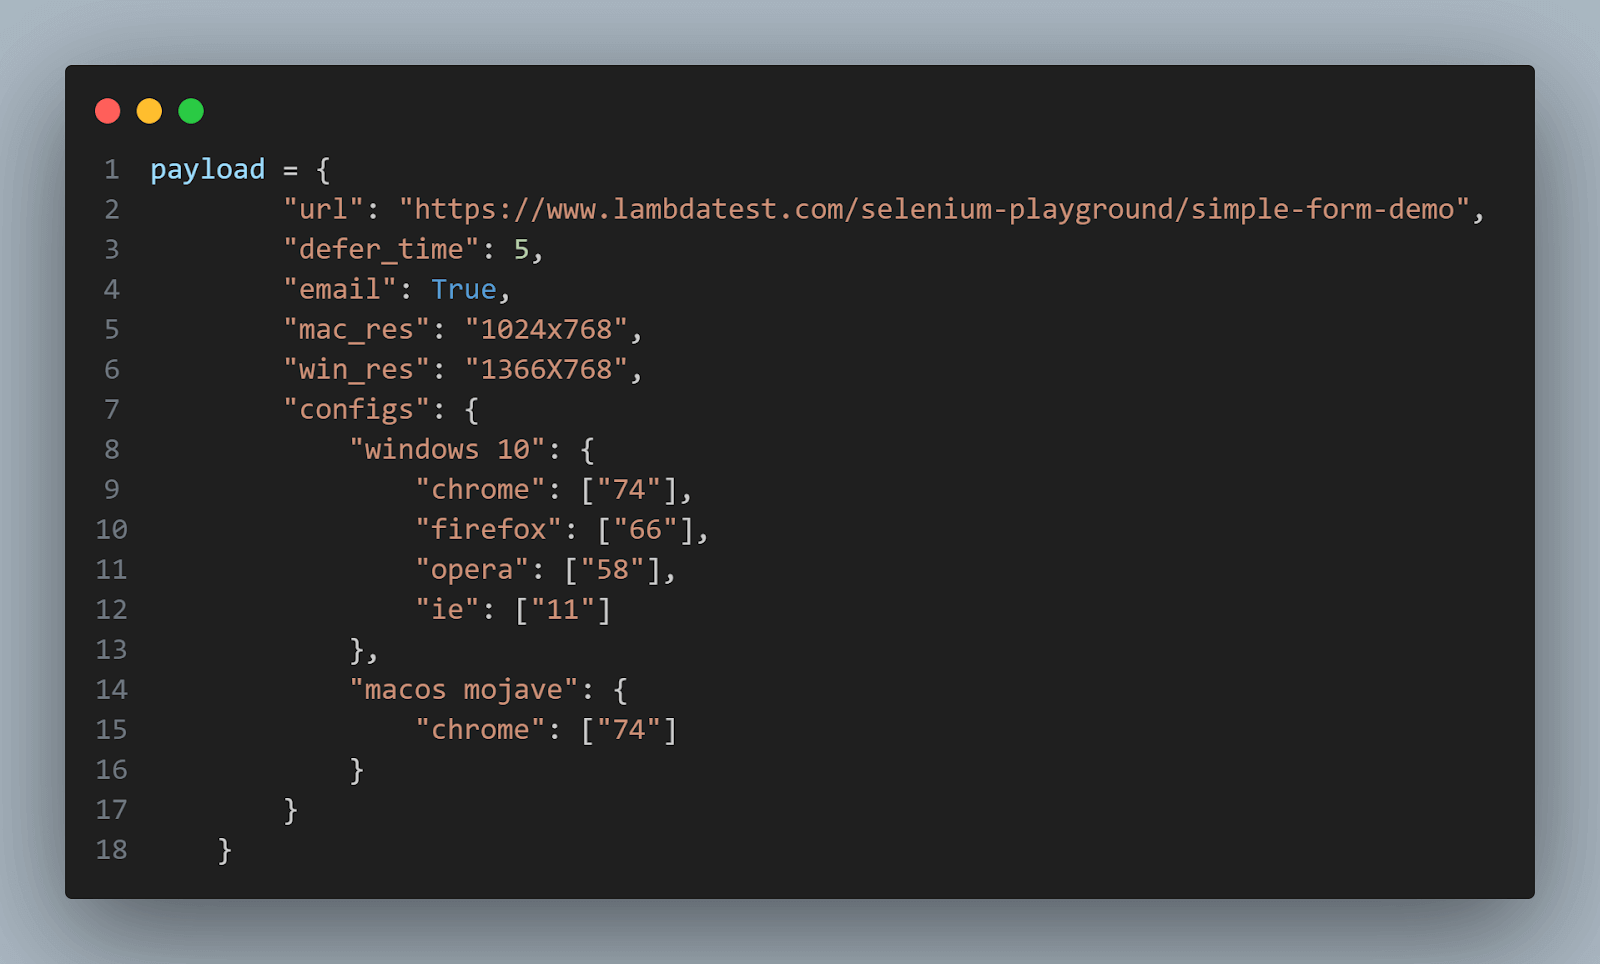
- This dictionary holds the configuration for the screenshot test, like which URL to capture, which browsers and operating systems to use, versions and resolutions, etc.
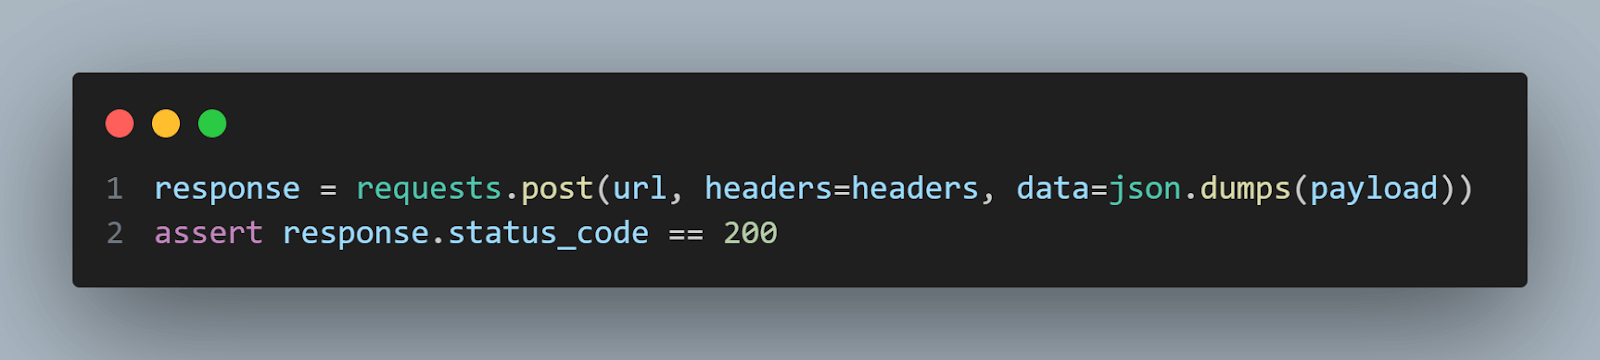
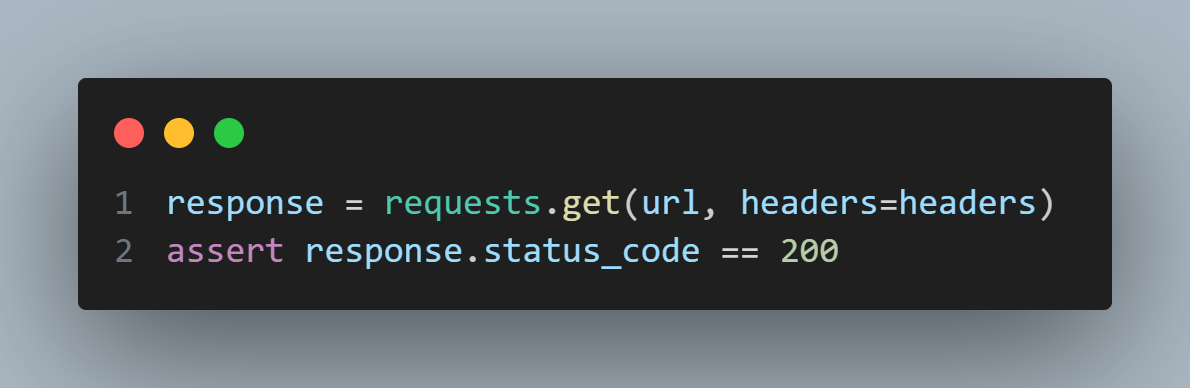
- A POST request is made to the API, sending the payload as JSON. The script asserts that the HTTP status code of the response is 200, indicating success.
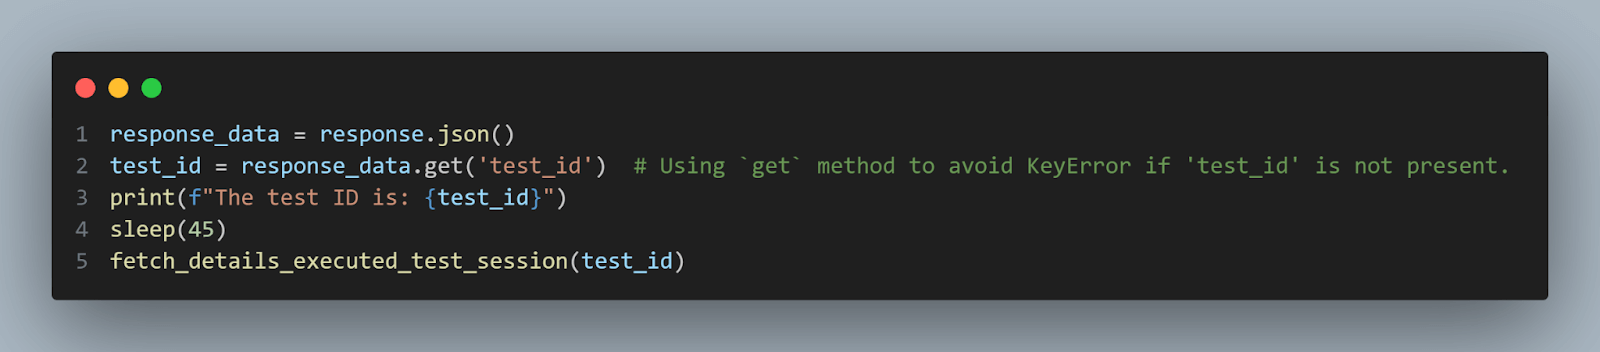
- The script then extracts the test ID from the JSON response and prints the received test ID to the console. The script is paused for 45 seconds to wait for the screenshot test to complete. This is not a good practice; we are just using this sleep here for didactic purposes so that you can see the result in just one execution. Finally, the function to fetch details of the executed test session using the test ID is called.
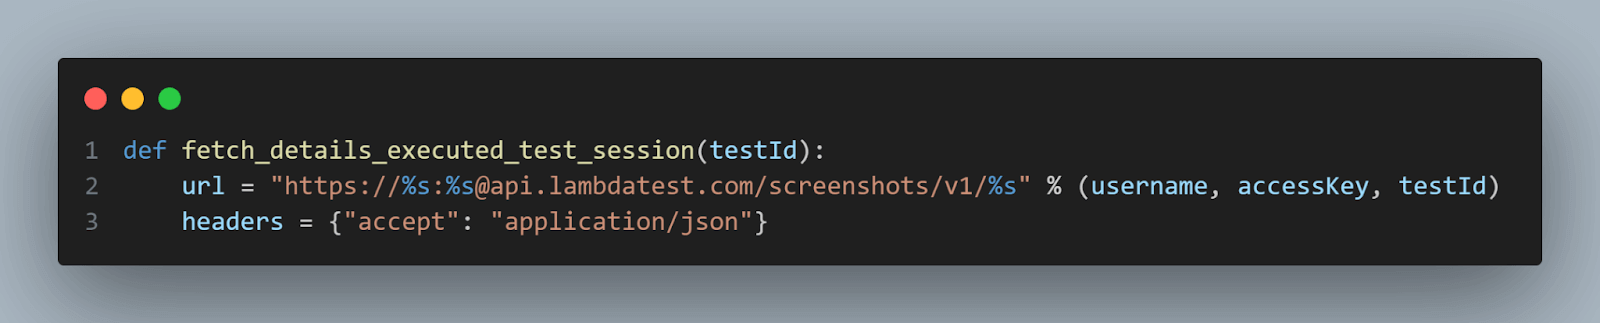
- The fetch_details_executed_test_session() function fetches the details of an executed test session from the LambdaTest API. The URL and headers are prepared similarly to the first function.
- Then, a GET request to fetch details is done, and the script asserts that the operation was successful.
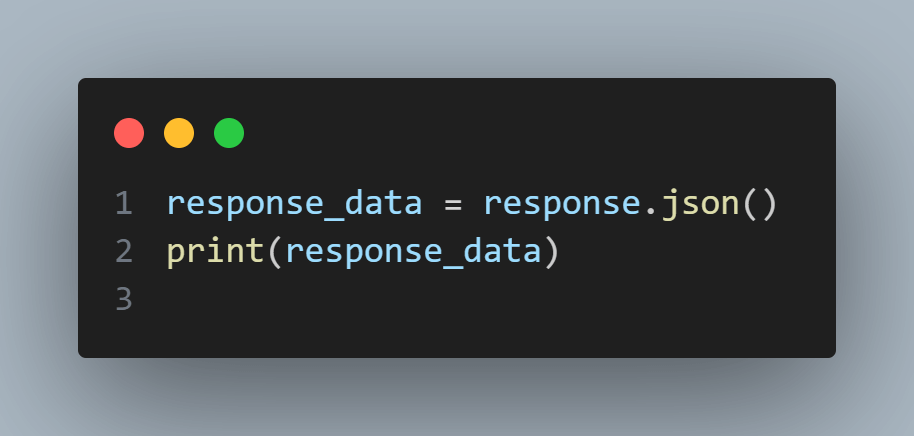
- Finally, the code prints the JSON response, which contains the details of the executed test session.
- Extensive file format support
- Easy-to-use API
- Powerful image manipulation capabilities
- Efficient memory usage
- Fast processing
- Strong community support
- Regular updates
- Wide application
- Cropping: If you captured more than you intended or just need a part of the screenshot, you can easily crop it.
- Rotating: Want to change the orientation? No problem. Use the specific function to perform operations like “rotate(and mention the degree) you want to rotate the image. Example rotate_img = img. rotate(90).
- Applying Filters: You can also apply various filters to your image using the below code
- Targeted captures
- Dynamic adjustments
- Resource efficiency
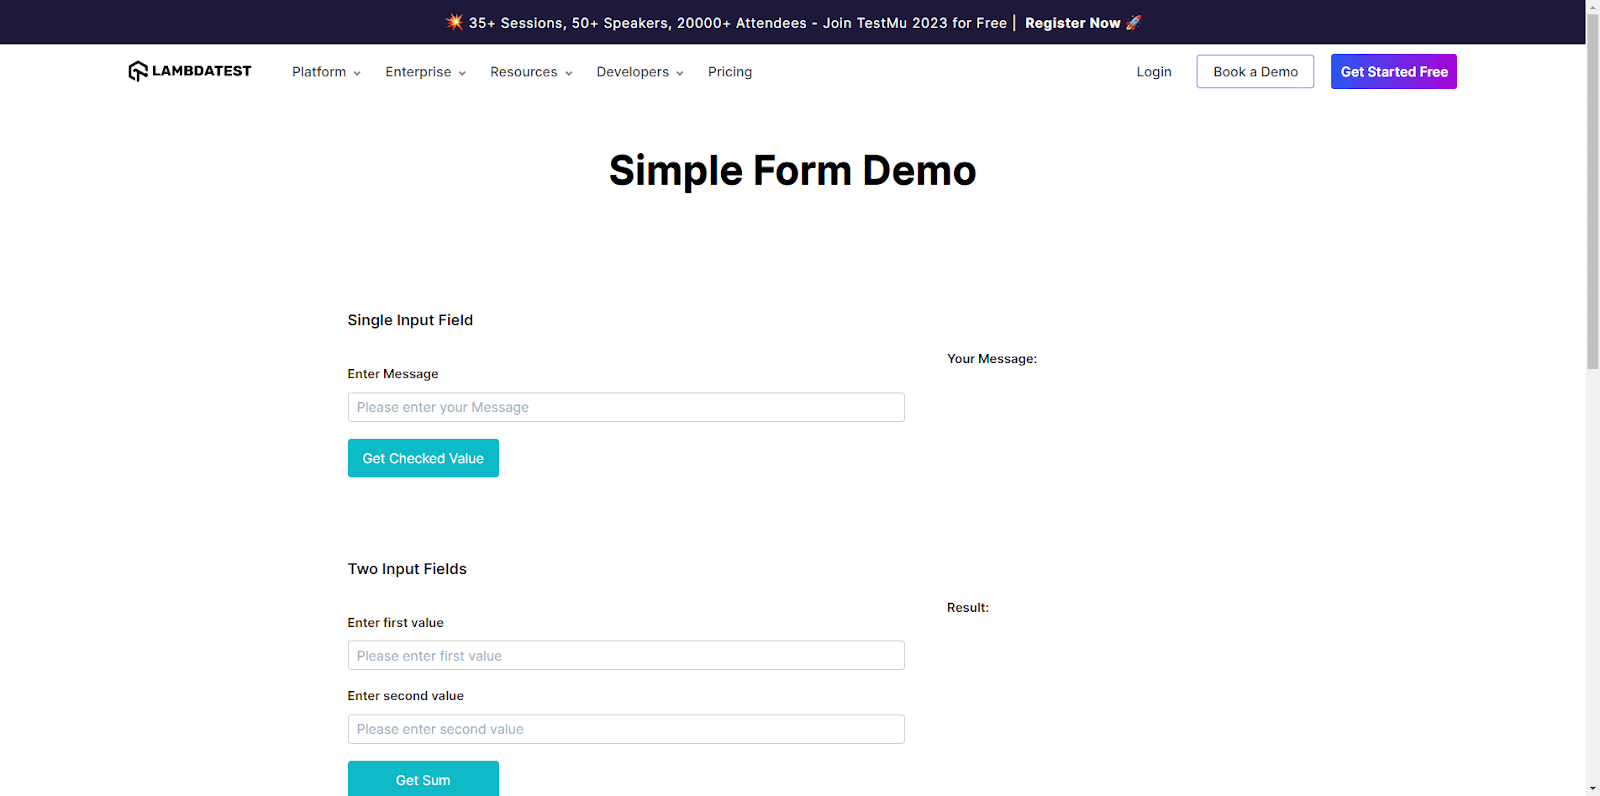
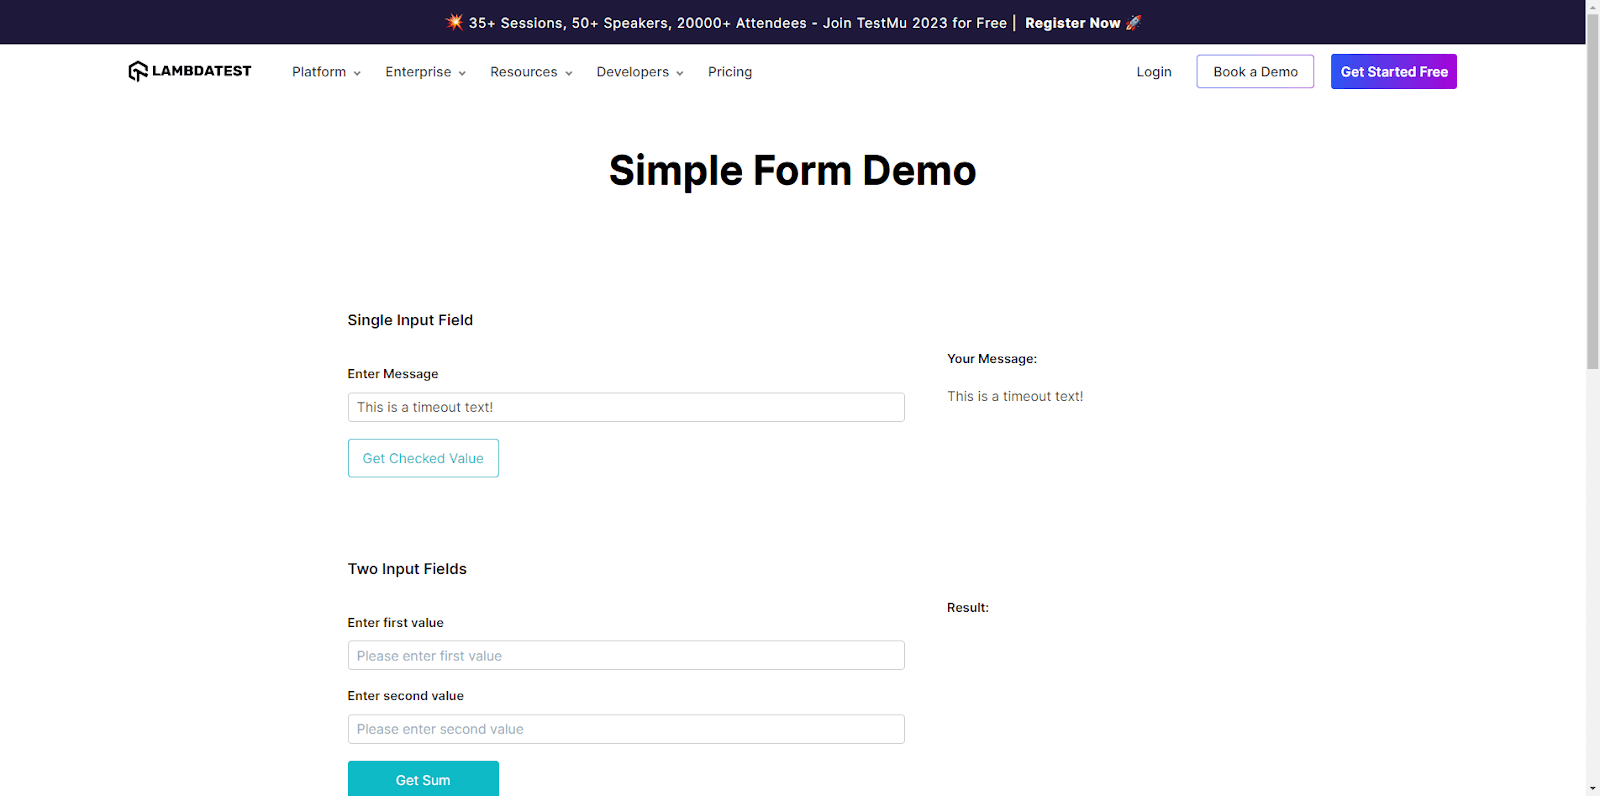
- Open the Simple Form Demo page in the LambdaTest Playground.
- Take a Screenshot of the entire page.
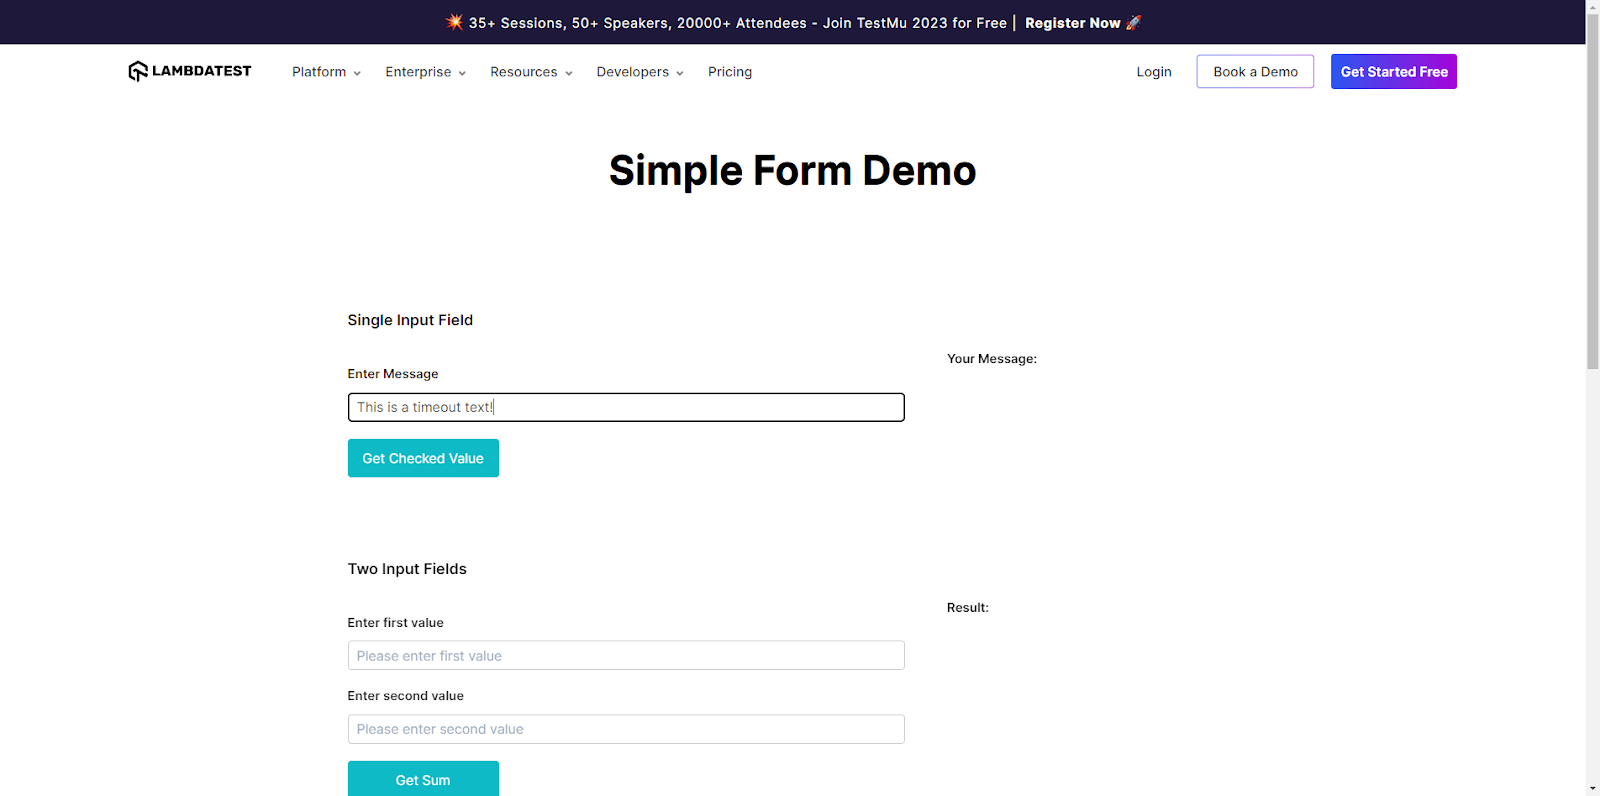
- Fill in the first field with a message.
- Take a Screenshot of the entire page.
- Click the Get Checked Value button.
- Take a Screenshot of the entire page.
- Check that the typed message is shown to the user on the right side.
- LambdaTest screenshot capability set to true.
- Open the Simple Form Demo page in the LambdaTest Playground.
- Fill in the first field with a message.
- Click the Get Checked Value button.
- Check that the typed message is shown to the user on the right side.
- Create a folder for your project (in our example python-screenshots).
- Open the project folder in Visual Studio Code.
- Open the command palette (menu View > Command Palette), and type “Configure Tests.”
- Select pytest as the test framework.
- Select the root directory option.
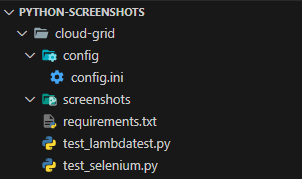
- First of all, let’s create the project structure:
FileName – config.ini - [WEBSITE] : Sets the test URL, guiding where the Selenium tests will run. For demonstration, a LambdaTest demo page is used.
- [LOGIN] : Acts as the platform’s gatekeeper, utilizing a username and access_key for personalized access to LambdaTest features.
- [CLOUDGRID] : Serves as the automation hub, featuring a grid_url for parallel testing. Parameters like build_name and test_name help organize tests. It adheres to global WebDriver standards through the w3c parameter and specifies browser and Selenium versions for compatibility.
- [ENV] : Defines the test environment, in this case, Windows 11 and Chrome, mirroring potential end-user conditions.
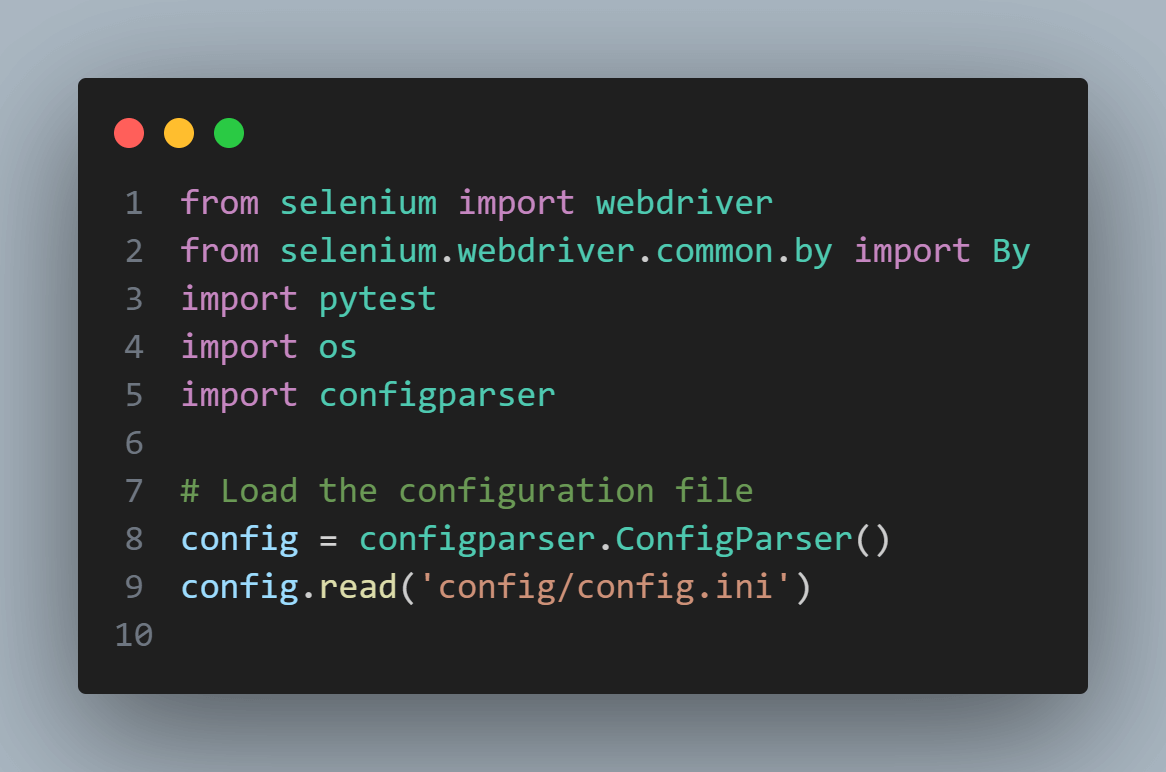
- The script begins by importing the necessary modules and loading configuration settings from the config.ini file.
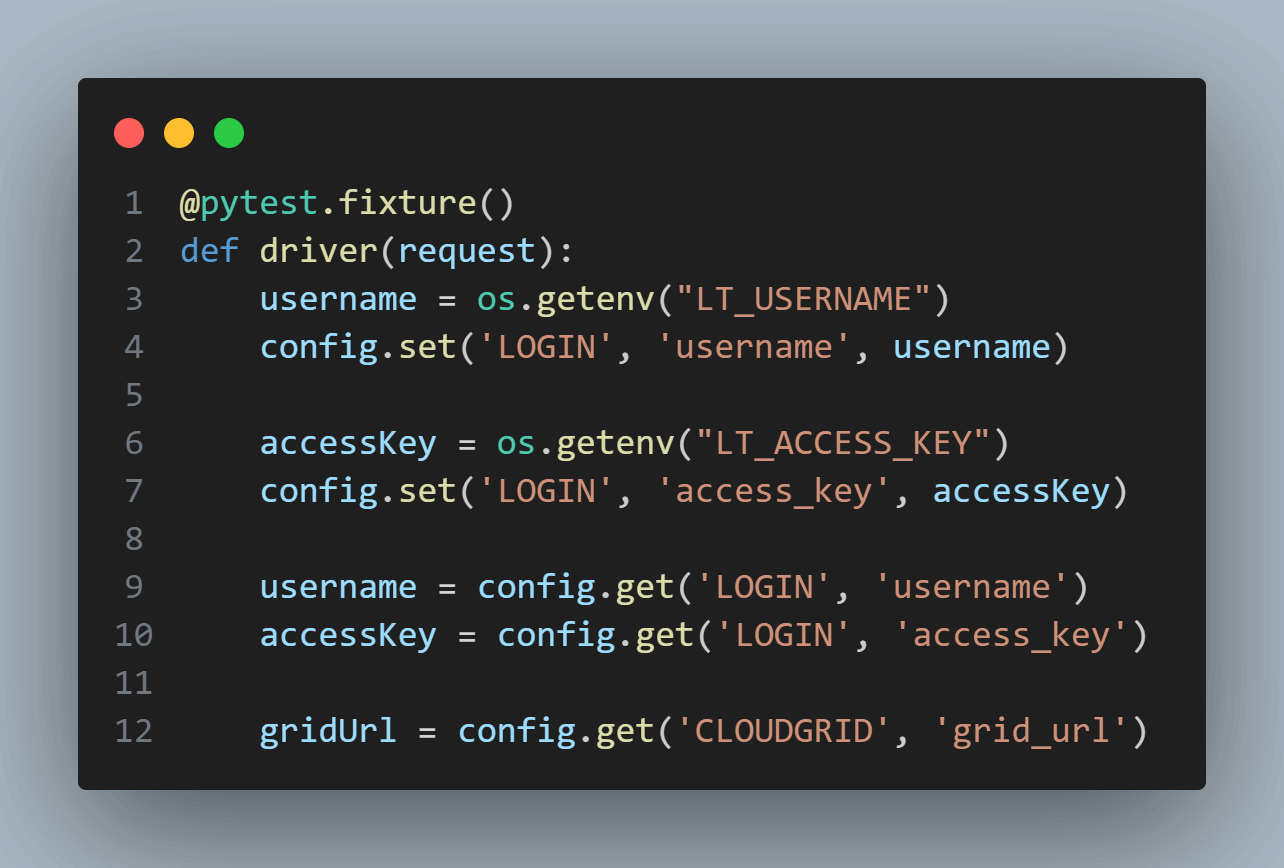
- The code now defines a pytest fixture called driver, which sets up a Selenium WebDriver for automated browser testing. Initially, it fetches username and access key values from environment variables and updates the login section of a configuration file (config). Also, the URL for the cloud grid where testing will occur (gridUrl) is retrieved.
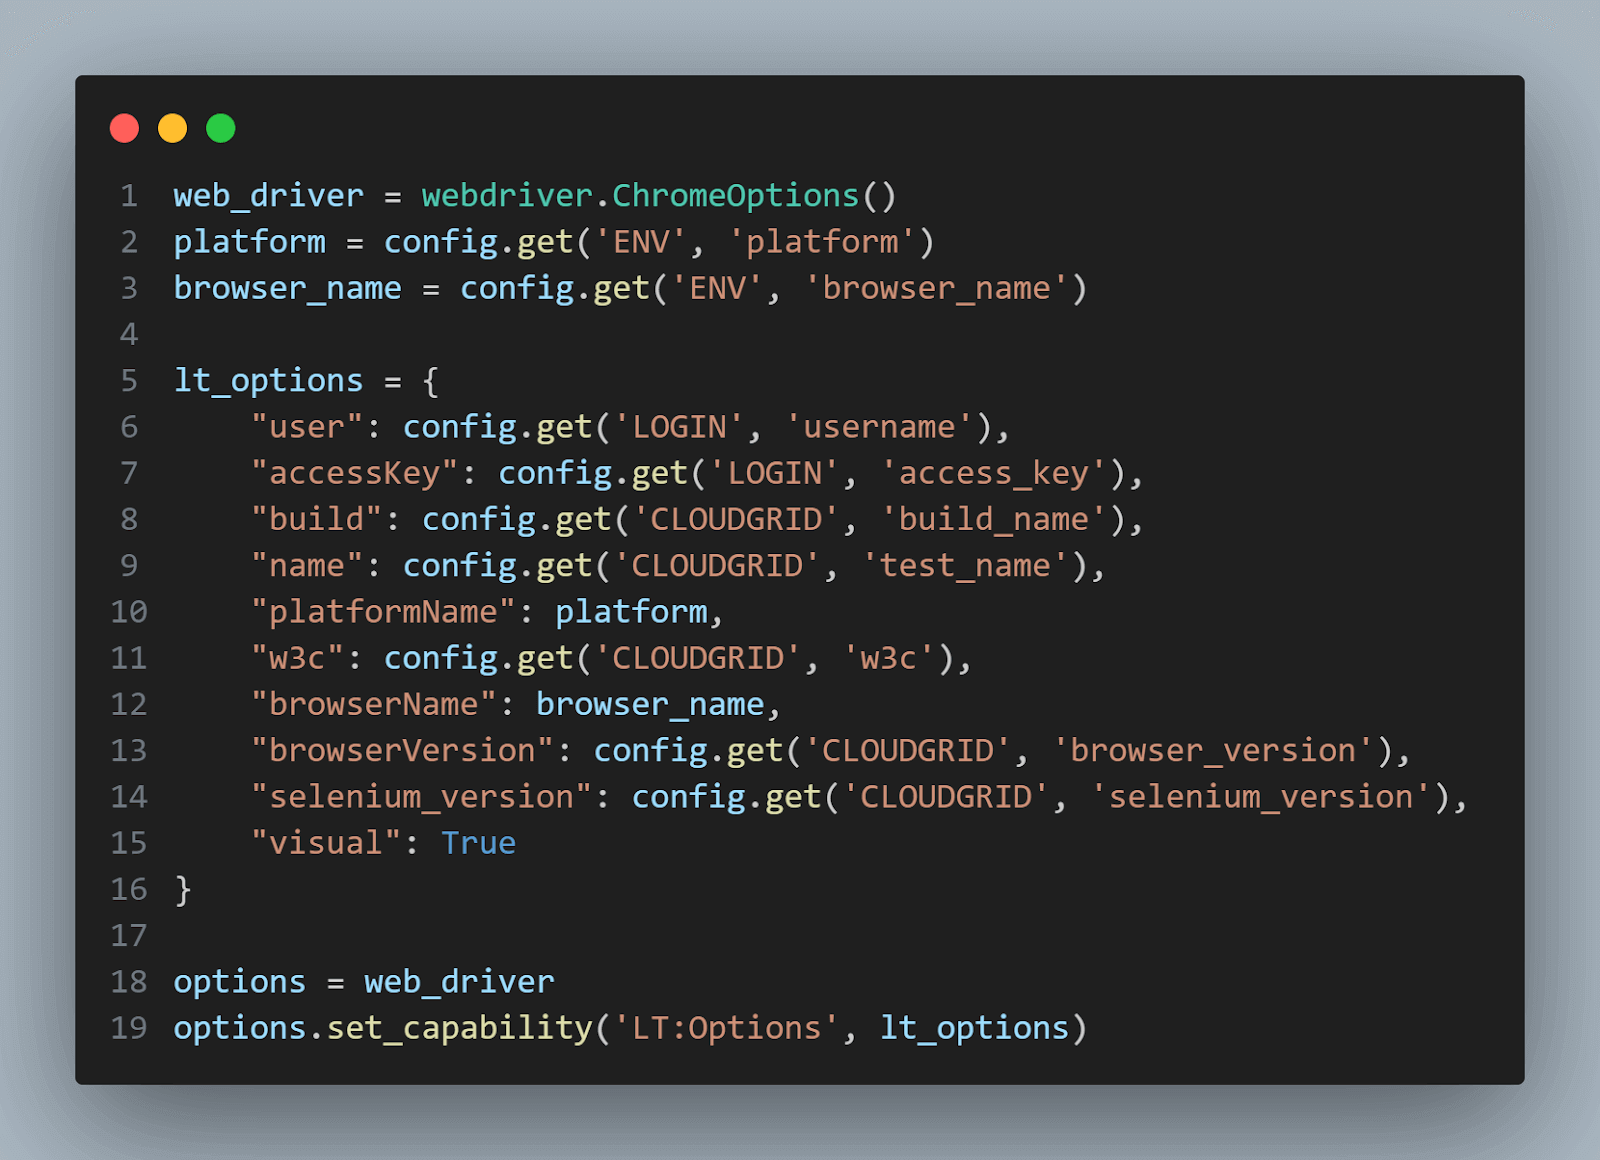
- A Chrome WebDriver is then instantiated with ChromeOptions (web_driver). A dictionary lt_options is populated with all these test settings, including login credentials, build and test names, platform information, and browser details; most came from the configuration file. Finally, these options are set as capabilities for the WebDriver instance using the set_capability method. This ensures that the WebDriver is fully configured according to the parameters defined in the config file and the environment variables.
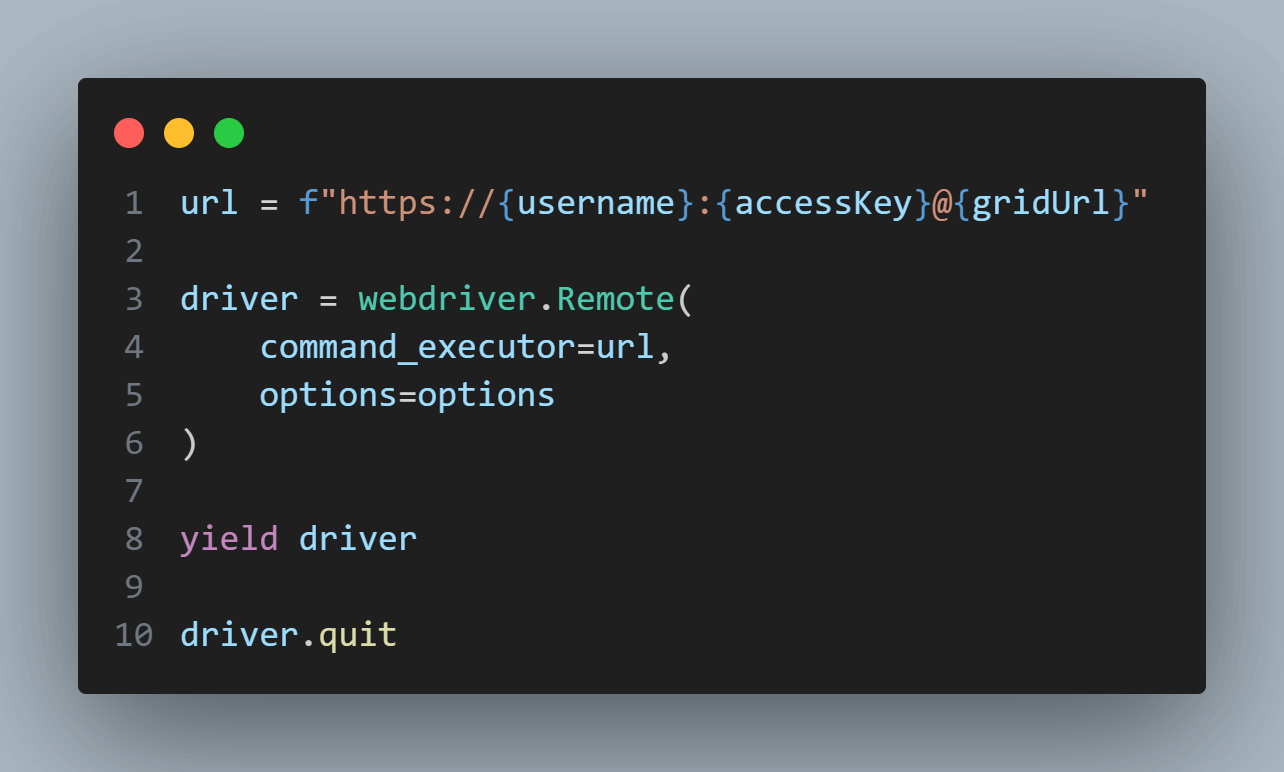
- With the WebDriver set up, the fixture connects to the LambdaTest Selenium Grid, which allows running tests on cloud-hosted browsers. It then yields the driver, making it available to the test function, and closes it once the test is done.
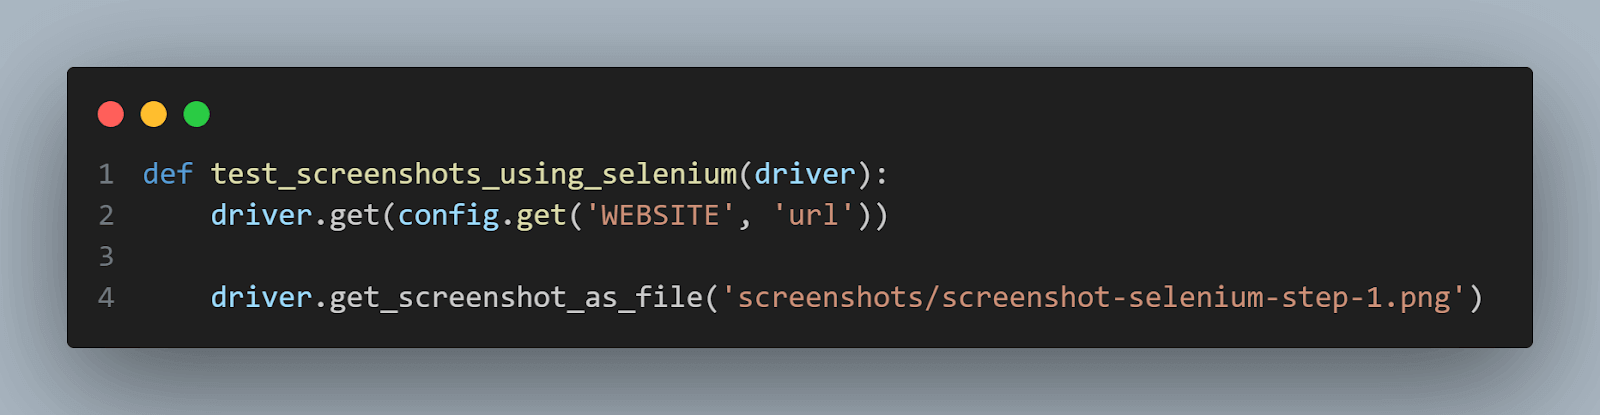
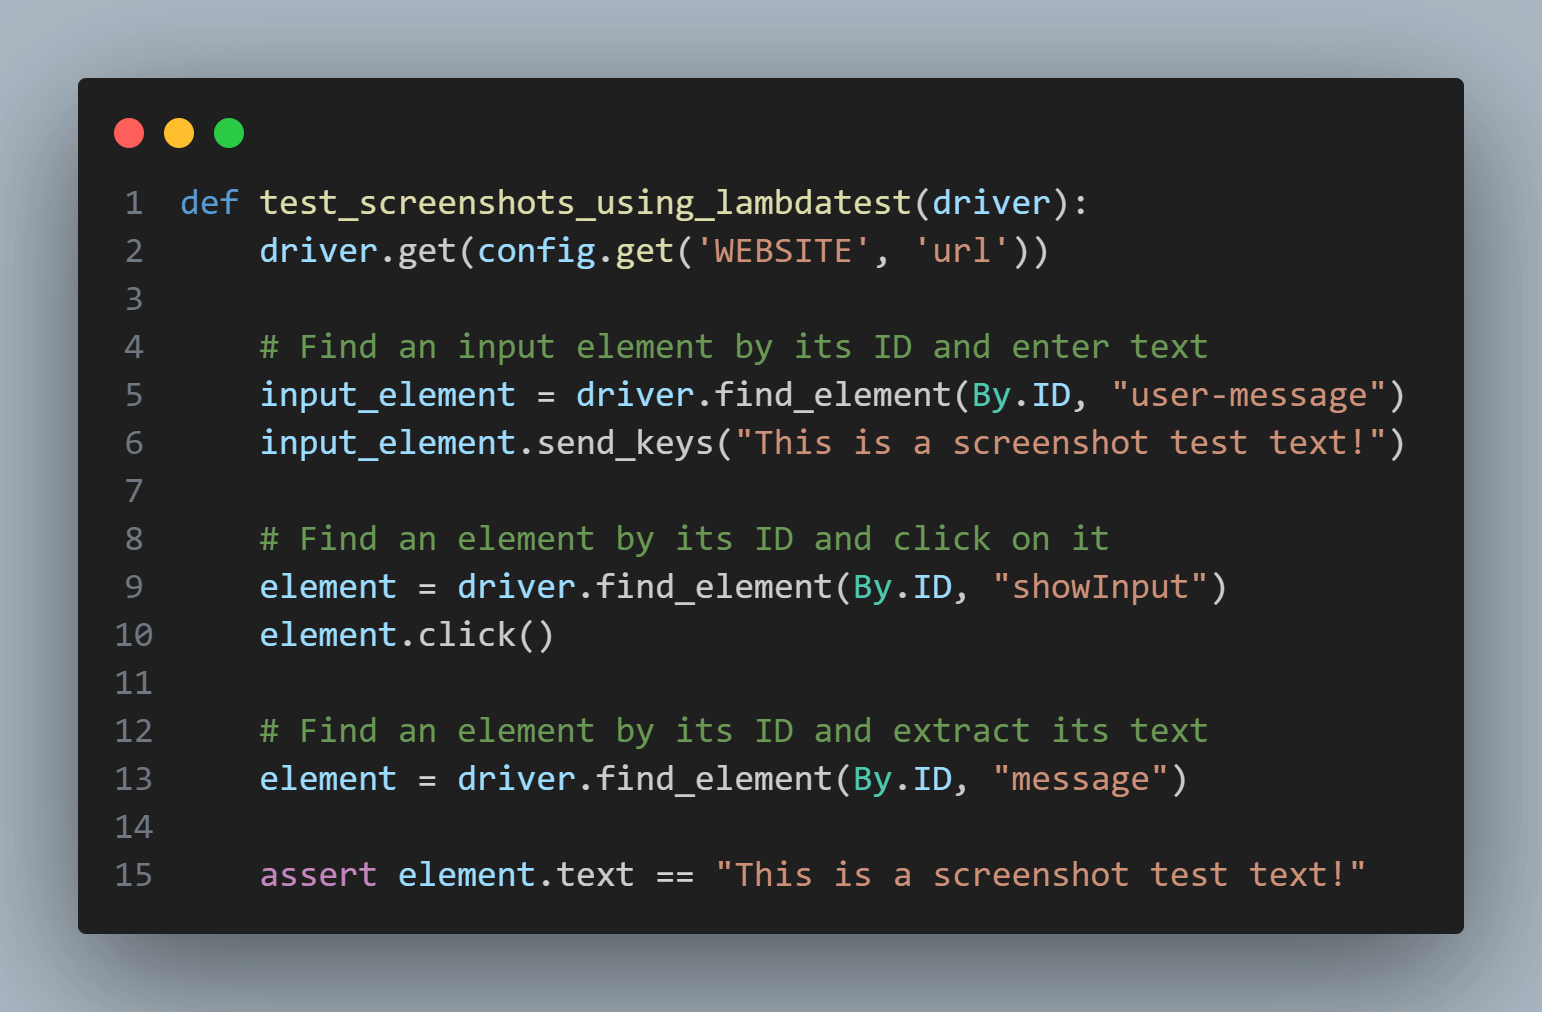
- The test function, test_screenshots_using_selenium, uses the driver fixture to automate the browser instance generation. It navigates to the specified website URL and takes a screenshot of the initial page.
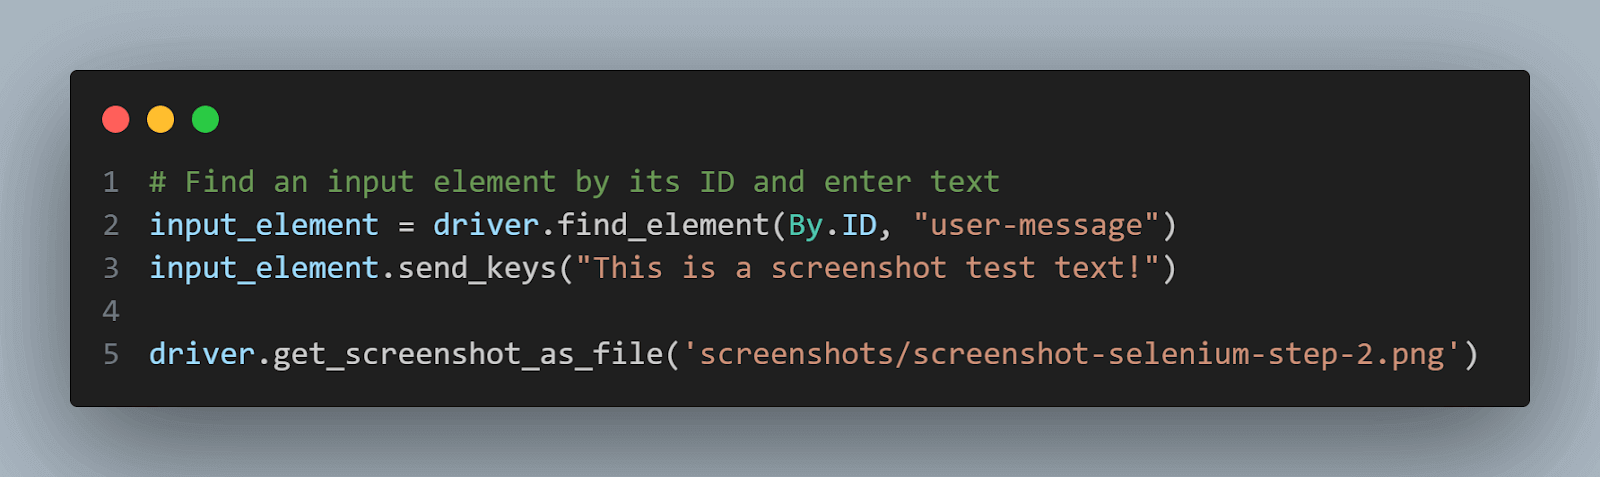
- It then finds an input field on the page using its ID, enters a test message, and takes another screenshot.
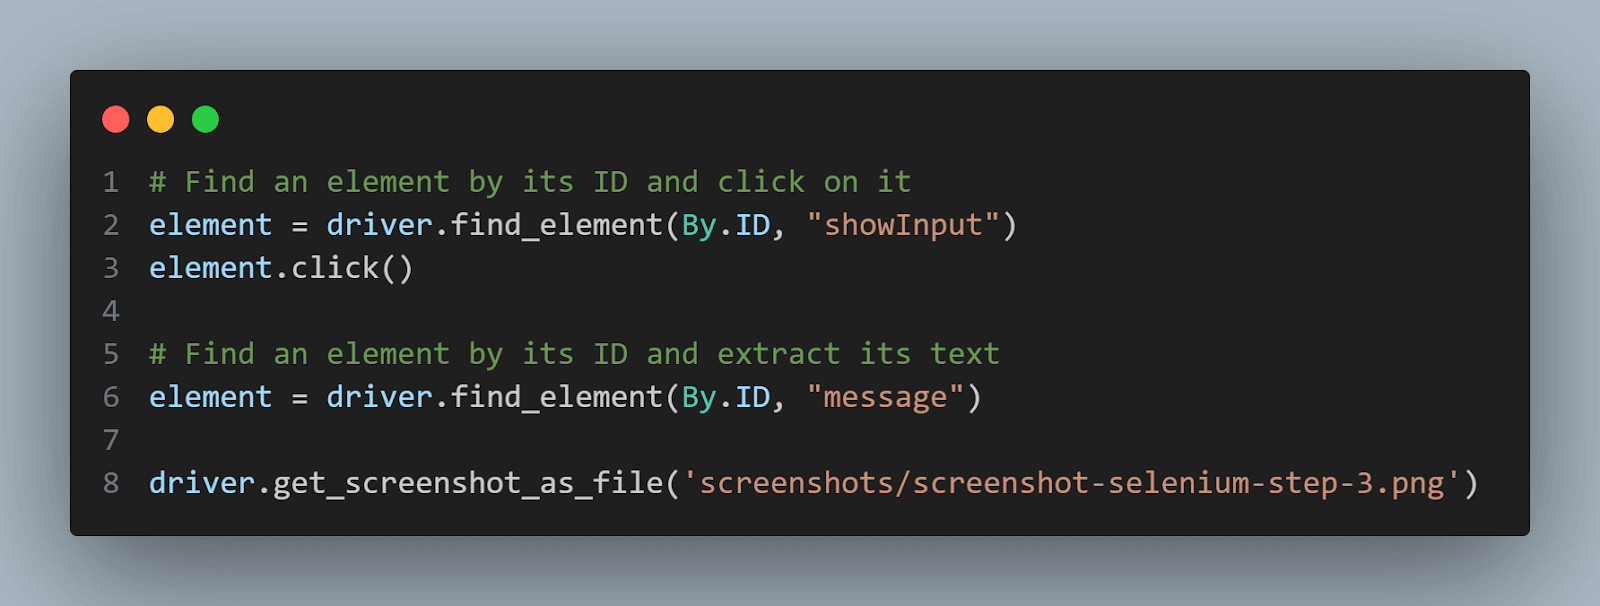
- Next, the test function finds and clicks a button on the page that likely displays the entered text. After clicking the button, it extracts the displayed text. After this process, the test function takes another screenshot.
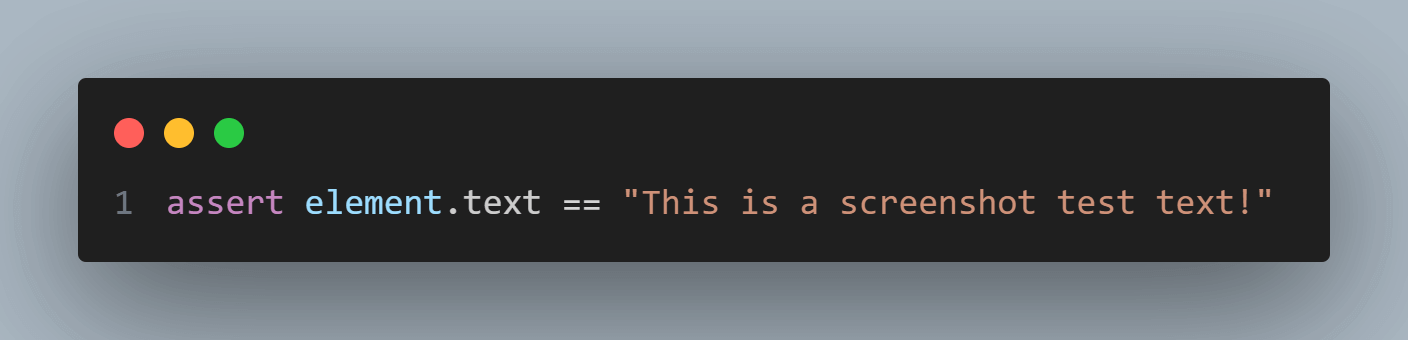
- Finally, it asserts that the displayed text matches the expected message, marking the test’s success or failure.
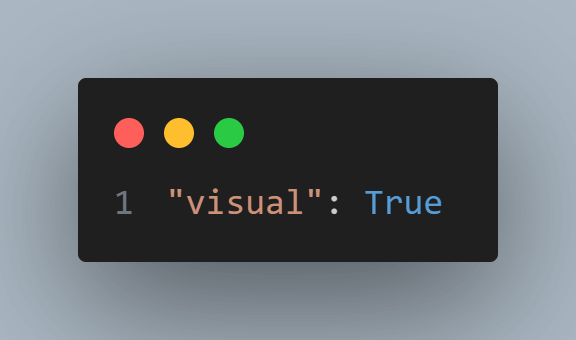
- A new LambdaTest capability called ‘visual ‘ has been added and is set to True. This capability automatically takes screenshots after each command.
- The test function is called test_screenshots_using_lambdatest and has no command to take screenshots inside it.
- Automated screenshot API for cross-browser testing
- Conventions for naming files
- Efficiently archiving Python screenshots
- Emphasizing key areas with annotations
- Trimming and adjusting superfluous segments
- Shrinking files while retaining clarity
- Instruments for minimizing image sizes
It’s one thing to check if elements exist on a page and entirely another to confirm they appear correctly. Visual analysis ensures that interfaces don’t just work but also look and feel right. While automated scripts validate element existence, they might miss visual inconsistencies like misalignments or overlaps, visual analysis rectifies this oversight.
To understand this point better, let’s take an example: imagine a well-known online store where product images sometimes didn’t show up. Regular functional tests didn’t catch this issue, but visual checks identified the problem as a CDN (Content Delivery Network) problem.
A visual check of an online shopping tool revealed that, in specific display settings, certain user interface elements were overlapping.
These instances highlight the complementary nature of visual analysis alongside functional tests, ensuring an all-round user experience.
Using Python screenshots for regression testing
Python screenshots are essential for regression testing. It helps identify changes or issues in software behavior. In this section, we’ll explore their role in ensuring software reliability.
When new code is added, things might unintentionally look different on the screen. By taking pictures before and after updates and comparing them closely, you can spot any unexpected changes.
Pinpointing visual inconsistencies and changes in your software during every integration is a challenging task. Learn how to simplify this process by watching this video on Smart UI visual testing and transform your regression testing with ease.
Logging and Reporting with screenshots
Adding Python screenshots in your test reports doesn’t only make the documentation look better, it actively improves the quality assurance process by providing a visual story that simplifies inspection and troubleshooting. This visual approach to documentation becomes an essential resource offering insights not easily obtained from text-based logs or summaries.
Consider a Python-based Selenium test script where you are automatically navigating through a web application. Every time the script encounters an error, it could be programmed to capture a screenshot of the current browser window. These Python screenshots could then be embedded in the test report, providing a precise view of what went wrong and where.
Here is a Python snippet for capturing a screenshot with Selenium that can then be embedded within an HTML test report:
|
1 2 3 4 5 6 7 8 9 10 11 12 13 14 15 16 17 18 19 |
# Direct the driver to navigate to the specified URLfrom selenium import webdriver from selenium.webdriver.common.by import By def test_report(): # Set up the webdriver driver = webdriver.Chrome() # Maximize the browser window to ensure that it occupies the entire screen driver.maximize_window() driver.get("https://www.lambdatest.com/selenium-playground/simple-form-demo") try: # Find an element by its ID and click on it element = driver.find_element(By.ID, "showInput") element.click() except Exception as e: driver.get_screenshot_as_file("test_failure.png") raise e # Rethrow the exception to mark the test as failed # Close the browser driver.quit() |
Here are some ways to facilitate Python screenshot integration.
@allure is a community-driven reporting tool that allows easy integration of screenshots. It enhances test reports by letting testers attach Python screenshots for each step of the test case, thereby offering an in-depth review.
For instance, using @allure annotations with a Selenium-based test can help you capture and attach screenshots automatically whenever a test fails or throws an exception.
|
1 2 3 |
@allure.step("Capture failure screenshot") def capture_failure_screenshot(driver): driver.get_screenshot_as_file("failure_screenshot.png") |
The pytest framework becomes even more powerful when used with extensions like pytest-selenium. This combination provides native support for capturing screenshots, particularly when a test fails or shows irregularity.
You can configure pytest to automatically capture a screenshot of failure and attach it to the test report using the command --capture=tee-sys.
In the pytest framework, you can utilize a specific command to manage how the output is captured and shown during test execution. To gain a deeper understanding, let’s dissect this command into two components and explore why it’s vital within the pytest framework.
In simple terms, when you include image captures in automated testing, they improve the quality assurance process. Whether using tools like Selenium or just checking things visually, these image captures play a vital role in today’s quality control practices.
NoteIdentify the difference between visual documentation and reporting. Try LambdaTest Today!
Capturing Python screenshots using Selenium
When testing web applications using Python screenshots, Selenium is widely used. Selenium WebDriver is a powerful component that allows programmatic automation of web browsers. While Selenium is well-known for simulating user actions across browsers like Chrome, Firefox, or Safari, its potential for screenshot testing is often overlooked.
Selenium WebDriver is particularly appealing to Python developers because of its seamless integration with Python. With Selenium, you can automate browser interactions and take screenshots at various points during the execution. This feature is invaluable for comprehensive web application testing where visual validation is vital.
Supported methods
The methods commonly used in Selenium for capturing Python screenshots include.
| Methods | Description |
|---|---|
| save_screenshot('path/to/save/screenshot') | This method allows you to specify the path to save the screenshot. |
| get_screenshot_as_file('filename.png') | This will save the screenshot as a PNG file. |
| get_screenshot_as_png() | This method returns the screenshot as binary data, which can be useful for on-the-fly image processing or analysis. |
Here you have a Selenium example using the three methods explained above:
|
1 2 3 4 5 6 7 8 9 10 11 12 13 14 15 16 17 18 19 20 21 22 23 24 25 26 27 28 29 30 31 32 |
from selenium import webdriver from selenium.webdriver.common.by import By from selenium.webdriver.support import expected_conditions as EC def test_fullpage(): # Set up the webdriver driver = webdriver.Chrome() # Maximize the browser window to ensure that it occupies the entire screen driver.maximize_window() # Direct the driver to navigate to the specified URL driver.get("https://www.lambdatest.com/selenium-playground/simple-form-demo") # Take a screenshot of the entire webpage and save it to a file in the specific path driver.save_screenshot('screenshots/selenium-save-screenshot.png') # Take a screenshot of the entire webpage and save it to a file driver.get_screenshot_as_file('screenshots/selenium-get-screenshot-as-file.png') # Take a screenshot of the entire webpage and save the data that can be used for further processing or saving screenshot_data = driver.get_screenshot_as_png() # Close the browser driver.quit() |
Capturing full-page Python screenshots
Selenium allows you to capture full-page Python screenshots, which can be immensely useful for visual regression testing. This helps ensure that all elements on the page, from the header to the footer, appear as expected. While capturing the viewport (what is currently visible in the browser window) is straightforward, capturing a full-page screenshot may require some additional steps. You may need to scroll through the page and take multiple screenshots, then stitch them together to create a complete image of the full page.
Code Walkthrough
The above Python code generates full-page Python screenshots; let’s understand what the code is trying to perform in a step-by-step procedure.
Importing necessary Selenium libraries.
|
1 2 3 |
from selenium import webdriver from selenium.webdriver.common.by import By from selenium.webdriver.support import expected_conditions as EC |
Define a function called test_fullpage this function will consist of the browser we will invoke, and with the maximize_window() function, we are instructed to maximize the browser window to ensure it occupies the entire screen.
|
1 2 3 4 5 6 7 |
def test_fullpage(): # Set up the webdriver driver = webdriver.Chrome() # Maximize the browser window to ensure that it occupies the entire screen driver.maximize_window() |
Direct the WebDriver to navigate to a specific URL (In this case, “https://www.lambdatest.com/selenium-playground/simple-form-demo“)
|
1 2 |
# Direct the driver to navigate to the specified URL driver.get("<a href="https://www.lambdatest.com/selenium-playground/simple-form-demo" target="_blank">https://www.lambdatest.com/selenium-playground/simple-form-demo</a>") |
Takes a screenshot of the entire webpage and saves it to a file in the specified path screenshots/selenium-save-screenshot.png.
|
1 2 |
# Take a screenshot of the entire webpage and save it to a file in the specific path driver.save_screenshot('screenshots/selenium-save-screenshot.png') |
Takes another screenshot of the entire webpage and saves it to a file with a different name screenshots/selenium-get-screenshot-as-file.png.
|
1 2 |
# Take a screenshot of the entire webpage and save it to a file driver.get_screenshot_as_file('screenshots/selenium-get-screenshot-as-file.png' |
Capture the Python screenshot of the entire webpage and save the data as a PNG file that can be used for further processing or saving.
|
1 2 |
# Take a screenshot of the entire webpage and save the data that can be used for further processing or saving screenshot_data = driver.get_screenshot_as_png() |
Close the browser to end the WebDriver session.
|
1 2 |
# Close the browser driver.quit() |
To summarize, in the above script, the browser we invoked is Google Chrome using WebDriver, which navigates to a specific web page, captures screenshots in different ways, and saves them into different files using data variables. It can be used for different purposes, such as visual testing and automated quality assurance.
Capturing the Python screenshots for specific elements
A highly valuable capability of Selenium is its capacity to pinpoint and capture Python screenshots of precise web elements. This is particularly useful when your testing needs to zoom in on particular UI components like buttons, banners, or modals. Utilizing WebDriver’s functions, you can identify the element you’re interested in and capture just that part of the screen. For instance, you can use the following method.
element.screenshot(‘element_screenshot.png’) to take a screenshot of a particular element you want to target.
Here you have a Selenium example that captures a screenshot of a specific element:
|
1 2 3 4 5 6 7 8 9 10 11 12 13 14 15 16 17 18 19 20 21 22 23 24 25 26 27 28 |
from selenium import webdriver from selenium.webdriver.common.by import By from selenium.webdriver.support import expected_conditions as EC def test_element(): # Set up the webdriver driver = webdriver.Chrome() # Maximize the browser window to ensure that it occupies the entire screen driver.maximize_window() # Direct the driver to navigate to the specified URL driver.get("https://www.lambdatest.com/selenium-playground/simple-form-demo") # Locate a specific element on the page using its ID attribute specific_element = driver.find_element(By.ID, "user-message") # Take a screenshot of just the located element and save it to a file specific_element.screenshot('screenshots/selenium-element-snapshot.png') # Close the browser driver.quit() |
To understand what the code is trying to perform, let’s walk through the code in a step-by-step procedure.
Code walkthrough
The above Python code generates specific page element screenshots; let’s understand what the code is trying to perform in a step-by-step procedure.
Imports necessary Selenium libraries.
|
1 2 3 |
from selenium import webdriver from selenium.webdriver.common.by import By from selenium.webdriver.support import expected_conditions as EC |
test_element() consists of the browser we will invoke. We are instructing the maximize_window() function to maximize the browser window to ensure it occupies the entire screen.
|
1 2 3 4 5 |
def test_element(): # Set up the webdriver driver = webdriver.Chrome() # Maximize the browser window to ensure that it occupies the entire screen driver.maximize_window() |
Direct the WebDriver to navigate to a specific URL (in this case, “https://www.lambdatest.com/selenium-playground/simple-form-demo“)
|
1 |
driver.get("<a href="https://www.lambdatest.com/selenium-playground/simple-form-demo" target="_blank">https://www.lambdatest.com/selenium-playground/simple-form-demo</a>") |
To locate the element on the web page using its unique ID. In this case, the element ID is user-message and stored in the variable specific_element.
|
1 2 |
# Locate a specific element on the page using its ID attribute specific_element = driver.find_element(By.ID, "user-message") |
This function takes a screenshot of the located element and saves it into a file. In this case, the Python screenshots are saved as screenshots/selenium-element-snapshot.png
|
1 2 |
# Take a screenshot of just the located element and save it to a file specific_element.screenshot('screenshots/selenium-element-snapshot.png') |
Close the browser to end the WebDriver session.
|
1 2 |
# Close the browser driver.quit() |
To summarize, the browser we invoked is Google Chrome using WebDriver, which navigates to a specific web page, locates a specific element by its ID, captures a screenshot of that element, and saves it to a file. This is useful for capturing Python screenshots of individual elements on a web page for testing or documentation purposes.
Manual screenshot capture is often slow and inefficient, particularly in situations requiring frequent and repetitive web application testing. It not only consumes human resources but also introduces potential errors and requires accuracy and QA metrics process efficiency.
To address these challenges and transition from manual to automated screenshot capture to improve the test process, watch this video on how to perform automated screenshot testing. This video will give you valuable insight that can help in the smooth transition from the manual to the automated screenshots process.
Subscribe to the LambdaTest YouTube channel for more videos on automated screenshots, Selenium testing, and Cypress testing to enhance your testing experience!
Potential challenges and solutions while taking Python screenshots
The journey through Python screenshots management, especially in automated testing and documentation, comes with unique challenges. These hurdles can potentially affect the quality of visuals, but they can be effectively overcome with the right strategies. Let us discover some of the challenges and their solutions below.
Dealing with dynamic content
Managing dynamic content while capturing screenshots can be quite challenging. With web applications increasingly relying on dynamic elements, maintaining accuracy and consistency in screenshots can be challenging. In this section, we will look into the challenges and solutions for dealing with the complexities of dynamic content within Python screenshot management.
Challenge
Modern web platforms and applications often feature content based on user interactions, including personalized greetings and smart advertisements.
Solution
You can use scripts to make the unpredictable elements more stable during captures or even avoid them. On the other hand, focus on the parts that stay the same or use masked regions to ignore the parts that change when conducting visual analysis.
Example
|
1 2 3 4 5 6 7 8 9 10 11 12 13 14 15 16 17 18 19 20 21 22 23 24 25 26 27 28 29 30 31 |
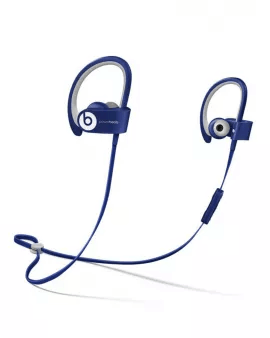
from selenium import webdriver from selenium.webdriver.common.by import By def test_dynamic_element(): # Set up the webdriver driver = webdriver.Chrome() # Maximize the browser window to ensure that it occupies the entire screen driver.maximize_window() # Direct the driver to navigate to the specified URL driver.get('https://ecommerce-playground.lambdatest.io/index.php?route=product/category&path=57') # Scroll down till the end driver.execute_script("window.scrollTo(0, document.body.scrollHeight);") # Locate a specific element on the page using CSS Selector specific_element = driver.find_element(By.CSS_SELECTOR, "img[alt='MacBook Air']") # Take a screenshot of just the located element and save it to a file specific_element.screenshot('screenshots/selenium-dynamic-element.png') # Close the browser driver.quit() |
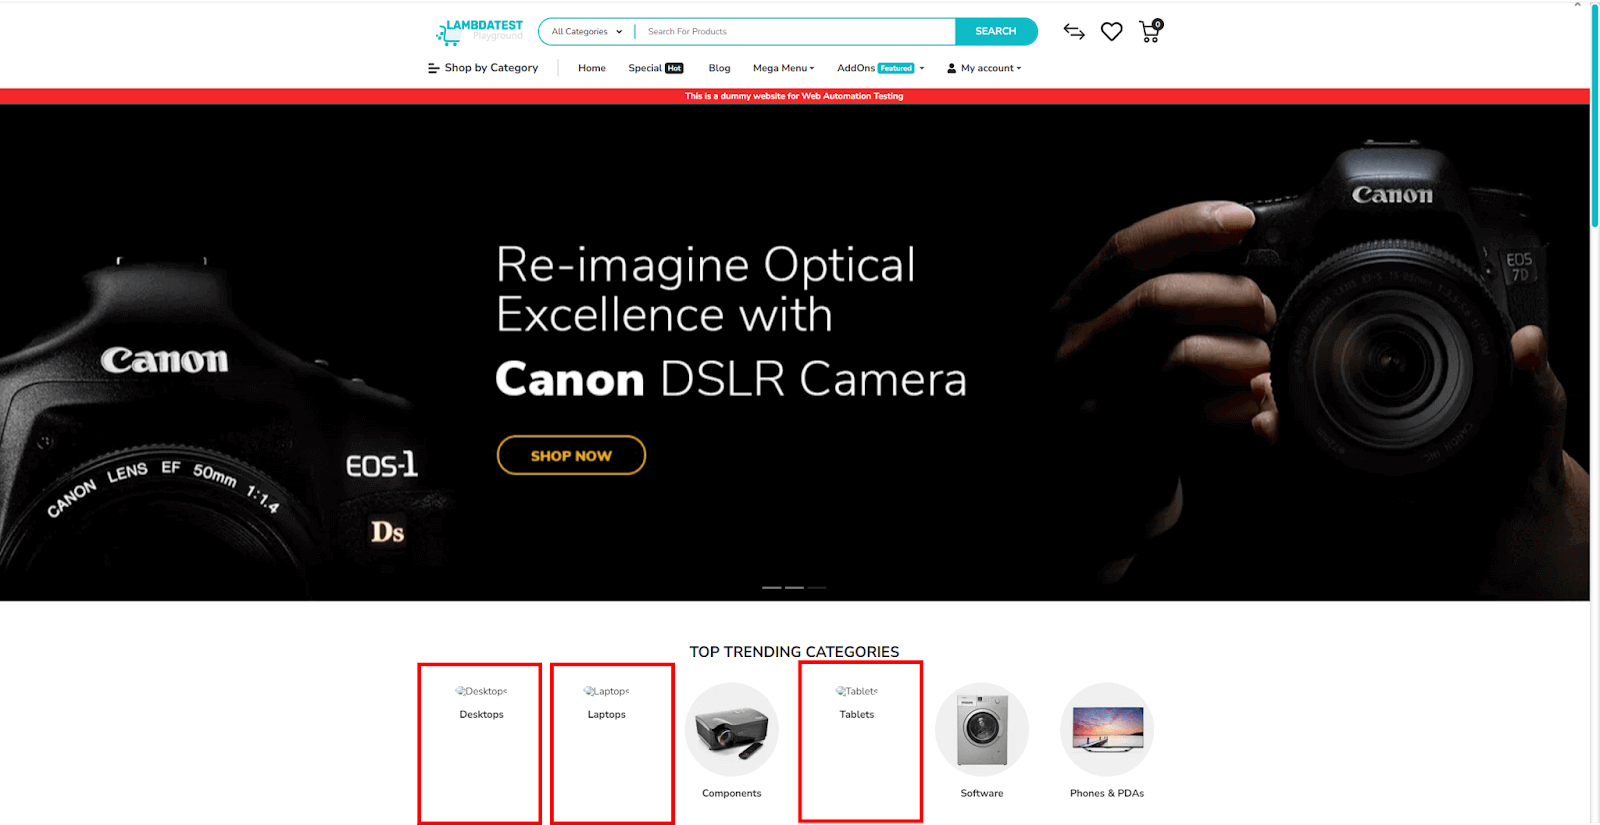
To summarize, the code initializes the Chrome WebDriver and then navigates to the URL. After opening the page, it scrolls down to the end of the page using JavaScript’s scrollTo method. Finally, it locates the element with an alt attribute of “MacBook Air”, takes a screenshot, saves it as selenium-dynamic-element.png, and closes the browser.
When running this code, you will get the below screenshot:
Handling multiple screen resolutions and orientations
Handling multiple screen sizes and orientations can be challenging in the digital world. Ensuring your visuals work well on different devices is crucial. In this section, we’ll discuss the challenge and the solution for managing various screen variations while taking Python screenshots.
Challenge
Various device screens with different resolutions can display visuals differently, making capturing screenshots more complicated.
Solution
Use checks that are specifically designed for adaptive designs. Use tools that help you take screenshots on various screen sizes and viewing modes. Additionally, create a list of common device dimensions to simplify the analysis process.
Overcoming issues with animated or frequently changing content
Managing dynamic or animated content in screenshot capture can be challenging. Modern web applications often have elements that change frequently, making it hard to capture accurate screenshots. In this section, we’ll discuss strategies to handle these challenges while taking Python screenshot.
Challenge
Active graphics or rapidly updating elements can yield inconsistent visual records.
Solution
To capture dynamic content more effectively, delay or pause to slow down the changing elements. In automated processes, set up the system to temporarily stop or slow these elements, ensuring your screenshots are clear and consistent.
While capturing screen visuals in the dynamic digital environment may pose some challenges, these difficulties can be overcome with careful planning, the right tools, and well-practiced techniques.
Managing dynamic content manually can be time-consuming. That’s where tools like Selenium and other automation frameworks come in handy. Selenium can be useful when dealing with dynamic content elements through implicit and explicit waits. These waits functions wait for the entire page to load and then capture the elements. This process really reduces manual work, making the process of handling dynamic content smoother and faster.
If you want to streamline your screenshot testing process and overcome the challenges of dynamic content, multiple screen resolutions, and animated elements, you can use a cloud platform like LambdaTest. LambdaTest is an AI-powered test orchestration and execution platform that lets you run manual and automated tests at scale with over 3000+ real devices, browsers, and OS combinations.
Python screenshots API for cross-browser testing
Screenshots API for browser testing is a feature offered by LambdaTest that allows you to automatically capture screenshots of web pages across multiple browsers and operating systems. Using this API, you can programmatically initiate screenshot tests on various browser and OS combinations. It is particularly useful for QA professionals and developers who must ensure their web applications are visually consistent across different platforms.
Determining the right moment to utilize LambdaTest’s Screenshot API can significantly amplify its benefits. Here are some scenarios where the Screenshot API becomes indispensable:
Benefits of Python screenshots API
Taking Python screenshots during testing is essential but can often be tedious and time-consuming. Leveraging LambdaTest’s Screenshot API for cross-browser testing offers an automated and streamlined solution. Here are some key benefits of using this powerful tool:
Python pytest sample
To showcase how this API can be used with Python, here’s a sample pytest code snippet. The code triggers a POST request to run a screenshot test on LambdaTest. This example uses Python’s requests library to make the API call.
Project Setup
|
1 |
pip install -r requirements.txt |


Code implementation
|
1 2 3 4 5 6 7 8 9 10 11 12 13 14 15 16 17 18 19 20 21 22 23 24 25 26 27 28 29 30 31 32 33 34 35 36 37 38 39 40 41 42 43 44 45 46 47 48 49 50 |
import json import requests import os from time import sleep # API documentation: https://www.lambdatest.com/support/docs/automated-screenshot-api-for-cross-browser-testing/ username = os.getenv("LT_USERNAME") accessKey = os.getenv("LT_ACCESS_KEY") def test_screenshot_api(): url = "https://%s:%s@api.lambdatest.com/screenshots/v1" % (username, accessKey) headers = {"accept": "application/json", "Content-Type": "application/json"} payload = { "url": "https://www.lambdatest.com/selenium-playground/simple-form-demo", "defer_time": 5, "email": True, "mac_res": "1024x768", "win_res": "1366X768", "configs": { "windows 10": { "chrome": ["74"], "firefox": ["66"], "opera": ["58"], "ie": ["11"] }, "macos mojave": { "chrome": ["74"] } } } response = requests.post(url, headers=headers, data=json.dumps(payload)) assert response.status_code == 200 response_data = response.json() test_id = response_data.get('test_id') # Using `get` method to avoid KeyError if 'test_id' is not present. print(f"The test ID is: {test_id}") sleep(45) fetch_details_executed_test_session(test_id) def fetch_details_executed_test_session(testId): url = "https://%s:%s@api.lambdatest.com/screenshots/v1/%s" % (username, accessKey, testId) headers = {"accept": "application/json"} response = requests.get(url, headers=headers) assert response.status_code == 200 response_data = response.json() print(response_data) |
Code Walkthrough
To better understand what the code is trying to perform in a step-by-step process.

You can run this test using the below command:
|
1 |
pytest test_api.py |
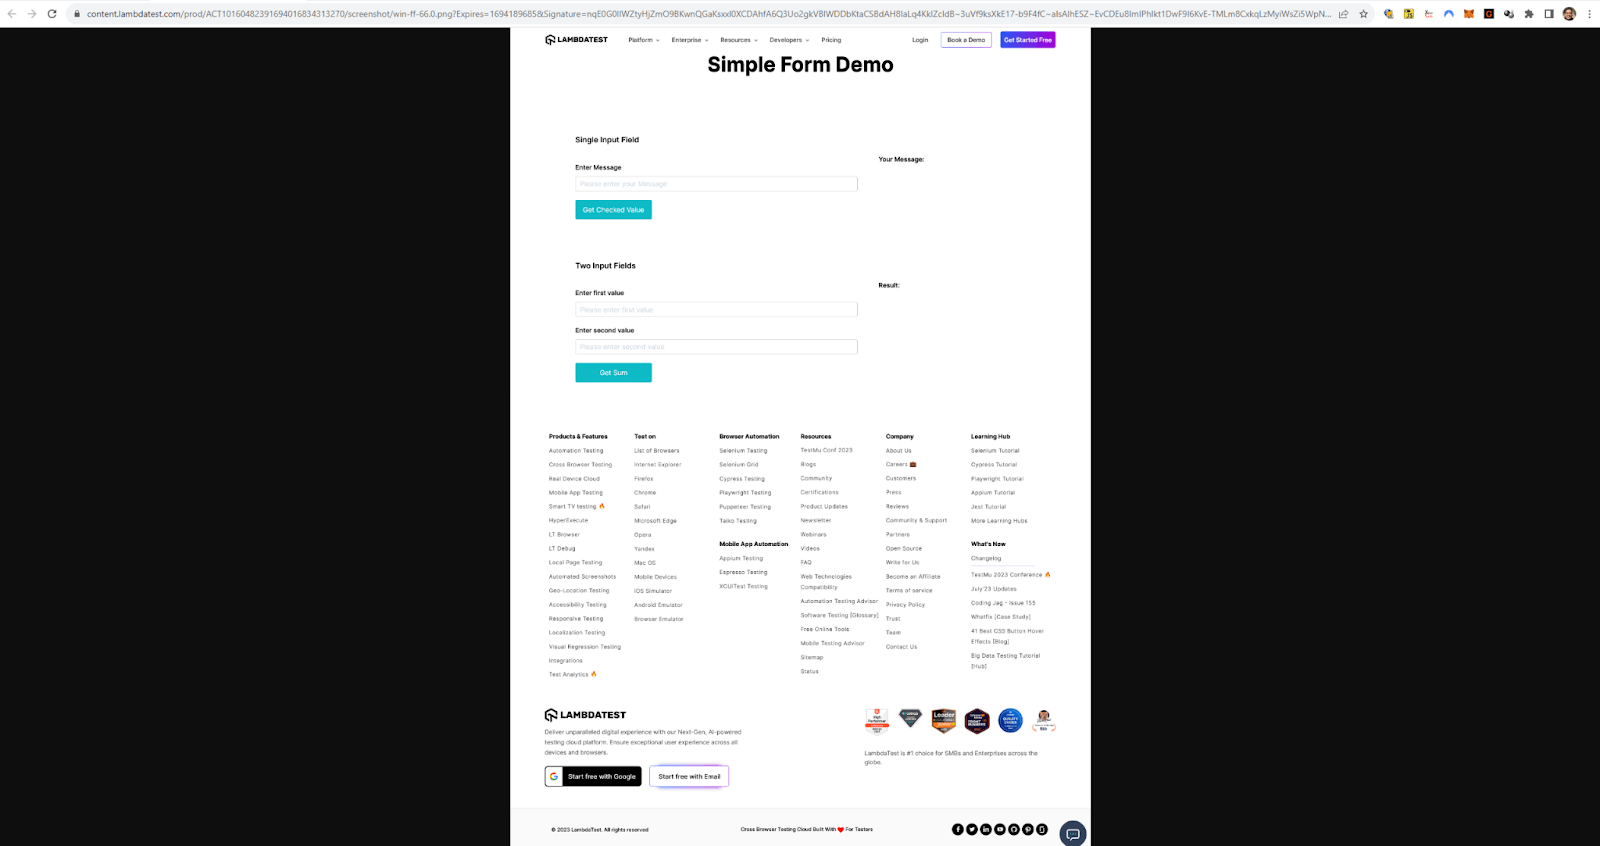
Result
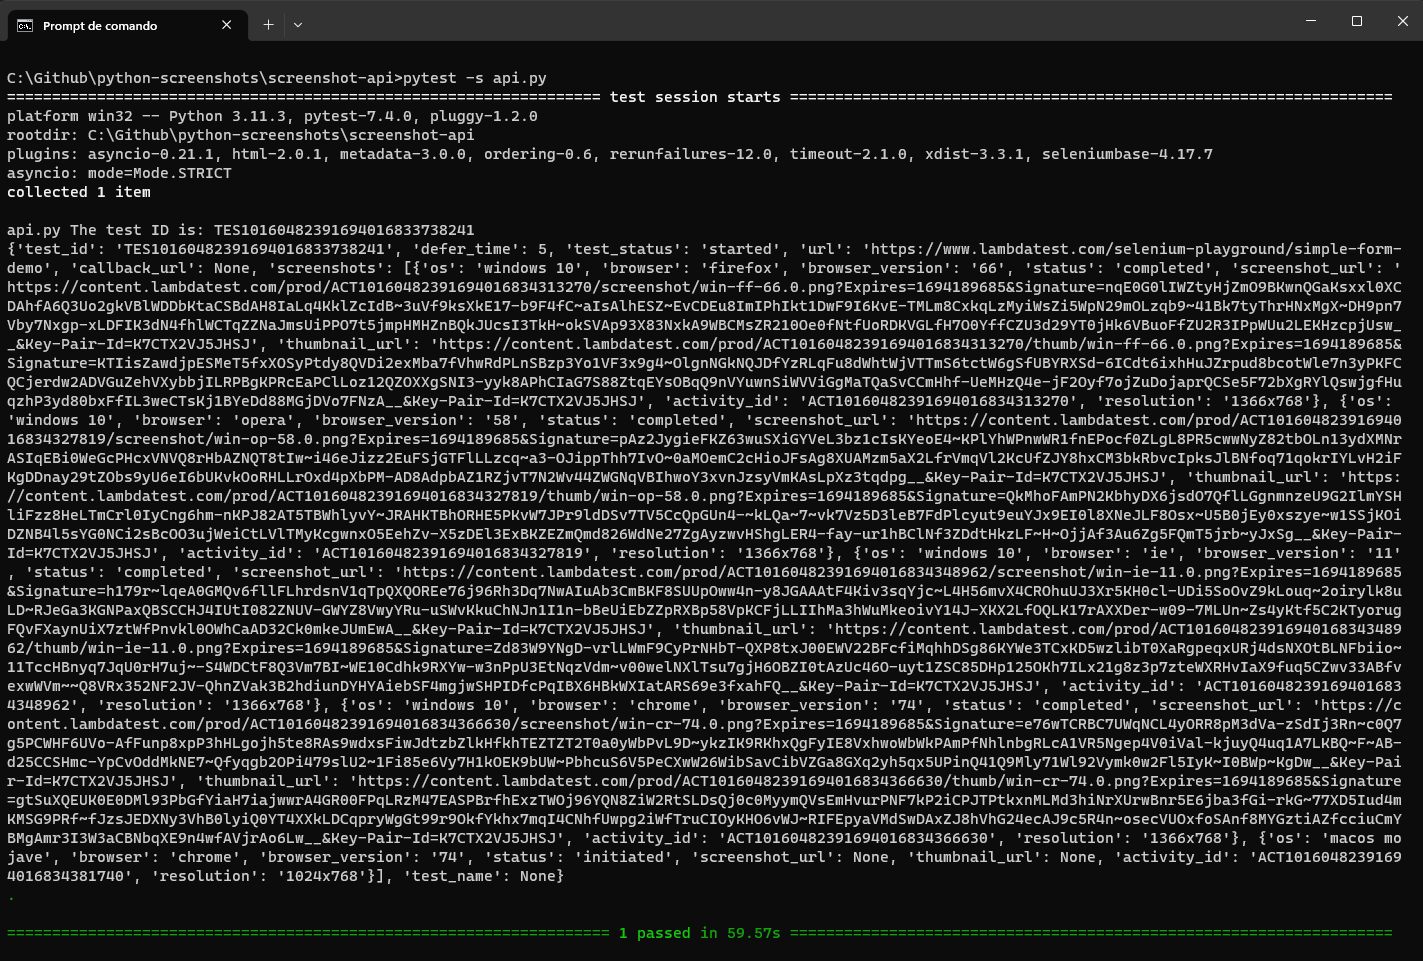
To summarize, the fetch_details_executed_test_session() function displays all the details of the screenshots, including the links for the screenshots. For example, in the above sample, the execution on Windows 10, Firefox version 66, and resolution 1366×768 provided the URL link that has this screenshot.
Bonus: Alternative tools for Python screenshots
In the previous section, we delved into Selenium’s robust capabilities for capturing screenshots, which are particularly useful for web-based testing scenarios. However, Selenium is one of many tools in your arsenal for screenshot capture and manipulation, especially when dealing with desktop applications or needing more control over screen captures. That’s where this bonus section comes in, expanding your toolkit with libraries like Pillow, PyAutoGUI, and PyGetWindow.
Pillow provides a strong foundation for general image capture and manipulation tasks. Meanwhile, PyAutoGUI and PyGetWindow offer more specialized functionalities tailored for desktop interactions. These libraries can be invaluable for test automation, enabling you to capture precise screen states of your desktop or specific windows, thereby providing a more holistic testing approach. With these libraries, you can easily extend your testing beyond the browser, ensuring that every element of your application looks and functions as intended.
Pillow (a fork of PIL)
Pillow, often called PIL (Python Imaging Library), is an open-source Python library designed for extensive file format support and an efficient internal representation. It’s a robust tool for image processing tasks, enabling users to create, modify, and save various image file formats.
Among its many functionalities, one particularly handy feature is its ability to capture screenshots.
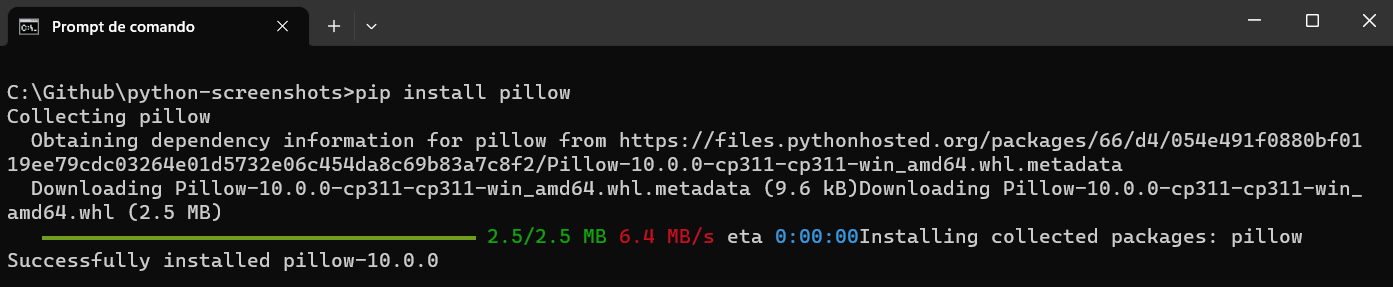
PIL can be easily installed using the pip command below:
|
1 |
pip install pillow |
Positive aspects
Pillow is a popular Python library for working with images. It’s known for being user-friendly and handling various image formats easily. Here are some of the positive aspects that make it a popular choice for image processing tasks:
Pillow supports a wide range of image file formats, including popular ones like JPEG, PNG, and TIFF, as well as less commonly used formats like BMP and ICO.
The API provided by Pillow is straightforward and easy to use, making it accessible even for those relatively new to image processing or Python programming.
From basic tasks like cropping, resizing, and rotation to more advanced features like applying filters, drawing text, or even changing individual pixels, Pillow offers a wide array of image manipulation capabilities.
Pillow is designed to be efficient with memory, allowing for processing large images without consuming excessive resources.
Built on the foundation of the original PIL (Python Imaging Library), Pillow is optimized for performance, ensuring rapid image processing tasks.
Pillow enjoys robust community support, which means you can find a wealth of third-party resources, including tutorials, sample projects, and an active issue tracker for troubleshooting.
The library is actively maintained and regularly updated, ensuring that it stays compatible with the latest Python versions and receives performance improvements and new features.
Whether you are automating tests, developing a web application, working in scientific research, or simply automating some personal tasks, Pillow can fit various needs and project scopes.
In summary, the Pillow library’s versatility, ease of use, and robust feature set make it an excellent choice for anyone looking to perform image processing tasks in Python.
Supported methods
The methods commonly used in Pillow for Python screenshot capturing and image manipulation include
| Methods | Description |
| ImageGrab.grab() | Captures an image of the entire screen or a specific region if coordinates are provided. |
| Image.show() | Displays the captured image using the default image viewer. |
| Image.save(‘filename.extension’) | Saves the captured image to a file. The format can be specified by the file extension like .png, .jpg, etc. |
| Image.crop((left, upper, right, lower)) | Crops the image to a region defined by the coordinates (left, upper, right, lower) |
| Image.rotate(angle) | Rotates the image by the specified angle in degrees. |
| Image.filter(filter_type) | Applies a filter to the image. Filters can be found in the ImageFilter module and include options like BLUR, CONTOUR, DETAIL, etc. |
Capturing entire screen Python screenshot using PIL
Capturing the entire screen might seem straightforward, but when integrated into a larger project, this simple action can offer a wealth of benefits.
During automated UI tests, you can capture the entire screen at various stages, such as debugging, monitoring, user experience studies, automated reporting, documentation, real-time decision-making, client demonstrations, and historical recording.
Here’s a simple example:
|
1 2 3 4 5 |
from PIL import ImageGrab # Capture the whole screen img = ImageGrab.grab() # Display the image img.show() |
This code leverages the ImageGrab.grab() method, which returns an image of the screen.
Saving the Python screenshots to a file
Once you’ve captured a screenshot, you might want to save it for future reference. Here’s how you can save the screenshot to a file:
|
1 2 |
# Save the image to file img.save("screenshot.png") |
This line of code will save the image in PNG format with the name screenshot.png. You can change the file extension to save in different formats like JPG or BMP.
Capturing specific screen regions using PIL
If you are interested in capturing just a particular region of your screen, Pillow has got you covered. The grab() method accepts a four-item tuple that defines the left, upper, right, and lower pixel coordinates.
|
1 2 3 4 5 6 7 8 |
from PIL import ImageGrab # Define the region (left, top, right, bottom). This captures a 300x300 box from the top-left corner. region = (0, 0, 300, 300) img_region = ImageGrab.grab(bbox=region) # Display the image img_region.show() # Save the image to file img_region.save("screenshot-region.png") |
This code will capture a 300×300 pixel box starting from the top-left corner of the screen.
Manipulating and editing Python screenshots
Pillow isn’t just for capturing images; it’s a complete image processing library. This means you can edit your screenshots directly using the library:
|
1 2 3 4 5 6 7 8 9 10 |
from PIL import ImageGrab # Capture the whole screen img = ImageGrab.grab() # Define the cropping box box = (50, 50, 250, 250) cropped_img = img.crop(box) # Display the image cropped_img.show() # Save the image to file cropped_img.save("screenshot-cropping.png") |
|
1 2 3 4 5 6 7 8 9 |
from PIL import ImageGrab # Capture the whole screen img = ImageGrab.grab() # Rotates the image by 90 degrees rotated_img = img.rotate(90) # Display the image rotated_img.show() # Save the image to file rotated_img.save("screenshot-rotating.png") |
|
1 2 3 4 5 6 7 8 9 10 |
from PIL import ImageGrab from PIL import ImageFilter # Capture the whole screen img = ImageGrab.grab() # Apply blur filter to image blurred_img = img.filter(ImageFilter.BLUR) # Display the image blurred_img.show() # Save the image to file blurred_img.save("screenshot-filters.png") |
Pillow is a handy Python library for managing Python screenshots and working with images, making it a good choice for various image-related tasks.
PyAutoGUI
PyAutoGUI provides complete Python screenshot functionalities that allow you to easily capture the screen or specific regions of it. It offers methods to capture the entire screen and capture a designated rectangular area of the screen. These features can be extremely useful for automated testing, monitoring, or documentation.
The library also offers the unique capability to locate an element on the screen by its image. This is highly beneficial for GUI automation tasks requiring interaction with specific buttons or UI elements. You can find more about these screenshot features on its GitHub repository.
Supported methods
The methods commonly used in PyAutoGUI for screenshot capturing include:
| Methods | Description |
| screenshot() | Captures the entire screen and returns it as an Image object. |
| screenshot(region=(left, top, width, height)) | Captures a specific region of the screen based on the coordinates provided. |
| locateOnScreen(‘image.png’) | Searches the screen for the given image and returns the coordinates of the first occurrence. |
| locateAllOnScreen(‘image.png’) | Searches the screen for the given image and returns all occurrences. |
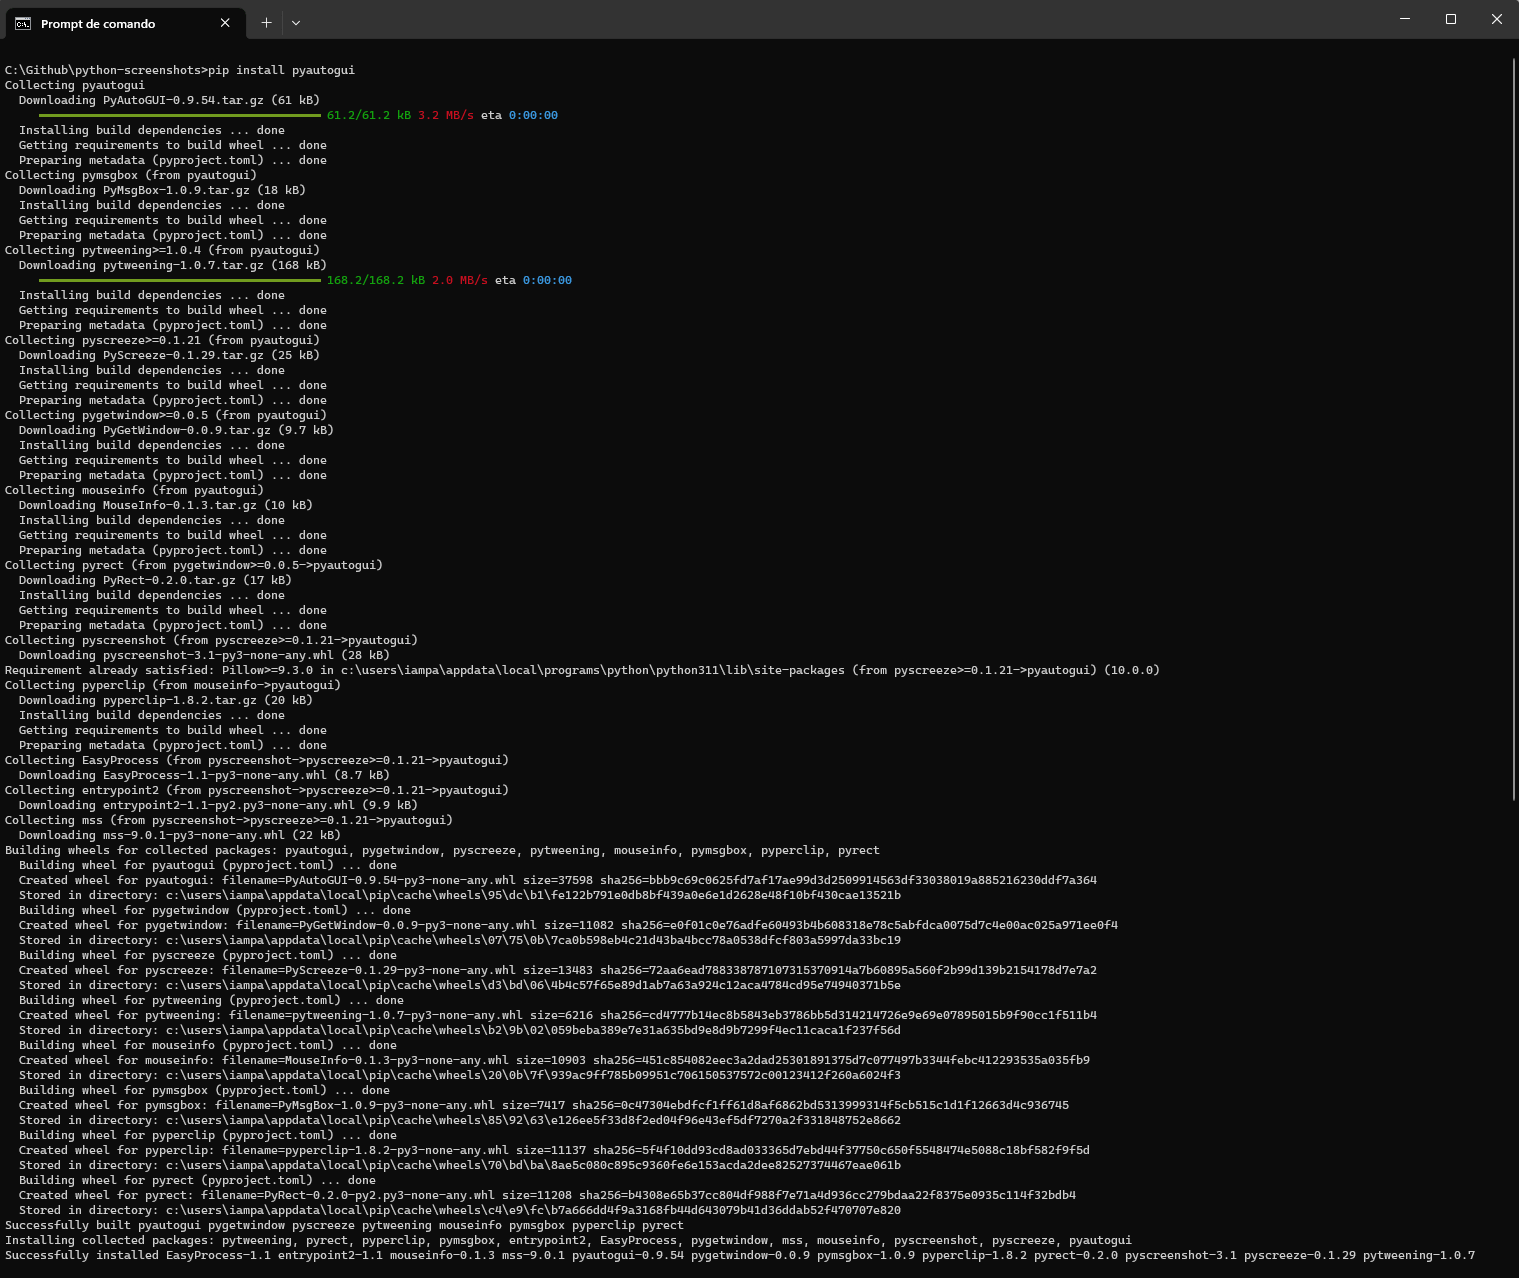
Installation
To install PyAutoGUI, you can just use pip:
|
1 |
pip install pyautogui |
Take Python screenshots with PyAutoGUI
Capturing Python screenshots with PyAutoGUI is simple. Here’s how to use it:
|
1 2 3 4 5 |
import pyautogui # Capture the entire screen screenshot = pyautogui.screenshot() # Save the screenshot to a file screenshot.save("screenshot_pyautogui.png") |
For capturing a specific region of the screen, similar to Pillow, you can define the coordinates as shown in the code below
|
1 2 3 4 5 |
import pyautogui # Capture a specific region: (left, top, width, height) region_screenshot = pyautogui.screenshot(region=(0, 0, 300, 300)) # Save the screenshot to a file region_screenshot.save("screenshot-pyautogui-region.png") |
PyGetWindow
While the previous libraries focus on capturing parts or the entirety of the screen, PyGetWindow allows you to capture specific application windows. This is especially useful if you take Python screenshots of individual apps without extra post-processing or cropping. You can find more about these features on its GitHub repository.
Supported methods
The methods commonly used in PyGetWindow for screenshot capturing include:
| Methods | Description |
| screenshot(region=(window.left, window.top, window.width, window.height)) | Take a Python screenshot of a window that was previously saved in the window variable. |
| getAllTitles() | Retrieves the titles of all currently open windows. |
| getWindowsWithTitle(title) | Retrieves a list of Window objects that match the given title. |
| getWindowRect() | Returns the position and size of the specified window as a tuple of integers (left, top, width, height). |
| getActiveWindow() | Captures the currently active/focused window. |
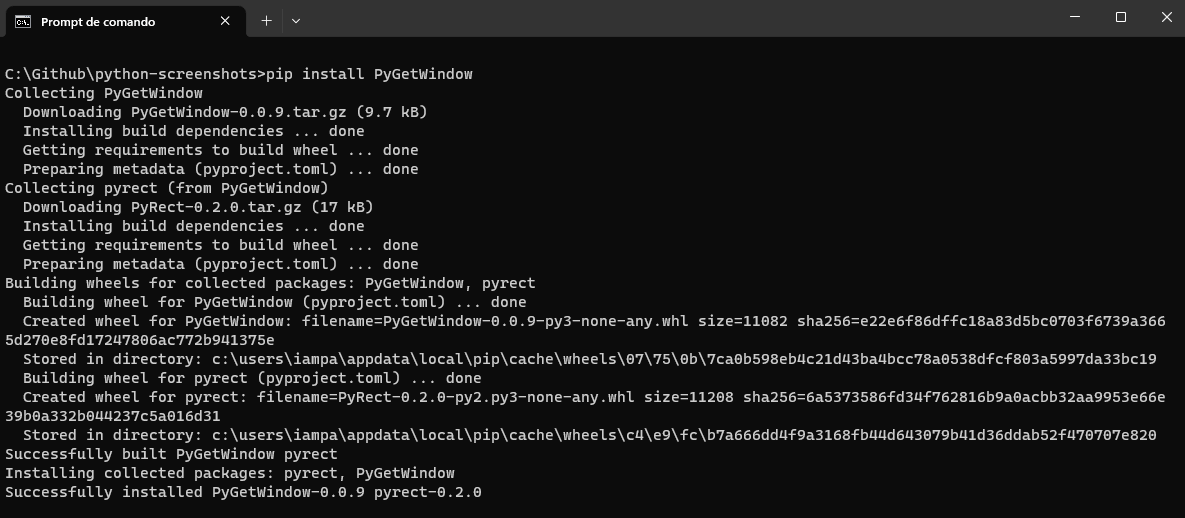
Installation
To install PyGetWindow, you can just use pip:
|
1 |
pip install PyGetWindow |
Take Python screenshots with PyGetWindow
Capturing Python screenshots with PyGetWindow is simple. Here’s how you can use it:
|
1 2 3 4 5 6 7 |
import pygetwindow as gw import pyautogui # Get a specific window by its title window = gw.getWindowsWithTitle('Calculadora')[0] # Use PyAutoGUI to capture the window's region screenshot = pyautogui.screenshot(region=(window.left, window.top, window.width, window.height)) screenshot.save("application-window-screenshot.png") |
Benefits over other methods
Instead of capturing the entire screen and cropping out unnecessary parts, PyGetWindow, lets you directly capture individual application windows, streamlining the process.
If an application window changes its position or size, PyGetWindow can still accurately capture it, given its capability to dynamically identify window boundaries.
Capturing smaller, targeted areas can be faster and more resource-efficient than taking full-screen captures, especially on systems with large resolutions.
In short, Pillow is great for general image tasks, while PyAutoGUI and PyGetWindow are more specialized for taking Python screenshots. Choose the one that fits your task and how much control you need.
Demonstration: Python screenshots using Selenium
In this section, we will apply some of the knowledge of this blog about taking Python screenshots using Selenium native screenshots and LambdaTest Capabilities.
Discover how to conduct Python automation testing for your websites or web applications using a cloud-based grid LambdaTest.
To perform Selenium Python testing on the LambdaTest cloud grid, you should use the capabilities to configure the environment where the test will run. In this blog, we will run the tests on Windows 11 and the browser as Chrome.
We will execute the below test scenarios:
Test Scenario 1 – Using Selenium native screenshots
| Steps:
|
Test Scenario 2 – Using LambdaTest capabilities
|
Preconditions:
Steps: |
Setting up the Python screenshot environment
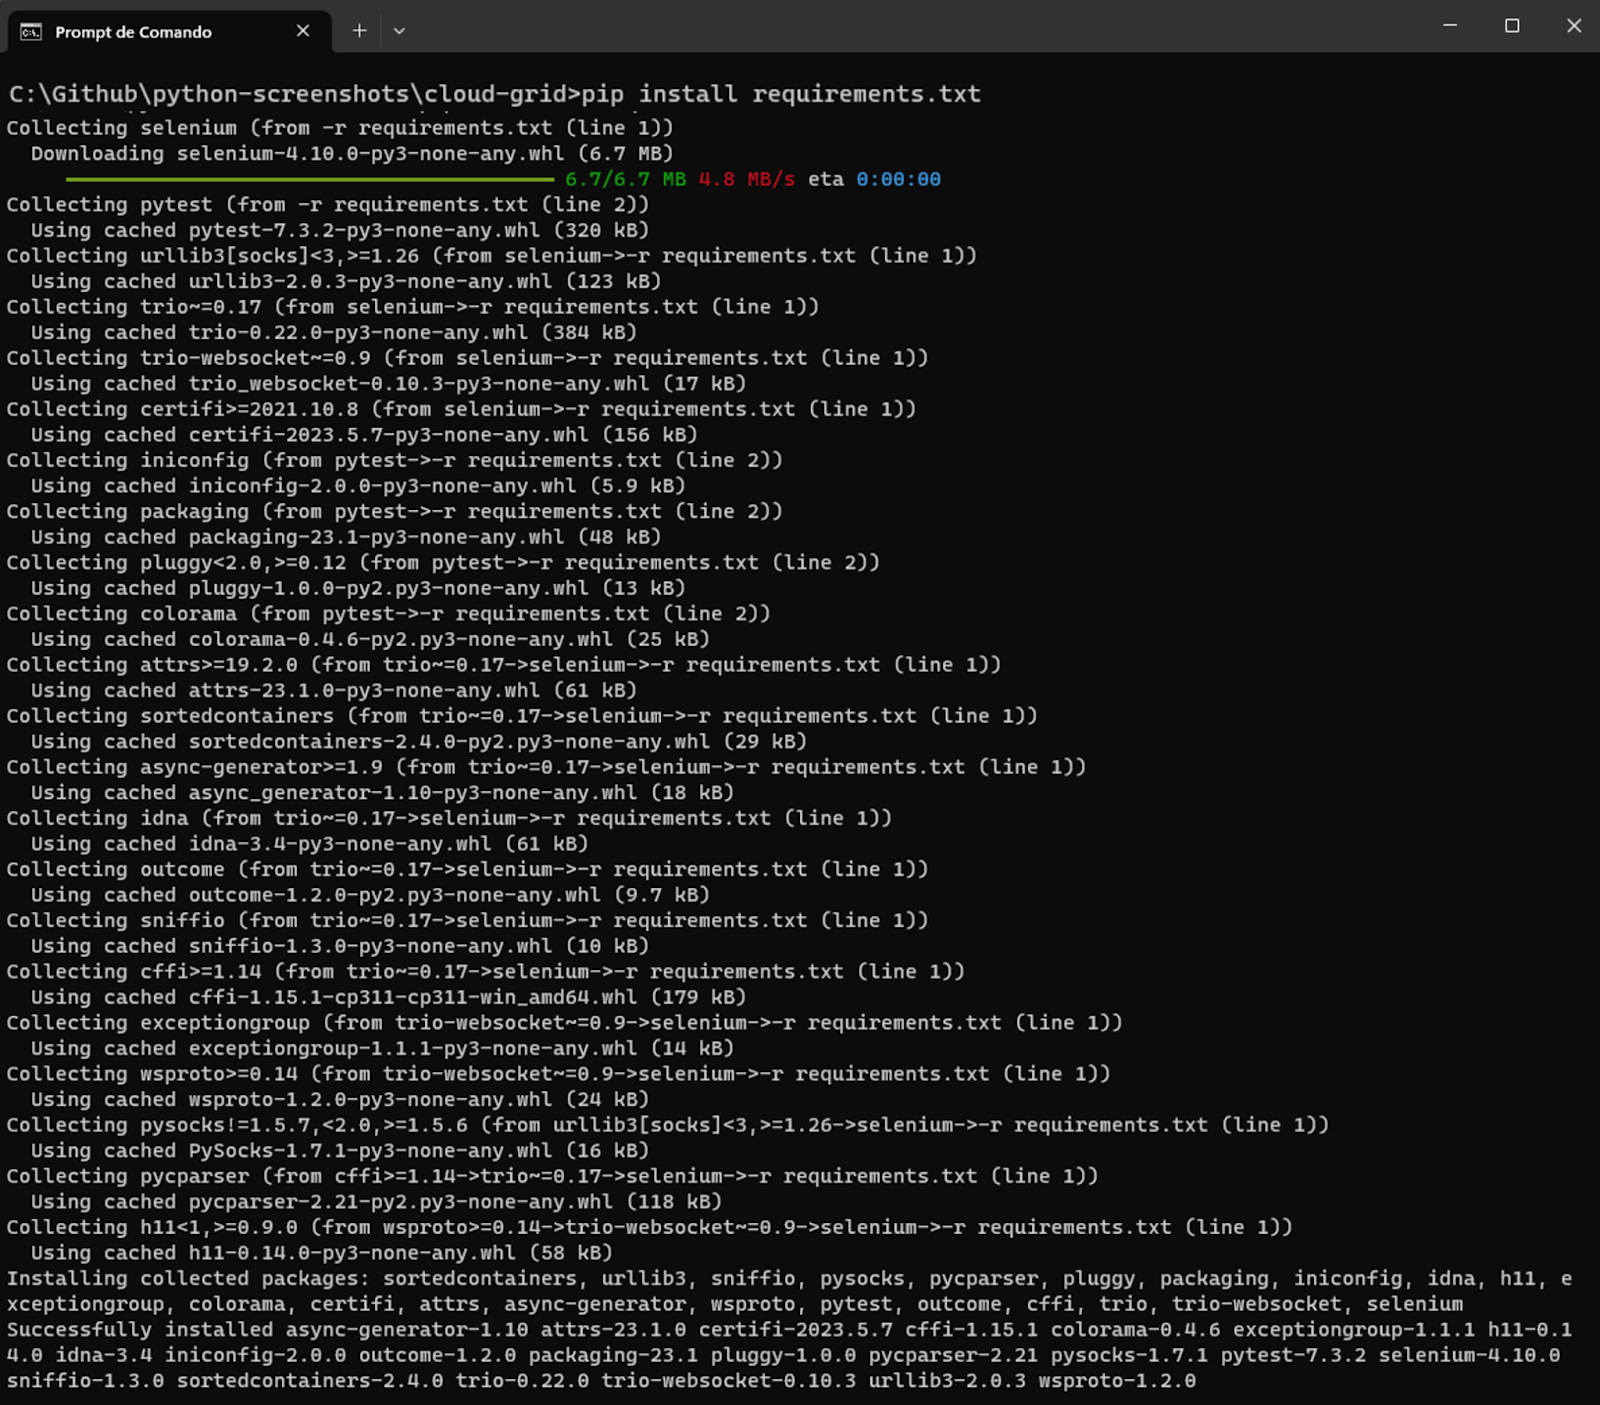
Step 1: Install Selenium, pytest, and other necessary libraries.
Once Python is installed, use the Python package manager, pip, to install Selenium and pytest by running the following command:
|
1 |
pip install -r requirements.txt |
Requirements.txt contains the dependencies we want to install.

Result
Step 2: Download and Install Visual Studio Code or your preferred IDE.
Step 3: Configure pytest in Visual Studio Code.
To finish the configuration, we must tell Visual Studio Code that pytest will be our test runner by following the instructions below:
Now that your IDE and framework are set up let’s configure the LambdaTest settings and define the required capabilities to include in your test script.
Setting up LambdaTest capabilities
Step 1: Create a LambdaTest account.
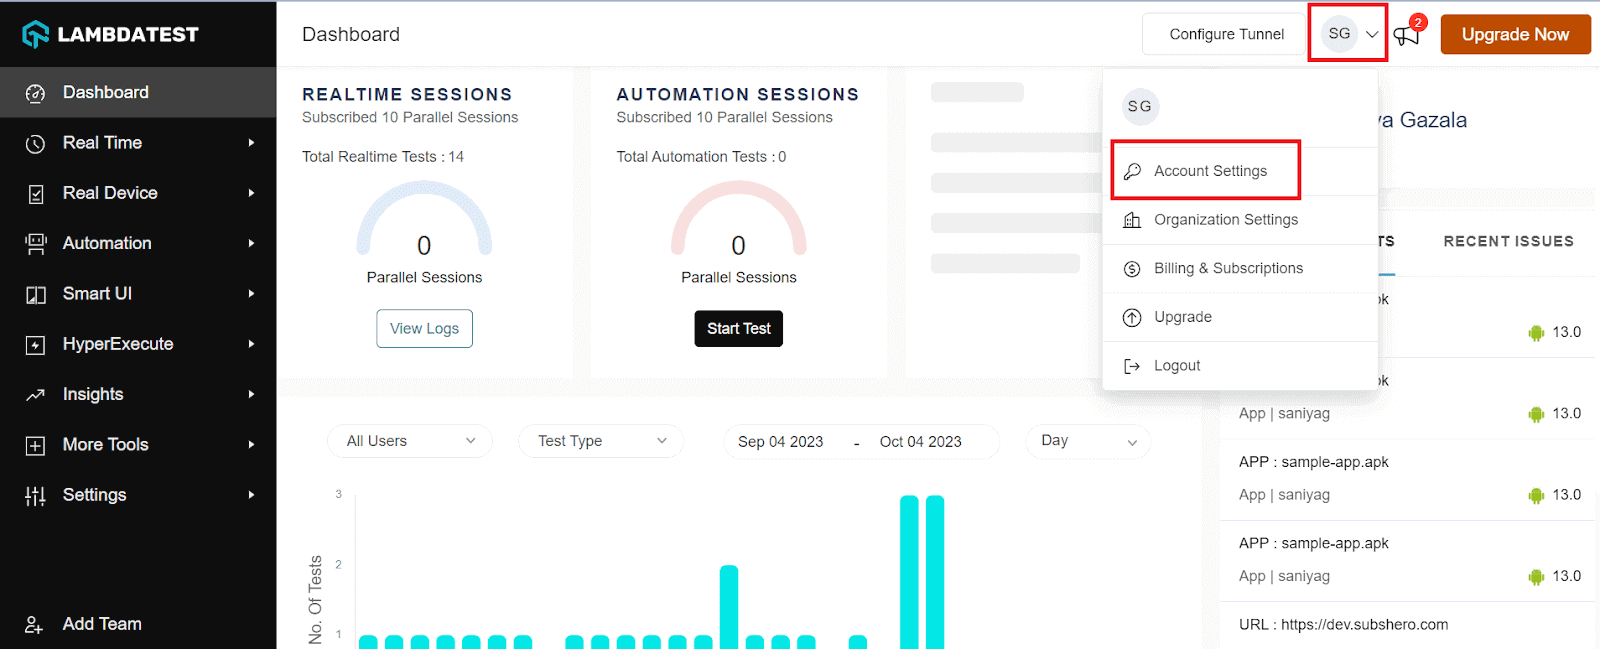
Step 2: Get your Username and Access Key by going to your Profile avatar from the LambdaTest dashboard and selecting Account Settings from the list of options.
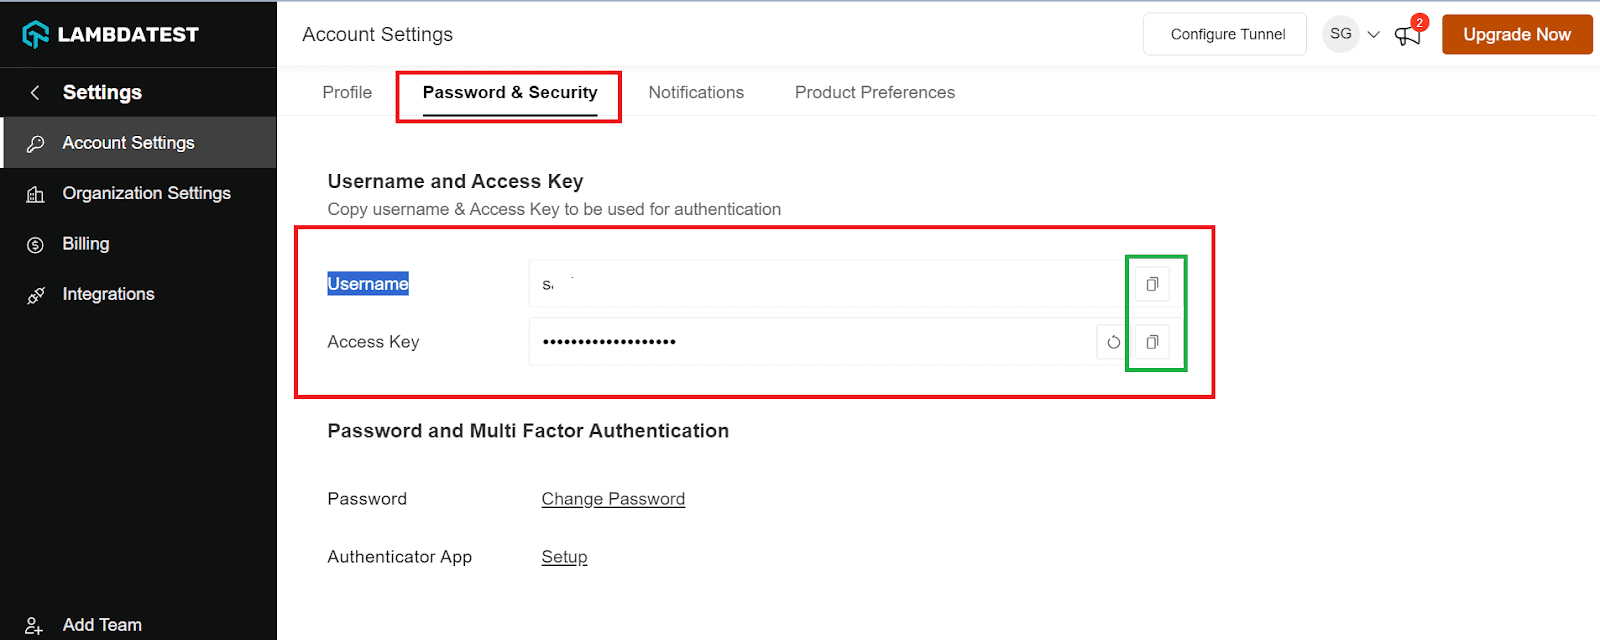
Step 3: Copy your Username and Access Key from the Password and Security tab.
Step 4: Generate Capabilities, which contain details like your desired browser and its various operating systems. Generate your LambdaTest Capabilities Generator as per your requirement.
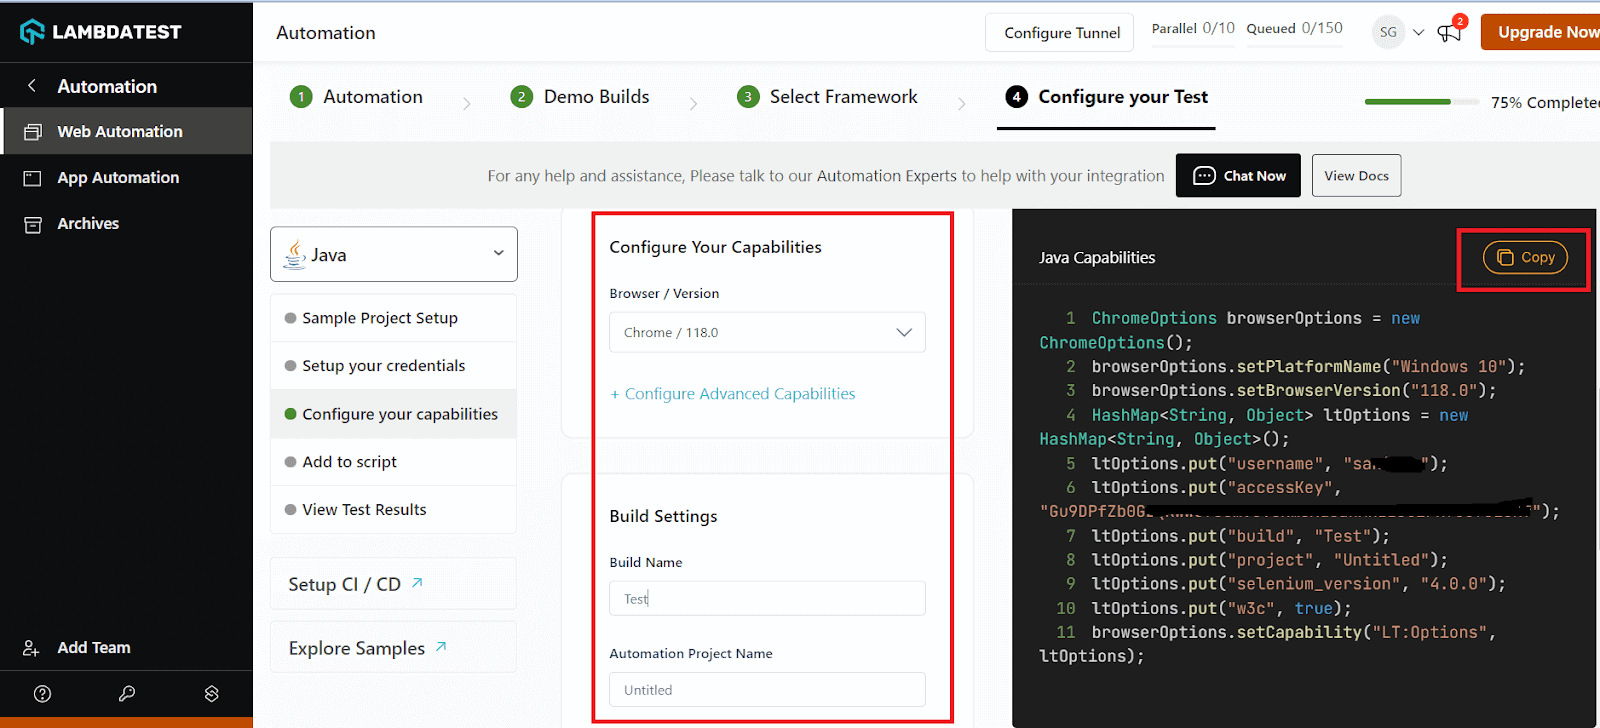
Step 5: Now that you have both the Username, Access key, and capabilities copied, all you need to do is paste it on your test script.
After configuring the required details, let’s jump into the scenarios executing on LambdaTest platform.
Scenario 1 – Using Selenium native screenshots
Lets understand the above code configuration in detail on what each of the attributes is responsible for.
Code walkthrough – config.ini
In short, the config.ini file sets up the website to test, user access, automation parameters, and the testing environment.
Now that we have set up the config file let’s create a Python file and write code.
Code Walkthrough – test_selenium.py
You can run this test using the below command:
|
1 |
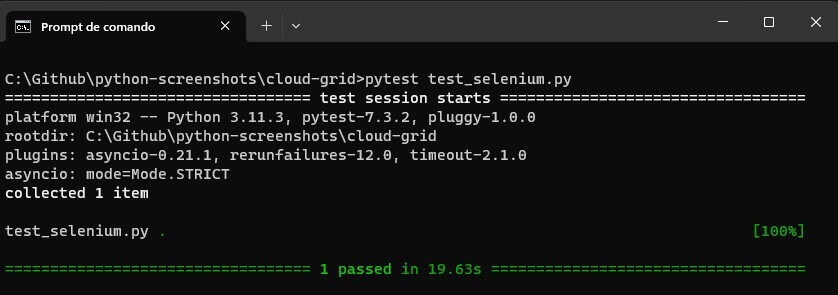
pytest test_selenium.py |
You will get the below result:
Inside the screenshots folder, you will see the generated files:
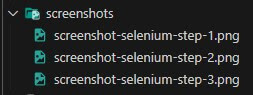
You can see the generated images:
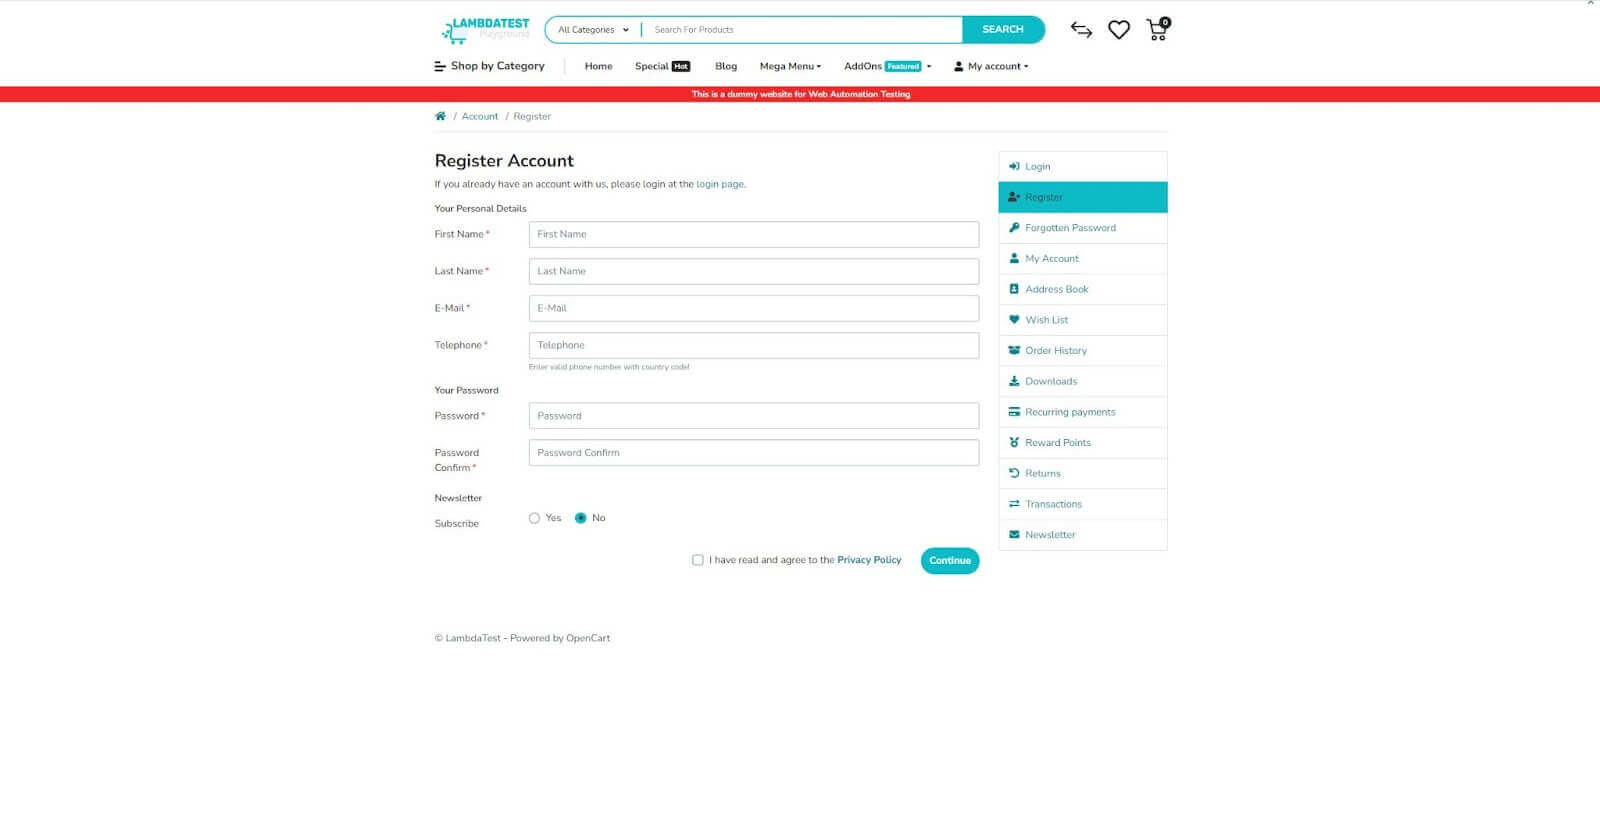
Filename – screenshot-selenium-step-1.png
Filename – screenshot-selenium-step-2.png
Filename – screenshot-selenium-step-3.png
Scenario 2 – Using LambdaTest visual testing capabilities
In scenario 1, we saw how the screenshots were taken and stored into a folder using LambdaTest capabilities, but as we discussed in the previous scenario we did not enable “visual” capability to “true”, now in scenarios 2 let’s do the same, but this time we will enable the capability “visual: true”.

Code Walkthrough
The code is almost the same as test_selenium.py, just changing two points:
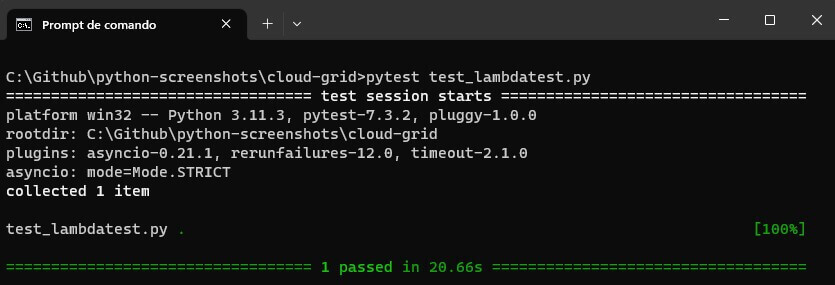
You can run this test using the below command:
|
1 |
pytest test_lambdatest.py |
Result
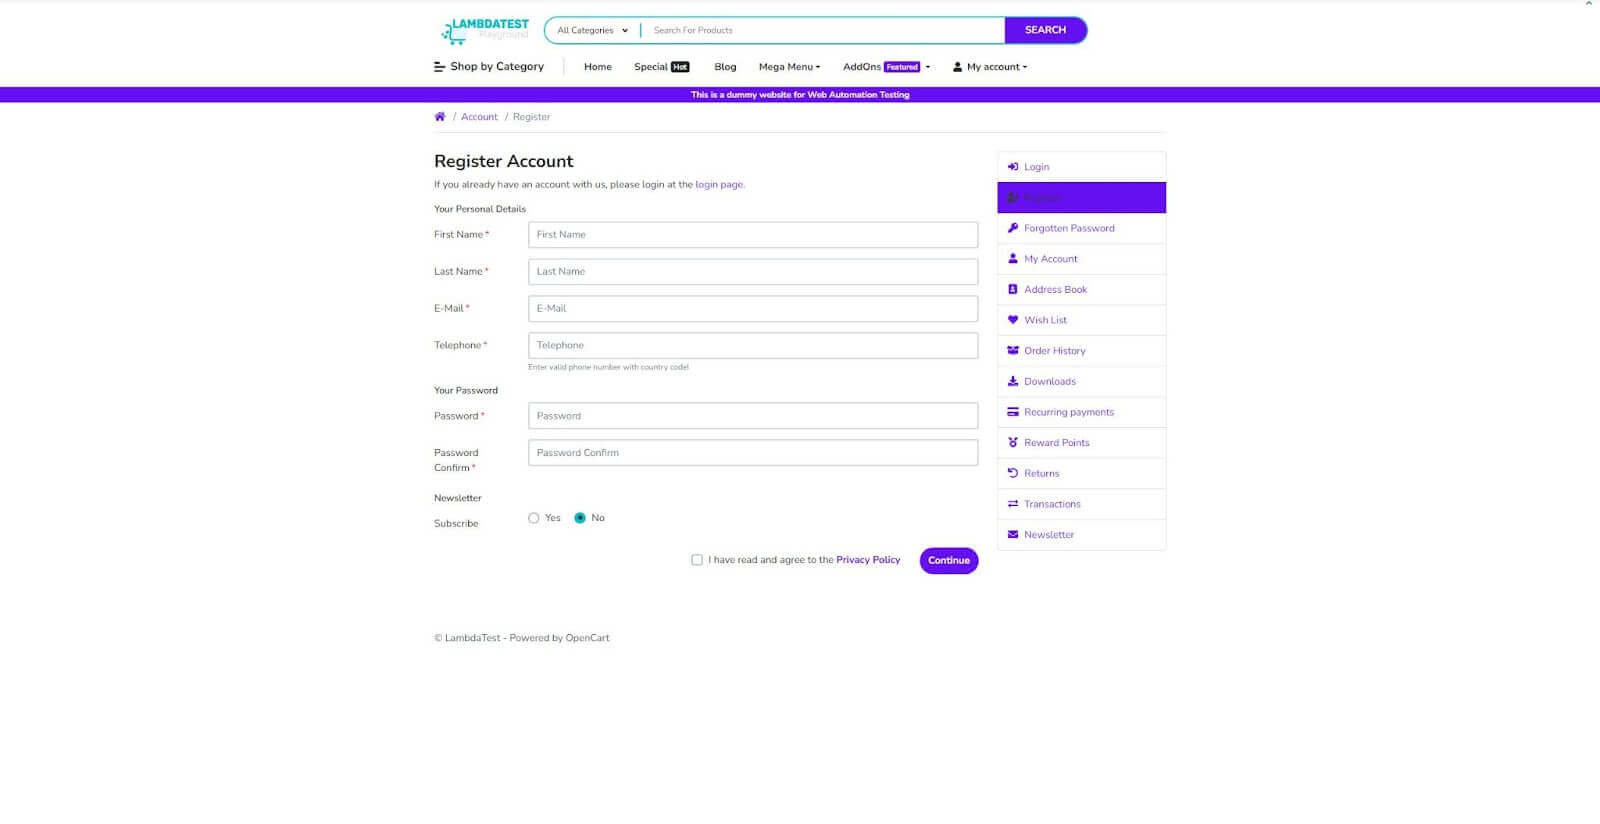
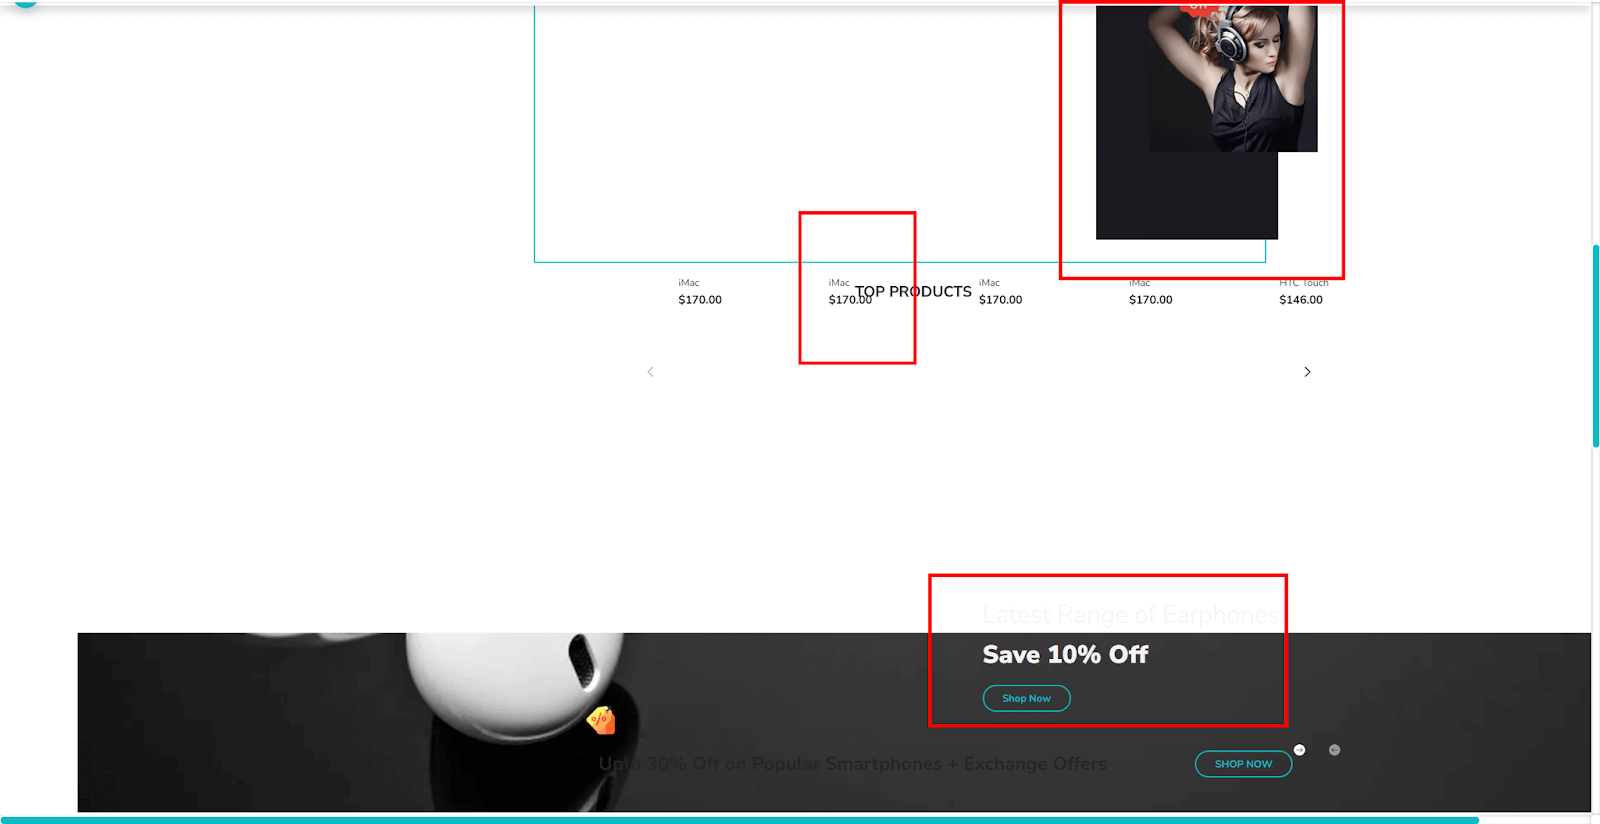
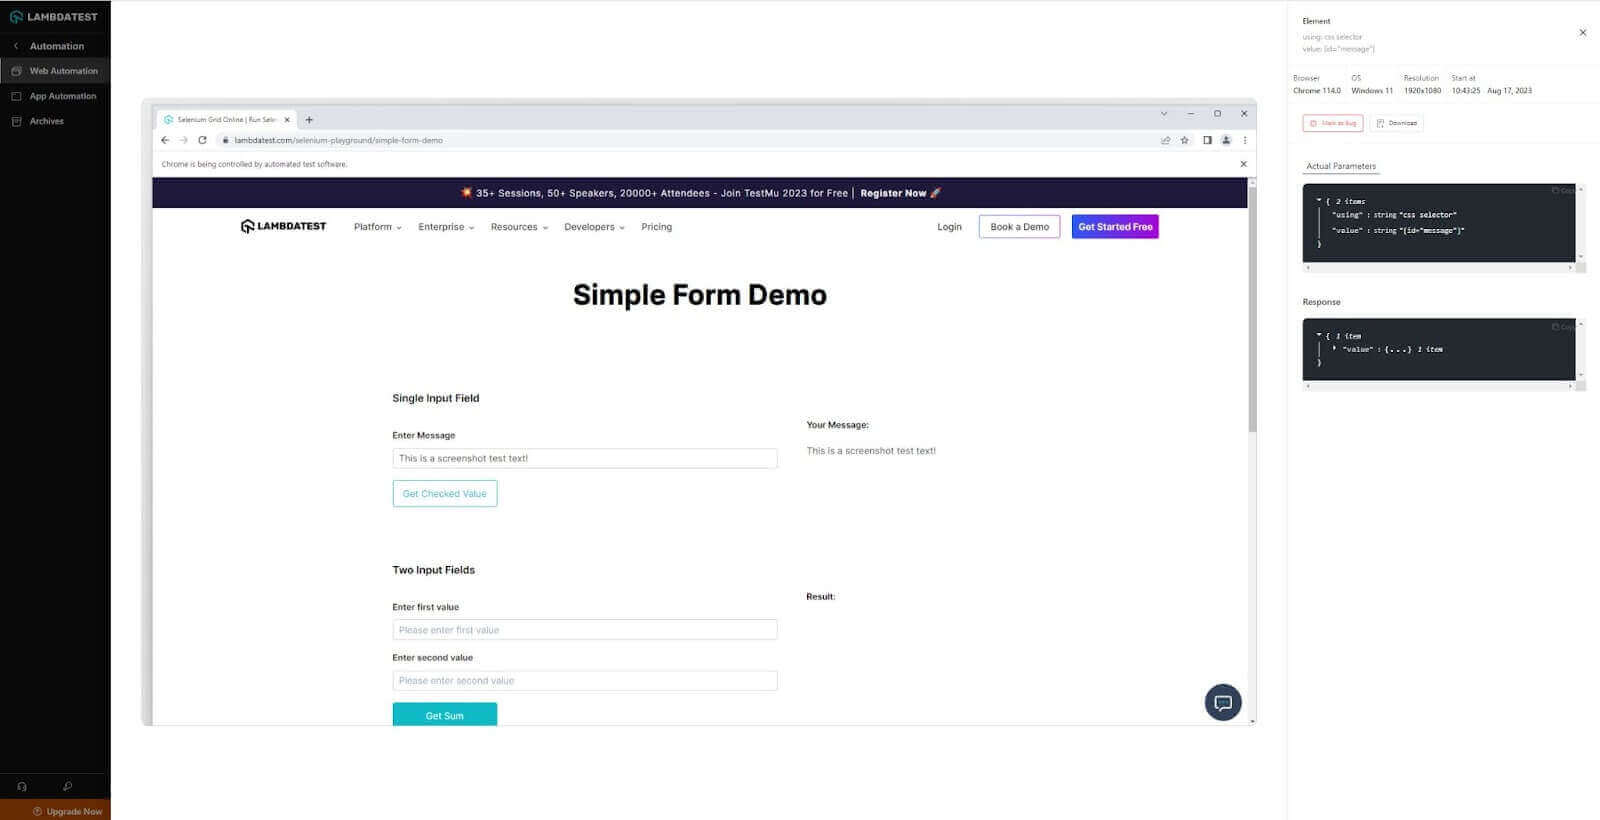
If you look at the LambdaTest Dashboard, you can see the details of the test case execution.
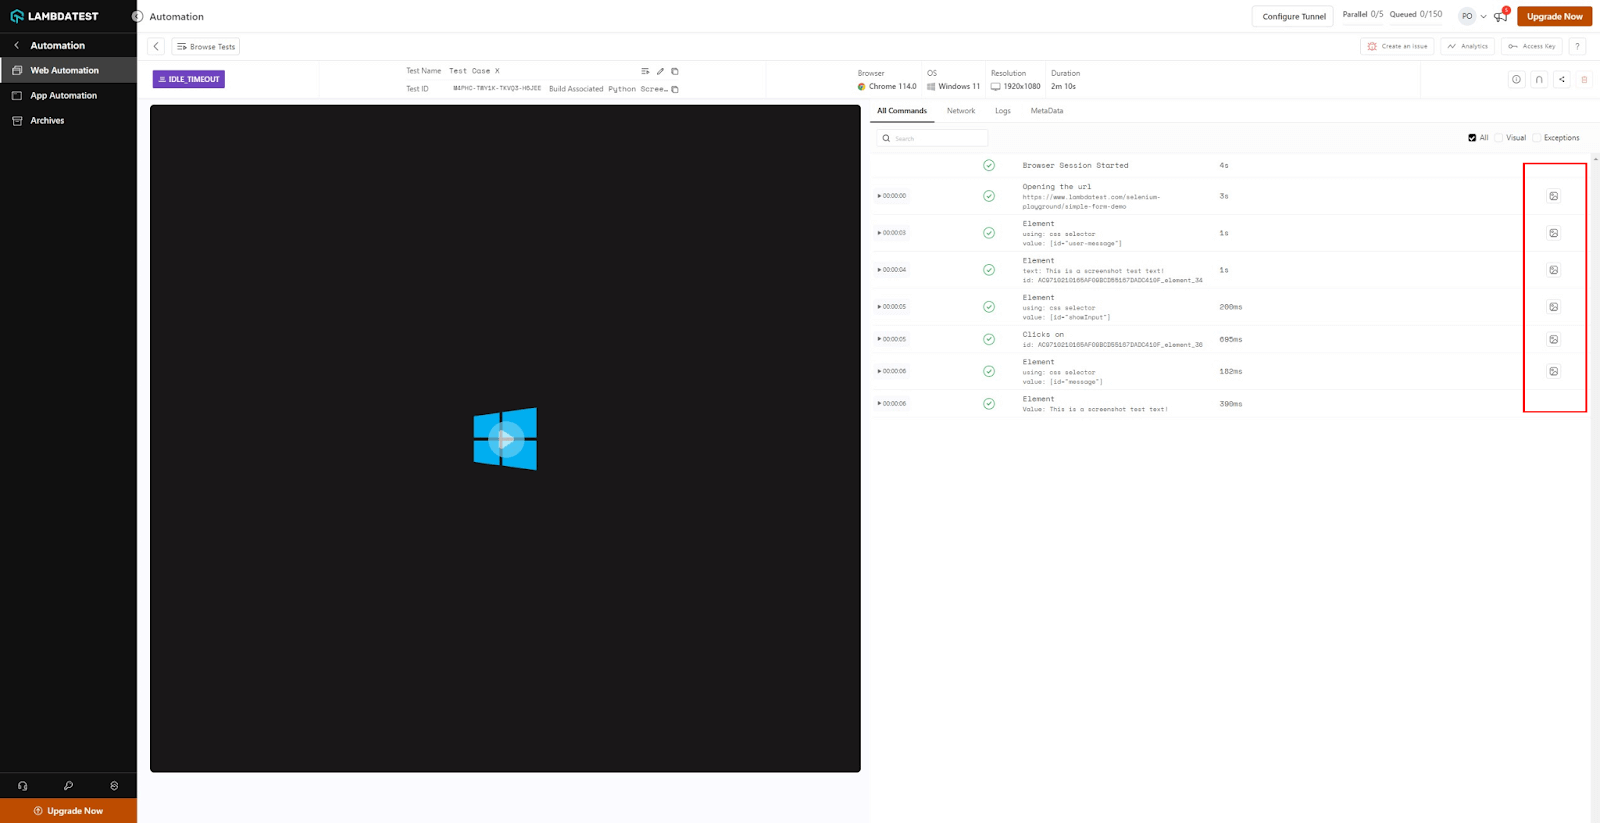
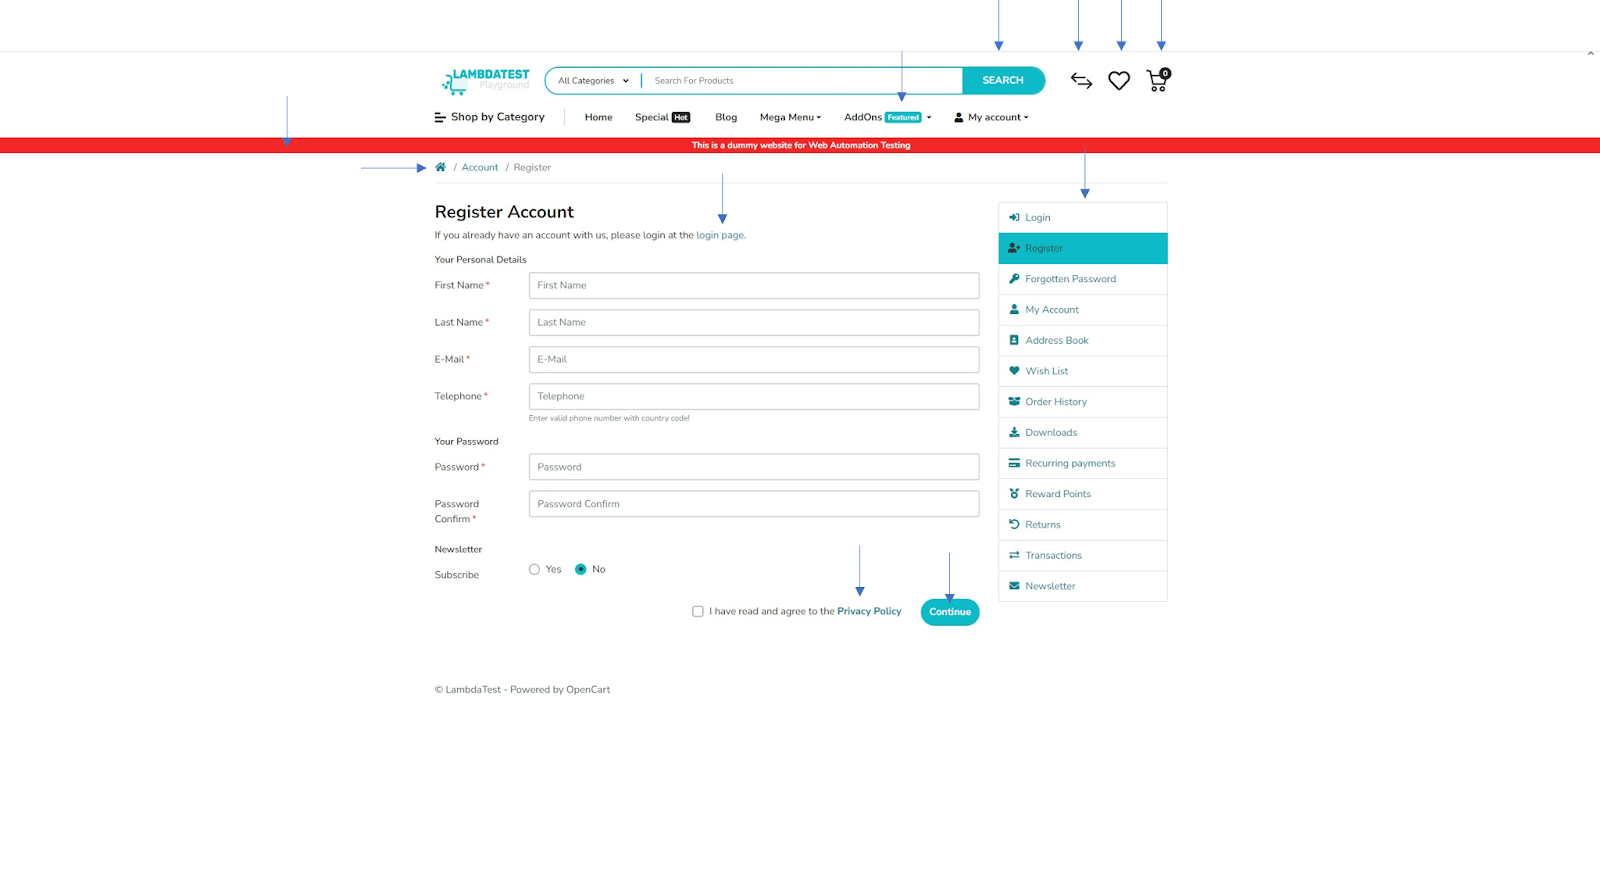
Highlighted in red, you can see the buttons to open the screenshots taken in each test step. If you open one of them (for example, the last one), it is possible to see how it is displayed.
Best practices while taking Python screenshots
To make the most of Python screenshots for tasks like documentation, testing, or presentations, you need a clear plan. Without a systematic approach, you can end up with too many images or lose the effectiveness of your visuals. Following simple and consistent practices is key to achieving clarity and efficiency.
Cross-browser testing
Cross-browser testing checks if your website works well on different web browsers (like Chrome, Firefox, Edge, and Safari). It’s essential for a consistent user experience.
One of the standout capabilities for efficient Python screenshots is the utilization of automated screenshot APIs, such as the one provided by LambdaTest. This feature allows for the generation of Python screenshots across many browser and operating system combinations, which is invaluable for cross-browser testing
Storing and organizing screenshots
Organizing screenshots is crucial for easy access and efficiency. Create a simple system with clear file names and folders to keep your digital records in order.
A descriptive and logical naming scheme is crucial. Integrating elements like capture date, context, and a brief label can be insightful. For example, 14Aug2023_Error_LoginUI.png provides an immediate sense of the image’s focus. Such a structured naming methodology helps in faster location and improved structuring.
Dedicating specific folders aligned with projects or themes improves the ease of locating images. Leveraging cloud storage platforms, such as OneDrive or iCloud, provides the benefits of accessibility and seamless sharing. Utilizing versioning systems, especially for iterative testing phases, is essential to monitor transitions.
Enhancing clarity
Clarity is important for effective communication. Use simple language, visuals, and logical organization to ensure your message is easily understood.
The essence of Python screenshots should be instantly evident. Utilizing applications to underline or highlight hidden regions ensures instant recognition. Elements like directional pointers, encapsulations, or concise textual overlays can improve the conveyed message.
Excess content in Python screenshots can be distracting. Removing unnecessary elements or adjusting dimensions to highlight essential information makes the image more focused and relevant.
Image compression and optimization
It involves reducing image file sizes without compromising quality. This is crucial for faster websites, efficient storage, and better user experiences. Techniques include format selection, compression tools, and optimization libraries.
This is crucial for web-based platforms and digital sharing, where optimized image sizes can enhance responsiveness and save digital space. When compressing, it’s vital to preserve visual quality.
The digital world offers many resources for image optimization. Tools like ImageOptim or JPEGmini can significantly reduce file sizes while maintaining acceptable image quality. If you prefer a code-based approach, Python’s image libraries offer suitable functionalities.
Although taking Python screenshots might appear simple, getting the most out of them requires some attention to detail. By following these best practices, your visuals will align with their intended purpose and be well-organized and clear in their presentation.
Conclusion
In today’s tech world, Python screenshots remain valuable for capturing real-time visuals. Python, with its various libraries, offers a straightforward way to get, edit, and use these images effectively. Whether you use Python libraries or specialized tools, Python provides many ways to take screenshots.
As demonstrated in this blog, combining these methods in automated testing can greatly improve quality assurance processes. It helps teams gather proof of their test automation in action. As you advance in building your test framework, incorporating Python-based screenshot techniques can be a game-changer in your testing toolbox.
Frequently Asked Questions (FAQs)
How can I capture a specific element from a webpage using Python screenshots?
To grab a specific element from a webpage with Python, you can use a framework like Selenium, which supports WebElement libraries like WebDriver and more. This allows you to navigate web pages, pinpoint the element you want, and take Python screenshots.
Can I take screenshots on a server without a graphical user interface (GUI) using Python screenshots?
Yes, it’s possible to capture screenshots on a headless server without a GUI using Python. You can achieve this by utilizing libraries like Selenium with a headless web driver, which doesn’t require a visual interface to capture screens.
What’s the best way to automate screenshot capture for testing and monitoring with Python screenshots?
When it comes to automating screenshot capture for testing or monitoring, popular choices include Pillow for static screen captures and PyAutoGUI for capturing screens and performing system interactions programmatically.


Author’s Profile
Paulo Oliveira
Paulo is a Quality Assurance Engineer with more than 15 years of experience in Software Testing. He loves to automate tests for all kind of applications (both backend and frontend) in order to improve the team’s workflow, product quality, and customer satisfaction. Even though his main roles were hands-on testing applications, he also worked as QA Lead, planning and coordinating activities, as well as coaching and contributing to team member’s development. Sharing knowledge and mentoring people to achieve their goals make his eyes shine.
Blogs: 15
Got Questions? Drop them on LambdaTest Community. Visit now


