How to Click Button in Selenium: A Complete Guide
Faisal Khatri
Posted On: March 28, 2024
![]() 409083 Views
409083 Views
![]() 24 Min Read
24 Min Read
No software test is truly complete without interacting with the elements of a webpage. Clicking a button to submit a form, checking a checkbox, or following a link are some of the primary actions users take.
We can mimic these actions with a mouse click or a keyboard shortcut, which can be automated using the click() method. When it comes to web automation, the Selenium click button method automates UI interactions and mimics user clicks on various WebElements. This allows testers to automate testing scenarios that involve clicking buttons, links, and other interactive components in real-world scenarios.
In this blog, we will cover the Selenium click button method to perform left and right-click operations. So stay tuned and read till the end to learn basic and advanced concepts of performing clicks using Selenium.
- What is Selenium?
- What is the Selenium Click Button Method?
- How to Click on a Button in Selenium?
- Basic Operations Using Selenium Click Button Method
- Advanced Operations Using Selenium Click Button Method
- Locators and Selenium Click Button Method
- Did We Click Some New Ideas?
- Frequently Asked Questions (FAQs)
If you are an experienced automation tester, you can skip the basic operations and head to the advanced click operations. For beginners, we will start with a basic introduction.
What is Selenium?
Selenium is an open-source suite of tools and libraries to automate web browser interactions. Its accessibility and cost-free availability have earned it a prominent spot in the global testing community, facilitating automated testing. Selenium supports multiple programming languages and an array of browsers, including Google Chrome, Mozilla Firefox, Safari, Microsoft Edge, and more. Thus, it is an ideal option to perform automated UI testing.
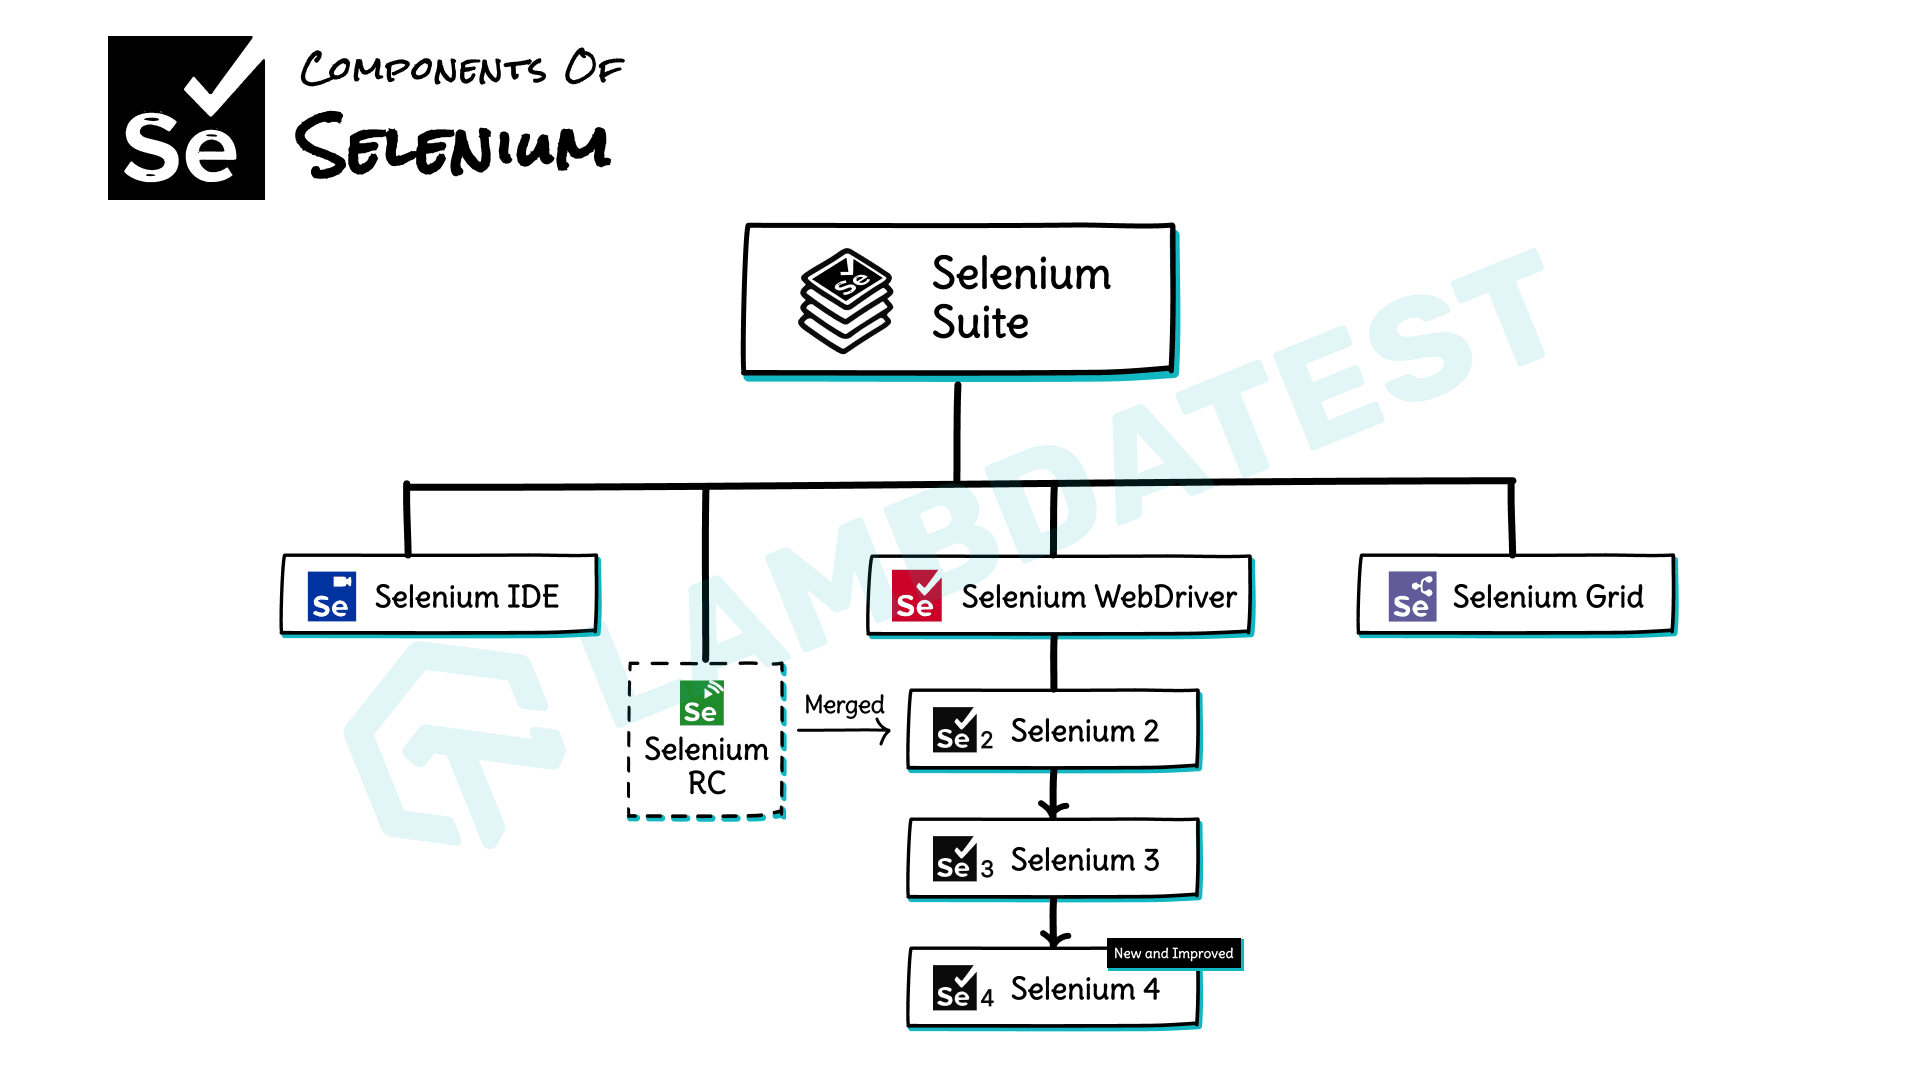
Selenium has the following components:
- Selenium IDE: Selenium IDE is a record and playback automation tool that allows developers and testers to create test scripts through recording and playback the recorded tests, debugging and analyzing test results. No prior programming knowledge is required to use this tool. Hence, testers with zero programming knowledge can use this tool seamlessly by recording and playing back the repetitive regression tests.
- Selenium WebDriver: Selenium WebDriver is a component of the Selenium framework that helps automate browser actions on different platforms. It supports multiple programming languages such as Java, JavaScript, Python, Ruby, C#, etc. The primary function of Selenium is to ensure that the web applications work correctly under various scenarios.
- Selenium Grid: It runs your Selenium tests in parallel on multiple browsers and machines. This can help speed up your test execution and for testing your web application on different browsers and operating systems.
Selenium 4 – the latest version of the Selenium framework uses the W3C WebDriver Protocol, which replaced the previously used JSON Wire Protocol in Selenium 3.
Selenium 4 has multiple new features introduced, such as enhanced performance, introduction of relative locators, native file upload support, unified Selenium DevTools API, and an improved Selenium IDE. The release of Selenium 4.11.0 has also introduced Selenium Manager, which allows automated browser and driver management for all popular browsers such as Chrome and Firefox.
To know more about the differences between Selenium 4 and Selenium 3, you can check this blog on Selenium 4 vs Selenium 3.
Subscribe to the LambdaTest YouTube Channel to catch up with the latest tutorials on automated testing, Selenium testing, browser compatibility, and more.
What is the Selenium Click Button Method?
When browsing the web, your mouse offers two click options: a left-click, which is the standard click for actions like activating buttons or opening links, and a right-click, which brings up a context menu specific to what you clicked on, offering shortcuts and faster navigation within the webpage.
For this, Selenium offers a click() method to help testers perform various mouse-based operations for the web application. The Selenium click button method can be used for multiple purposes, such as handling radio buttons and handling checkboxes or simply clicking on any button or link, drag and drop operation, click and hold operation, etc.
In the next section, we will be checking out the practical implementation of the Selenium click button method for basic operation, and advanced operations and will also check out how to use the click() method with different Selenium locators.
How to Click on a Button in Selenium?
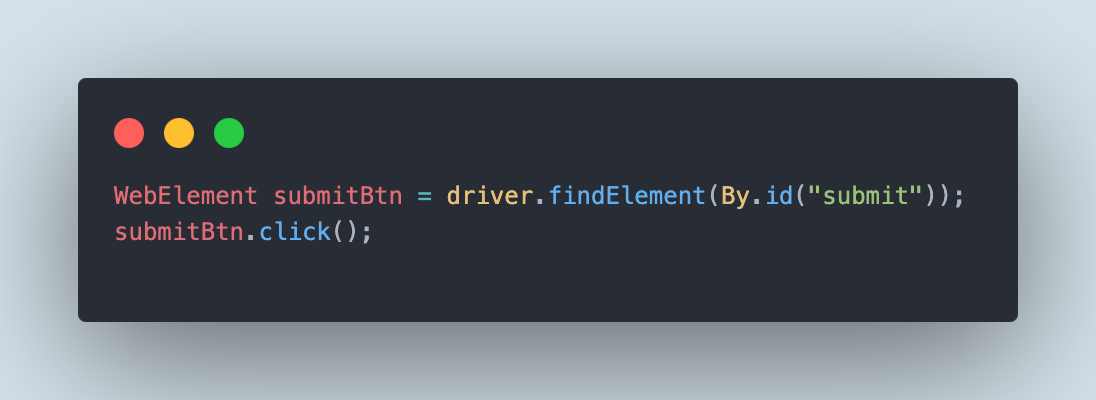
Selenium click button method can be used to click on a button. First, we need to locate the WebElement of the button on which we need to perform the left mouse click operation. Then, using the click() method, we can interact with the WebElement and perform a click on it.
The following code snippet shows how to perform a click on a button using Selenium Java.
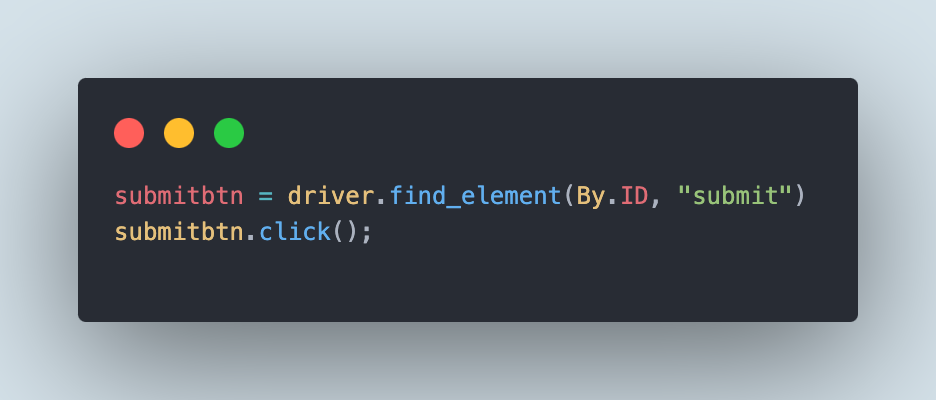
The following code snippet shows how to perform a click on a button using Selenium Python.
The following code snippet shows how to perform a click on a button using Selenium JavaScript.
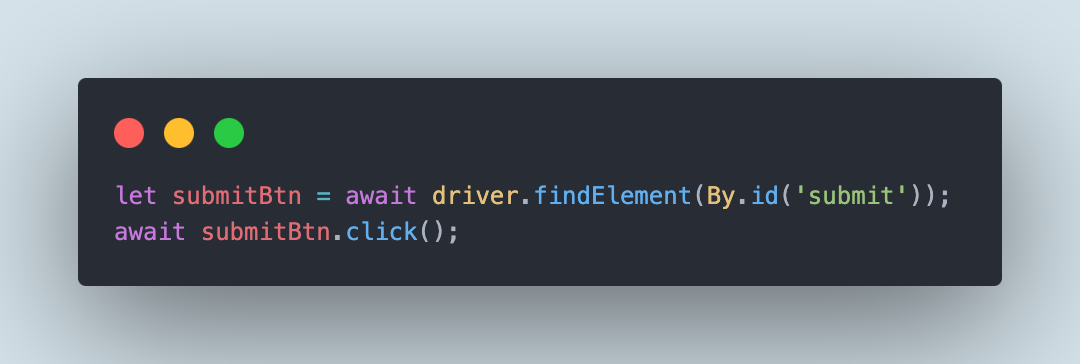
There are multiple mouse operations that can be performed using the Selenium click button method. Selenium WebDriver is capable of performing various mouse operations such as right-click, click and hold, drag and drop, and double-click.
It also allows the users to move the focus to a particular WebElement and perform the click using the coordinates on the webpage.
Actions class in Selenium can be used to chain multiple operations and perform the required interaction with the respective WebElements.
The WebElement on which the click, right-click, double-click, etc. commands could be executed need not be only a button; it could be an image, textbox, or a link as well.
In the upcoming sections of this blog on Selenium click button method, we will be learning about basic operations to perform click on WebElements on the webpage and also delve into the advanced concepts of interacting with WebElements using right click, double click, and drag and drop.
Basic Operations Using Selenium Click Button Method
Let’s start with the basic operations and perform a click on the WebElements using the Selenium click button method. But before we begin demonstrating the code, it should be noted that we will run all the tests on the LambdaTest cloud grid using the Chrome browser on the Windows 10 platform.
LambdaTest is an AI-powered test orchestration and execution platform that lets developers and testers perform automation testing on a remote test lab of 3000+ real desktop and mobile environments.
To run tests on the LambdaTest cloud, we will need a LambdaTest Username and Access Key. These values are on the Profile > Account Settings > Password & Security.

Next, we will need the LambdaTest automation capabilities to set the browser, browser version, platform, build and test name, etc. The LambdaTest Automation Capabilities Generator can be used to get the auto-generated code of the capabilities by manually setting all the values using the UI provided on the website.
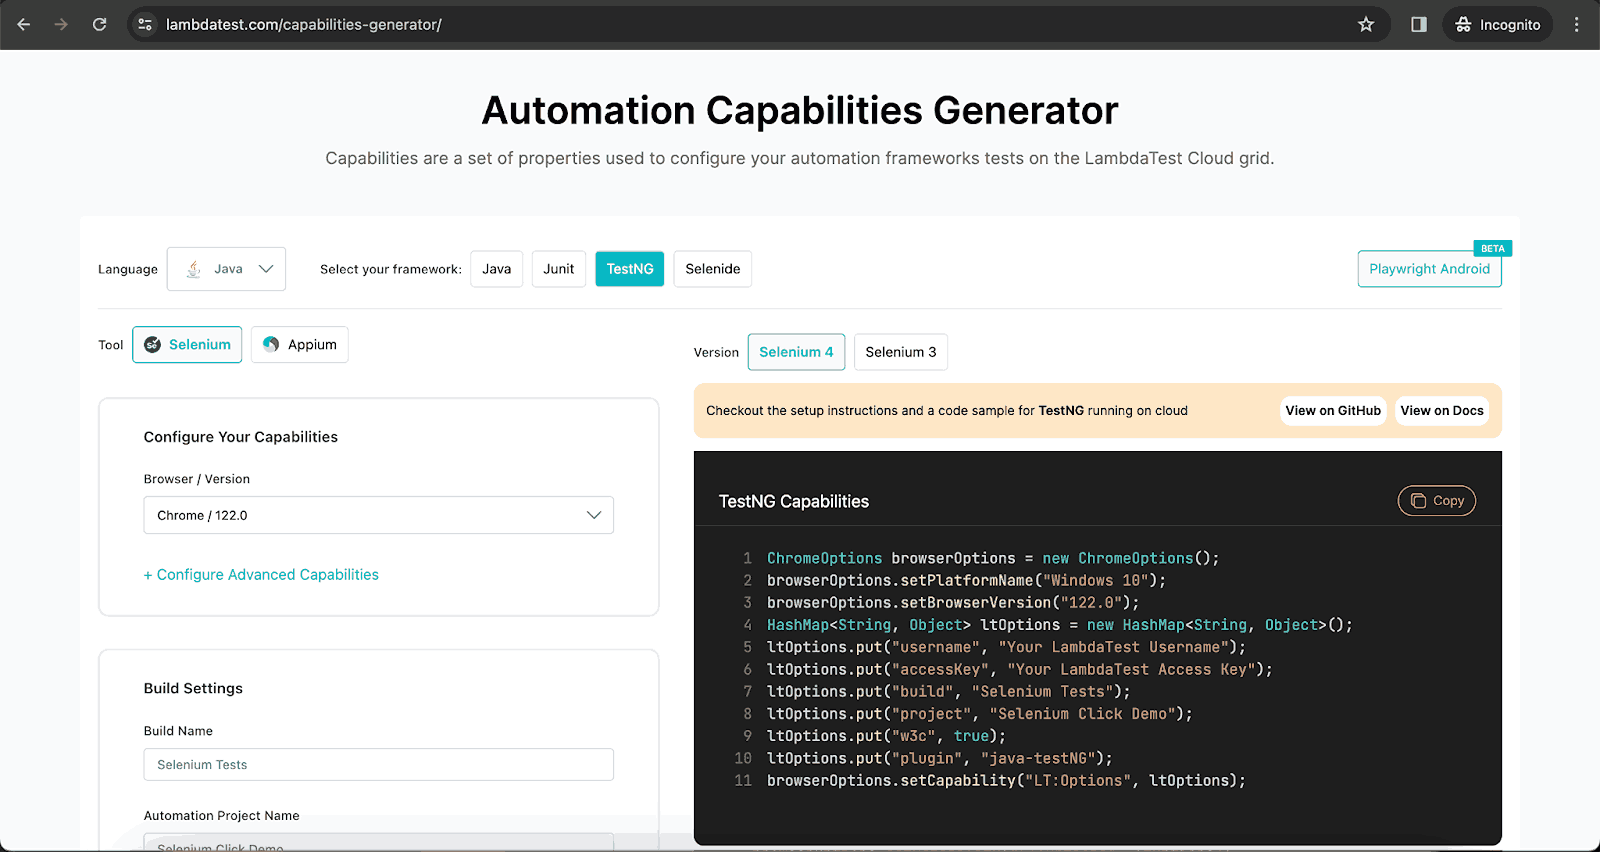
Finally, the code generated on the right-hand side of the window will be used in the test scripts.
The setup() method created inside the ClickDemoTests class will allow instantiating the instance of WebDriver using the RemoteWebDriver class.
setup() method:
|
1 2 3 4 5 6 7 8 9 10 11 |
@BeforeTest public void setup() { String userName = System.getenv("LT_USERNAME") == null ? "LT_USERNAME" : System.getenv("LT_USERNAME"); String accessKey = System.getenv("LT_ACCESS_KEY") == null ? "LT_ACCESS_KEY" : System.getenv("LT_ACCESS_KEY"); String gridUrl = "@hub.lambdatest.com/wd/hub"; try { this.driver = new RemoteWebDriver(new URL("http://" + userName + ":" + accessKey + gridUrl), getChromeOptions()); } catch (final MalformedURLException e) { System.out.println("Could not start the remote session on LambdaTest cloud grid"); } } |
All the LambdaTest capabilities will be set using the getChromeOptions() method.
getChromeOptions() method:
|
1 2 3 4 5 6 7 8 9 10 11 12 13 14 15 16 |
public ChromeOptions getChromeOptions() { final var browserOptions = new ChromeOptions(); browserOptions.setPlatformName("Windows 10"); browserOptions.setBrowserVersion("122.0"); final HashMap<String, Object> ltOptions = new HashMap<String, Object>(); ltOptions.put("project", "Selenium Click Demo"); ltOptions.put("build", "Selenium Tests"); ltOptions.put("name", "Selenium Click method tests"); ltOptions.put("w3c", true); ltOptions.put("plugin", "java-testNG"); browserOptions.setCapability("LT:Options", ltOptions); return browserOptions; } |
We are all set with the configuration to run our tests seamlessly on the LambdaTest cloud grid. Now, let’s delve into the demonstration and check out the different operations we can perform using the Selenium click button method.
Performing Mouse-Click/Left-Click in Selenium
The most basic operation using a Selenium click button method is a left-click or a mouse click. The following test scenario will click on the button and post a message.
Test Scenario 1
|
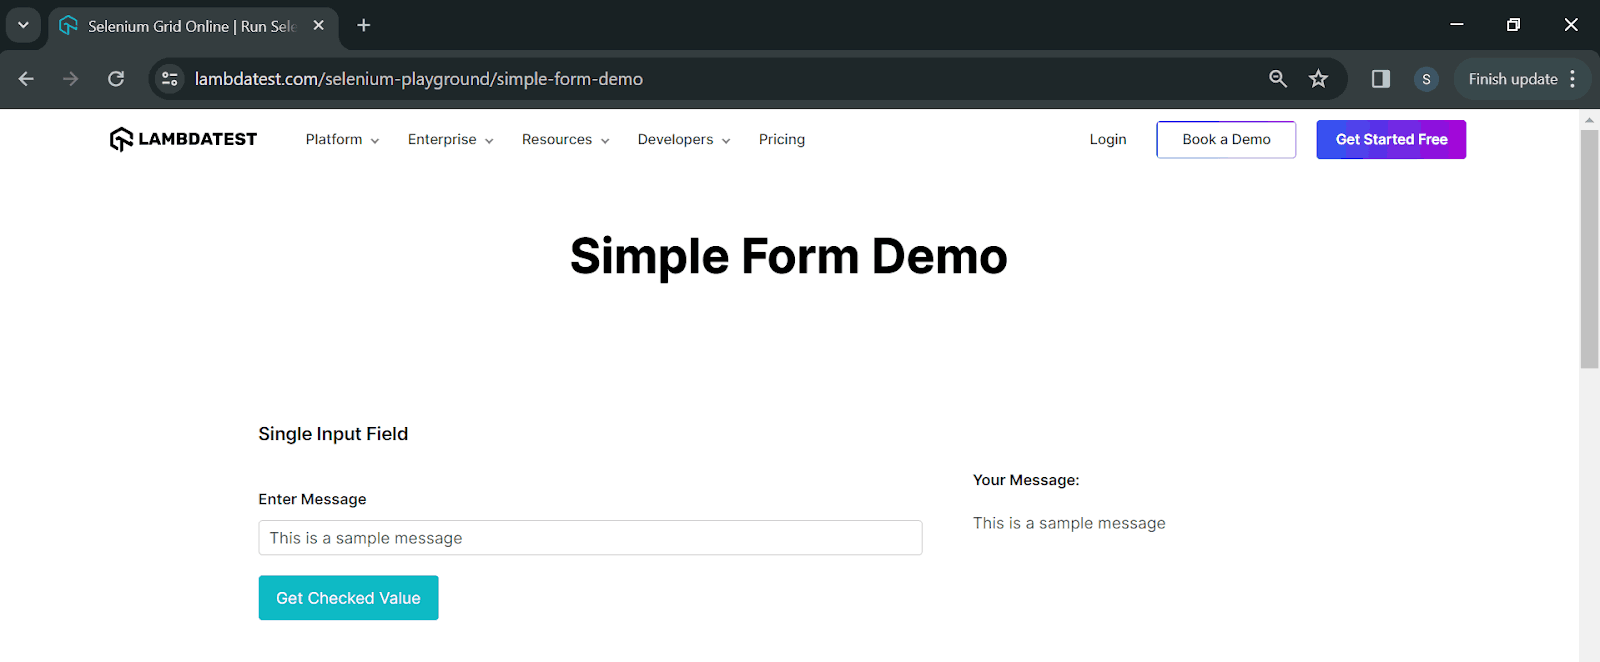
The following code will test the respective scenario.
|
1 2 3 4 5 6 7 8 9 10 |
@Test public void radioButtonDemoTest() { driver.get("https://www.lambdatest.com/selenium-playground/radiobutton-demo"); final WebElement maleRadioBtn = driver.findElement(By.cssSelector("[name=\"optradio\"][value=\"Male\"]")); maleRadioBtn.click(); final WebElement getValueBtn = driver.findElement(By.id("buttoncheck")); getValueBtn.click(); String resultText = driver.findElement(By.cssSelector("p.text-black.radiobutton")).getText(); assertEquals(resultText,"Radio button 'Male' is checked"); } |
Code Walkthrough:
The test will first navigate to the Simple Form Demo page and find the Enter Message textbox. Next, it will enter the values. After that, the text “This is a sample message” is entered as a String. The Get Checked Value button will be located and clicked. Finally, the message text, “This is a sample message”, will be verified by getting the text below Your Message.
Test Execution:
The following is the screenshot of the test executed on the LambdaTest cloud grid.
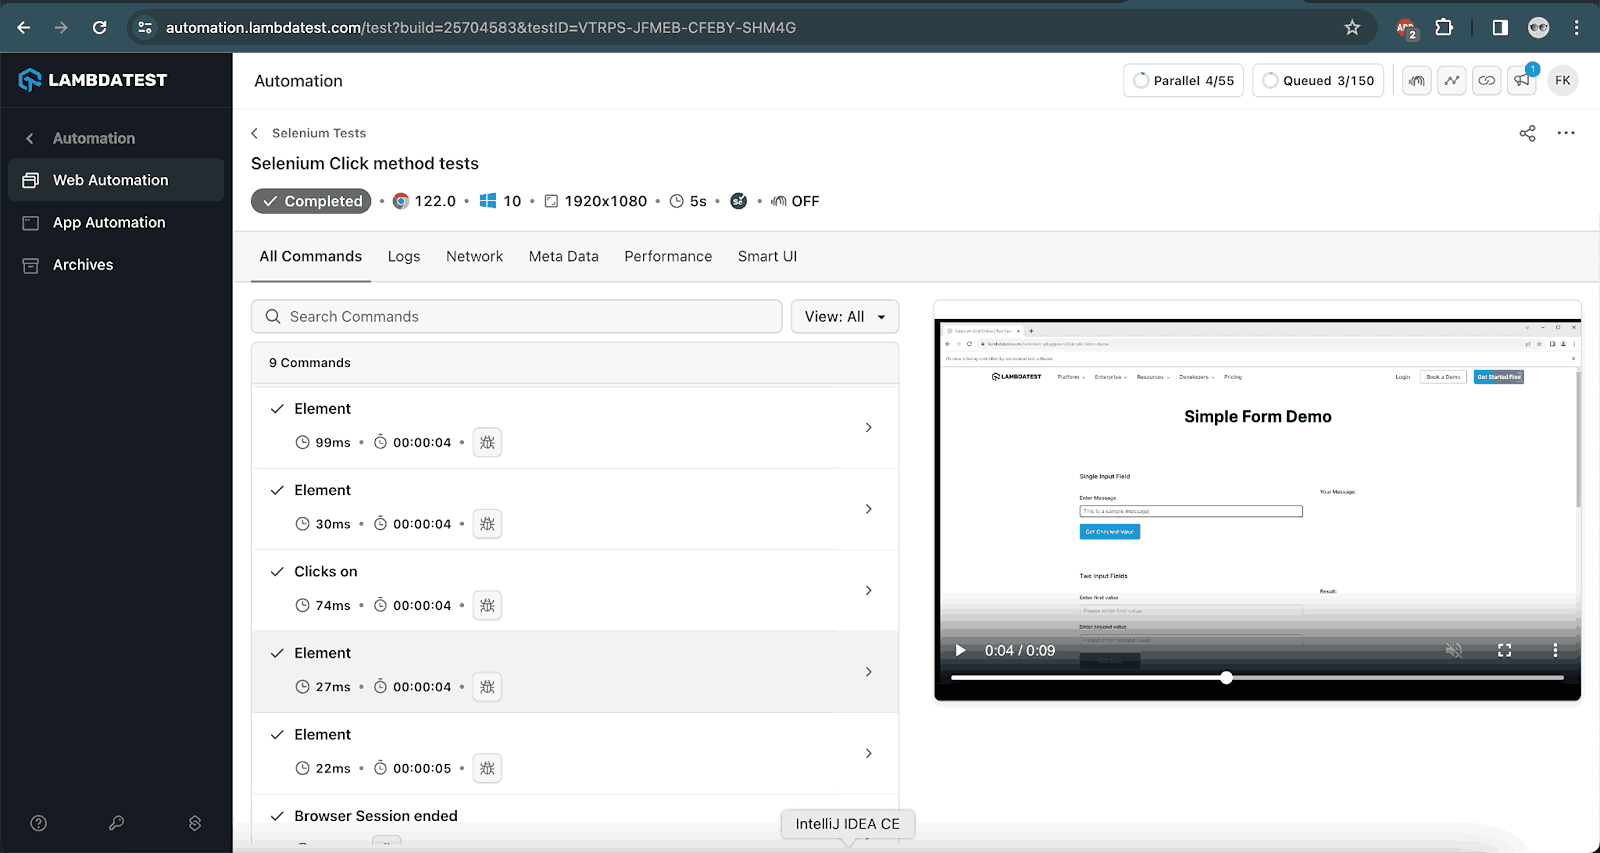
Selenium click button method can also be used to enable/disable checkboxes. The following test scenarios demonstrate how the Selenium click button method works with checkboxes.
Test Scenario 2
|

The following code will help execute the test scenario.
|
1 2 3 4 5 6 7 8 9 |
@Test public void checkboxDemoTest() { this.driver.get("https://www.lambdatest.com/selenium-playground/checkbox-demo"); final WebElement checkboxOne = this.driver.findElement(By.id("isAgeSelected")); checkboxOne.click(); assertTrue(checkboxOne.isSelected()); final String selectedResult = this.driver.findElement(By.id("txtAge")).getText(); assertEquals(selectedResult, "Checked"); } |
Code Walkthrough:
The driver.get() method will open the Checkbox Demo page as its URL is provided in the method parameter. Next, the checkbox will be located. It will be clicked using the Selenium click button method. To check that the checkbox was ticked successfully, we have used two ways, the first one is using the isSelected() method that returns a boolean value true or false based on the WebElement selection. So, here, as we expect that the checkbox should be ticked, we are asserting it using the assertTrue() method of TestNG to check that the isSelected() method returns true, meaning the checkbox is ticked.
The other way to assert is using the text “Checked”, which is displayed below the checkbox after it is ticked.
Test Execution:
The following screenshot displays the test execution performed on the LambdaTest cloud grid.
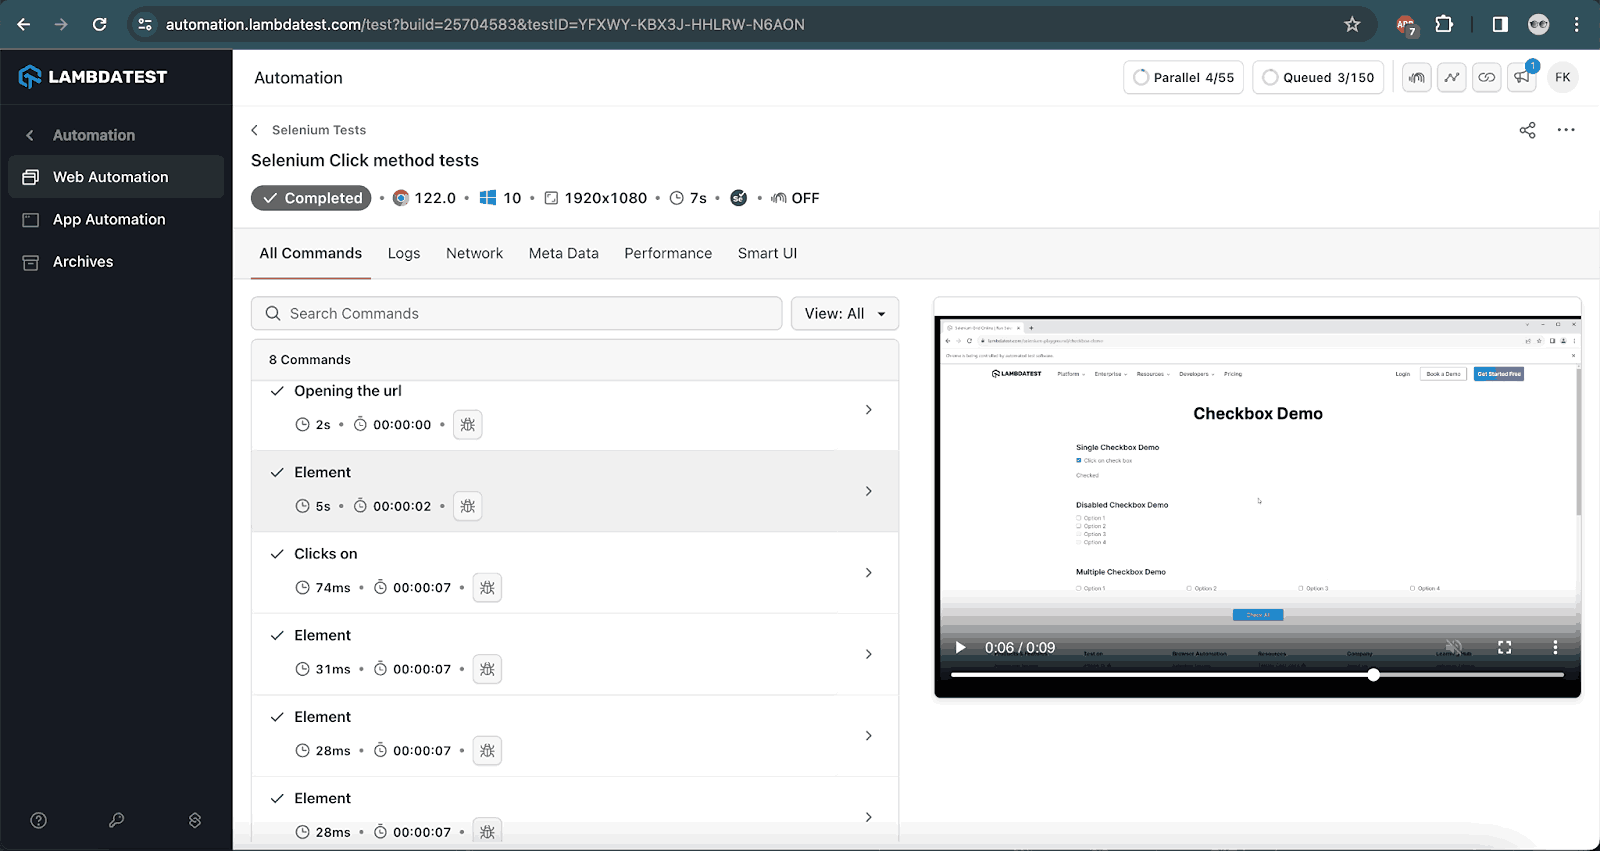
Selenium click button method can also be used to select/deselect radio buttons. The following test scenario demonstrates the working of the click() method on radio buttons.
Test Scenario 3
|
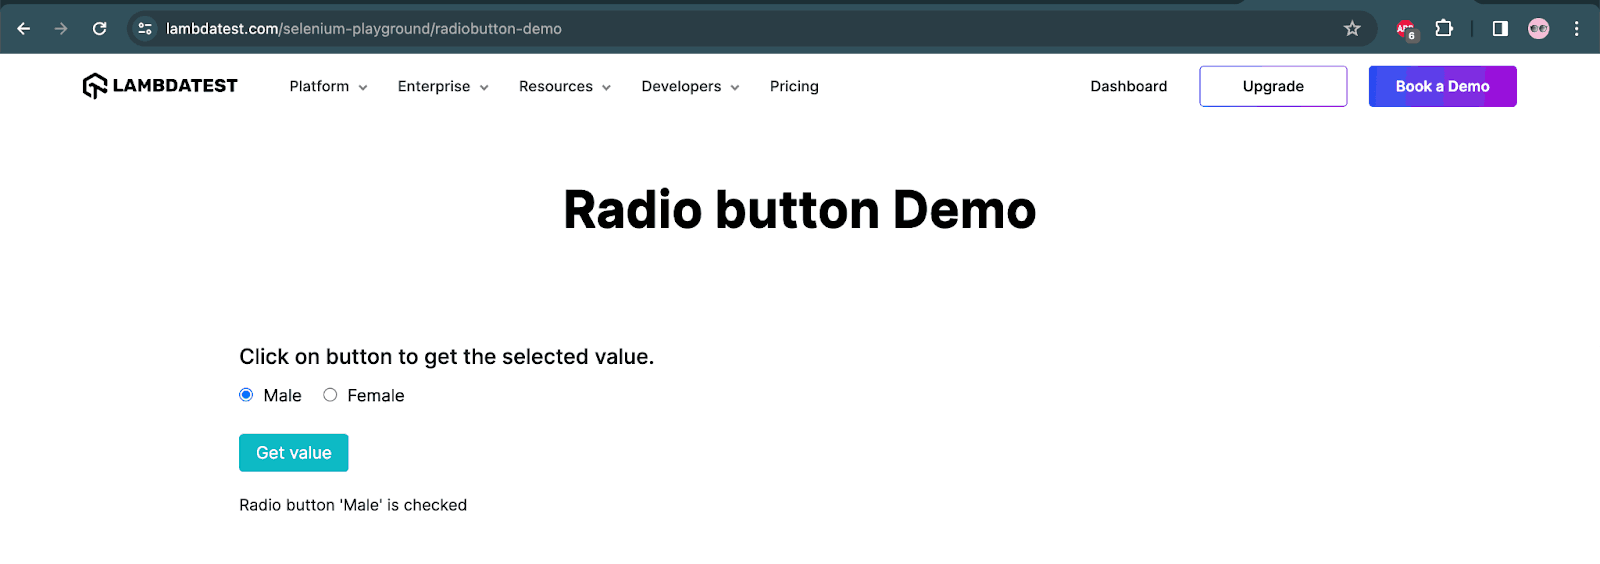
The following code will click on the radio button.
|
1 2 3 4 5 6 7 8 9 10 |
@Test public void radioButtonDemoTest() { driver.get("https://www.lambdatest.com/selenium-playground/radiobutton-demo"); final WebElement maleRadioBtn = driver.findElement(By.cssSelector("[name=\"optradio\"][value=\"Male\"]")); maleRadioBtn.click(); final WebElement getValueBtn = driver.findElement(By.id("buttoncheck")); getValueBtn.click(); String resultText = driver.findElement(By.cssSelector("p.text-black.radiobutton")).getText(); assertEquals(resultText,"Radio button 'Male' is checked"); } |
Code Walkthrough:
The code will first navigate to the Radio button Demo page and search for the Male radio button. It will perform a click on the Male radio button using the Selenium click() method. To check that the correct radio button is selected, the Get value button will be clicked, which will show the message “Radio button ‘Male’ is checked”. This text will be asserted using the assertEquals() method of TestNG.
Test Execution:
The following screenshot shows the test execution performed on the LambdaTest cloud grid.
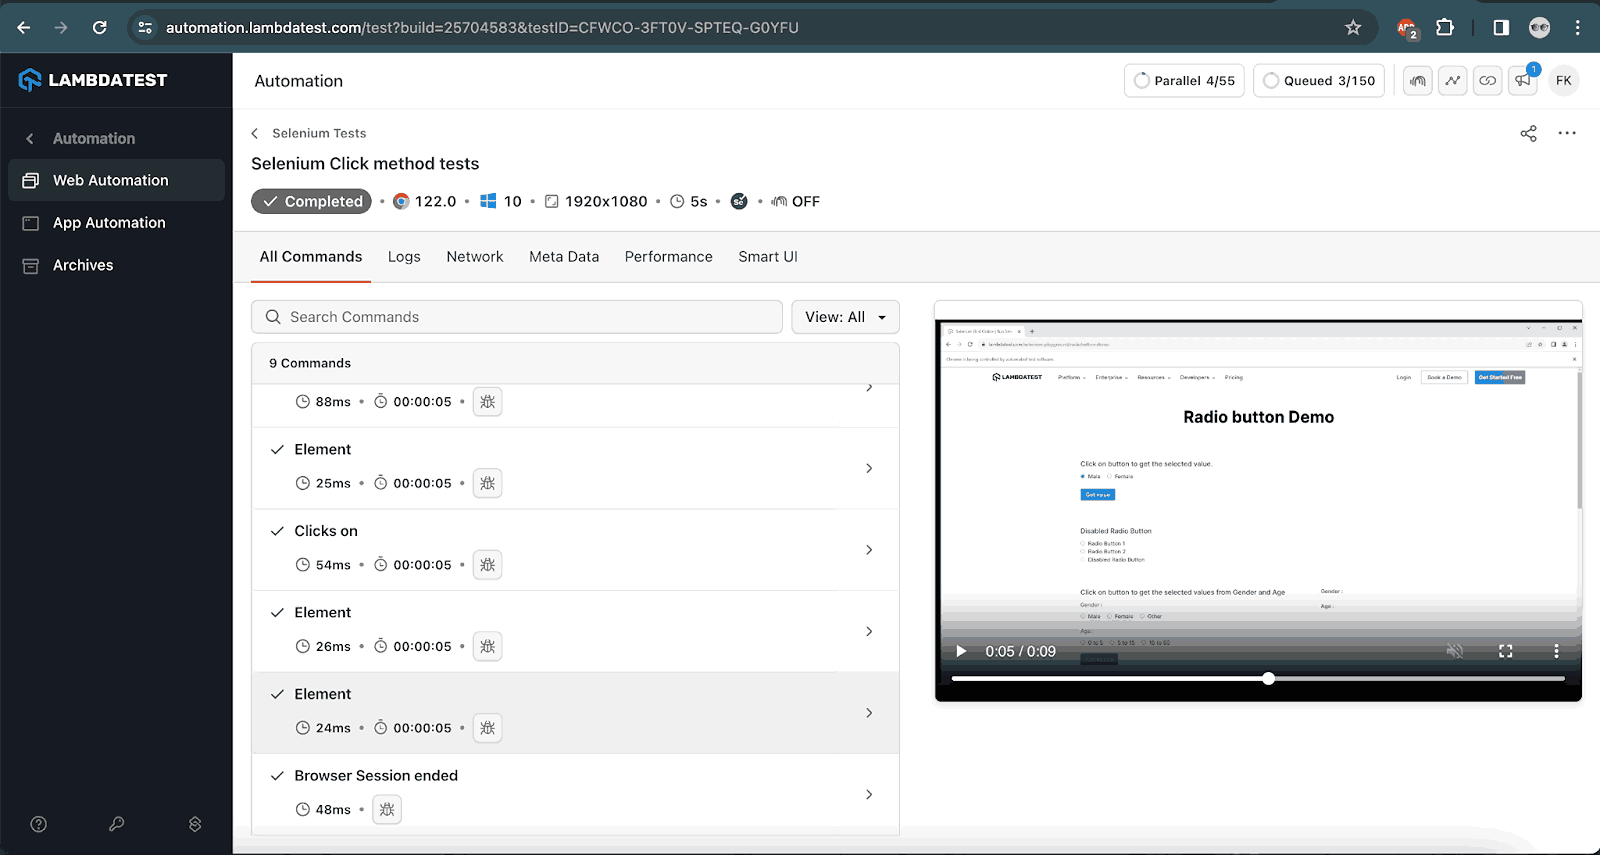
Performing Right-Click in Selenium
Based on the functionality and the features of the application under test. There are sometimes scenarios that need automating the right-clicking on the WebElement and selecting the option from the right-click menu bar. This right-click might be required on a button, textbox, image, URL, etc.
In this demo on the Selenium click button method, we will check out how to perform a right click using the Actions class in Selenium. However, the Actions class might be ineffective in selecting and clicking the different menu options after right-clicking.
Test Scenario
|

The following code will execute the test and perform the right click using Selenium.
|
1 2 3 4 5 6 7 8 9 10 11 12 |
@Test public void testRightClick() { driver.get("https://www.lambdatest.com/selenium-playground/context-menu"); final WebElement rightClickArea = driver.findElement(By.id("hot-spot")); Actions actions = new Actions(driver); actions.contextClick(rightClickArea).build().perform(); String alertText = driver.switchTo().alert().getText(); assertEquals(alertText, "You selected a context menu"); } |
Code Walkthrough:
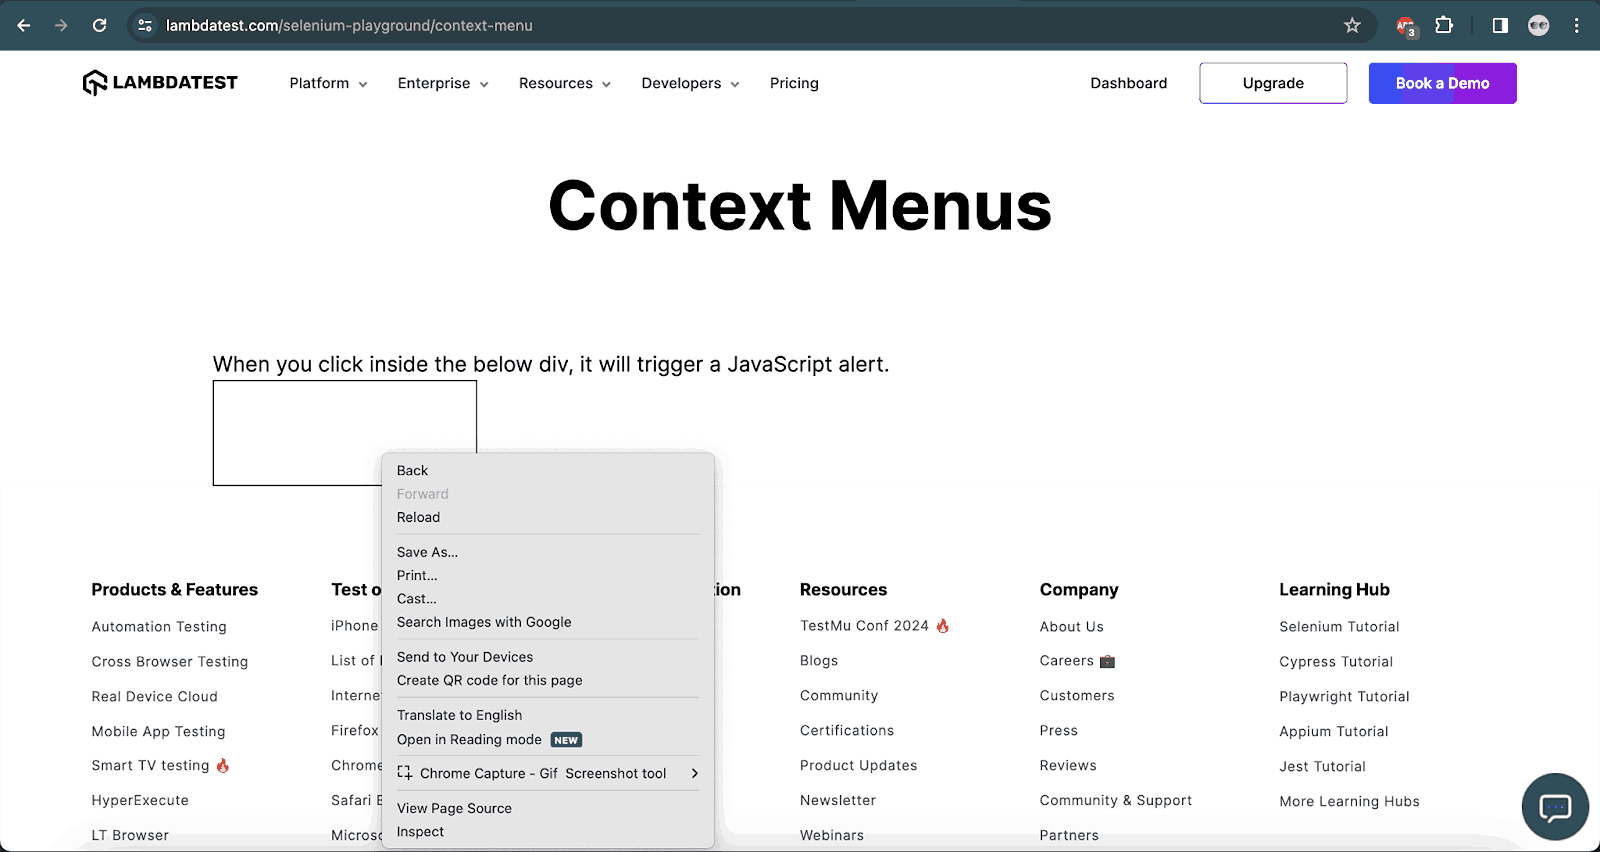
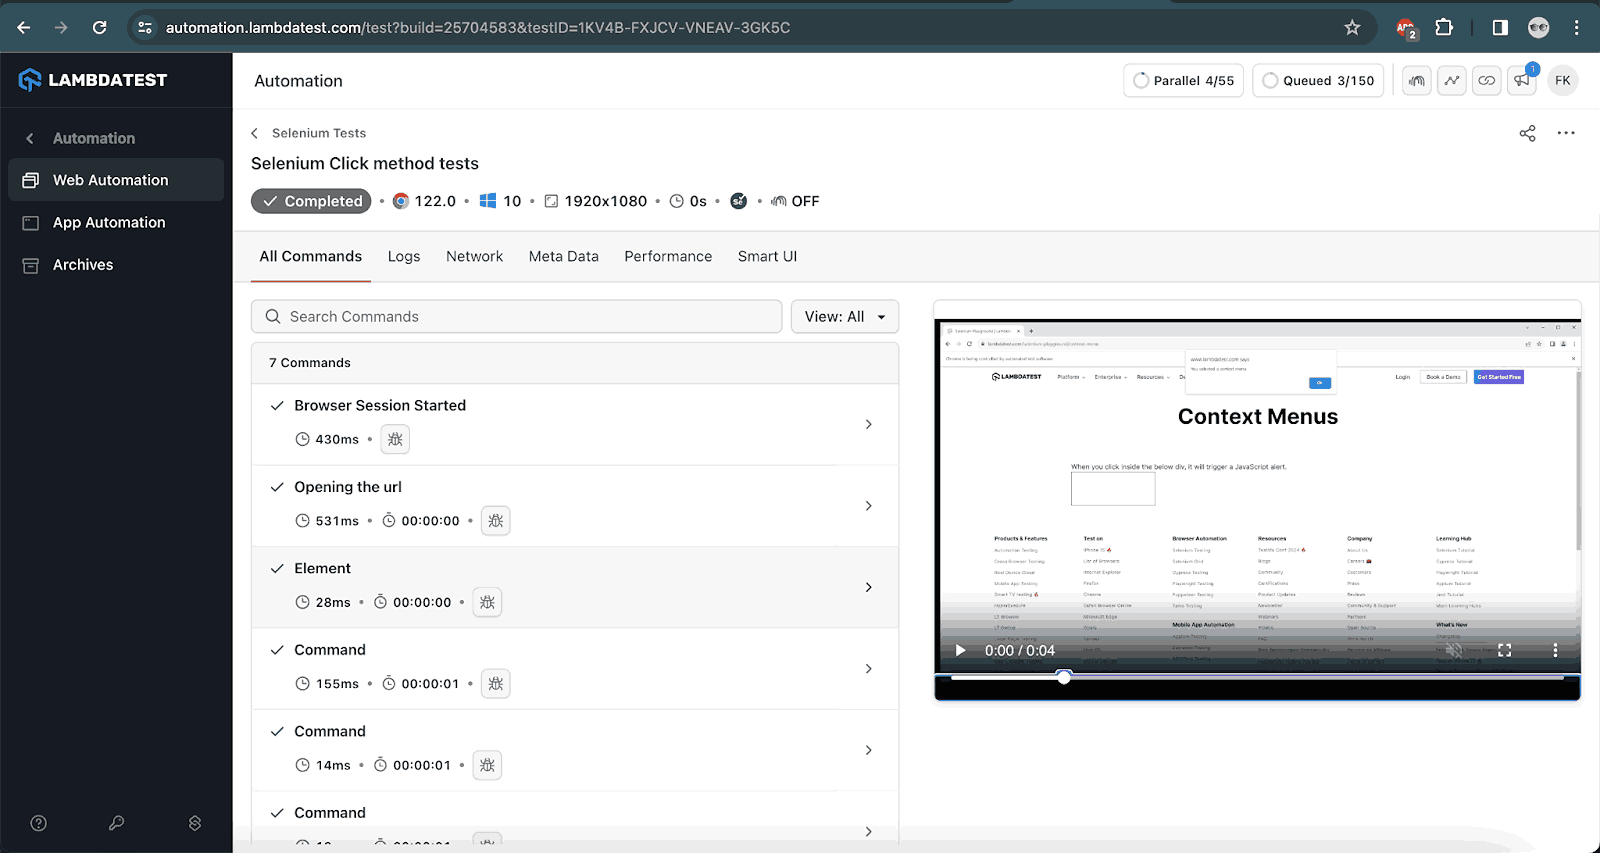
The first line of code will navigate to the context menu page on the LambdaTest Selenium Playground website. The right-click will be performed using the contextClick() method of the Actions class in Selenium.
Note that we have used the build() and perform() methods after using the contextClick() method, these methods are necessary to perform the action using the Actions class. Next, the text of the alert message is fetched, and finally, the assertion is performed using the assertEquals() method.
It should be noted that if we need to select the options from the right-click menu, there is no support from Selenium for the native menu bar, however, the options can be selected if it is not a native right-click menu bar.
In the case of right-click menu options that are not native, the WebElements of the menu options can be located, and accordingly, the click can be performed on those options.
Test Execution:
The following screenshot provides the result of the test execution performed on the LambdaTest cloud grid.
Performing Mouse Hover in Selenium
Mouse hover is a vital part of any cross browser testing checklist. Many times, we want to check whether the styling applied over a WebElement is supported in a consistent manner when accessed from different browsers or not? We can use a mouse hover to verify a prompt message over a button.
There are two different ways to mouse hover in Selenium. We can use the moveToElement() method in the Actions class in Selenium, or we can use the JavaScriptExecutor and scroll into view.
Performing Mouse Hover Using Actions Class
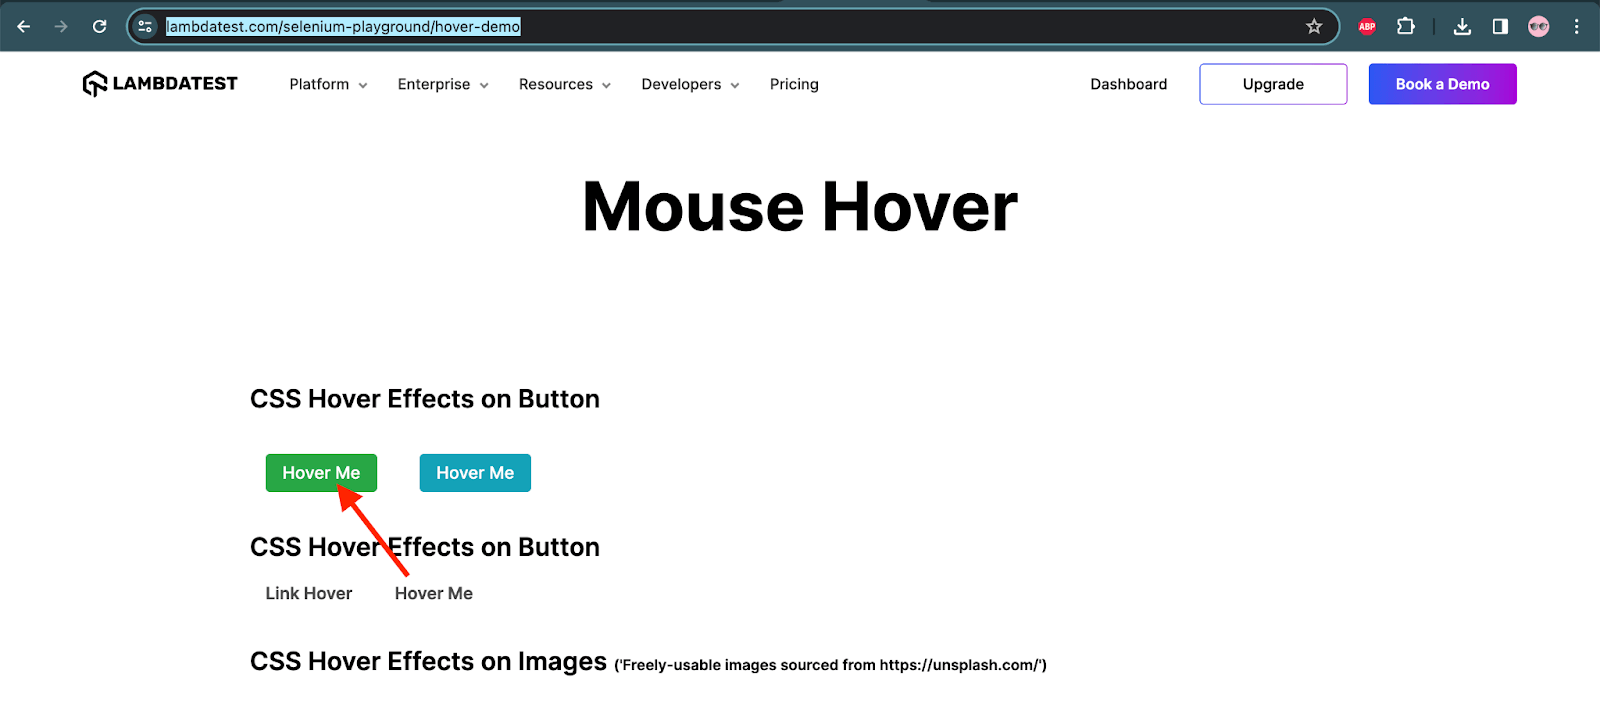
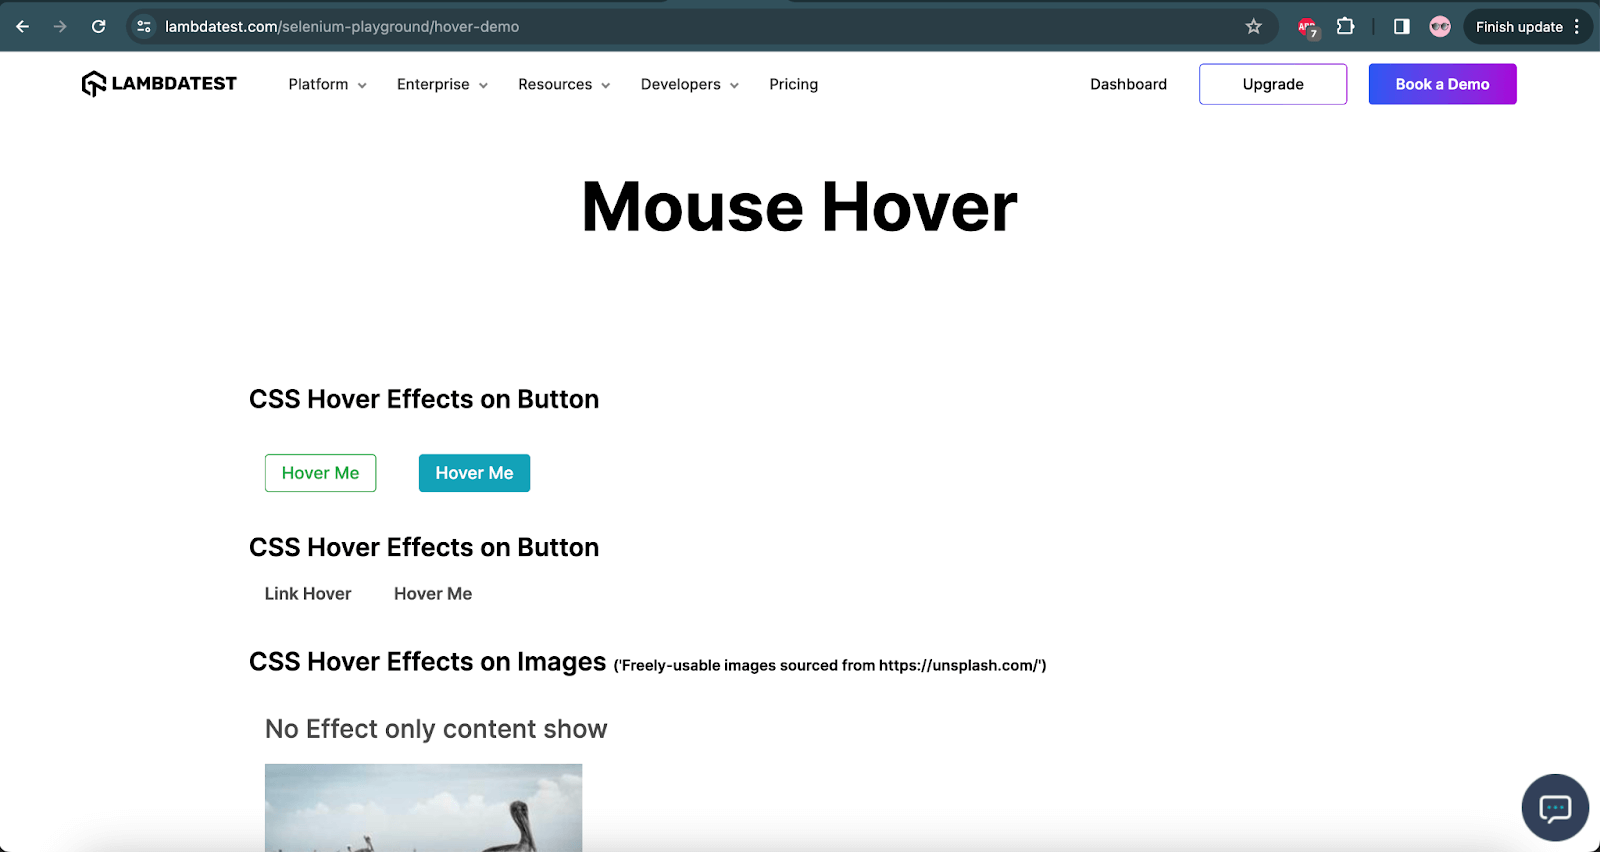
In the following test scenario, we will use the Actions class in Selenium to demonstrate the working of mouse hover.
Test Scenario
|
The following code will help in performing the mouse hover action.
|
1 2 3 4 5 6 7 8 9 10 11 12 13 |
@Test public void testMouseHover() { driver.get("https://www.lambdatest.com/selenium-playground/hover-demo"); WebElement hoverMeGreenBtn = driver.findElement(By.className("bg-green-100")); String bgColorBase = hoverMeGreenBtn.getCssValue("background-color"); assertEquals(bgColorBase, "rgba(40, 167, 69, 1)"); Actions actions = new Actions(driver); actions.moveToElement(hoverMeGreenBtn).build().perform(); String bgColorNew = hoverMeGreenBtn.getCssValue("background-color"); assertEquals(bgColorNew, "rgba(255, 255, 255, 1)"); } |
Code Walkthrough:
The code will first navigate to the Mouse Hover page on the LambdaTest Selenium Playground website. Next, it will search and locate the green button and capture its background color value using the getCssValue() method of Selenium. The property background-color will return the background color in RGBA format. The background color of the button should be rgba(40, 167, 69, 1).
The Actions class will be instantiated next. Using the moveToElement() method, the mouse hover operation will be performed on the green button. Once the mouse hover is performed, the background color of the button should change to white, which is rgba(255, 255, 255, 1). This color will be asserted to ensure the mouse hover operation was performed successfully.
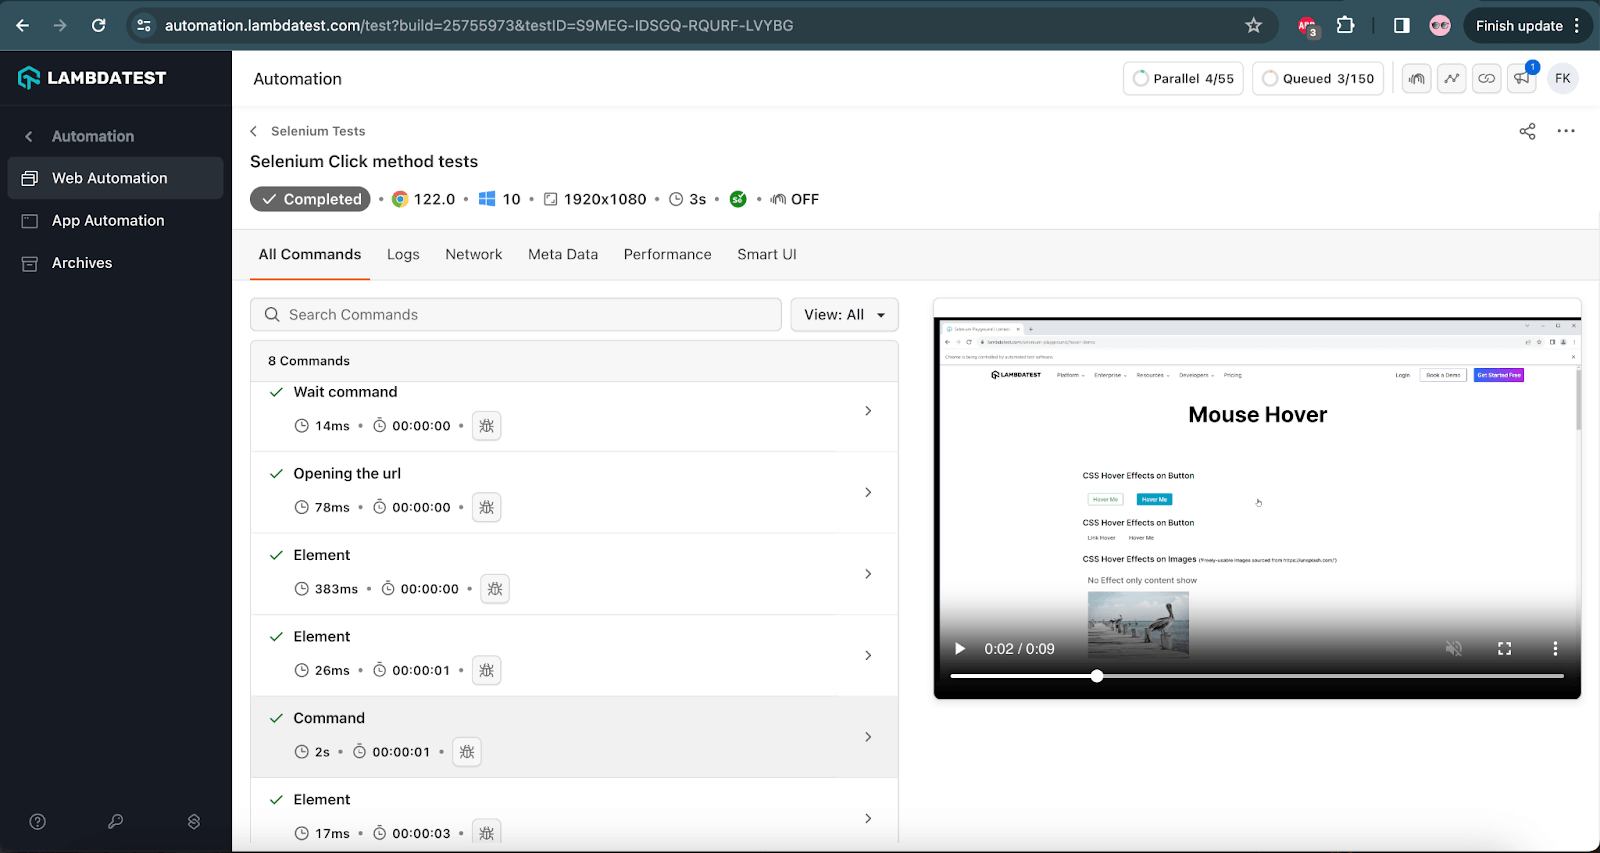
Test Execution:
The following screenshot shows the details of the test execution on the LambdaTest cloud platform.
Performing Mouse Hover (Scroll Action) Using JavaScriptExecutor
While testing, we may face scenarios where the WebElements are not visible, and we have to scroll down the page to interact with the element. In such cases, the JavaScriptExecutor interface in Selenium can help us perform the required scroll action. In the following demo, we will check out how to perform scrolling to the WebElement on the web page.
Test Scenario
|
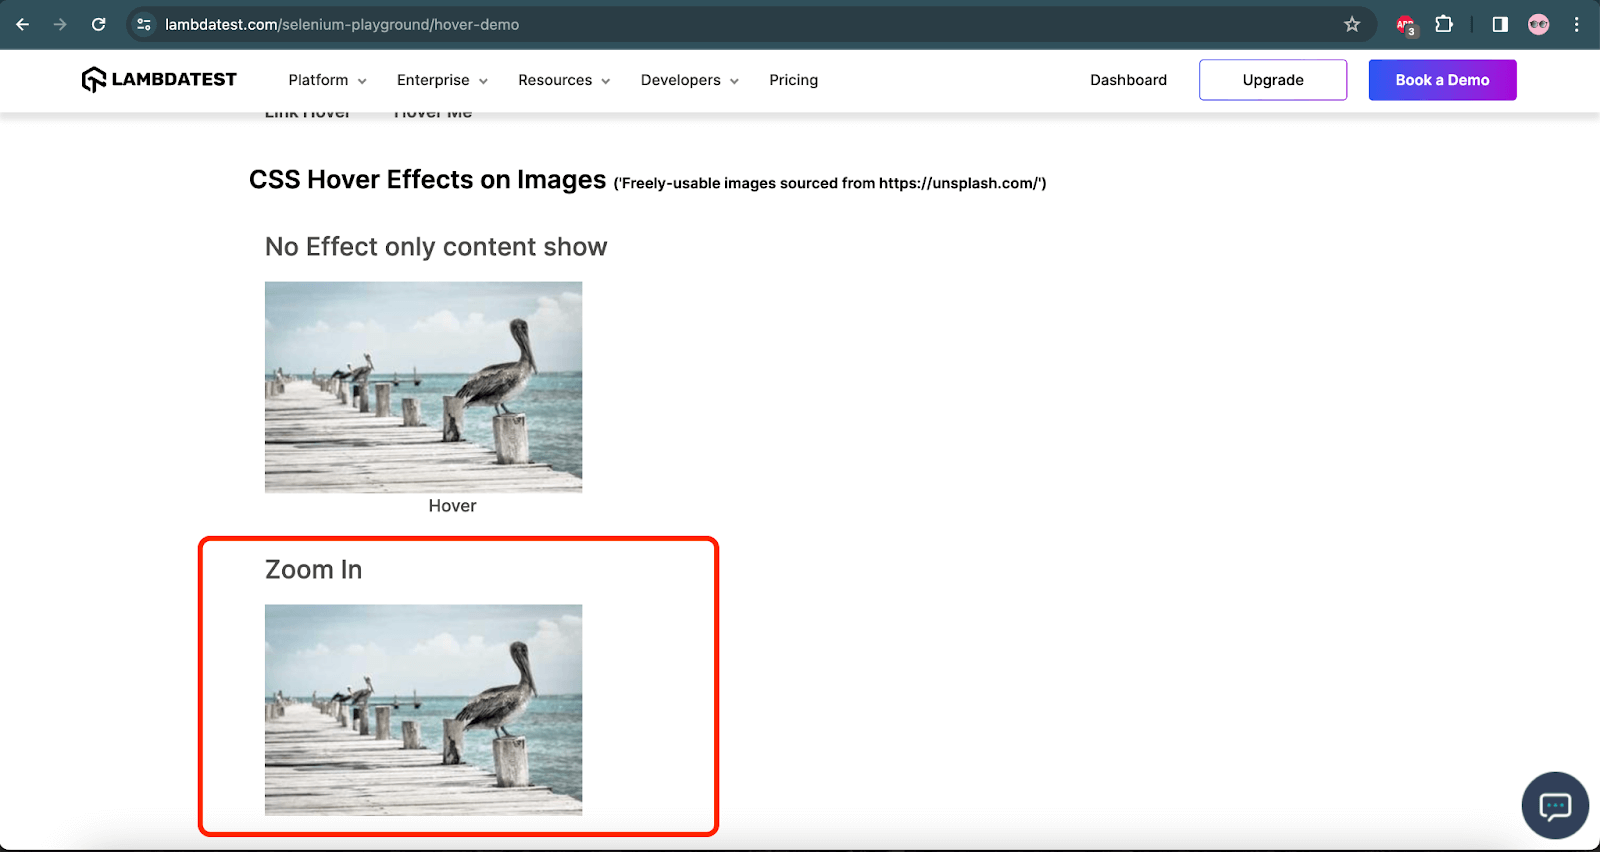
The following code will help us perform the scroll action using JavaScriptExecutor in Selenium.
|
1 2 3 4 5 6 7 8 9 10 |
@Test public void testScrollUsingJSExecutor () { driver.get("https://www.lambdatest.com/selenium-playground/hover-demo"); WebElement zoomInImage = driver.findElement(By.cssSelector(".s__column2 .image-card img")); JavascriptExecutor js = (JavascriptExecutor) driver; js.executeScript("arguments[0].scrollIntoView();", zoomInImage); String imageText = driver.findElement(By.cssSelector(".p-15 h2:nth-child(8)")).getText(); assertEquals(imageText, "Zoom In"); } |
Code Walkthrough:
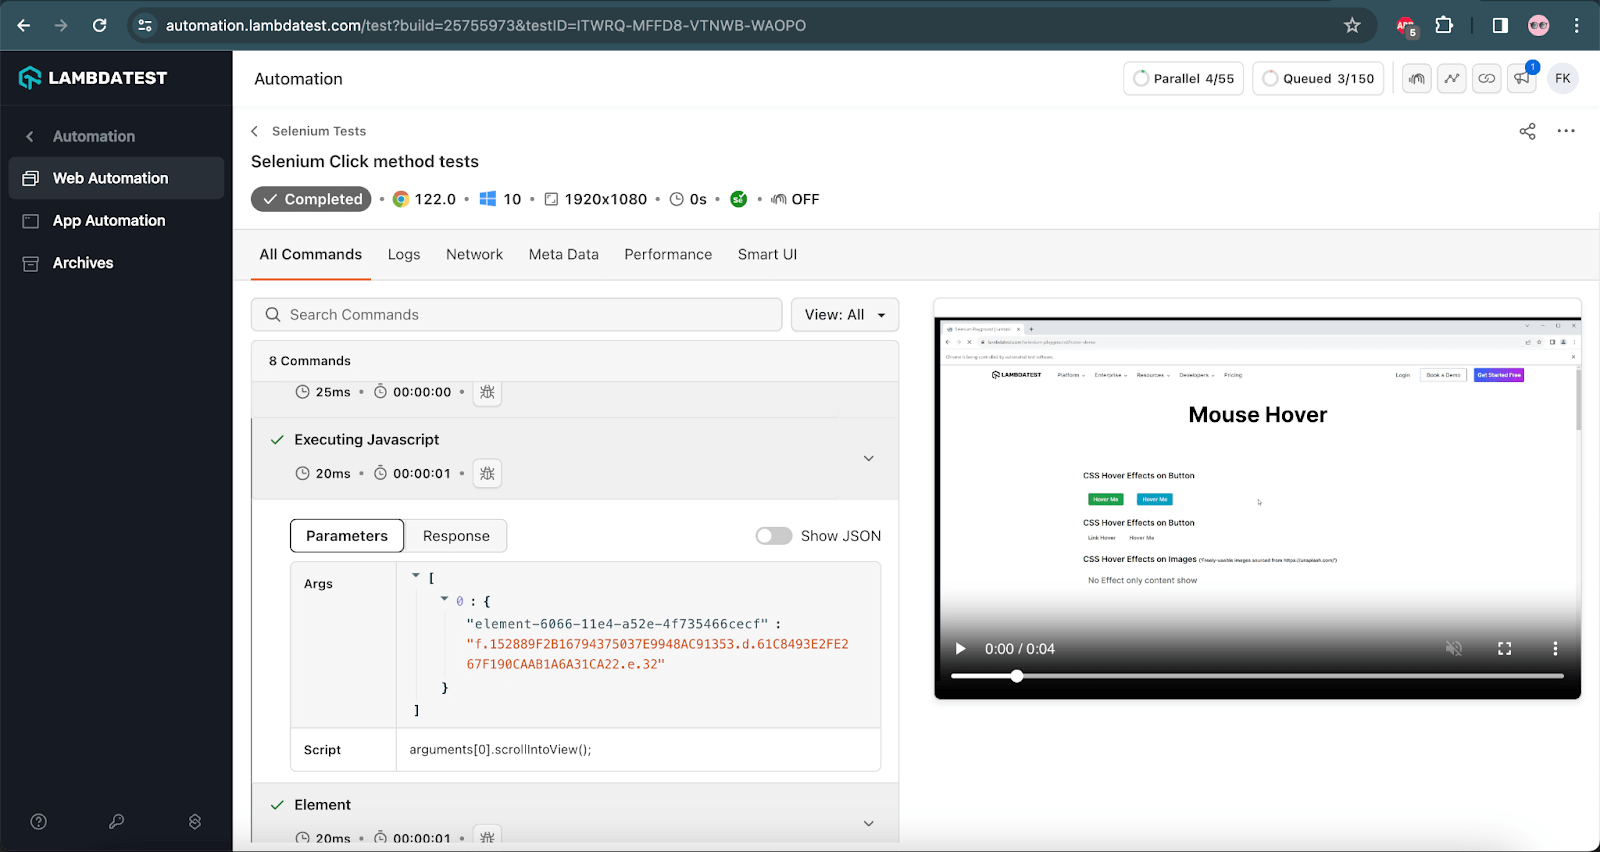
The code above will first navigate to the Mouse Hover page on the LambdaTest Selenium Playground website. Next, it will search and locate the Zoom In image on the webpage using the scrollIntoView() method of JavascriptExecutor.
After the image is located, the text – Zoom In, above the image will be located and accordingly will be asserted.
Test Execution:
The following screenshot from the LambdaTest cloud grid shows that the tests were executed successfully.
Advanced Operations Using Selenium Click Button Method
With basic operations covered, we will now perform advanced operations using the Selenium click button method.
Performing Click With (X, Y) Coordinates in Selenium
We can use movebyOffset() to perform a click anywhere on the page by feeding (x,y) coordinates to the WebDriver. You can even generate a click on blank portions of your webpage as long as you are aware of the (X, Y) coordinates.
Test Scenario
|

The following code will perform the click operation using the coordinates
|
1 2 3 4 5 6 7 8 9 10 11 12 13 14 15 16 17 18 |
@Test public void testClickUsingCoOrdinates () { driver.get("https://www.lambdatest.com/selenium-playground/simple-form-demo"); WebElement firstValueField = driver.findElement(By.id("sum1")); firstValueField.sendKeys("5"); WebElement secondValueField = driver.findElement(By.id("sum2")); secondValueField.sendKeys("8"); WebElement getSumBtn = driver.findElement(By.cssSelector("#gettotal > button")); Actions actions = new Actions(driver); actions.moveToElement(getSumBtn,10,10).click().build().perform(); String resultText = driver.findElement(By.id("addmessage")).getText(); assertEquals(resultText, "13"); } |
Code Walkthrough:
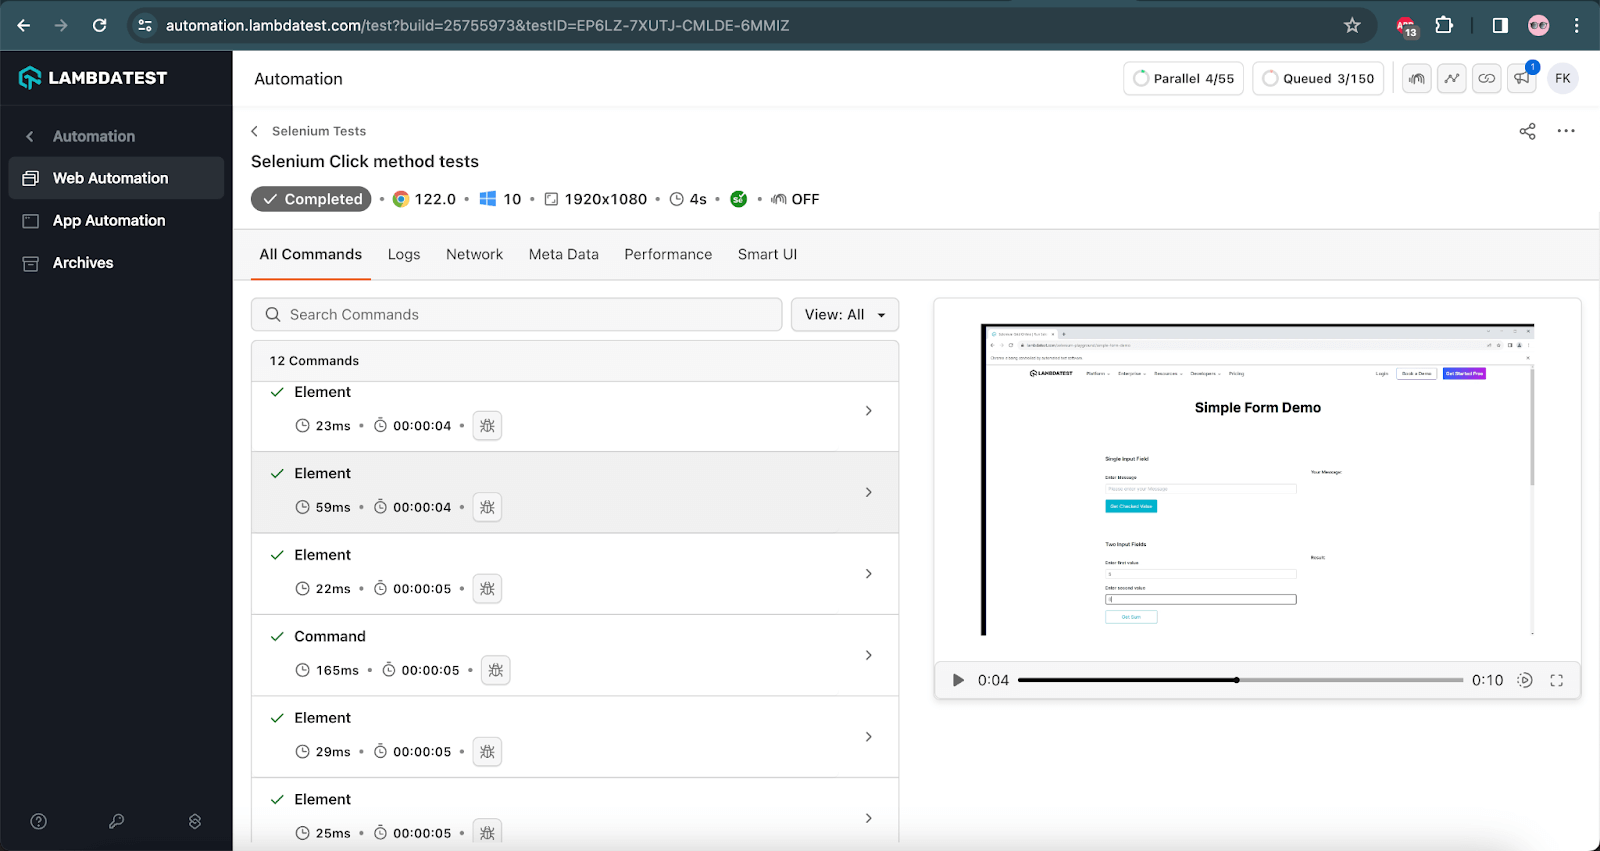
The code will navigate to the Simple Form Demo page on the LambdaTest Selenium Playground website. It will locate the Enter first value and Enter second value fields. Now, enter the values 5 and 8 in the respective fields.
Next, it will locate the Get Sum button. Finally, using the moveToElement() method of the Actions class with the offset values for x and y coordinates, it will click on the Get Sum button to get the result. The offset values (10,10) will be taken into consideration after the focus is moved to the Get Sum button.
The result values, i.e. 13, are checked using the assertEquals() method of TestNG, which marks the completion of the test.
Note: These (X, Y) coordinates will differ from one screen resolution and size to another.
Test Execution:
The following screenshot shows the successful test execution on the LambdaTest cloud grid.
Performing Double-Click in Selenium
Double-click is an absolute must for Selenium automation testing, be it for performance or automated browser testing. Here is an example of how you can perform a double-click using Selenium.
Test Scenario
|

The following code will be used to perform a double click.
|
1 2 3 4 5 6 7 8 9 10 |
@Test public void testDoubleClick() { this.driver.get("https://www.lambdatest.com/selenium-playground/checkbox-demo"); final WebElement checkboxOne = this.driver.findElement(By.id("isAgeSelected")); Actions actions = new Actions(driver); actions.doubleClick(checkboxOne).build().perform(); assertTrue(!checkboxOne.isSelected()); } |
Code Walkthrough:
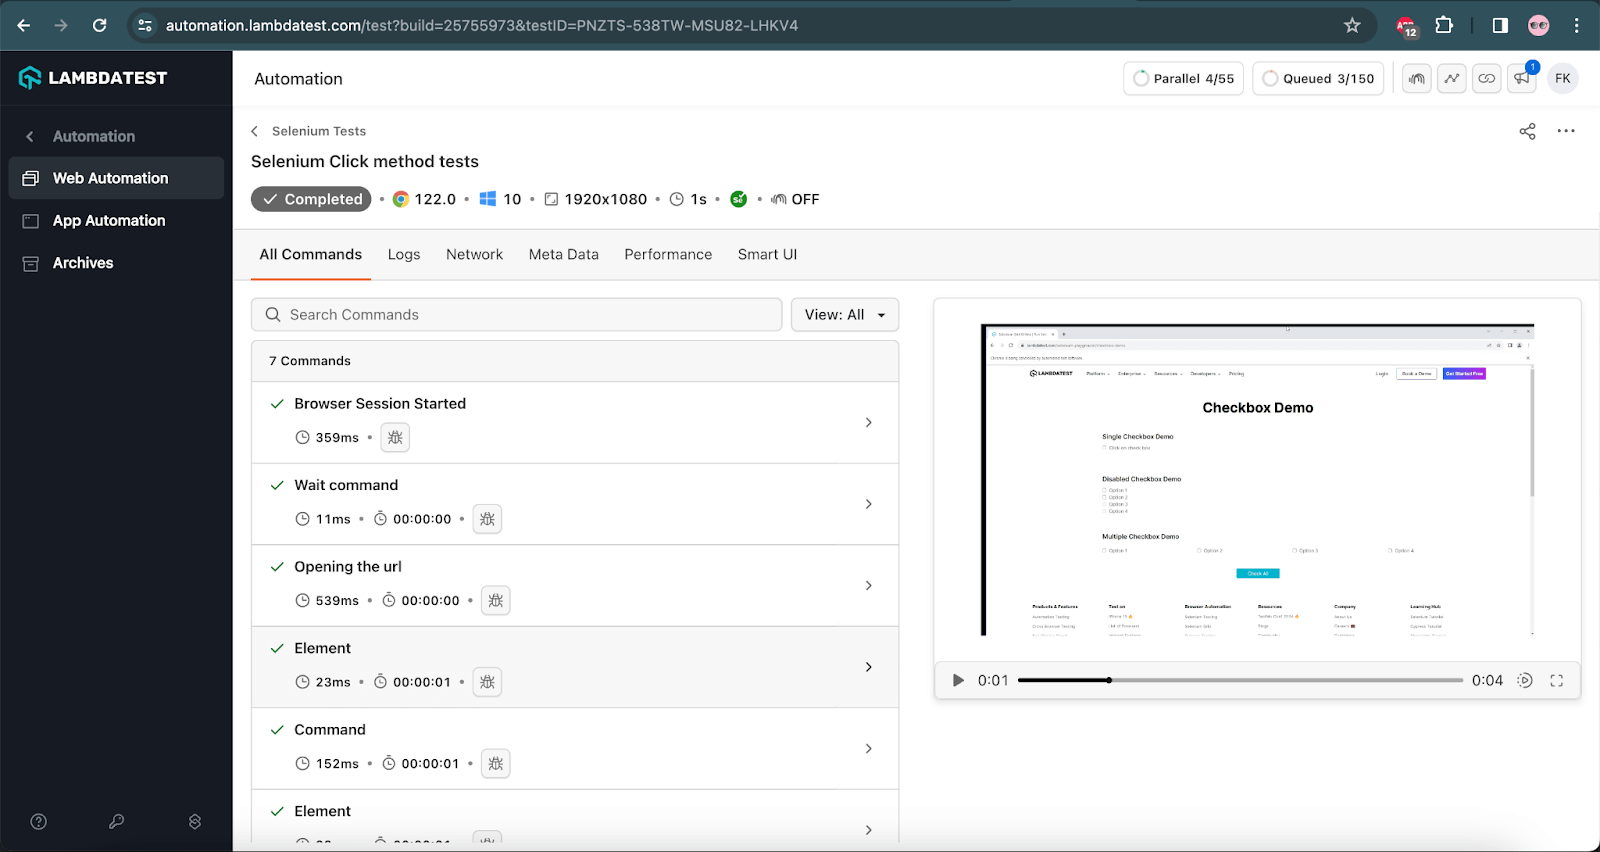
The code will first open the Checkbox Demo page. It will search for the Checkbox on the page. Next, using the doubleClick() method from the Actions class of Selenium, a double-click will be performed on the checkbox.
Finally, an assertion will be made to check that the checkbox is not selected. Note the ! character in the assertion statement works as a NOT and reverses the condition. So, it can be read as “checkbox one is not selected”.
Test Execution:
The following screenshot shows the successful test execution performed on the LambdaTest cloud grid.
Performing Click and Hold in Selenium
When performing automation testing with Selenium, we may come across a requirement where we would need to highlight a text or image by clicking and holding the mouse. Let us take a scenario to automate this interaction.
Test Scenario
|


The following code will help move the slider using the clickAndHold() method in Selenium.
|
1 2 3 4 5 6 7 8 9 10 11 |
@Test public void testClickAndHold () { driver.get("https://www.lambdatest.com/selenium-playground/drag-drop-range-sliders-demo"); WebElement sliderOne = driver.findElement(By.cssSelector("#slider1 input.sp__range")); Actions actions = new Actions(driver); actions.moveToElement(sliderOne).clickAndHold().moveByOffset(100,283).build().perform(); String outputRange = driver.findElement(By.id("range")).getText(); assertEquals(outputRange,"71"); } |
Code Walkthrough:
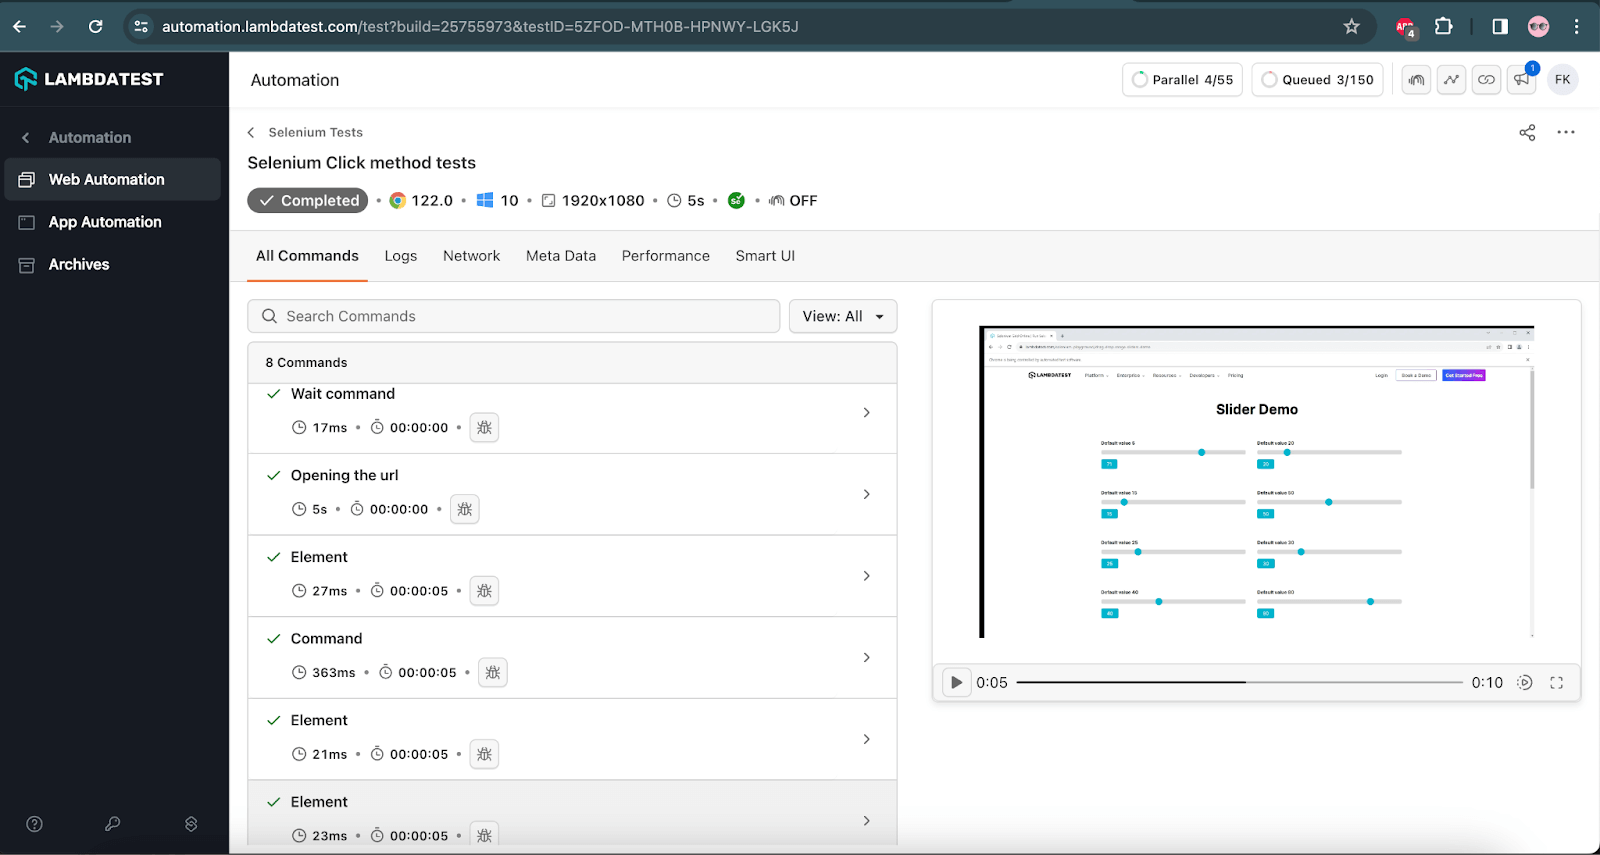
The code will first navigate to the Slider Demo page on the LambdaTest Selenium Playground website. Next, the slider will be located.
After instantiating the Actions class in Selenium, chain actions will be performed by moving the focus to the slider, clicking and holding the mouse button, and moving the offset to (100,283). This will drag the slider to 71%.
The slider’s width is 500 pixels, so from the center to the end, it is 250 pixels, hence, if I take 100, it means from the slider’s center, it is 100 pixels toward the end. Therefore, it will move to 71% when I apply the offset of 100.
This offset value is provided in the X and Y coordinates; 100 is the X coordinate value, and 283 is the Y coordinate value.
Similarly, if we need to move the slider between 1-50%, we need to provide the values in negative, for example, if we put the X coordinate as -250, it will move it to 0%.
After the slider range is set, the output range field will be located, and an assertion will be performed to check the value 71 is displayed in it.
Test Execution:
The following screenshot from the LambdaTest cloud grid shows the successful execution of the test.
Performing Drag and Drop in Selenium
Somewhat similar but slightly different from click and hold is the requirement for drag and drop. Here, the place to drop after dragging is prominent in the UI, so you know where to place an element.
The following test scenario will demonstrate how the drag-and-drop action works using Selenium.
Test Scenario
|


The following code will perform the drag-and-drop action.
|
1 2 3 4 5 6 7 8 9 10 11 12 13 |
@Test public void testDragAndDrop() { driver.get("https://www.lambdatest.com/selenium-playground/drag-and-drop-demo"); WebElement draggableOne = driver.findElement(By.cssSelector("#todrag > span")); WebElement dropHere = driver.findElement(By.id("mydropzone")); Actions actions = new Actions(driver); actions.dragAndDrop(draggableOne, dropHere).build().perform(); WebElement droppedList = driver.findElement(By.cssSelector("#droppedlist > span")); assertEquals(droppedList.getText(), "Draggable 1"); } |
Code Walkthrough:
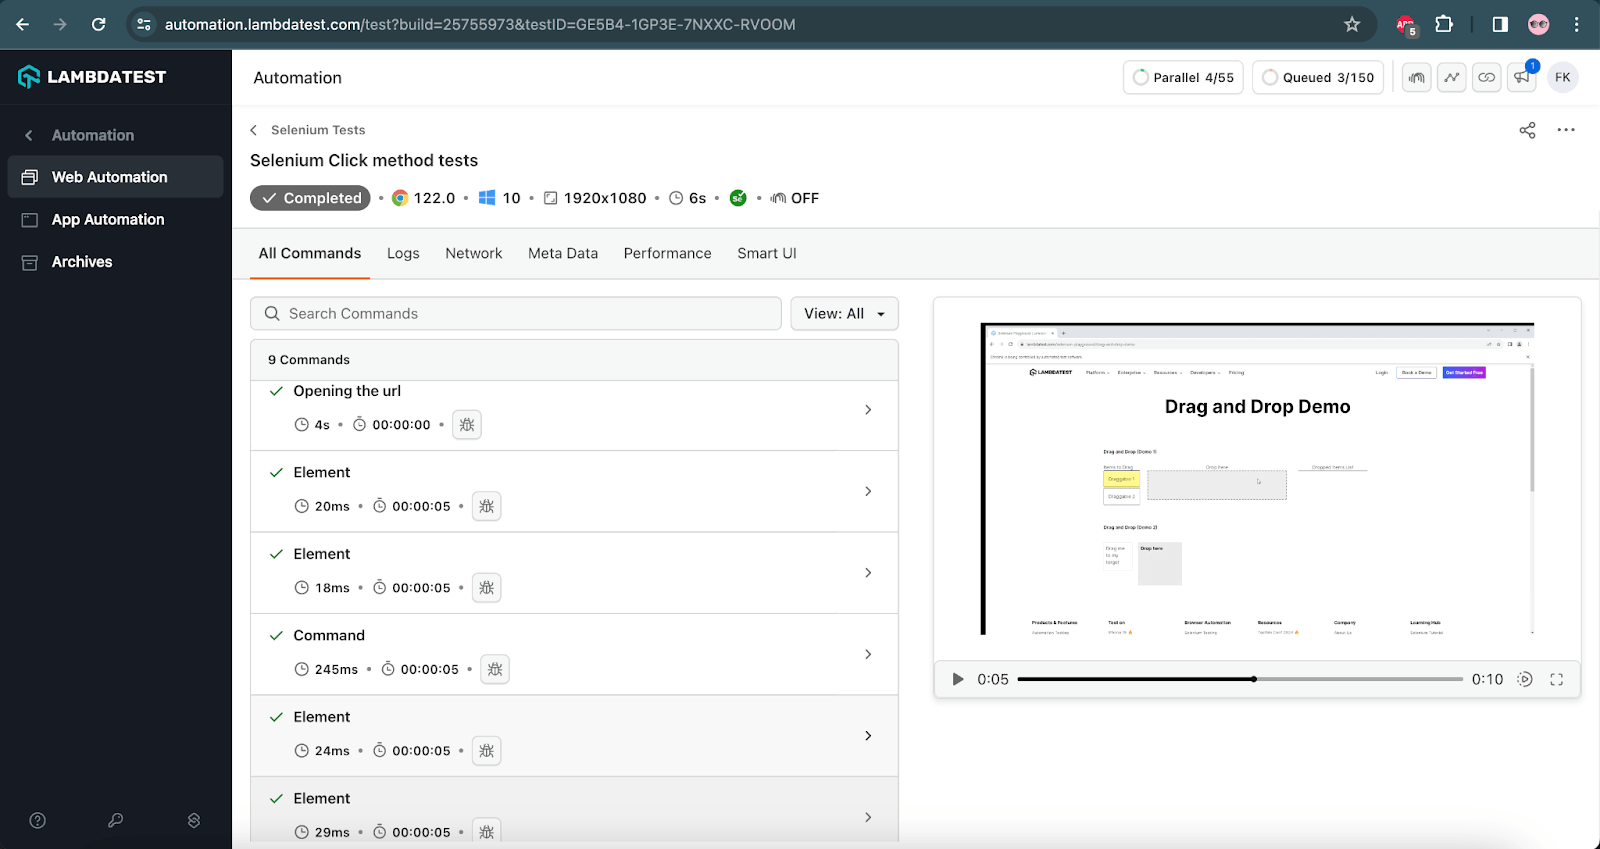
The code will first navigate to the Drag and Drop Demo page on the LambdaTest Selenium Playground website. Next, it will locate the Draggable 1 and the Drop here boxes, respectively.
The drag and drop actions will be performed using the dragAndDrop() method of the Actions class. We need to pass on the draggable WebElement, which would be the source element, and the droppable WebElement, which would be the target in the parameter of the dragAndDrop() method, respectively.
Finally, the assertions will be performed to check that the draggable item was dropped successfully in the drop box.
Test Execution:
The following screenshot shows that the test was executed successfully on the LambdaTest cloud grid.
Performing Click on Random Links in Selenium
Here is a cool tip using which you can click on every hyperlink on a webpage.
Test Scenario
|
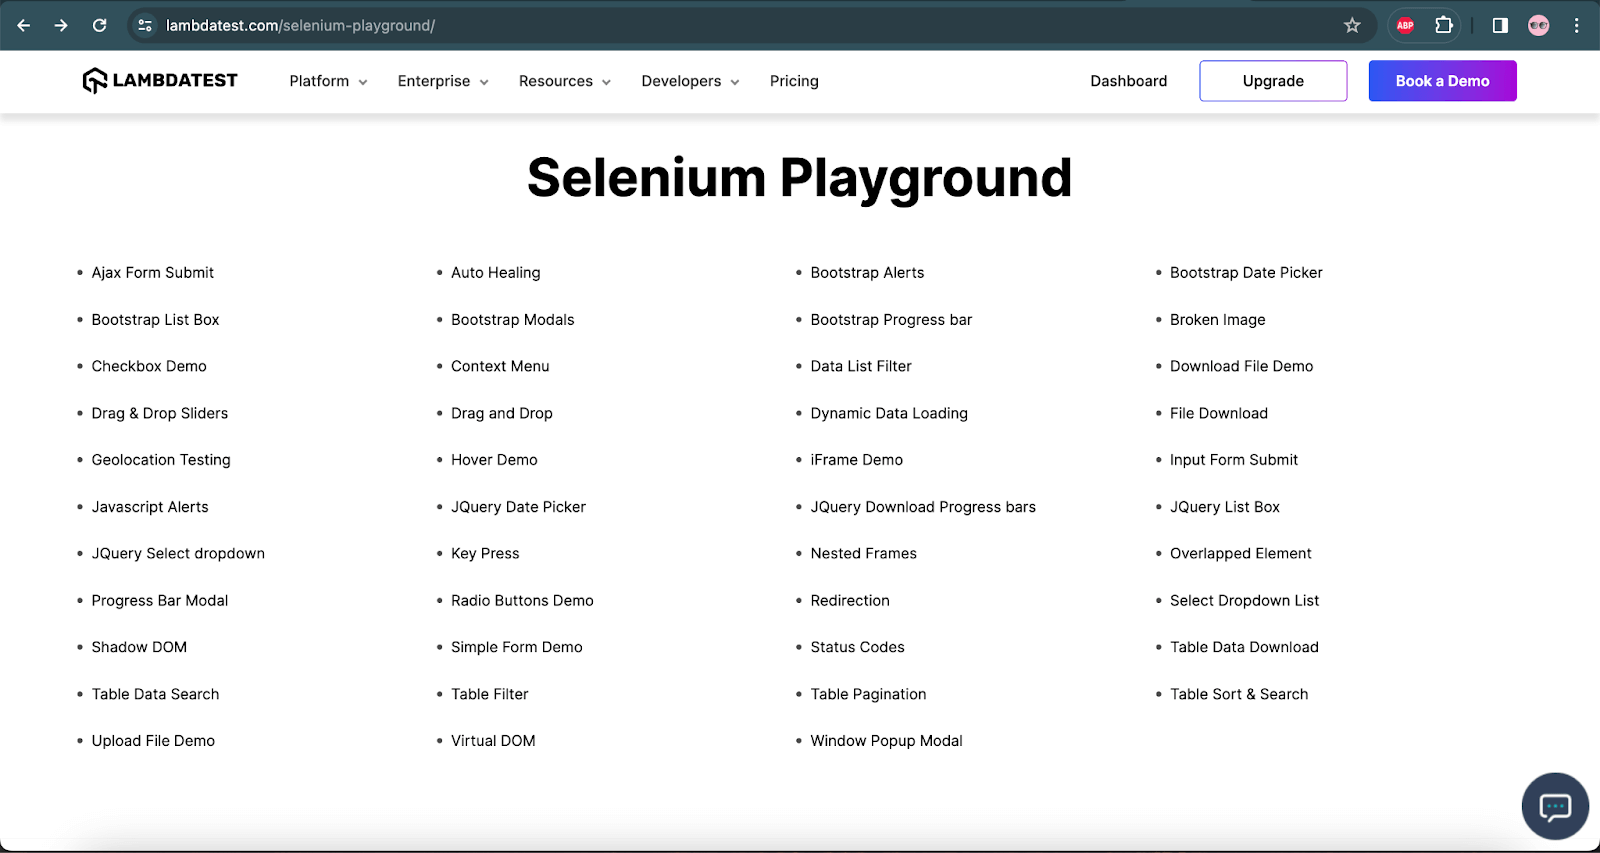
The following test script will generate the list of hyperlinks on the LambdaTest Selenium Playground website. Once all the links are located, a click will be performed on the demo page links. After the link is clicked, the page header will be located and printed in the console. This ensures the link was clicked and the page was navigated successfully.
|
1 2 3 4 5 6 7 8 9 10 11 12 13 14 15 16 17 18 19 20 21 22 23 24 25 26 27 28 |
@Test public void testPageLinks() { this.driver.get("https://www.lambdatest.com/selenium-playground/"); final WebDriverWait wait = new WebDriverWait(this.driver, Duration.ofSeconds(20)); List<WebElement> demoPageLinks = this.driver.findElements(By.cssSelector(".container__selenium ul li a")); for (int i = 0; i < demoPageLinks.size(); i++) { String pageLinkName = demoPageLinks.get(i).getText(); System.out.println(pageLinkName); if (!(pageLinkName.equals("Nested Frames"))) { final WebElement link = wait.until(ExpectedConditions.elementToBeClickable(demoPageLinks.get(i))); link.click(); final WebElement pageHeader = wait.until(ExpectedConditions.presenceOfElementLocated(By.tagName("h1"))); final String pageHeaderText = pageHeader.getText(); System.out.println("Visited: " + pageHeaderText); this.driver.navigate().back(); demoPageLinks = this.driver.findElements(By.cssSelector(".container__selenium ul li a")); } } } |
The link with the name Nested Frames will not be clicked as this page has no page header. Hence, it will break the test since we are locating and searching for the page header with tagName(“h1”) in the test.
After the click is performed and the page header is printed, the website’s homepage with all the links will be called back using the driver.navigate.back() statement. The demoPageLinks variable is referenced again to ensure we don’t get the StaleElementReference exception.
The following is the screenshot of the test executed using IntelliJ IDE:
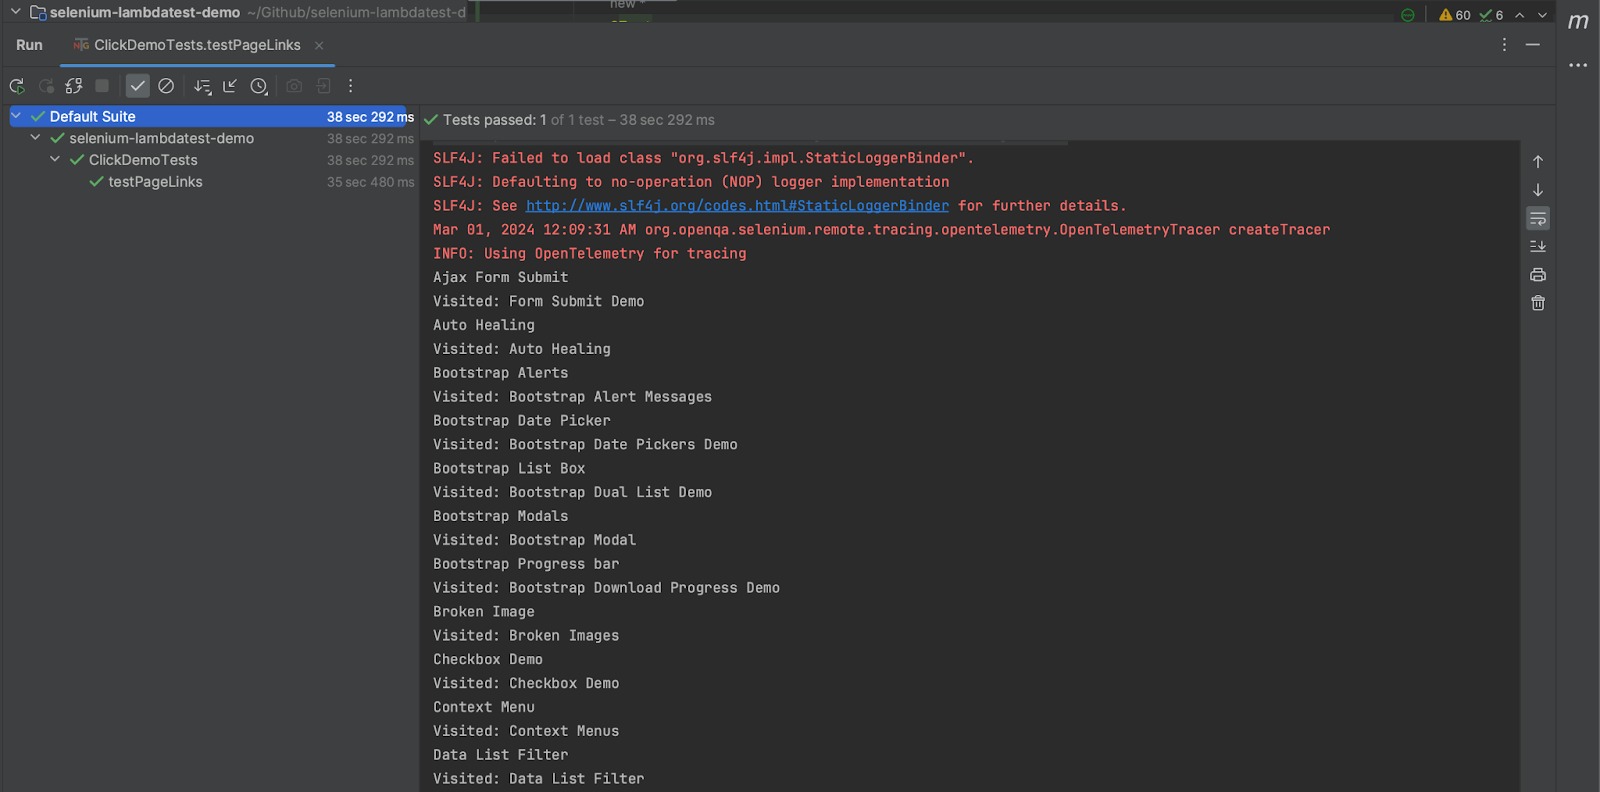
As you can see, there were, in total, 43 hyperlinks that were accumulated by the test automation scripts. They are visited one by one! I will leave it to you to find a way of incorporating this in your automated browser testing scripts.
Locators and Selenium Click Button Method
Selenium locators allow you to locate a WebElement over a web page. There are eight types of locators (identifiers) in Selenium. Let’s see how you can perform a click in Selenium using different locators.
ID
Wherever an ID locator in Selenium is specified in the HTML code for any WebElement, we can leverage that in our Selenium automation testing scripts to locate that particular element. The ID of a WebElement would always be unique, which makes it a very powerful way to locate WebElements automatically. To automate clicks using an ID locator we would need to specify the code as below.
|
1 |
driver.findElement(By.id("idLocator")).click(); |
Name
Similarly, we can find the name of a WebElement by inspecting the HTML and using it to locate the WebElement. To use the click() method with the Name locator in Selenium, we need to address it in a similar way.
|
1 |
driver.findElement (By.name("submit").click(); |
ClassName
Inspect a WebElement, find its class name, and locate it using the Selenium automation scripts. The following statement can help click the WebElement using the ClassName locator in Selenium.
|
1 |
driver.findElement (by.className("mycheckbox")).click(); |
TagName
Whenever there is a WebElement with a unique HTML tag, we can use the TagName locator in Selenium. There can be many types of unique HTML tags, such as:
- Hyperlink –
<a> - Image –
<img> - Header –
<h1>
So, for example, if we have a unique hyperlink TagName using the anchor tag, we can incorporate Selenium click button interaction using the code below.
|
1 |
driver.findElement(By.tagName("a")).click(); |
LinkText
If there is a hyperlink with a unique HTML tag then we can make use of the LinkText locator. Here, we specify the text over which a hyperlink is triggered on a web page through a click.
|
1 |
driver.findElement(By.linktext("Selenium Playground").click(); |
Partial LinkText
The text for a hyperlink can even partially be specified and located using the Partial LinkText locator. For example, if we wish to locate a WebElement with a hyperlink that says Amazon then we can do so using the below command.
|
1 |
driver.findElement(By.partialLinkText("zon")).click(); |
You can find more information here on how to use LinkText and Partial LinkText in Selenium.
CSS Selector
A more cross-browser compatible locator than XPath is a CSS Selector, as popular browsers such as Google Chrome and Mozilla Firefox are designed to optimize the execution time for a CSS Selector.
|
1 |
driver.findElement(By.cssSelector("#app > section > form > div > div > input:nth-child(3)")).click(); |
XPath
XPath is a locator used to locate the WebElement based on the tag, attribute, text, etc. We can use XPath for HTML and XML docs.
|
1 |
driver.findElement(By.xpath("//*[@id=\"app\"]/section/form/div/div/input[1]")).click(); |
 Note
NoteAutomate Your Button Clicks With Selenium on Cloud. Try LambdaTest Today!
Did We Click Some New Ideas?
By far, you must have got a good understanding of how powerful the Selenium click() button method can be and how you can leverage it. I hope the bonus tips were helpful for your daily automated browser testing scripts. Do you want to share a bonus tip, too, or a unique way you used the Selenium click button method? If so, drop your thoughts in the comment section below!
Happy testing! 🙂
Frequently Asked Questions (FAQs)
How to click on the button in Selenium?
A button could be clicked using the following ways in Selenium WebDriver:
- Using the Selenium click button method – click()
- Using the Actions class, you can leverage its different methods, such as click(), contextClick(), clickAndHold(), dragAndDrop(), etc.
How to write XPath for the click button in Selenium?
You need to locate the WebElement using the XPath locator and then call the click() method.
Code Example:
|
1 2 |
WebElement submitBtn = driver.findElement(By.xpath("//*[@id=\"seleniumform\"]/div[6]/button")); submitBtn.click(); |
How to click the Enter button in Selenium?
You can use sendKeys() if you want to enter text before pressing Enter and have more control over the interaction. However, use submit() only if you’re specifically dealing with submitting a form and don’t need to enter any text beforehand.
Got Questions? Drop them on LambdaTest Community. Visit now


