How To Check If An Element Exists In Python Selenium
Idowu (Paul) Omisola
Posted On: October 27, 2023
![]() 126516 Views
126516 Views
![]() 22 Min Read
22 Min Read
The content of a dynamic web page is changeable, which can change with each request or session as the database is updated. This can lead to automation test failures when using tools like Selenium. These changes alter the DOM layouts and the attributes of web elements, making it difficult for automation scripts to locate specific elements based on their previous specifications.
Selenium’s built-in mechanisms, such as NoSuchElementException, are not always sufficient to handle these dynamic changes, and they may not account for delays caused by asynchronous calls or network issues.
To address this challenge to check if an element exists in Python Selenium while locating web elements, you can implement a solution that fits if an element exists before interacting with it. This approach helps in tracking and adapting to changes in the DOM content.
While Selenium’s NoSuchElementException can be used for this purpose, it may need more flexibility and specificity. A more effective solution would involve creating custom methods or functions that consider checking if an element exists in Python Selenium, adapting to changes, and handling potential delays due to asynchronous calls or network glitches. This ensures more robust and adaptable automation tests on dynamic web pages.
In this blog, we will delve into the essential skill of checking if an element exists in Python Selenium during automation testing. We will cover the significance of this skill and provide a step-by-step guide on how to implement custom methods and functions to accomplish this task effectively. If you are preparing for an interview you can learn more through Selenium interview questions.
TABLE OF CONTENTS
Why check if an element exists in Python Selenium?
When your UI automation test encounters a failure, a crucial strategy is to validate if the targetted web elements are present and ready for interaction. However, a more effective and sustainable approach involves checks right from the start rather than relying on debugging when issues arise.
By involving these checks in the initial stages, you can proactively deal with potential errors and set a strong foundation for reliable automation testing.
In this section, we will delve into the significance of this proactive approach, exploring why it’s essential and how to implement it effectively. This strategy ensures smoother and more robust testing experiences, ultimately saving time and resources in the long run.
Here are some reasons to check if an element exists in Python Selenium during test automation:
- Handling dynamic web content
- Early bug detection
- Reduce test flakiness
Handling dynamic web content in automation testing is a crucial skill. When web pages change frequently or elements get reshuffled in the Document Object Model(DOM) layout, causing the automation tests to break, this is even common while automating shadow web elements.
To address this, testers use various strategies like switching to relative XPath locators, locating the web elements with multiple attributes, or finding elements by their indexes.
Other locators like ID, className, CSSSelector, and more can come in handy based on situations and needs when locating a web element to check if an element exists in Python Selenium.
Explore this comprehensive blog on Selenium locators to enhance your element identification skills. This blog provides valuable insights, tips, and best practices to help you become a pro at locating web elements.
By proactively checking if an element exists in Python Selenium and element visibility, testers can adapt their tests to handle these changes, making their automation more robust and reliable.
This approach helps with smoother testing experiences and prevents potential bugs from leaking into production. Handling dynamic web content is essential for successful automation testing.
 Note
NoteTake control of dynamic web content to ensure reliability in your automation testing Try LambdaTest Today!
Besides web content dynamism, a web element may be present, but it can be slow to respond inactive due to external conditions like network speed.
Checking if an element exists in Python Selenium during test automation helps you identify the direct cause of a test failure. It prevents potential bugs from leaking into production.
If a desired web element is not rendering correctly or missing, it might indicate a bug in the UI or the test suite. Checking the presence and visibility of the desired web element helps identify where updates may be needed in either the UI or the test suite.
It helps verify that a web element is visible and responsive to user interactions before moving to further test steps. It also helps verify if your UI test needs to include a significant action. This might involve ensuring the target web element exists and is visible before any interaction is performed.
To overcome flaky tests and unexpected failures, explore this blog on how to overcome flaky tests and unexpected failures. This resource provides valuable insights and strategies to enhance the reliability of your test automation.
NoteRun your Selenium Python scripts with ease across various testing frameworks. Try LambdaTest Today!
Different techniques for checking if an element exists in Python Selenium
Techniques like counting the presence of the target element, utilizing boolean assertions along with expected_conditions, or using Selenium’s built-in exception handling can be a great help while checking if an element exists in Python Selenium.
Handling exceptions in Selenium can sometimes be tricky and challenging when dealing with concepts like dynamic web elements. To know more about what types of built-in exceptions Selenium provides, explore this blog on how to handle errors and exceptions in Selenium Python.
In the further section, we will see examples demonstrating the different techniques to check if an element exists in Python Selenium using the count() method and is_displayed, is_enabled with expected_conditions.
Before jumping to the demonstration, let’s look into the prerequisites we need to set up, from choosing the coding language testing framework to finalizing the IDE.
In this case, I will use Python version 3.10.6, and the IDE will be VS Code. You’ll also need to install the following packages:
- pytest
- Selenium
- python-dotenv
To run our tests, we will use pytest as a test runner and Selenium as the framework that provides drivers and interactive methods to automate the test.
Now, create a file and name it requirements.txt. This file must be made under your project root folder as shown:
Now, to install the dependencies, run the following command:
|
1 |
pip install -r requirements.txt |

These dependencies get installed into the text file you created, that is, requirement.txt
In this case, we will use the dotenv package to mask secret variables, including your grid username and access key.
Using the pytest framework for running Python-based automation? Check out our blog on pytest tutorial. Run your test suites in parallel across multiple browsers and operating systems for complete test coverage.
Subscribe to the LambdaTest YouTube channel for more videos on Parallel testing and Selenium testing and to enhance your testing experience!
Now that everything is set up, let’s look into the technique.
Using the count() technique
In this technique, we add the desired web element to a random list using a list-supported Selenium selector. Then, we count how many web elements are in that list. The resulting list remains empty if the web element is absent in the DOM.
In the following example, we’ll test a selection action from a dropdown.
Example: Select action from drop-down.
Action: First, we will check if an element exists in the dropdown before taking the action. We will check if the test has selected the expected option.
But before performing the action, we need to identify the element like ID or XPath that can help us interact with the UI.
Locating element using ID
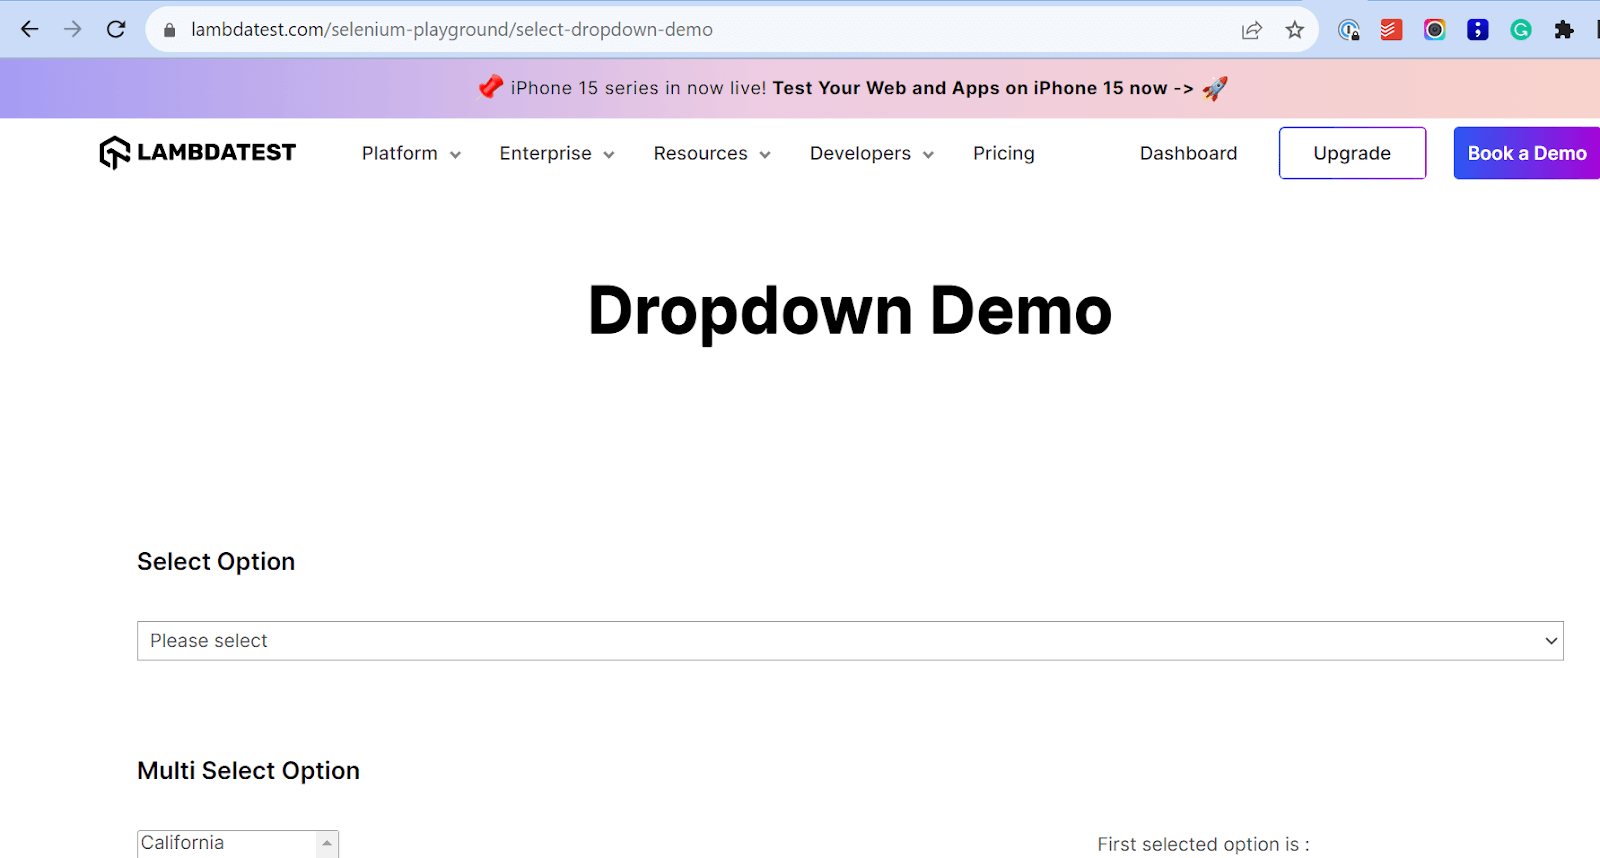
I will perform actions on the Select Options box present on the LambdaTest Demo site using Python Selenium in this example.
But before performing any action on the Select Options button, we must find the element using any locator. In this case, I will use IDs as IDs are considered unique.
So, let’s find the element ID in the following steps:
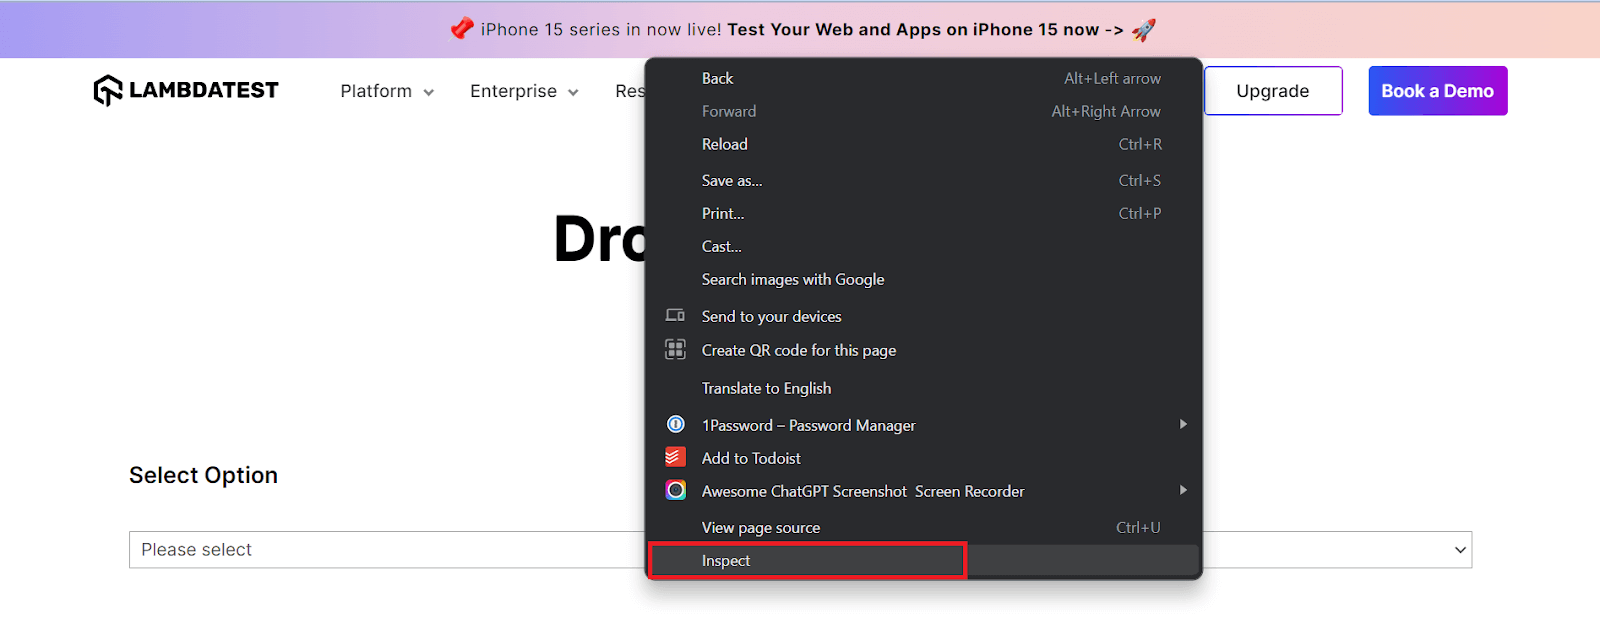
- Visit the LambdaTest Dropdown demo site.
- Right-click on the web page and click on Inspect.
- The developer panel will appear. Now, hover over the Select Options box and get its ID.
- The ID of the Select Options box is select-demo.
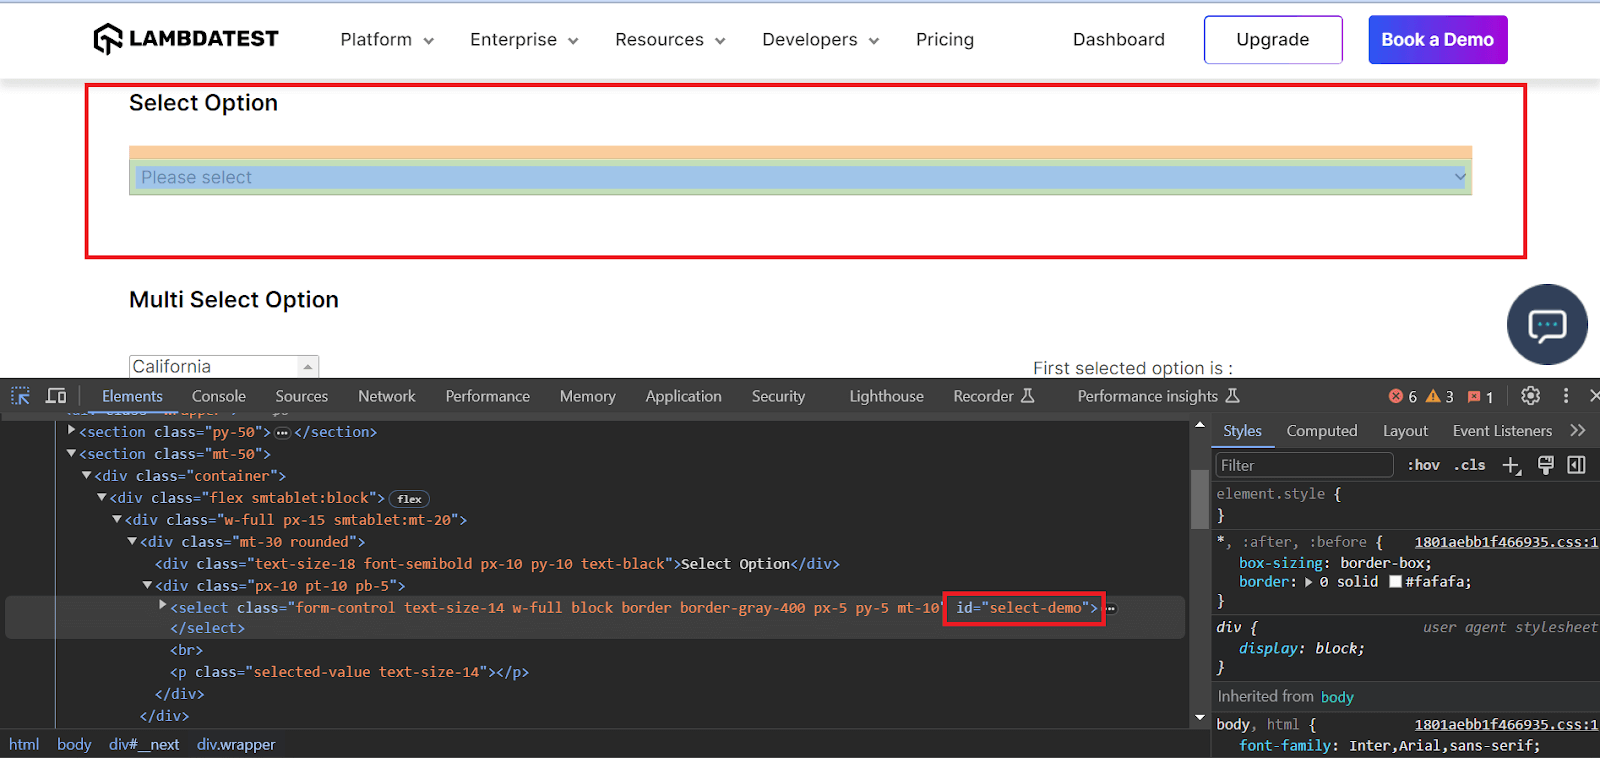
Great, now that you have the element ID, let’s proceed with the other actions, like importing Selenium file libraries, invoking Chrome Driver, maximizing the browser, and more in our test script.
|
1 2 3 4 5 6 7 8 9 10 11 12 13 14 15 16 17 18 19 20 21 22 23 24 25 26 27 28 29 30 |
from selenium import webdriver from selenium.webdriver.common.by import By from selenium.webdriver.support.ui import Select driver = webdriver.Chrome() class TestSelection(): def should_select_text(self): drop_down_button = "select-demo" selected_value = "selected-value" url = "https://www.lambdatest.com/selenium-playground/select-dropdown-demo" driver.maximize_window() driver.get(url) elements = driver.find_elements(By.ID, drop_down_button) assert len(elements)>0, "The element does not exist" drop_down = Select(driver.find_element(By.ID, drop_down_button)) selected = driver.find_element(By.CLASS_NAME, selected_value) drop_down.select_by_visible_text("Sunday") assert "Sunday" in selected.text, "The expected day not selected" print(selected.text) driver.quit() should_select_text_from_dropdown = TestSelection() should_select_text_from_dropdown.should_select_text() |
Before we see the outcome, let us understand the code in the following steps:
Code Walkthrough:
Import statements
Importing all necessary Selenium libraries and related modules.

Creating a WebDriver instance
This line initializes a new instance of the Chrome WebDriver, which will be used for automation.

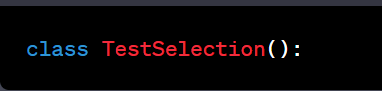
Defining a test class
The code defines a Python class named TestSelection to encapsulate the test methods.
Test method should_select_text
This method is defined within the TestSelection class. It performs the following steps:
- Assigning element identifiers: These variables store the IDs of the dropdown element and the selected value element on a web page.
- Setting the URL: The web page URL to be tested is stored in the URL variable.
- Maximizing the browser window: This command maximizes the browser window.
- Opening the web page: The WebDriver navigates to the specified URL.
- Locating the dropdown element: It attempts to locate elements on the web page using the By.ID method. If any element with the specified ID is found, it is stored in the elements variable.
- Assertion for element existence: This line checks if the elements list is not empty, indicating that the dropdown element exists on the page. If the element is not found, it raises an assertion error.
- Interacting with the dropdown: The code locates the dropdown element using driver.find_element and creates a Select object.
- Locating the selected value element: The code locates the element displaying the desired value.
- Selecting an option from the dropdown: It selects Sunday from the dropdown using the select_by_visible_text method.
- Assertion for selected value: This line verifies that the selected text matches “Sunday” and raises an assertion error if it does not.
- Printing the selected text: Finally, the code prints the selected day to the console.
- Quitting the WebDriver: The WebDriver is closed to end the automation session.


Creating an instance of the test class and executing the test
An instance of the TestSelection class is made, and the should_select_text method is called to execute the test.

To summarize the code, it conducts UI automation, selecting a day from a web page’s dropdown, verifying the selected value, and displaying it in the console. Additionally, it includes error handling through assertions and checking if an element exists in Python Selenium.
Result

Let’s look into the other technique, which can make checking if an element exists in Python Selenium easier.
Using is_displayed() and is_enabled() with expected_conditions
Before we see how we can use is_displayed and is_enabled with expected_conditions, we will first understand the basics of is_displayed and is_enabled methods in Selenium.
- Is_displayed(): The is_displayed() method checks if an element on a web page is visible to the user. If the element is visual, it returns true; else, it returns false.
- Is_enabled(): The is_enabled() method checks if the element is interactable. If the element is not interactable, it returns false; else, it returns true.
When automation scripts fail due to an element not being clickable or if the element is hidden behind another element, using is_displayed() can be helpful. Learn more on how to use isDisplayed() in Selenium WebDriver.
Now that we have a good glance at the is_displayed() and is_enabled() methods, let’s understand what expected_conditions are.
- expected_conditions: In Selenium, expected_conditions provides methods to check various pointers of web elements such as presence, visibility, activeness, and clickability. It means you can use expected_conditions to wait for a web element to be visible or active before the user can interact.
In addition, using expected_conditions is an add-on to your element validation by verifying if the web element is available for interaction using the is_displayed and is_enabled methods. These methods return a Boolean value, which helps to ensure that the web element is ready for interaction.
|
1 2 3 |
element = driver.find_element_by_name("sub_activate") print element.is_enabled() print(element.is_displayed) |
This is an alternative method called custom error message, which you can use instead of expected_conditions. This custom error message allows you to manage missing elements by printing them when they are not found.
Let’s understand this custom error message better with an example. We will consider the previous example using these methods:
|
1 2 3 4 5 6 7 8 9 10 11 12 13 14 15 16 17 18 19 20 21 22 23 24 25 26 27 28 29 30 31 32 33 34 35 36 37 38 39 40 41 |
from selenium import webdriver from selenium.webdriver.common.by import By from selenium.webdriver.support.ui import Select from selenium.webdriver.support import expected_conditions as EC from selenium.common.exceptions import NoSuchElementException driver = webdriver.Chrome() class TestSelection(): def should_select_text(self): drop_down_button = "select-demo" selected_value = "selected-value" url = "https://www.lambdatest.com/selenium-playground/select-dropdown-demo" driver.implicitly_wait(10) driver.maximize_window() driver.get(url) element_present = False try: target_element = driver.find_element(By.ID, drop_down_button) element_present = EC.presence_of_element_located((By.ID, drop_down_button))(driver) except: pass assert element_present, "element not found" assert target_element.is_displayed(), "The element is not visible" assert target_element.is_enabled(), "Element is visible but disabled" drop_down = Select(target_element) selected = driver.find_element(By.CLASS_NAME, selected_value) drop_down.select_by_visible_text("Sunday") assert "Sunday" in selected.text, "The expected day not selected" print(f"selected text: {selected.text}, Test status: Passed") driver.quit() should_select_text_from_dropdown = TestSelection() should_select_text_from_dropdown.should_select_text() |
Code Walkthrough
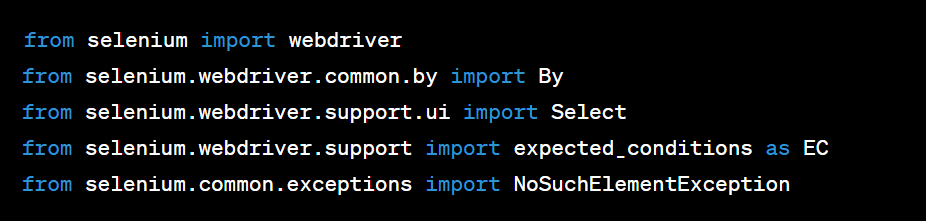
Import statements
Importing all necessary Selenium libraries and related modules.
Creating a WebDriver instance
This line initializes a new instance of the Chrome WebDriver, which will be used for automation.

Defining a test class
The code defines a Python class named TestSelection to encapsulate the test methods.

Test method should_select_text
This method is defined within the TestSelection class.

Web element IDs and URL
Web element IDs and the web page URL to be tested are defined.

Driver configuration and navigation
The driver is configured with a 10-second implicit wait, the browser window is maximized, and the web page is loaded.

In this case, I have used implicit wait, the default wait function provided by Selenium. Implicit wait methods are applied globally; you can add this once in your code, and it applies to all the web elements specified within a script throughout the entire WebDriver instance. To know more about Selenium waits, explore this blog on types of waits in Selenium, get valuable insights on holds, and learn how and when to use them.
Check for element presence
In this code section, we will check if an element exists in Python Selenium.
Check for element presence
In this code section, we will check if an element exists in Python Selenium.
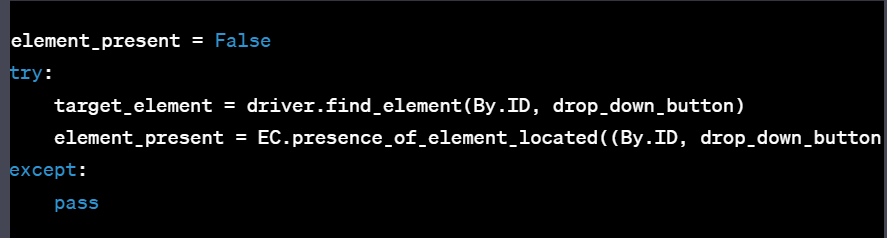
- A variable element_present is initialized as false.
- The code attempts to find the target_element using its ID and checks its presence using expected_conditions. Any NoSuchElementException exceptions are handled in a try-except block.

Assert element presence
An assertion is made to verify the existence of the target_element, and a custom error message is displayed if it’s not found.

Check visibility and enablement
Assertions are made to check if the target_element is displayed and enabled.
Dropdown selection
In this code section, we will select the dropdown option.

- A Select object is created for the target_element to work with dropdowns.
- The selected element is found using its class name.
- The “Sunday” option is selected from the dropdown.
Assert selected value
assert Sunday is selected.text. The expected day is not selected.

An assertion is made to ensure that “Sunday” is in the selected element’s text.
Print results and quit
The selected text and a Test status: Passed message are printed. The WebDriver instance is quit to end the test.

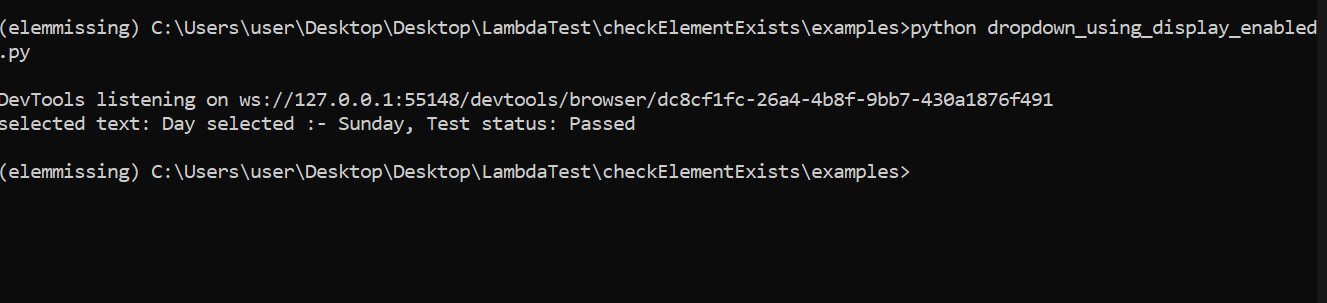
Result
You get the following command-line output:

If true, the target_element satisfies all conditions. Hence, the test runs and passes as shown.
Using Selenium’s built-in exception
The Selenium built-in exception catches a missing element error during automation test execution. This approach involves the use of the NoSuchElementException exception class of Selenium.
If the test code in the try block fails, Selenium executes the exception, stating clearly that an element is missing from the DOM.
Relying solely on the NoSuchElementException exception method can lead to incorrect failure, especially with dynamic elements or those with delayed loading. This approach can occasionally be misleading as it may trigger exceptions for dynamically generated web elements temporarily inaccessible to the driver.
Below is the output generated when the web element could not locate and interact.
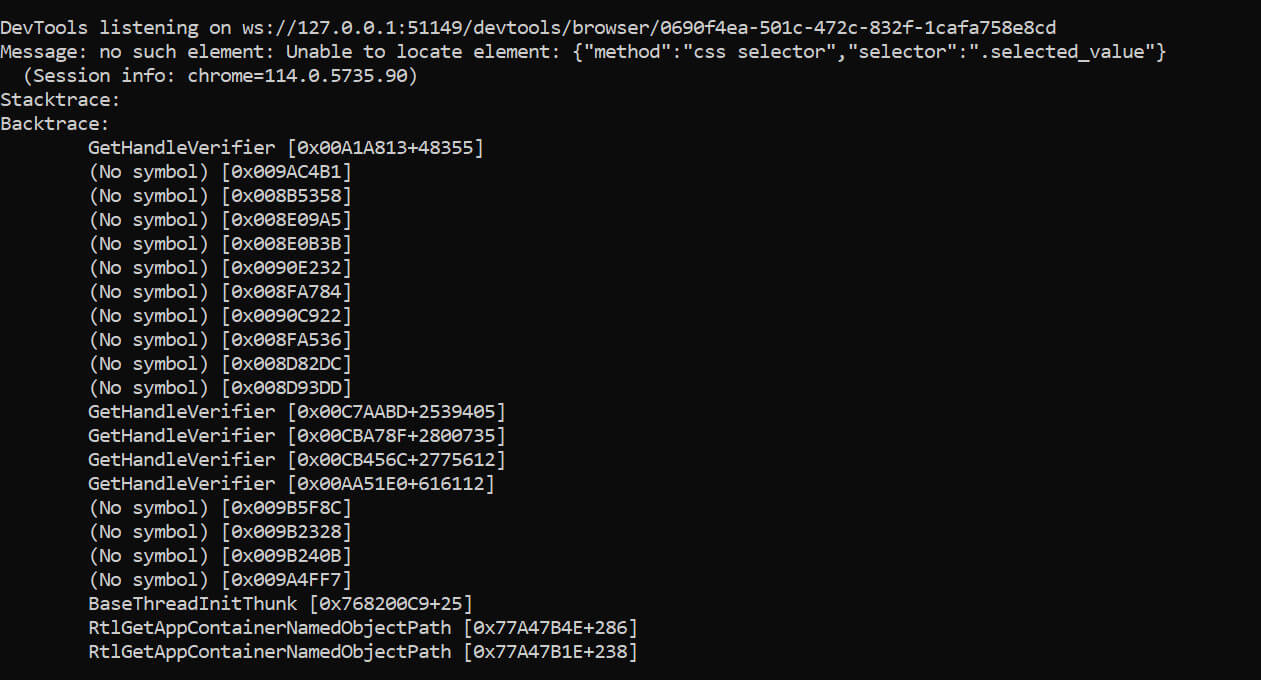
To understand this better, let’s take an example.
|
1 2 3 4 5 6 7 8 9 10 11 12 13 14 15 16 17 18 19 20 21 22 23 24 25 26 27 28 29 30 |
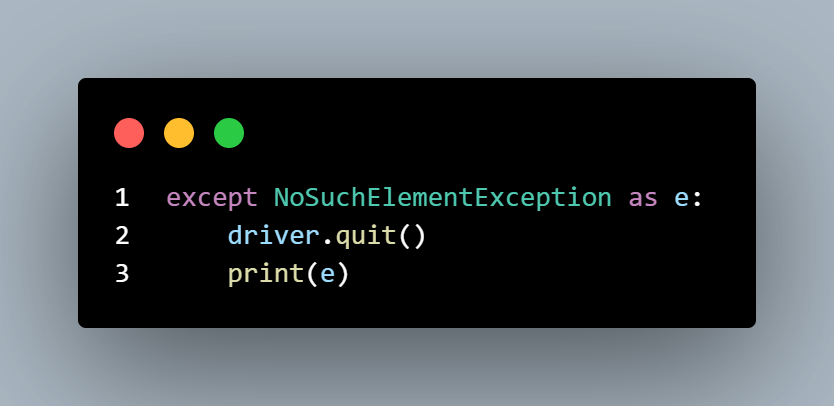
from selenium import webdriver from selenium.webdriver.common.by import By from selenium.webdriver.support.ui import Select from selenium.common.exceptions import NoSuchElementException driver = webdriver.Chrome() class TestSelection(Setup): def should_select_text(self): try: drop_down_button = "select-demo" selected_value = "selected-value" url = "https://www.lambdatest.com/selenium-playground/select-dropdown-demo" driver.maximize_window() driver.get(url) target_element = driver.find_element(By.ID, drop_down_button) drop_down = Select(target_element) selected = driver.find_element(By.CLASS_NAME, selected_value) drop_down.select_by_visible_text("Sunday") assert "Sunday" in selected.text, "The expected day not selected" driver.quit() except NoSuchElementException as e: driver.quit() print(e) should_select_text_from_dropdown = TestSelection() should_select_text_from_dropdown.should_select_text() |
The test code above masks the missing element errors for any selector using the NoSuchElementException exception. If any of the selected web elements are missing from the DOM, this method prompts Selenium to return an exception and quit the test.
Dealing with dynamic elements, implementing custom error handling, and managing potential false test failures during Selenium automation testing can be challenging. Inconsistent test results caused by dynamic web content and tests executed locally may lead to development delays.
Using cloud platforms
Making use of a cloud-based service like LambdaTest can be proven beneficial. LambdaTest is an AI-powered test orchestration and execution platform that lets you run manual and automated tests at scale with over 3000+ real devices, browsers, and OS combinations.
Along with web automation, LambdaTest also provides a mobile device lab, which allows you to run tests on mobile devices, making it a complete solution for mobile app testing.
It provides a wide range of real browsers and operating systems for comprehensive test coverage, ensuring that dynamic elements and web content variations are handled effectively.
With cloud-based testing, developers can overcome inconsistencies caused by element readiness, reduce false test failures, and streamline the testing process. LambdaTest empowers teams to detect and address issues early in the development cycle, ultimately enhancing the reliability and quality of web applications.
How to check if an element exists in Python Selenium on LambdaTest?
We’ll use the LambdaTest eCommerce playground to demonstrate how to check if an element exists and run the test via the Selenium Grid using Python and pytest to run the test suite. Let’s begin with the steps to set up to run our test over LambdaTest.
Step 1: Create a LambdaTest account.
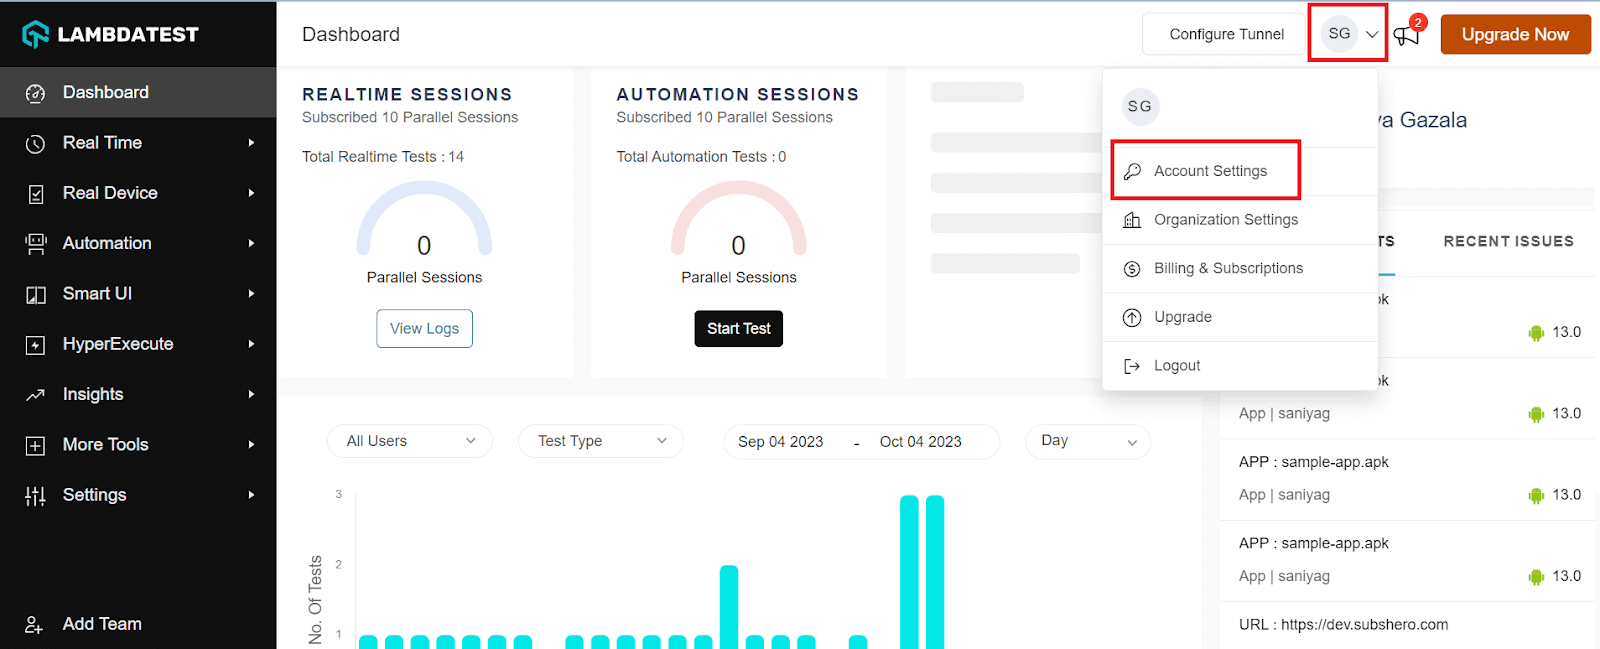
Step 2: Get your Username and Access Key by going to your Profile avatar from the LambdaTest dashboard and selecting Account Settings from the list of options.
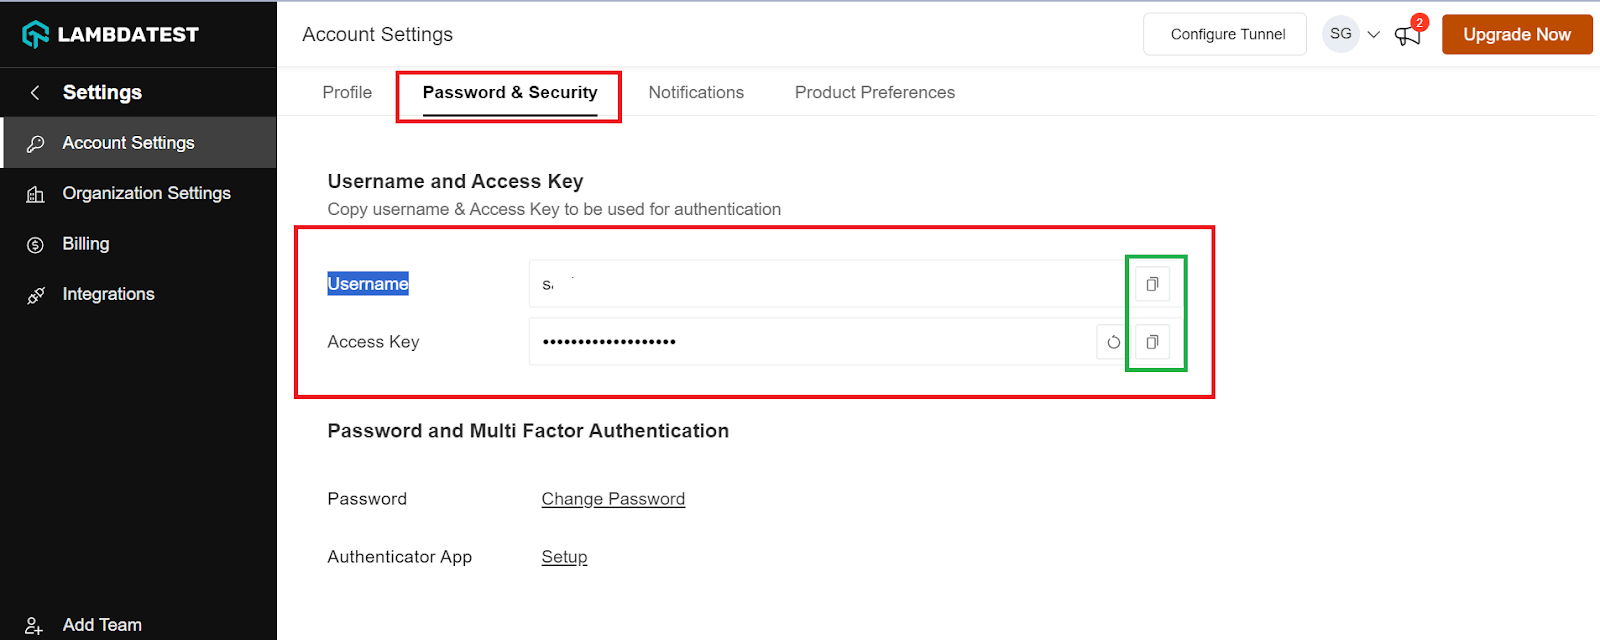
Step 3: Copy your Username and Access Key from the Password and Security tab.
Step 4: Generate Capabilities containing details like your desired browser and its various operating systems. Generate your LambdaTest Capabilities Generator as per your requirement.
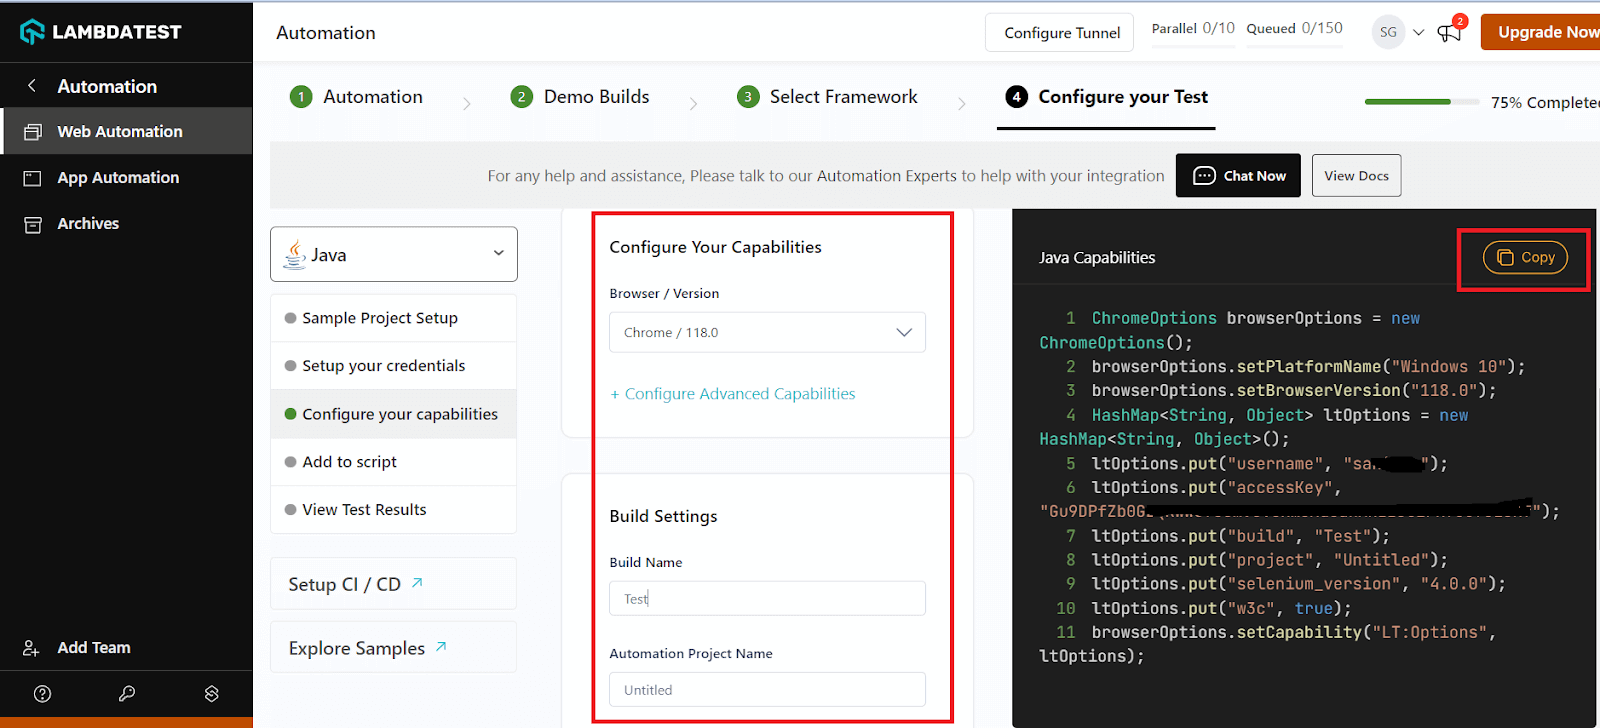
Step 5: Now that you have both the Username, Access key, and capabilities copied, all you need to do is paste it on your test script.
Having details collected from the LambdaTest platform, all you need to do is paste it accordingly into your test script; let’s cover each step in the following steps.
Project setup
We must set up a few things before implementing the code with the LambdaTest platform. Let’s examine the steps individually.
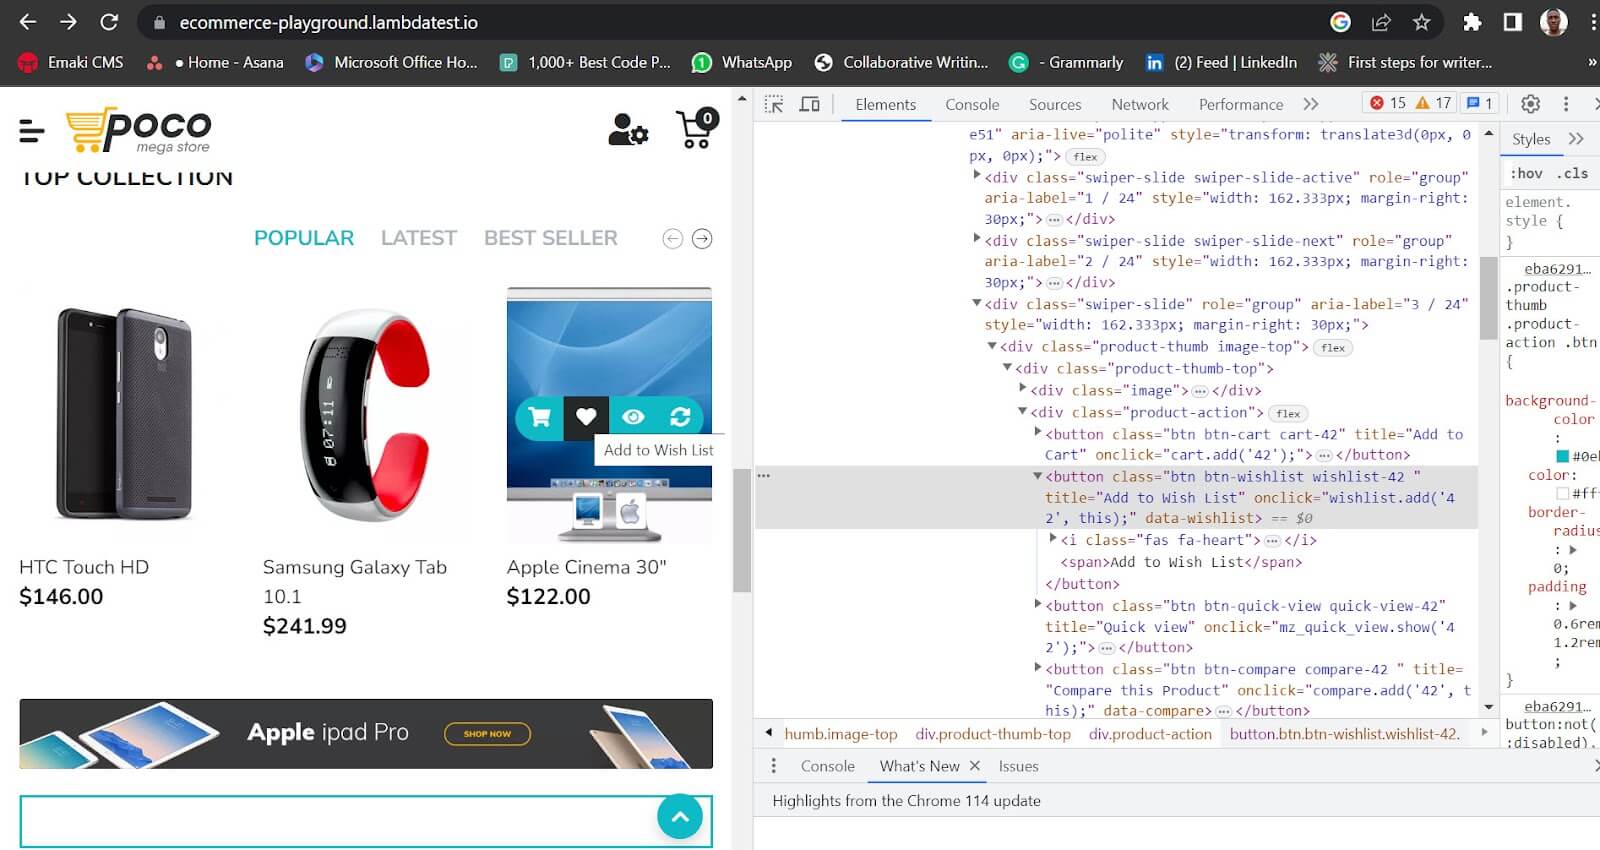
- Inspecting element: First, inspect the target web page using Chrome’s Inspect tool.
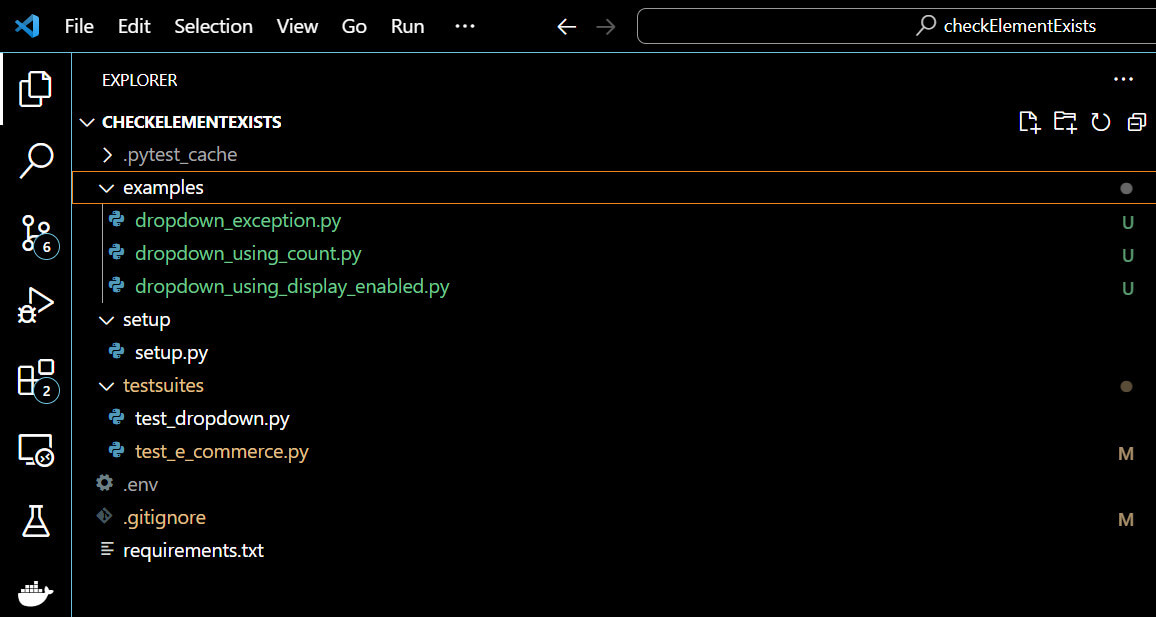
- Project structure: Let’s take a look at the project structure:
- VS Code: Below is the test suite structure inside VS Code. The examples folder contains the test examples.
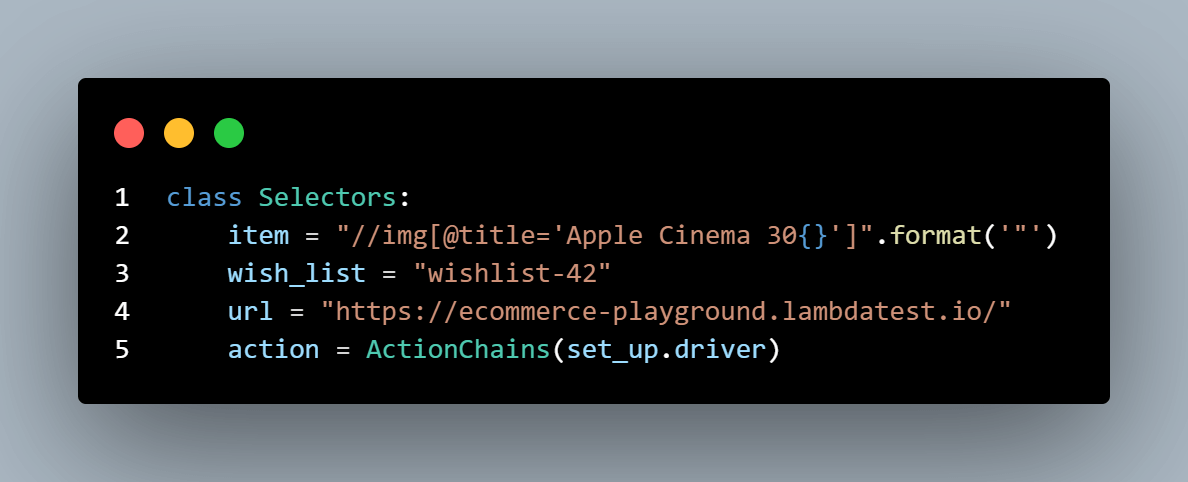
- This class also attributes the target URL and instantiates the ActionChains using the driver attribute from Setting. It also contains the locators for the target web elements.
- The item attribute is the product’s locator, while the wish_list attribute is the heart icon locator.
|
1 2 3 4 5 6 7 8 9 10 11 12 |
checkElementExists ├─ .env ├─ .gitignore ├─ examples │ ├─ dropdown_exception.py │ ├─ dropdown_using_count.py │ └─ dropdown_using_display_enabled.py ├─ requirements.txt ├─ setup │ └─ setup.py └─ testsuites └─ test_e_commerce.py |
Use case
The test scenario is simple. It first hovers over a product and then clicks the heart icon once visible and active to add the selected item to the wishlist. We chose this test scenario because the wishlist icon appears dynamically on mouse hover.
Here’s a breakdown of the test steps:
Test Scenario
| Step 1: Open the target URL. Step 2: Scroll the target item into view and set the mouse on it. Step 3: Check for the web element’s existence using expected_conditions. Step 4: Check if the target web element is active and enabled. Step 5: Click the wishlist icon dynamically. |
The test setup is inside the setup/setup.py file, while the testsuites directory contains the test execution file.
Code Walkthrough
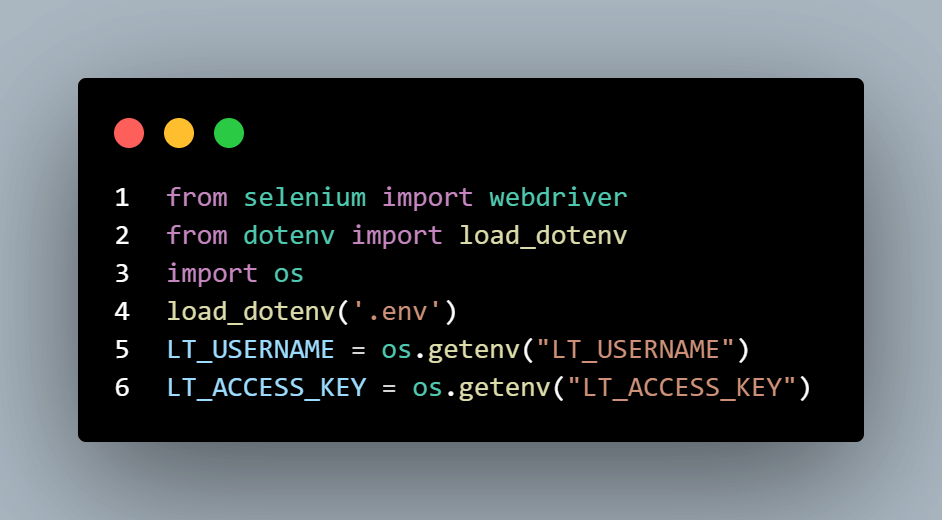
Step 1: We import the webdriver package from Selenium. It allows you to configure the browser and add the desired capabilities. We also import Python’s dotenv and the os package to mask and read environment variables from the .env file.
Step 2: Next is an instantiation of the dotenv package and declaration of the LamdaTest grid username and access key.
Step 3: We instantiate a ChromeOptions object as an option. Then, we declared the browser version and platform name using the options object. The WebDriver will use these selections to set up the Chrome browser during the test execution.

Step 4: The lt_options is an empty dictionary extended with the test capabilities.
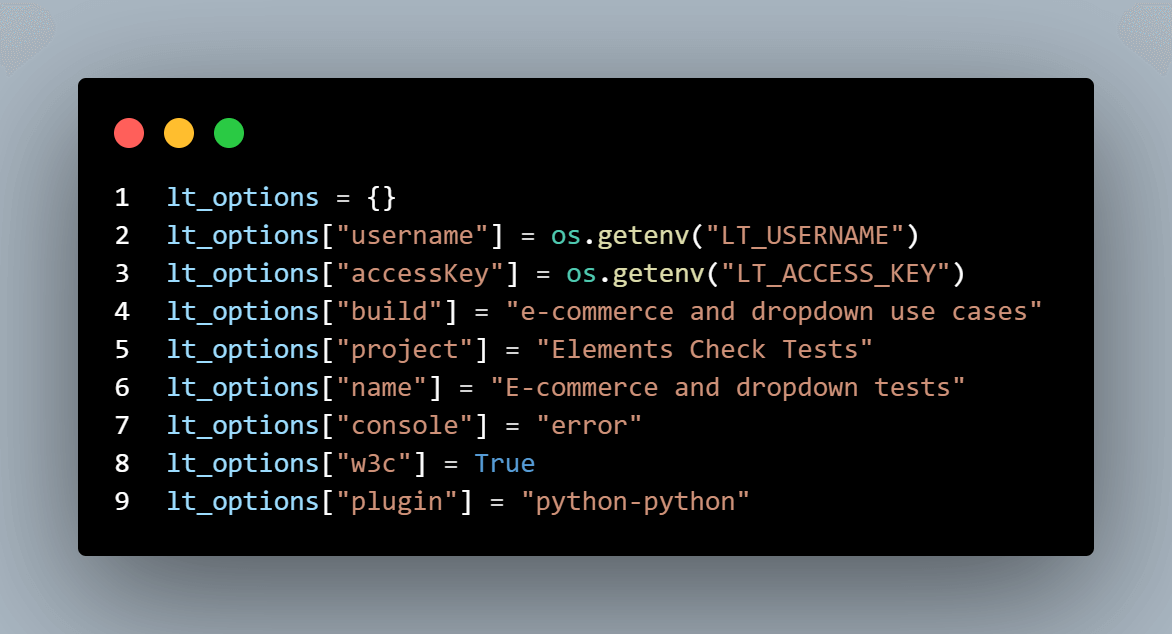
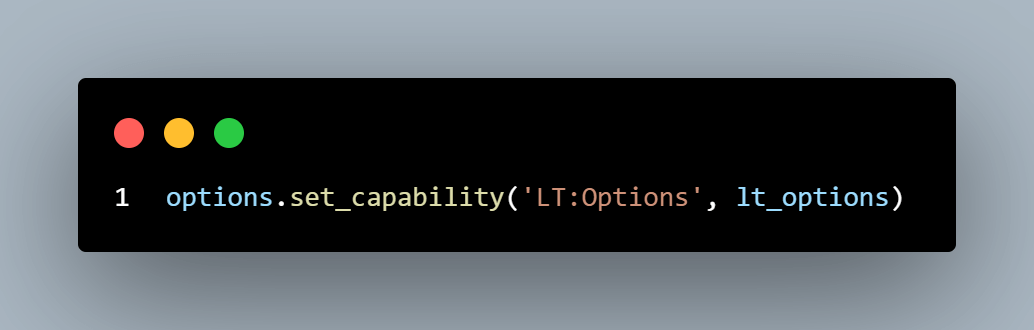
Step 5: Next, we set these capabilities and add them to ChromeOptions using the set_capability method.
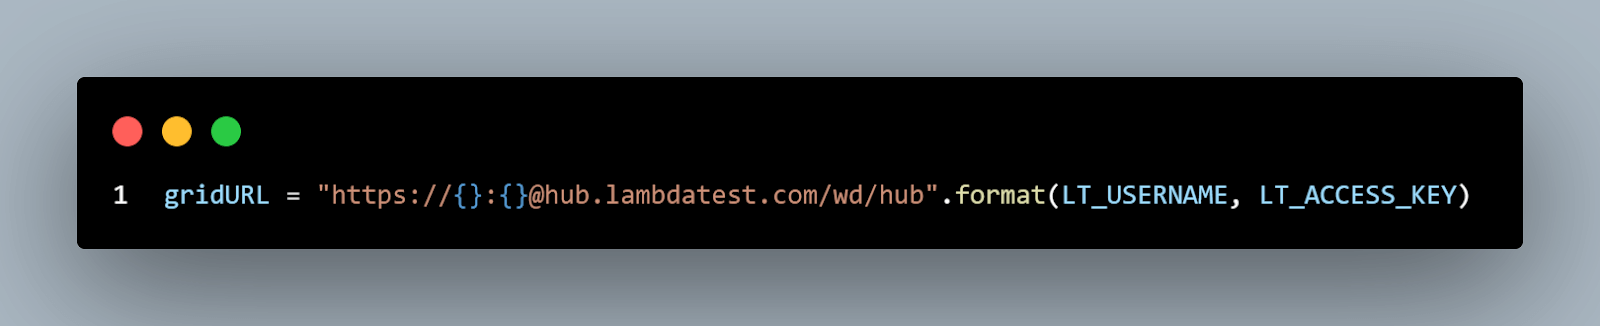
Step 6: We set the cloud grid URL to include our grid username and access key.
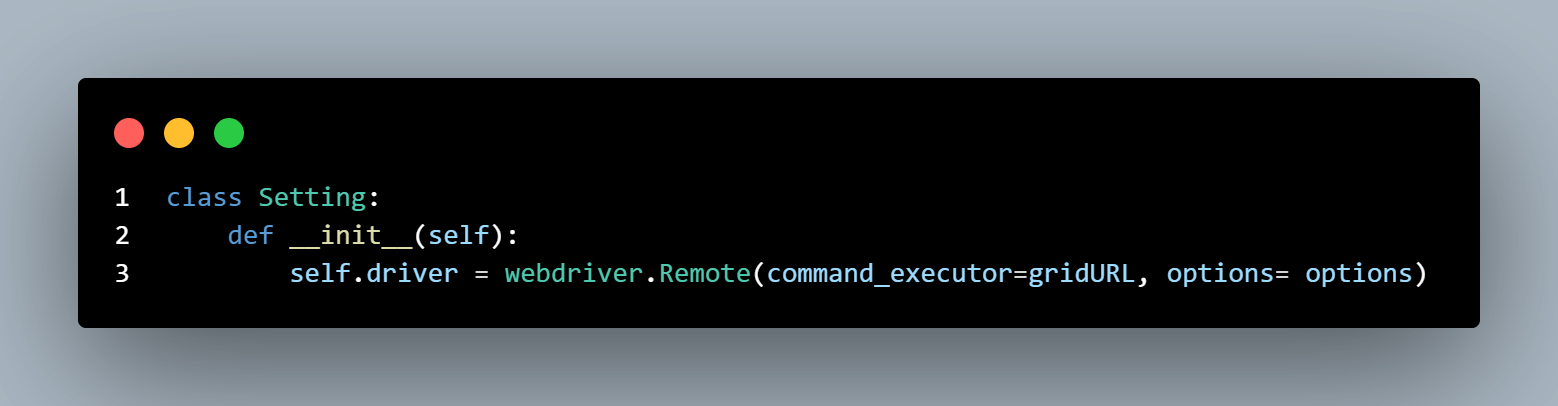
Step 7: The Setting class’s __init__ function defines the driver attribute. It accepts the pre-defined options and sets the grid URL as the test executor using the webdriver’s remote method.
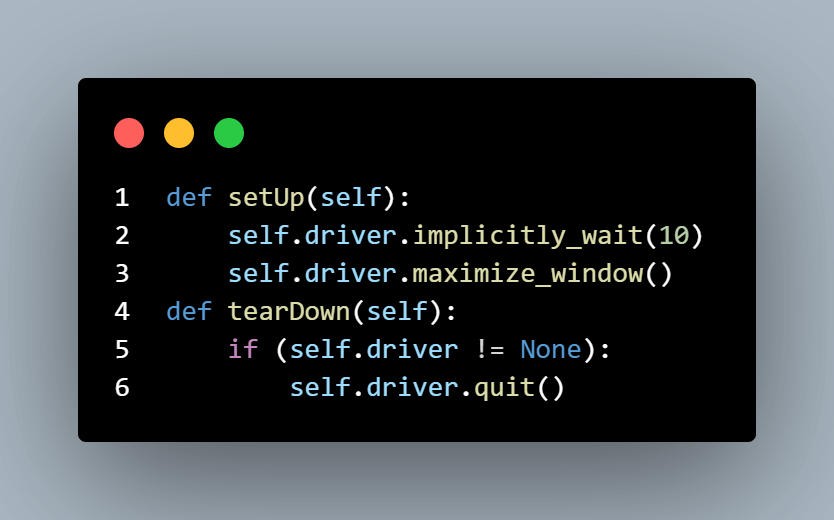
Step 8: Finally, we define the setUp and tearDown methods to maximize the browser window and quit the test.
Now, let’s go through the test executor file.

Code Walkthrough
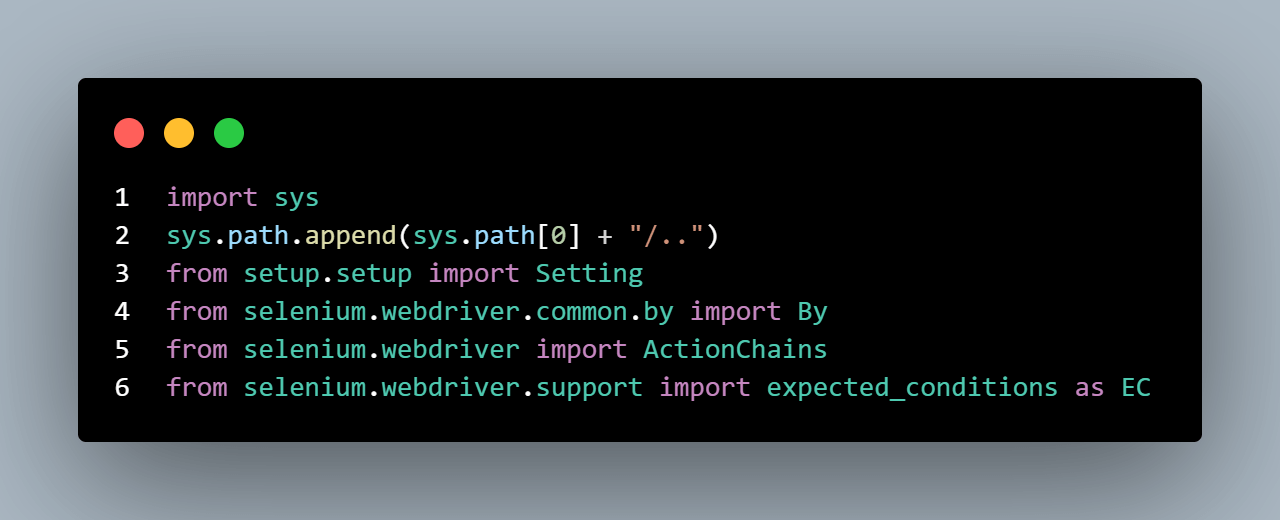
Step 1: We start the above code by appending the file path and importing the required modules. We import the Setting class from the setup folder to use the driver attribute, which contains the browser options and capabilities for the test suite. We also import ActionChains and expected_conditions.
Step 2: Using the ActionChain object, we can dynamically interact with a web element and perform keyboard actions and mouse events like scrolling and hovering. As shown earlier, expected_conditions lets you check if the target web element exists.
Step 3: Next, we instantiate the Setting class as set_up. Then, we declare the DOM selectors inside the Selectors class.
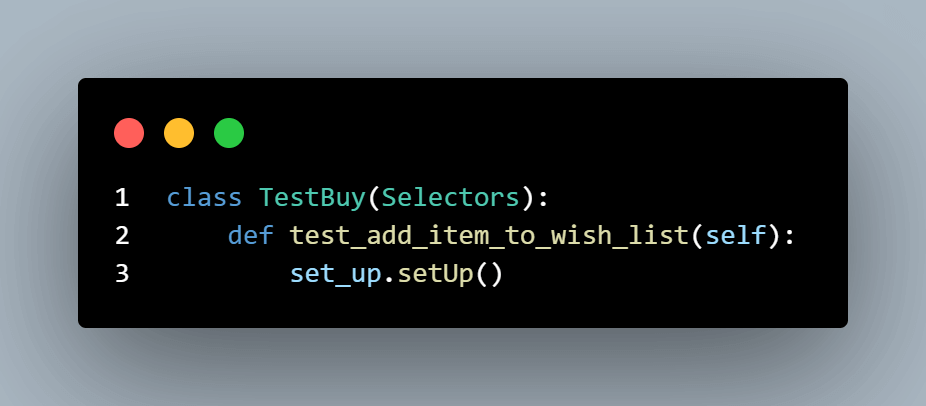
Step 4: The TestBuy class is the test runner class. This class inherits the Selectors class to use its attributes. This class contains only one test method (test_add_item_to_wish_list), which starts by calling the setUp method of the Setting class to maximize the browser window.
Next is executing our test steps:
Step 5: The test opens the target URL using the Selenium web driver’s get method.
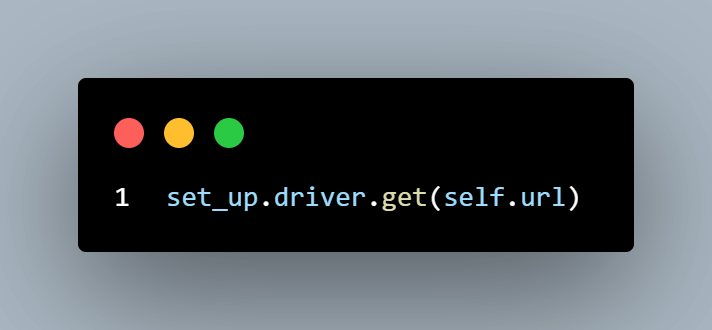
Before moving to the next step, we obtained the product element using Selenium’s XPath attribute.

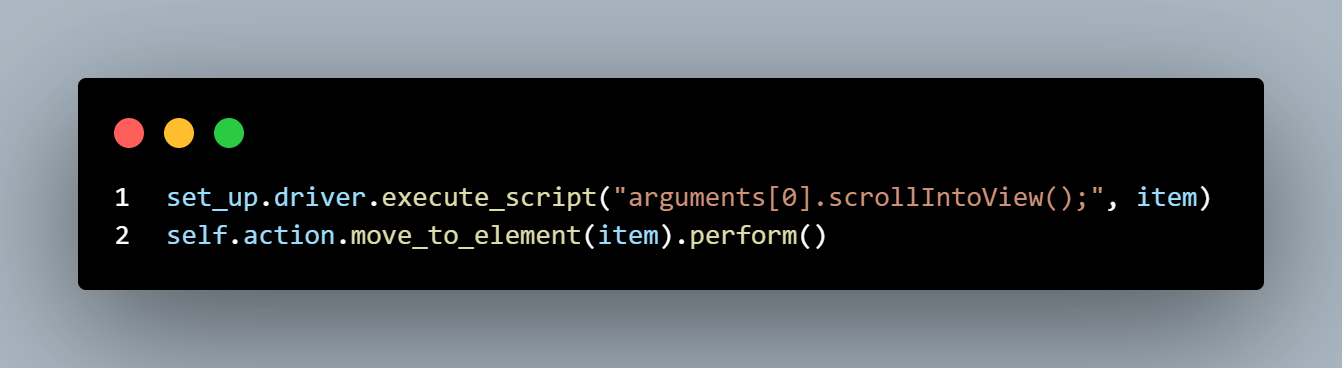
Step 6: Use the scrollIntoView method in JavaScript to scroll the target item into view using Selenium’s execute_script. Then, set the mouse upon it using the ActionChain object. This initiates a hover action that makes the wishlist icon visible to a user. The perform method ensures that the ActionChains run.
Step 7: Check for the web element’s existence using expected_conditions. We implement this using the try/except block. We use a wildcard except to pass possible errors since we don’t want Selenium to throw the built-in exception.
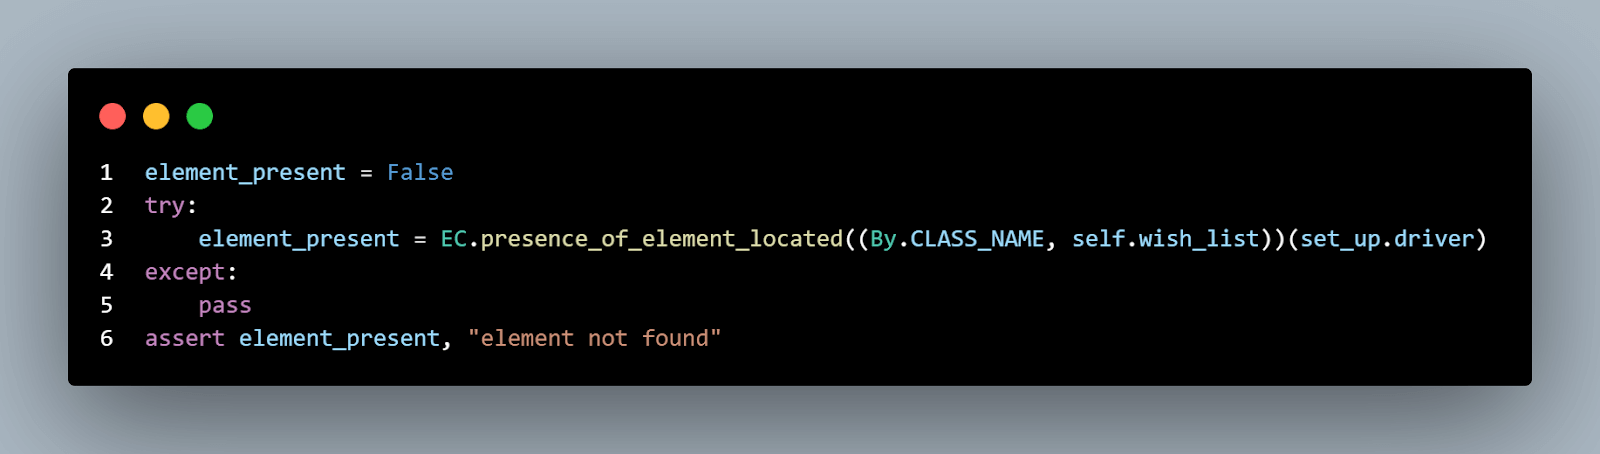
The set_up.driver call ensures the WebDriver gets the browser session for the wish_list element.
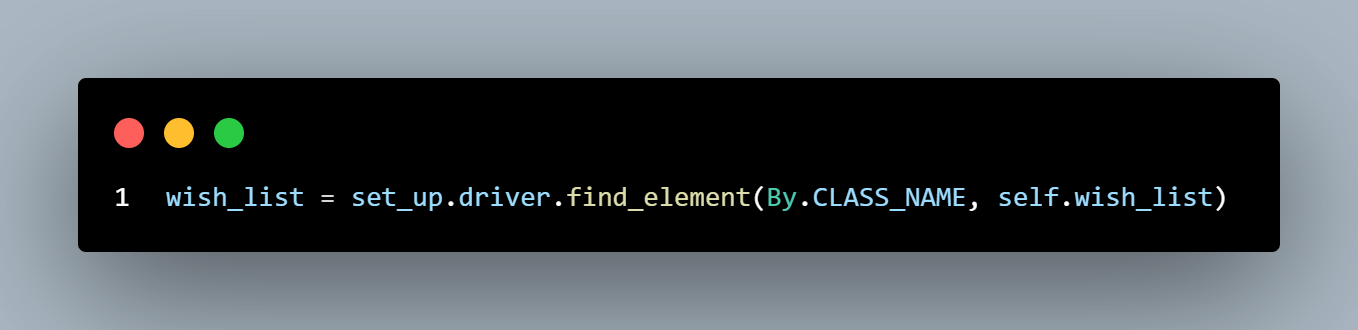
Once we assert that the wish_list element exists, we obtain it from the DOM using the inherited locator and querying it before the check might result in failing the test.
Step 8: Check if the target web element is active and enabled using the is_displayed and is_enabled methods.
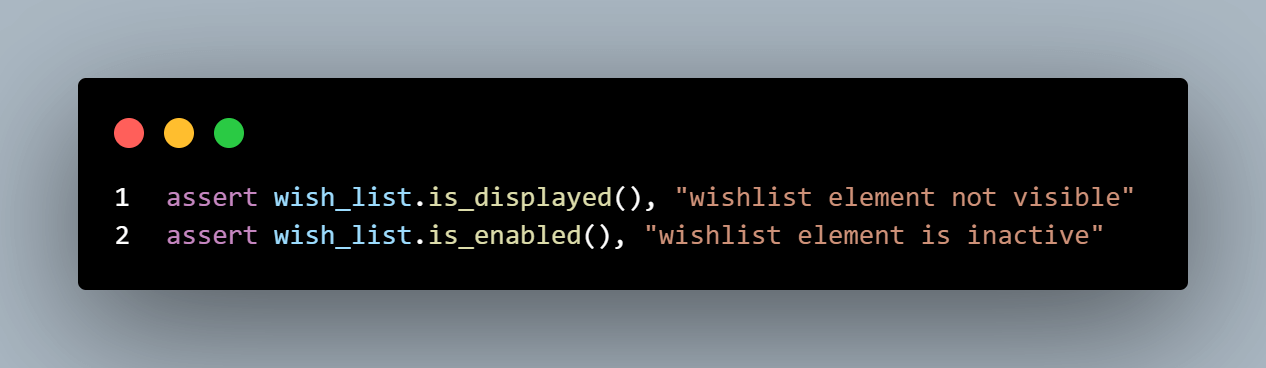
Step 9: Click the wishlist icon dynamically using Selenium’s execute_script method. This method allows you to execute JavaScript inside Python with Selenium. The execute_script is ideal here, as the UI renders the wish_list element dynamically.

To know more on how to use JavaScript executor, explore this blog on how to use JavaScript executor in Selenium WebDriver.
Step 10: Finally, we call the set_up.tearDown to quit the browser and end the test.
Result
To run the test suite, open your command line to your test root folder and run the pytest command as shown.
|
1 |
pytest |
The test runs in the command line, as shown below.

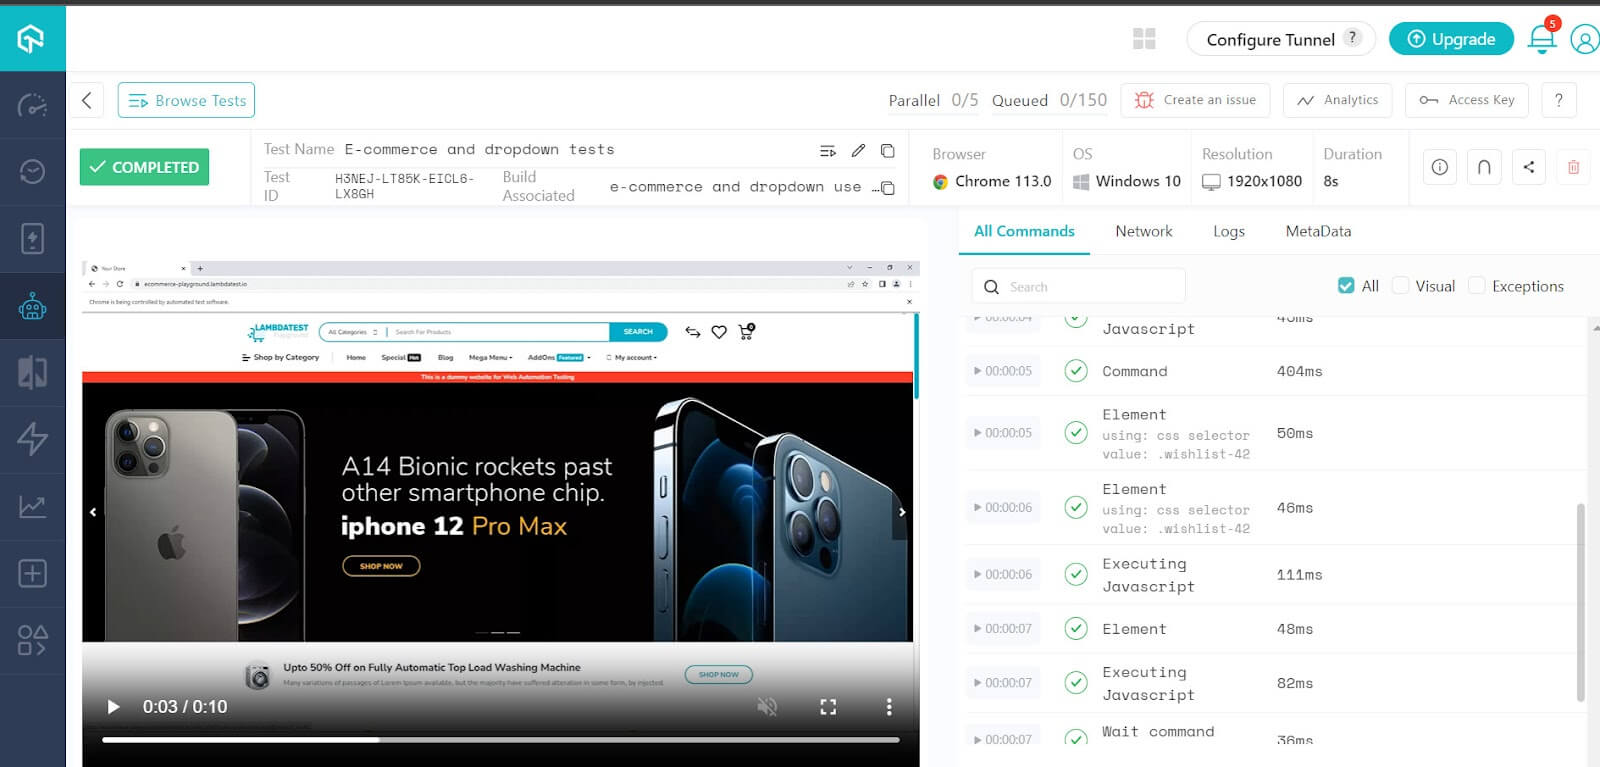
Below is the automation test execution on the Selenium cloud grid:
Conclusion
In automation testing, it’s common to overlook the need for element existence checks. However, it’s important to remember that web elements are only sometimes readily visible. Incorporating this validation into your testing approach is crucial to keep your test suite aligned with the ever-changing software.
In this blog, we’ve explored various practical methods for checking if an element exists in Python Selenium. Our initial examples and test demonstrations provide simple, effective solutions to strengthen your test strategies. By using these approaches, you’ll improve the reliability of your automation tests and ensure that your software remains consistent, even when dealing with dynamic web elements.
Frequently Asked Questions (FAQs)
How to check if the element is visible in Python Selenium?
Use is_displayed() method. It returns True if the element is visible on the web page and False if not.
How do you verify dynamic elements in Selenium?
Use explicit waits in Selenium to ensure that the element we are looking for is available before we interact with it.
How do you find hidden elements in Python Selenium?
Hidden elements exist in the webpage’s source code but are not visible to users when they view the page. You can locate these hidden elements in Selenium by using attributes such as class name or ID. It’s important to note that even if you interact with these hidden elements using Selenium, these interactions may not produce any visible changes on the webpage that a user can see.


Author’s Profile
Idowu (Paul) Omisola
Idowu is a self-taught programmer, coding YouTuber, and technical writer with a penchant for teaching. He started his coding career in 2018 but combined it with technical writing a year later and has never looked back. He has worked for a couple of websites over the years, and you'll find some of his coding guides on popular websites like MUO. He loves discussing software structure and coding topics in Python, JavaScript, Golang, and TypeScript. And when it comes to software testing, he's a fan of Playwright and Selenium.
Blogs: 6
Got Questions? Drop them on LambdaTest Community. Visit now