Record and Generate Tests With Cypress Studio
Tahera Alam
Posted On: September 2, 2025
18 Min


Writing tests for web applications can often feel time-consuming, even for simple interactions. Cypress Studio streamlines this process by allowing you to generate Cypress test script directly through interacting with your application.
You can perform actions like clicking buttons, filling forms and Cypress Studio translates them into reliable test steps automatically. This visual and intuitive approach accelerates test creation, ensures accuracy, and helps developers maintain robust, maintainable test suites with greater efficiency.
Chapters
- What Is Cypress
- Installing Cypress
- Writing First Cypress Test
- Cypress CLI and Test Runner
- Cypress in Headless Mode
- Find Broken Links Using Cypress
- Check if an Element Exists in Cypress
- Cypress for File Upload and Download
- Fill and Submit Forms in Cypress
- Find HTML Elements Using Cypress Locators
- Touch and Mouse Events in Cypress
- Cypress Page Object Model
- Shadow DOM in Cypress
- Cypress Viewport
- iFrames in Cypress
- Cypress Component Testing
- Cypress API Testing
- Cypress run Command
- Cypress .should() Command
- Cypress scrollIntoView() Command
- Cypress select() Command
- Cypress Testing Library
- Cypress With GitHub Actions
- Run Cypress With Jenkins
- Run Cypress Tests in Azure DevOps
- Cypress Intercept
- Exception Handling in Cypress
- Cypress App Actions
- Cypress With Docker
- Cypress Debugging
- Cypress Logs
- Cypress Accessibility Testing
- Anti-Patterns in Cypress
- Cypress Visual Regression Testing
- Cypress React Native App Testing
- Cypress Performance Testing
- Cypress Studio
- Cypress Code Coverage
- Cypress Cucumber Preprocessor Plugin
- Cypress Best Practices
- Cypress Tips And Tricks
- What Is Cypress Studio?
- Benefits of Cypress Studio
- Setting up Cypress Studio
- Generating Tests Using Cypress Studio
- Extending the Pre-Existing Test Script
- Limitations of Cypress Studio
- How to Run Tests At Scale With LambdaTest Cypress Cloud?
- Best Practices When Using Cypress Studio
- Frequently Asked Questions (FAQs)
Overview
Cypress Studio is an experimental feature in Cypress that simplifies test creation by recording user interactions directly in the Cypress Test Runner. It allows testers to build automated end-to-end tests without manually writing every command.
Benefits of Cypress Studio
- Faster Test Script Creation: Build test scripts by interacting with your app in the browser. Cypress Studio records clicks, typing, and other actions in real time, enabling quick, reliable test flows with minimal setup.
- Reduced Learning Curve: Cypress Studio lets testers create tests without mastering the full API or JavaScript syntax first.
- Easy Test Maintenance: Update tests effortlessly when your UI changes. Re-record interactions to regenerate steps without rewriting them manually.
- Improved Debugging: The Cypress Test Runner shows real-time visual feedback, helping you spot failures, inspect the DOM, and follow user interactions step by step.
- Code Reusability: Review, edit, and reuse recorded test steps across different cases, reducing redundant effort and speeding up QA, especially for similar user flows.
How to Use Cypress Studio
- Enable Cypress Studio: In your cypress.config.js file, set experimentalStudio: true inside the e2e configuration block.
- Create a New Spec: Navigate to your cypress/e2e folder and create a new spec file for your test.
- Open Test Runner: Run npx cypress open or yarn cypress open to launch the Cypress Test Runner and select your spec file.
- Record Actions: Click ‘Create test with Cypress Studio’, navigate through your application, and Cypress will record clicks, typing, and navigation into your spec file.
- Save and Extend: Save the recorded commands. You can extend the test using ‘Add Commands to Test’ to append more steps to an existing test.
- Manual Assertions: Insert assertions manually where needed to validate outcomes and ensure your tests verify application behavior.
What Is Cypress Studio?
Cypress Studio is a feature in Cypress that simplifies the creation and modification of automated test scripts. Currently available as an experimental capability, it allows you to generate tests by interacting directly with their web application in the Cypress Test Runner.
Instead of writing each command manually, you can click, type, or perform other actions on the app, and Cypress Studio will automatically generate the corresponding test steps for that. It supports common user actions such as .click(), .type(), .check(), .uncheck(), and .select() to interact with the DOM, along with basic assertions such as verifying that an element is visible, contains specific text, etc.
Benefits of Cypress Studio
While Cypress Studio isn’t meant to replace hand-written tests entirely, it does offer several benefits that can significantly speed up test creation and reduce the need for writing repetitive code.
- Faster Test Script Creation: Cypress Studio makes it possible to build test scripts simply by interacting with your web application in the browser. UI actions like clicks, typing, etc., are recorded in real time, allowing for quick generation of reliable test flows with minimal setup.
- Reduced Learning Curve for New Users: For teams new to Cypress test automation in general, Cypress Studio offers a gentle introduction. It lets testers and developers create tests without needing to immediately understand the full Cypress API or JavaScript syntax.
- Easy Test Maintenance: When the UI of your web application changes, maintaining existing tests can be time-consuming. Cypress Studio helps by allowing you to re-record interactions and regenerate test steps, making it easier to update affected tests without rewriting them manually.
- Improved Debugging: The Cypress Test Runner provides real-time visual feedback during test creation and execution. This helps you quickly pinpoint where a test failed, inspect the state of the DOM at each step, and understand the flow of user interactions, streamlining the debugging process.
- Code Reusability: Once recorded, test steps can be reviewed, edited, and reused across different test cases. This encourages code reuse and speeds up the QA process by minimizing redundant effort, especially when testing similar user flows or components across pages.
 Note
NoteRun Cypress tests across 50+ browser versions. Try LambdaTest Today!
Setting up Cypress Studio
Before setting up Cypress Studio, the first step is to install Cypress on your machine. Open your terminal and run one of the following commands, depending on your package manager:
|
1 |
npm install cypress --save-dev |
Once installed, you will see it listed under the devDependencies section in your package.json file.
For example:
|
1 2 3 4 5 6 7 8 9 10 11 12 13 14 |
{ "name": "cypress-studio", "version": "1.0.0", "description": "", "main": "index.js", "scripts": { "test": "echo \"Error: no test specified\" && exit 1" }, "author": "", "license": "ISC", "devDependencies": { "cypress": "^14.5.3" } } |
Enabling Cypress Studio
After installing Cypress, the next step is to enable Cypress Studio. This feature is disabled by default, so you’ll need to manually activate it in your configuration.
To do that, open your cypress.config.js file and add the experimentalStudio: true flag inside the e2e block as shown below:
|
1 2 3 4 5 6 7 8 9 10 |
const { defineConfig } = require("cypress"); module.exports = defineConfig({ e2e: { experimentalStudio: true, setupNodeEvents(on, config) { // implement node event listeners here }, }, }); |
If the cypress.config.js file isn’t present in your project, you can generate it by running:
|
1 |
npx cypress open |
This command opens the Cypress Test Runner and initializes any missing configuration files if needed. Once Cypress Studio is enabled, you’re ready to start creating tests visually.
Generating Tests Using Cypress Studio
Let’s generate a simple test script using Cypress Studio, by recording real interactions on a live web application.
Step 1: Create a New Spec File Under e2e Folder
First, navigate to the cypress/e2e folder inside your project. If the folder isn’t present, it will be created automatically when you run Cypress for the first time.
Now, let’s create a new cypressStudio.cy.js file inside the e2e folder.
Add the following basic structure to this file:
|
1 |
describe('Cypress Studio Demo', () => {}); |
Step 2: Open Cypress Test Runner
Run one of the following commands to launch the Cypress Test Runner:
|
1 |
npx cypress open |
Running this command will open a new window as shown below where you’ll be asked to choose a testing type.
Select E2E Testing, and then select Chrome to run your tests.
Once selected, click Start E2E Testing in Chrome to proceed.
Step 3: Launch Cypress Studio
Once you’ve selected the browser and started E2E testing, Cypress will display a list of available test files in your project.
Since our project has only one file, you will see the cypressStudio.cy.js file, the one we created earlier, in the list.
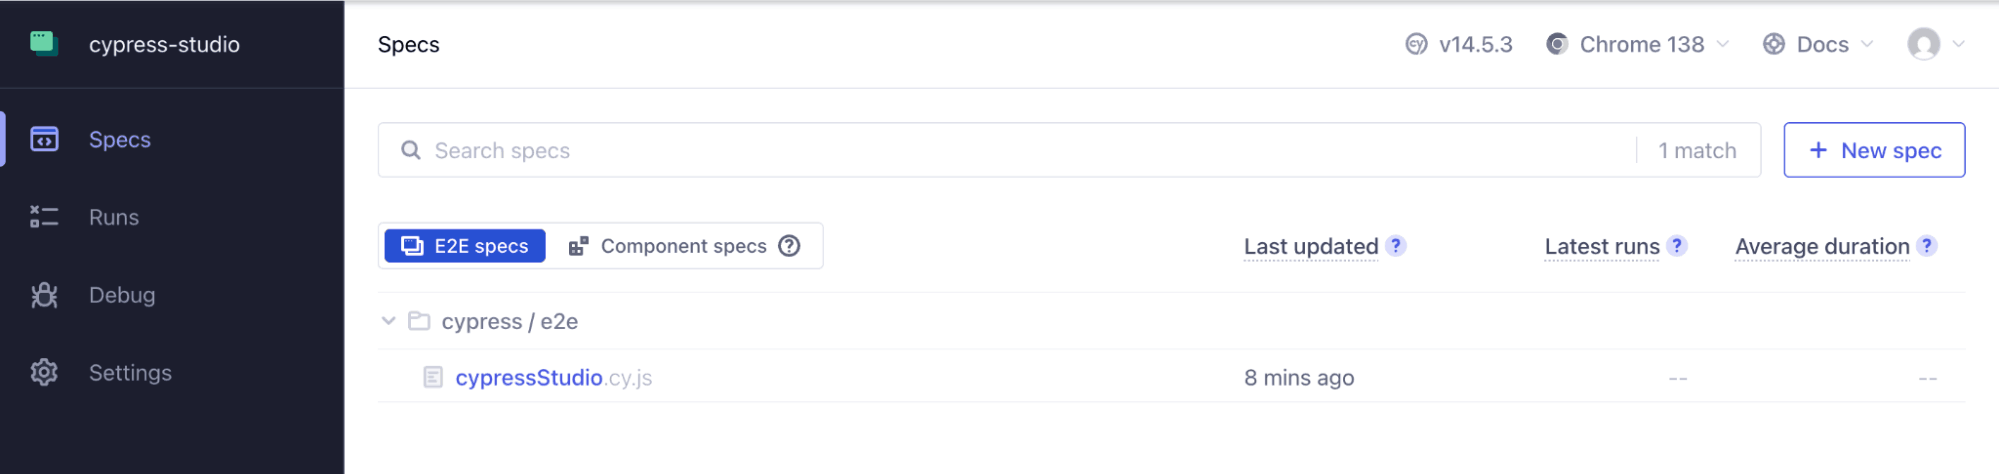
Click on this test file to open it in the runner.
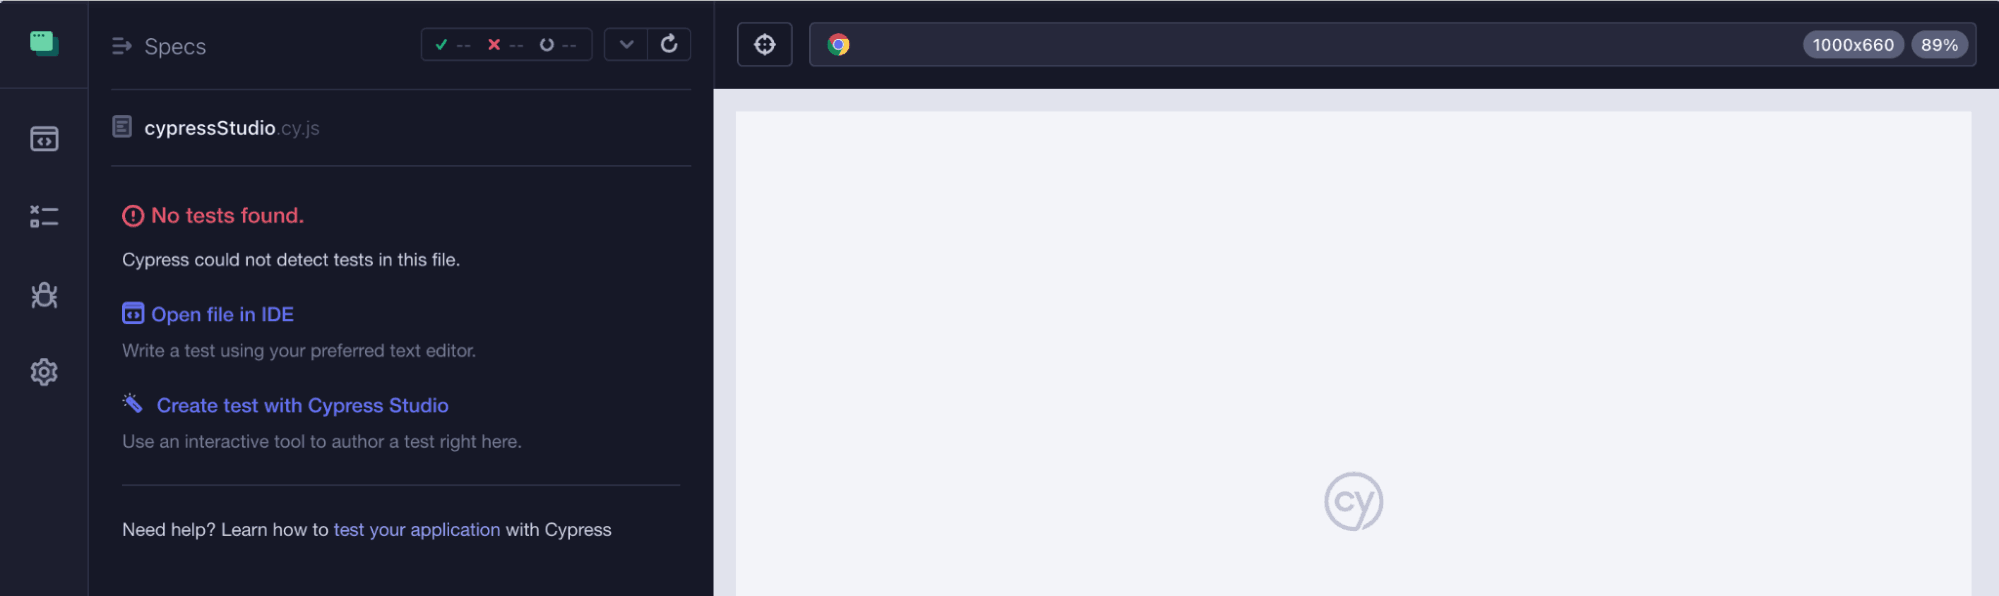
Since we have not added any tests yet, Cypress will show a message that says “No tests found”. Below that, you’ll see a link labeled “Create test with Cypress Studio”. This is where our recording process will begin.
Step 4: Record the Actions
Here’s the scenario we’ll be recording:
- Open the LambdaTest eCommerce Playground.
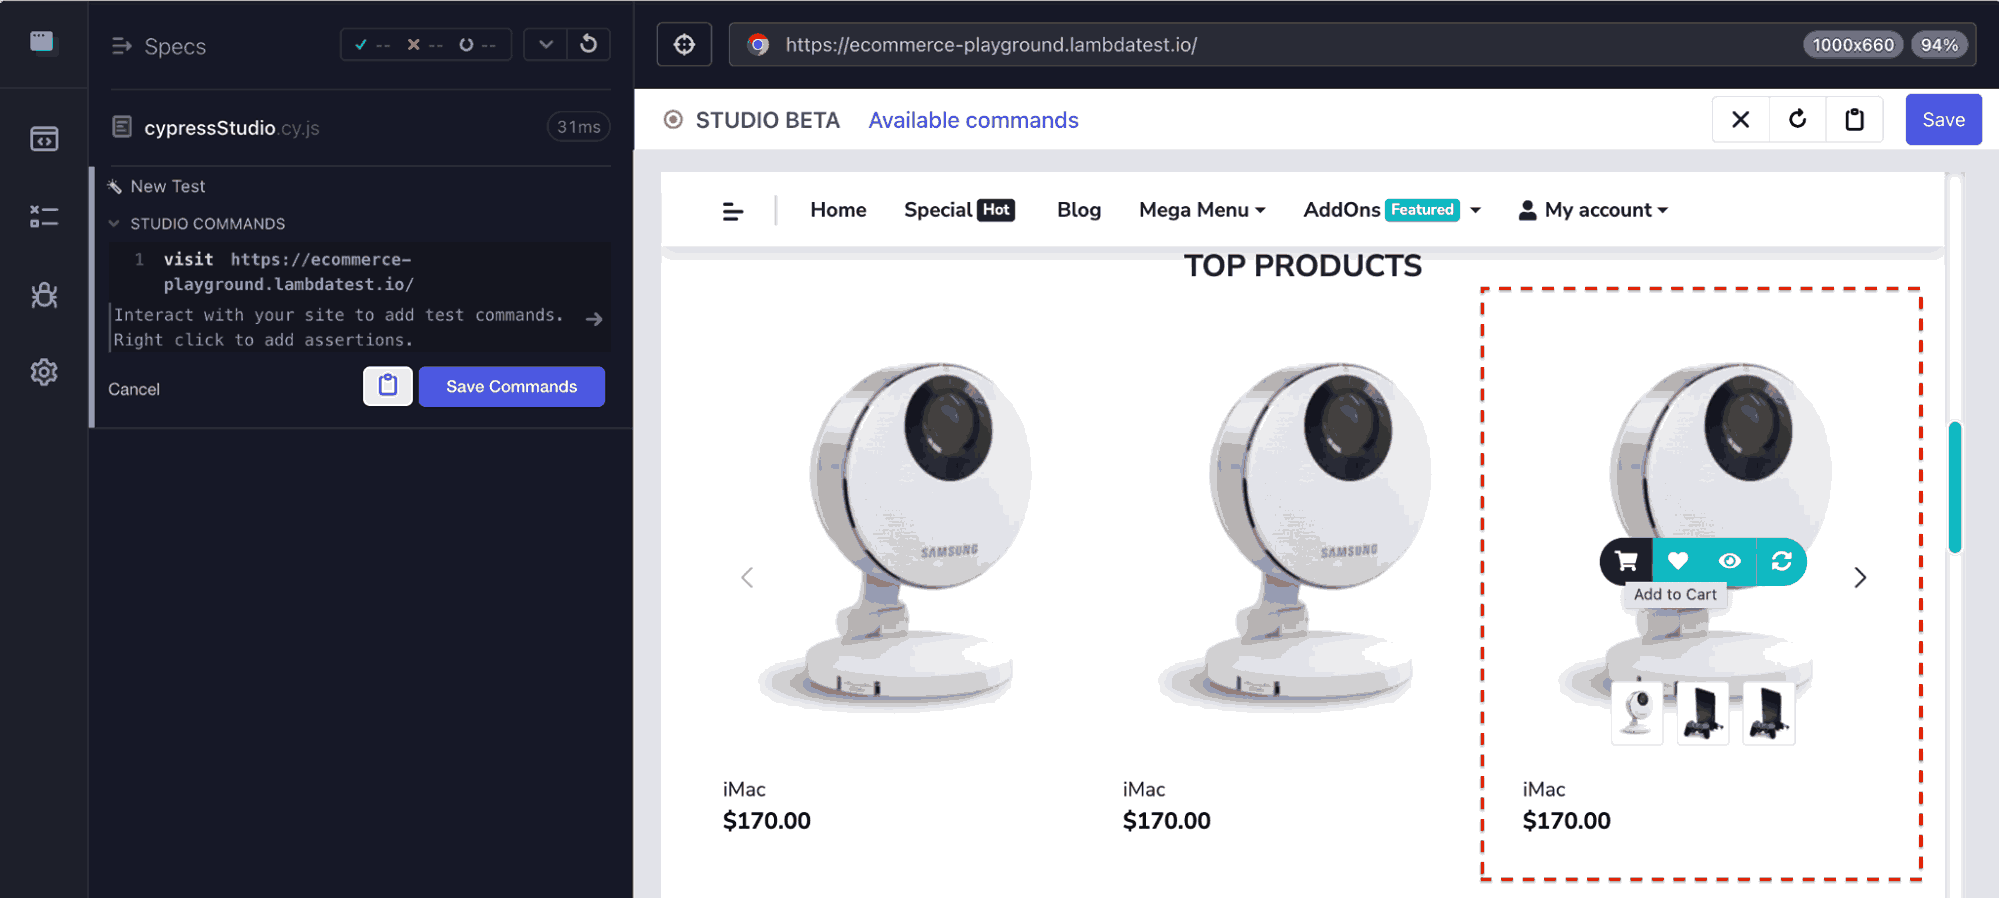
- Navigate to the 3rd iMac listed under the TOP PRODUCTS section.
- Click Add to Cart button or the cart icon to add the product to cart.
- Open the cart to confirm the product was added.
Click on Create test with Cypress Studio as shown below to begin the test creation process. This will prompt you to enter the URL of the website you want to record.
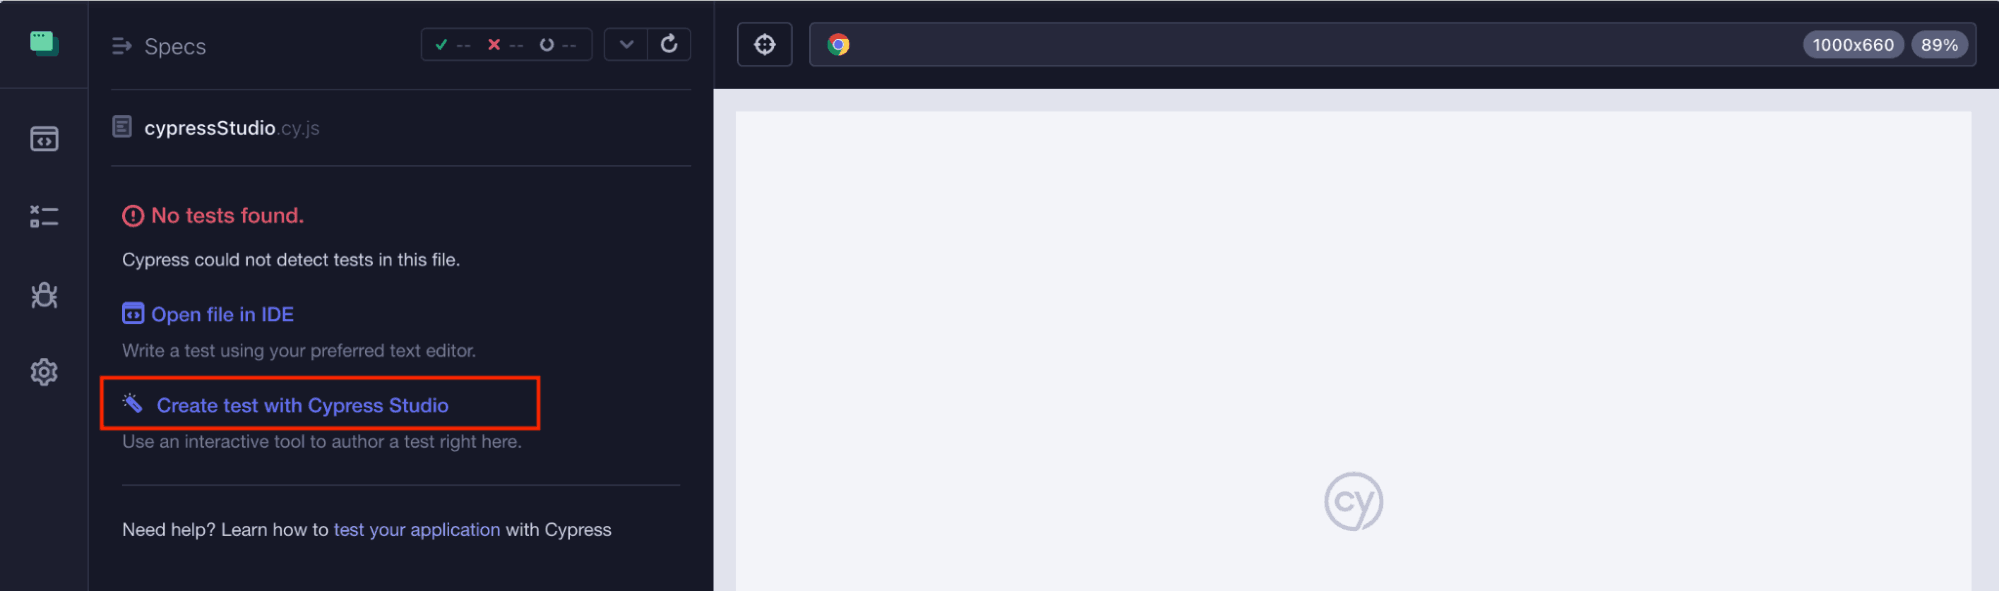
Provide the above URL as shown below and hit the Continue button:
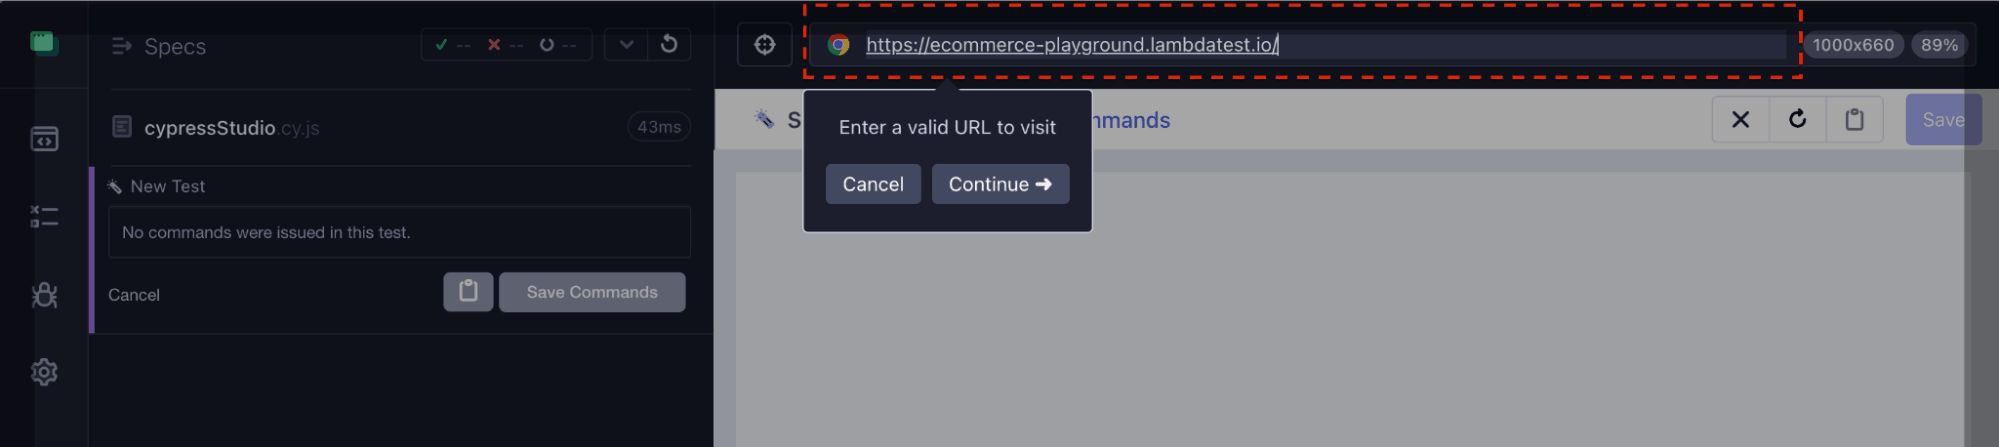
Once you hit Continue, Cypress Studio will load the website in a browser where all your interactions will be captured.
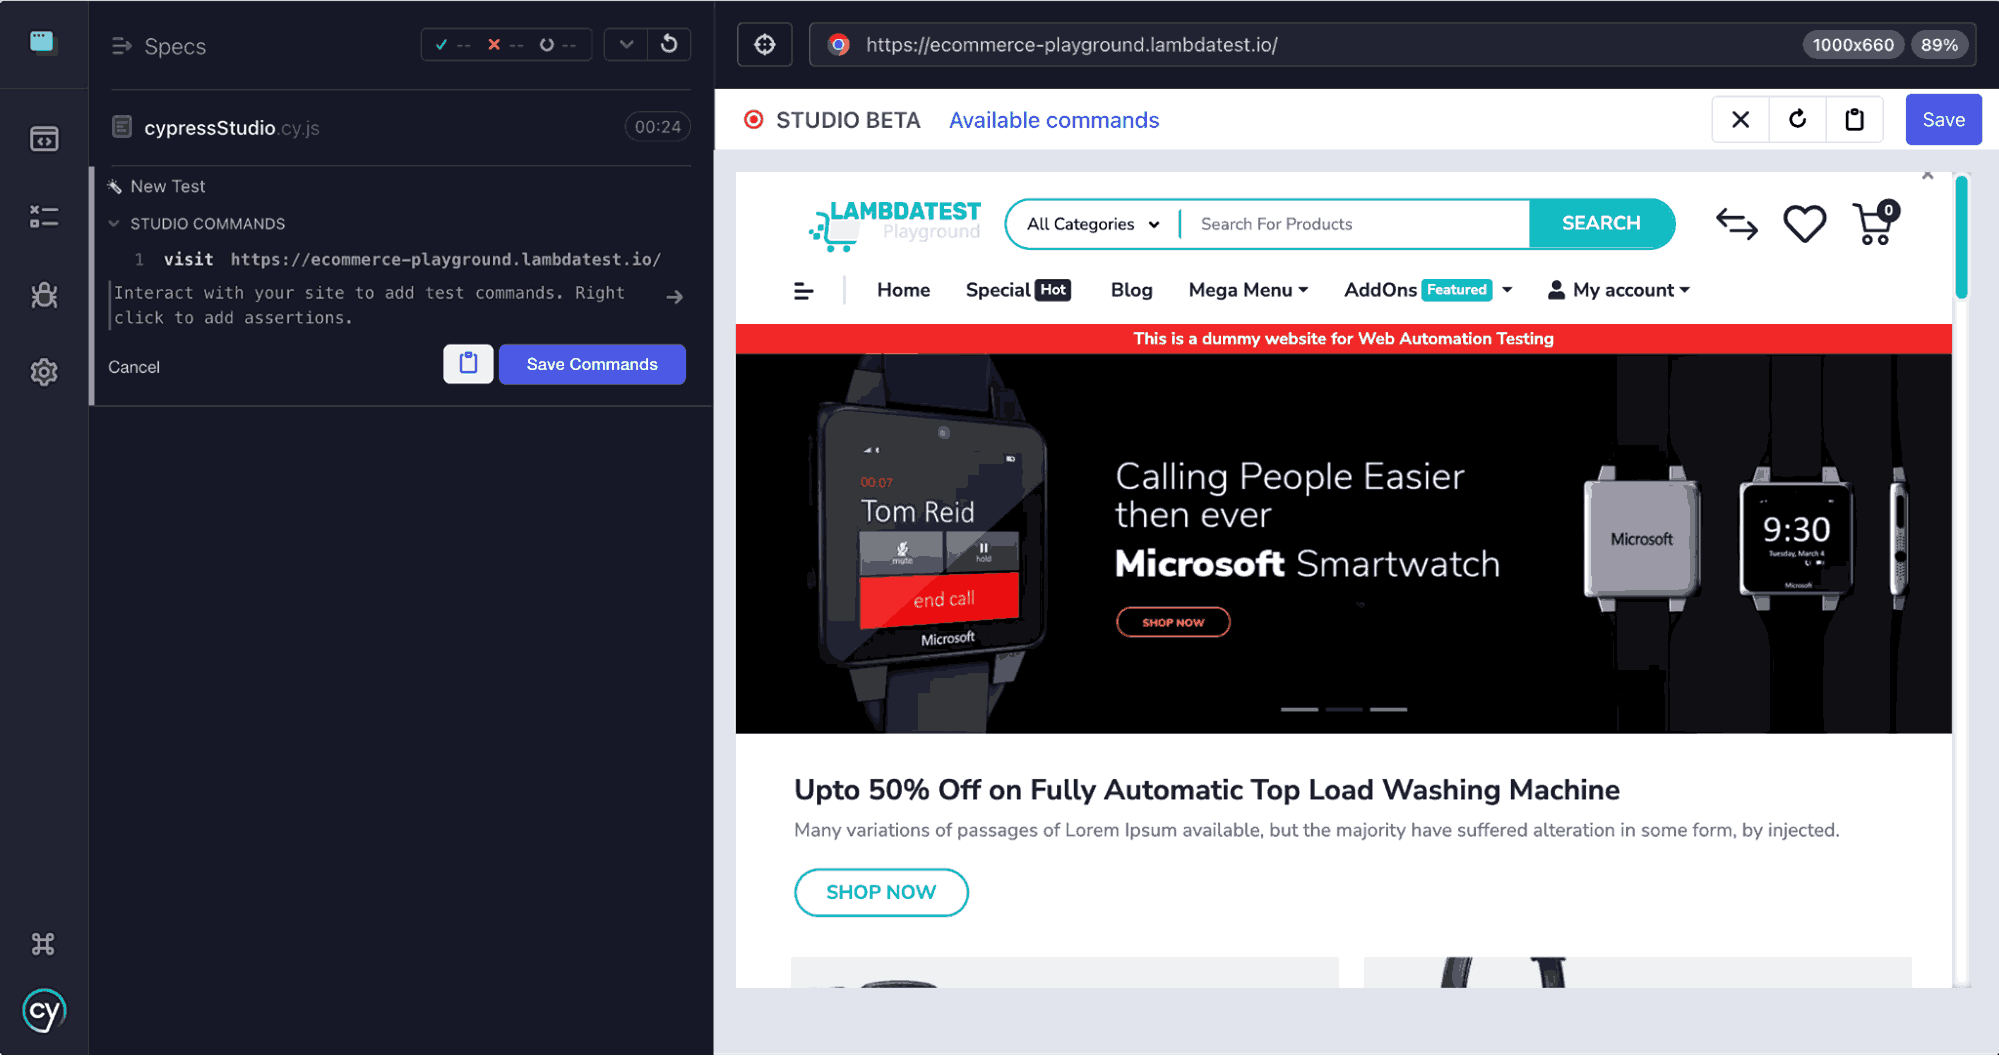
As you perform each of these actions, you’ll see Cypress logging the corresponding commands in the left-hand panel of the test runner, this is Cypress Studio generating your test script in real-time.
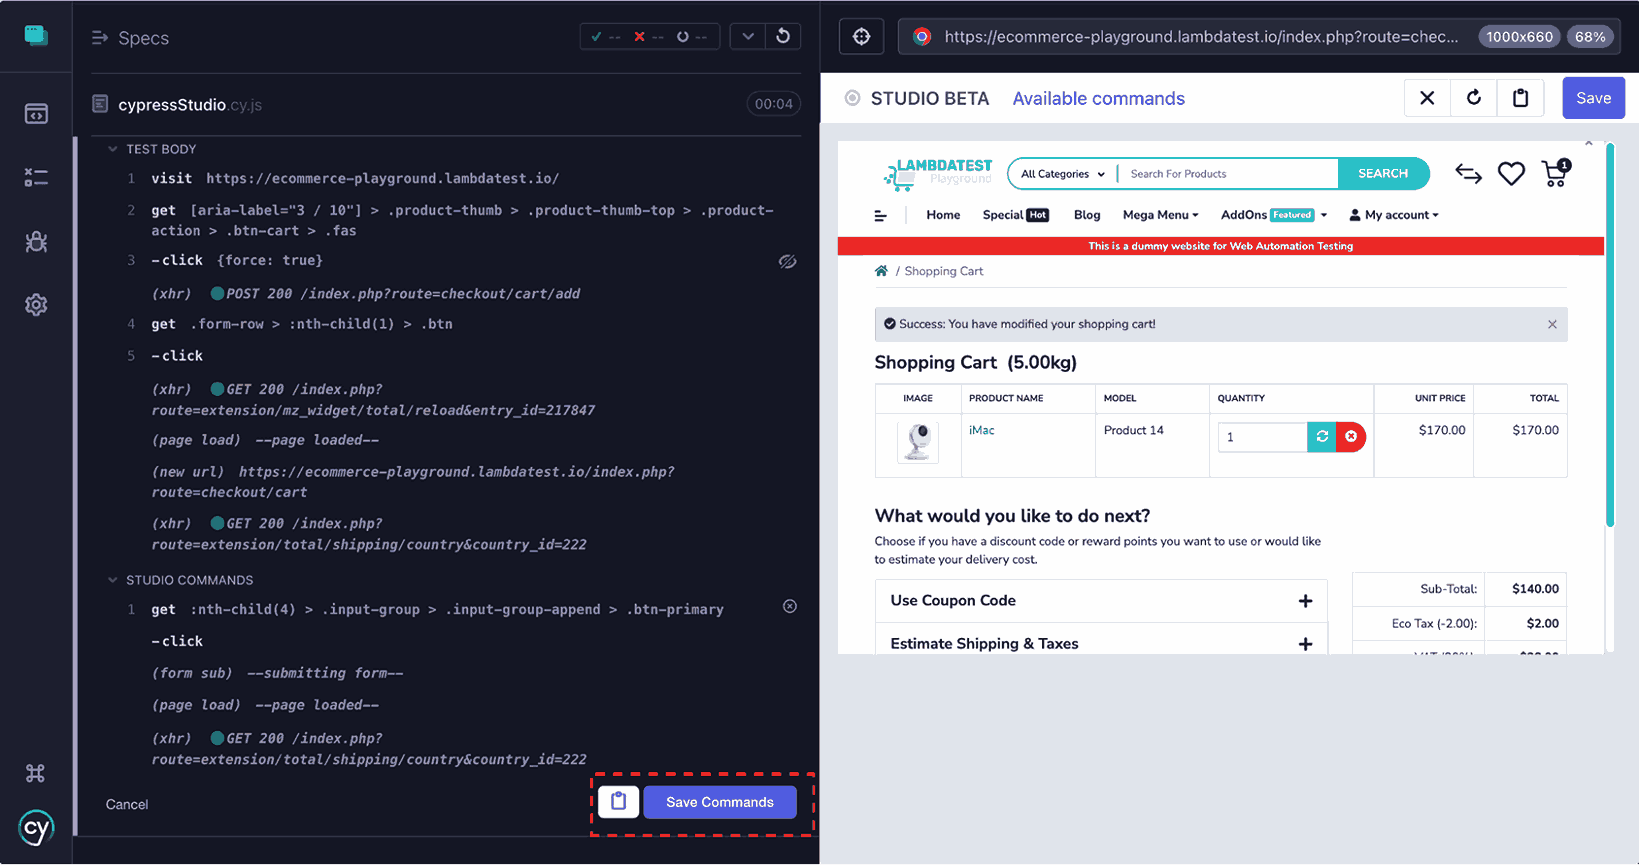
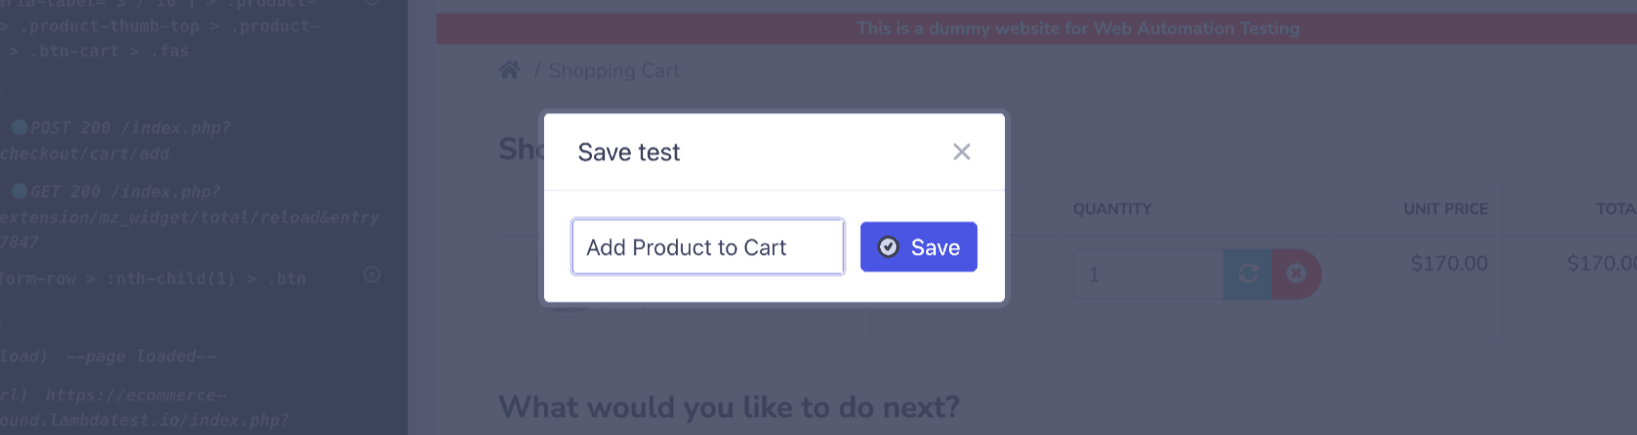
Once you’re done, click on Save Commands in the Studio panel to save the recorded commands.
You’ll now be prompted to enter a name for your test. Let’s call it something like Add Product to Cart and confirm.
Once the script is saved, Cypress will re-run the test automatically, using the exact steps you just recorded. If everything went right, the test will pass and the code for this test will now be visible in your spec file located under cypress/e2e.
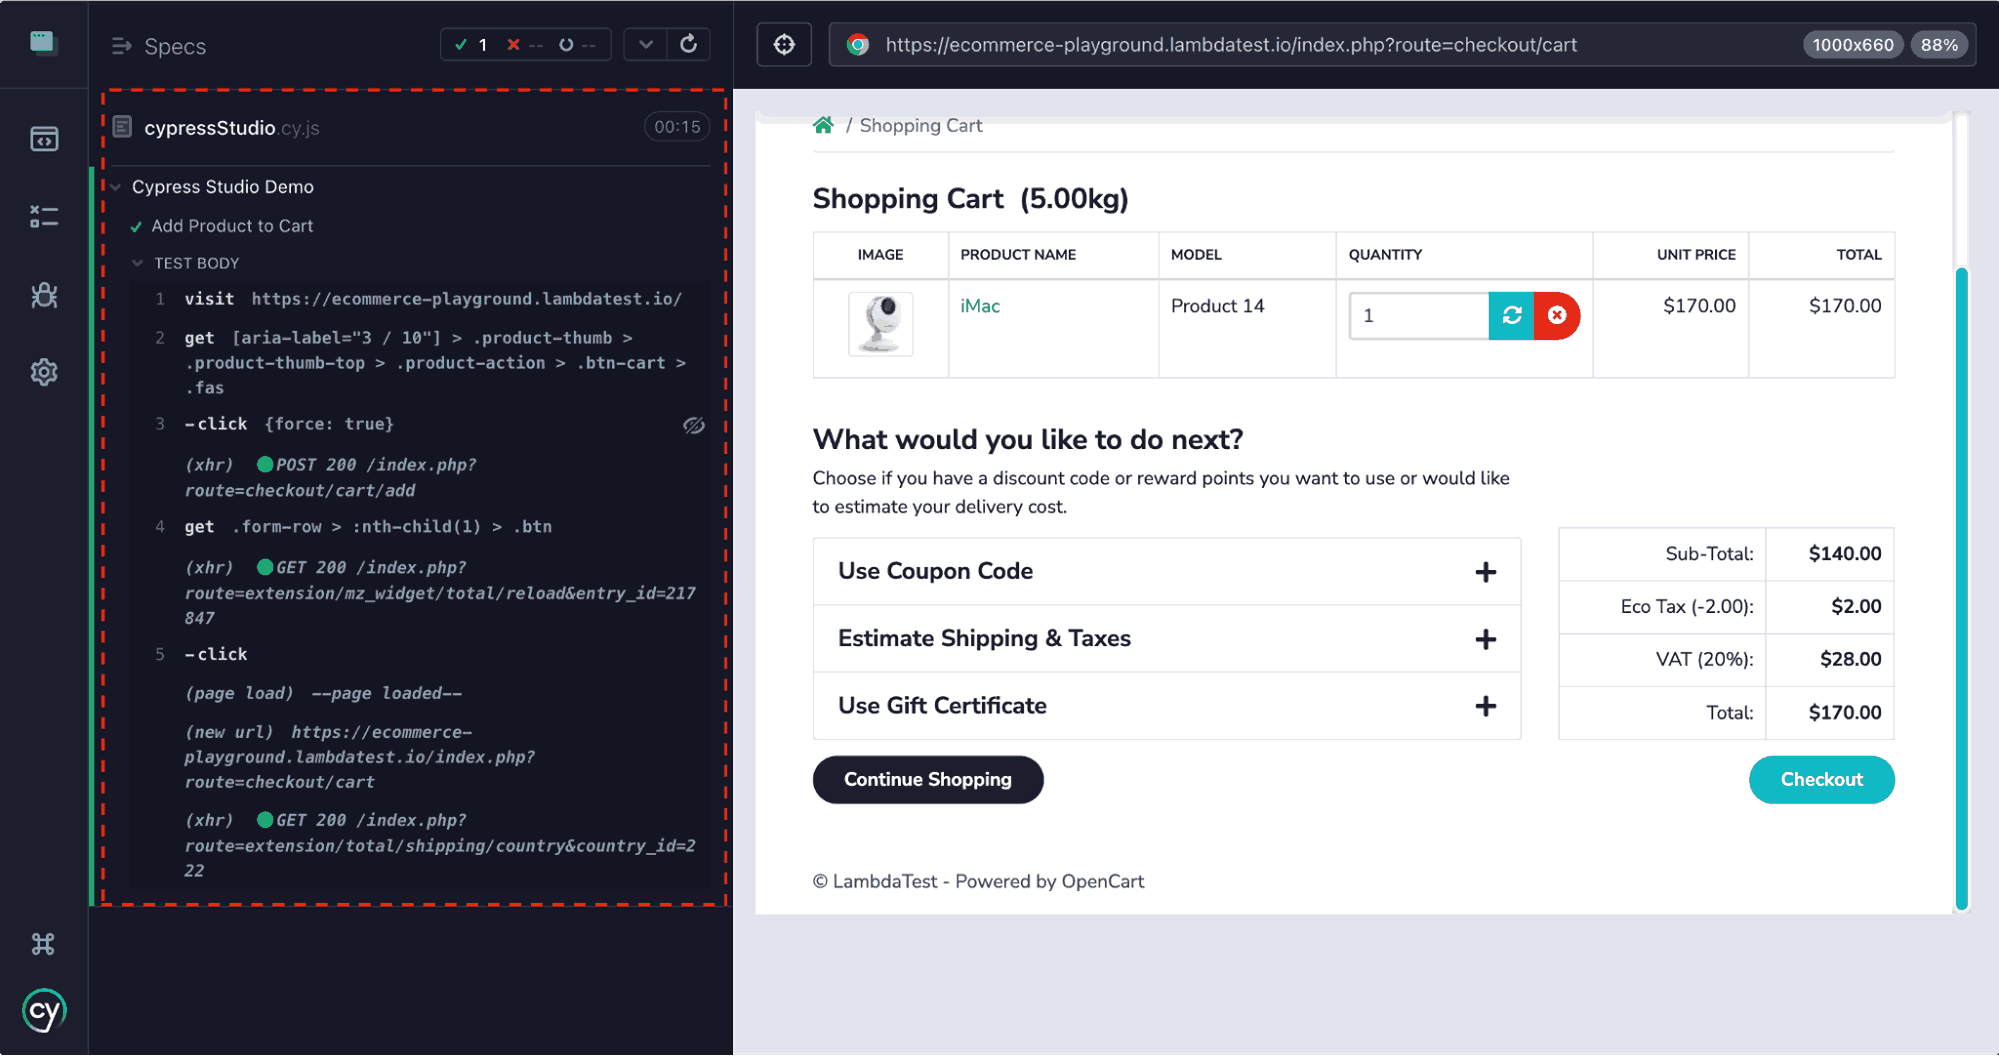
Cypress Studio doesn’t just create a new file, it writes the recorded commands directly into the selected spec file, wrapping them in special comment blocks:
|
1 2 3 |
/* ==== Test Created with Cypress Studio ==== */ /* ==== Generated with Cypress Studio ==== */ /* ==== End Cypress Studio ==== */ |
This makes it easy to identify which parts were generated automatically and edit them later without affecting the rest of your code.
Now if you go back to your IDE, you’ll see the test file contains the above comment blocks, along with all the commands you performed during the recording.
|
1 2 3 4 5 6 7 8 9 10 11 12 |
describe("Cypress Studio Demo", () => { /* ==== Test Created with Cypress Studio ==== */ it("Add Product to Cart", function () { /* ==== Generated with Cypress Studio ==== */ cy.visit("https://ecommerce-playground.lambdatest.io/"); cy.get( '[aria-label="3 / 10"] > .product-thumb > .product-thumb-top > .product-action > .btn-cart > .fas' ).click({ force: true }); cy.get(".form-row > :nth-child(1) > .btn").click(); /* ==== End Cypress Studio ==== */ }); }); |
Note: The force:true option is added in click because the cart icon might be slightly overlapped by other elements on smaller screens. This ensures the click is executed even if Cypress would normally block it.
Assertions are crucial for confirming that your actions actually had the intended effect. To make your test more meaningful, you’ll want to manually add assertions. A common validation is to confirm that the product added actually appears in the cart.
For dynamic updates, relying on *.should()* immediately after an action can lead to flaky tests. Instead, wait explicitly before asserting:
|
1 2 3 4 |
cy.wait(2000); // Wait for cart to update cy.get(".table") // Target the cart table .find("td a") // Find all links inside table .should("contain.text", "iMac"); // Ensure it contains the title "iMac" |
With that, your first recorded test using Cypress Studio is complete.
Extending the Pre-Existing Test Script
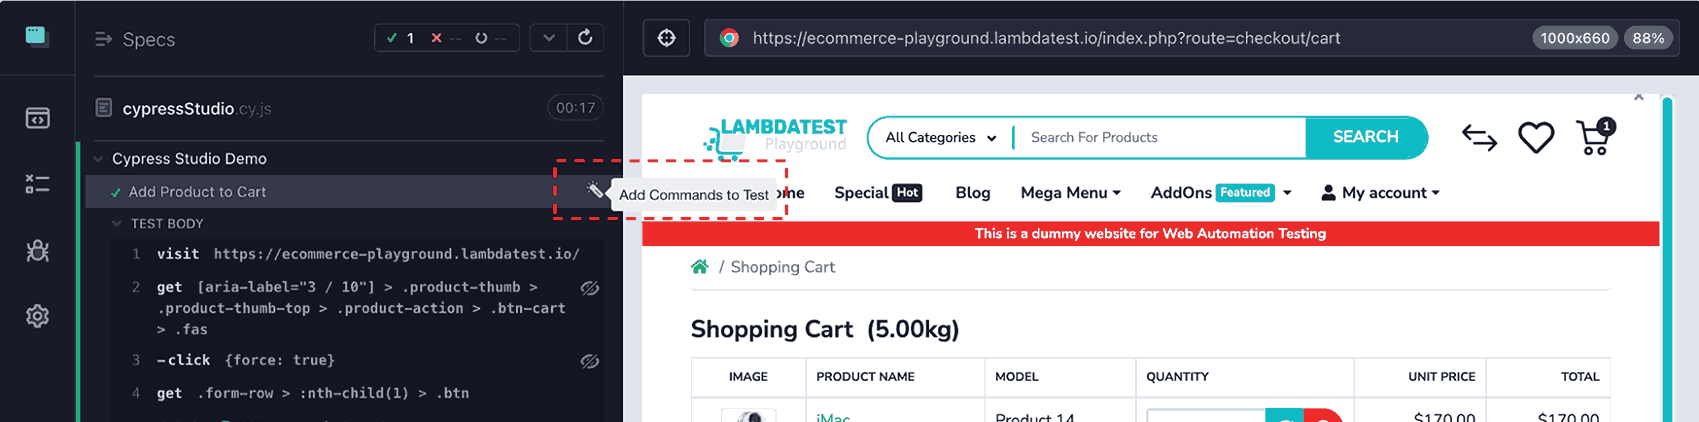
The Add Commands to Test feature of Cypress Studio lets you append new commands to an existing test.
- Add New Test: Creates a completely new test from scratch.
- Add Commands to Test: Appends additional commands to an existing test, continuing where it left off.
Below are the steps to extend an existing test script:
Launch the Cypress Test Runner:
|
1 |
npx cypress open |
Select the test file we created earlier. Hover over the test name in the Command Log panel, and click Add Commands to Test to launch Cypress Studio again.
Perform the next set of interactions:
- Open the cart by clicking the cart icon
- Locate the quantity field for the product and change it
- After updating, a success message should appear
Stop recording and click the Save Commands button.
Cypress updates your test with the new steps. Here’s an example of the updated test code:
|
1 2 3 4 5 6 7 8 9 10 11 12 13 14 15 16 17 |
describe("Cypress Studio Demo", () => { /* ==== Test Created with Cypress Studio ==== */ it("Add Product to Cart", function () { /* ==== Generated with Cypress Studio ==== */ cy.visit("https://ecommerce-playground.lambdatest.io/"); cy.get( '[aria-label="3 / 10"] > .product-thumb > .product-thumb-top > .product-action > .btn-cart > .fas' ).click({ force: true }); cy.get(".form-row > :nth-child(1) > .btn").click(); /* ==== End Cypress Studio ==== */ /* ==== Generated with Cypress Studio ==== */ cy.get( ":nth-child(4) > .input-group > .input-group-append > .btn-primary" ).click(); /* ==== End Cypress Studio ==== */ }); }); |
How to Run Tests At Scale With LambdaTest Cypress Cloud?
Running Cypress tests at scale requires speed, reliability, and the ability to manage multiple test environments simultaneously. LambdaTest Cypress cloud provides a cloud-based platform that lets you execute Cypress tests across thousands of browser and OS combinations in parallel, ensuring faster feedback and higher test coverage.
Core Features:
- Parallel Test Execution: Run multiple Cypress tests simultaneously across different browsers and devices to speed up the CI/CD pipeline.
- Cross-Browser Testing: Test your applications on over 3000+ real browsers and operating systems to ensure consistent behavior.
- Smart Test Analytics: Gain actionable insights into test results, track failures, and monitor trends to improve software quality.
- Real-Time Logs and Screenshots: Capture logs, screenshots, and videos for each test session to debug issues faster.
- Scalable Cloud Infrastructure: Leverage a cloud-based environment to scale testing without worrying about setting up in-house test infrastructure.
- Custom Test Configurations: Configure test settings for different environments, browsers, and screen resolutions to match production scenarios.
- CI/CD Integration: Seamlessly integrate with popular CI/CD tools like Jenkins, GitHub Actions, GitLab, and CircleCI for automated test runs.
To start running Cypress tests at scale, check out this LambdaTest Cypress testing guide.
Limitations of Cypress Studio
While Cypress Studio is useful for quickly generating test scripts through user interactions, there are a few important limitations to keep in mind:
- Only Supports E2E Tests: Cypress Studio can only be used to create end-to-end tests. Component tests must be written manually.
- No Multi-Origin Support: It doesn’t record actions across multiple domains. Third-party logins or external redirects must be handled manually.
- Limited Support for Shadow DOM: Interactions inside Shadow DOM elements must be added manually.
- No Assertions Recorded by Default: Clicks and input are tracked, but validations must be added manually.
- Fragile and Overly Specific Selectors: Recorded selectors are often too tied to the current UI structure and may break easily.
- Not Suitable for Complex Scenarios: Extensive flows, API mocking, or conditional logic are better handled with manual tests.
- Not Ideal for CI/CD Pipelines: Studio only runs in interactive mode and requires adjustments for headless CI/CD execution.
Best Practices When Using Cypress Studio
While Cypress Studio makes it incredibly easy to generate test scripts quickly, relying solely on it can lead to fragile or hard-to-maintain tests. To make your tests more reliable and maintainable, here are some important best practices you can follow:
- Use data-* Attributes for Stable Selectors: Avoid using classes, IDs, or element types. Instead, use *data-cy*, *data-testid*, or custom *data-* attributes.
- Keep Tests Independent: Each it() block should work independently to prevent cascading failures.
- Write Clear and Descriptive Test Names: Ensure describe and it blocks have clear, descriptive names.
- Add Assertions Manually for Accuracy: Review the generated test and add assertions like cy.should() or cy.contains().
- Clean Up Redundant Steps After Recording: Remove unnecessary clicks or actions to keep tests lean and stable.
|
1 2 |
cy.get('[data-cy="submit-button"]'); cy.get('[data-testid="username"]'); |
Conclusion
Cypress Studio provides a user-friendly way to quickly record and generate test flows, making it accessible even to those without extensive technical expertise. Throughout this guide, we examined how to set up and use Studio, discussed its limitations, and highlighted best practices to maximize its effectiveness.
While Cypress Studio is excellent for accelerating initial test creation, it is most powerful when combined with manual enhancements. By refining and customizing the automatically generated tests, you can achieve greater reliability, maintainability, and coverage in your test suite.
Frequently Asked Questions (FAQs)
How to debug Cypress in Visual Studio Code?
You can debug Cypress by launching VS Code, setting breakpoints in your spec files, and running Cypress in headed mode. Use the debugger statement in your test code to pause execution. Attach VS Code’s debugger to inspect variables, DOM state, and step through commands interactively.
How to run Cypress in Visual Studio Code?
Open your project in VS Code, open the integrated terminal, and run npx cypress open or yarn cypress open. This launches the Cypress Test Runner where you can select browsers and spec files to execute, enabling interactive testing directly from VS Code.
Can Cypress Studio record tests across multiple domains?
No, Cypress Studio only records interactions within the same origin. Multi-domain flows, such as third-party logins or external redirects, must be handled manually using Cypress commands. Attempting cross-origin recording will fail due to Cypress’s security restrictions.
Does Cypress Studio automatically generate assertions?
By default, Cypress Studio only records user interactions like clicks and typing. Assertions must be added manually to verify expected outcomes. Adding them ensures that the test not only reproduces interactions but also validates the application’s behavior accurately.
Can I extend existing tests using Cypress Studio?
Yes, use the Add Commands to Test feature to append actions to existing test scripts. This allows you to continue recording from a previous test state without creating a new test, keeping all interactions consolidated in one spec file.
Why are Cypress Studio selectors sometimes brittle?
Selectors recorded by Cypress Studio often rely on precise DOM structures. Any minor change in classes, IDs, or hierarchy can break tests. Using stable attributes like data-cy or data-testid is recommended for more resilient automation.
Can Cypress Studio be used in CI/CD pipelines?
Not directly. Cypress Studio runs in interactive mode only, which is not suitable for headless CI/CD execution. Recorded tests can be edited and cleaned up for pipeline use, but Studio itself is meant for development and debugging, not automated pipelines.
Is Cypress Studio suitable for component testing?
No, Cypress Studio is designed for end-to-end tests. Component-level or unit testing requires writing test cases manually using Cypress’s component testing utilities. Studio cannot record interactions for isolated components outside a full application flow.
How do I handle dynamic elements in Cypress Studio tests?
Dynamic elements may appear or change after actions. Studio records clicks immediately, which can lead to flaky tests. Use explicit waits like cy.wait(), or assertions to confirm visibility or presence before performing actions on dynamic elements.
Can I reuse recorded test steps across multiple tests?
Yes, once recorded, Cypress Studio commands can be copied or moved into other spec files. Reviewing and refactoring the recorded code into reusable functions or custom commands improves maintainability and reduces duplication when automating similar flows across tests.
Citations
- Cypress Studio: https://docs.cypress.io/app/guides/cypress-studio
Author
Tahera is a freelance Frontend Developer and a Community Evangelist with over 2 years of hands-on experience in JavaScript, React, Next.js, TypeScript, Tailwind CSS, and Git/GitHub. She specializes in building responsive user interfaces and writing clear, engaging documentation, tutorials, and API guides on technologies like Selenium, Cypress, and modern web development. Tahera has contributed to open-source projects focused on improving UI components and documentation. She has built a following of 7,000+ on X, with some of her posts reaching 400,000+ views, showcasing her influence in the frontend and tech writing community.
Blogs: 13